Love this? Save it for later!
Share the inspiration with your friends
I wasn’t expecting baking advice from my seven-year-old’s pediatrician, but there I was, sitting in the waiting room with a toddler who refused to let go of my leg, listening to Dr. Patel describe exactly how to make ghost meringue cookies. She was supposed to be checking ears and throats, not giving me dessert recipes. But apparently, her own kids had thrown a “spooky baking party” the weekend before, and she couldn’t stop talking about how simple these little ghosts were. Honestly, I was just trying to keep my youngest from pulling down the anatomical chart on the wall, but I found myself mentally taking notes. She said they took less than ten minutes to prep and looked like tiny ghosts floating on the baking sheet. I scribbled the basics on the back of an old receipt I found in my purse. The next week, when Halloween crept up and I realized I had nothing for my kids’ classroom party, I remembered that receipt. Let me tell you, these little guys saved me. They’re light, crispy, and just sweet enough—perfect for little hands and even littler budgets. Maybe you’ve been there, scrambling for a last-minute treat that won’t break the bank or send your kids bouncing off the walls. These ghosts are it.
Why You’ll Love This Recipe
Let’s face it—finding a Halloween treat that’s affordable, easy, and actually kid-approved can feel like searching for a needle in a haystack. Store-bought candy adds up fast, and most homemade options involve melted chocolate and sticky fingers everywhere. These ghost meringue cookies solve all of that. They’re light as air, naturally low in fat, and come together with just four ingredients you probably already have in your pantry. Plus, they look impressive without requiring any fancy piping skills.
- Quick & Easy: From start to finish, you’re looking at about 15 minutes of active prep time. The oven does the rest while you help with homework or clean up the kitchen.
- Simple Ingredients: Egg whites, sugar, vanilla extract, and mini chocolate chips. That’s it. No specialty baking aisle trips required.
- Perfect for Halloween Parties: Whether it’s a classroom celebration, a trunk-or-treat event, or just a fun weekend activity, these cookies fit right in.
- Crowd-Pleaser: I’ve brought these to three different gatherings now, and every single time, the kids gobble them up before the adults even get a chance. The chocolate chip eyes make them extra fun to eat.
- Unbelievably Delicious: There’s something magical about the way meringue melts on your tongue. It’s sweet and airy with a slight chewiness in the center if you bake them just right.
What makes these different from other meringue recipes is the technique. I tested this version about four times before I got it just right—tweaking the baking temperature and the timing so the ghosts stay white and puffy instead of turning brown and flat. The chocolate chip eyes stay put because I add them at just the right moment. Trust me, I’ve learned the hard way what happens when you add them too early or too late.
This recipe isn’t just good—it’s the kind that makes you close your eyes after the first bite. It’s comfort food reimagined for Halloween, without all the sugar crashes and artificial colors. Perfect for impressing your kid’s classmates without stressing yourself out.
What Ingredients You Will Need
This recipe uses simple, wholesome ingredients to deliver that light, airy texture and just the right amount of sweetness. Most of these are pantry staples, so you probably won’t need a special trip to the store.
- Egg whites, 4 large (room temperature is best—it helps them whip up higher and fluffier)
- Granulated sugar, 1 cup (superfine sugar works even better if you have it, but regular granulated does the job)
- Vanilla extract, 1 teaspoon (pure vanilla gives the best flavor, but imitation works fine in a pinch)
- Cream of tartar, 1/4 teaspoon (this stabilizes the egg whites and helps them hold their shape—don’t skip it)
- Mini chocolate chips, 1/3 cup (for the eyes—I prefer Ghirardelli mini chips because they’re small enough to look like tiny eyes but big enough to see)
- Pinch of salt (just a tiny one—it balances the sweetness)
A few notes from my kitchen to yours: Room temperature egg whites are non-negotiable here. Cold eggs won’t whip up as high, and you’ll end up with flat, sad ghosts. If you forget to take your eggs out ahead of time, place them in a bowl of warm water for about five minutes. It works like a charm. Also, make sure your bowl and whisk are completely clean and free of any grease. Even a tiny bit of oil can keep your egg whites from whipping properly. I learned this the hard way when I used a bowl that had a trace of butter residue—my meringue never got past the soupy stage.
For the sugar, I’ve tested this with both regular granulated and superfine. Superfine dissolves faster, which means a smoother meringue, but regular granulated works perfectly fine if you give it enough time to dissolve. You can test this by rubbing a tiny bit of the meringue between your fingers—if it feels gritty, keep beating.
The chocolate chips are where you can get creative. I use mini chips because they look like cute little eyes, but you could also use regular chocolate chips cut in half. If your kids are allergic to dairy, look for dairy-free mini chips—they work just as well.
Equipment Needed
You don’t need a professional bakery setup for these cookies. Here’s what you’ll need:
- Electric mixer (stand mixer or hand mixer—both work, but a stand mixer with the whisk attachment is easier if you have it)
- Large mixing bowl (glass or metal—avoid plastic because it can hold onto grease)
- Baking sheet (one large or two smaller ones—I prefer light-colored sheets because dark ones can cause the meringues to brown too fast)
- Parchment paper (don’t use wax paper—it’ll stick and ruin your ghosts)
- Rubber spatula (for folding in the chocolate chips)
- Piping bag or large zip-top bag (if you want perfectly shaped ghosts—a zip-top bag with the corner snipped off works great)
- Cooling rack (optional but helpful for cooling the cookies evenly)
If you don’t have a piping bag, don’t worry. I’ve made these ghosts by simply spooning the meringue onto the baking sheet and shaping them with the back of the spoon. They won’t look as uniform, but they’ll still be delicious. For the budget-conscious home cook, a zip-top bag is your best friend. Just fill it, snip off a small corner, and pipe away. No need to buy specialty equipment.
One tip: if you use a hand mixer, make sure your bowl is deep enough to prevent splatters. Meringue can get messy fast, and nobody wants to clean egg white off their countertops.
Preparation Method
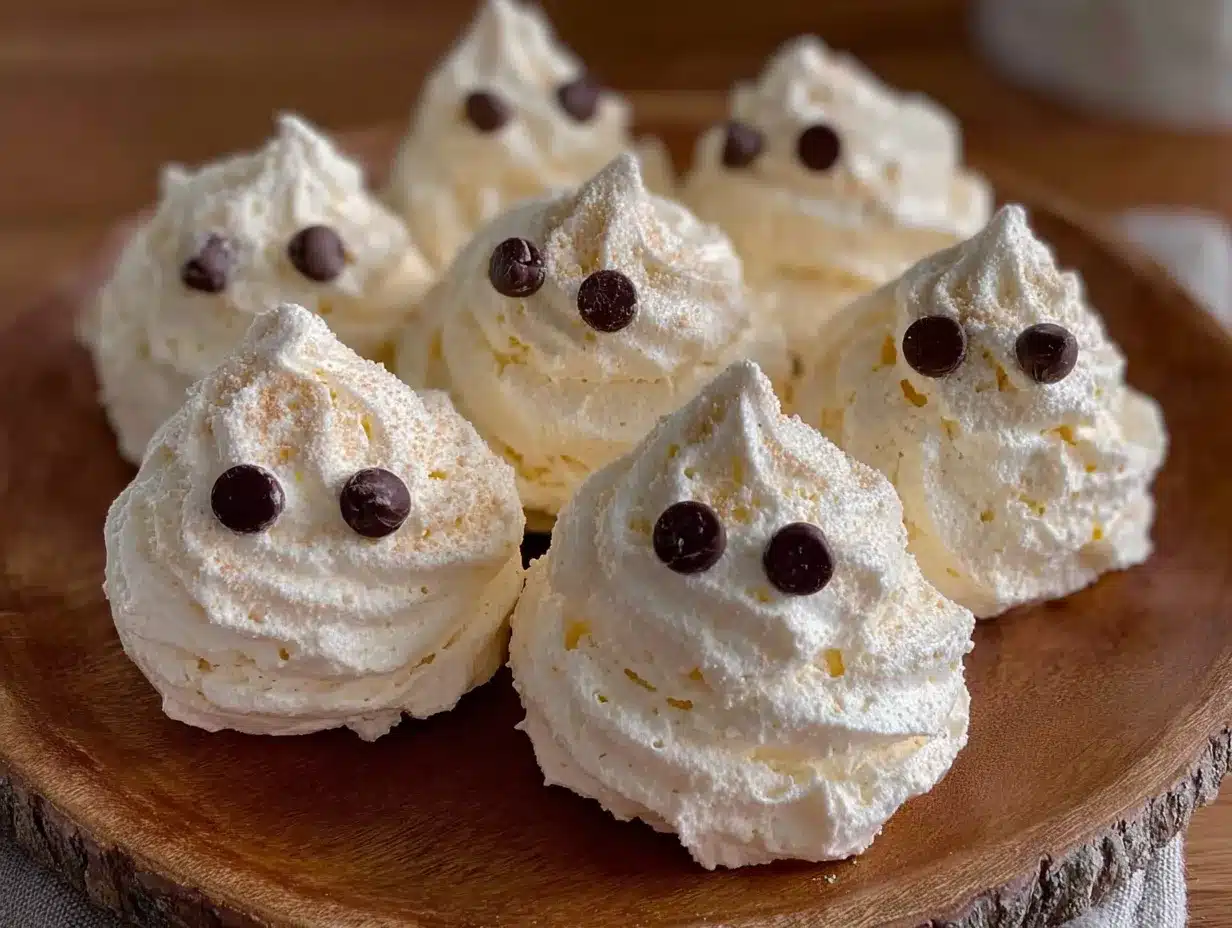
Let’s get those ghosts ready. This takes about 15 minutes of active time, plus about an hour and a half in the oven. Plan ahead so you’re not rushing.
- Preheat your oven to 200°F (95°C). Yes, that’s low and slow. We’re drying out the meringues, not baking them. Line your baking sheet with parchment paper and set it aside.
- Separate your eggs carefully. Crack each egg and let the white fall into a small bowl, then transfer it to your large mixing bowl. This way, if you accidentally get yolk in one, you haven’t ruined the whole batch. I use the shell-to-shell method—crack the egg, pass the yolk back and forth between the shell halves, and let the white drip down. It takes practice, but it works. Any trace of yolk will prevent your egg whites from whipping properly, so be careful.
- Add the cream of tartar and salt. Sprinkle them over the egg whites before you start beating. This helps stabilize the foam and gives you a sturdier meringue.
- Beat the egg whites on medium speed until they become frothy and start to look like foam. This takes about 1-2 minutes with a stand mixer, maybe 3-4 with a hand mixer. You’ll see bubbles forming and the mixture turning white.
- Gradually add the sugar. With the mixer still running on medium, add the sugar one tablespoon at a time. I know it’s tedious, but adding it slowly helps it dissolve completely. If you dump it all in at once, you’ll end up with gritty meringue. Take your time here—it makes a difference.
- Increase the speed to high and beat until stiff peaks form. This is the moment of truth. You’ll know it’s ready when you lift the whisk and the meringue stands up straight without drooping. The mixture should look glossy and white, like marshmallow fluff. This usually takes about 5-7 minutes total. Add the vanilla extract during the last minute of beating.
- Test for doneness. Rub a tiny bit of meringue between your thumb and finger. If it feels smooth and not gritty, the sugar has dissolved. If it feels grainy, keep beating for another minute or two.
- Fold in the chocolate chips. Use your rubber spatula to gently fold in the mini chocolate chips. Don’t overmix—you want them distributed evenly, but you don’t want to deflate all that air you just whipped in. A few gentle folds should do it.
- Pipe or spoon the ghosts. Transfer the meringue to your piping bag or zip-top bag. Snip off about a half-inch from the corner. Pipe small ghost shapes onto the parchment paper—think of a teardrop shape with a round head and a slightly pointed bottom. Leave about an inch between each ghost because they don’t spread much. If you’re spooning them, use two spoons to shape them into little mounds, then gently pull up the top to create a pointy head.
- Add the eyes. Gently press two mini chocolate chips into each ghost for eyes. Do this right after piping while the meringue is still soft. If you wait too long, a skin will form and the chips won’t stick.
- Bake for 1 hour and 15 minutes. Place the baking sheet in the preheated oven and bake without opening the door. I know it’s tempting to peek, but opening the door lets out heat and moisture, which can cause your ghosts to crack or deflate.
- Turn off the oven and let them cool inside. After the baking time is up, turn off the oven but leave the ghosts inside for another 30 minutes to an hour. This helps them dry out completely and gives them that perfect crisp texture. They should peel easily off the parchment paper when they’re done.
Cooking Tips & Techniques
I’ve made these ghosts about a dozen times now, and I’ve learned a few things along the way. Let me save you some trouble.
Humidity is your enemy. Meringue hates moisture. If it’s a rainy or humid day, your ghosts might end up sticky instead of crisp. Try to make these on a dry day if possible. If you’re stuck with humid weather, extend the drying time in the oven by another 15-20 minutes.
Don’t overbeat. I’ve done this more times than I’d like to admit. You beat the egg whites, they look perfect, and then you get distracted for thirty seconds and suddenly they’re dry and lumpy. Overbeaten meringue looks grainy and separates into curds and liquid. If this happens, sadly, you have to start over. There’s no fixing it.
Use room temperature eggs. I mentioned this before, but it bears repeating. Cold eggs don’t whip up as well. Take them out of the fridge about 30 minutes before you start. If you’re in a rush, place them in a bowl of warm water for 5-10 minutes.
Keep your bowl squeaky clean. Any grease or yolk will ruin your meringue. I wipe my bowl and whisk with a little lemon juice or white vinegar on a paper towel before I start, just to be safe. It sounds extra, but it works.
Pipe with confidence. When you’re piping the ghosts, don’t overthink it. They don’t have to be perfect. In fact, the imperfect ones look more charming. My kids always point out the “wonky ghosts” and claim them as their favorites.
Let them cool completely. I know you’ll want to taste one right away, but patience pays off here. If you try to remove them from the parchment while they’re still warm, they’ll stick and break. Let them cool completely in the oven, and they’ll lift right off.
Variations & Adaptations
One of the best things about this recipe is how easy it is to customize. Here are some variations I’ve tried and loved:
- Colorful Ghosts: Add a few drops of food coloring to the meringue before piping. I’ve made purple ghosts for a friend’s birthday party and green ones for St. Patrick’s Day. Just be careful not to overmix—fold the color in gently with a spatula.
- Different Eye Colors: Swap the mini chocolate chips for mini M&M’s or candy eyes. Rainbow-colored eyes make the ghosts look extra playful. My kids love picking out the colors.
- Flavor Variations: Instead of vanilla, try peppermint extract for a holiday twist or almond extract for a nutty flavor. Start with half a teaspoon since these extracts are stronger than vanilla.
- Gluten-Free Option: This recipe is naturally gluten-free since it uses no flour. Just double-check that your chocolate chips are certified gluten-free if that’s a concern.
- Dairy-Free Option: Use dairy-free chocolate chips. Most dark chocolate chips are dairy-free, but always check the label.
- Larger Ghosts: Pipe bigger ghosts and bake them for an extra 15-20 minutes. They’ll be softer in the center, almost like a marshmallow.
- Spooky Sprinkle Ghosts: Before baking, sprinkle a little edible glitter or Halloween sprinkles over the ghosts. It adds a fun crunch and makes them look magical.
I once tried making these with stevia instead of sugar, and honestly, it was a disaster. The texture was off, and they never got crisp. So stick with real sugar for this one. Some things just can’t be swapped.
Serving & Storage Suggestions
These ghosts are best served at room temperature, right after they’ve cooled. They have a light, airy texture that’s perfect for snacking. Arrange them on a platter with some fake spiderwebs or plastic spiders for a spooky presentation. My kids love arranging them themselves—they line them up like a ghost parade.
For a Halloween party, I like to serve them alongside a bowl of hot chocolate or apple cider. The sweetness of the meringue pairs beautifully with a warm drink. You can also crumble them over ice cream for a crunchy topping.
Storage: Store your ghost meringue cookies in an airtight container at room temperature. They’ll stay crisp for about a week—if they last that long. Don’t refrigerate them because the moisture will make them sticky. If you live in a humid climate, add a silica gel packet (the kind that comes in shoe boxes) to the container to absorb excess moisture.
Freezing: You can freeze these cookies for up to three months. Place them in a single layer in a freezer-safe container with parchment paper between layers. Thaw them at room temperature for about 15 minutes before serving. They might lose a bit of their crispness, but they’ll still taste great.
Reheating: If your ghosts have gone a little soft, pop them in a 200°F (95°C) oven for 10-15 minutes to re-crisp them. Let them cool completely before storing again.
One thing I’ve noticed: these cookies actually taste better the next day. The flavors meld together, and the texture becomes even more delicate. So if you’re planning ahead, make them a day in advance.
Nutritional Information & Benefits
Per serving (about 2 ghosts): approximately 60 calories, 1g fat, 12g carbohydrates, 1g protein, 10g sugar. These numbers are estimates and will vary based on the exact ingredients you use.
Compared to traditional Halloween treats like candy bars or cupcakes, these meringue cookies are lighter and lower in fat. They’re primarily made of egg whites, which are a good source of protein without the cholesterol found in egg yolks. Egg whites also contain riboflavin and selenium, which support energy metabolism and immune function.
These cookies are naturally gluten-free and can be made dairy-free with the right chocolate chips. They’re also free of artificial colors and preservatives, which is a big win for parents trying to limit processed snacks. Plus, they’re portion-controlled—each ghost is small enough that kids feel satisfied without overdoing it.
That said, they do contain sugar, so they’re still a treat. I like to serve them as part of a balanced Halloween spread with fruit and veggie platters. My kids know they can have a couple ghosts after they’ve eaten their apple slices.
If you’re watching your sugar intake, you could reduce the sugar by a quarter cup, but the texture will be slightly different. The sugar isn’t just for sweetness—it’s what gives meringue its structure and stability.
Conclusion
These spooky ghost meringue cookies have become a Halloween tradition in our house, all thanks to a pediatrician who shared her family’s favorite recipe in between checkups. They’re simple enough for a weeknight baking session with the kids, yet impressive enough to bring to any Halloween gathering. The best part? They cost next to nothing to make, and they disappear just as fast as expensive store-bought treats.
I love how these ghosts bring a little bit of magic to the kitchen. My kids get so excited when they see me pulling out the mixer, and they take their job of placing the chocolate chip eyes very seriously. It’s one of those rare recipes that’s fun to make, fun to eat, and fun to share.
Give them a try, and don’t be afraid to make them your own. Add different colors, try different extracts, or let your kids go wild with the sprinkles. I’d love to hear how yours turn out—drop a comment below and tell me about your ghost-making adventures. And if you’re looking for other easy Halloween treats, check out my pumpkin spice popcorn mix or these no-bake spider web cookies. Happy baking, and may your ghosts be perfectly spooky!
Frequently Asked Questions
Can I make these ghost meringue cookies without a piping bag?
Absolutely. Just spoon the meringue onto the parchment paper and use the back of the spoon to shape it into a ghost. They won’t look as uniform, but they’ll taste the same.
Why did my meringue turn brown?
Your oven temperature was likely too high. Make sure it’s set to exactly 200°F (95°C). Dark baking sheets can also cause browning, so use light-colored ones if you have them.
Can I use liquid egg whites from a carton?
I don’t recommend it. Carton egg whites are pasteurized differently and often contain stabilizers that prevent them from whipping up properly. Fresh egg whites work best.
How do I know when the meringue is done whipping?
Lift the whisk attachment—the meringue should stand up in stiff peaks without drooping. The mixture should look glossy and feel smooth when you rub a little between your fingers.
Can I double this recipe?
Yes, but you’ll need to bake them in batches or use two baking sheets on separate racks. Just make sure your mixer bowl is big enough to handle double the volume.
Pin This Recipe!
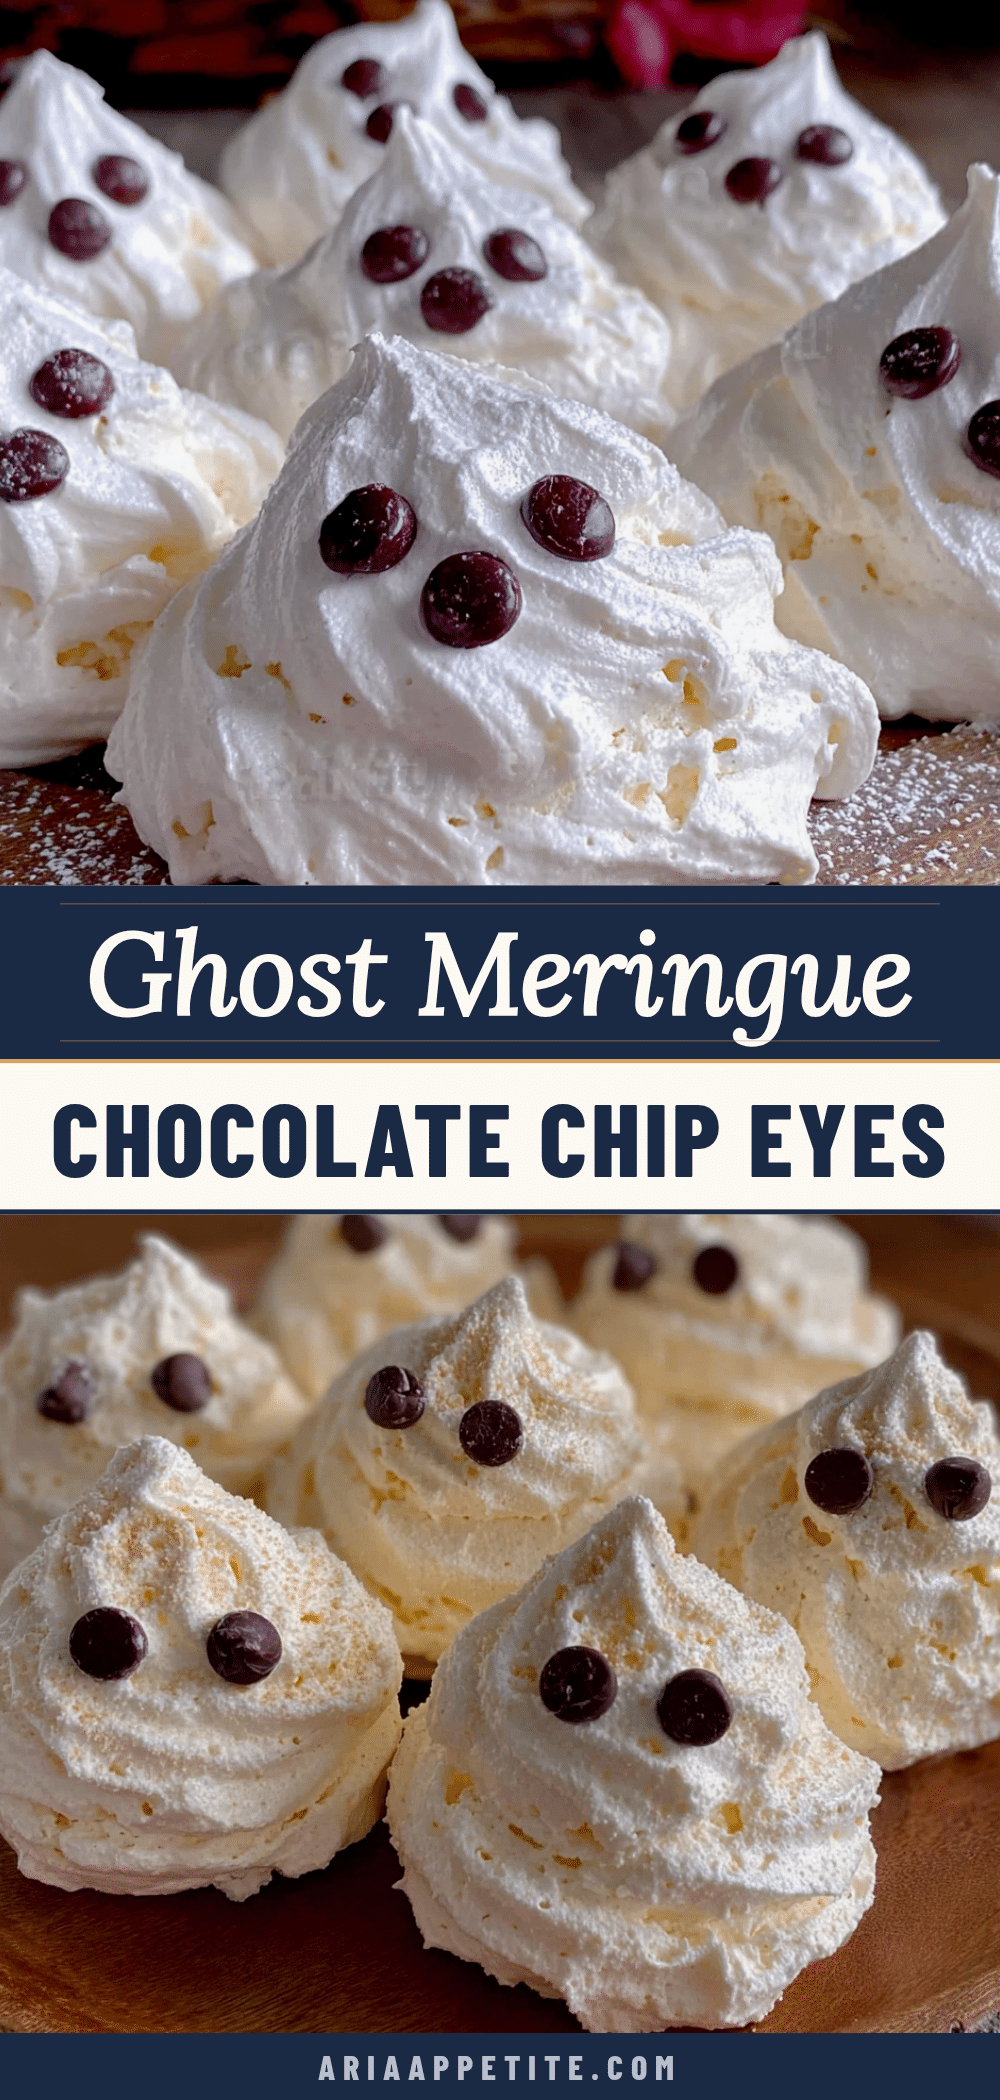
Spooky Ghost Meringue Cookies with Chocolate Chip Eyes
Light, crispy, and just sweet enough, these ghost meringue cookies are a quick and easy Halloween treat made with just four simple ingredients. Perfect for classroom parties or a fun weekend baking activity with the kids.
- Prep Time: 15 minutes
- Cook Time: 1 hour 15 minutes
- Total Time: 2 hours (including cooling time in oven)
- Yield: 24 servings (about 2 ghosts per serving) 1x
- Category: Dessert
- Cuisine: American
Ingredients
- 4 large egg whites, room temperature
- 1 cup granulated sugar (superfine sugar works even better)
- 1 teaspoon vanilla extract (pure vanilla gives the best flavor)
- 1/4 teaspoon cream of tartar
- 1/3 cup mini chocolate chips (for the eyes)
- Pinch of salt
Instructions
- Preheat your oven to 200°F (95°C). Line your baking sheet with parchment paper and set it aside.
- Separate your eggs carefully. Crack each egg and let the white fall into a small bowl, then transfer it to your large mixing bowl. Any trace of yolk will prevent your egg whites from whipping properly.
- Add the cream of tartar and salt. Sprinkle them over the egg whites before you start beating.
- Beat the egg whites on medium speed until they become frothy and start to look like foam. This takes about 1-2 minutes with a stand mixer, maybe 3-4 with a hand mixer.
- Gradually add the sugar. With the mixer still running on medium, add the sugar one tablespoon at a time. Adding it slowly helps it dissolve completely.
- Increase the speed to high and beat until stiff peaks form. You’ll know it’s ready when you lift the whisk and the meringue stands up straight without drooping. The mixture should look glossy and white, like marshmallow fluff. This usually takes about 5-7 minutes total. Add the vanilla extract during the last minute of beating.
- Test for doneness. Rub a tiny bit of meringue between your thumb and finger. If it feels smooth and not gritty, the sugar has dissolved. If it feels grainy, keep beating for another minute or two.
- Fold in the chocolate chips. Use your rubber spatula to gently fold in the mini chocolate chips. Don’t overmix—you want them distributed evenly, but you don’t want to deflate all that air you just whipped in.
- Pipe or spoon the ghosts. Transfer the meringue to your piping bag or zip-top bag. Snip off about a half-inch from the corner. Pipe small ghost shapes onto the parchment paper—think of a teardrop shape with a round head and a slightly pointed bottom. Leave about an inch between each ghost.
- Add the eyes. Gently press two mini chocolate chips into each ghost for eyes. Do this right after piping while the meringue is still soft.
- Bake for 1 hour and 15 minutes. Place the baking sheet in the preheated oven and bake without opening the door.
- Turn off the oven and let them cool inside. After the baking time is up, turn off the oven but leave the ghosts inside for another 30 minutes to an hour. This helps them dry out completely and gives them that perfect crisp texture. They should peel easily off the parchment paper when they’re done.
Notes
Humidity is your enemy—make these on a dry day if possible. Room temperature eggs are non-negotiable. Keep your bowl and whisk completely clean and free of any grease. Don’t overbeat the meringue. Let them cool completely in the oven before removing. Store in an airtight container at room temperature for up to a week. Can be frozen for up to three months.
Nutrition
- Serving Size: 2 ghosts
- Calories: 60
- Sugar: 10
- Sodium: 20
- Fat: 1
- Saturated Fat: 0.5
- Carbohydrates: 12
- Protein: 1
Keywords: Halloween cookies, ghost meringue, meringue cookies, easy Halloween treat, spooky cookies, egg white cookies, gluten-free Halloween


