Love this? Save it for later!
Share the inspiration with your friends
This was supposed to be a pumpkin cheesecake. I mean, that was the plan. It was mid-November, I had a block of cream cheese softening on the counter, and I was feeling pretty smug about getting a head start on holiday baking. But then I opened the pantry and realized I was completely out of pumpkin puree. Not a single can. And honestly, I was already in my flour-dusted apron, my mixer was out, and the whole “I’m a prepared adult” energy was quickly slipping away.
I stood there staring at the shelves, and my eyes landed on a carton of eggnog I’d bought on a whim. You know that feeling when you grab something at the store because it just looks festive, and then it sits in your fridge for a week? That was this carton. I almost closed the door and reached for a backup plan—maybe a plain cheesecake with a drizzle of caramel. But something stopped me. I grabbed the eggnog, shrugged, and thought, Well, this is either going to be a disaster or a really happy accident.
Spoiler: it was the happy accident. The first bite was this unexpected moment of creamy, spiced perfection that made me laugh out loud in my empty kitchen. The eggnog gave the filling this velvety richness without being heavy, and the gingersnap crust—well, that was just pure serendipity. I’d crushed up a bag of gingersnaps I’d bought for a cookie recipe I never got around to making. The whole thing came together in a way that felt less like a recipe and more like the kitchen just decided to work with me that day.
I’ve made this lighter eggnog cheesecake every holiday season since. It’s the kind of dessert that makes people close their eyes after the first forkful, and I love that it started as a complete accident. Maybe you’ve had one of those kitchen moments where you just go with it and something amazing happens. This is that recipe.
Why You’ll Love This Recipe
Let me tell you why this lighter eggnog cheesecake has become my go-to holiday dessert. It checks all the boxes without any of the guilt or fuss.
- Quick & Easy: This cheesecake comes together in about 20 minutes of active prep time. The oven does the rest of the work. Perfect for when you’re juggling holiday chaos and still want to show up with something impressive.
- Simple Ingredients: No fancy grocery store scavenger hunts here. You likely already have most of these in your kitchen—cream cheese, eggs, sugar, and that carton of eggnog you bought on a whim.
- Perfect for Holiday Gatherings: Whether it’s Christmas dinner, a cozy Friendsgiving, or a New Year’s Eve party, this cheesecake fits right in. It’s festive without being over-the-top.
- Crowd-Pleaser: I’ve served this to everyone from my picky-eating nephew to my health-conscious sister-in-law. It gets rave reviews every single time. Kids love the gingersnap crunch, and adults appreciate the sophisticated flavor.
- Unbelievably Delicious: The texture is this dreamy balance of creamy and light. The eggnog flavor is present but not overpowering, and the gingersnap crust adds this warm, spicy crunch that just works.
What makes this recipe different from other eggnog cheesecakes? I swapped out heavy cream for a combination of low-fat cream cheese and a bit of Greek yogurt. The result? A cheesecake that’s rich and indulgent but doesn’t leave you feeling like you need to unbutton your pants. It’s comfort food reimagined—healthier, faster, but with the same soul-soothing satisfaction. Perfect for impressing guests without stress, or turning a simple holiday meal into something memorable.
What Ingredients You Will Need
This lighter eggnog cheesecake uses simple, wholesome ingredients to deliver that holiday flavor without the heavy feeling. Most of these are pantry staples or easy to find at any grocery store.
For the Gingersnap Crust
- 1 ½ cups gingersnap cookie crumbs (about 25-30 cookies, crushed finely)—I prefer using store-bought gingersnaps from the bakery section; they have that perfect snap and spice blend
- ¼ cup unsalted butter, melted (use dairy-free butter if needed)
- 2 tablespoons granulated sugar (adds just a touch of sweetness to balance the spicy cookies)
- ¼ teaspoon salt (trust me on this—it enhances the ginger and clove flavors)
For the Lighter Cheesecake Filling
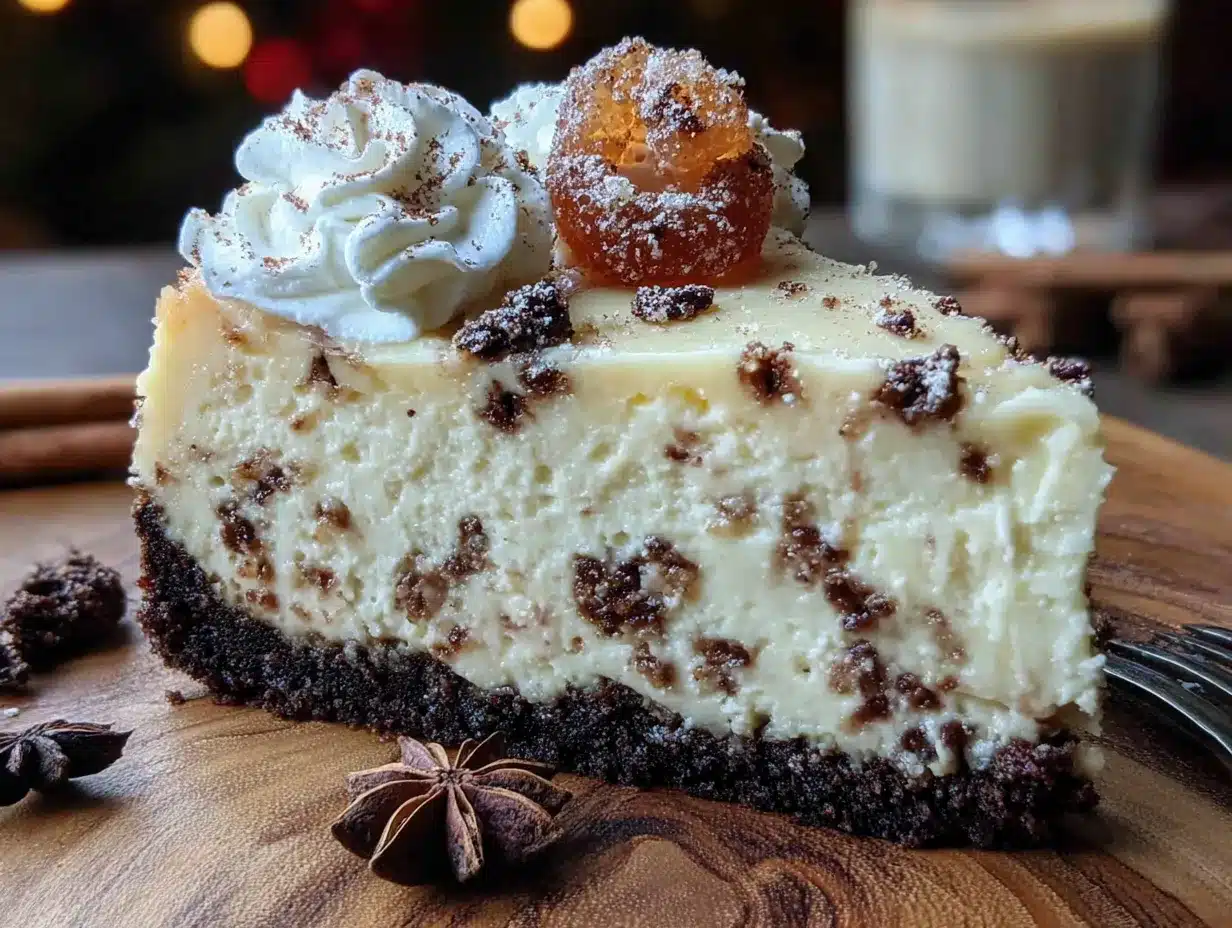
- 16 ounces low-fat cream cheese, softened (Neufchâtel cheese works beautifully here—it’s lower in fat but still creamy)
- ½ cup plain Greek yogurt (I use 2% for the best texture; full-fat works too if you’re not counting calories)
- ¾ cup granulated sugar (you can reduce to ⅔ cup if you prefer a less sweet cheesecake)
- 2 large eggs, room temperature (this is important—cold eggs can make the filling lumpy)
- 1 cup eggnog (use your favorite brand; I’ve tested this with both regular and light eggnog, and both work great)
- 1 teaspoon vanilla extract (pure vanilla makes a difference, but imitation works in a pinch)
- ½ teaspoon ground nutmeg, plus extra for garnish (freshly grated is amazing if you have it)
- ¼ teaspoon ground cinnamon (adds warmth without overpowering the eggnog)
- Pinch of ground cloves (optional but recommended—it ties the filling to the crust beautifully)
For the Optional Topping
- ½ cup heavy cream or coconut cream, whipped (I sometimes use a can of chilled full-fat coconut milk for a dairy-free option)
- 1 tablespoon powdered sugar (for sweetening the whipped cream)
- Extra crushed gingersnaps for garnish
- Fresh cranberries or a sprig of rosemary (for that holiday presentation vibe)
A quick note on ingredient selection: I recommend using a good-quality eggnog for this recipe. The cheaper brands tend to be thinner and less flavorful, which can affect the final texture. I’ve had great results with the store-brand organic eggnog from my local grocery—it’s rich without being too heavy. And for the gingersnaps, look for ones that are crispy, not soft. You want that snappy texture for the crust.
Equipment Needed
You don’t need a professional bakery setup for this lighter eggnog cheesecake. Here’s what you’ll need:
- 9-inch springform pan—this is non-negotiable for easy removal. I’ve made the mistake of using a regular cake pan, and let me tell you, extracting a cheesecake from a standard pan is a messy affair. A springform pan makes it effortless.
- Electric mixer (handheld or stand mixer both work fine). I’ve made this with a whisk before, and while it’s possible, your arm will thank you for using a mixer.
- Food processor or zip-top bag and rolling pin for crushing the gingersnaps. The food processor gives you a finer, more even crumb, but the bag-and-rolling-pin method works in a pinch. I’ve used both, and honestly, the bag method makes me feel a little more connected to the process—plus it’s great stress relief.
- Large mixing bowls (at least two)
- Measuring cups and spoons
- Spatula (rubber or silicone for scraping every bit of that filling)
- Roasting pan or large baking dish for the water bath—this ensures even baking and prevents cracking
- Aluminum foil to wrap the springform pan so water doesn’t seep in
- Cooling rack
If you don’t have a springform pan, you can use a deep-dish pie plate, but the slices won’t be as clean. I’ve done it before in a pinch, and it still tasted amazing—just looked a little rustic. Budget-friendly tip: check thrift stores for springform pans. I found mine for three dollars, and it’s been going strong for years.
Preparation Method
Let’s walk through this step by step. Trust me, if I can pull this off after a pumpkin-puree mishap, you’ve got this.
- Preheat your oven to 325°F (165°C). Position the rack in the center of the oven. While it’s heating, wrap the outside of your springform pan with two layers of aluminum foil. Make sure the foil comes up at least halfway on the sides—this prevents water from sneaking in during the water bath.
- Make the gingersnap crust. In a food processor, pulse the gingersnap cookies until they form fine crumbs. You should have about 1 ½ cups. Transfer to a medium bowl, add the melted butter, sugar, and salt, and stir until the mixture looks like wet sand. Press this mixture firmly into the bottom of your prepared springform pan. Use the flat bottom of a glass or measuring cup to really pack it down—this prevents the crust from crumbling when you cut slices later. Bake for 8 minutes, then set aside to cool. Your kitchen will smell like a holiday bakery at this point.
- Start the filling. In a large mixing bowl, beat the softened cream cheese with an electric mixer on medium speed until it’s smooth and creamy—about 2 minutes. Scrape down the sides of the bowl with your spatula. Don’t skip this step; nobody wants lumps in their cheesecake.
- Add the sugar and yogurt. Beat in the granulated sugar and Greek yogurt until well combined, about 1 minute. The mixture should look silky and smooth. Add the eggs one at a time, beating on low speed after each addition just until incorporated. Overmixing at this stage can incorporate too much air, which may cause cracks later. I learned this the hard way after my first cheesecake looked like a topographic map.
- Pour in the eggnog. With the mixer on low, slowly add the eggnog, vanilla extract, nutmeg, cinnamon, and cloves. Mix just until everything is combined. The batter will be thinner than a traditional cheesecake batter—that’s totally normal. It should be pourable and smooth.
- Pour the filling over the crust. Gently pour the batter into the cooled crust. Smooth the top with your spatula. Give the pan a gentle tap on the counter to release any air bubbles. If you see tiny bubbles on the surface, pop them with a toothpick.
- Set up the water bath. Place the wrapped springform pan into a large roasting pan. Carefully pour hot water (not boiling, just hot from the tap) into the roasting pan until it reaches about halfway up the sides of the springform pan. Be careful not to splash water onto the cheesecake filling. This water bath creates a steamy environment that helps the cheesecake bake evenly and prevents cracks.
- Bake the cheesecake. Bake at 325°F (165°C) for 50-60 minutes, or until the edges are set and the center is slightly jiggly. It should wobble like Jell-O, not slosh like liquid. If the center looks wet and ripples when you shake the pan, it needs more time. The internal temperature should read about 150°F (65°C) when done.
- Cool slowly. Turn off the oven, crack the door open, and let the cheesecake sit in the warm oven for 1 hour. This gradual cooling helps prevent cracking. After an hour, remove the cheesecake from the water bath, remove the foil, and let it cool completely on a wire rack. Then refrigerate for at least 4 hours, but overnight is best. The flavors really develop and meld together overnight.
- Serve and garnish. When you’re ready to serve, run a knife around the edge of the pan before releasing the springform. Slice with a sharp knife, wiping the blade clean between cuts for neat slices. Top with whipped cream, a sprinkle of nutmeg, and some crushed gingersnaps. If you’re feeling fancy, add a few fresh cranberries or a tiny sprig of rosemary for that holiday pop of color.
Cooking Tips & Techniques
After making this lighter eggnog cheesecake more times than I care to count, I’ve picked up a few tricks that make a real difference. Let me share them so you can skip my mistakes.
Room temperature ingredients are your friend. I cannot stress this enough. Cold cream cheese and cold eggs will give you a lumpy batter that no amount of mixing can fully fix. Take everything out of the fridge about 30 minutes before you start. If you forget (and I forget all the time), cut the cream cheese into small cubes and let it sit for 10 minutes—it softens much faster that way.
Don’t overmix the batter. I know it’s tempting to keep beating until it’s perfectly smooth, but overmixing incorporates too much air. That air expands in the oven and then collapses, leaving you with cracks. Mix just until the ingredients come together. A few tiny lumps are fine—they’ll smooth out during baking.
The water bath is worth the hassle. I tried skipping it once because I was in a hurry. Big mistake. The cheesecake cracked down the middle, and the edges were overbaked while the center was still underdone. If wrapping the pan with foil makes you nervous, use a slow cooker liner or an oven bag around the pan before the foil—it adds an extra layer of protection against water seepage.
Let it cool completely before refrigerating. I know you’re excited, but putting a warm cheesecake directly into the fridge can cause condensation to form on the surface, making it watery. Let it cool on the counter for at least an hour first. Patience pays off here.
Use a sharp knife for clean slices. Run the knife under hot water, dry it off, then slice. Wipe the blade clean between each cut. This gives you those beautiful, bakery-style slices that look great on a plate. I learned this after years of serving cheesecake that looked like it had been attacked by a spoon.
Variations & Adaptations
One of the best things about this lighter eggnog cheesecake is how adaptable it is. Here are some variations I’ve tried and loved.
Gluten-Free Version: Swap the gingersnap crust for gluten-free gingersnaps or use a mixture of almond flour and crushed gluten-free graham crackers. I’ve tested this with a 1:1 gluten-free flour blend in the crust, and it works beautifully. Just make sure your eggnog is also gluten-free—most brands are, but it’s worth checking the label.
Dairy-Free Adaptation: Use dairy-free cream cheese (I like the brand Kite Hill for its creamy texture), coconut yogurt instead of Greek yogurt, and a dairy-free butter substitute for the crust. For the eggnog, there are several excellent dairy-free options available now, or you can make your own with coconut milk, nutmeg, and a touch of maple syrup. The texture will be slightly different—a bit softer—but still delicious.
Bourbon-Infused Version: For an adult twist, add 2 tablespoons of bourbon to the filling along with the eggnog. The bourbon complements the warm spices beautifully and adds a subtle warmth. I made this for a New Year’s Eve party, and it was a hit. Just note that the baking time might increase by about 5 minutes because of the extra liquid.
Mini Cheesecake Option: Use a muffin tin lined with paper liners instead of a springform pan. Press the crust mixture into the bottom of each liner, then fill with the batter. Bake for 18-22 minutes at 325°F (165°C). These are perfect for parties or portion control. I’ve made them for cookie exchanges, and they disappear fast.
Spice It Up: If you love bold flavors, add an extra ¼ teaspoon of ginger and a pinch of cardamom to the filling. The cardamom adds this floral, slightly citrusy note that pairs wonderfully with the eggnog. I tried this on a whim one afternoon, and it’s become my go-to variation for winter gatherings.
Serving & Storage Suggestions
This lighter eggnog cheesecake is best served chilled, straight from the fridge. The cold temperature makes the texture firm and creamy, and the flavors are more pronounced. Let it sit at room temperature for about 10 minutes before slicing for the cleanest cuts.
For presentation, I love to serve each slice on a small plate with a dollop of whipped cream, a dusting of nutmeg, and a few crushed gingersnaps scattered around. During the holidays, I add a few fresh cranberries and a tiny sprig of rosemary for that festive red-and-green pop. It looks like something from a magazine, but it takes about 30 seconds to put together.
This cheesecake pairs beautifully with a cup of hot coffee or spiced tea. For a dessert spread, serve it alongside a plate of gingerbread cookies or a bowl of fresh poached pears. The creamy, spiced flavors complement each other perfectly.
Storage: Store the cheesecake in the refrigerator, covered, for up to 5 days. I use a cake carrier or wrap the springform pan tightly with plastic wrap. The flavor actually improves after a day or two as the spices meld together. If you’re making this ahead for a party, I recommend making it 1-2 days in advance.
Freezing: This cheesecake freezes beautifully. Once it’s fully chilled and set, wrap it tightly in plastic wrap, then a layer of aluminum foil. Freeze for up to 3 months. To thaw, transfer to the refrigerator overnight. Don’t thaw at room temperature—it can become watery. I’ve pulled this out for unexpected guests more times than I can count, and no one has ever guessed it was frozen.
Reheating: This is a cold dessert, so no reheating needed. But if you want to serve it slightly warm, you can microwave individual slices for about 10 seconds. Just be careful not to overdo it—the texture changes quickly.
Nutritional Information & Benefits
Here’s the thing about this lighter eggnog cheesecake: it feels indulgent, but it’s actually a smarter choice than traditional cheesecake. By using low-fat cream cheese and Greek yogurt instead of heavy cream, I’ve cut the fat and calories significantly without sacrificing that creamy texture.
Per slice (based on 12 servings):
- Calories: approximately 285
- Protein: 8g
- Carbohydrates: 28g
- Fat: 16g
- Saturated Fat: 9g
- Fiber: 1g
- Sugar: 20g
The Greek yogurt adds a good dose of protein and probiotics, which are great for gut health. Eggnog itself is a good source of calcium and vitamin D, especially if you use a fortified brand. The ginger in the crust has anti-inflammatory properties, and the nutmeg and cinnamon add antioxidants. It’s not a health food, but it’s a dessert that lets you enjoy the holidays without overdoing it.
This recipe is vegetarian-friendly. For gluten-free and dairy-free options, check the variations section above. The main allergens to note are dairy, eggs, and gluten (from the gingersnaps).
Conclusion
This lighter eggnog cheesecake with gingersnap crust is proof that sometimes the best recipes come from happy accidents. It’s creamy, spiced, and just the right amount of indulgent—perfect for holiday gatherings or a cozy night in. I love that it started as a pantry mishap and turned into something I look forward to making every year.
I hope you give this recipe a try. Don’t be afraid to make it your own—add a little extra nutmeg, swap in your favorite cookie for the crust, or go all out with the bourbon version. The kitchen is your playground, and this cheesecake is a forgiving canvas. If you make it, I’d love to hear how it turned out. Drop a comment below or tag me in your photos. Happy baking, and here’s to happy accidents!
Frequently Asked Questions
Can I use store-bought eggnog for this recipe?
Absolutely! Store-bought eggnog works perfectly. I’ve tested this with several brands, and they all work well. Just avoid the light or low-sugar versions if possible—they can be thinner and less flavorful, which might affect the texture of the cheesecake.
Why did my cheesecake crack?
Cracks usually happen from overmixing the batter or cooling the cheesecake too quickly. Make sure you mix just until the ingredients are combined, and follow the slow-cooling method in the oven. The water bath also helps prevent cracks by providing even, gentle heat. If your cheesecake does crack, don’t worry—a layer of whipped cream covers it beautifully!
Can I make this cheesecake ahead of time?
Yes, this is a great make-ahead dessert. I actually think it tastes better after a day or two in the fridge because the flavors have time to meld. You can make it up to 3 days in advance and keep it covered in the refrigerator. Just add the whipped cream and garnish right before serving.
How do I know when the cheesecake is done baking?
The cheesecake is done when the edges are set and the center is still slightly jiggly—it should wobble like Jell-O, not slosh like liquid. If you have an instant-read thermometer, the internal temperature should be about 150°F (65°C). Don’t overbake it, or the texture will become dense and dry.
Can I freeze leftover cheesecake?
Yes, this cheesecake freezes very well. Wrap individual slices tightly in plastic wrap, then place them in a freezer-safe bag or container. They’ll keep for up to 3 months. To thaw, transfer a slice to the refrigerator overnight. I love having a few slices stashed away for those days when I need a little holiday cheer.
Pin This Recipe!
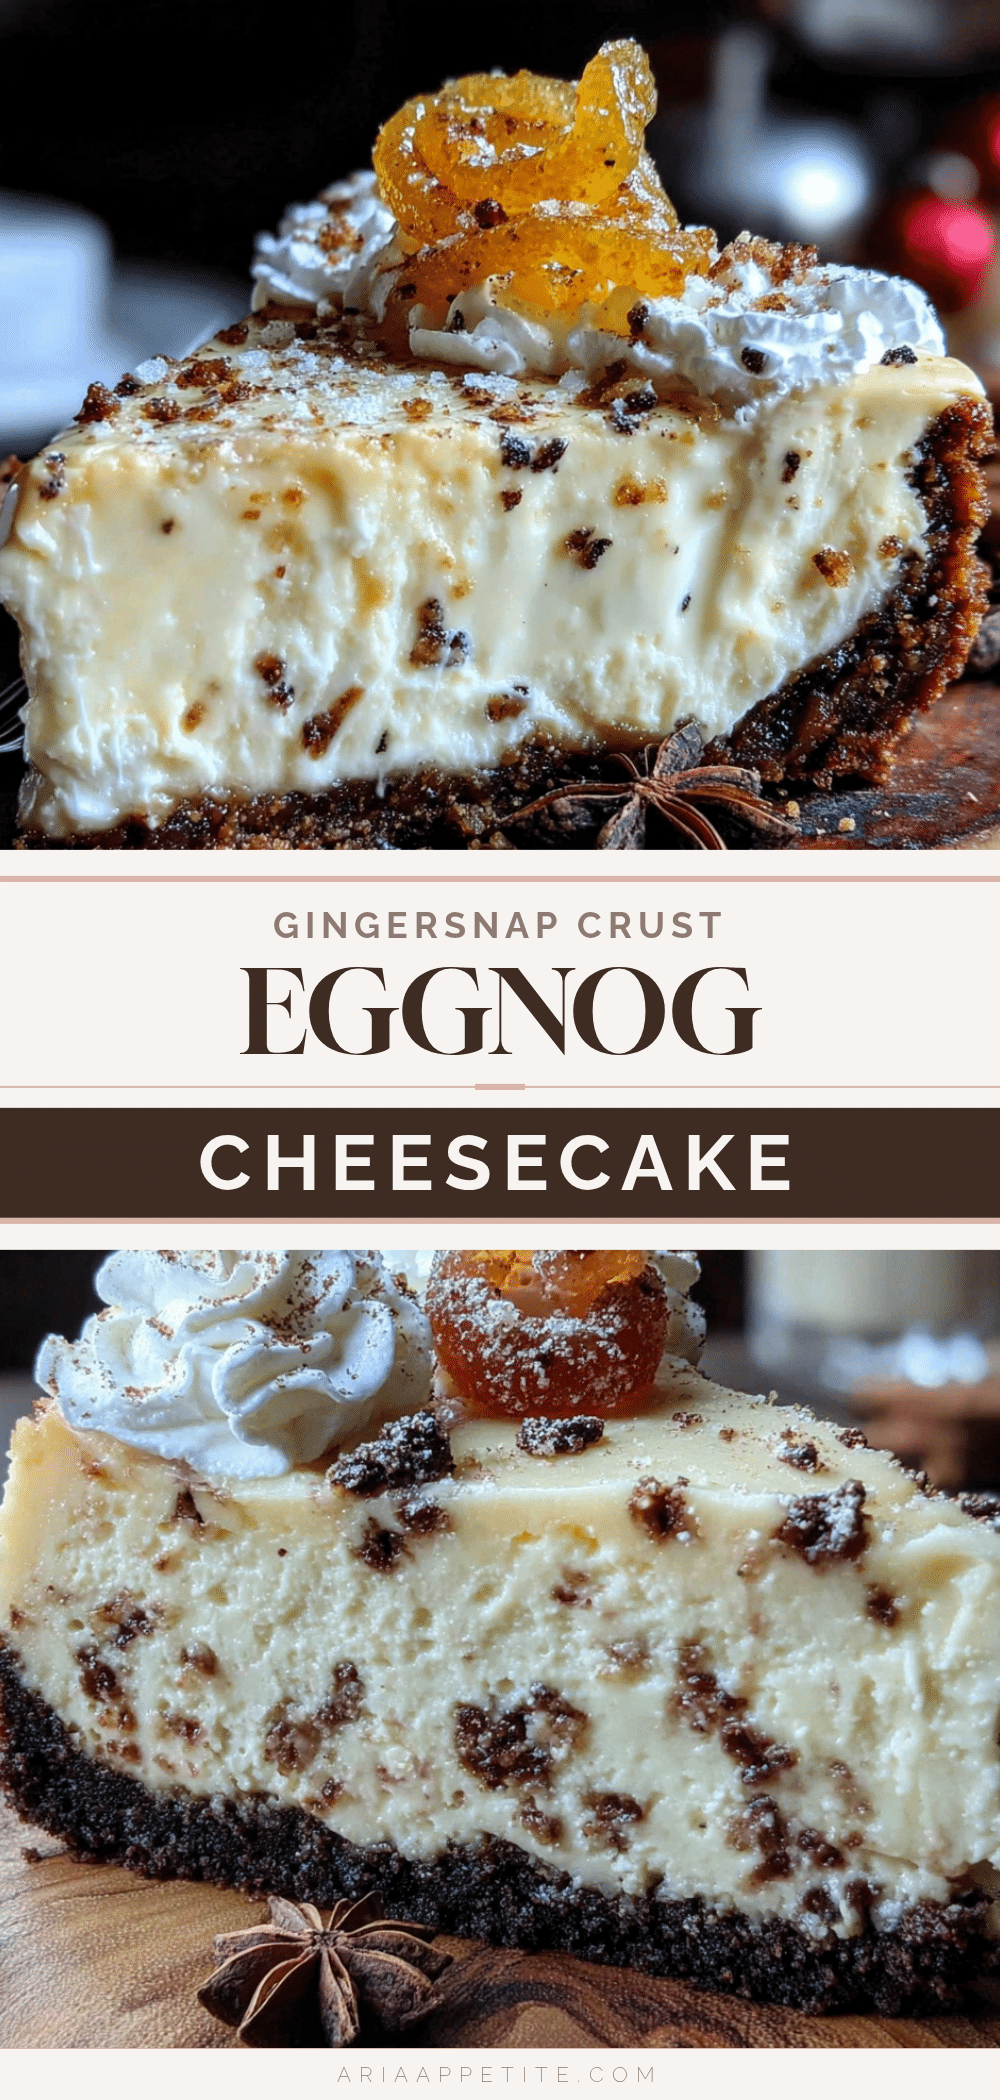
Lighter Eggnog Cheesecake with Easy Gingersnap Crust
A creamy, spiced eggnog cheesecake with a crunchy gingersnap crust that’s lighter than traditional cheesecake. Perfect for holiday gatherings, this recipe uses low-fat cream cheese and Greek yogurt for a rich yet guilt-free dessert.
- Prep Time: 20 minutes
- Cook Time: 50-60 minutes
- Total Time: 1 hour 20 minutes (plus cooling and chilling time)
- Yield: 12 servings 1x
- Category: Dessert
- Cuisine: American
Ingredients
- 1 ½ cups gingersnap cookie crumbs (about 25–30 cookies, crushed finely)
- ¼ cup unsalted butter, melted
- 2 tablespoons granulated sugar
- ¼ teaspoon salt
- 16 ounces low-fat cream cheese, softened (Neufchâtel cheese works well)
- ½ cup plain Greek yogurt (2% recommended)
- ¾ cup granulated sugar (can reduce to ⅔ cup)
- 2 large eggs, room temperature
- 1 cup eggnog (regular or light)
- 1 teaspoon vanilla extract
- ½ teaspoon ground nutmeg, plus extra for garnish
- ¼ teaspoon ground cinnamon
- Pinch of ground cloves (optional)
- ½ cup heavy cream or coconut cream, whipped (optional topping)
- 1 tablespoon powdered sugar (for whipped cream, optional)
- Extra crushed gingersnaps for garnish (optional)
- Fresh cranberries or a sprig of rosemary for garnish (optional)
Instructions
- Preheat oven to 325°F (165°C). Wrap the outside of a 9-inch springform pan with two layers of aluminum foil, making sure the foil comes up at least halfway on the sides.
- Make the crust: In a food processor, pulse gingersnap cookies until fine crumbs form. Transfer to a medium bowl, add melted butter, sugar, and salt, and stir until mixture resembles wet sand. Press firmly into the bottom of the prepared springform pan. Bake for 8 minutes, then set aside to cool.
- Start the filling: In a large mixing bowl, beat softened cream cheese with an electric mixer on medium speed until smooth and creamy, about 2 minutes. Scrape down the sides of the bowl.
- Add sugar and yogurt: Beat in granulated sugar and Greek yogurt until well combined, about 1 minute. Add eggs one at a time, beating on low speed after each addition just until incorporated.
- Pour in the eggnog: With mixer on low, slowly add eggnog, vanilla extract, nutmeg, cinnamon, and cloves. Mix just until combined. Batter will be thinner than traditional cheesecake batter.
- Pour filling over crust: Gently pour batter into cooled crust. Smooth the top with a spatula. Tap the pan gently on the counter to release air bubbles.
- Set up water bath: Place wrapped springform pan into a large roasting pan. Carefully pour hot water into the roasting pan until it reaches about halfway up the sides of the springform pan.
- Bake: Bake at 325°F (165°C) for 50-60 minutes, until edges are set and center is slightly jiggly (like Jell-O). Internal temperature should be about 150°F (65°C).
- Cool slowly: Turn off oven, crack the door open, and let cheesecake sit in warm oven for 1 hour. Then remove from water bath, remove foil, and cool completely on a wire rack. Refrigerate for at least 4 hours, preferably overnight.
- Serve: Run a knife around the edge of the pan before releasing the springform. Slice with a sharp knife, wiping blade clean between cuts. Top with whipped cream, a sprinkle of nutmeg, and crushed gingersnaps if desired.
Notes
Room temperature ingredients are crucial for a smooth batter. Don’t overmix to avoid cracks. The water bath is essential for even baking and preventing cracks. Cool the cheesecake slowly in the oven to avoid cracking. For best flavor, refrigerate overnight before serving.
Nutrition
- Serving Size: 1 slice
- Calories: 285
- Sugar: 20
- Fat: 16
- Saturated Fat: 9
- Carbohydrates: 28
- Fiber: 1
- Protein: 8
Keywords: eggnog cheesecake, lighter cheesecake, holiday dessert, gingersnap crust, Christmas cheesecake, easy cheesecake recipe


