Love this? Save it for later!
Share the inspiration with your friends
My niece asked why I couldn’t just skip the oven and use the food processor instead. I was in the middle of explaining the science of baked pumpkin desserts—the caramelization, the texture development, the whole spiel. Then I stopped. I mean, honestly, why was I making this so complicated? She was eight years old and had just solved a problem I’d been wrestling with for weeks: how to get that deep, cozy pumpkin flavor without turning on the oven during an unseasonably warm October afternoon.
I started to explain why that wouldn’t work—then stopped. The truth is, I had no good reason. I was just stuck in my ways, you know? So I handed her the bag of chocolate sandwich cookies and said, “Show me what you’ve got.”
What happened next was pure kitchen magic. She crushed those cookies with a rolling pin (and maybe got crumbs on the ceiling—no regrets), mixed in some cream cheese and pumpkin puree, and within twenty minutes we had these adorable little cups that tasted like fall in a bowl. The power went out halfway through our experiment, which was actually perfect because we didn’t need electricity for anything except the fridge. We ate them by candlelight, and I swear they tasted even better that way.
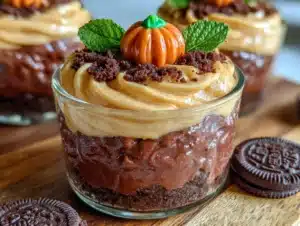
These Easy No-Bake Pumpkin Dirt Cups have become my secret weapon for fall gatherings. They’re the kind of dessert that makes people close their eyes after the first bite, and nobody believes me when I say there’s no baking involved. Maybe you’ve been there—wanting all the cozy autumn flavors without the kitchen heat or the complicated steps. That’s exactly why this recipe stuck with me. It’s proof that sometimes the best ideas come from letting someone else take the lead, especially when that someone has zero preconceived notions about how things are supposed to be done.
Why You’ll Love This Recipe
Let me tell you why these dirt cups have earned a permanent spot in my fall rotation. After testing this recipe about seven times (my neighbors were very happy volunteers), I can confidently say this is the version you want.
- No Oven Required: Seriously, zero heat. Perfect for those warm fall days or when you just don’t want to deal with preheating anything.
- Ready in 20 Minutes: From start to fridge, you’re looking at about twenty minutes of active work. The hardest part is waiting for them to chill.
- Simple Pantry Ingredients: You probably already have most of these in your kitchen. No special trips to fancy grocery stores.
- Perfect for Fall Parties: These little cups are always the first thing to disappear at potlucks, Halloween parties, and Thanksgiving gatherings.
- Kid-Friendly Fun: My niece still reminds me that she “invented” this recipe. Kids love helping crush the cookies and layering the cups.
- Make-Ahead Magic: They actually taste better after sitting overnight. The flavors meld together in the most wonderful way.
What makes these different from other no-bake desserts? It’s the texture combination. The creamy pumpkin layer has this velvety richness from the cream cheese, while the crushed cookie “dirt” adds that satisfying crunch. I use a specific ratio of cream cheese to pumpkin puree that took me several tries to nail—too much pumpkin and it gets runny, too much cream cheese and it’s too dense. This version hits that sweet spot where every spoonful feels like a little autumn hug.
This isn’t just another pumpkin dessert. It’s the kind that makes you wonder why you ever bothered with complicated recipes in the first place. Comfort food reimagined—simpler, faster, but with all the soul-soothing satisfaction of your favorite fall treats.
What Ingredients You Will Need
This recipe uses simple, wholesome ingredients to create something truly special. Most of these are pantry staples, especially if you’ve done any fall baking recently.
For the Pumpkin Layer
- 8 ounces cream cheese, softened to room temperature (I prefer Philadelphia for the smoothest texture)
- 1 cup pumpkin puree (not pumpkin pie filling—make sure it’s 100% pure pumpkin)
- ½ cup powdered sugar (adds sweetness without graininess)
- 1 teaspoon pumpkin pie spice (or make your own with cinnamon, nutmeg, ginger, and cloves)
- ½ teaspoon vanilla extract
- 1 cup heavy whipping cream (cold, for the fluffiest texture)
For the Dirt Layer
- 1 package (about 14 ounces) chocolate sandwich cookies (Oreos work great, but store brands are fine too)
- 4 tablespoons unsalted butter, melted
For the Topping
- ½ cup whipped topping (Cool Whip or homemade)
- Optional: gummy worms, candy pumpkins, or crushed graham crackers for decoration
A few ingredient notes from my testing kitchen: The cream cheese absolutely needs to be at room temperature. I learned this the hard way when I tried to rush things and ended up with lumpy filling. Leave it on the counter for about 30 minutes before you start. For the pumpkin puree, I’ve tested both Libby’s and store brands—they both work, but Libby’s has a slightly thicker consistency that gives a better texture. If you’re using a different brand and the puree seems watery, blot it with a paper towel before mixing.
For the cookies, you can use regular or double-stuffed. Double-stuffed gives a slightly sweeter “dirt” layer, which I personally love. If you’re avoiding dairy, use dairy-free cream cheese and coconut cream instead of heavy whipping cream. The texture will be slightly different but still delicious.
One more thing—don’t skip the powdered sugar. I tried using granulated sugar once because I thought it would save a step, and the filling had a weird gritty texture. Powdered sugar dissolves completely and gives that silky smooth finish we’re after.
Equipment Needed
You don’t need anything fancy for these dirt cups. Here’s what you’ll want to have on hand:
- Food processor or rolling pin (for crushing cookies—I’ve used both, and the food processor is faster but the rolling pin is more fun)
- Large mixing bowl
- Electric hand mixer or stand mixer (you can whisk by hand, but your arm will thank you for using a mixer)
- Small cups or jars (I use 8-ounce mason jars or clear plastic cups—anything see-through shows off the pretty layers)
- Spatula for scraping every last bit of filling
- Measuring cups and spoons
If you don’t have a food processor, no worries. Put the cookies in a zip-top bag and go to town with a rolling pin. It’s actually really satisfying, especially if you’ve had a rough day. My niece insists this is the only proper way to do it. For the cups, I’ve used everything from fancy glassware to paper cups—whatever you have works. Just make sure they’re clear if you want to show off those beautiful layers.
One tip: if you’re using a hand mixer, start on low speed so the powdered sugar doesn’t fly everywhere. I learned that one the messy way.
Preparation Method
Let me walk you through this step by step. I promise it’s easier than it looks.
- Crush the cookies. Place the chocolate sandwich cookies in a food processor and pulse until they become fine crumbs. If you’re using the bag-and-rolling-pin method, seal the bag tightly and crush until you have a mix of fine crumbs and small chunks. Transfer to a medium bowl and stir in the melted butter until everything looks like damp sand. Set aside.
- Make the pumpkin filling. In a large mixing bowl, beat the softened cream cheese with an electric mixer until smooth and fluffy, about 2 minutes. Scrape down the sides of the bowl with a spatula. Add the pumpkin puree, powdered sugar, pumpkin pie spice, and vanilla extract. Beat on medium speed until everything is well combined and silky smooth. This should take about 1 minute. Don’t overmix—you want it light and airy.
- Whip the cream. In a separate bowl, pour the cold heavy whipping cream. Using clean beaters, whip the cream on medium-high speed until stiff peaks form. This takes about 3-4 minutes. You’ll know it’s ready when you lift the beaters and the cream holds its shape without drooping. Be careful not to over whip, or you’ll end up with butter (speaking from experience here).
- Fold it all together. Gently fold the whipped cream into the pumpkin mixture. Use a spatula and cut through the center, then scoop along the bottom and fold over. Repeat until you don’t see any white streaks. This should take about 1 minute. The mixture should be light, fluffy, and a beautiful pale orange color.
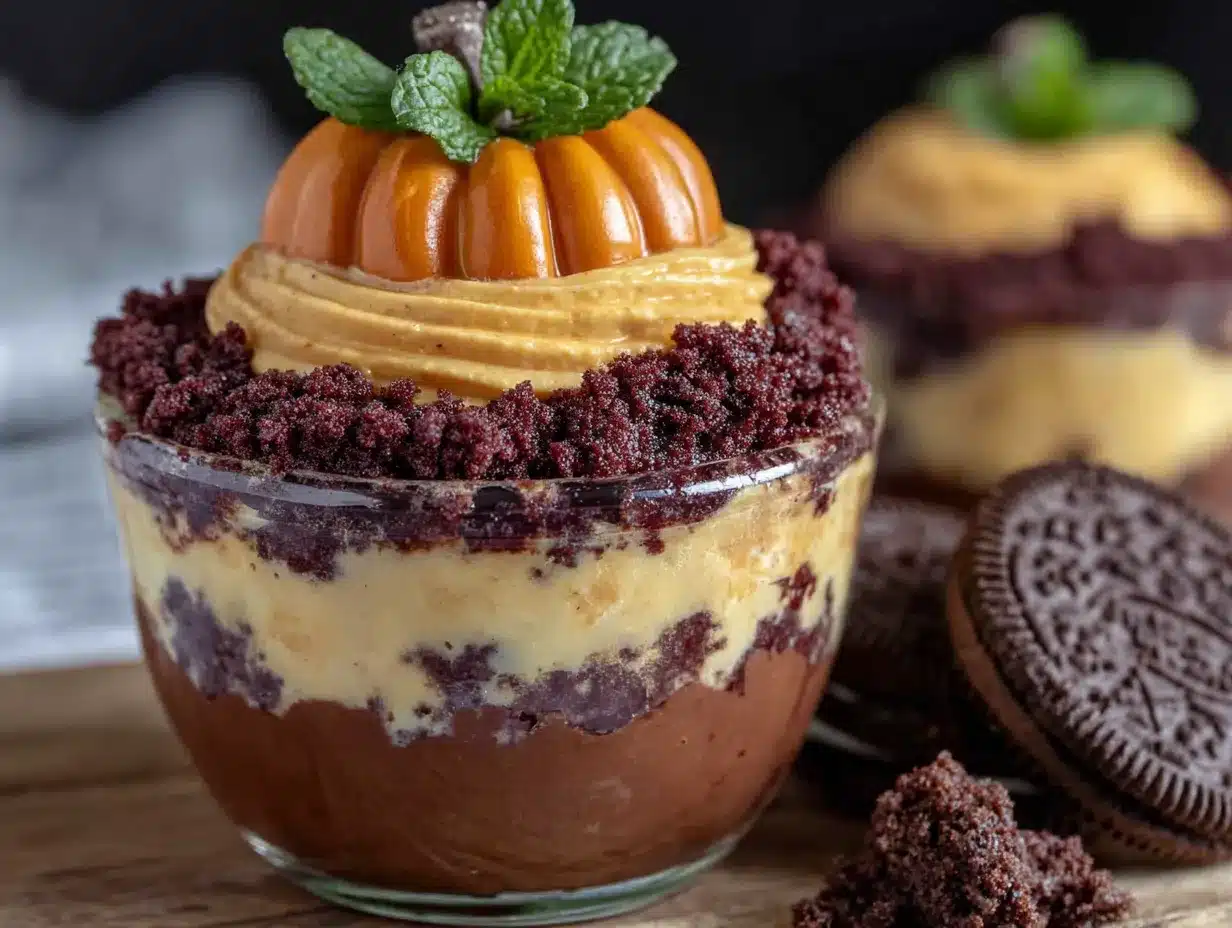
- Layer the cups. Grab your cups or jars. Start with a layer of cookie crumbs at the bottom—about 2 tablespoons each. Spoon the pumpkin filling on top, filling each cup about halfway. Add another layer of cookie crumbs, then more pumpkin filling. End with a generous sprinkle of cookie crumbs on top. You should have enough for 6-8 cups, depending on their size.
- Chill and set. Place the cups in the refrigerator for at least 2 hours, but overnight is even better. The filling needs time to firm up and the flavors need time to meld. I know it’s tempting to dig in right away, but trust me—patience pays off here.
- Add the finishing touches. Just before serving, add a dollop of whipped topping on each cup. If you’re feeling playful, stick a gummy worm or a candy pumpkin on top. The kids (and let’s be honest, the adults too) will love it.
One thing I learned the hard way: don’t skip the step of whipping the cream separately. I tried using just Cool Whip once to save time, and the filling was way too sweet and not nearly as fluffy. The homemade whipped cream makes a huge difference in texture.
Cooking Tips & Techniques
After making these dirt cups more times than I care to count, I’ve picked up a few tricks that make the process smoother and the results better.
Room temperature ingredients matter. I can’t stress this enough. Cold cream cheese doesn’t blend smoothly, and you’ll end up with little white lumps in your filling. Let it sit on the counter for 30 minutes before you start. Same goes for the butter—melted butter that’s too hot will make the cookie crumbs clump together weirdly. Let it cool for a minute or two after melting.
Don’t crush the cookies too fine. You want some texture in the “dirt” layer. If you pulverize them into dust, you lose that satisfying crunch. Aim for a mix of fine crumbs and small pea-sized pieces. This is where the rolling pin method actually has an advantage—you have more control over the texture.
Chill your bowl for the whipped cream. Pop your mixing bowl and beaters in the freezer for 10 minutes before whipping the cream. The cold bowl helps the cream whip up faster and hold its shape better. This is a trick I learned from a pastry chef friend, and it works every time.
Watch out for overmixing. Once you fold in the whipped cream, stop as soon as everything is combined. Overmixing deflates the air you just whipped in, and your filling will be denser than you want. It’ll still taste good, but it won’t have that light, mousse-like texture.
Make extra cookie crumbs. Trust me on this. You’ll want extra for snacking, and it’s nice to have a backup in case you accidentally add too much filling to a cup and need more “dirt” for the top layer. I always make about ¼ cup extra.
I once forgot to chill the cups before serving them at a family gathering. The filling was runny, the layers got all mixed up, and it looked like a pumpkin soup disaster. Everyone still ate it and said it was good, but I knew better. Don’t skip the chilling time—it’s non-negotiable.
Variations & Adaptations
One of the best things about this recipe is how easy it is to tweak. Here are some variations I’ve tried and loved:
Dairy-Free Version
Use dairy-free cream cheese (I like Kite Hill or Violife) and coconut cream instead of heavy whipping cream. Chill the can of coconut cream overnight, then scoop out the solid part and whip it just like regular cream. The texture is slightly different but still delicious. Use vegan chocolate sandwich cookies—most store brands are accidentally vegan.
Gluten-Free Option
Use gluten-free chocolate sandwich cookies. There are several brands available now, and they work perfectly. Just check the labels to make sure everything else in the recipe is gluten-free. The rest of the ingredients naturally don’t contain gluten.
Pumpkin Cheesecake Version
Add an extra 4 ounces of cream cheese and reduce the pumpkin puree to ¾ cup. This gives a denser, more cheesecake-like texture. Top with a drizzle of caramel sauce before serving. My sister-in-law requests this version for every family gathering.
Spice It Up
Add ¼ teaspoon of cayenne pepper or chipotle powder to the pumpkin filling for a spicy-sweet kick. It sounds weird, but the heat balances perfectly with the sweetness. I tried this on a whim one night and it’s become my secret favorite version.
Individual Parfaits
Instead of cups, layer everything in a large trifle dish for a party-friendly presentation. Double the recipe and alternate layers in a clear glass bowl. Top with extra whipped cream and a sprinkle of cinnamon. It looks stunning and serves a crowd.
Serving & Storage Suggestions
These dirt cups are best served cold, straight from the fridge. The contrast between the creamy filling and the crunchy cookie layer is most noticeable when they’re well-chilled. I like to take them out about 5 minutes before serving—just enough to take the chill off without losing the texture.
For presentation, clear cups or mason jars really show off the layers. If you’re serving these at a party, arrange them on a tray with some mini pumpkins or fall leaves scattered around. It makes for a gorgeous display that screams “autumn.”
These pair beautifully with a hot cup of coffee or spiced apple cider. If you’re serving them after a heavy meal, keep the portions small—they’re rich and satisfying. I sometimes serve them alongside a simple pumpkin bread or cinnamon sugar donuts for a full fall dessert spread.
Storage: Keep the dirt cups covered in the refrigerator for up to 4 days. The cookie layer will soften over time, which some people actually prefer. If you want to keep the crunch longer, store the cookie crumbs separately and add them just before serving. I don’t recommend freezing these—the texture gets weird when thawed.
The flavors actually get better after a day or two in the fridge. The pumpkin spice melds with the cream cheese, and everything becomes more harmonious. So if you’re making these for a party, make them the day before. Your future self will thank you.
Nutritional Information & Benefits
Here’s the approximate nutritional breakdown for one serving (based on 8 servings):
| Nutrient | Amount Per Serving |
|---|---|
| Calories | 320 |
| Total Fat | 22g |
| Saturated Fat | 12g |
| Carbohydrates | 28g |
| Fiber | 2g |
| Sugar | 18g |
| Protein | 4g |
| Vitamin A | 80% DV |
| Calcium | 6% DV |
Pumpkin is packed with vitamin A, which is great for eye health and immune function. It’s also a good source of fiber and antioxidants. The cream cheese adds calcium and protein, while the cookies provide a little iron from the chocolate. Is this a health food? No. But it’s a treat that has some redeeming qualities, and sometimes that’s exactly what we need.
If you’re watching your sugar intake, you can reduce the powdered sugar to ¼ cup and use sugar-free cookies. The flavor will be less sweet but still enjoyable. For a lower-fat option, use reduced-fat cream cheese and skip the whipped cream topping—just use a dollop of Greek yogurt instead.
Frequently Asked Questions
Can I make these dirt cups ahead of time?
Absolutely! In fact, they taste better after sitting overnight in the fridge. Just add the whipped topping and decorations right before serving to keep everything looking fresh.
Can I use pumpkin pie filling instead of pumpkin puree?
I don’t recommend it. Pumpkin pie filling already has sugar and spices added, which will throw off the sweetness and texture of this recipe. Stick with 100% pure pumpkin puree for the best results.
How long do these keep in the fridge?
They’ll stay fresh for up to 4 days when covered properly. The cookie layer will soften over time, so if you prefer crunch, add fresh cookie crumbs on top each day.
Can I freeze these dirt cups?
I wouldn’t recommend freezing them. The cream cheese and whipped cream don’t thaw well, and the texture becomes grainy and watery. These are best enjoyed fresh from the fridge.
What can I use instead of chocolate sandwich cookies?
Graham crackers, ginger snaps, or vanilla wafers all work great. Ginger snaps add a nice spicy kick that pairs beautifully with the pumpkin. Just crush them the same way you would the chocolate cookies.
Conclusion
These Easy No-Bake Pumpkin Dirt Cups have become my go-to fall dessert for good reason. They’re simple enough for a Tuesday night treat but impressive enough for a holiday gathering. The combination of creamy pumpkin filling and crunchy chocolate cookie “dirt” is pure comfort in a cup, and the fact that you don’t need to turn on the oven is just icing on the cake.
I love that this recipe came from a moment of letting go of my own expectations. My niece didn’t know that pumpkin desserts were supposed to be complicated or that they required baking. She just saw a problem and solved it in the simplest way possible. That’s the kind of kitchen wisdom I try to carry with me now.
I’d love to hear how these turn out for you! Drop a comment below and let me know if you tried any fun variations or if the gummy worms made it onto your cups. And if you’re looking for more easy fall treats, check out my pumpkin banana loaf or simple apple crisp for more no-fuss desserts that taste like autumn. Happy no-baking, friends!
Pin This Recipe!
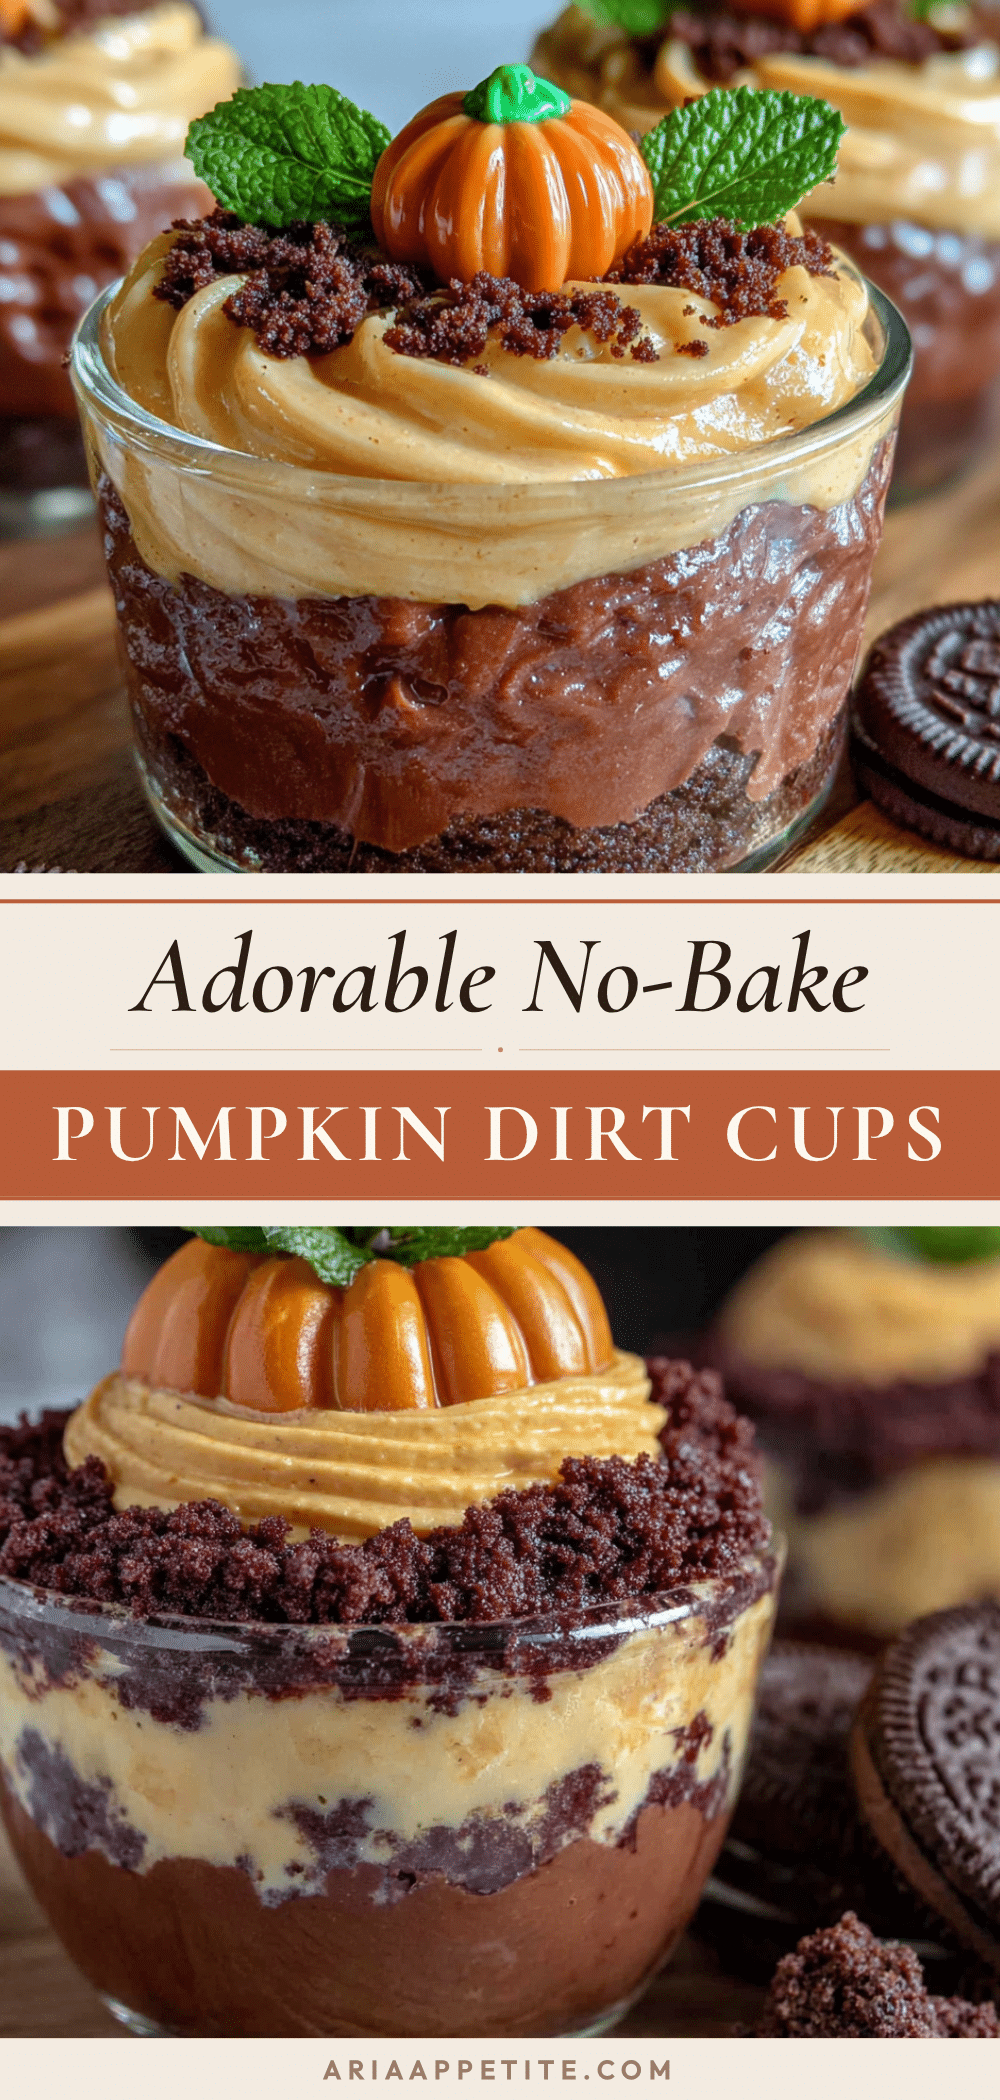
Easy No-Bake Pumpkin Dirt Cups: Best Fall Dessert

These Easy No-Bake Pumpkin Dirt Cups are a simple, no-oven dessert with creamy pumpkin filling and crunchy chocolate cookie ‘dirt.’ Perfect for fall gatherings, they come together in 20 minutes and taste even better after chilling.
- Prep Time: 20 minutes
- Cook Time: 0 minutes
- Total Time: 2 hours 20 minutes (includes chilling)
- Yield: 8 servings 1x
- Category: Dessert
- Cuisine: American
Ingredients
- 8 ounces cream cheese, softened to room temperature
- 1 cup pumpkin puree (not pumpkin pie filling)
- ½ cup powdered sugar
- 1 teaspoon pumpkin pie spice
- ½ teaspoon vanilla extract
- 1 cup heavy whipping cream (cold)
- 1 package (about 14 ounces) chocolate sandwich cookies (e.g., Oreos)
- 4 tablespoons unsalted butter, melted
- ½ cup whipped topping (Cool Whip or homemade)
- Optional: gummy worms, candy pumpkins, or crushed graham crackers for decoration
Instructions
- Crush the cookies. Place the chocolate sandwich cookies in a food processor and pulse until they become fine crumbs. If using the bag-and-rolling-pin method, seal the bag tightly and crush until you have a mix of fine crumbs and small chunks. Transfer to a medium bowl and stir in the melted butter until everything looks like damp sand. Set aside.
- Make the pumpkin filling. In a large mixing bowl, beat the softened cream cheese with an electric mixer until smooth and fluffy, about 2 minutes. Scrape down the sides of the bowl with a spatula. Add the pumpkin puree, powdered sugar, pumpkin pie spice, and vanilla extract. Beat on medium speed until everything is well combined and silky smooth, about 1 minute. Do not overmix.
- Whip the cream. In a separate bowl, pour the cold heavy whipping cream. Using clean beaters, whip the cream on medium-high speed until stiff peaks form, about 3-4 minutes. Be careful not to overwhip.
- Fold it all together. Gently fold the whipped cream into the pumpkin mixture using a spatula. Cut through the center, then scoop along the bottom and fold over. Repeat until no white streaks remain, about 1 minute. The mixture should be light, fluffy, and a beautiful pale orange color.
- Layer the cups. Grab your cups or jars. Start with a layer of cookie crumbs at the bottom—about 2 tablespoons each. Spoon the pumpkin filling on top, filling each cup about halfway. Add another layer of cookie crumbs, then more pumpkin filling. End with a generous sprinkle of cookie crumbs on top. You should have enough for 6-8 cups, depending on their size.
- Chill and set. Place the cups in the refrigerator for at least 2 hours, but overnight is even better. The filling needs time to firm up and the flavors need time to meld.
- Add the finishing touches. Just before serving, add a dollop of whipped topping on each cup. If desired, stick a gummy worm or a candy pumpkin on top.
Notes
Cream cheese must be at room temperature for smooth blending. Do not use pumpkin pie filling; use 100% pure pumpkin puree. For best texture, chill the cups for at least 2 hours or overnight. The cookie layer will soften over time; for crunchier texture, add fresh cookie crumbs just before serving. Store covered in the refrigerator for up to 4 days. Do not freeze.
Nutrition
- Serving Size: 1 cup
- Calories: 320
- Sugar: 18
- Fat: 22
- Saturated Fat: 12
- Carbohydrates: 28
- Fiber: 2
- Protein: 4
Keywords: no-bake pumpkin dessert, pumpkin dirt cups, easy fall dessert, no oven dessert, pumpkin cream cheese dessert, kid-friendly dessert