Love this? Save it for later!
Share the inspiration with your friends
My friend Carla watched me struggle with a batch of sugar cookie dough that was far too sticky, and she didn’t say anything at first. Then she reached into her apron pocket, pulled out a bag of whole almonds, and said, “You’re overthinking it. Just make them look like something that would crawl out of a grave.” That was the moment everything clicked.
I had been trying to perfect a Halloween cookie recipe for a party, and honestly, I was about to give up. The dough was a mess, the kitchen looked like a flour bomb had gone off, and I had almond slivers stuck to my sweater. But Carla’s suggestion was so simple, so perfectly unsettling, that I couldn’t stop laughing. We spent the next hour shaping these creepy little fingers, pressing almond “nails” into the tips, and cackling every time we added a knuckle crease.
The cookies turned out wonderfully grotesque, you know? They were the hit of the party, disappearing before the store-bought candy even got opened. Maybe you’ve been there, staring at a Pinterest board full of perfect Halloween treats and feeling completely intimidated. Let me tell you, these witch finger cookies are the opposite of intimidating. They’re forgiving, fun to make, and genuinely spooky without requiring any fancy decorating skills.
That evening, as I watched guests do a double-take before biting into a “finger,” I realized this recipe had staying power. It wasn’t just a gimmick, it was a genuinely good shortbread cookie that happened to look like something from a horror movie. I’ve been making them every October since, and they never fail to get the exact reaction I’m looking for.
Why You’ll Love This Recipe
Let me tell you why these cookies have earned a permanent spot in my Halloween rotation. I’ve tested this recipe at least a dozen times, tweaking the butter-to-flour ratio until the texture was just right, not too crumbly, not too soft. The result is a cookie that holds its shape perfectly while still being tender and delicious.
- Quick & Easy: Comes together in about 45 minutes, including chilling time. Perfect for last-minute Halloween parties or when you need a treat that looks impressive without hours of work.
- Simple Ingredients: No fancy grocery trips needed. You likely have everything in your kitchen right now, butter, sugar, flour, eggs, and almonds.
- Perfect for Halloween: Great for spooky gatherings, classroom parties, office potlucks, or just for fun with the kids.
- Crowd-Pleaser: Always gets double-takes and laughs. Kids love the creepy factor, and adults appreciate that they actually taste good.
- Unbelievably Delicious: The buttery shortbread base with the crunch of an almond “nail” is next-level comfort food.
What makes this recipe different from the rest is the texture. I spent a long time figuring out how to keep the cookies from puffing up and losing their finger shape. The secret is a slightly drier dough and a proper chill. This isn’t just another Halloween cookie, it’s your best version, tested and perfected so you don’t have to guess.
This recipe is the kind that makes you close your eyes after the first bite. It’s comfort food reimagined, spooky but satisfying, with the same soul-soothing butteriness that makes shortbread so irresistible. Perfect for impressing guests without stress, or turning a simple October afternoon into something memorable.
What Ingredients You Will Need
This recipe uses simple, wholesome ingredients to deliver that perfect shortbread texture and just the right amount of creepiness. Most of these are pantry staples, which makes this an easy last-minute Halloween project.
- 1 cup (226g) unsalted butter, softened – I always use unsalted so I can control the salt level. Let it sit out for about 30 minutes before starting.
- 1 cup (200g) granulated sugar – Regular white sugar works perfectly here. You could try coconut sugar, but the color will be darker.
- 1 large egg – Room temperature is best. If you forget to take it out, place it in a bowl of warm water for 5 minutes.
- 1 teaspoon vanilla extract – Pure vanilla makes a difference, but imitation works fine for this recipe.
- 1/2 teaspoon almond extract – This is optional, but it really enhances the almond flavor and makes the cookies smell amazing.
- 2 1/2 cups (312g) all-purpose flour – Spoon and level your flour, don’t scoop directly from the bag or you’ll end up with dry cookies.
- 1 teaspoon baking powder – Helps the cookies have a slight lift without puffing up too much.
- 1/2 teaspoon salt – Balances the sweetness and brings out the buttery flavor.
- Whole almonds, about 48 pieces – These become the “fingernails.” Look for raw or roasted, unsalted works best.
- Red food coloring or strawberry jam – For that bloody effect at the base of the “nail.” I prefer jam because it adds flavor and looks more realistic.
I recommend using Land O’Lakes butter for best texture, but any good quality unsalted butter will work. For the almonds, Blue Diamond whole almonds are my go-to because they’re consistently sized and not too brittle. If you’re using jam, Smucker’s strawberry jam gives a nice deep red color without being too runny.
For substitution guidance, use dairy-free butter for a lactose-free option, though the texture will be slightly different. You can also swap the all-purpose flour with a gluten-free 1:1 blend, just add an extra tablespoon of liquid if the dough seems too dry.
Equipment Needed
You don’t need any special equipment for these cookies, which is part of their charm. Here’s what you’ll need:
- Large mixing bowl – Any bowl works, but a wide one makes creaming easier.
- Electric hand mixer or stand mixer – You can do this by hand, but your arm will thank you for using a mixer. I’ve made these with both, and the stand mixer is definitely faster.
- Baking sheets – Two standard-sized sheets work well. Line them with parchment paper for easy cleanup.
- Parchment paper or silicone baking mats – Silicone mats are my preference because they prevent spreading and are reusable.
- Small knife or toothpick – For creating the knuckle creases and cuticle lines.
- Pastry brush (optional) – For brushing on the jam “blood” effect.
- Wire cooling rack – Essential for letting the cookies cool properly so they stay crisp.
If you don’t have a pastry brush, a small spoon works fine for applying the jam. I’ve also used a clean paintbrush in a pinch, just make sure it’s never been used for paint!
Preparation Method
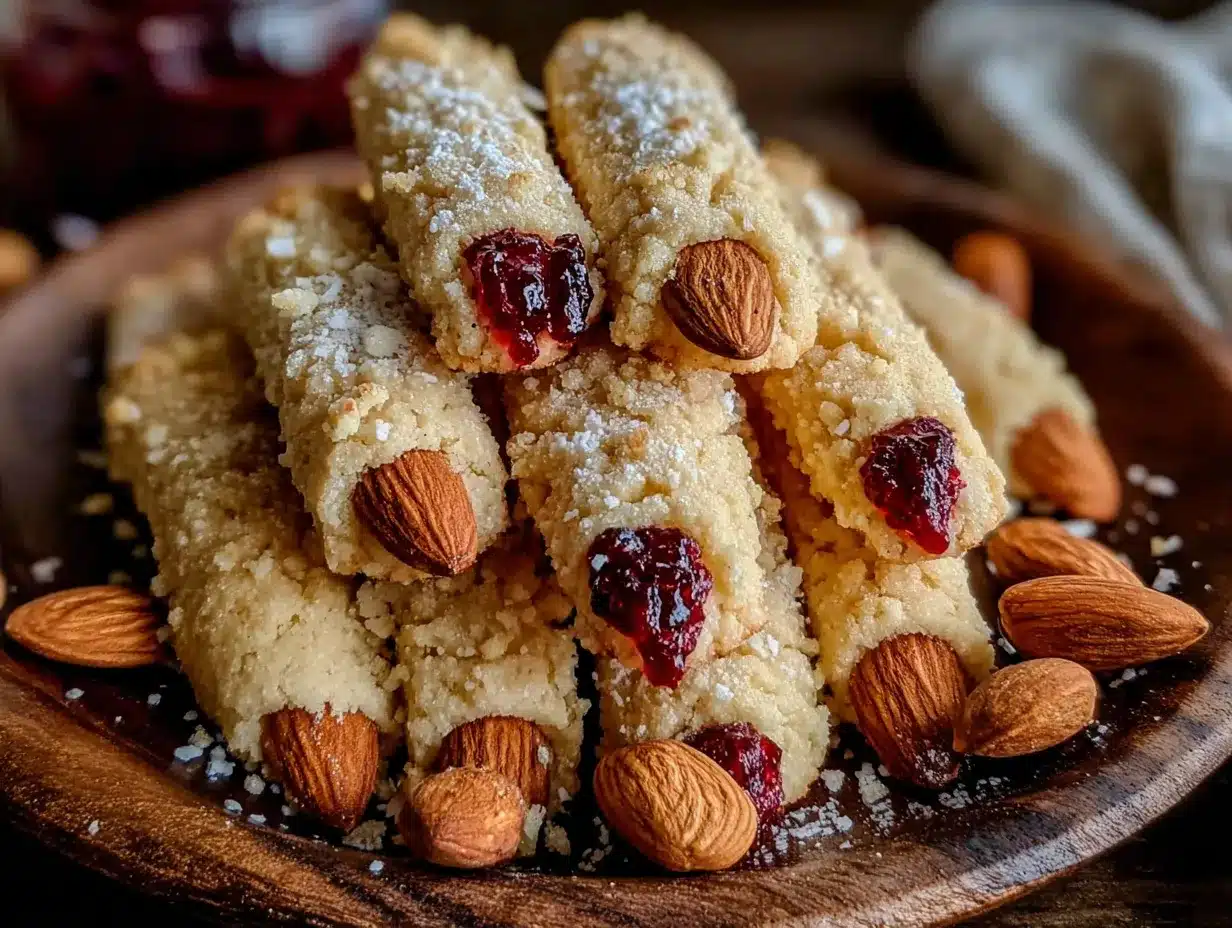
Let’s get to the fun part, making these creepy little fingers. I’ll walk you through every step so you don’t miss a detail.
- Cream the butter and sugar – In your large mixing bowl, beat the softened butter and granulated sugar together until light and fluffy. This takes about 3-4 minutes with an electric mixer on medium speed. You want the mixture to be pale yellow and look almost like whipped cream. Scrape down the sides of the bowl once or twice.
- Add the wet ingredients – Beat in the egg, vanilla extract, and almond extract (if using). Mix until just combined, about 30 seconds. Don’t overmix here, or the cookies might become tough. The mixture might look slightly curdled at this point, that’s completely normal.
- Combine the dry ingredients – In a separate bowl, whisk together the all-purpose flour, baking powder, and salt. This ensures the baking powder is evenly distributed throughout the flour.
- Mix the dough – Gradually add the dry ingredients to the wet mixture, mixing on low speed until a soft dough forms. Stop as soon as the flour disappears. The dough should be slightly firm but not sticky. If it feels too sticky, add a tablespoon more flour. If it’s too dry, add a teaspoon of milk.
- Chill the dough – Wrap the dough in plastic wrap and refrigerate for at least 30 minutes. This step is crucial. Chilling prevents the cookies from spreading too much and helps them hold their finger shape. I’ve skipped this step before, and let me tell you, I ended up with sad, puffy blobs instead of fingers.
- Preheat the oven – About 10 minutes before you’re ready to bake, preheat your oven to 325°F (163°C). Line your baking sheets with parchment paper or silicone mats.
- Shape the fingers – Take a small piece of dough, about 1 tablespoon worth, and roll it into a log shape about 3 inches long. Gently taper one end to look like a fingertip. Place it on the prepared baking sheet. Repeat with the remaining dough, spacing the fingers about 2 inches apart. I usually get about 40-48 cookies from this recipe.
- Create the knuckles – Use the back of a small knife or a toothpick to press horizontal lines into each finger to create knuckle creases. Press firmly enough to make a deep indentation, but not so hard that you cut through the dough. Make 2-3 creases per finger, depending on the length.
- Add the almond nails – Press a whole almond into the tapered end of each finger, pointed side facing out. Push it in until about half the almond is embedded in the dough. This creates the “nail” effect. If the almond won’t stay, dab a tiny bit of water on the dough first.
- Add cuticle details (optional) – Use your toothpick to create small lines around the base of the almond to look like cuticles. This small detail makes a huge difference in realism.
- Bake the cookies – Bake for 12-15 minutes, or until the cookies are just set and the edges are very lightly golden. The bottoms should be golden brown. Don’t overbake, or they’ll be too hard. The cookies will still be soft when you take them out, they firm up as they cool.
- Cool completely – Let the cookies cool on the baking sheet for 5 minutes, then transfer them to a wire cooling rack. Wait until they are completely cool before adding the “blood” effect.
- Add the bloody effect – Once cooled, use a small brush or your finger to dab a tiny amount of red food coloring or strawberry jam at the base of each almond “nail.” This creates the illusion of bloody cuticles. For extra creepiness, let a little drip down the side of the finger.
I once forgot to chill the dough and ended up with cookies that looked more like fat sausages than witch fingers. Learn from my mistake, don’t skip the chilling step! Also, if you find the dough is getting too soft while shaping, pop the baking sheet in the fridge for 10 minutes to firm up.
Cooking Tips & Techniques
After making these cookies for several Halloweens, I’ve picked up a few tricks that make the process smoother and the results more convincing.
Keep your hands cool. Warm hands will soften the dough and make it sticky. If you find the dough getting tacky, run your hands under cold water for a few seconds and dry them thoroughly before continuing.
Vary the finger shapes. Not all fingers should look the same. Make some longer, some shorter, some with more knuckles, some with less. This variety makes them look more realistic, like actual hands from different people. I always make a few that look slightly crooked, like they’ve been broken before. Gross, I know, but it works.
Watch the bake time carefully. Every oven runs differently. My old oven used to bake these in exactly 12 minutes, but my new one takes 14. Start checking at the 12-minute mark. The cookies should be pale on top with just a hint of golden on the edges.
Don’t skip the almond extract. Even though it’s optional, that tiny amount of almond extract really ties the whole cookie together. It makes the almond “nails” feel intentional rather than just a garnish.
One of my biggest failures was using too much red food coloring. It bled into the dough and made the whole fingertip look infected rather than just slightly bloody. A tiny dab is all you need. Less is definitely more here.
Variations & Adaptations
These cookies are surprisingly versatile. Here are some ways I’ve adapted them over the years.
Dietary Variations
- Gluten-Free: Swap the all-purpose flour with a 1:1 gluten-free baking blend. I’ve used Bob’s Red Mill with great results. Add an extra tablespoon of butter to compensate for the drier flour.
- Dairy-Free: Use vegan butter sticks, not the spreadable kind in a tub. Miyoko’s or Earth Balance work well. The texture will be slightly softer, so chill the dough for an extra 10 minutes.
- Egg-Free: Replace the egg with a flax egg (1 tablespoon ground flaxseed mixed with 3 tablespoons water, let sit for 5 minutes). The cookies will be a bit more crumbly but still delicious.
Flavor Variations
- Chocolate Witch Fingers: Replace 1/4 cup of the flour with cocoa powder. These look like they belong to a chocolate witch, which is doubly delicious.
- Matcha Monster Fingers: Add 1 tablespoon of matcha powder for a green, undead look. The earthy flavor pairs surprisingly well with the almond.
- Spiced Pumpkin Fingers: Add 1 teaspoon pumpkin pie spice and replace 2 tablespoons of flour with pumpkin puree. These look more like zombie fingers with their orange tint.
Alternative Nails
- Use slivered almonds for a more delicate nail look.
- Try pistachios for green witch nails.
- Use candy corn for a sweeter, more colorful option (press them in after baking).
I once made a batch with black food coloring for a truly gothic look. They turned out more gray than black, but they still looked appropriately spooky. Sometimes the experiments don’t work perfectly, but they’re always fun to try.
Serving & Storage Suggestions
These cookies are best served at room temperature, which makes them perfect for parties. Arrange them on a platter in a way that looks like a pile of severed fingers, it’s guaranteed to get a reaction. I like to scatter a few whole almonds around the platter to add to the creepy effect.
For a truly dramatic presentation, place them in a shallow bowl with the “fingertips” pointing up, as if hands are reaching out of the bowl. I’ve also seen people serve them sticking out of a hollowed-out pumpkin, which is absolutely brilliant.
Storage
- Room Temperature: Store in an airtight container for up to 5 days. Layer them with parchment paper between each layer to prevent sticking.
- Refrigerator: They’ll keep for up to a week in the fridge, but the texture becomes slightly harder. Let them sit at room temperature for 10 minutes before serving.
- Freezer: These freeze beautifully. Place the baked, cooled cookies in a single layer on a baking sheet and freeze for 1 hour. Then transfer to a freezer bag. They’ll keep for up to 3 months. Thaw at room temperature for 20 minutes before serving.
Reheating
If you want that freshly-baked warmth, pop them in a 300°F (150°C) oven for 3-4 minutes. Don’t microwave them, it will make the almonds soggy and the cookies soft.
The flavors actually develop over time. I find these cookies are even better on day two, when the almond flavor has had a chance to meld with the shortbread. Just don’t tell your guests they’re day-old cookies, let them think you’re a baking wizard.
Nutritional Information & Benefits
Let’s be honest, these are a treat, not a health food. But here’s what you should know.
| Nutrient | Per Cookie (based on 48 cookies) |
|---|---|
| Calories | 95 |
| Total Fat | 5g |
| Saturated Fat | 3g |
| Cholesterol | 15mg |
| Sodium | 45mg |
| Total Carbohydrates | 11g |
| Sugars | 5g |
| Protein | 1.5g |
On the bright side, almonds are a great source of vitamin E and healthy fats. So there’s that! The butter provides vitamin A, and the eggs add a small amount of protein. These are a treat for special occasions, not an everyday snack, and that’s perfectly okay.
These cookies are vegetarian and can be made gluten-free and dairy-free with the substitutions mentioned above. They contain nuts (almonds), dairy (butter), eggs, and gluten (flour), so keep that in mind for any allergies.
I believe in balance, you know? A few of these cookies on Halloween won’t derail anyone’s healthy eating, and the joy they bring is worth every calorie.
Conclusion
These spooky witch finger cookies are more than just a Halloween gimmick, they’re genuinely delicious shortbread cookies that happen to look like they belong in a horror movie. The buttery texture, the crunch of the almond “nail,” and that little hint of almond extract make them a treat you’ll actually want to eat, not just display.
I love that this recipe lets you be creative. You can make them as creepy or as cute as you want. Add more “blood” for a gory look, or keep them clean for a more subtle spooky effect. The dough is forgiving, the process is fun, and the results are always a conversation starter.
I’d love to hear how yours turn out! Did you try any variations? Did your kids help shape the fingers? Drop a comment below and share your spooky creations. And if you’re looking for more Halloween fun, check out my pumpkin spice cookies or these ghost meringues for a complete spooky spread. Happy baking, and may your cookies be perfectly creepy!
Frequently Asked Questions
Can I make the dough ahead of time?
Absolutely! The dough can be made up to 3 days in advance and kept in the refrigerator. Just wrap it tightly in plastic wrap. You can also freeze the shaped, unbaked cookies on a baking sheet, then transfer them to a freezer bag. Bake directly from frozen, adding 2-3 minutes to the baking time.
Why did my cookies spread and lose their shape?
This usually happens when the dough wasn’t chilled enough or the butter was too soft. Make sure you chill the dough for at least 30 minutes, and if your kitchen is warm, pop the shaped cookies in the fridge for 10 minutes before baking. Also, check that your baking powder isn’t expired, old baking powder can cause excessive spreading.
Can I use something other than almonds for the nails?
Yes! Slivered almonds work well for a more delicate look. You can also use pistachios for green nails, candy corn for a sweeter option, or even small pieces of white chocolate for a more elegant look. Just make sure whatever you use is pressed in securely so it doesn’t fall off during baking.
How do I get the “blood” effect without food coloring?
Strawberry jam or raspberry jam works beautifully. Just warm a spoonful in the microwave for 10 seconds and dab it at the base of the almond. The jam adds flavor and looks more realistic than food coloring. You can also use pomegranate molasses for a darker, more sinister effect.
Can kids help make these cookies?
Definitely! Kids love shaping the fingers and adding the almond nails. It’s a great Halloween activity. Just supervise the use of the small knife for creating knuckle creases. The “bloody” part might be a bit much for very young children, but older kids usually think it’s hilarious.
Pin This Recipe!
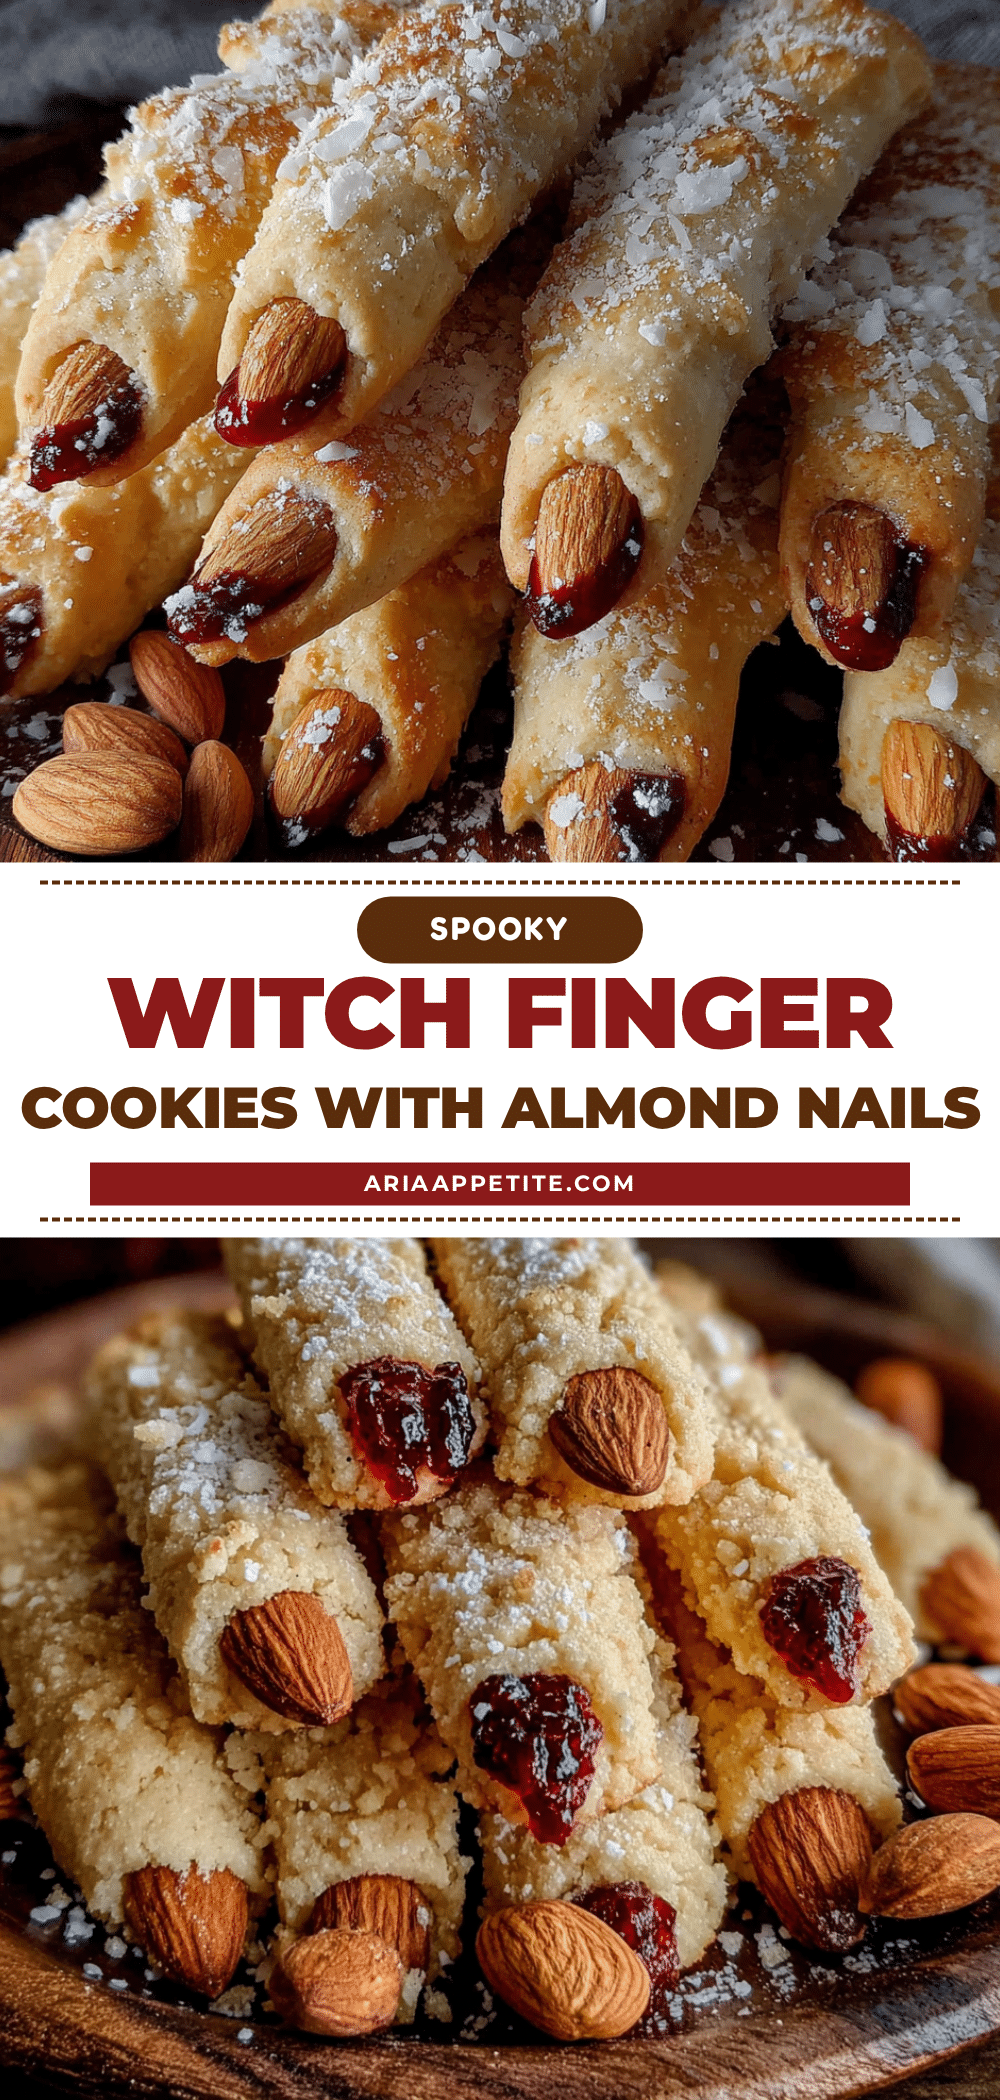
Spooky Witch Finger Cookies with Almond Nails: Easy Halloween Treat

These spooky witch finger cookies are a fun and easy Halloween treat made with a buttery shortbread base and almond ‘nails’. Perfect for parties, they are deliciously creepy and sure to be a hit.
- Prep Time: 15 minutes
- Cook Time: 15 minutes
- Total Time: 45 minutes
- Yield: 48 cookies 1x
- Category: Dessert
- Cuisine: American
Ingredients
- 1 cup (226g) unsalted butter, softened
- 1 cup (200g) granulated sugar
- 1 large egg
- 1 teaspoon vanilla extract
- 1/2 teaspoon almond extract (optional)
- 2 1/2 cups (312g) all-purpose flour
- 1 teaspoon baking powder
- 1/2 teaspoon salt
- Whole almonds, about 48 pieces
- Red food coloring or strawberry jam (for ‘blood’ effect)
Instructions
- Cream the butter and sugar together until light and fluffy, about 3-4 minutes.
- Beat in the egg, vanilla extract, and almond extract (if using) until just combined.
- In a separate bowl, whisk together the flour, baking powder, and salt.
- Gradually add the dry ingredients to the wet mixture, mixing on low speed until a soft dough forms.
- Wrap the dough in plastic wrap and refrigerate for at least 30 minutes.
- Preheat the oven to 325°F (163°C). Line baking sheets with parchment paper or silicone mats.
- Shape about 1 tablespoon of dough into a 3-inch log, tapering one end to look like a fingertip. Place on prepared baking sheet.
- Use the back of a small knife or toothpick to press 2-3 horizontal lines into each finger to create knuckle creases.
- Press a whole almond into the tapered end of each finger, pointed side out, until half embedded.
- Optionally, use a toothpick to create small lines around the base of the almond for cuticles.
- Bake for 12-15 minutes, until just set and edges are lightly golden.
- Let cool on the baking sheet for 5 minutes, then transfer to a wire rack to cool completely.
- Once cooled, dab a tiny amount of red food coloring or strawberry jam at the base of each almond ‘nail’ for a bloody effect.
Notes
Chilling the dough is crucial to prevent spreading. Keep hands cool while shaping. Vary finger shapes for realism. Use a tiny amount of red coloring or jam for the ‘blood’ effect. Cookies can be stored at room temperature for up to 5 days or frozen for up to 3 months.
Nutrition
- Serving Size: 1 cookie
- Calories: 95
- Sugar: 5
- Sodium: 45
- Fat: 5
- Saturated Fat: 3
- Carbohydrates: 11
- Protein: 1.5
Keywords: Halloween cookies, witch finger cookies, shortbread cookies, almond cookies, spooky treats, easy Halloween dessert