Love this? Save it for later!
Share the inspiration with your friends
I used to think layered Jello was one of those things that looked way better than it actually tasted. You know the kind—all show and no substance, pretty on the outside but kind of boring once you actually dig in. For years, I’d scroll past those gorgeous rainbow photos on Pinterest, thinking “that’s cute, but I’ll pass.” Then my sister showed up at a family barbecue with these little cups that looked like actual candy corn, and I found myself standing over the dessert table eating my third one before I even admitted I liked them.
It was a Thursday afternoon in July, and I was supposed to be bringing a dessert to a last-minute get-together. I had maybe two hours and zero energy for anything complicated. My sister handed me a box of Jello and said, “Trust me on this one.” I rolled my eyes—honestly, I did—but I was desperate. What came out of that kitchen was so ridiculously fun and simple that I felt almost silly for being such a snob about it.
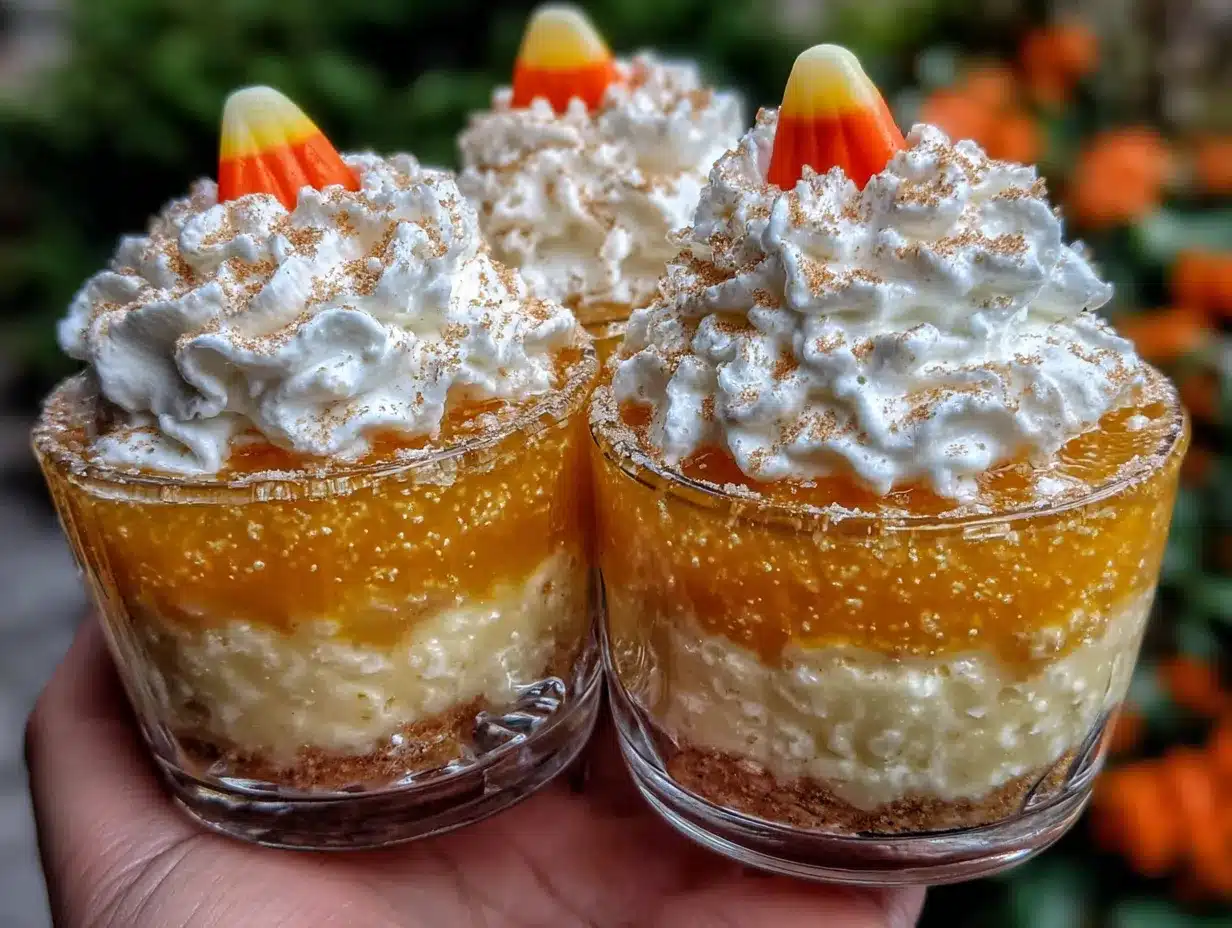
These Easy Candy Corn Layered Jello Cups are exactly what they sound like: three pretty layers of Jello stacked to look like everyone’s favorite Halloween candy, but without the sticky teeth situation. They’re the kind of thing you bring to a party and watch people light up when they realize what they’re looking at. Maybe you’ve been there, standing in the grocery store aisle wondering what on earth to bring that isn’t another bag of chips. This is that thing. I keep making them because they never fail to make people smile, and honestly, we could all use a little more of that.
Why You’ll Love This Recipe
Let me tell you straight up—this is one of those recipes that looks like you spent hours fussing over it when you really didn’t. I’ve tested this about six times now (tough job, I know) and every single batch came out looking like something from a fancy bakery display. Here is why these little cups deserve a spot in your dessert rotation:
- Quick & Easy: From start to finish, you’re looking at about 20 minutes of actual work. The rest is just waiting for layers to set, which means you can binge-watch your favorite show while your dessert makes itself.
- Simple Ingredients: Three boxes of Jello, some sweetened condensed milk, unflavored gelatin, and water. That is literally it. No fancy extracts, no hard-to-find items, no special trips to a specialty store.
- Perfect for Halloween Parties: These are basically made for October gatherings. They look like candy corn, they’re portion-controlled in little cups, and kids absolutely lose their minds over them.
- Crowd-Pleaser: I’ve brought these to three different parties now and every single time, people ask for the recipe before they even finish eating. Adults love the nostalgia, kids love the colors, and everyone loves how light and refreshing they taste.
- Unbelievably Delicious: The texture is what gets me every time. The creamy middle layer balances out the bouncy Jello layers perfectly. It is not too sweet, not too heavy, and somehow manages to feel both fun and sophisticated at the same time.
What makes this version different from all those other layered Jello recipes floating around? It is the ratio. I spent a good bit of time figuring out exactly how thick each layer needs to be so the candy corn effect actually works. Too thin and you can’t see the stripes. Too thick and the proportions look off. These cups hit that sweet spot where they genuinely look like little edible candy corns standing up in a cup.
This recipe is the kind that makes you close your eyes after the first bite—not because it’s some complex culinary masterpiece, but because it tastes like being a kid again. It is comfort food reimagined: faster, simpler, but with the same soul-soothing satisfaction. Perfect for impressing guests without stress, or turning a simple Tuesday into something worth remembering.
What Ingredients You Will Need
This recipe uses simple, everyday ingredients to create something that looks way more complicated than it actually is. Everything here is probably already in your pantry or just a quick trip to the grocery store away.
For the Orange Layer (Bottom)
- 1 box (3 oz) orange Jello (I prefer Jell-O brand for consistent setting)
- 1 cup boiling water
- 1/2 cup cold water
For the Yellow Layer (Middle)
- 1 box (3 oz) lemon or yellow Jello (adds brightness)
- 1 cup boiling water
- 1/2 cup cold water
For the White Layer (Top)
- 1 box (3 oz) white or vanilla Jello (or unflavored gelatin with sugar—see note)
- 1 cup boiling water
- 1/2 cup cold water
For the Creamy Middle Layer
- 1 can (14 oz) sweetened condensed milk
- 2 envelopes (1/4 oz each) unflavored gelatin (like Knox brand)
- 1/2 cup cold water
- 1/2 cup boiling water
A quick note on the white layer: if you can’t find white or vanilla Jello (it can be tricky to locate sometimes), just use 1 envelope of unflavored gelatin dissolved in 1/4 cup cold water, then add 1/4 cup boiling water and 2 tablespoons of sugar. It works perfectly and tastes just as good.
For the Jello itself, I really do recommend sticking with the name-brand stuff. I tried a generic store brand once and the color was kind of dull—the orange looked more like peach, and the yellow was barely visible. The layers need to be vibrant for that candy corn effect to pop, so spend the extra dollar.
If you want to get creative, you can swap the orange for mango or peach Jello, and the yellow for pineapple. Just keep the colors similar so the candy corn look stays intact. And for the creamy layer, please don’t substitute the sweetened condensed milk with regular milk—it won’t set properly and you’ll end up with a soupy mess. Trust me on this one, I learned that lesson the hard way.
Equipment Needed
You do not need anything fancy for this recipe, which is honestly my favorite part. Here is what you will need:
- Clear plastic cups: 3-ounce cups work best for the candy corn look. I get the little clear ones from the party supply aisle—they’re cheap and show off the layers perfectly.
- Medium mixing bowls: You will need at least three, one for each Jello flavor. Glass or metal works best because they hold heat well.
- Measuring cups: A 1-cup measure for boiling water and a 1/2-cup measure for cold water.
- Whisk or fork: For stirring the gelatin until it dissolves completely.
- Small saucepan: For boiling water. A kettle works too if you have one.
- Liquid measuring cup: A 2-cup glass one with a spout makes pouring into the cups so much easier and less messy.
- Tray or baking sheet: To hold the cups while they set in the refrigerator. Trust me, trying to carry multiple cups by hand is a disaster waiting to happen.
- Refrigerator space: You need a flat spot where the cups can sit undisturbed for at least 4 hours total.
If you don’t have clear plastic cups, small glass shot glasses or mason jars work beautifully too. I’ve used both and they look even more impressive in glass. Just make sure whatever you use can hold about 3 to 4 ounces of liquid. And if you don’t have a whisk, a fork works fine—just stir a little longer to make sure everything dissolves.
One tip from experience: don’t use paper cups. The layers seep into the paper and you lose that beautiful translucent effect. Clear cups are non-negotiable if you want the candy corn look to shine.
Preparation Method
Okay, let’s get into the actual making part. This looks like a lot of steps, but I promise it is mostly just waiting. Set yourself up with a good podcast or playlist and you will be done before you know it.
Step 1: Prep Your Workspace
Clear out a shelf in your refrigerator where the cups can sit flat and undisturbed. Arrange your clear cups on a baking sheet or tray—this makes moving them in and out of the fridge so much easier. You should have about 10 to 12 cups depending on their size.
Step 2: Make the Orange Layer (Bottom)
In a medium bowl, empty the orange Jello powder. Add 1 cup of boiling water and whisk for about 2 minutes until the powder is completely dissolved. Then stir in 1/2 cup of cold water. Pour the mixture evenly into your cups, filling them about one-third of the way up. Place the tray in the refrigerator and let it set for about 30 to 40 minutes. The layer should be firm to the touch but not completely solid—you want it to hold its shape when you add the next layer.
Step 3: Make the Creamy Middle Layer
While the orange layer is setting, get the creamy layer ready. In a small bowl, sprinkle the 2 envelopes of unflavored gelatin over 1/2 cup of cold water. Let it sit for about 5 minutes—this is called blooming and it helps the gelatin dissolve smoothly. Then add 1/2 cup of boiling water and stir until the gelatin is completely dissolved. Pour in the can of sweetened condensed milk and whisk until everything is combined and smooth. Set this aside at room temperature—do not refrigerate it yet or it will start setting before you pour it.
Step 4: Add the Creamy Layer
Once the orange layer is set (it should jiggle slightly but not be liquid), gently spoon or pour the creamy mixture on top. Fill each cup about halfway now—the creamy layer should be about the same thickness as the orange layer. Return the tray to the refrigerator and let this set for about 45 minutes to 1 hour. The creamy layer needs to be fully firm before you add the next Jello layer, otherwise they will bleed into each other.
Step 5: Make the Yellow Layer
In another bowl, empty the yellow Jello powder. Add 1 cup of boiling water and whisk until dissolved. Stir in 1/2 cup of cold water. Let this cool at room temperature for about 10 minutes—you don’t want it hot when you pour it over the creamy layer or it might melt the creamy layer slightly. Once the creamy layer is fully set, carefully pour the yellow Jello on top, filling the cups to about three-quarters full. Back to the refrigerator for another 30 to 40 minutes.
Step 6: Make the White Layer
In your last bowl, prepare the white or vanilla Jello the same way—1 cup boiling water, whisk, then 1/2 cup cold water. Let it cool slightly. Once the yellow layer is set, pour the white Jello on top to fill the cups almost to the rim. Refrigerate for at least 2 more hours, or until everything is fully set and firm.
Step 7: Serve
Once fully set, the cups are ready to serve. They should be firm enough to hold their shape but still have that classic Jello jiggle. If you want to get fancy, you can top each cup with a dollop of whipped cream and a sprinkle of orange or yellow sprinkles. But honestly, they look amazing just as they are.
A word of warning: do not rush the setting times. I tried to speed things up once by putting the cups in the freezer and ended up with icy, separated layers that looked nothing like candy corn. Patience is your friend here. Each layer needs to be fully set before you add the next one, or you will end up with a muddy mess instead of those beautiful clean stripes.
Cooking Tips & Techniques
After making these cups more times than I care to count, I have picked up a few tricks that make the whole process smoother. Here is what I wish someone had told me the first time:
Temperature matters more than you think. When you pour a warm Jello layer over a set layer, make sure the warm Jello has cooled to room temperature first. If it is too hot, it will melt the layer underneath and you will lose that crisp separation. If it is too cold, it might start setting before you even get it poured. Let it sit on the counter for about 10 minutes after mixing and you will be golden.
Pour slowly and carefully. I use a small measuring cup with a spout and pour against the side of the cup rather than straight down. This minimizes splashing and keeps the layers clean. If you do get a splash on the side of the cup, just wipe it off with a damp paper towel before it sets.
Check for doneness the right way. To test if a layer is set, gently tilt the cup. If the surface ripples like liquid, it needs more time. If it holds its shape and just jiggles a little, it is ready. Do not poke at it with a finger—you will leave a dent that shows through the next layer.
Make extra creamy mixture. I always make a little more creamy layer than I think I need. It is better to have a bit left over than to run out halfway through filling the cups. Leftover creamy mixture can be chilled and eaten as a pudding-like treat, so nothing goes to waste.
Use a tray with a lip. The first time I made these, I used a flat cookie sheet and one of the cups tipped over when I bumped the refrigerator shelf. A tray with raised edges saves you from that heartbreak. Trust me on this one.
One mistake I made early on was trying to make all the Jello layers at once. Do not do this. The Jello will start setting while you are waiting for the previous layer to firm up, and you will end up with a bowl of solid Jello that you have to remelt. Make each layer fresh right before you need it. It takes a little more time but the results are worth it.
Variations & Adaptations
Once you have the basic technique down, the possibilities are honestly endless. Here are some variations I have tried and loved:
Halloween Color Twist
Swap the white layer for a purple or black Jello layer to make spooky Halloween cups instead of candy corn ones. Use grape or black cherry Jello for the top layer and keep the orange and yellow the same. They look like little Halloween flags and are perfect for October parties.
Thanksgiving Edition
Use orange, yellow, and brown layers for a fall-themed dessert. The brown layer (chocolate or butterscotch Jello) on the bottom gives it an earthy, autumn feel that works beautifully for Thanksgiving gatherings.
Dairy-Free Version
Replace the sweetened condensed milk with a can of full-fat coconut milk mixed with 1/2 cup of sugar and 2 tablespoons of cornstarch. Heat it on the stove until it thickens slightly, then add the bloomed gelatin. It sets just as well and has a lovely subtle coconut flavor that pairs nicely with the fruity Jello.
Sugar-Free Option
Use sugar-free Jello for all three layers and replace the sweetened condensed milk with a mixture of 1 can of evaporated milk and 1/2 cup of your favorite sugar substitute. The texture will be slightly less creamy but still delicious and much lower in sugar.
Adult Version
Replace 1/4 cup of the cold water in each Jello layer with vodka or coconut rum. The alcohol prevents the Jello from setting quite as firmly, so reduce the cold water by 1/4 cup and add the alcohol instead. These are always a hit at grown-up Halloween parties.
I tried the coconut rum version last year for a friend’s costume party and they disappeared in about 15 minutes. Just make sure you label them clearly if kids are around—they look exactly like the non-alcoholic version.
Serving & Storage Suggestions
These cups are best served chilled, straight from the refrigerator. The cold temperature keeps the layers firm and the texture perfectly bouncy. If you let them sit out too long, they will start to soften and lose that clean layered look.
For presentation, arrange the cups on a platter or tray and sprinkle some orange and yellow candy corn around the base for a fun touch. You can also add a small paper flag or Halloween-themed pick to each cup for extra flair. I like to serve them on a white platter so the colors really pop.
Storage is incredibly easy. Keep the cups covered with plastic wrap or transfer them to an airtight container in the refrigerator. They will stay fresh for up to 5 days. In fact, they actually look better on day two because the layers have had time to fully set and the colors become even more vibrant.
Do not freeze these cups. The texture becomes grainy and watery when thawed, and the layers separate into a sad, slushy mess. Trust me, I tried it once so you do not have to.
For reheating—well, you do not really reheat Jello. But if you want to serve them at a party and they have been sitting out for a while, just pop them back in the fridge for 20 minutes to firm up again. They will be good as new.
One thing I have noticed is that the flavors actually meld together a bit after a day or two. The creamy layer absorbs a hint of the orange and yellow Jello flavors, creating this subtle citrus-cream taste that is honestly even better than when they are freshly made. So do not be afraid to make these a day ahead of your event.
Nutritional Information & Benefits
Let’s be real here—these are a treat, not a health food. But here is what you can expect nutritionally for one cup (based on a 3-ounce serving):
- Calories: Approximately 180-200
- Total Fat: 4-5g
- Saturated Fat: 3g
- Carbohydrates: 35-40g
- Sugar: 32-36g
- Protein: 4-5g
- Sodium: 80-100mg
The good news is that each cup is portion-controlled, so it is easy to enjoy one without going overboard. The gelatin provides a small amount of protein (about 4 grams per serving) and is known for supporting joint health and skin elasticity. The sweetened condensed milk adds calcium and vitamin D, though it also brings the sugar content up.
For those watching their sugar intake, the sugar-free version I mentioned earlier cuts the sugar down to about 8-10 grams per serving. And the dairy-free version using coconut milk reduces the saturated fat while adding healthy medium-chain triglycerides (MCTs) that some studies suggest support metabolism.
These cups are naturally gluten-free, nut-free, and egg-free, making them a safe option for many common dietary restrictions. Just double-check your Jello boxes if you have specific allergies—some brands may have trace amounts of certain allergens.
Honestly, I see these as a fun occasional treat. They are not something you eat every day, but for a Halloween party or holiday gathering, they bring so much joy that the sugar is worth it. Balance is everything, right?
Conclusion
These Easy Candy Corn Layered Jello Cups are exactly the kind of recipe that makes you look like a kitchen wizard without actually having to be one. Three simple ingredients, a little bit of patience, and you have got a dessert that stops people in their tracks. I have made these for Halloween parties, fall gatherings, and even just for fun on a random Tuesday, and they never fail to make people smile.
What I love most about this recipe is how customizable it is. Once you understand the basic layering technique, you can switch up the colors and flavors for any holiday or occasion. Red, white, and blue for the Fourth of July. Green, white, and red for Christmas. Pink and red for Valentine’s Day. The possibilities are endless, and that is what keeps me coming back to this recipe year after year.
I would love to hear how yours turn out! Drop a comment below and let me know what color combinations you tried, or tag me in your photos if you share them on social media. Did you try the coconut rum version? The dairy-free swap? I am always looking for new ideas to test in my kitchen. Until next time, happy layering!
Frequently Asked Questions
Can I use sugar-free Jello for this recipe?
Absolutely! Sugar-free Jello works perfectly for all three layers. Just follow the same instructions for dissolving it in boiling water. The texture will be slightly less firm than regular Jello, so you might need to add an extra 5 to 10 minutes to the setting times for each layer.
How far in advance can I make these cups?
You can make these cups up to 3 days before you plan to serve them. Store them covered in the refrigerator and they will stay fresh and beautiful. The flavors actually improve after a day or two as they meld together.
Why did my layers bleed into each other?
This usually happens when you pour the next layer too soon or when the Jello you are pouring is too warm. Make sure each layer is fully set before adding the next, and let your Jello mixture cool to room temperature before pouring. Patience is key here!
Can I make these in a large dish instead of individual cups?
Yes, you can use a 9×13 inch glass baking dish. Just triple the recipe quantities and follow the same layering process. Once fully set, cut into squares and serve. The individual cups look more like candy corn, but a large dish works great for feeding a crowd.
My creamy layer turned out grainy. What went wrong?
Grainy texture usually means the unflavored gelatin was not fully dissolved before you added the sweetened condensed milk. Make sure you let the gelatin bloom in cold water for a full 5 minutes, then stir it into the boiling water until every grain is dissolved before adding the condensed milk. Also, avoid letting the mixture boil—gentle heat is best.
Pin This Recipe!
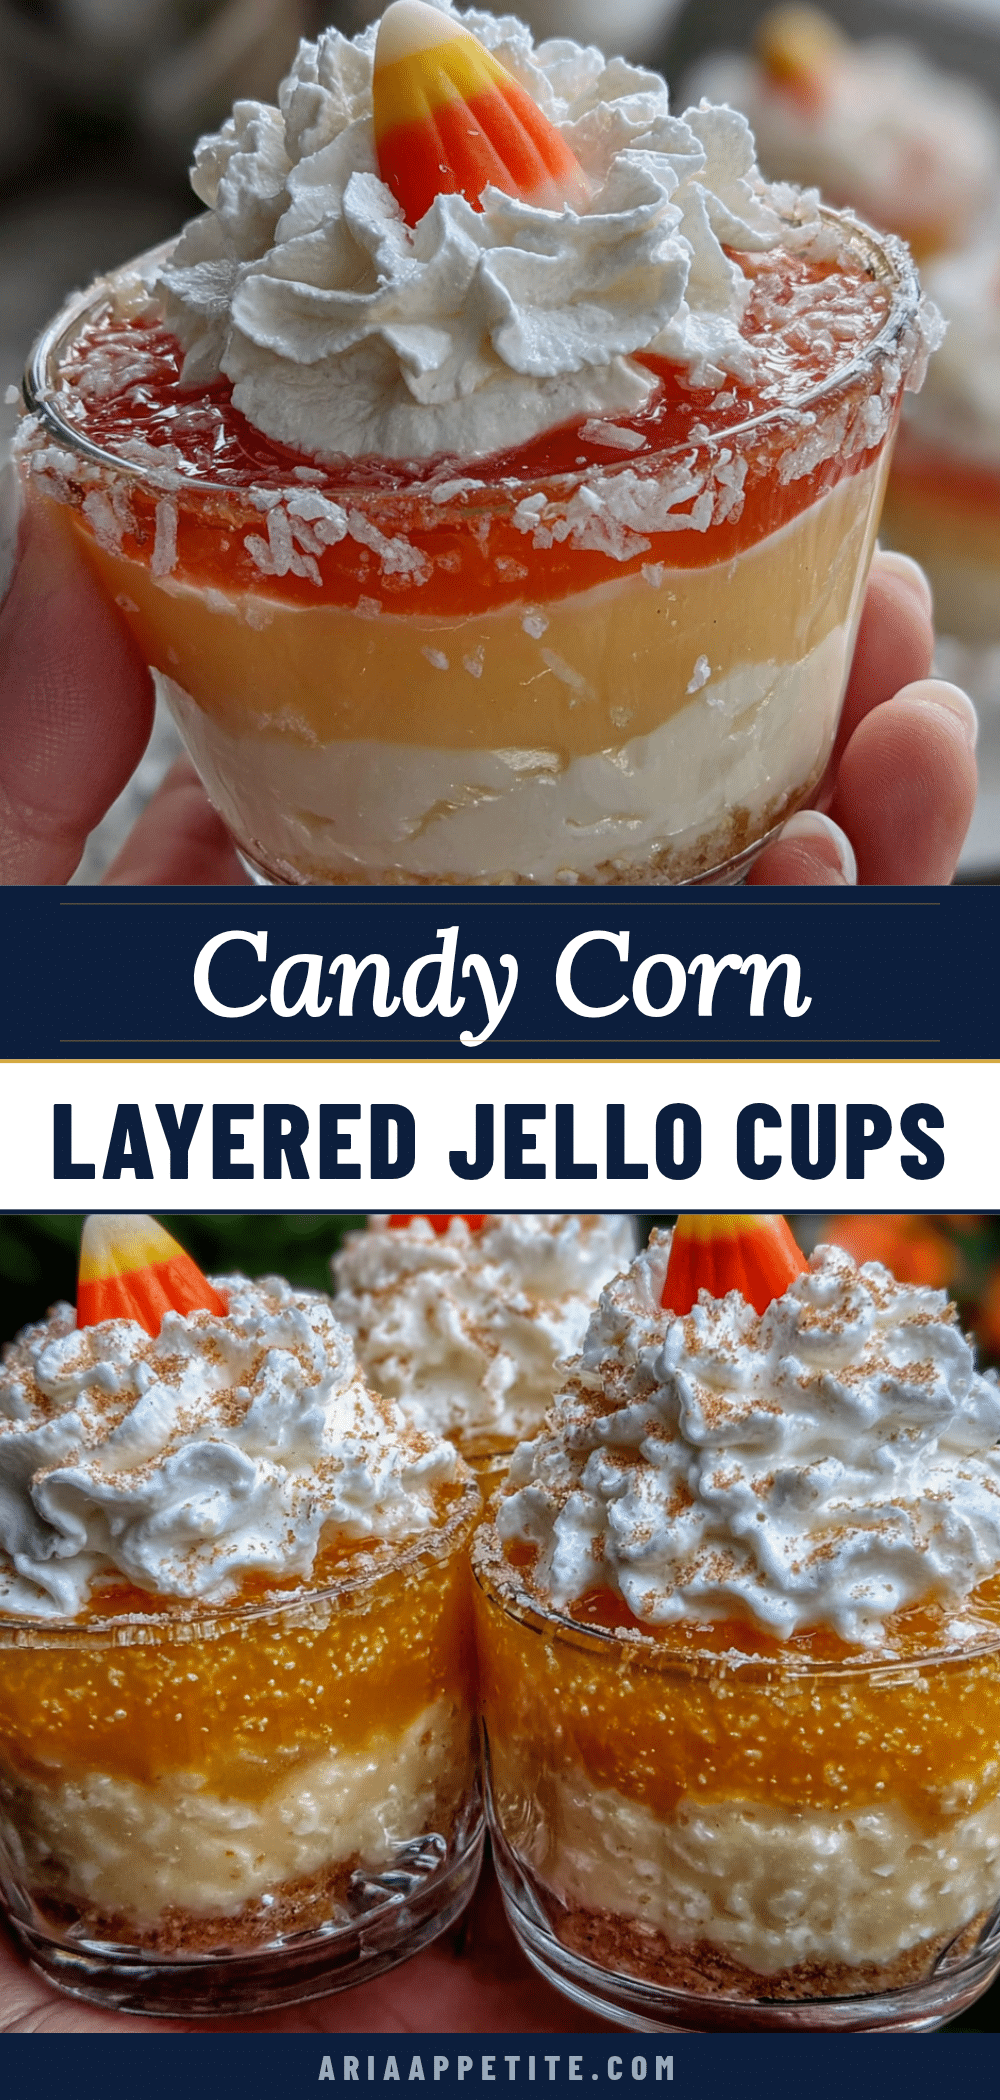
Easy Candy Corn Layered Jello Cups Recipe
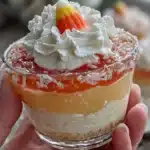
These Easy Candy Corn Layered Jello Cups are a fun and simple Halloween dessert that looks like actual candy corn. With three vibrant layers of Jello and a creamy middle, they are a crowd-pleaser that requires only 20 minutes of active prep time.
- Prep Time: 20 minutes
- Cook Time: 0 minutes
- Total Time: 4 hours 20 minutes (includes setting time)
- Yield: 10-12 servings 1x
- Category: Dessert
- Cuisine: American
Ingredients
- 1 box (3 oz) orange Jello
- 1 cup boiling water
- 1/2 cup cold water
- 1 box (3 oz) lemon or yellow Jello
- 1 cup boiling water
- 1/2 cup cold water
- 1 box (3 oz) white or vanilla Jello (or 1 envelope unflavored gelatin + 1/4 cup cold water + 1/4 cup boiling water + 2 tablespoons sugar)
- 1 cup boiling water
- 1/2 cup cold water
- 1 can (14 oz) sweetened condensed milk
- 2 envelopes (1/4 oz each) unflavored gelatin
- 1/2 cup cold water
- 1/2 cup boiling water
Instructions
- Prep your workspace: Clear a shelf in the refrigerator and arrange 10-12 clear plastic cups on a baking sheet.
- Make the orange layer: In a medium bowl, dissolve orange Jello in 1 cup boiling water. Stir in 1/2 cup cold water. Pour evenly into cups, filling about one-third full. Refrigerate 30-40 minutes until set.
- Make the creamy middle layer: In a small bowl, sprinkle unflavored gelatin over 1/2 cup cold water. Let bloom 5 minutes. Add 1/2 cup boiling water and stir until dissolved. Whisk in sweetened condensed milk until smooth. Set aside at room temperature.
- Add the creamy layer: Once orange layer is set, gently spoon creamy mixture on top, filling cups to about halfway. Refrigerate 45 minutes to 1 hour until firm.
- Make the yellow layer: In another bowl, dissolve yellow Jello in 1 cup boiling water. Stir in 1/2 cup cold water. Let cool 10 minutes. Pour over set creamy layer, filling cups to three-quarters full. Refrigerate 30-40 minutes.
- Make the white layer: In a last bowl, dissolve white Jello in 1 cup boiling water. Stir in 1/2 cup cold water. Let cool slightly. Pour over set yellow layer, filling cups almost to the rim. Refrigerate at least 2 hours until fully set.
- Serve: Cups are ready when firm. Optionally top with whipped cream and sprinkles. Serve chilled.
Notes
Do not rush the setting times. Each layer must be fully set before adding the next to avoid bleeding. Let Jello cool to room temperature before pouring over set layers. For the white layer, if white/vanilla Jello is unavailable, use 1 envelope unflavored gelatin dissolved in 1/4 cup cold water, then add 1/4 cup boiling water and 2 tablespoons sugar.
Nutrition
- Serving Size: 1 cup (3 oz)
- Calories: 180200
- Sugar: 3236
- Sodium: 80100
- Fat: 45
- Saturated Fat: 3
- Carbohydrates: 3540
- Protein: 45
Keywords: candy corn, jello cups, Halloween dessert, layered jello, easy dessert, no-bake dessert