Love this? Save it for later!
Share the inspiration with your friends
My neighbor Marta watched me struggling with a batch of store-bought Halloween cupcakes one October afternoon, the frosting sliding off in sad, sticky clumps. She didn’t say anything at first. Then she just appeared at my kitchen door with a worn recipe card, the edges soft and stained from years of use. “For the party,” she said, and shrugged like it was nothing. But the card held something special—a recipe for black velvet cake that her grandmother had brought over from Hungary, adapted for American ovens and American Halloweens. I tweaked it a little, added the spider web detail because I’m extra like that, and honestly? These Black Velvet Spider Web Cupcakes have been the star of every fall gathering I’ve hosted since. The cake itself is this incredible deep black color (thanks to a smart trick with cocoa and food coloring) with a tender, moist crumb that practically melts. And the spider web on top? It looks impossibly fancy, but let me tell you—it’s almost embarrassingly easy to pull off. I mean, the first time I tried it, I actually laughed out loud at how simple it was. You know that feeling when you want to impress people but also want to actually enjoy your own party? That’s exactly what these cupcakes deliver. They’ve become my go-to for Halloween potlucks, spooky movie nights, and especially for the big dinner party I throw every year in late October. Marta moved away a few years ago, but every time I make these, I think about her standing in my doorway, flour on her apron, sharing a piece of her family history without any fuss. That’s the thing about good recipes—they carry stories along with the ingredients.
Why You’ll Love This Recipe
I’ve tested this recipe more times than I care to count, tweaking the ratios and the baking time until it was absolutely foolproof. Here’s why it works so well for hosting:
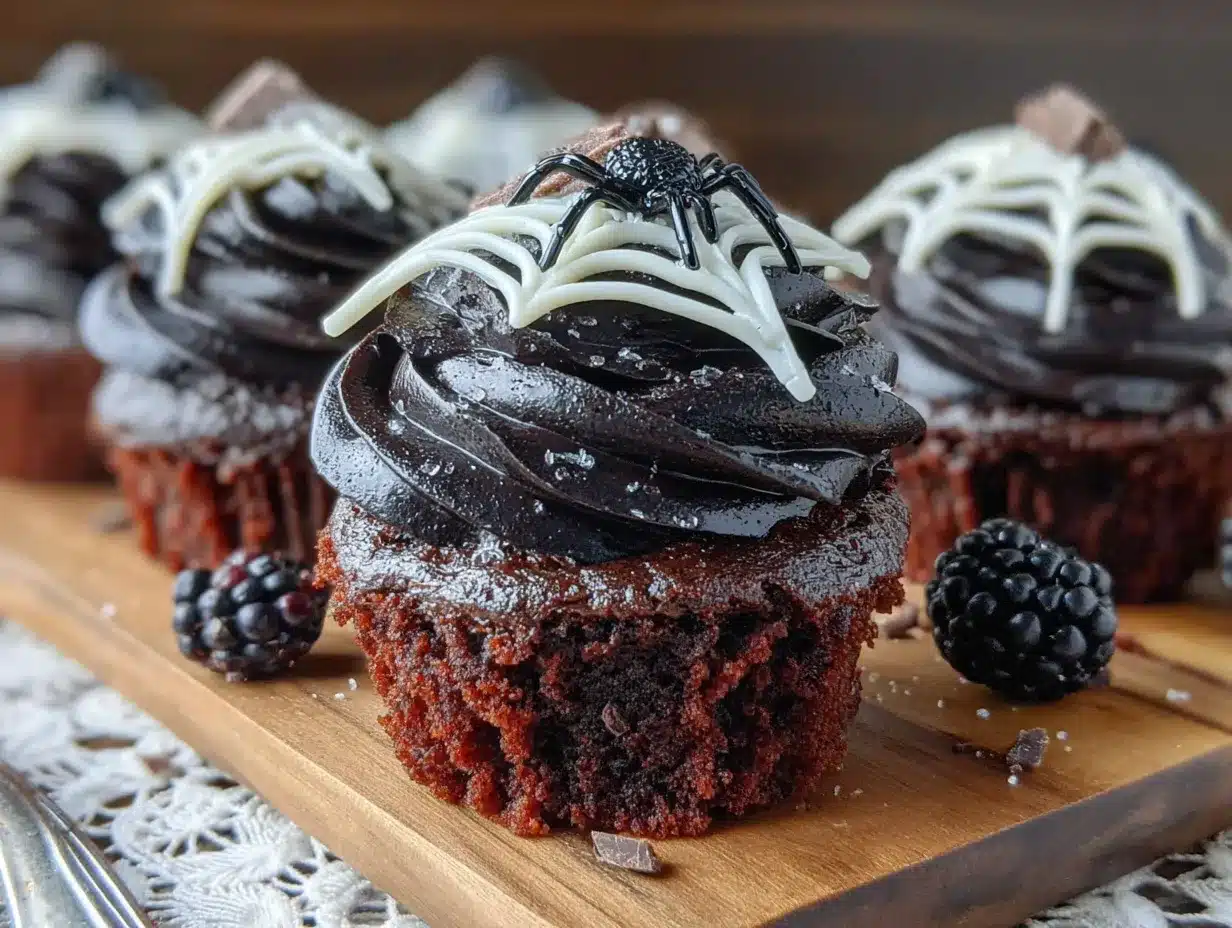
- Show-Stopping Presentation: The spider web design looks like something from a professional bakery, but it’s done with a simple toothpick drag technique. Your guests will genuinely think you spent hours on these.
- Made for a Crowd: This recipe scales beautifully. I’ve made 48 of these for a Halloween open house without breaking a sweat. The batter comes together in one bowl, and the frosting is equally forgiving.
- Prep-Ahead Friendly: You can bake the cupcakes two days in advance and frost them the day of your party. The cake actually gets more moist and flavorful after a day in the fridge.
- Kid-Approved, Adult-Coveted: The black velvet cake is rich and chocolatey without being overly sweet. Kids love the spooky look, and adults appreciate the sophisticated flavor.
- Customizable for Dietary Needs: I’ve made these gluten-free with a 1:1 flour blend and dairy-free with coconut oil and oat milk. Both versions turned out beautifully.
What really sets these apart from other Halloween cupcakes is the texture. The cake is incredibly tender—almost like a cross between a classic red velvet and a moist chocolate cake. The black color is deep and dramatic, not that washed-out gray you sometimes get. And the frosting? It’s a silky vanilla buttercream that balances the rich cake perfectly. This isn’t just another Halloween dessert. It’s the one people will ask you to bring year after year.
What Ingredients You Will Need
This recipe uses straightforward ingredients, most of which you probably already have in your pantry. The magic happens through a few smart tricks rather than obscure components.
For the Black Velvet Cupcakes
- 1 ½ cups all-purpose flour (spooned and leveled—don’t scoop directly from the bag or you’ll pack it too tight)
- 1 cup granulated sugar
- ¼ cup unsweetened cocoa powder (I prefer Dutch-process for a deeper color, but natural works fine too)
- 1 teaspoon baking soda
- ½ teaspoon salt
- 1 cup buttermilk, room temperature (adds incredible tenderness—make your own by adding 1 tablespoon lemon juice to 1 cup milk and letting it sit for 5 minutes)
- ½ cup vegetable oil (keeps the cake moist for days)
- 1 large egg, room temperature
- 1 teaspoon vanilla extract
- 1 tablespoon black gel food coloring (this is non-negotiable—liquid coloring won’t give you that deep, dramatic black)
- 1 teaspoon white vinegar (reacts with the baking soda for extra lift)
For the Vanilla Buttercream Frosting
- 1 cup unsalted butter, softened (I use Kerrygold for the best flavor)
- 3 ½ cups powdered sugar, sifted
- 2 teaspoons vanilla extract
- 2-3 tablespoons heavy cream (or whole milk if that’s what you have)
- Pinch of salt
For the Spider Web Decoration
- ¼ cup black gel icing or black royal icing in a piping bag with a small round tip
- Optional: 12-16 small plastic spiders for a fun garnish (wash them first if they’re from a craft store)
A quick note on the black food coloring: I’ve tried every brand out there, and my favorite is the AmeriColor Super Black. It gives you that deep, velvety black without any bitter aftertaste. Start with 1 tablespoon and add a little more if you want it even darker. Just don’t go overboard—too much can affect the texture.
Equipment Needed
- Standard 12-cup muffin tin (I prefer a non-stick one for easy release)
- Paper cupcake liners (black or orange ones look fantastic, but white works too—the contrast is fun)
- Large mixing bowl and whisk
- Electric hand mixer or stand mixer with paddle attachment for the frosting
- Piping bag with a large round tip (or a sturdy zip-top bag with the corner snipped off)
- Small piping bag or squeeze bottle for the black spider web icing
- Toothpick—this is your most important tool for the web design
- Cooling rack
- Offset spatula (optional but helpful for smooth frosting)
If you don’t have a piping bag, don’t run out to buy one. A gallon-sized zip-top bag works perfectly—just fill it with frosting, seal it, and snip a ½-inch corner off. For the black spider web icing, a small squeeze bottle from a craft store is my favorite tool, but a tiny piping tip works just as well.
Preparation Method
Step 1: Preheat and Prepare
Preheat your oven to 350°F (175°C). Line your muffin tin with 12 paper liners. I like to give them a light spray of non-stick cooking spray—just in case—because there’s nothing worse than a cupcake that sticks to its liner.
Step 2: Mix the Dry Ingredients
In your large mixing bowl, whisk together the flour, sugar, cocoa powder, baking soda, and salt. Make sure everything is evenly combined. I usually give it about 30 seconds of vigorous whisking to break up any lumps in the cocoa powder.
Step 3: Combine the Wet Ingredients
In a separate small bowl or a large liquid measuring cup, whisk together the buttermilk, vegetable oil, egg, vanilla extract, and black gel food coloring. The mixture will look a bit strange at this point—kind of a dark grayish-purple. Don’t panic. It will transform in the oven.
Step 4: Bring It All Together
Pour the wet ingredients into the dry ingredients and stir gently with a spatula until just combined. A few small lumps are totally fine—overmixing will make the cupcakes tough. Add the white vinegar and give it one final gentle stir. You’ll see the batter start to bubble slightly as the baking soda and vinegar react. That’s good—it means your cupcakes will be light and fluffy.
Step 5: Fill and Bake
Divide the batter evenly among the 12 liners, filling each about ⅔ full. I use a cookie scoop for this—it’s cleaner and ensures even sizes. Bake for 18-20 minutes, or until a toothpick inserted into the center comes out with just a few moist crumbs. The tops should spring back when lightly touched. Let them cool in the pan for 5 minutes, then transfer to a wire rack to cool completely. And I mean completely—warm frosting is a recipe for a melty mess.
Step 6: Make the Buttercream
While the cupcakes cool, make the frosting. In a stand mixer fitted with the paddle attachment, beat the softened butter on medium speed for about 3 minutes until it’s pale and fluffy. Scrape down the sides. Add the sifted powdered sugar one cup at a time, beating on low speed after each addition. Add the vanilla extract, salt, and 2 tablespoons of heavy cream. Beat on medium-high for 2-3 minutes until the frosting is light, airy, and spreadable. If it’s too thick, add the remaining tablespoon of cream. If it’s too thin, add a little more powdered sugar.
Step 7: Frost the Cupcakes
Fit your piping bag with the large round tip and fill it with buttercream. Pipe a generous swirl on each cooled cupcake. I like to start from the outside edge and work my way inward in a spiral, ending with a small peak in the center. Alternatively, you can spread the frosting with an offset spatula for a more rustic look.
Step 8: Create the Spider Web
Here’s where the magic happens. Using your black gel icing with a small round tip, pipe a small dot in the center of each frosted cupcake. Then pipe 4-5 concentric circles around it, spacing them about ½ inch apart. Working quickly while the icing is still wet, take a toothpick and drag it from the center dot outward through all the circles. Repeat this around the entire cupcake, spacing the drags evenly—I usually do 6-8 drags per cupcake. The toothpick pulls the black icing through the white frosting, creating a perfect spider web pattern. It’s honestly so satisfying to watch it come together.
Step 9: Garnish and Serve
If you’re using plastic spiders, place one on each cupcake while the icing is still slightly tacky so it stays put. Otherwise, leave them as-is—the spider web design is striking enough on its own. Serve immediately or store for later.
Cooking Tips & Techniques
The first time I made these, I used regular liquid food coloring because that’s all I had in the cabinet. Big mistake. The cupcakes came out a sad, streaky gray that looked more like a science experiment than a Halloween treat. Learn from my failure—gel food coloring is absolutely essential for that deep, dramatic black color. It’s more concentrated, so you use less, and it won’t thin out your batter.
Another thing I learned the hard way: don’t overbake these. The difference between a perfectly moist black velvet cupcake and a dry, crumbly one is about 90 seconds. Start checking at 18 minutes. The edges should be set, but the center should still look slightly underdone. They’ll continue cooking from residual heat as they cool in the pan.
For the spider web design, work on one cupcake at a time. If you pipe all the circles on every cupcake first and then try to drag them all, the icing will have started to set and the web won’t form cleanly. I learned this during a particularly chaotic Halloween baking session when I was trying to do too many things at once. Trust me—one at a time is the way to go.
If you’re making these for a party, here’s my multitasking strategy: bake the cupcakes two days ahead and store them in an airtight container at room temperature. Make the frosting the day before and keep it refrigerated. The day of your party, let the frosting come to room temperature (about 30 minutes), then whip it briefly to restore its fluffiness. Frost and decorate—the whole process takes about 20 minutes. This way you’re not stuck in the kitchen when your guests arrive.
Variations & Adaptations
Gluten-Free Version
I’ve made these with a 1:1 gluten-free flour blend (Bob’s Red Mill is my go-to) and they turned out beautifully. Add an extra tablespoon of buttermilk to compensate for the drier flour blend. No one at my party even noticed the difference.
Dairy-Free Version
Swap the buttermilk for oat milk mixed with 1 tablespoon of lemon juice, and use a plant-based butter for the frosting. Miyoko’s European Style Cultured Butter works wonderfully—it has that same rich, creamy texture. The cupcakes won’t be quite as tender, but they’re still delicious.
Chocolate Buttercream Variation
For double-chocolate black velvet cupcakes, add ¼ cup of unsweetened cocoa powder to the buttercream (reduce the powdered sugar by ¼ cup to keep the sweetness balanced). The chocolate-on-chocolate effect is absolutely decadent.
Spider Web Color Variations
Instead of black on white, try white icing on black frosting for a reverse spider web effect. Or use orange gel icing on white frosting for a more playful, less spooky look. I did orange webs for a fall harvest party and they were a huge hit.
Mini Cupcake Version
For bite-sized treats, bake the batter in mini muffin tins for 10-12 minutes. You’ll get about 36 mini cupcakes. They’re perfect for parties where people want to sample multiple desserts.
Serving & Storage Suggestions
These cupcakes are best served at room temperature. If you’ve refrigerated them, let them sit out for about 30 minutes before serving—the cake will be more tender and the frosting will be perfectly creamy.
For presentation, I like to arrange them on a black or dark purple cake stand. The contrast makes the white frosting and black spider webs really pop. Add a few fake cobwebs around the base of the stand for an extra spooky touch. If you’re serving these at a Halloween party, they pair beautifully with a warm apple cider or a pumpkin spice latte.
To store leftovers (if you have any), place them in an airtight container in the refrigerator for up to 5 days. The cake stays remarkably moist thanks to the oil in the recipe. For longer storage, freeze the unfrosted cupcakes in a freezer-safe bag for up to 3 months. Thaw them at room temperature, then frost and decorate as directed. The spider web design is best done fresh—the gel icing can bleed into the frosting if frozen and thawed.
One thing I love about these cupcakes is that the flavors actually improve after a day in the fridge. The black velvet cake becomes even more moist and the chocolate flavor deepens. So don’t stress about making them too far in advance—they’ll be even better on day two.
Nutritional Information & Benefits
Each cupcake (with frosting) contains approximately 380 calories, 18g of fat, 52g of carbohydrates, and 3g of protein. These are definitely a treat, not an everyday snack, but they’re made with real ingredients and no artificial preservatives.
The cocoa powder in the black velvet cake is rich in antioxidants called flavonoids, which can help reduce inflammation and support heart health. The buttermilk adds a dose of calcium and probiotics. And while I wouldn’t call these cupcakes health food, they’re certainly better for you than anything from a box mix or a bakery.
For anyone with dietary restrictions, the gluten-free and dairy-free variations work beautifully. The recipe is naturally nut-free (as long as your chocolate and food coloring are processed in nut-free facilities). If you’re serving these at a party where allergies might be a concern, make a small batch of the gluten-free version and clearly label them.
Frequently Asked Questions
Can I use regular food coloring instead of gel?
You can, but I really don’t recommend it. Liquid food coloring will give you a grayish-purple color rather than a deep black. You’d need to use so much liquid coloring that it would thin out your batter and affect the texture. Gel food coloring is more concentrated, gives a truer black, and won’t mess with your recipe.
Why did my spider web design turn out messy?
This usually happens when the frosting is too soft or the black icing has started to set. Make sure your buttercream is firm but spreadable—if it’s too soft, pop it in the fridge for 10 minutes. And work on one cupcake at a time, piping the circles and immediately dragging with the toothpick before the icing sets.
Can I make the batter ahead of time?
I don’t recommend it. The reaction between the baking soda and vinegar starts as soon as you mix them, so the batter needs to go into the oven immediately. You can, however, mix the dry ingredients and wet ingredients separately and combine them right before baking.
How do I get my cupcakes to come out perfectly flat on top?
For flat tops, fill the liners only ⅔ full and bake at 325°F (163°C) instead of 350°F. The lower temperature gives the cupcakes more time to rise evenly without doming. You’ll need to add about 3-4 minutes to the baking time.
Can I use a box cake mix instead of making from scratch?
You can, but the texture and flavor won’t be the same. Box mixes are designed for convenience, not for the tender, moist crumb of a from-scratch black velvet cake. If you’re short on time, I’d suggest making the frosting from scratch even if you use a box mix—the homemade buttercream makes a huge difference.
Conclusion
These Black Velvet Spider Web Cupcakes are more than just a Halloween dessert—they’re a conversation starter, a crowd-pleaser, and honestly, a bit of a confidence booster. There’s something deeply satisfying about watching your guests’ faces light up when they see that perfect spider web design, knowing you created it with nothing more than a toothpick and a steady hand. Marta’s recipe has become a beloved tradition in my home, and every October when I pull out that worn recipe card, I’m reminded that the best recipes are the ones that connect us to the people we care about. I hope these cupcakes become a tradition in your home too. Try them for your next fall gathering, and don’t be shy about making them your own—add a different frosting color, skip the spiders, or double the batch for a big party. Whatever you do, just make sure you save one for yourself before they disappear. And when you do make them, come back and tell me how they turned out in the comments. I’d love to hear about your spider web successes (and your hilarious failures—we’ve all been there). Happy baking, and happy Halloween!
Pin This Recipe!
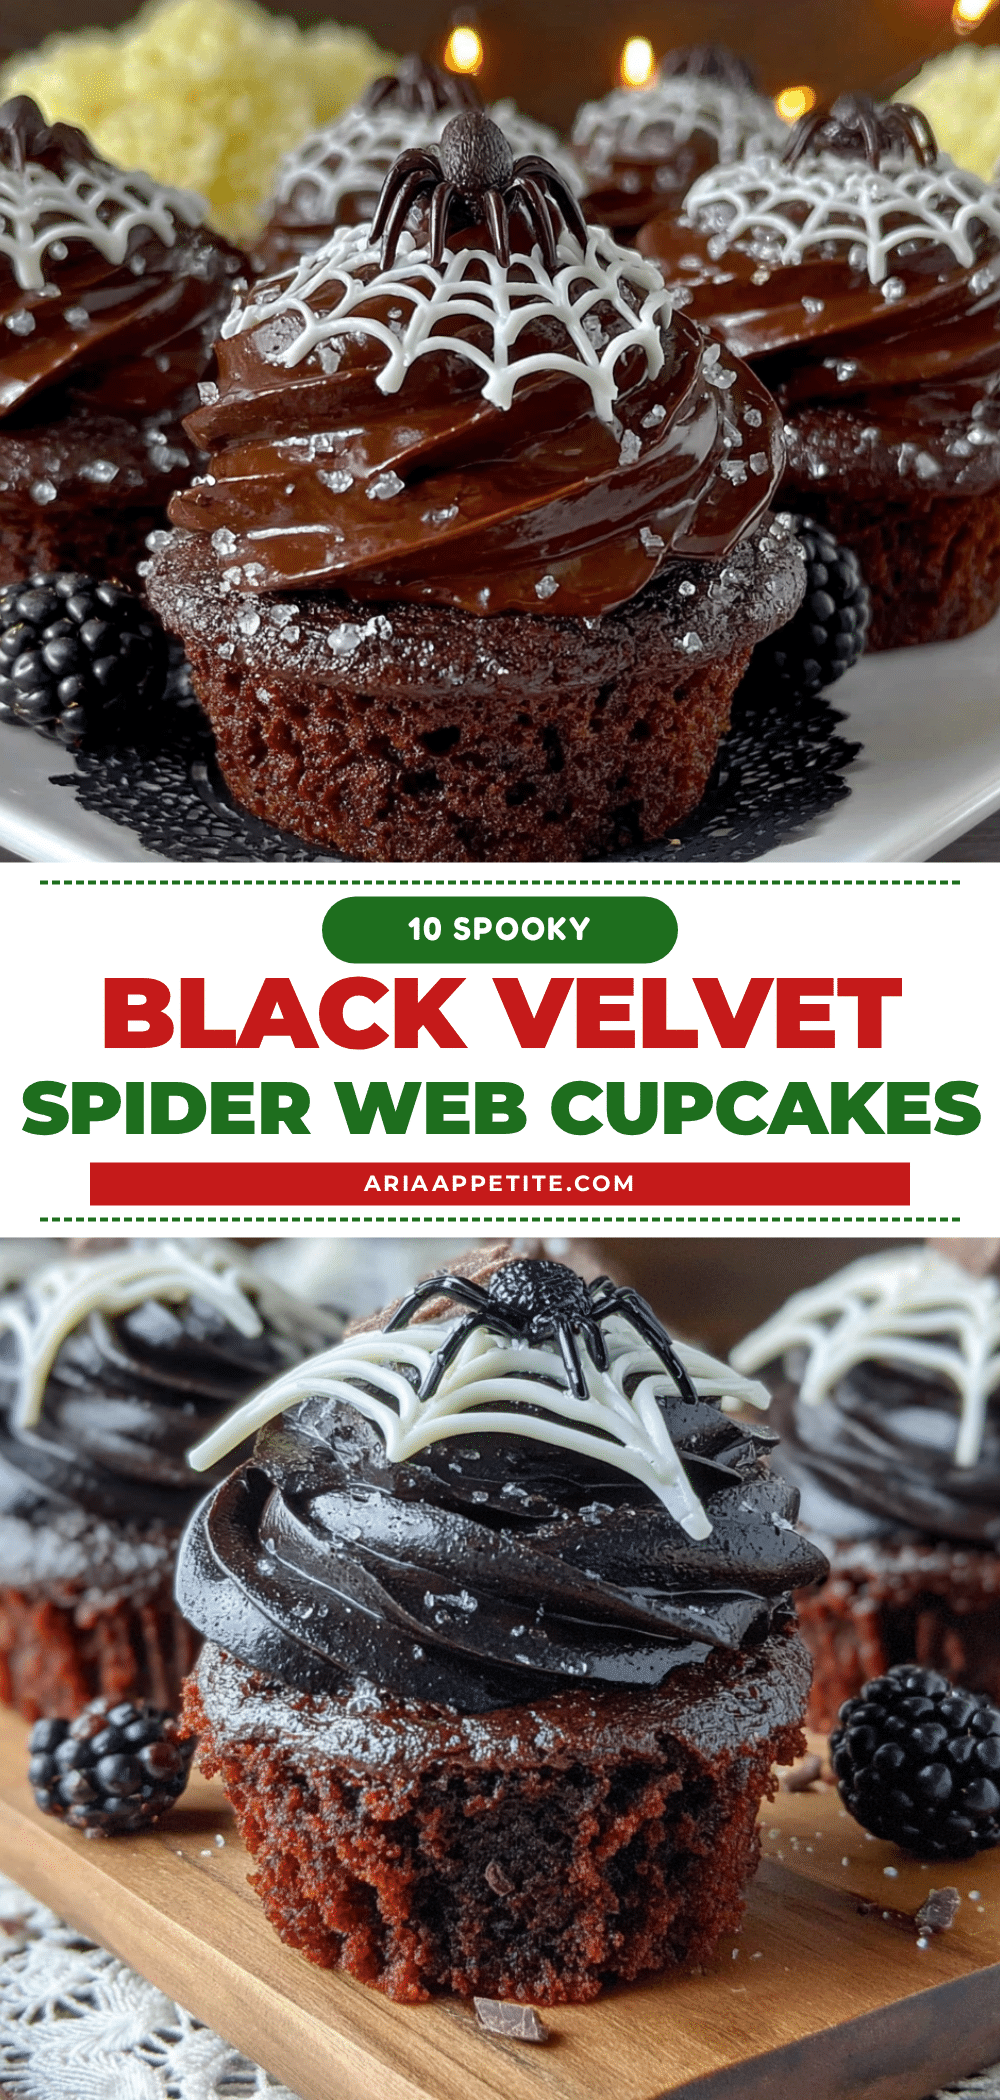
Black Velvet Spider Web Cupcakes: Easy Halloween Treat
These Black Velvet Spider Web Cupcakes feature a deep black, tender crumb cake topped with silky vanilla buttercream and a stunning spider web design that’s surprisingly easy to create. Perfect for Halloween parties, they’re a show-stopping treat that tastes as good as it looks.
- Prep Time: 20 minutes
- Cook Time: 20 minutes
- Total Time: 40 minutes
- Yield: 12 servings 1x
- Category: Dessert
- Cuisine: American
Ingredients
- 1 ½ cups all-purpose flour (spooned and leveled)
- 1 cup granulated sugar
- ¼ cup unsweetened cocoa powder (Dutch-process preferred)
- 1 teaspoon baking soda
- ½ teaspoon salt
- 1 cup buttermilk, room temperature
- ½ cup vegetable oil
- 1 large egg, room temperature
- 1 teaspoon vanilla extract
- 1 tablespoon black gel food coloring
- 1 teaspoon white vinegar
- 1 cup unsalted butter, softened
- 3 ½ cups powdered sugar, sifted
- 2 teaspoons vanilla extract
- 2–3 tablespoons heavy cream
- Pinch of salt
- ¼ cup black gel icing or black royal icing
- Optional: 12-16 small plastic spiders
Instructions
- Preheat oven to 350°F (175°C). Line a 12-cup muffin tin with paper liners and lightly spray with non-stick cooking spray.
- In a large mixing bowl, whisk together flour, sugar, cocoa powder, baking soda, and salt until evenly combined.
- In a separate small bowl or liquid measuring cup, whisk together buttermilk, vegetable oil, egg, vanilla extract, and black gel food coloring.
- Pour wet ingredients into dry ingredients and stir gently with a spatula until just combined. Add white vinegar and stir once more. Batter will bubble slightly.
- Divide batter evenly among the 12 liners, filling each about ⅔ full. Bake for 18-20 minutes, until a toothpick inserted into the center comes out with a few moist crumbs. Cool in pan for 5 minutes, then transfer to a wire rack to cool completely.
- For the buttercream: In a stand mixer with paddle attachment, beat softened butter on medium speed for 3 minutes until pale and fluffy. Add sifted powdered sugar one cup at a time, beating on low after each addition. Add vanilla, salt, and 2 tablespoons heavy cream. Beat on medium-high for 2-3 minutes until light and airy. Add more cream if too thick, more sugar if too thin.
- Fit a piping bag with a large round tip and fill with buttercream. Pipe a generous swirl on each cooled cupcake, starting from the outside and working inward.
- For the spider web: Using black gel icing with a small round tip, pipe a small dot in the center of each frosted cupcake. Pipe 4-5 concentric circles around it, spaced about ½ inch apart. Working quickly, use a toothpick to drag from the center dot outward through all circles. Repeat 6-8 drags evenly around each cupcake.
- If using plastic spiders, place one on each cupcake while icing is still tacky. Serve immediately or store.
Notes
Gel food coloring is essential for deep black color; liquid coloring will result in gray. Work on one cupcake at a time for the spider web design to prevent icing from setting. Cupcakes can be baked 2 days ahead and stored airtight at room temperature; frost and decorate day of serving. For best texture, let refrigerated cupcakes sit at room temperature 30 minutes before serving.
Nutrition
- Serving Size: 1 cupcake
- Calories: 380
- Sugar: 38
- Sodium: 220
- Fat: 18
- Saturated Fat: 9
- Carbohydrates: 52
- Fiber: 1
- Protein: 3
Keywords: Halloween cupcakes, black velvet, spider web, easy Halloween treat, black velvet cake, buttercream frosting


