Love this? Save it for later!
Share the inspiration with your friends
This was supposed to be a pumpkin spice bundt cake. I had it all planned out—the canned pumpkin was sitting on the counter, the cinnamon and nutmeg were measured, and my favorite bundt pan was greased and ready. But somewhere between grabbing the baking powder and reaching for the sugar, my hand landed on a jar of creamy peanut butter instead. I stared at it for a solid minute, caught between sticking to the plan and following this weird impulse. The pumpkin sat there untouched while I opened that peanut butter jar, took a whiff, and thought, “You know what? Let’s see what happens.”
Honestly, I was convinced I’d ruined dessert for Thanksgiving that year. My mom was coming over, and she’s a traditionalist when it comes to fall baking—pumpkin or apple, nothing else. But I’d already mixed the peanut butter into the batter, and there was no going back. I tossed in some chopped Reese’s cups I’d stashed in the freezer (leftover from Halloween candy, let’s be real) and poured the whole thing into the pan, half-expecting a dense, greasy disaster. The kitchen smelled amazing, though—like a peanut butter cup had a baby with a cozy autumn afternoon.
When I pulled that cake out of the oven, it was golden on the edges and perfectly domed on top. I let it cool, drizzled a chocolate ganache over it, and nervously sliced into it. That first bite? I actually laughed out loud. It was rich without being heavy, peanut buttery with just enough chocolate to feel indulgent, and somehow it had this warm, comforting vibe that screamed fall without a single pumpkin in sight. My mom asked for the recipe before she even finished her slice. Maybe you’ve been there—when a kitchen mistake turns into something you secretly hope becomes a tradition. This cake is that mistake, and I keep making it on purpose now.
Why You’ll Love This Recipe
Let me tell you why this cake has earned a permanent spot in my fall baking rotation. I’ve tested this recipe at least seven times, tweaking the flour ratio, adjusting the baking time, and even trying different brands of peanut butter. The version you’re getting here is the one that made my neighbor, who “doesn’t do chocolate cakes,” ask for a second slice. That’s the kind of power we’re dealing with.
- Rich, Decadent Flavor: The combination of creamy peanut butter and semi-sweet chocolate is a classic for a reason. It hits that sweet-salty spot that makes you close your eyes after every bite.
- Perfectly Moist Texture: This cake stays moist for days, thanks to a little trick I learned from a pastry chef friend—using buttermilk and oil instead of all butter. It’s tender, not crumbly.
- Simple Ingredients: You probably have most of these in your pantry right now. No weird specialty items, no trips to three different stores.
- Fall-Friendly Without Pumpkin: If you’re tired of pumpkin everything (or if someone in your family just doesn’t like it), this cake brings all the cozy fall vibes with peanut butter and chocolate instead.
- Crowd-Pleaser for All Ages: Kids love the Reese’s pieces on top, and adults appreciate that it’s not overly sweet. It’s the dessert that disappears fastest at potlucks.
- Make-Ahead Friendly: You can bake this cake a day ahead, and it actually tastes better the next day. The flavors meld together, and the texture gets even more tender.
What makes this recipe different from other chocolate peanut butter cakes is the balance. I spent a lot of time getting the peanut butter-to-chocolate ratio just right—enough peanut butter flavor to be unmistakable, but not so much that it overpowers the chocolate. The ganache drizzle is thin enough to soak into the cake slightly, creating this lovely fudgy layer on top. It’s not just another cake; it’s the cake I bring to every fall gathering now, and people always ask for the recipe before they leave.
What Ingredients You Will Need
This recipe uses simple, everyday ingredients that come together to create something truly special. Most of these are pantry staples, which means you can probably make this cake right now without a grocery run. Here’s what you’ll need and why each ingredient matters.
For the Cake:
- All-purpose flour, 2 cups (240g) – This gives the cake structure without making it dense. Spoon and level your flour for the best results—don’t scoop straight from the bag.
- Granulated sugar, 1 ½ cups (300g) – Adds sweetness and helps create that tender crumb. I’ve tried reducing the sugar, and the cake loses some moisture, so stick with this amount.
- Brown sugar, ½ cup (100g), packed – This is my secret weapon. Brown sugar adds moisture and a subtle molasses flavor that pairs beautifully with peanut butter.
- Baking powder, 1 ½ teaspoons – Helps the cake rise evenly. Make sure yours is fresh—test it by dropping a little in warm water; it should bubble immediately.
- Baking soda, ½ teaspoon – Works with the buttermilk to create a light, airy texture.
- Salt, ½ teaspoon – Balances the sweetness and enhances the peanut butter flavor. I use fine sea salt here.
- Unsalted butter, ½ cup (113g), softened – Adds richness. If you only have salted butter, reduce the added salt to ¼ teaspoon.
- Creamy peanut butter, ½ cup (130g) – Use a brand you like eating straight from the jar. I prefer Jif or Skippy for baking because they have a consistent texture. Natural peanut butter that separates can make the cake oily, so stick with the processed stuff here.
- Vegetable oil, ¼ cup (60ml) – Keeps the cake moist for days. Canola or avocado oil works too.
- Large eggs, 2, room temperature – Room temperature eggs incorporate better into the batter, creating a smoother texture. Let them sit on the counter for 30 minutes before starting.
- Vanilla extract, 2 teaspoons – Enhances the chocolate and peanut butter flavors. Pure vanilla extract is worth the splurge here.
- Buttermilk, 1 cup (240ml) – Adds tanginess and activates the baking soda. No buttermilk? Add 1 tablespoon of lemon juice or vinegar to regular milk and let it sit for 5 minutes.
For the Chocolate Ganache:
- Semi-sweet chocolate chips, 1 cup (175g) – I use Ghirardelli or Guittard for the smoothest melt. Chocolate chips with a higher cocoa content (around 60%) work best.
- Heavy cream, ½ cup (120ml) – Creates that silky, pourable consistency. Don’t substitute with milk; the fat content is crucial for the ganache to set properly.
- Unsalted butter, 1 tablespoon (14g) – Adds shine and makes the ganache extra smooth.
For the Topping:
- Reese’s peanut butter cups, 1 cup chopped (about 6-8 regular cups) – I like to chop them into rough chunks so you get pieces in every bite. Freeze them for 10 minutes before chopping for cleaner cuts.
- Mini Reese’s pieces, ¼ cup (optional) – Adds a fun crunch and makes the cake look festive. Totally optional but highly recommended for visual appeal.
Equipment Needed
You don’t need a professional bakery setup to make this cake. Here’s what I use, along with some alternatives if you’re working with a less-stocked kitchen.
- 10-cup bundt pan – This is my go-to for this cake because the ridges catch the ganache beautifully. If you don’t have a bundt pan, a 9×13-inch baking dish works too—just reduce the baking time by 5-7 minutes.
- Electric hand mixer or stand mixer – Creaming the butter and sugars by hand is possible, but your arm will thank you for using a mixer. I’ve done both, and the mixer gives a fluffier texture.
- Large mixing bowls – You’ll need at least two: one for dry ingredients and one for wet ingredients.
- Whisk – For combining dry ingredients evenly.
- Rubber spatula – For folding in the chopped Reese’s cups and scraping down the bowl.
- Small saucepan – For making the ganache. A microwave-safe bowl works too if you prefer that method.
- Cooling rack – Essential for even cooling. If you don’t have one, let the cake cool in the pan for 10 minutes, then carefully transfer it to a plate.
- Non-stick baking spray with flour – This is non-negotiable for bundt pans. Regular cooking spray won’t cut it, and you’ll end up with cake stuck in the pan. I use Baker’s Joy, and it works every time.
Preparation Method
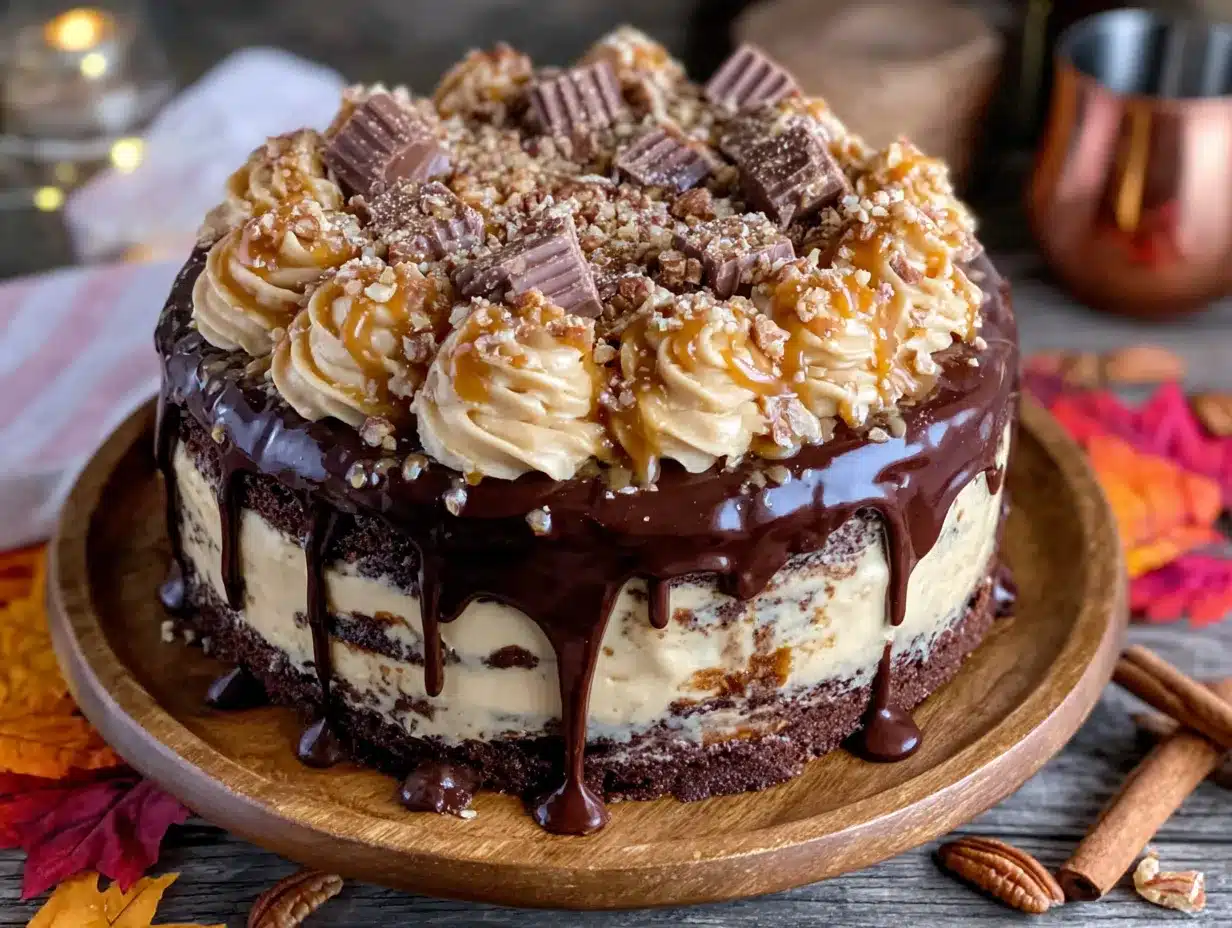
Let’s walk through this step by step. I’ve included time estimates and sensory cues so you know exactly what to look for at each stage. Trust me, paying attention to these details makes the difference between a good cake and a showstopper.
- Preheat and prep the pan. Preheat your oven to 350°F (175°C). Generously spray your bundt pan with non-stick baking spray that contains flour. Make sure you get into all the crevices—I missed a spot once, and half the cake stayed in the pan. Let the pan sit while you prepare the batter so the spray can settle.
- Mix the dry ingredients. In a medium bowl, whisk together 2 cups all-purpose flour, 1 ½ teaspoons baking powder, ½ teaspoon baking soda, and ½ teaspoon salt. Whisk for about 20 seconds to aerate the flour and distribute the leavening agents evenly. Set this aside.
- Cream the butter and sugars. In a large mixing bowl, beat ½ cup softened unsalted butter, 1 ½ cups granulated sugar, and ½ cup packed brown sugar together on medium speed until light and fluffy, about 3-4 minutes. Scrape down the sides of the bowl halfway through. You’ll know it’s ready when the mixture looks pale and feels airy when you scrape it.
- Add the peanut butter and oil. Add ½ cup creamy peanut butter and ¼ cup vegetable oil to the butter-sugar mixture. Beat on medium speed until fully combined and smooth, about 1 minute. The mixture will look glossy and smell amazing at this point.
- Incorporate the eggs and vanilla. Add 2 room-temperature eggs one at a time, beating well after each addition. Add 2 teaspoons vanilla extract and beat until combined. The batter might look slightly separated at this stage—that’s normal and will come together once you add the dry ingredients.
- Alternate adding dry ingredients and buttermilk. With the mixer on low speed, add about one-third of the dry ingredients, then half of the buttermilk. Repeat with another third of dry ingredients, the remaining buttermilk, and finish with the last third of dry ingredients. Mix just until combined after each addition—overmixing at this stage can make the cake tough. Stop the mixer and give the batter a few gentle folds with a spatula to catch any flour hiding at the bottom.
- Fold in the chopped Reese’s cups. Gently fold in 1 cup of chopped Reese’s peanut butter cups using a rubber spatula. Don’t overmix—you want chunks distributed throughout the batter, not melted into it. The batter will be thick and luscious, like a peanut butter cookie dough but looser.
- Fill the pan and bake. Spoon the batter into the prepared bundt pan and spread it evenly. Tap the pan on the counter a few times to release any air bubbles. Bake for 45-55 minutes, or until a toothpick inserted into the center comes out with a few moist crumbs (not wet batter). The top should be golden brown and spring back when lightly touched. My oven runs hot, so I start checking at 42 minutes.
- Cool the cake properly. Let the cake cool in the pan on a wire rack for 15 minutes. This is crucial—if you try to flip it too soon, it will fall apart. After 15 minutes, place a serving plate upside down on top of the pan, then carefully flip the whole thing over. Lift the pan off gently. If any pieces stick, use a small spatula to coax them loose. Let the cake cool completely before adding the ganache, about 1-2 hours.
- Make the ganache. Place 1 cup semi-sweet chocolate chips in a heat-safe bowl. Heat ½ cup heavy cream in a small saucepan over medium heat until it just starts to simmer—small bubbles will form around the edges. Don’t let it boil. Pour the hot cream over the chocolate chips and let it sit for 2 minutes without stirring. Then gently whisk until smooth. Add 1 tablespoon butter and whisk until glossy. Let the ganache cool for 5-10 minutes until it thickens slightly but is still pourable.
- Glaze and garnish. Place the cooled cake on a serving plate. Slowly pour the ganache over the top, letting it drip down the sides. Use a spatula to help it along if needed. Immediately sprinkle the remaining chopped Reese’s cups and mini Reese’s pieces over the top before the ganache sets. Let the cake sit for about 30 minutes so the ganache firms up slightly.
Cooking Tips & Techniques
I’ve made this cake enough times to know where things can go wrong. Here are the lessons I learned the hard way, so you don’t have to.
Don’t overmix the batter. I know I said this already, but it’s worth repeating. Overmixing develops the gluten in the flour, which makes the cake dense and tough instead of tender. Mix just until the flour disappears into the batter, then stop. A few small lumps are fine—they’ll bake out.
Use room temperature ingredients. This is one of those baking rules that actually matters. Cold eggs and cold buttermilk won’t emulsify properly with the butter and sugar, leading to a dense, greasy cake. Take everything out of the fridge 30-45 minutes before you start. If you forget, place the eggs in a bowl of warm water for 5 minutes and microwave the buttermilk for 10-15 seconds.
Test your baking powder. I once made this cake with expired baking powder, and it came out flat as a pancake. If you’re not sure how old yours is, drop a teaspoon into hot water. If it bubbles vigorously, it’s good. If it fizzles weakly or not at all, buy a new can.
Grease the pan thoroughly. I cannot stress this enough. Bundt pans are notorious for holding onto cake. Use a baking spray with flour, and get into every nook and cranny. I hold the pan up to the light after spraying to check for missed spots. It sounds obsessive, but it saves you from crying over a broken cake.
Let the cake cool in the pan for exactly 15 minutes. Not 10, not 20. Set a timer. If you flip it too early, the cake will collapse. If you wait too long, the steam will make the bottom soggy, and it’ll stick to the pan. Fifteen minutes is the sweet spot.
Make the ganache while the cake cools. This saves time and ensures the ganache is ready when the cake is cool. Just remember to let the ganache cool slightly before pouring—if it’s too hot, it’ll run right off the cake and pool on the plate.
Variations & Adaptations
One of the best things about this cake is how adaptable it is. Here are some variations I’ve tried, along with notes on what worked and what didn’t.
Gluten-Free Version: Substitute the all-purpose flour with a 1:1 gluten-free baking flour blend that contains xanthan gum. I’ve used Bob’s Red Mill with great results. The texture will be slightly more tender, so handle the cake gently when flipping it out of the pan.
Dairy-Free Adaptation: Use vegan butter (I like Miyoko’s) and substitute the buttermilk with 1 cup of unsweetened almond milk mixed with 1 tablespoon of apple cider vinegar. For the ganache, use full-fat coconut cream instead of heavy cream and dairy-free chocolate chips. The cake will be slightly less rich but still delicious.
Extra Chocolatey Version: Add ½ cup of cocoa powder to the dry ingredients and increase the buttermilk by 2 tablespoons. This creates a double-chocolate peanut butter cake that’s intensely fudgy. I made this for a friend’s birthday, and she said it was the best cake she’d ever had.
Peanut Butter Lover’s Version: Swirl ¼ cup of extra peanut butter into the batter just before baking. Drop spoonfuls of peanut butter on top of the batter, then use a knife to gently swirl it through. You’ll get pockets of concentrated peanut butter flavor throughout the cake.
Fall Spice Version: Add 1 teaspoon of cinnamon, ½ teaspoon of nutmeg, and ¼ teaspoon of cloves to the dry ingredients. This gives the cake a warm, autumnal flavor that pairs surprisingly well with the peanut butter and chocolate. I tried this on a whim last October, and it’s become my go-to for Thanksgiving.
Serving & Storage Suggestions
This cake is versatile enough to serve at a casual family dinner or a holiday gathering. Here’s how I like to serve it and store it.
Serving temperature: I prefer this cake at room temperature. The texture is most tender, and the ganache is perfectly set but still soft. If you’ve refrigerated it, let it sit on the counter for 30-45 minutes before serving. For an extra indulgent treat, warm individual slices in the microwave for 10-15 seconds and serve with a scoop of vanilla ice cream.
Presentation ideas: Place the cake on a decorative cake stand or a wooden board for a rustic look. Dust with a little powdered sugar just before serving for a beautiful finish. If you’re serving it for a fall gathering, arrange some cinnamon sticks, whole star anise, or small pumpkins around the base of the cake stand.
Complementary dishes: This cake pairs beautifully with a cup of hot coffee or a cold glass of milk. For a dessert spread, serve it alongside apple crisp, pumpkin pie, or a simple vanilla panna cotta. The peanut butter and chocolate flavors also work well with a drizzle of caramel sauce.
Storage instructions: Store leftover cake in an airtight container at room temperature for up to 3 days. If your kitchen is warm, refrigerate it to prevent the ganache from melting—just bring it back to room temperature before serving. The cake actually tastes better on day two as the flavors meld together.
Freezing: This cake freezes beautifully. Wrap the completely cooled cake (without ganache) tightly in plastic wrap, then in a layer of aluminum foil. Freeze for up to 3 months. When you’re ready to serve, thaw the cake overnight in the refrigerator, then make the ganache fresh and glaze it. I’ve done this for holiday prep, and no one can tell it was frozen.
Nutritional Information & Benefits
Let’s be real—this is an indulgent dessert, and it’s meant to be enjoyed as a treat. But there are a few nutritional bright spots worth mentioning.
Estimated nutritional values per slice (based on 12 servings):
- Calories: 485
- Total Fat: 27g
- Saturated Fat: 12g
- Cholesterol: 65mg
- Sodium: 320mg
- Total Carbohydrates: 56g
- Dietary Fiber: 3g
- Sugars: 38g
- Protein: 9g
Health benefits of key ingredients: Peanut butter provides protein, healthy fats, and vitamin E, which supports skin health. Dark chocolate (from the ganache) contains antioxidants called flavonoids that may support heart health. Eggs provide high-quality protein and essential vitamins like B12 and D. The buttermilk adds calcium and probiotics for digestive health.
Dietary considerations: This recipe contains gluten, dairy, eggs, and peanuts. For a gluten-free version, see the variations section above. For a dairy-free version, use the adaptations I shared earlier. Unfortunately, there’s no good way to make this cake nut-free since peanut butter is the star ingredient.
My personal perspective: I believe in enjoying dessert without guilt. This cake is made with real ingredients, and it’s meant to be shared with people you love. One slice won’t derail your health goals, and the joy of sharing something delicious with others is good for the soul. Balance is everything.
Conclusion
This Reese’s Peanut Butter Chocolate Fall Cake started as a happy accident, but it’s become one of my most-requested recipes. It’s the kind of cake that makes people close their eyes when they take the first bite—and that’s not something I say lightly. The combination of creamy peanut butter, rich chocolate, and tender crumb is just right, and the chopped Reese’s cups add little pockets of joy throughout.
I love that this cake feels special enough for a holiday but simple enough for a random Tuesday. It doesn’t require any fancy techniques or hard-to-find ingredients. It’s just good baking, made with care and a little bit of peanut butter obsession. Whether you’re making it for Thanksgiving, a potluck, or just because it’s fall and you want something cozy, I think you’ll love it as much as I do.
If you make this cake, I’d love to hear about it. Leave a comment below and let me know how it turned out—did you add any twists? Did your family fight over the last slice? Share your photos on Pinterest and tag me so I can see your beautiful creations. Happy baking, friends!
Frequently Asked Questions
Can I use natural peanut butter in this recipe?
I don’t recommend it. Natural peanut butter that separates can make the cake oily and dense. Stick with processed creamy peanut butter like Jif or Skippy for the best texture. If you only have natural peanut butter, stir it very well and reduce the oil in the recipe by 1 tablespoon.
How do I know when the cake is done baking?
Insert a toothpick or wooden skewer into the center of the cake. If it comes out with a few moist crumbs (not wet batter), it’s done. The top should also spring back when lightly pressed. Start checking at 45 minutes to avoid overbaking.
Can I make this cake in a different pan?
Absolutely. A 9×13-inch baking dish works well—just reduce the baking time to 30-35 minutes. You can also use two 9-inch round cake pans for a layer cake; bake for 25-30 minutes. Adjust your cooling and glazing method accordingly.
Why did my cake stick to the bundt pan?
This usually happens when the pan isn’t greased thoroughly enough. Use a baking spray that contains flour, and make sure you get into all the ridges. Let the cake cool in the pan for exactly 15 minutes before flipping—too short and it’ll break, too long and it’ll stick.
Can I freeze the cake with the ganache already on it?
I recommend freezing the cake without the ganache. The ganache can become grainy when thawed. Freeze the unglazed cake, then make fresh ganache when you’re ready to serve. If you’re in a hurry, you can freeze the glazed cake, but the texture won’t be as perfect.
Pin This Recipe!
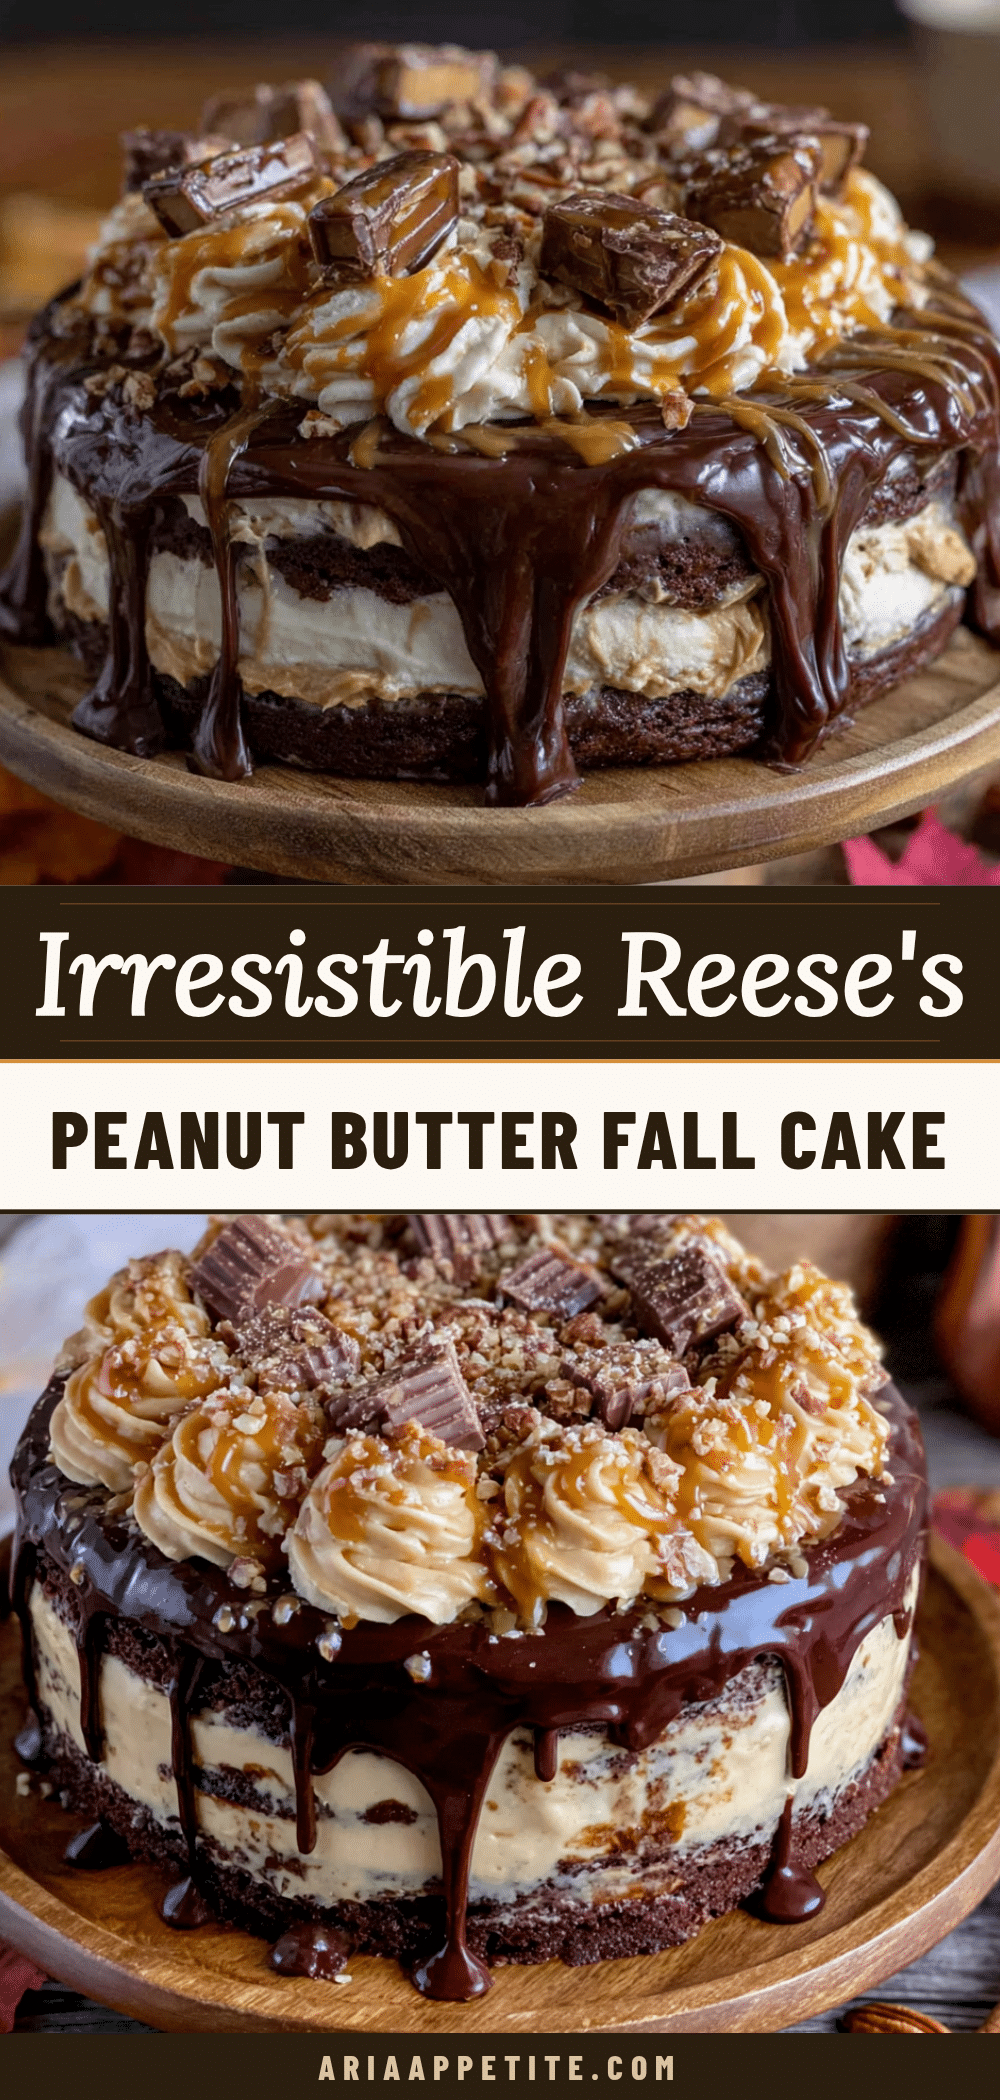
Best Reeses Peanut Butter Chocolate Fall Cake Recipe
A rich and moist peanut butter chocolate cake with chopped Reese’s cups and a silky chocolate ganache. This happy accident turned into a fall favorite that’s perfect for Thanksgiving, potlucks, or cozy autumn gatherings.
- Prep Time: 20 minutes
- Cook Time: 50 minutes
- Total Time: 1 hour 10 minutes
- Yield: 12 servings 1x
- Category: Dessert
- Cuisine: American
Ingredients
- 2 cups (240g) all-purpose flour
- 1 ½ cups (300g) granulated sugar
- ½ cup (100g) packed brown sugar
- 1 ½ teaspoons baking powder
- ½ teaspoon baking soda
- ½ teaspoon salt
- ½ cup (113g) unsalted butter, softened
- ½ cup (130g) creamy peanut butter (e.g., Jif or Skippy)
- ¼ cup (60ml) vegetable oil
- 2 large eggs, room temperature
- 2 teaspoons vanilla extract
- 1 cup (240ml) buttermilk
- 1 cup (175g) semi-sweet chocolate chips
- ½ cup (120ml) heavy cream
- 1 tablespoon (14g) unsalted butter
- 1 cup chopped Reese’s peanut butter cups (about 6–8 regular cups)
- ¼ cup mini Reese’s pieces (optional)
Instructions
- Preheat oven to 350°F (175°C). Generously spray a 10-cup bundt pan with non-stick baking spray containing flour.
- In a medium bowl, whisk together flour, baking powder, baking soda, and salt for about 20 seconds.
- In a large mixing bowl, beat softened butter, granulated sugar, and brown sugar on medium speed until light and fluffy, about 3-4 minutes. Scrape down sides halfway through.
- Add peanut butter and vegetable oil; beat on medium speed until fully combined and smooth, about 1 minute.
- Add eggs one at a time, beating well after each addition. Add vanilla extract and beat until combined.
- With mixer on low speed, add dry ingredients and buttermilk alternately, starting and ending with dry ingredients (1/3 dry, 1/2 buttermilk, 1/3 dry, remaining buttermilk, last 1/3 dry). Mix just until combined. Fold batter gently with a spatula.
- Gently fold in 1 cup chopped Reese’s peanut butter cups.
- Spoon batter into prepared pan and spread evenly. Tap pan on counter to release air bubbles.
- Bake for 45-55 minutes, until a toothpick inserted in center comes out with a few moist crumbs. Top should be golden and spring back when touched.
- Cool cake in pan on a wire rack for exactly 15 minutes. Invert onto a serving plate and lift pan off. Cool completely, about 1-2 hours.
- Make ganache: Place chocolate chips in a heat-safe bowl. Heat heavy cream in a small saucepan over medium heat until it just simmers (small bubbles around edges). Pour hot cream over chocolate; let sit 2 minutes, then whisk until smooth. Add 1 tablespoon butter and whisk until glossy. Let cool 5-10 minutes until slightly thickened but pourable.
- Pour ganache over cooled cake, letting it drip down sides. Immediately sprinkle remaining chopped Reese’s cups and mini Reese’s pieces on top. Let sit 30 minutes for ganache to set.
Notes
Use room temperature ingredients for best results. Do not overmix batter. Grease bundt pan thoroughly with flour-based baking spray. Let cake cool in pan exactly 15 minutes before inverting. For a gluten-free version, use a 1:1 gluten-free flour blend with xanthan gum. For dairy-free, use vegan butter, almond milk with apple cider vinegar for buttermilk, and coconut cream for ganache. Cake tastes even better the next day.
Nutrition
- Serving Size: 1 slice
- Calories: 485
- Sugar: 38
- Sodium: 320
- Fat: 27
- Saturated Fat: 12
- Carbohydrates: 56
- Fiber: 3
- Protein: 9
Keywords: Reese's cake, peanut butter chocolate cake, fall cake, bundt cake, chocolate ganache, peanut butter dessert, easy cake recipe