Love this? Save it for later!
Share the inspiration with your friends
I was at the community garden last fall, up to my elbows in squash vines, when Mrs. Gable finally spoke. She’d been watching me struggle with a particularly stubborn butternut for a good five minutes before she set down her watering can. “You’re fighting it,” she said, not unkindly. “Come inside. I’ll show you something that’s actually worth the effort.” I followed her into her tiny, cluttered kitchen, expecting some kind of heirloom secret passed down through generations. Instead, she pulled out a box of Jiffy corn muffin mix and a tub of sour cream from her fridge. I think my face must have shown my disappointment. She just laughed. “Don’t you look at me like that,” she said. “This here is the dish that’s won me more potluck ribbons than any fancy French thing I’ve ever made.” And she was right. That first bite of her Jiffy corn casserole with sour cream was a revelation—creamy, sweet, with that golden, slightly crisp top that everyone fights over. I’ve made it for every gathering since, and honestly, it’s never let me down.
Why You’ll Love This Recipe
Let’s be real: you’re here because you need a side dish that disappears before the main course even hits the table. This Jiffy corn casserole with sour cream is that dish. It’s the one people hover around, asking for the recipe before they’ve even finished their first helping. I’ve tested this version more times than I can count, tweaking the ratios until it hit that perfect sweet-and-savory balance. It’s not just good—it’s the kind of thing that makes you close your eyes after the first bite.
- Quick & Easy: Mix, pour, bake. That’s it. You’ve got about 10 minutes of hands-on work, and the oven does the rest.
- Simple Ingredients: Five things, most of which are probably in your pantry right now. No special trips to the fancy grocery store.
- Perfect for Hosting: This is your secret weapon for Thanksgiving, Easter, potlucks, or any dinner party where you want to look like you tried harder than you actually did.
- Crowd-Pleaser: Kids love the sweetness. Adults love the creamy texture. Everyone loves that buttery, golden crust.
- Unbelievably Delicious: The sour cream keeps it ridiculously moist, while the whole kernel corn gives it a little pop of texture. It’s comfort food, reimagined for the modern table.
What makes this version different from all the others? It’s the ratio. I spent a whole month testing different amounts of sour cream and butter, and this is the sweet spot. It’s not too wet, not too dry—just perfectly spoonable, with a top that gets beautifully browned without burning. You can prep it the night before, too, which is a lifesaver when you’ve got guests coming and a million other things to do.
What Ingredients You Will Need
This recipe uses simple, honest ingredients to deliver a side dish that punches way above its weight. The magic is in how these five things work together—the sweetness of the cornbread mix, the tang of the sour cream, the richness of the butter. It’s a beautiful little alchemy.
- 2 boxes (8.5 oz each) Jiffy Corn Muffin Mix – I know, I know, it’s from a box. But Mrs. Gable was right: this stuff has a sweetness and a fine texture that’s hard to replicate from scratch. Don’t swap it for another brand unless you’re prepared for a different result. The Jiffy mix is the foundation here.
- 1 can (15.25 oz) whole kernel corn, drained – You want the whole kernels, not creamed corn. The whole kernels give you those little bursts of sweetness in every bite. I usually go with Libby’s or Green Giant, but any brand works. Just make sure you drain it really well—nobody wants a watery casserole.
- 1 can (14.75 oz) cream-style corn – This is the secret to the creamy, almost pudding-like texture in the middle. It blends into the batter and keeps everything moist. Don’t skip it, and don’t drain it. The liquid is your friend here.
- 1 cup (8 oz) sour cream – Full-fat is best for texture and flavor, but I’ve used light sour cream in a pinch and it still works. It just won’t be quite as lush. Let it come to room temperature before mixing so it blends in smoothly. I prefer Daisy or Breakstone’s for their thickness.
- 1/2 cup (1 stick) unsalted butter, melted – Salted butter will work if that’s all you have, just cut the salt in the mix if you’re worried. I like Kerrygold for the richness, but honestly, any good butter does the trick. Let it cool slightly so it doesn’t cook the eggs when you mix everything together.
Optional add-ins: A pinch of black pepper for a little heat, or a handful of shredded cheddar cheese on top in the last 5 minutes of baking. I’ve done both, and they’re lovely, but the classic version is perfect as is.
Equipment Needed
Nothing fancy here. You probably have all of this in your kitchen right now.
- 9×13-inch baking dish – Glass or ceramic works best. Metal can work, but it might brown the bottom faster. I’ve got an old Pyrex dish that’s seen more casseroles than I can count, and it’s perfect.
- Large mixing bowl – Big enough to hold everything without splashing. I use a big ceramic one my sister gave me.
- Whisk or wooden spoon – A whisk gets things smoother, but a wooden spoon works just fine. I usually start with a whisk and finish with a spatula to scrape the sides.
- Measuring cups and spoons – For the sour cream and butter. Though honestly, I just eyeball the butter stick now.
- Can opener – Obvious, but you’d be surprised.
- Non-stick cooking spray or butter – To grease the dish. Don’t skip this, or you’ll be scraping golden bits off the bottom for hours.
If you don’t have a 9×13, you can use a 10-inch cast iron skillet. It’ll bake a little faster and give you an even crispier edge. Just keep an eye on it.
Preparation Method
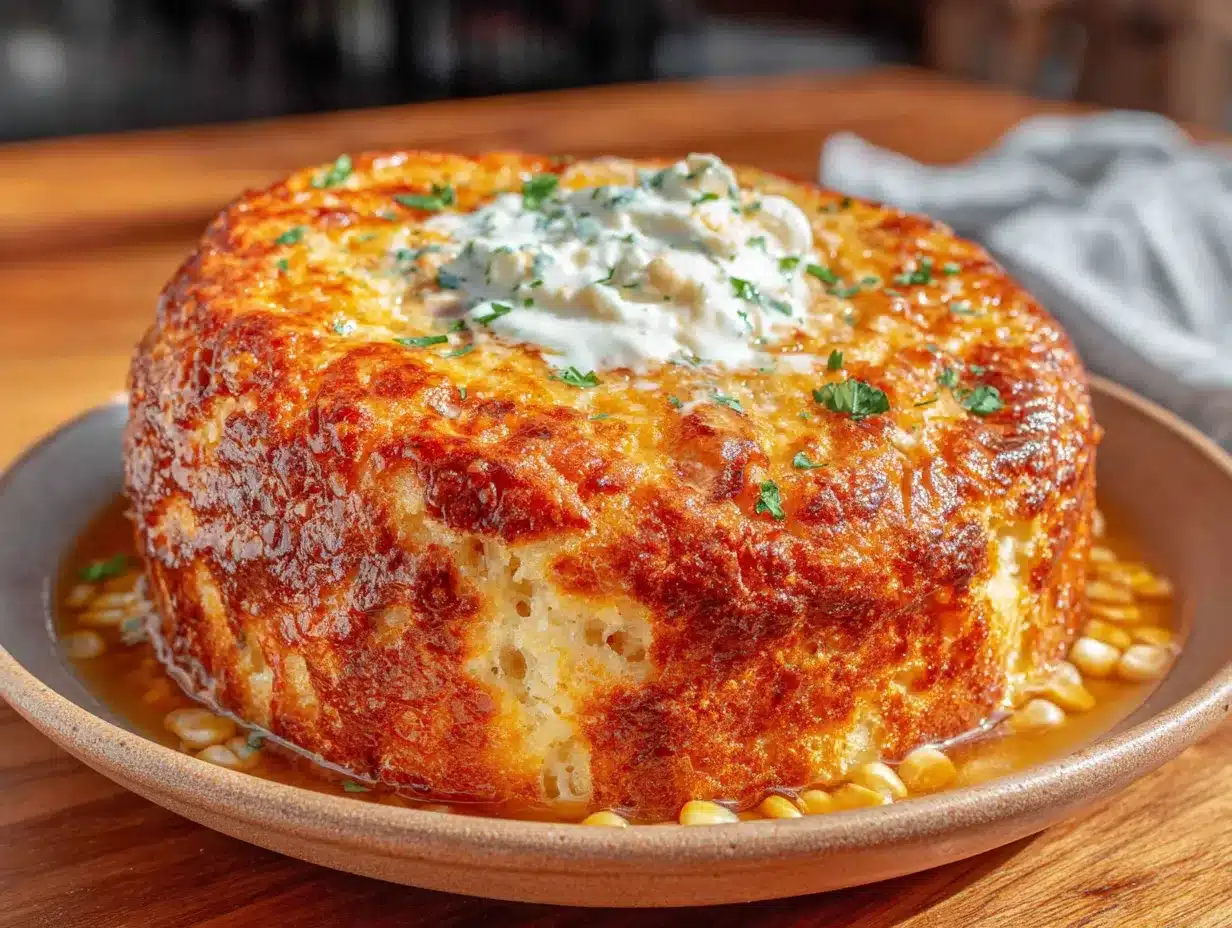
This is the easy part. I mean it. You’re maybe 10 minutes away from popping this in the oven.
- Preheat your oven to 350°F (175°C). Get this going first so it’s nice and hot when you’re ready. While it’s heating, grease your 9×13 baking dish with butter or non-stick spray. I use butter because, well, butter.
- Melt your butter. Pop that half-cup (1 stick) in a microwave-safe bowl and nuke it for 30-second intervals until it’s just melted. Set it aside to cool for a minute. You don’t want it hot enough to scramble an egg if you’re using them—though this recipe doesn’t call for eggs, so you’re safe. Still, let it cool.
- Open your cans. Drain the whole kernel corn really well. I dump it in a small sieve and shake it a few times. Don’t drain the cream-style corn—you want all that liquid gold. Set both aside.
- Mix the dry ingredients. In your large bowl, dump both boxes of Jiffy corn muffin mix. Break up any clumps with your whisk or fork. It should look like fine, yellow sand.
- Add the wet ingredients. Pour in the melted butter, the sour cream, the drained whole kernel corn, and the undrained cream-style corn. Stir it all together with your whisk or wooden spoon until just combined. A few lumps are fine—overmixing will make it tough. You’re looking for a thick, slightly lumpy batter that smells like sweet cornbread.
- Pour into the dish. Scrape the batter into your greased 9×13 and spread it even with a spatula. It’ll be thick, so take your time. Give the dish a gentle tap on the counter to settle any air bubbles.
- Bake for 45-55 minutes. Place it on the middle rack. At 45 minutes, start checking. The top should be golden brown and a toothpick inserted in the center should come out clean or with just a few moist crumbs. The edges will pull away from the dish slightly. If the top is browning too fast but the center is still jiggly, tent it loosely with foil for the last 10 minutes.
- Let it rest. This is the hardest part. Let the casserole sit for at least 10 minutes before serving. It needs that time to set up, otherwise you’ll get a soupy mess. I know you want to dig in, but trust me on this one.
My personal tip: If you’re making this for a big gathering, double the recipe and use a half-sheet pan. It bakes faster (about 30-35 minutes) and gives you more of that crispy edge per serving. I did this for Thanksgiving last year and it was the first thing to run out.
Cooking Tips & Techniques
I’ve made this Jiffy corn casserole with sour cream at least two dozen times, and I’ve learned a few things the hard way. Let me save you the trouble.
Don’t overmix the batter. I know it’s tempting to keep stirring until it’s perfectly smooth, but that develops the gluten in the corn muffin mix and makes the casserole tough and dense. You want it tender and almost custard-like. Stop mixing as soon as the dry streaks disappear. A few lumps are your friends here.
Let your sour cream come to room temperature. Cold sour cream doesn’t blend in as smoothly, and you’ll end up with little white pockets in the baked casserole. It won’t ruin it, but it’s not as pretty. Take it out of the fridge when you start preheating the oven, and it’ll be ready by the time you need it.
Watch your oven. Every oven runs a little differently. My old gas oven runs hot, so I start checking at 40 minutes. A friend of mine has an electric oven that’s always 25 degrees cooler than it says, so hers takes a full hour. Get to know your oven’s quirks. The toothpick test is your best friend.
I once forgot the butter. I was rushing to get this together for a potluck, and I completely spaced on the melted butter. The casserole came out dry and sad. I tried to salvage it with extra butter on top, but it wasn’t the same. Don’t be me. Double-check your ingredients before you start mixing.
Multitasking tip: While this bakes, you can prep your main dish or set the table. It’s pretty forgiving in the oven—if it finishes a few minutes early, just cover it with foil and it’ll stay warm for a good 20 minutes. Perfect for when you’re juggling multiple dishes.
Variations & Adaptations
This recipe is a great base for playing around. Here are a few ways I’ve adapted it over the years.
- Cheesy Corn Casserole: Stir in 1 cup of shredded cheddar cheese into the batter before baking. Sprinkle another half cup on top in the last 5 minutes. It’s rich and a little decadent, perfect for when you want to impress.
- Spicy Southwest Version: Add a drained can of diced green chiles and a pinch of cumin and chili powder to the batter. Top with a little chopped cilantro before serving. I made this for a taco night and it was a huge hit.
- Bacon Lover’s Twist: Cook 4-5 slices of bacon until crispy, crumble them, and stir half into the batter. Sprinkle the rest on top before baking. Because everything is better with bacon, right?
- Gluten-Free Option: Use a gluten-free cornbread mix instead of Jiffy. I’ve tested this with Bob’s Red Mill gluten-free cornbread mix, and it works well. You might need to add a tablespoon or two of milk to get the right consistency.
- Dairy-Free Adaptation: Swap the butter for a plant-based butter and use a dairy-free sour cream. I’ve used Kite Hill’s sour cream alternative with good results. The texture will be slightly less creamy, but it’s still delicious.
My personal favorite variation? I add a tablespoon of honey and a pinch of cayenne pepper. The sweetness and heat play off each other beautifully. It’s become my go-to for holiday dinners.
Serving & Storage Suggestions
This Jiffy corn casserole with sour cream is best served warm, straight from the oven. Let it rest for that 10 minutes, then scoop it out with a large spoon. The top should be golden and slightly crisp, the inside soft and creamy. It’s a beautiful thing.
What to serve alongside: This is a natural partner for honey glazed ham, roasted turkey, or a simple roast chicken. It also works great with BBQ pulled pork or even a hearty chili. For a lighter meal, serve it with a big green salad and some grilled vegetables. It’s versatile enough to fit almost any menu.
Storage: Leftovers keep well in an airtight container in the fridge for up to 4 days. The texture will firm up a bit, but it’s still delicious. To reheat, pop individual portions in the microwave for 30-45 seconds, or reheat the whole dish in a 350°F oven for 10-15 minutes. If it seems dry, add a little pat of butter on top before reheating.
Freezing: You can freeze this casserole! Bake it fully, let it cool completely, then wrap it tightly in plastic wrap and foil. It’ll keep for up to 3 months. To serve, thaw it in the fridge overnight and reheat in a 350°F oven until warmed through. I’ve done this for holiday prep, and it’s a lifesaver.
Flavor development: Honestly, this casserole is even better the next day. The flavors meld together overnight, and the texture becomes even more cohesive. If you can resist eating it all the first night, you’re in for a treat the next day.
Nutritional Information & Benefits
Let’s be honest: this is comfort food, not health food. But it’s made with real ingredients, and there are a few bright spots worth mentioning.
Estimated per serving (based on 12 servings): About 280 calories, 14g fat, 36g carbs, 4g protein, and 12g sugar. These are rough estimates—actual values depend on your specific ingredients and serving size.
Health highlights: Corn is a good source of fiber and antioxidants like lutein and zeaxanthin, which are good for eye health. Sour cream provides calcium and a little protein. The butter adds vitamin A. It’s not a superfood by any stretch, but it’s not empty calories either.
Dietary considerations: This recipe is vegetarian. For a gluten-free version, use a gluten-free cornbread mix. For a lower-fat option, use light sour cream and reduce the butter to 1/4 cup. The texture will change, but it’ll still be tasty.
Potential allergens: Contains dairy and gluten. If you’re serving guests with allergies, make sure to label it clearly.
My personal take? I don’t make this every week. But for special occasions, it’s absolutely worth the indulgence. Food is about joy and connection, and this dish delivers both in spades.
Conclusion
This Jiffy corn casserole with sour cream is the kind of recipe that becomes a family legend. It’s the dish people ask for by name at every gathering. It’s simple enough for a weeknight but special enough for a holiday table. And honestly, it’s just plain delicious.
I love that this recipe came from a neighbor who didn’t try to impress me with fancy techniques or exotic ingredients. She just shared what she knew would work. That’s the best kind of cooking, isn’t it? Real food, shared freely, made with love.
I hope you’ll try this for your next get-together. And when you do, I’d love to hear about it. Did you add cheese? Throw in some jalapeños? Double the batch for a crowd? Drop a comment below and share your version. And don’t forget to pin this recipe for later—you’ll want it handy the next time you’re asked to bring a side dish.
Happy cooking, friends. You’ve got this.
Frequently Asked Questions
Can I make this Jiffy corn casserole ahead of time?
Absolutely. You can assemble the batter, pour it into the greased dish, cover it, and refrigerate for up to 24 hours before baking. You might need to add 5-10 minutes to the baking time since you’re starting from cold. This is a great trick for holiday meal prep.
Can I use frozen corn instead of canned?
Yes, you can. Thaw about 1.5 cups of frozen corn first and drain off any excess liquid. It won’t be quite as sweet as canned whole kernel corn, so you might want to add a teaspoon of sugar to the batter. I’ve done this in a pinch and it worked fine.
Why is my corn casserole runny in the middle?
This usually means it’s underbaked. Every oven is different, so rely on the toothpick test rather than the timer. If the top is browning too fast, cover it loosely with foil and keep baking until the center is set. Also, make sure you drained your whole kernel corn well—excess liquid can make things soupy.
Can I add eggs to this recipe?
You can, but you don’t need to. The Jiffy mix already has leavening agents, and the sour cream and butter provide enough structure. If you add an egg, the casserole will be a little firmer and more cake-like. I prefer the softer, creamier texture without eggs, but it’s a matter of personal taste.
How do I get a crispier top on my corn casserole?
For a crunchier top, bake it uncovered for the full time. You can also sprinkle a little extra cornmeal or panko breadcrumbs on top before baking. If you want it really golden, switch the oven to broil for the last 1-2 minutes, but watch it carefully so it doesn’t burn.
Pin This Recipe!

Best Jiffy Corn Casserole with Sour Cream (Easy 5-Ingredient Side)

This Jiffy corn casserole with sour cream is a creamy, sweet, and golden-topped side dish that’s perfect for potlucks, holidays, or any gathering. With just five simple ingredients and 10 minutes of prep, it’s an easy crowd-pleaser that disappears fast.
- Prep Time: 10 minutes
- Cook Time: 50 minutes
- Total Time: 1 hour
- Yield: 12 servings 1x
- Category: Side Dish
- Cuisine: American
Ingredients
- 2 boxes (8.5 oz each) Jiffy Corn Muffin Mix
- 1 can (15.25 oz) whole kernel corn, drained
- 1 can (14.75 oz) cream-style corn, undrained
- 1 cup (8 oz) sour cream, room temperature
- 1/2 cup (1 stick) unsalted butter, melted and cooled slightly
Instructions
- Preheat your oven to 350°F (175°C). Grease a 9×13-inch baking dish with butter or non-stick spray.
- Melt the butter in a microwave-safe bowl in 30-second intervals. Set aside to cool slightly.
- Drain the whole kernel corn well in a sieve. Do not drain the cream-style corn.
- In a large mixing bowl, combine both boxes of Jiffy corn muffin mix. Break up any clumps with a whisk or fork.
- Add the melted butter, sour cream, drained whole kernel corn, and undrained cream-style corn to the dry mix. Stir with a whisk or wooden spoon until just combined. A few lumps are fine; do not overmix.
- Pour the batter into the greased baking dish and spread evenly with a spatula. Tap the dish gently on the counter to settle air bubbles.
- Bake on the middle rack for 45-55 minutes, until the top is golden brown and a toothpick inserted in the center comes out clean or with a few moist crumbs. If the top browns too quickly, tent loosely with foil for the last 10 minutes.
- Let the casserole rest for at least 10 minutes before serving to allow it to set.
Notes
For a crispier top, bake uncovered for the full time or broil for the last 1-2 minutes. The casserole can be assembled up to 24 hours ahead and refrigerated; add 5-10 minutes to baking time. Leftovers keep in the fridge for up to 4 days and can be frozen for up to 3 months. For a gluten-free version, use a gluten-free cornbread mix. For a dairy-free version, use plant-based butter and dairy-free sour cream.
Nutrition
- Serving Size: 1 serving (1/12 of r
- Calories: 280
- Sugar: 12
- Sodium: 480
- Fat: 14
- Saturated Fat: 8
- Carbohydrates: 36
- Fiber: 2
- Protein: 4
Keywords: Jiffy corn casserole, corn casserole with sour cream, easy corn side dish, 5-ingredient casserole, potluck side dish, Thanksgiving side dish, cornbread casserole


