Love this? Save it for later!
Share the inspiration with your friends
It was 11:47 PM on a random Wednesday in October, and I had a sudden, undeniable urge to make something that looked like it belonged in a haunted house. I wasn’t hosting a party. I didn’t even have guests coming. But I had a block of cream cheese that was about to expire, a bag of shredded mozzarella, and this wild idea that wouldn’t let me sleep. I didn’t have any fancy Halloween cookie cutters or creepy molds, but I had a squeeze bottle of sriracha and a bag of pretzel sticks. Honestly, that was enough to get me started.
The thing about late-night cooking is that the usual rules sort of fall away. You’re not worrying about impressing anyone. You’re just following a weird, wonderful impulse. I remember standing in my kitchen, the only light coming from the open fridge, thinking, “What if I made a cheese ball, baked it until it was all gooey and golden, and then… made it look like a spider web?” It sounded ridiculous, but also kind of brilliant. I mean, what’s Halloween without a little theatrical cheese?
Maybe you’ve been there—struck by a recipe idea that feels just a little bit crazy. This Perfect Spider Web Baked Cheese Ball with Crackers was born from that very moment. It’s the appetizer that makes people stop, stare, and then grab a cracker before you can even say “boo.” It stayed with me because it’s not just a pretty face; it’s genuinely, ridiculously good. And let me tell you, watching someone’s face light up when they break through that creepy web to get to the cheese? That’s the good stuff.
Why You’ll Love This Recipe
I have tested this recipe more times than I care to admit, and I can tell you with absolute certainty: this is the Halloween appetizer that wins the night. It’s not just about the spooky look—though that’s a huge part of the fun. It’s about the fact that it tastes incredible and is surprisingly simple to pull off.
- Quick & Easy: This whole thing comes together in about 30 minutes. The prep is a breeze, and the oven does most of the work. Perfect for when you’re juggling costume prep and last-minute decorations.
- Simple Ingredients: You probably have most of these in your kitchen right now. Cream cheese, mozzarella, a few seasonings—nothing that requires a special trip to a fancy grocery store.
- Perfect for Halloween Parties: Whether it’s a spooky soirée, a classroom treat, or just a fun movie night, this cheese ball is the star of the show. It’s a guaranteed conversation starter.
- Crowd-Pleaser: I have watched kids and adults alike go back for thirds. The creamy, savory filling paired with crunchy crackers is a texture and flavor combo that is pure comfort food magic.
- Unbelievably Delicious: Let’s be honest, a lot of themed food looks better than it tastes. Not this one. The blend of cheeses and spices is perfectly balanced, and the baked exterior gets this beautiful, slightly crisp edge that is absolutely next-level.
What makes this recipe different from the dozens of other cheese balls out there is the technique. Baking it transforms the texture from a cold, dense block into a warm, dippable, almost fondue-like experience. And the spider web design? It’s easier than you think. You don’t need to be a pastry artist to pull it off. It’s comfort food reimagined for the spookiest season—faster, easier, and with the same soul-soothing satisfaction that makes you close your eyes after that first bite.
What Ingredients You Will Need
This recipe uses simple, wholesome ingredients to deliver a ton of flavor without any fuss. Most of these are pantry staples, making this a perfect last-minute Halloween treat.
- For the Cheese Ball Base:
- 16 oz cream cheese, softened (I recommend Philadelphia for the creamiest texture)
- 2 cups shredded mozzarella cheese (low-moisture, part-skim works best)
- 1/2 cup grated Parmesan cheese (adds a salty, nutty depth)
- 1 teaspoon garlic powder
- 1/2 teaspoon onion powder
- 1/4 teaspoon black pepper
- 1/4 teaspoon salt
- For the Coating & Spider Web:
- 1 cup crushed pretzel sticks (for that crunchy, salty crust)
- 1/4 cup sour cream (for the web design)
- 1-2 tablespoons mayonnaise (helps the sour cream pipe smoothly)
- Black food coloring gel (for the spider, a tiny drop goes a long way)
- 1 black olive (for the spider’s body)
- 8-10 pretzel sticks (for the spider legs)
- For Serving:
- Assorted crackers (I love a mix of buttery rounds and salty squares)
- Fresh veggie sticks (carrots, celery, bell peppers for a colorful platter)
When choosing your cream cheese, make sure it is truly softened to room temperature. This is the single most important step for a smooth, lump-free mixture. For the mozzarella, I have found that pre-shredded cheese works fine here, but freshly shredded melts even more smoothly. If you want a little kick, you can add 1/4 teaspoon of cayenne pepper to the cheese mixture. Look for a thick, full-fat sour cream for the web—it pipes much better than a low-fat version.
Equipment Needed
You don’t need a lot of fancy tools for this recipe, which is part of its charm. Here’s what you’ll need to pull it off:
- Large Mixing Bowl: For combining all the cheese and seasonings.
- Hand Mixer or Stand Mixer: A hand mixer is perfect for getting the cream cheese super smooth. A sturdy wooden spoon works too, but your arm will get a workout.
- Plastic Wrap: Essential for shaping the cheese ball and keeping it tidy while it chills.
- Baking Sheet: Line it with parchment paper for easy cleanup.
- Piping Bag or Small Ziploc Bag: For drawing the spider web. A Ziploc bag with a tiny corner snipped off works like a charm and is much cheaper than a real piping bag.
- Small Offset Spatula or Butter Knife: For spreading the coating and smoothing the web design.
- Toothpick: For dragging the web lines to create that classic spiderweb effect.
I have made this using just a bowl and a fork in a pinch, and it still turned out great. A stand mixer makes the initial mixing effortless, but it is by no means required. If you don’t have a piping bag, don’t stress—the Ziploc method works perfectly. Just be careful not to cut too big of a hole, or your web lines will be too thick.
Preparation Method
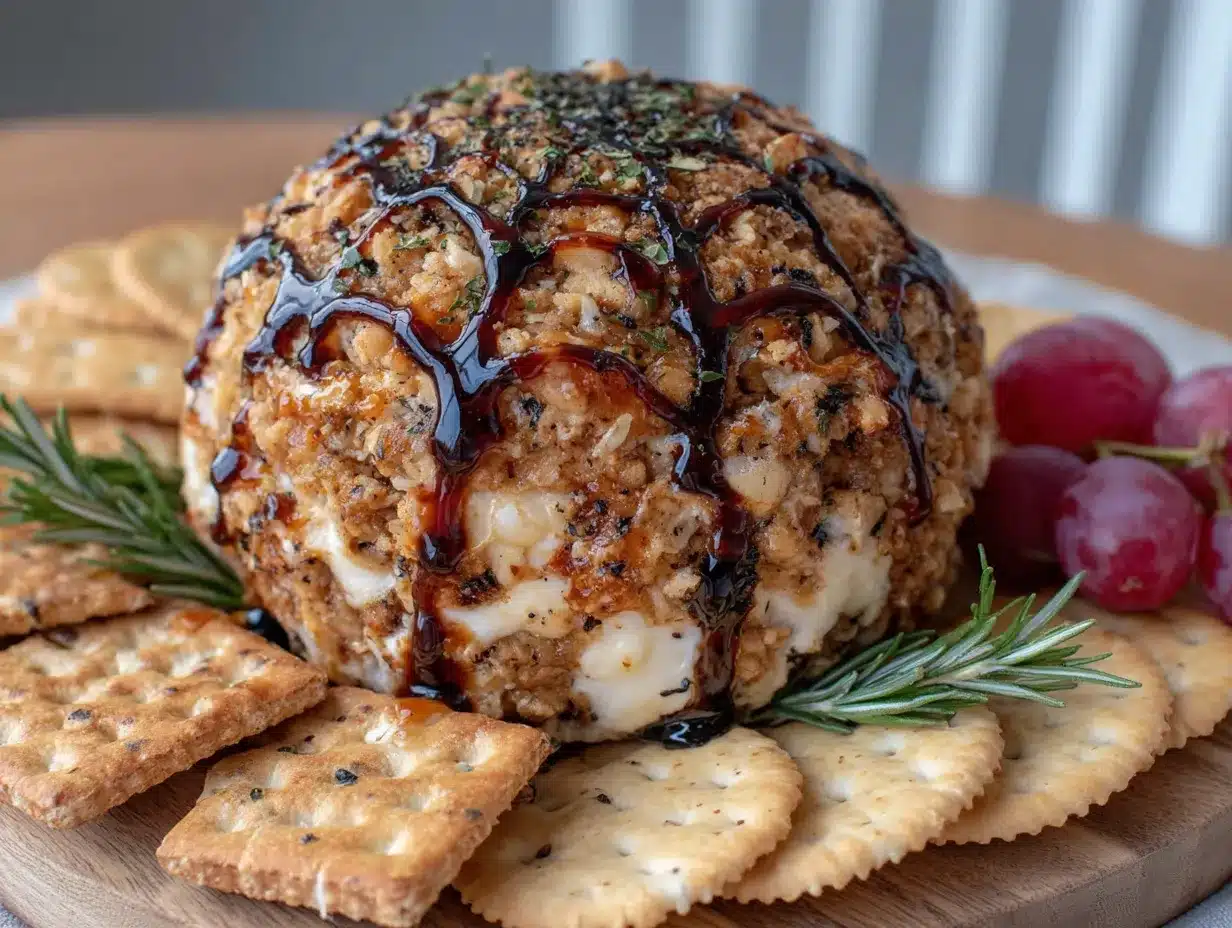
Let’s get to the fun part. Follow these steps, and you will have a show-stopping appetizer that looks like it took hours.
- Preheat & Prep: Preheat your oven to 375°F (190°C). Line a baking sheet with parchment paper. This makes cleanup a breeze.
- Make the Cheese Mixture: In a large mixing bowl, combine the softened cream cheese, shredded mozzarella, grated Parmesan, garlic powder, onion powder, black pepper, and salt. Using a hand mixer on medium speed, beat everything together until it is completely smooth and well combined. This should take about 2-3 minutes. Scrape down the sides of the bowl once to ensure everything is incorporated.
- Shape the Cheese Ball: Lay out a large piece of plastic wrap on your counter. Scoop the cheese mixture onto the center of the plastic wrap. Gather the edges of the wrap and twist them tightly at the top, shaping the mixture into a tight, round ball. You want it to be as compact as possible so it holds its shape. Refrigerate the wrapped cheese ball for at least 30 minutes. This is a crucial step—it firms up the mixture so it doesn’t spread into a puddle when baked.
- Coat in Pretzel Crust: While the cheese ball chills, crush your pretzel sticks into fine crumbs. You can do this in a food processor or by placing them in a Ziploc bag and smashing them with a rolling pin. I prefer a mix of fine crumbs and a few slightly larger pieces for texture. Remove the cheese ball from the fridge and unwrap it. Gently roll it in the pretzel crumbs, pressing the crumbs into the surface until it is completely covered.
- Bake the Cheese Ball: Place the coated cheese ball on your prepared baking sheet. Bake for 15-18 minutes, or until the cheese ball is hot and starting to get golden brown on the outside. The center should be soft and slightly jiggly when you gently shake the pan. Do not overbake, or the cheese ball will become too runny.
- Make the Spider Web Sauce: While the cheese ball bakes, make the web mixture. In a small bowl, whisk together the sour cream and mayonnaise until smooth. Transfer this mixture to your piping bag or Ziploc bag.
- Create the Web Design: Once the cheese ball is out of the oven, let it cool for 2-3 minutes—just enough so it’s not molten lava. Starting from the top center, pipe concentric circles of the sour cream mixture around the cheese ball, working your way down to the bottom. It doesn’t have to be perfect! Then, using a toothpick, gently drag from the center outward through the circles, creating the classic spider web spokes. Wipe the toothpick clean between each drag for the cleanest lines.
- Make the Spider: For the spider on top, cut a black olive in half. Use one half for the body. Cut the other half into small slivers for the head. Insert 8 pretzel sticks around the olive body to create the legs. Place the spider right on top of the cheese ball.
- Serve Immediately: Surround your spider web cheese ball with an assortment of crackers and veggie sticks. Serve it while it’s still warm and gooey.
Cooking Tips & Techniques
Over the course of developing this recipe, I have made every mistake in the book so you don’t have to. Here are the key lessons I’ve learned:
The Biggest Mistake: Not Softening the Cream Cheese. I cannot stress this enough. If your cream cheese is cold, you will end up with a lumpy, uneven mixture. It won’t pipe well, and it won’t bake evenly. Leave it out on the counter for at least an hour before you start. If you’re in a rush, cut it into small cubes and microwave it in 10-second bursts until it’s soft.
Chilling is Not Optional. I once tried to skip the chilling step because I was in a hurry. The cheese ball spread out into a flat, sad pancake on the baking sheet. It still tasted good, but it looked nothing like the photo. The 30-minute chill is what gives the cheese ball the structural integrity to hold its shape in the oven.
Don’t Overbake. The goal is a warm, gooey center, not a baked block of cheese. Keep an eye on it in the last few minutes. You want the outside to be golden and the inside to be just starting to soften. If you see cheese starting to ooze out onto the pan, it’s time to pull it out.
Timing is Everything. I like to make the cheese mixture and shape the ball the day before. Then, on the day of the party, all I have to do is coat it, bake it, and decorate it. It takes the stress out of entertaining and makes you look like a total pro.
Variations & Adaptations
This recipe is wonderfully flexible. Here are a few ways I have adapted it for different tastes and dietary needs.
- Spicy Southwest Version: Add 1/2 cup of finely diced pickled jalapeños and 1 teaspoon of cumin to the cheese mixture. Use crushed tortilla chips instead of pretzels for the coating. The web can be made with a mixture of sour cream and hot sauce for an extra kick.
- Herb & Garlic Version: Omit the onion powder and add 2 tablespoons of fresh, finely chopped chives and 1 tablespoon of fresh dill to the cheese mixture. This version is incredibly fresh and pairs beautifully with plain crackers or crostini.
- Gluten-Free Adaptation: This is an easy one. Simply use gluten-free pretzel sticks for the coating and gluten-free crackers for serving. The rest of the ingredients are naturally gluten-free. I have tested this with a few brands, and it works perfectly every time.
- Make it a Meal: Leftover cheese mixture (if you have any!) is incredible stuffed into hollowed-out bell peppers and baked, or spread on a bagel and toasted for a next-level breakfast.
Serving & Storage Suggestions
This cheese ball is best served warm, straight from the oven. The gooey texture is the whole point. I like to place it in the center of a large wooden board or platter and surround it with a colorful array of crackers, pretzel sticks, and fresh veggie sticks like carrots, celery, and bell pepper slices. The crunch of the vegetables is a perfect counterpoint to the rich, creamy cheese.
For a full Halloween spread, pair this with a bowl of spooky pumpkin soup or a platter of mummy pigs in a blanket. It also goes wonderfully with a crisp apple cider or a dry sparkling wine for the adults.
Storage: Leftover baked cheese ball can be stored in an airtight container in the refrigerator for up to 3 days. To reheat, place it in a 350°F (175°C) oven for 5-7 minutes, or until warmed through. The texture won’t be quite as perfect as the first time, but it will still be delicious. I do not recommend freezing the baked cheese ball, as the texture becomes watery and grainy upon thawing.
Interestingly, the flavors actually meld together even more overnight. The leftovers, if you have any, are fantastic cold, spread on a cracker like a savory cheesecake.
Nutritional Information & Benefits
While this is definitely a treat, it does offer some surprising benefits. A single serving (about 1/4 of the cheese ball with crackers) provides a good source of protein and calcium from the cheese. The cream cheese adds a dose of healthy fats that help keep you full and satisfied.
- Estimated per serving: Approximately 280 calories, 18g fat, 12g protein, 15g carbohydrates, 2g fiber.
- Dietary Considerations: This recipe is vegetarian. For a gluten-free version, simply use gluten-free pretzels and crackers.
- Potential Allergens: Contains dairy (milk) and gluten (from the pretzels and crackers).
I am not a nutritionist, but I do believe in balance. This is a recipe for celebration, and a little indulgence is part of what makes life fun. Pair it with a big salad or some crunchy veggies to round out the meal.
Conclusion
This Perfect Spider Web Baked Cheese Ball with Crackers is more than just a Halloween appetizer—it’s an experience. It’s the dish that gets people talking, laughing, and reaching for just one more cracker. It’s proof that you don’t need fancy skills or complicated techniques to create something truly memorable. You just need a little creativity, a few simple ingredients, and the willingness to have fun with your food.
I absolutely love how this recipe brings people together. The moment you set it on the table, everyone’s eyes go wide. It creates that perfect moment of shared delight that is what hosting is all about. I encourage you to make it your own. Change up the spices, try a different coating, or just go wild with the spider web design. There are no rules here.
I would love to hear how yours turns out! Leave a comment below with your spooky creations, tag me in your photos, or share your own twists on the recipe. Happy Halloween, and happy dipping!
Frequently Asked Questions
Can I make this cheese ball ahead of time?
Absolutely! You can prepare the cheese mixture, shape it into a ball, and wrap it tightly in plastic wrap up to 2 days in advance. Keep it in the refrigerator. When you are ready to serve, just coat it in the pretzel crumbs and bake it as directed. This makes party prep so much easier.
My cheese mixture is too sticky to shape. What should I do?
If your mixture feels too soft or sticky, it likely needs more time in the refrigerator. Pop it back in the fridge for another 15-20 minutes. The colder mixture is much easier to handle and shape into a tight ball. If it is still sticky after chilling, you can lightly grease your hands with a little oil to prevent sticking.
Can I use a different type of cheese?
Yes, you can experiment! A sharp cheddar or pepper jack would be fantastic substitutes for some of the mozzarella. Just keep in mind that harder cheeses like Parmesan are key for the savory depth. Avoid using very soft cheeses like brie, as they will make the mixture too wet to hold its shape.
How do I get the spider web to look perfect?
Don’t stress about perfection! The key is to pipe your circles evenly, starting from the center and working out. Then, use a clean toothpick to drag from the center out to the edge. Wipe the toothpick clean after each drag. The sour cream mixture should be thick enough to hold its shape—if it is too thin, add a little more mayonnaise to thicken it.
Can I make this dairy-free?
You can try! Use a high-quality dairy-free cream cheese and shredded dairy-free mozzarella. The texture will be slightly different, and you may need to add a little more starch (like a tablespoon of cornstarch) to the mixture to help it set. I have tested this with a couple of brands, and while it works, the flavor is best with the real deal.
Pin This Recipe!
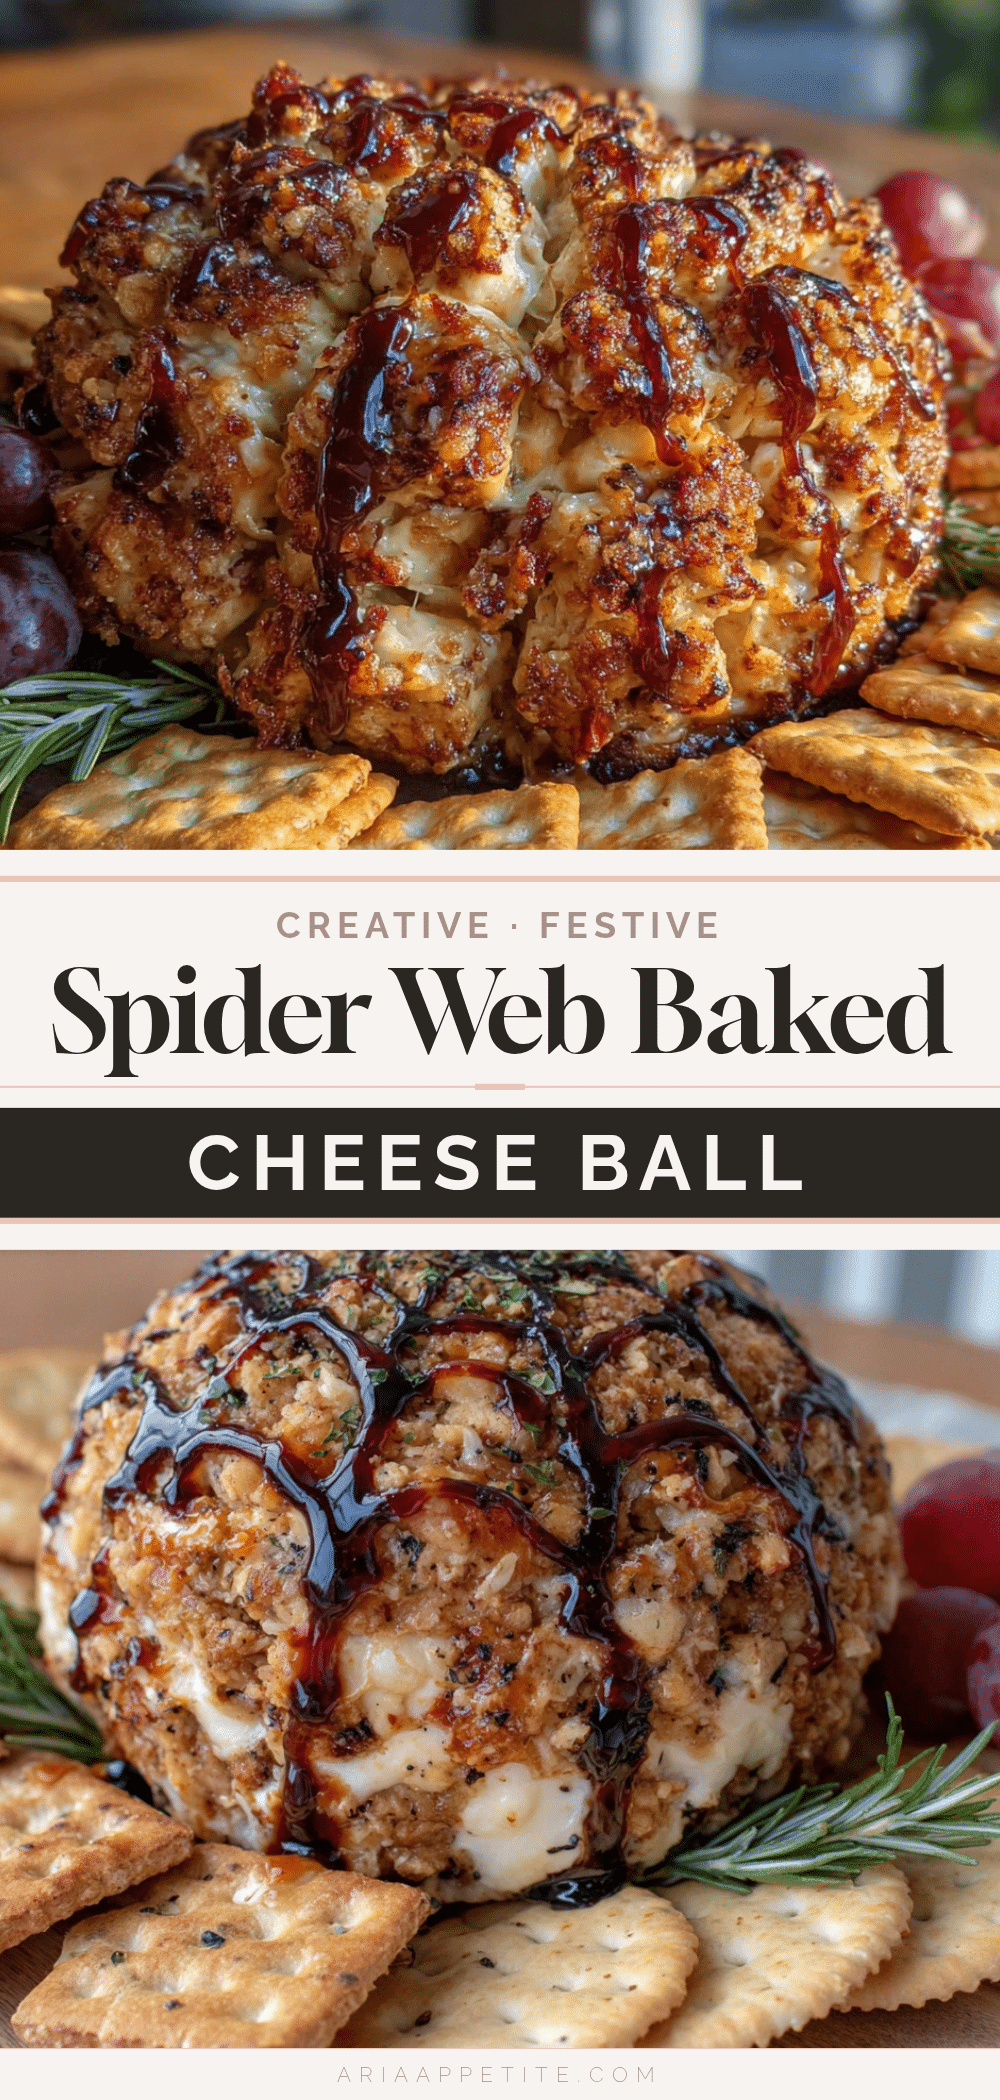
Perfect Spider Web Baked Cheese Ball: Easy Halloween Appetizer
A warm, gooey baked cheese ball with a crunchy pretzel crust, decorated with a sour cream spider web and a pretzel-leg spider. Perfect for Halloween parties, this easy appetizer is a crowd-pleaser that looks spooky and tastes incredible.
- Prep Time: 15 minutes
- Cook Time: 18 minutes
- Total Time: 33 minutes
- Yield: 8 servings 1x
- Category: Appetizer
- Cuisine: American
Ingredients
- 16 oz cream cheese, softened
- 2 cups shredded mozzarella cheese (low-moisture, part-skim)
- 1/2 cup grated Parmesan cheese
- 1 teaspoon garlic powder
- 1/2 teaspoon onion powder
- 1/4 teaspoon black pepper
- 1/4 teaspoon salt
- 1 cup crushed pretzel sticks
- 1/4 cup sour cream
- 1–2 tablespoons mayonnaise
- Black food coloring gel
- 1 black olive
- 8–10 pretzel sticks
- Assorted crackers, for serving
- Fresh veggie sticks (carrots, celery, bell peppers), for serving
Instructions
- Preheat your oven to 375°F (190°C). Line a baking sheet with parchment paper.
- In a large mixing bowl, combine the softened cream cheese, shredded mozzarella, grated Parmesan, garlic powder, onion powder, black pepper, and salt. Using a hand mixer on medium speed, beat everything together until completely smooth and well combined, about 2-3 minutes. Scrape down the sides of the bowl once.
- Lay out a large piece of plastic wrap on your counter. Scoop the cheese mixture onto the center of the plastic wrap. Gather the edges of the wrap and twist them tightly at the top, shaping the mixture into a tight, round ball. Refrigerate the wrapped cheese ball for at least 30 minutes.
- While the cheese ball chills, crush the pretzel sticks into fine crumbs using a food processor or by placing them in a Ziploc bag and smashing with a rolling pin.
- Remove the cheese ball from the fridge and unwrap it. Gently roll it in the pretzel crumbs, pressing the crumbs into the surface until completely covered.
- Place the coated cheese ball on the prepared baking sheet. Bake for 15-18 minutes, or until the cheese ball is hot and starting to get golden brown on the outside. The center should be soft and slightly jiggly.
- While the cheese ball bakes, make the web mixture. In a small bowl, whisk together the sour cream and mayonnaise until smooth. Transfer this mixture to a piping bag or a small Ziploc bag with a tiny corner snipped off.
- Once the cheese ball is out of the oven, let it cool for 2-3 minutes. Starting from the top center, pipe concentric circles of the sour cream mixture around the cheese ball, working your way down to the bottom. Using a toothpick, gently drag from the center outward through the circles, creating the classic spider web spokes. Wipe the toothpick clean between each drag.
- For the spider, cut a black olive in half. Use one half for the body. Cut the other half into small slivers for the head. Insert 8 pretzel sticks around the olive body to create the legs. Place the spider on top of the cheese ball.
- Serve immediately, surrounded by assorted crackers and veggie sticks.
Notes
Make sure cream cheese is truly softened to room temperature for a smooth mixture. Chilling the cheese ball for at least 30 minutes is essential to prevent it from spreading into a pancake during baking. Do not overbake; the center should be soft and jiggly. For a gluten-free version, use gluten-free pretzels and crackers. The cheese ball can be prepared up to 2 days in advance and refrigerated; coat and bake just before serving.
Nutrition
- Serving Size: 1/4 of the cheese ba
- Calories: 280
- Sugar: 3
- Sodium: 450
- Fat: 18
- Saturated Fat: 10
- Carbohydrates: 15
- Fiber: 2
- Protein: 12
Keywords: Halloween appetizer, baked cheese ball, spider web cheese ball, easy Halloween recipe, cream cheese appetizer, party appetizer, spooky snack


