Love this? Save it for later!
Share the inspiration with your friends
It was 11:47 PM on a random Wednesday, and the craving hit me like a freight train. Not for a salad. Not for something virtuous. For s’mores. The gooey, messy, campfire kind that feels like a hug from the inside out. But here’s the thing—I didn’t have a campfire. I didn’t have graham crackers, and honestly, I didn’t have the energy to fire up the oven or stand over a stove. What I did have was a box of chocolate wafers, some marshmallow fluff I’d bought on a whim, and a weird, sleep-deprived idea that maybe, just maybe, I could build a s’mores cake without turning on a single appliance. Let me tell you, when you’re standing in your kitchen at nearly midnight in fuzzy slippers, you start to think differently about what’s possible. I grabbed a springform pan, started layering, and told myself if it flopped, at least no one would witness it but my cat. That cake? It didn’t flop. It became the thing I’ve made more times than I can count, and now I’m sharing it with you—because maybe you’ve been there too, craving something nostalgic but needing it to actually fit into your weeknight reality.
This Lightened-Up No-Bake S’mores Icebox Cake is exactly what it sounds like: all the campfire nostalgia, none of the guilt or the heat. It’s rich, creamy, and deeply satisfying, but made with smarter ingredients and about ten minutes of hands-on effort. It’s the kind of dessert that makes you close your eyes after the first bite, wondering why you ever thought you needed to turn on the oven for something this good.
Why You’ll Love This Recipe
I’ve tested this recipe more times than I’m willing to admit (hello, three batches in one week), and I can confidently say it delivers on every front. Here’s why this one is different:
- Quick & Easy: Comes together in just 10 minutes of active time. No baking, no boiling, no complicated steps.
- Simple Ingredients: You likely have most of these in your pantry right now. No fancy grocery runs required.
- Perfect for Summer (and Year-Round): Great for backyard barbecues, pool parties, or those random Wednesday cravings when you need something sweet.
- Crowd-Pleaser: I’ve served this to kids, adults, and self-proclaimed dessert snobs. It disappears every single time.
- Unbelievably Delicious: The combination of creamy chocolate, fluffy marshmallow, and crunchy graham is pure comfort food magic.
What makes this recipe stand out from the thousands of other icebox cakes out there? It’s the balance. I swapped heavy cream for a lighter whipped topping, used a sugar-reduced chocolate wafer, and added a touch of Greek yogurt to the marshmallow layer for extra creaminess without the sugar crash. It’s not just another version—it’s the version that lets you eat a slice (or two) and still feel great about it.
This is comfort food reimagined. Healthier, faster, but with the same soul-soothing satisfaction that makes you reach for seconds. Perfect for impressing guests without stress, or turning a simple Tuesday into something memorable.
What Ingredients You Will Need
This recipe uses simple, wholesome ingredients to deliver bold flavor and satisfying texture without the fuss. Most are pantry staples, and I’ve included easy swaps where they work best.
For the Chocolate Layer
- 1 ½ cups chocolate wafer crumbs (about 20-25 wafers; I prefer Nabisco Famous Chocolate Wafers for their deep flavor and crisp texture)
- 3 tablespoons unsalted butter, melted (adds richness and helps the crust hold together)
- 1 tablespoon maple syrup (optional, for a touch of natural sweetness; you can also use honey)
For the Marshmallow Cream Layer
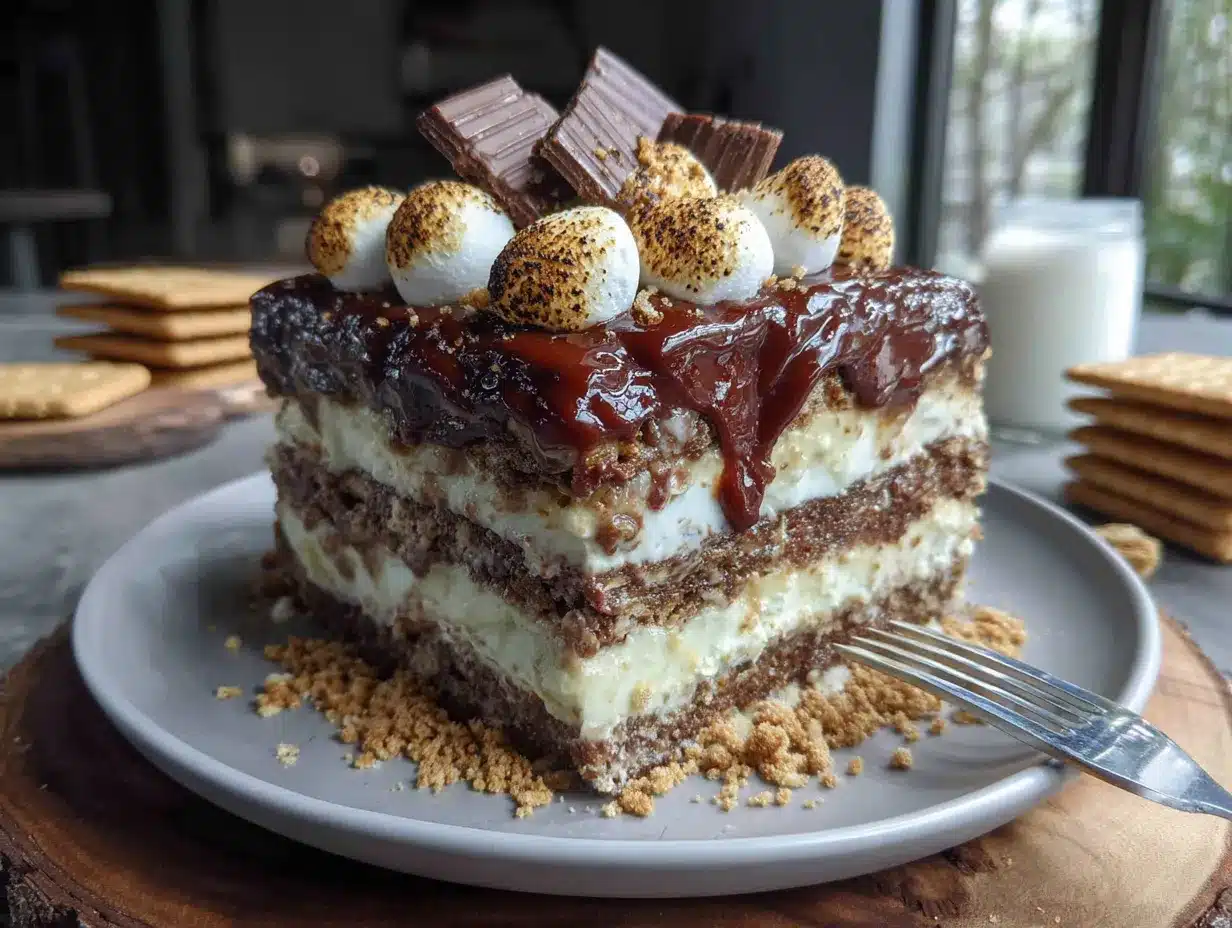
- 1 ½ cups marshmallow fluff (the kind in a jar works perfectly; look for one with real vanilla)
- ½ cup plain Greek yogurt (full-fat or 2% works best for creaminess; dairy-free coconut yogurt works too)
- 1 teaspoon vanilla extract (pure, not imitation, for the best flavor)
- Pinch of salt (balances the sweetness and enhances the chocolate)
For the Whipped Topping Layer
- 2 cups light whipped topping (like Cool Whip Lite or a homemade version with Greek yogurt and powdered sweetener)
- ¼ cup powdered sugar (or a powdered monk fruit blend for lower sugar)
- ½ teaspoon vanilla extract
For Assembly & Topping
- 1 cup crushed graham crackers (about 6-8 full sheets; use gluten-free if needed)
- ¼ cup mini chocolate chips (optional, for extra crunch and chocolate hit)
- 10-12 large marshmallows (for toasting on top, if you want that campfire vibe)
Ingredient Tips: For the chocolate wafers, look for ones with minimal added sugar. I’ve used gluten-free chocolate wafers in the past with great results. If you can’t find marshmallow fluff, you can make your own by melting marshmallows with a splash of water, but the jarred stuff is honestly easier and works beautifully.
Equipment Needed
- 8-inch springform pan (or a deep pie dish; a springform makes removal easier)
- Food processor (for crushing wafers and graham crackers; a zip-top bag and rolling pin works too)
- Medium mixing bowls (at least two)
- Hand mixer or whisk (a hand mixer makes the whipped topping fluffier, but a whisk and some elbow grease works)
- Spatula (for spreading layers evenly)
- Kitchen torch (optional, for toasting marshmallows; you can also use the broiler)
- Plastic wrap (for covering the pan while it chills)
I’ve made this cake with just a bowl and a spoon before, and it worked fine. The springform pan is nice for presentation, but honestly, a regular pie dish works in a pinch. If you don’t have a kitchen torch, just skip the toasted marshmallow topping—it’s still amazing without it.
Preparation Method
This is where the magic happens. Follow these steps, and you’ll have a dessert that looks like you spent hours on it—when really, it took ten minutes.
- Make the chocolate crust. In a food processor, pulse the chocolate wafers until they become fine crumbs. You should have about 1 ½ cups. Transfer to a medium bowl, add the melted butter and maple syrup, and stir until the mixture looks like wet sand. Press this firmly into the bottom of your springform pan. Use the bottom of a glass or measuring cup to really pack it down. Set aside.
- Prepare the marshmallow cream layer. In a clean bowl, combine the marshmallow fluff, Greek yogurt, vanilla extract, and a pinch of salt. Whisk until smooth and creamy. It should be thick but spreadable. If it’s too stiff, add a teaspoon of milk or water to loosen it up. Spread this evenly over the chocolate crust. Pop the pan in the fridge while you make the next layer.
- Whip up the topping. In another bowl, combine the light whipped topping, powdered sugar, and vanilla extract. Use a hand mixer or whisk to beat until soft peaks form—about 2 minutes. You want it light and airy, not stiff. Spread this gently over the marshmallow layer, being careful not to mix the two layers together.
- Layer the graham cracker crunch. Sprinkle the crushed graham crackers evenly over the whipped topping. Press them down very lightly so they stick, but don’t bury them. If you’re using mini chocolate chips, sprinkle those on top now too.
- Add the toasted marshmallows (optional but amazing). If you have large marshmallows, arrange them on top of the graham cracker layer. Use a kitchen torch to toast them until golden and bubbly. If you don’t have a torch, place the pan under the broiler for 30-45 seconds—watch closely so they don’t burn. Let them cool for a minute before moving on.
- Chill, chill, chill. Cover the pan with plastic wrap and refrigerate for at least 6 hours, but overnight is best. This is crucial—the layers need time to set and meld together. I know it’s tempting to dig in, but trust me, patience pays off here.
- Serve and enjoy. When you’re ready, run a knife around the edge of the pan, release the springform, and slice. Serve cold, straight from the fridge. The texture should be creamy, crunchy, and perfectly sliceable.
Pro tip from my late-night test kitchen: If you’re in a hurry, you can speed up the chilling by placing the pan in the freezer for 2 hours instead of the fridge for 6. Just let it sit at room temperature for 5 minutes before slicing.
Cooking Tips & Techniques
I’ve made this cake at least a dozen times, and I’ve learned a few things along the way—mostly from my own mistakes. Here’s what I wish someone had told me:
- Don’t skip the salt. A pinch of salt in the marshmallow layer makes a world of difference. It cuts the sweetness and makes the chocolate taste deeper. I forgot it once, and the cake was noticeably flatter in flavor.
- Press the crust firmly. If your crust is too loose, it will crumble when you slice the cake. Use the bottom of a glass and really pack it down. I’ve had a few crumbly disasters, and they all traced back to a lazy pressing job.
- Let it chill fully. I know I said this already, but it’s worth repeating. The first time I made this, I was impatient and only chilled it for 3 hours. The layers were still soft, and the cake fell apart when I tried to slice it. Overnight chilling gives you those clean, beautiful slices that look professional.
- Toast marshmallows just before serving. If you toast them too early, they’ll deflate and get sticky. Toast them right before you bring the cake to the table for maximum visual impact and that campfire smell.
- Use a wet knife for clean slices. Run your knife under hot water and dry it off between cuts. This prevents the layers from sticking and gives you picture-perfect slices.
Variations & Adaptations
This recipe is wonderfully flexible. Here are some ways to make it your own:
- Gluten-Free Version: Use gluten-free chocolate wafers and gluten-free graham crackers. I’ve tested this with Schär brand graham-style crackers, and it works beautifully.
- Dairy-Free Option: Swap the butter with coconut oil, use dairy-free Greek yogurt (like Kite Hill), and choose a dairy-free whipped topping. The texture will be slightly different, but still delicious.
- Lower Sugar Twist: Use sugar-free chocolate wafers, skip the maple syrup in the crust, and use a powdered monk fruit blend in the whipped topping. You’ll cut the sugar by about half without sacrificing flavor.
- Peanut Butter S’mores: Add 2 tablespoons of peanut butter to the marshmallow layer. It adds a savory note that pairs perfectly with the chocolate. I tried this on a whim one night, and now it’s my favorite variation.
- Berry S’mores: Layer fresh raspberries or sliced strawberries between the marshmallow and whipped topping. The tartness cuts the sweetness beautifully.
Serving & Storage Suggestions
This cake is best served cold, straight from the fridge. Let it sit at room temperature for about 5 minutes before slicing to make cutting easier. I like to serve it with a cup of black coffee or a cold glass of milk—the bitterness of the coffee balances the sweetness perfectly.
Storage: Cover the cake tightly with plastic wrap or transfer slices to an airtight container. It will keep in the refrigerator for up to 5 days. The texture actually improves after day one, as the layers continue to meld together.
Freezing: You can freeze the entire cake (without the toasted marshmallows) for up to 3 months. Wrap it in plastic wrap, then a layer of foil. Thaw overnight in the refrigerator before serving. Add the toasted marshmallows after thawing.
Reheating: If you have leftovers with toasted marshmallows, you can re-toast them under the broiler for 15-20 seconds. Just watch closely so they don’t burn.
One thing I love about this cake is how the flavors develop. Day two is always better than day one. The chocolate crust softens slightly, the marshmallow layer gets creamier, and everything just comes together. It’s the kind of dessert that gets better with time—like a good friendship or a lazy Sunday afternoon.
Nutritional Information & Benefits
Here’s the approximate nutritional breakdown per serving (based on 12 servings):
- Calories: 245
- Fat: 11g
- Carbohydrates: 34g
- Fiber: 2g
- Sugar: 18g
- Protein: 4g
Compared to a traditional s’mores icebox cake, this version has about 40% fewer calories and half the sugar. The Greek yogurt adds protein and probiotics, while the chocolate wafers provide a small amount of fiber. It’s not a health food, but it’s a dessert that lets you indulge without the sugar crash.
Dietary Considerations: This recipe can easily be made gluten-free, dairy-free, or lower in sugar with the substitutions mentioned above. It’s naturally egg-free and nut-free (unless you add peanut butter).
I love that this dessert fits into a balanced lifestyle. It’s proof that you don’t have to choose between eating well and eating something that feels like a treat. You can have both—and honestly, that’s the kind of energy I want to bring to my kitchen.
Frequently Asked Questions
Can I make this cake vegan?
Yes! Use dairy-free butter or coconut oil, dairy-free Greek yogurt, and a vegan whipped topping. The marshmallow fluff is typically vegan (check the label), but you can also use aquafaba-based marshmallow cream. The texture will be slightly different, but still delicious.
Why is my crust falling apart?
This usually happens when the crust isn’t pressed firmly enough into the pan. Use the bottom of a glass or measuring cup to really pack it down. Also, make sure your butter is fully incorporated—if the crumbs look dry, add another teaspoon of melted butter.
Can I use homemade whipped cream instead of whipped topping?
Absolutely! Whip 1 cup of heavy cream with 2 tablespoons of powdered sugar until stiff peaks form. It will be richer and less stable than whipped topping, so the cake may not slice as cleanly. But the flavor? Incredible.
How long does this cake last in the fridge?
Up to 5 days, covered tightly. The texture actually improves after the first day as the layers meld together. Just keep the toasted marshmallows on top—they’ll deflate after a day or two, but the cake underneath stays perfect.
Can I double this recipe for a crowd?
Yes! Double all the ingredients and use a 9-inch springform pan or a 9×13-inch dish. The chilling time may need to be extended by an hour or two. For a 9×13, you’ll get about 16 servings.
Conclusion
This Lightened-Up No-Bake S’mores Icebox Cake is the kind of recipe that makes you feel like a kitchen genius—even when you’re in fuzzy slippers at 11 PM on a Wednesday. It’s simple enough for a last-minute craving, but impressive enough to bring to a party. It’s nostalgic without being heavy, indulgent without the guilt, and honestly, it’s just really, really good.
I hope you give this recipe a try and make it your own. Maybe you’ll add peanut butter like I did one night, or top it with fresh berries, or skip the toasted marshmallows because you’re in a rush. However you make it, I’d love to hear about it. Drop a comment below and tell me how it turned out—or share your own twist on this campfire classic. And if you’re looking for another no-bake dessert to add to your rotation, you might enjoy this no-bake chocolate peanut butter pie I’ve been making for years.
Until next time, happy (no-bake) baking!
Pin This Recipe!
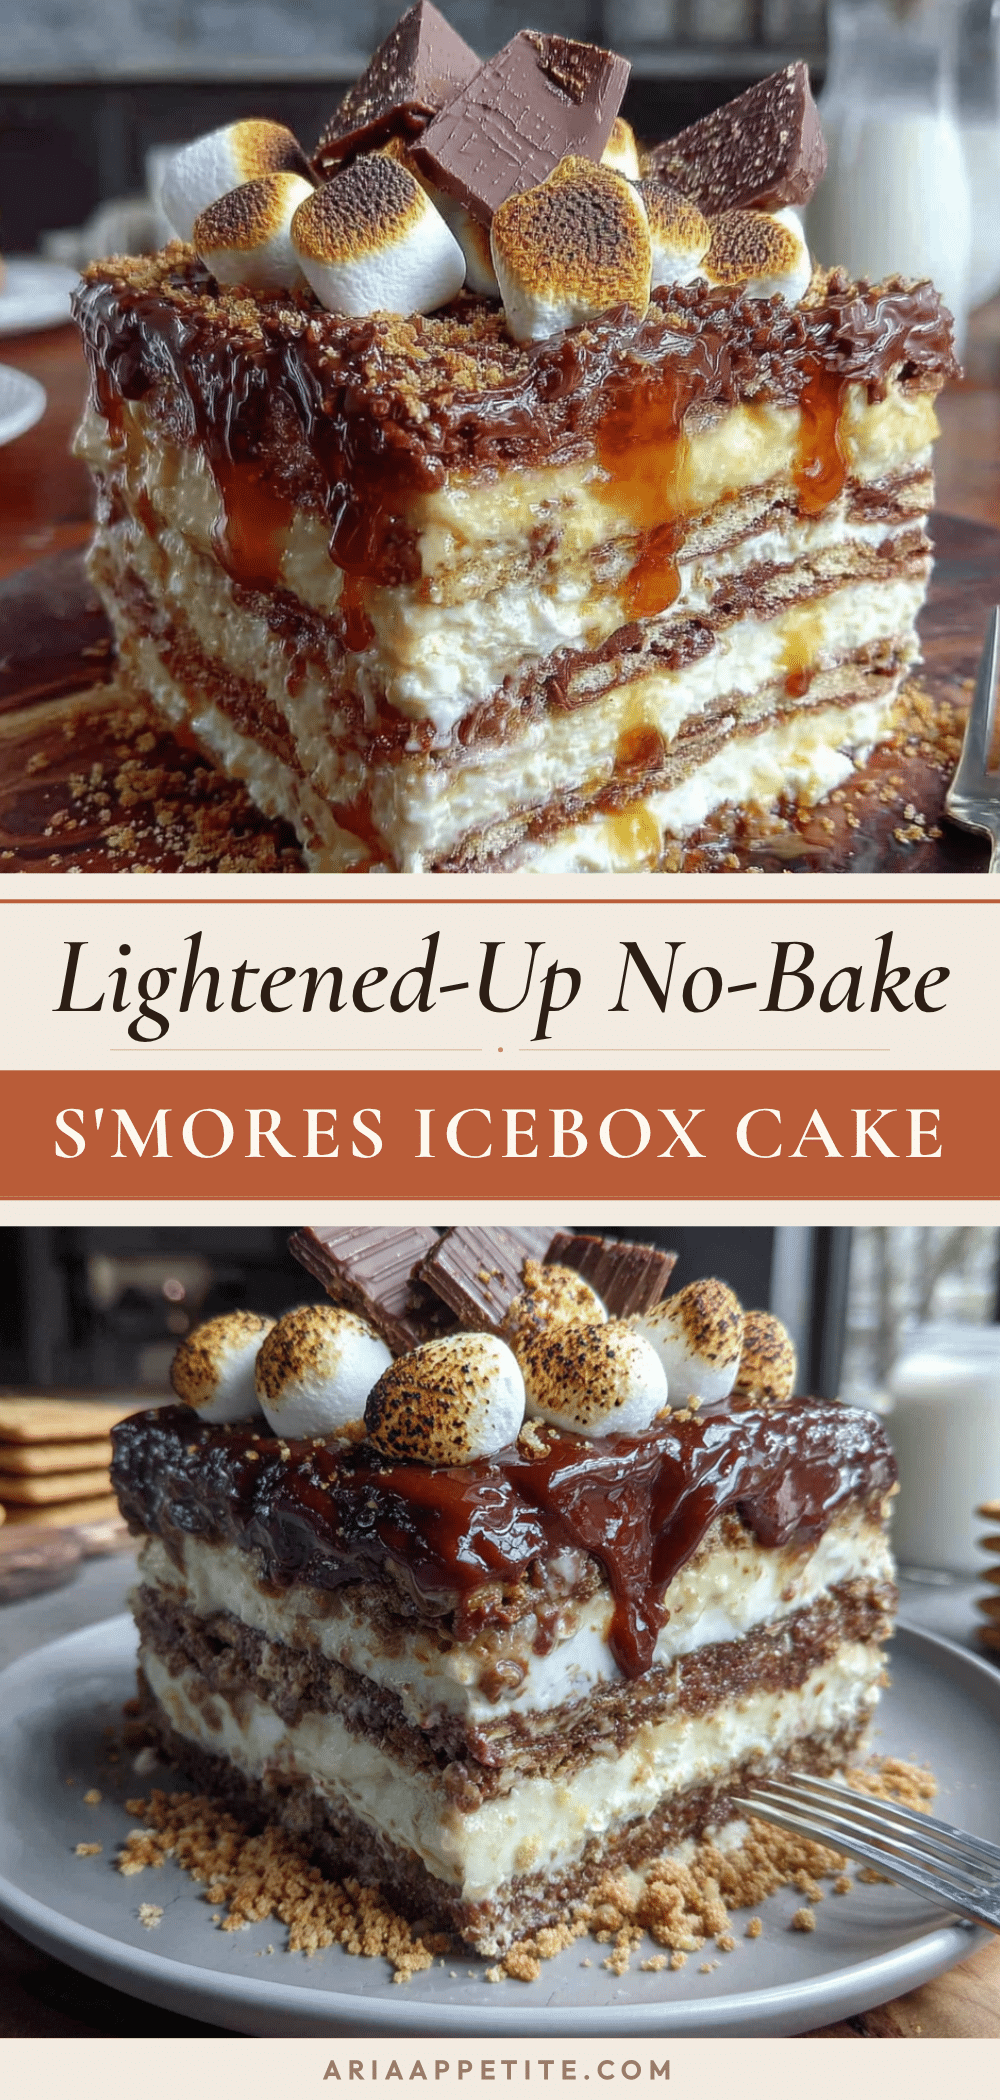
Lightened-Up No-Bake Smores Icebox Cake: Easy 10-Minute Recipe
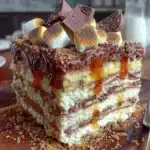
This Lightened-Up No-Bake S’mores Icebox Cake is exactly what it sounds like: all the campfire nostalgia, none of the guilt or the heat. It’s rich, creamy, and deeply satisfying, but made with smarter ingredients and about ten minutes of hands-on effort.
- Prep Time: 10 minutes
- Cook Time: 0 minutes
- Total Time: 6 hours 10 minutes (includes chilling)
- Yield: 12 servings 1x
- Category: Dessert
- Cuisine: American
Ingredients
- 1 ½ cups chocolate wafer crumbs (about 20–25 wafers)
- 3 tablespoons unsalted butter, melted
- 1 tablespoon maple syrup (optional)
- 1 ½ cups marshmallow fluff
- ½ cup plain Greek yogurt (full-fat or 2%)
- 1 teaspoon vanilla extract
- Pinch of salt
- 2 cups light whipped topping (like Cool Whip Lite)
- ¼ cup powdered sugar
- ½ teaspoon vanilla extract
- 1 cup crushed graham crackers (about 6–8 full sheets)
- ¼ cup mini chocolate chips (optional)
- 10–12 large marshmallows (for toasting, optional)
Instructions
- Make the chocolate crust. In a food processor, pulse the chocolate wafers until they become fine crumbs. You should have about 1 ½ cups. Transfer to a medium bowl, add the melted butter and maple syrup, and stir until the mixture looks like wet sand. Press this firmly into the bottom of your springform pan. Use the bottom of a glass or measuring cup to really pack it down. Set aside.
- Prepare the marshmallow cream layer. In a clean bowl, combine the marshmallow fluff, Greek yogurt, vanilla extract, and a pinch of salt. Whisk until smooth and creamy. It should be thick but spreadable. If it’s too stiff, add a teaspoon of milk or water to loosen it up. Spread this evenly over the chocolate crust. Pop the pan in the fridge while you make the next layer.
- Whip up the topping. In another bowl, combine the light whipped topping, powdered sugar, and vanilla extract. Use a hand mixer or whisk to beat until soft peaks form—about 2 minutes. You want it light and airy, not stiff. Spread this gently over the marshmallow layer, being careful not to mix the two layers together.
- Layer the graham cracker crunch. Sprinkle the crushed graham crackers evenly over the whipped topping. Press them down very lightly so they stick, but don’t bury them. If you’re using mini chocolate chips, sprinkle those on top now too.
- Add the toasted marshmallows (optional but amazing). If you have large marshmallows, arrange them on top of the graham cracker layer. Use a kitchen torch to toast them until golden and bubbly. If you don’t have a torch, place the pan under the broiler for 30-45 seconds—watch closely so they don’t burn. Let them cool for a minute before moving on.
- Chill, chill, chill. Cover the pan with plastic wrap and refrigerate for at least 6 hours, but overnight is best. This is crucial—the layers need time to set and meld together.
- Serve and enjoy. When you’re ready, run a knife around the edge of the pan, release the springform, and slice. Serve cold, straight from the fridge.
Notes
Don’t skip the salt in the marshmallow layer. Press the crust firmly. Let it chill fully (overnight is best). Toast marshmallows just before serving. Use a wet knife for clean slices. For a quicker chill, freeze for 2 hours instead of refrigerating for 6.
Nutrition
- Serving Size: 1 slice (1/12 of cak
- Calories: 245
- Sugar: 18
- Fat: 11
- Carbohydrates: 34
- Fiber: 2
- Protein: 4
Keywords: no-bake, smores, icebox cake, lightened-up, easy, summer dessert, chocolate, marshmallow, graham cracker