Love this? Save it for later!
Share the inspiration with your friends
The Halloween party was in four hours and I’d completely forgotten. Everyone else would be bringing elaborate themed desserts—I’d seen the neighbor’s graveyard brownies on Instagram and they looked like they took three days. I had a dozen hard-boiled eggs in the fridge, a jar of olives, and honestly, a growing sense of panic. My kids were counting on me to bring something “cool” this year, and I was staring down the barrel of showing up with plain deviled eggs. That’s when I spotted the black olives, and something clicked. I mean, spiders are basically just legs and a body, right? And deviled eggs are already the perfect finger food. Twenty minutes later, I had a platter of the most ridiculous, wonderful, creepy-crawly things I’d ever made. They were gone before the punch bowl was even set up. That’s the thing about these Light & Spooky Deviled Eggs with Olive Spiders—they look like you spent all day planning them, when really, you just got lucky with what was in your fridge.
Why You’ll Love This Recipe
Let me tell you, after years of bringing dishes to potlucks and school events, this one has become my secret weapon. It’s the kind of recipe that makes people stop mid-conversation and point at the platter. I’ve tested this version more times than I can count, tweaking the filling until it was just right—creamy, tangy, but still light enough that you can eat three without feeling guilty.
- Quick & Easy: Comes together in under 25 minutes, perfect for last-minute Halloween prep or when you realize the party is tomorrow.
- Simple Ingredients: No fancy grocery trips needed. Eggs, olives, mayo, mustard—that’s probably already in your kitchen.
- Perfect for Halloween Parties: Great for spooky gatherings, school events, office parties, or even a fun dinner at home with the kids.
- Crowd-Pleaser: Always gets rave reviews from both kids and adults. Even people who “don’t like olives” end up trying one.
- Unbelievably Delicious: The creamy filling paired with the briny olive legs? It’s a combo that just works.
What makes this recipe different from the rest is the technique. I use a piping bag for the filling (just a zip-top bag with the corner snipped off works fine), which gives you that perfect, fluffy swirl. And instead of regular mayo, I mix in a little Greek yogurt—it keeps things light and adds a subtle tang that plays beautifully with the olives. This isn’t just another deviled egg recipe; it’s the one that’ll have people asking for the recipe before the party’s over.
What Ingredients You Will Need
This recipe uses simple, everyday ingredients to create something that looks far more complicated than it actually is. You probably have most of these on hand already, which is exactly the point.
- 12 large eggs (hard-boiled and peeled; older eggs peel easier, so plan ahead if you can)
- ¼ cup mayonnaise (I prefer Duke’s or Hellmann’s for that perfect creamy texture)
- 2 tablespoons plain Greek yogurt (adds lightness and a subtle tang; full-fat works best here)
- 1 teaspoon Dijon mustard (yellow mustard works in a pinch, but Dijon gives a nicer depth)
- ½ teaspoon white vinegar (balances the richness without overpowering)
- ¼ teaspoon salt (plus more to taste)
- ⅛ teaspoon black pepper (freshly ground is always better)
- ¼ teaspoon paprika (for garnish and a hint of smoky flavor)
- 1 can (6 oz) large black olives (you’ll need whole olives for the spider bodies)
- 1 can (6 oz) sliced black olives (for the spider legs—this saves you a ton of time)
Ingredient Tips: For the best texture, make sure your eggs are fully hard-boiled but not overcooked—you don’t want that green ring around the yolk. If you’re using fresh farm eggs, let them sit in the fridge for a week before boiling; they’ll peel much easier. For a dairy-free version, swap the Greek yogurt with an extra tablespoon of mayo or use dairy-free yogurt. And honestly, don’t skip the white vinegar—it’s the secret to that classic deviled egg tang that everyone loves.
Equipment Needed
You don’t need much for this recipe, which is part of its charm. Here’s what you’ll want to have handy:
- Medium saucepan (for boiling the eggs; any size works as long as it fits the eggs in a single layer)
- Large bowl of ice water (for shocking the eggs after boiling—makes peeling so much easier)
- Sharp knife and cutting board (for halving the eggs and slicing olives)
- Small mixing bowl (for the filling)
- Fork or potato masher (for mashing the yolks)
- Piping bag or zip-top bag (for filling the egg whites neatly; a spoon works too, but the bag gives that professional look)
- Serving platter (something dark-colored makes the spiders pop visually)
If you don’t have a piping bag, just grab a quart-size zip-top bag, spoon the filling into one corner, and snip off about ¼ inch from the tip. Works like a charm and costs nothing extra. I’ve used the same trick for years and honestly prefer it to actual piping bags—less cleanup.
Preparation Method
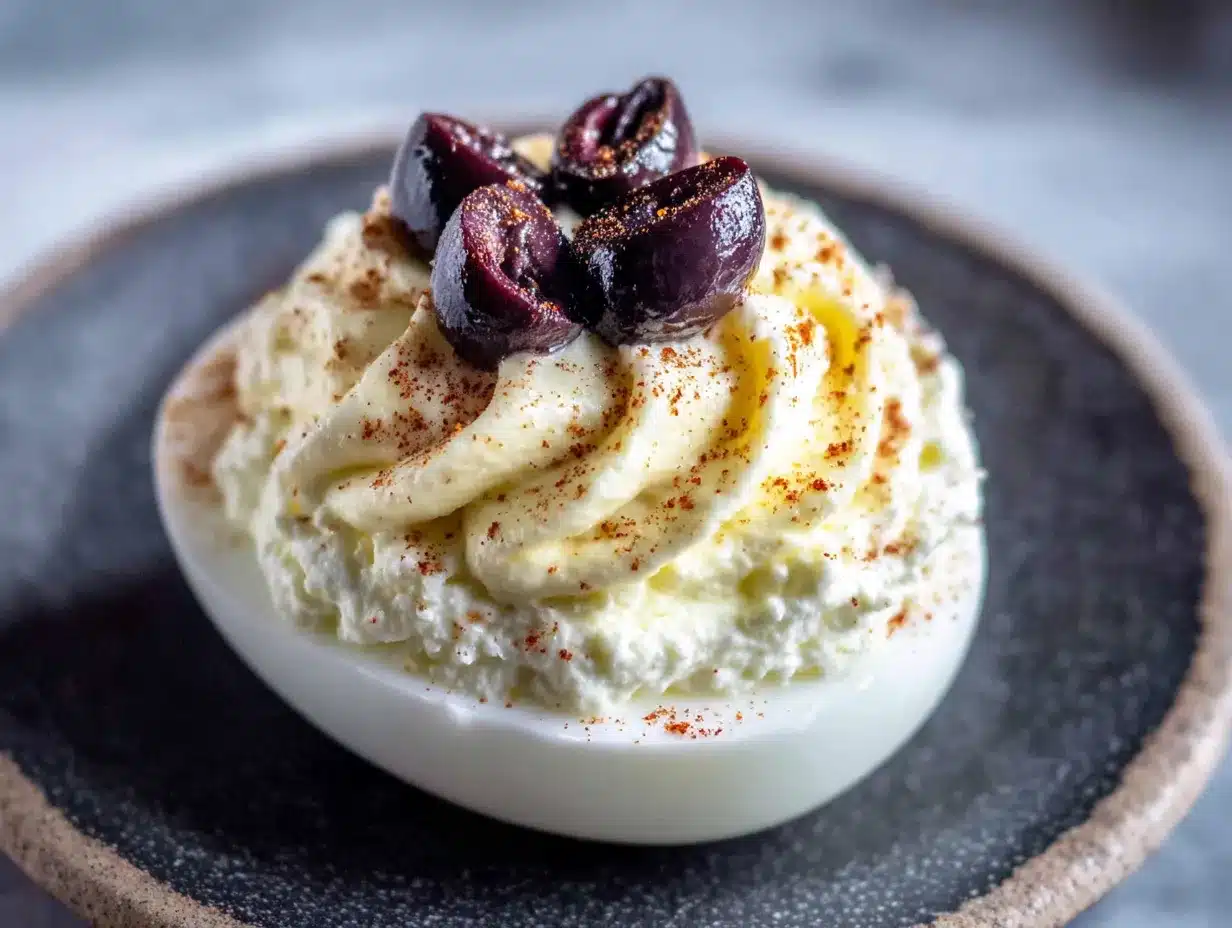
- Hard-boil the eggs. Place the eggs in a single layer in your saucepan and cover with cold water by about an inch. Bring to a rolling boil over high heat, then immediately cover the pan, remove from heat, and let sit for exactly 12 minutes. While they’re sitting, prepare your ice water bath. Transfer the eggs to the ice water and let them cool completely—at least 10 minutes. This shock step is non-negotiable for easy peeling.
- Peel and halve the eggs. Gently crack the eggs all over and peel under running cold water. The water helps separate the membrane from the egg white. Pat the peeled eggs dry with paper towels. Using a sharp knife, slice each egg in half lengthwise. Carefully pop the yolks out into your small mixing bowl. Arrange the white halves on your serving platter, cut-side up.
- Make the filling. Add the mayonnaise, Greek yogurt, Dijon mustard, white vinegar, salt, and pepper to the bowl with the yolks. Mash everything together with a fork until smooth and creamy. Taste it—this is important. Adjust the salt and pepper if needed. You want it tangy and rich, but not overpowering. If it seems too thick, add another teaspoon of yogurt or mayo.
- Prepare the spiders. While the filling rests, make your spiders. Take the whole black olives and drain them well. These are your spider bodies. For the legs, you have two options: use pre-sliced black olives (each slice gives you two legs) or slice whole olives into thin rounds and then cut each round in half. You’ll need 8 leg pieces per spider. It sounds fiddly, but after the first one, you’ll get into a rhythm.
- Fill the eggs. Spoon your filling into a piping bag or zip-top bag. Snip the corner and pipe a generous swirl into each egg white half. Don’t be shy—you want the filling to mound slightly above the edge. If you’re using a spoon, just dollop it in and smooth the top with the back of the spoon.
- Assemble the spiders. Gently press a whole olive (the body) into the center of the filling on each egg. Then, carefully insert 4 olive slices on each side of the body to create the legs. You want them to look like they’re crawling—angle the legs slightly forward and back for that spooky effect. Take your time with this step; it’s what makes the presentation so memorable.
- Garnish and serve. Lightly dust the eggs with paprika using a fine-mesh strainer. The paprika adds color and a subtle smoky flavor that ties everything together. Serve immediately or refrigerate until ready to serve. The spiders will hold their shape for several hours.
Sensory Cue: When you’re piping the filling, you should see a smooth, creamy ribbon that holds its shape without drooping. If it’s too runny, add another yolk or a bit more yogurt. The finished eggs should look plump and inviting, with the olives sitting proudly on top like little eight-legged decorations.
Cooking Tips & Techniques
I’ve made these eggs more times than I can count, and I’ve learned a few things the hard way. Let me save you some trouble.
The biggest mistake? Overcooking the eggs. I once left them on the stove while I answered the door for a package delivery, and by the time I got back, those yolks had turned green and smelled like sulfur. Set a timer. The 12-minute rest method I shared above is foolproof—just don’t skip the ice bath.
Peeling frustration is real. If your eggs are fresh, they’ll be a nightmare to peel. The trick is to use eggs that have been in the fridge for at least a week. The air pocket inside gets larger, and the membrane separates from the shell more easily. If you’re in a pinch, add a teaspoon of baking soda to the boiling water—it helps loosen the shells.
Multitasking strategy: While the eggs are boiling and then cooling, prep your olives. Slice the whole olives for the legs and set them aside. This way, when the eggs are ready, you can focus on assembly without interruption. I usually make the filling while the eggs are in the ice bath, too—it saves a solid 5 minutes.
For consistency: Use a piping bag for the filling. I know it sounds fussy, but it gives you that uniform, professional look that makes people think you’re a culinary genius. And if you’re making these for a party, assemble them on the platter directly rather than transferring them later—they’re delicate, and the spiders can shift.
Variations & Adaptations
One of the best things about this recipe is how flexible it is. Here are a few ways I’ve tweaked it over the years:
- Spicy Southwest Version: Add ¼ teaspoon of smoked paprika and a pinch of cayenne to the filling. Top each spider with a tiny sliver of pickled jalapeño for a kick. This version was a hit at my brother’s Halloween party—people kept coming back for “the spicy ones.”
- Dairy-Free Adaptation: Swap the Greek yogurt with an extra tablespoon of mayo or use a dairy-free yogurt alternative. The texture will be slightly different—a bit richer—but the flavor is still spot-on. I’ve made this for a friend with dairy sensitivities and she couldn’t tell the difference.
- Gluten-Free Note: This recipe is naturally gluten-free, so no changes needed there. Just double-check your mustard and mayo labels if you’re serving someone with celiac disease.
- Pumpkin Spice Twist: For a fall-themed variation, add 1 tablespoon of pumpkin puree and a pinch of pumpkin pie spice to the filling. The orange tint is perfect for Halloween, and the flavor is surprisingly good with the olives. I tried this on a whim last October and it’s become a seasonal favorite.
- Mini Version: Use quail eggs instead of chicken eggs for bite-sized spiders. You’ll need about 24 quail eggs, and the assembly is more delicate, but the result is adorable. Perfect for cocktail parties where you want something dainty.
Serving & Storage Suggestions
These Light & Spooky Deviled Eggs are best served chilled, straight from the fridge. The cold filling contrasts beautifully with the briny olives, and the texture is at its peak when they’ve had at least 30 minutes to set after assembly.
Presentation tip: Arrange the eggs on a dark-colored platter or a black serving board. The contrast makes the spiders pop and adds to the spooky vibe. I like to scatter a few extra olive slices around the platter for visual interest, and sometimes I add a tiny plastic spider or two for fun.
Pairing suggestions: These eggs pair wonderfully with other Halloween appetizers like spooky stuffed mushrooms or a warm bowl of creamy pumpkin soup. For drinks, a crisp white wine or a dark stout beer complements the creamy, briny flavors. Non-alcoholic options like sparkling apple cider or a ginger beer mocktail work great too.
Storage instructions: Store any leftover eggs in an airtight container in the refrigerator for up to 2 days. The texture of the filling will firm up slightly, but they’ll still taste delicious. Do not freeze—the eggs will become watery and the texture will be ruined.
Reheating: These are served cold, so no reheating needed. If you’ve stored them, just let them sit at room temperature for 10 minutes before serving to take the chill off.
Flavor development: Honestly, these eggs taste even better the next day. The flavors meld together overnight, and the filling becomes more cohesive. If you’re making them for a party, I’d recommend assembling them the morning of the event—they’ll be perfect by party time.
Nutritional Information & Benefits
Here’s the thing about these deviled eggs—they’re actually pretty good for you. Each serving (2 egg halves) provides a solid dose of protein and healthy fats, making them a satisfying snack that won’t weigh you down.
| Nutrient | Per Serving (2 halves) |
|---|---|
| Calories | 145 |
| Protein | 10g |
| Fat | 11g |
| Carbohydrates | 2g |
| Fiber | 0g |
| Sugar | 1g |
| Sodium | 320mg |
Health benefits: Eggs are a fantastic source of high-quality protein and contain important nutrients like choline (great for brain health), vitamin D, and B vitamins. The Greek yogurt adds probiotics for gut health, and olives provide healthy monounsaturated fats and antioxidants. This recipe is naturally low-carb and keto-friendly, making it a great option for those watching their carb intake.
Dietary considerations: This recipe is gluten-free and can be made dairy-free with the substitution mentioned above. It’s also suitable for low-carb and keto diets. The main allergen to be aware of is eggs, and the olives are a potential concern for those with olive allergies (though that’s rare).
Personal perspective: I love that this recipe lets me indulge without the guilt. When I’m trying to eat well, having a protein-packed snack like this on hand keeps me from reaching for processed options. And honestly, knowing that something this fun to look at is also good for me? That’s a win in my book.
Conclusion
Look, I get it—Halloween recipes can feel like a lot of pressure. You want something that looks impressive, tastes amazing, and doesn’t require a culinary degree to pull off. These Light & Spooky Deviled Eggs with Olive Spiders check every box. They’re fun without being fussy, spooky without being scary, and delicious without being heavy.
I’ve made these for Halloween parties, school events, and even just a random Tuesday night when my kids wanted something “creepy” for dinner. Every single time, they disappear faster than anything else on the table. There’s something about the combination of creamy, tangy filling and those briny little spider legs that just works.
So go ahead—customize them, make them your own, and don’t stress about perfection. The beauty of this recipe is that even if your spiders look a little lopsided, they’ll still taste incredible. And honestly? That’s what matters most.
I’d love to hear how yours turn out! Drop a comment below and let me know if your kids loved them, or if you came up with a fun variation I haven’t tried yet. Happy Halloween, and happy cooking!
Frequently Asked Questions
Can I make these deviled eggs ahead of time?
Absolutely! You can prepare the hard-boiled eggs and the filling up to 2 days in advance. Store the peeled egg whites and the filling separately in the refrigerator. Assemble the spiders on the day you plan to serve them for the best presentation.
How do I prevent the egg whites from tearing when I peel them?
The key is to use older eggs (at least a week old) and to shock them in an ice bath immediately after boiling. Start peeling from the wider end where the air pocket is—the membrane is looser there. Running the eggs under cold water while you peel helps separate the shell from the white.
Can I use a different type of olive for the spiders?
Sure! Large green olives stuffed with pimento work well, though the color contrast won’t be as spooky. Kalamata olives give a more intense flavor and a darker color, but they’re softer and can be trickier to slice neatly. Stick with large black olives for the best visual effect.
How long do these deviled eggs last at a party?
They can sit out at room temperature for up to 2 hours safely. If your party runs longer, keep the platter on ice or rotate in a fresh batch from the fridge after 2 hours. I usually make a double batch and keep half chilled until the first platter is empty.
What if I don’t have a piping bag? Can I just use a spoon?
Absolutely! A spoon works fine—just dollop the filling into each egg white and smooth the top with the back of the spoon. It won’t look as fancy, but it’ll taste exactly the same. If you want that piped look without buying special equipment, use a zip-top bag with the corner snipped off. Works like a charm.
Pin This Recipe!
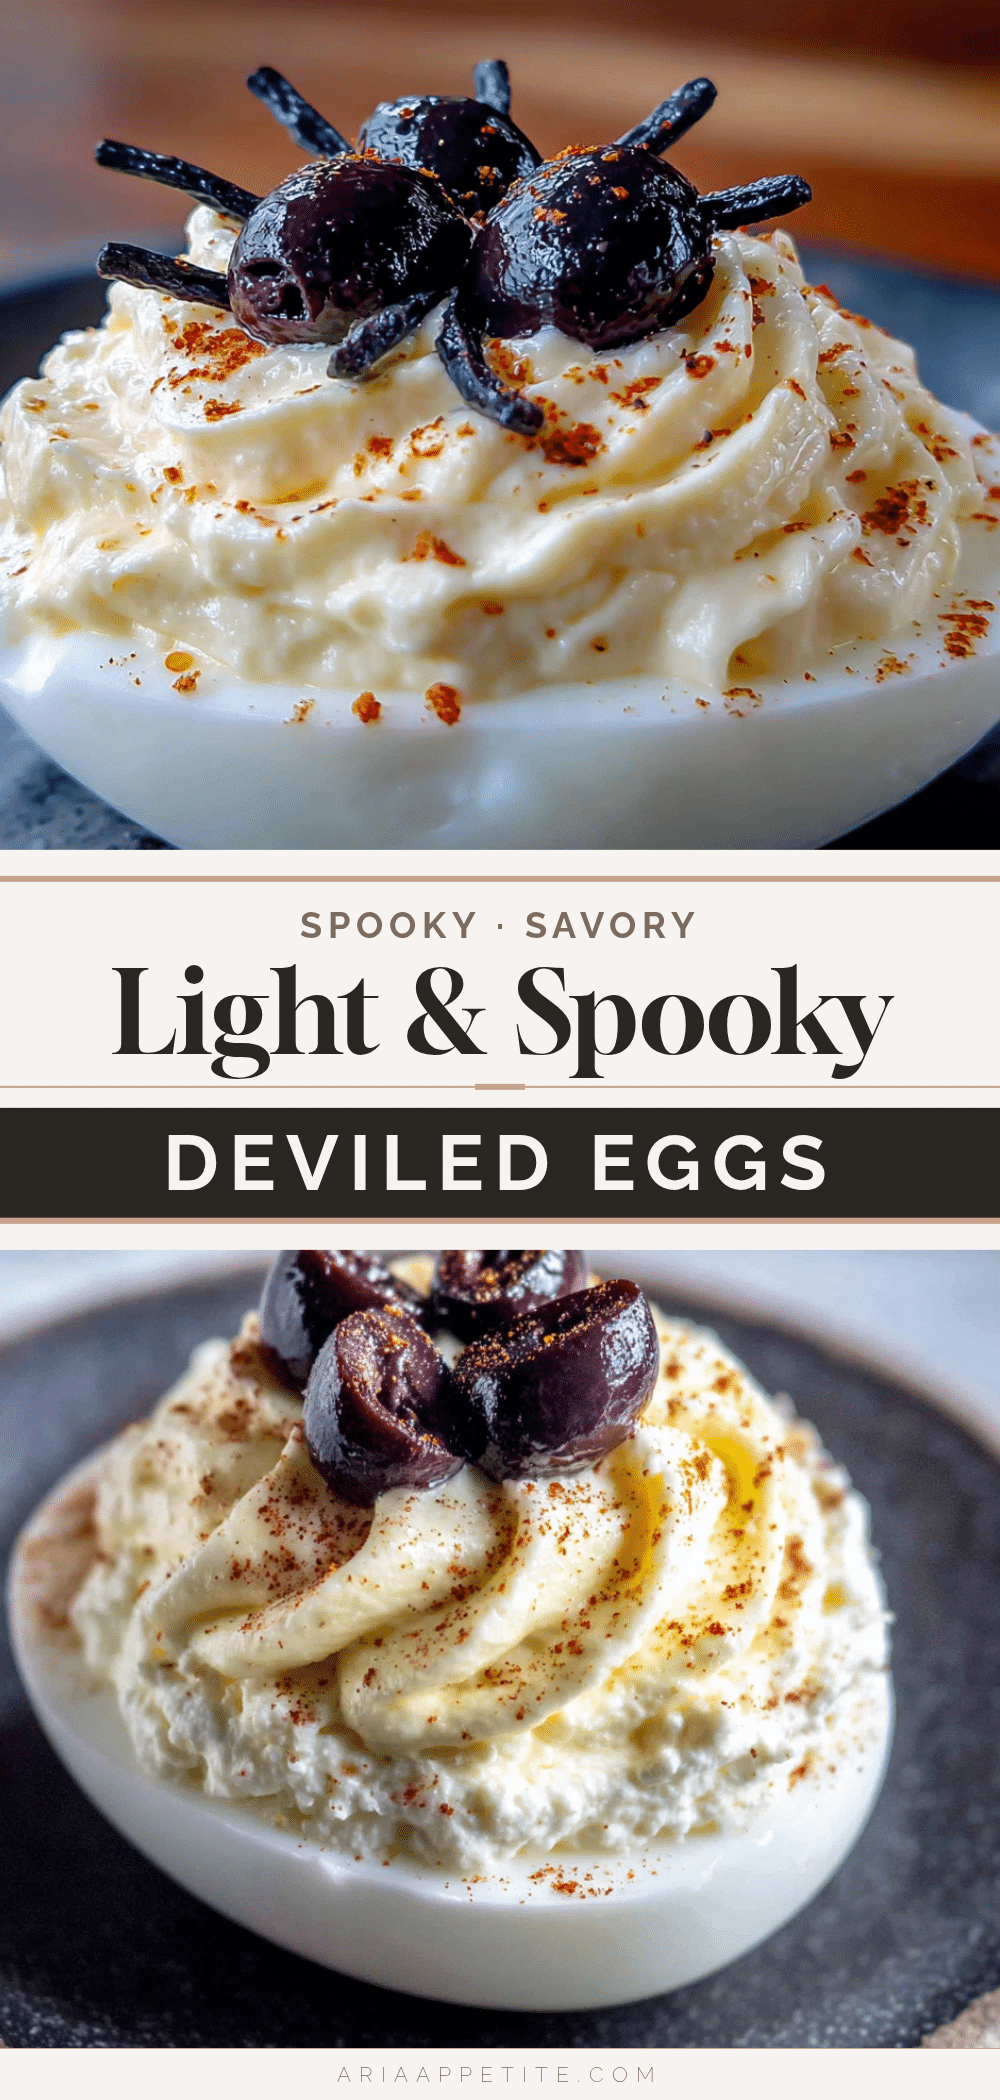
Light & Spooky Deviled Eggs with Olive Spiders: Easy Halloween Appetizer
These deviled eggs are transformed into creepy-crawly spiders using black olives, making them the perfect last-minute Halloween appetizer that looks impressive but comes together in under 25 minutes.
- Prep Time: 15 minutes
- Cook Time: 12 minutes
- Total Time: 27 minutes
- Yield: 24 servings 1x
- Category: Appetizer
- Cuisine: American
Ingredients
- 12 large eggs (hard-boiled and peeled)
- 1/4 cup mayonnaise
- 2 tablespoons plain Greek yogurt
- 1 teaspoon Dijon mustard
- 1/2 teaspoon white vinegar
- 1/4 teaspoon salt
- 1/8 teaspoon black pepper
- 1/4 teaspoon paprika (for garnish)
- 1 can (6 oz) large black olives (for spider bodies)
- 1 can (6 oz) sliced black olives (for spider legs)
Instructions
- Hard-boil the eggs: Place eggs in a single layer in a saucepan, cover with cold water by 1 inch. Bring to a rolling boil over high heat, then cover, remove from heat, and let sit for exactly 12 minutes. Transfer to an ice water bath and cool completely (at least 10 minutes).
- Peel and halve the eggs: Gently crack eggs and peel under running cold water. Pat dry, slice each egg in half lengthwise, and pop yolks into a small bowl. Arrange whites on a serving platter cut-side up.
- Make the filling: Add mayonnaise, Greek yogurt, Dijon mustard, white vinegar, salt, and pepper to the yolks. Mash with a fork until smooth and creamy. Taste and adjust seasoning if needed.
- Prepare the spiders: Drain whole black olives (bodies). For legs, use pre-sliced olives or slice whole olives into thin rounds and cut each round in half. You’ll need 8 leg pieces per spider.
- Fill the eggs: Spoon filling into a piping bag or zip-top bag, snip the corner, and pipe a generous swirl into each egg white half.
- Assemble the spiders: Gently press a whole olive (body) into the center of the filling on each egg. Insert 4 olive slices on each side of the body to create legs, angling them slightly forward and back.
- Garnish and serve: Lightly dust eggs with paprika using a fine-mesh strainer. Serve immediately or refrigerate until ready to serve.
Notes
Use older eggs (at least a week old) for easier peeling. For dairy-free, swap Greek yogurt with extra mayo or dairy-free yogurt. The eggs taste even better the next day. Store leftovers in an airtight container in the refrigerator for up to 2 days. Do not freeze.
Nutrition
- Serving Size: 2 egg halves
- Calories: 145
- Sugar: 1
- Sodium: 320
- Fat: 11
- Saturated Fat: 3
- Carbohydrates: 2
- Protein: 10
Keywords: Halloween appetizer, deviled eggs, olive spiders, spooky eggs, easy Halloween recipe, party appetizer, creepy crawly eggs


