Love this? Save it for later!
Share the inspiration with your friends
The school fall festival was in twenty-four hours and I had completely forgotten. Every other parent was going to show up with elaborate homemade pies, themed cupcakes with perfect frosting swirls, and those Pinterest-perfect caramel apples that look like they took three days. I had a bag of candy corn, some white chocolate chips that were probably past their prime, and a vague sense of panic that felt a lot like my usual Tuesday morning.
Honestly, I almost gave up and grabbed a store-bought pumpkin pie from the freezer section. But something stopped me—maybe it was the stubborn part of my brain that refuses to admit defeat, or maybe it was the way my six-year-old kept eyeing that candy corn bag like it held the secrets to the universe. I stared at my pantry for a solid five minutes. Candy corn. White chocolate. A baking sheet. And then it hit me—this weird, simple idea that felt almost too easy to work.
I melted that chocolate in a rush, probably burned my finger a little on the microwave bowl (you know the feeling), and spread it out on a sheet pan like my life depended on it. My daughter helped press the candy corn into the warm chocolate, and I’m pretty sure half of it ended up in her mouth instead of on the tray. The bark went into the fridge, I crossed my fingers, and I went to bed convinced I’d be the one bringing the sad dessert to the party.
Let me tell you what happened next—people lost their minds over this Easy Candy Corn Bark. Not in a polite, “oh, that’s nice” way, but in a “where did you get this recipe, I need it immediately” way. The pies sat untouched while my humble little bark disappeared in minutes. Maybe you’ve been there—the moment when the simplest thing you threw together becomes the star of the show. That’s this recipe. It’s the underdog that wins every time, and honestly, that’s why I keep making it.
Why You’ll Love This Recipe
This Easy Candy Corn Bark is the kind of recipe that makes you look like a kitchen hero without actually doing much work. I’ve tested it about a dozen times now—different chocolates, different toppings, different cooling methods—and it always delivers. Here’s why this one stands out from every other fall treat you’ll find online.
- Quick & Easy: From start to finish, you’re looking at about 15 minutes of active time. The hardest part is unwrapping the candy corn, and even that’s not hard. Perfect for those evenings when you need a classroom treat or a potluck contribution and you’re fresh out of time.
- Simple Ingredients: No fancy grocery trips needed. You likely have white chocolate chips in your pantry right now, and candy corn is everywhere during fall. I’ve made this with both cheap store-brand chocolate and the fancy Ghirardelli stuff—both work great, though the better chocolate does give a creamier finish.
- Perfect for Fall Gatherings: This bark is custom-made for Halloween parties, fall festivals, Thanksgiving dessert tables, and those classroom celebrations where you need something nut-free and crowd-pleasing. It’s also fantastic for movie nights at home when you want something sweet without baking a whole cake.
- Crowd-Pleaser: Here’s the thing—kids absolutely love this because it has candy corn. Adults love it because it’s nostalgic and not overly sweet (if you use good quality chocolate). I’ve watched grown men go back for thirds at office parties. It’s that good.
- Unbelievably Delicious: The combination of creamy white chocolate with that chewy, slightly waxy candy corn texture is weirdly perfect. The salt from the pretzels (if you add them) cuts through the sweetness, and the whole thing just works in a way that surprises everyone who tries it.
What makes this recipe different from other candy bark recipes is the technique. Most people just melt chocolate and dump candy on top, but I’ve learned that layering the candy corn in while the chocolate is still warm creates a better bond. The candy doesn’t fall off when you break the bark into pieces. It’s a small thing, but it makes a huge difference when you’re serving it at a party and nobody wants to eat a piece of plain chocolate that lost all its toppings.
This recipe isn’t just good—it’s the kind that makes you close your eyes after the first bite. It’s comfort food reimagined for busy families who still want something special without spending hours in the kitchen. Perfect for impressing other parents without stress, or turning a regular Tuesday into something memorable.
What Ingredients You Will Need
This recipe uses simple, everyday ingredients to create something that tastes surprisingly special. Most of these are pantry staples during the fall season, and you probably already have everything except maybe the candy corn itself.
- White chocolate chips or melting wafers (24 ounces / 680 grams): This is your base. I recommend Ghirardelli white chocolate chips for the smoothest melt and creamiest texture, but store-brand works fine too. If you use melting wafers (like Wilton brand), they set up firmer and have a nicer snap when you break the bark. Avoid white chocolate bars with fillers—they can seize up when melted.
- Candy corn (2 cups / about 300 grams): The star of the show. Regular candy corn works best—avoid the pumpkin-shaped ones for this recipe because they’re too thick and don’t distribute as evenly. I prefer Brach’s brand because they’re softer and have that classic flavor. Store brands can be a bit harder and less flavorful.
- Pretzel twists or sticks (1 cup / about 100 grams, optional but recommended): These add a salty crunch that balances the sweetness beautifully. I like using mini pretzel twists because they create nice texture pockets. If you’re making this for someone with a gluten sensitivity, leave these out or use gluten-free pretzels.
- Dried cranberries or chopped dried cherries (1/2 cup / about 60 grams, optional): The tartness cuts through the sweet chocolate and candy corn. This is my secret weapon—it makes the bark taste more sophisticated than it has any right to be. Craisins work perfectly and are easy to find.
- Orange and yellow sprinkles (2 tablespoons, optional): For extra fall color and fun. My daughter insists on these, and honestly, they do make the bark look more festive. Any fall-themed jimmies or nonpareils work great.
- Flaky sea salt (1/2 teaspoon, optional): A light sprinkle on top before the chocolate sets takes this from good to unforgettable. Maldon salt is my favorite for this—it’s delicate and crunchy without being too salty.
Ingredient selection tips: When choosing candy corn, check the expiration date. Fresh candy corn is soft and chewy; older candy corn gets hard and can be unpleasant to bite into. For the white chocolate, look for one that contains cocoa butter (not just palm oil) for the best melt and flavor. If you’re dairy-free, there are good white chocolate alternatives made with coconut milk—I’ve used Enjoy Life brand with great results.
Substitution guidance: You can swap the white chocolate for milk chocolate or dark chocolate if you prefer a less sweet bark. Use vegan white chocolate chips for a dairy-free version. Replace pretzels with pumpkin seeds for a nutty crunch that’s also gluten-free. The dried cranberries can be swapped for dried apricots (finely chopped) or even crystallized ginger for a spicy kick.
Equipment Needed
You don’t need fancy equipment for this recipe, which is part of why I love it so much. Here’s what you’ll need:
- Baking sheet (half-sheet pan, 13×18 inches / 33×46 cm): This is the perfect size for a thin layer of bark. If you only have a smaller pan, just make the bark thicker—it’ll still taste amazing.
- Parchment paper or silicone baking mat: Absolutely essential. Without it, your bark will stick to the pan and you’ll be scraping chocolate off with a spatula while muttering things I can’t print here. Parchment paper is cheaper; silicone mats are reusable and more eco-friendly.
- Microwave-safe bowl or double boiler: I use a large glass measuring cup for melting chocolate in the microwave. It’s deep enough to prevent splatters and has a spout for easy pouring. A double boiler gives you more control and reduces the risk of burning the chocolate.
- Rubber spatula: For spreading the melted chocolate into an even layer. A silicone spatula is ideal because it won’t scratch your bowls and it’s heat-resistant.
- Sharp knife or pizza cutter: For breaking the set bark into pieces. A pizza cutter actually works better than a knife—it creates cleaner edges without shattering the bark.
- Refrigerator space: You need a flat spot in your fridge where the baking sheet can sit undisturbed for at least 30 minutes.
Budget-friendly options: Don’t have a baking sheet? A large dinner plate works in a pinch—just line it with parchment paper. No microwave? Use a saucepan over low heat on the stovetop, stirring constantly. No pizza cutter? Just break the bark by hand after it sets—imperfect pieces look homemade and charming.
I learned the hard way that using a cheap baking sheet with hot spots can burn your chocolate in the microwave. If your sheet is thin, use the double boiler method instead. Trust me on this—burnt white chocolate smells terrible and tastes worse.
Preparation Method
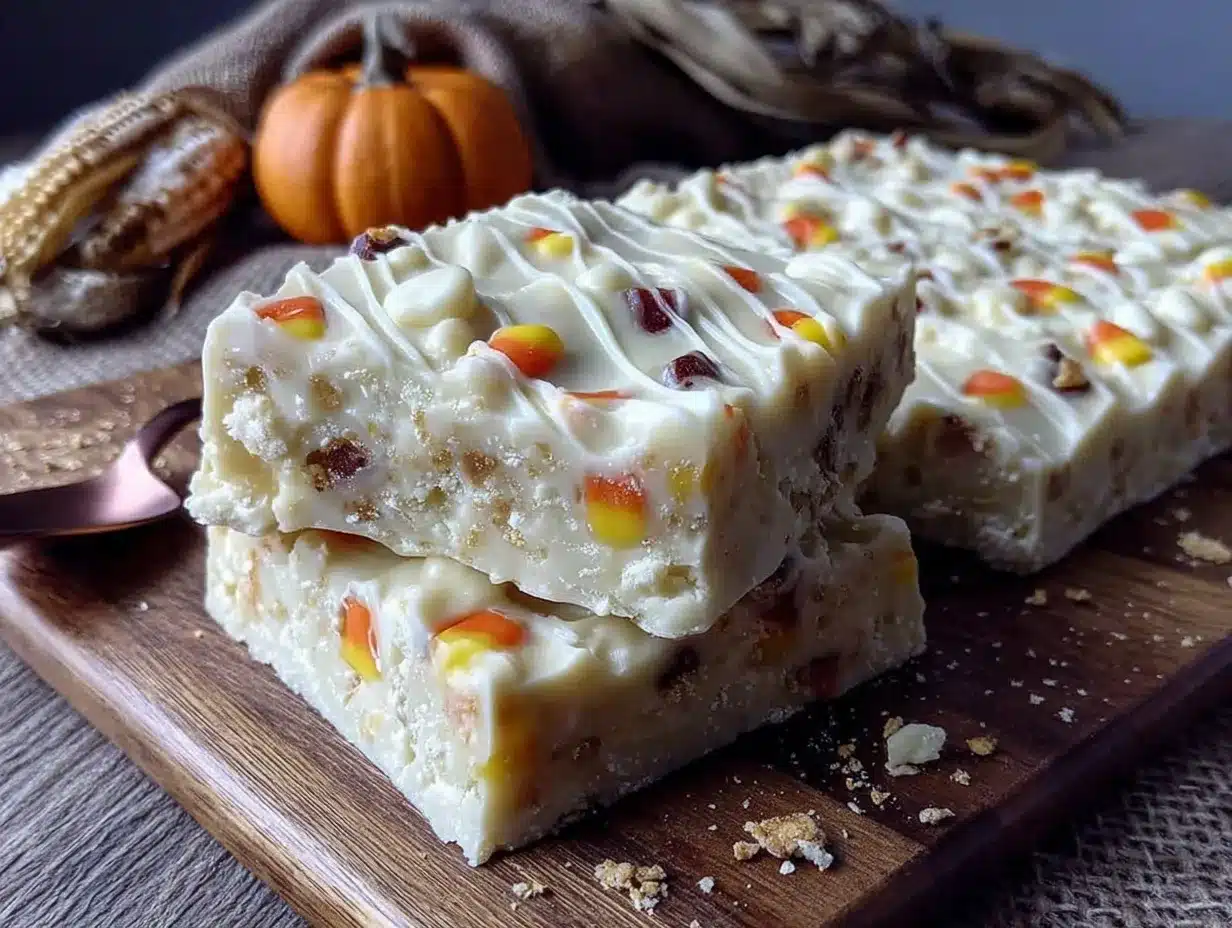
This Easy Candy Corn Bark comes together in about 15 minutes of active work, plus chilling time. Here’s exactly how to do it so it turns out perfect every time.
- Prepare your baking sheet (5 minutes): Line your half-sheet pan with parchment paper or a silicone baking mat. Make sure the paper extends up the sides a little—this helps contain the melted chocolate. If you’re using parchment, crumple it up first and then smooth it out; this helps it lay flat without curling up at the edges. Set the pan aside within easy reach of your work area.
- Melt the white chocolate (3-4 minutes): Place 24 ounces (680 grams) of white chocolate chips in a microwave-safe bowl. Microwave in 30-second intervals at 50% power, stirring thoroughly between each interval. White chocolate burns easily, so don’t rush this step. After about 2 minutes, the chips should be mostly melted with a few lumps remaining. Stir continuously until the residual heat melts the remaining lumps. If you’re using a double boiler, fill the bottom pot with about 2 inches of water, bring it to a gentle simmer, and place the chocolate in the top pot. Stir until completely smooth. Remove from heat immediately.
- Spread the chocolate (2 minutes): Pour the melted white chocolate onto the center of your prepared baking sheet. Use a rubber spatula to spread it into a rough rectangle about 1/4 inch (6 mm) thick. Don’t worry about making it perfect—rustic edges are part of the charm. The layer should be even enough that there aren’t thin spots that will break easily later. If the chocolate starts to set up before you finish spreading, pop the pan in the microwave for 10 seconds to warm it slightly.
- Add the toppings (3-4 minutes): While the chocolate is still warm and melted, sprinkle 2 cups (300 grams) of candy corn evenly over the surface. Press each piece gently into the chocolate so it sticks—especially important if your chocolate is starting to cool. Scatter 1 cup (100 grams) of pretzel pieces and 1/2 cup (60 grams) of dried cranberries over the top. Add orange and yellow sprinkles if using. For the final touch, sprinkle 1/2 teaspoon of flaky sea salt over everything. This step is best done with a helper—my daughter loves pressing the candy corn into the chocolate, and it keeps her occupied for a solid few minutes.
- Chill the bark (30-45 minutes): Carefully transfer the baking sheet to the refrigerator. Make sure it’s on a flat surface—if your fridge has wire shelves, place the pan on a cutting board or another flat tray first. Let it chill for at least 30 minutes, or until the chocolate is completely firm and no longer sticky to the touch. If you’re in a hurry, the freezer works too—just 15 minutes should do it, but watch it carefully so the chocolate doesn’t get too cold and develop condensation.
- Break into pieces (2 minutes): Once the bark is fully set, remove it from the refrigerator. Lift the parchment paper or silicone mat off the baking sheet and place it on a cutting board. Use a sharp knife or pizza cutter to cut the bark into irregular pieces, or simply break it by hand. I prefer hand-breaking because each piece ends up unique—some with more candy corn, some with more pretzel crunch. Aim for pieces about 2-3 inches (5-7 cm) across. If the bark cracks in unexpected places, that’s fine—it adds to the homemade look.
- Serve or store (1 minute): Transfer the broken pieces to a serving platter or storage container. If serving immediately, arrange the pieces in a single layer for the best presentation. For storage, layer the pieces between sheets of parchment paper in an airtight container. The bark will keep at room temperature for up to 2 weeks—if it lasts that long, which honestly, it won’t.
Sensory cues to watch for: When the white chocolate is perfectly melted, it should be smooth and glossy, like thick cream. If it looks grainy or separated, you’ve overheated it—start over with fresh chocolate. When you press the candy corn into the chocolate, you should feel a slight give; if the chocolate is too firm to press into, it’s cooled too much and the toppings won’t stick well. The finished bark should have a clean snap when you break it, not a bendy or soft texture.
Troubleshooting tip: If your chocolate seizes up (turns into a thick, lumpy mess), you can sometimes save it by adding a teaspoon of vegetable oil or coconut oil and stirring vigorously. But honestly, it’s better to start fresh. White chocolate is finicky that way.
Cooking Tips & Techniques
After making this Easy Candy Corn Bark about a dozen times (and failing spectacularly a few of those times), I’ve gathered some tips that make the process smoother and the results better.
Temperature is everything. White chocolate is the diva of the chocolate world—it hates heat and it hates moisture. If even a single drop of water gets into your melting chocolate, it will seize up into a grainy mess. Make sure your bowl and spatula are completely dry before you start. Also, don’t melt white chocolate on high power in the microwave—it burns at a lower temperature than milk or dark chocolate. Low and slow is the way to go.
Topping distribution matters. I learned this the hard way when I made my first batch and all the candy corn sank to one side because I dumped it in one spot. Sprinkle your toppings evenly across the entire surface, and don’t be shy about pressing them in. The toppings should be visible on top, not buried beneath the chocolate. If you’re using pretzels, break them into smaller pieces so they distribute more evenly and don’t create huge bumps.
Timing your chill. Don’t leave the bark in the fridge for more than an hour—it can develop condensation when you bring it out, which makes the chocolate look dull and can affect the texture. If you’re making this ahead of time, let it set in the fridge for 45 minutes, then transfer to an airtight container at room temperature. The bark will stay firm and shiny.
Multitasking strategy: While the chocolate is melting, have your toppings measured and ready to go. This is a fast-moving recipe once you start, and you don’t want to be fumbling with bags of candy corn while your chocolate cools. I lay out all my ingredients on the counter before I even turn on the microwave.
My biggest failure: The first time I made this, I used cheap white chocolate that had a lot of vegetable oil in it. The bark never set properly—it stayed soft and greasy, and the candy corn slid right off. Lesson learned: invest in good quality white chocolate with cocoa butter. It costs a dollar or two more, but the texture difference is night and day.
Variations & Adaptations
This Easy Candy Corn Bark is wonderfully adaptable. Here are some variations I’ve tried and loved.
Chocolate swap: Use milk chocolate or dark chocolate instead of white chocolate for a less sweet version. Dark chocolate with 60% cocoa solids pairs beautifully with the candy corn—the bitterness cuts the sugar perfectly. I made this for my husband who claims to hate candy corn, and he ate half the batch before admitting he liked it.
Fall harvest version: Add 1/2 cup of roasted pumpkin seeds (pepitas) and 1/4 cup of dried apple pieces (finely chopped) along with the candy corn. The pumpkin seeds add a nutty crunch and the dried apple brings a chewy, tart element. This version is great for Thanksgiving dessert tables.
Halloween spooky bark: Use orange and black sprinkles, add some candy eyeballs (the little white ones with black pupils), and swap the pretzels for broken Oreo pieces. My daughter’s friends went absolutely wild for this version at their Halloween party. The Oreos add a cookies-and-cream vibe that’s hard to resist.
Dietary adaptations: For a dairy-free version, use vegan white chocolate chips (Enjoy Life brand works well) and skip the pretzels if you need it gluten-free. The candy corn itself is usually gluten-free and dairy-free, but always check the package to be sure. For a nut-free version (important for school parties), just leave out any nut-based toppings—the basic recipe is naturally nut-free.
Sprinkle-free option: If you’re not a sprinkle person (I wasn’t until my daughter converted me), skip them entirely. The bark is still beautiful with just the candy corn, pretzels, and cranberries. Sometimes simpler is better.
My personal favorite variation: I make a “salted caramel” version where I drizzle melted caramel sauce over the white chocolate before adding the candy corn, then finish with extra flaky sea salt. The caramel adds a gooey, chewy element that takes this bark to another level. Just be warned—it’s messier to eat, but totally worth it.
Serving & Storage Suggestions
This Easy Candy Corn Bark is best served at room temperature. The chocolate has the best snap and the candy corn is pleasantly chewy when it’s not straight out of the fridge. If you’ve chilled the bark, let it sit on the counter for about 10 minutes before serving.
Presentation ideas: Arrange the broken pieces on a wooden cutting board or a white platter for maximum visual impact. The contrast between the white chocolate, orange candy corn, and brown pretzels is beautiful. For Halloween parties, I like to serve it in a wide-mouth mason jar or a festive bowl lined with orange napkins. You can also stack the pieces in clear cellophane bags tied with ribbon for party favors or teacher gifts.
What to serve with it: This bark pairs wonderfully with hot apple cider, pumpkin spice lattes, or even a glass of cold milk. For a dessert board, arrange it alongside caramel apples, popcorn balls, and small cookies for a fall-themed spread. It also makes a great topping for vanilla ice cream—just crumble it over the top.
Storage instructions: Store the bark in an airtight container at room temperature for up to 2 weeks. Layer the pieces between sheets of parchment or wax paper to prevent them from sticking together. Do not refrigerate for long-term storage—the chocolate can develop a white bloom (fat crystallization) that looks unappetizing, even though it’s still safe to eat. If your kitchen is very warm (above 75°F / 24°C), you can refrigerate it, but let it come to room temperature before serving to avoid condensation.
Freezer instructions: This bark freezes beautifully for up to 3 months. Place the pieces in a single layer on a baking sheet and freeze until solid (about 1 hour), then transfer to a freezer-safe bag or container. Thaw at room temperature for about 15 minutes before serving. The texture remains excellent—I’ve done this for holiday prep and it works perfectly.
Flavor development note: Interestingly, this bark actually tastes better after a day or two. The flavors meld together, and the candy corn softens slightly, making the texture more cohesive. If you can resist eating it immediately (I usually can’t), make it a day ahead for the best results.
Nutritional Information & Benefits
Let’s be real—this is a treat, not a health food. But here’s the nutritional breakdown so you can plan accordingly. Per serving (about 2 ounces / 56 grams, roughly a 3-inch piece):
- Calories: 220
- Total Fat: 11g
- Saturated Fat: 7g
- Cholesterol: 5mg
- Sodium: 95mg
- Total Carbohydrates: 30g
- Dietary Fiber: 0g
- Sugars: 26g
- Protein: 2g
Health highlights: The white chocolate does contain some calcium (about 4% of your daily value per serving) from the milk solids. The dried cranberries offer a small amount of vitamin C and antioxidants. The pretzels add a tiny bit of iron and B vitamins. But honestly, this is a dessert meant for enjoyment, not nutrition. It’s perfect for those moments when you want something special without pretending it’s good for you.
Dietary considerations: This recipe is nut-free (if you skip any nut-based additions), making it safe for school parties. It contains dairy and gluten (from the pretzels), so adjust accordingly for allergies. The candy corn is typically made from corn syrup, sugar, and gelatin—check the label if you’re vegetarian or vegan, as some brands use animal-derived gelatin.
My perspective: I believe in balance. This bark is a treat for celebrations and special occasions, not an everyday snack. One or two pieces satisfies that sweet craving without going overboard. And honestly, the joy it brings to kids and adults alike is worth every calorie.
Conclusion
This Easy Candy Corn Bark has become my go-to fall treat for a reason—it’s simple, fast, and somehow always steals the show. Whether you’re rushing to a school party, hosting a Halloween gathering, or just want something sweet to enjoy with your family on a cool autumn evening, this recipe delivers every single time.
What I love most about it is how customizable it is. You can make it exactly as written, or you can play with different chocolates, toppings, and add-ins to make it your own. My version has evolved over the years, and yours probably will too. That’s the beauty of simple recipes—they leave room for your personal touch.
I’d love to hear how yours turns out! Did you add something unexpected? Did your kids help press in the candy corn? Drop a comment below and share your version—I genuinely read every single one. And if you found a variation that blew your mind, please share it. We’re all in this kitchen together, learning and tasting and making memories.
So grab that bag of candy corn, melt some chocolate, and make something that’ll make everyone smile. You’ve got this—and honestly, it’s almost too easy. Happy fall baking, friends!
Frequently Asked Questions
Can I use chocolate chips instead of melting wafers?
Yes, absolutely. Chocolate chips work fine—just be aware that they contain stabilizers that help them hold their shape, so they may not melt as smoothly as wafers. Add a teaspoon of coconut oil or vegetable shortening to help them melt into a smoother consistency.
How do I prevent the candy corn from falling off the bark?
Press the candy corn gently into the chocolate while it’s still warm and melted. If the chocolate has started to set, the toppings won’t stick as well. Work quickly after spreading the chocolate, and don’t be shy about pressing each piece in with your fingertip.
Can I make this bark ahead of time for a party?
Yes! This bark actually tastes better after a day or two. Make it up to 2 weeks ahead and store it in an airtight container at room temperature. Just make sure it’s fully set before storing, and layer pieces between parchment paper to prevent sticking.
Is candy corn gluten-free?
Most candy corn brands are gluten-free, including Brach’s and store brands. However, always check the label to be sure, as manufacturing processes can vary. The white chocolate and pretzels are the main sources of gluten in this recipe, so adjust accordingly if needed.
Can I freeze candy corn bark?
Yes, it freezes beautifully for up to 3 months. Freeze the pieces in a single layer on a baking sheet first, then transfer to a freezer bag or container. Thaw at room temperature for about 15 minutes before serving. The texture remains excellent after freezing.
Pin This Recipe!
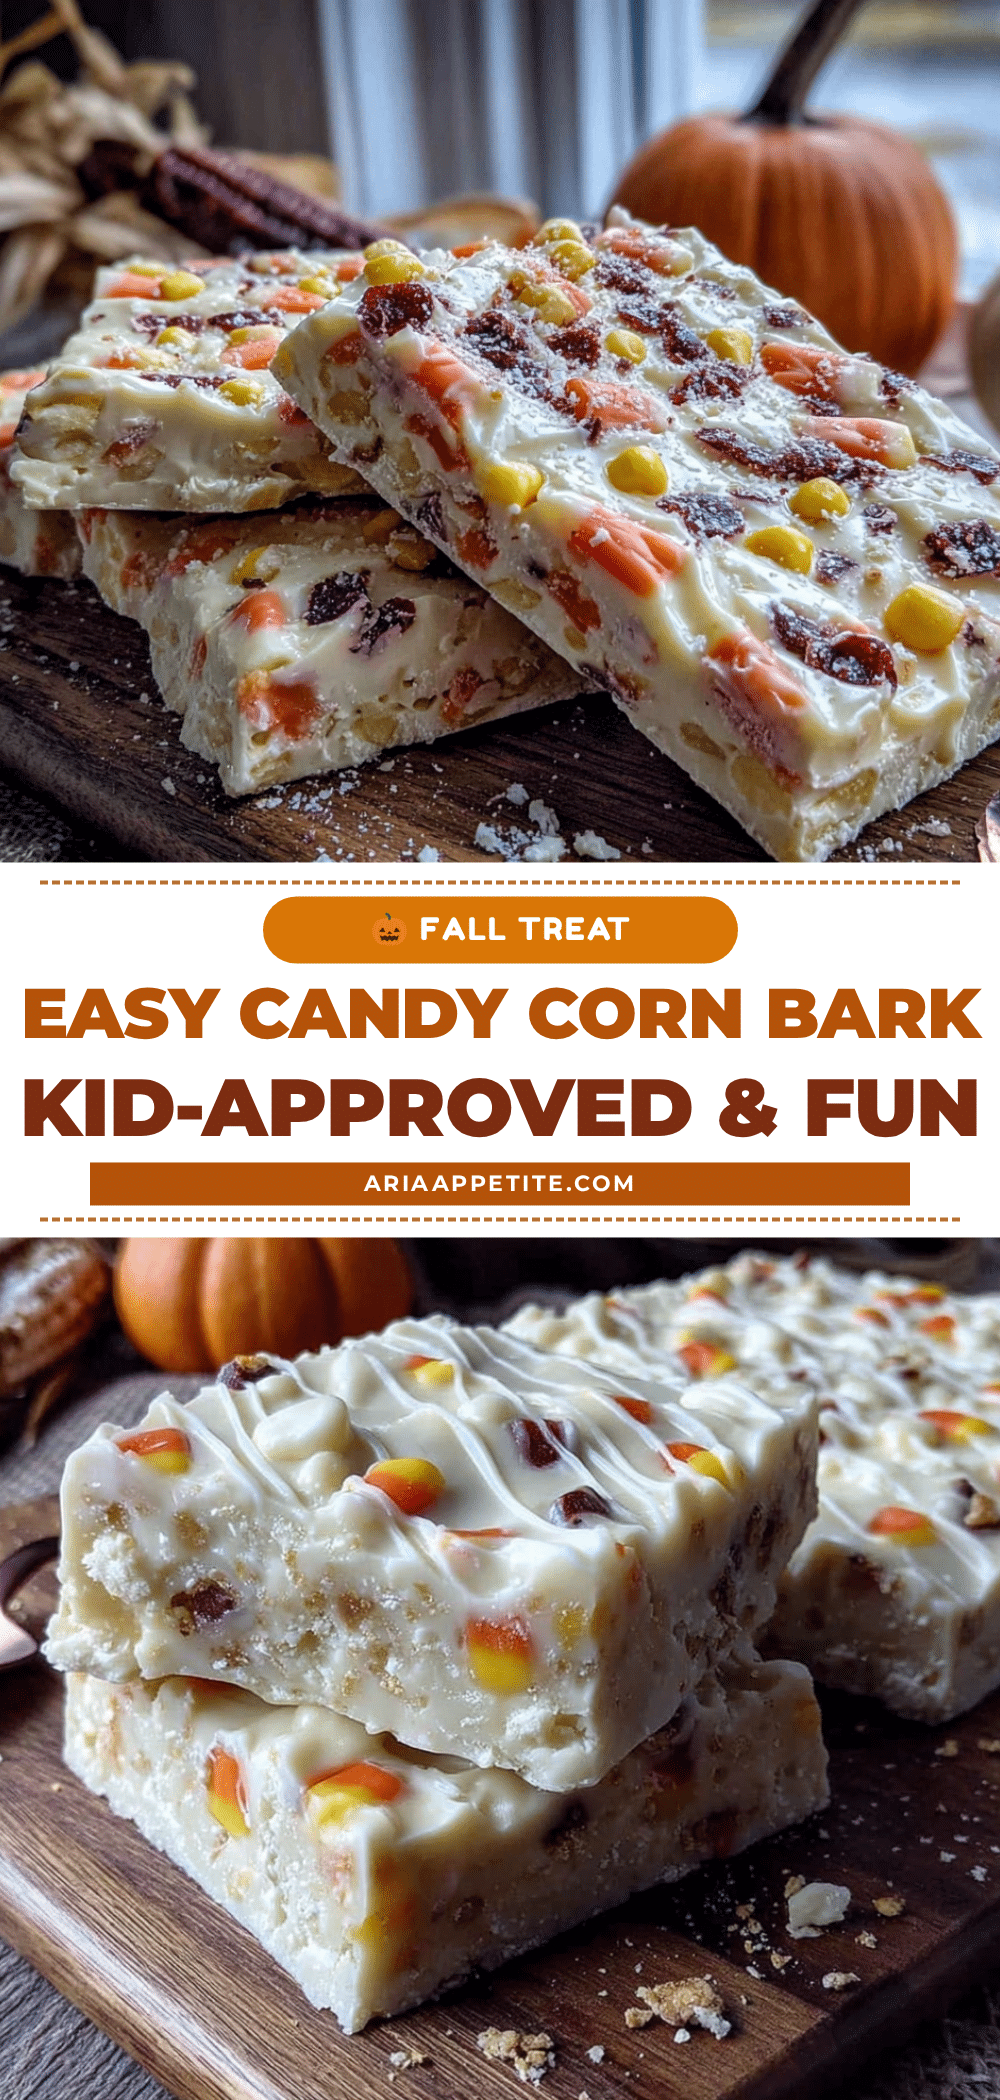
Easy Candy Corn Bark: Best Kid-Approved Fall Treat
This Easy Candy Corn Bark is a quick, simple, and crowd-pleasing fall treat made with white chocolate, candy corn, and optional pretzels and dried cranberries. It’s perfect for Halloween parties, fall festivals, and classroom celebrations, and comes together in just 15 minutes of active time.
- Prep Time: 15 minutes
- Cook Time: 0 minutes
- Total Time: 45 minutes
- Yield: 12 servings 1x
- Category: Dessert
- Cuisine: American
Ingredients
- 24 ounces (680 grams) white chocolate chips or melting wafers
- 2 cups (about 300 grams) candy corn
- 1 cup (about 100 grams) pretzel twists or sticks (optional but recommended)
- 1/2 cup (about 60 grams) dried cranberries or chopped dried cherries (optional)
- 2 tablespoons orange and yellow sprinkles (optional)
- 1/2 teaspoon flaky sea salt (optional)
Instructions
- Prepare your baking sheet: Line a half-sheet pan (13×18 inches) with parchment paper or a silicone baking mat. Crumple the parchment first for easier laying.
- Melt the white chocolate: Place 24 ounces of white chocolate chips in a microwave-safe bowl. Microwave in 30-second intervals at 50% power, stirring thoroughly between each interval, until mostly melted. Stir until smooth. Alternatively, use a double boiler.
- Spread the chocolate: Pour the melted white chocolate onto the center of the prepared baking sheet. Use a rubber spatula to spread it into a rough rectangle about 1/4 inch (6 mm) thick.
- Add the toppings: While the chocolate is still warm, sprinkle 2 cups of candy corn evenly over the surface, pressing each piece gently into the chocolate. Scatter 1 cup of pretzel pieces and 1/2 cup of dried cranberries over the top. Add sprinkles if using. Finish with 1/2 teaspoon of flaky sea salt.
- Chill the bark: Transfer the baking sheet to the refrigerator and chill for at least 30 minutes, or until the chocolate is completely firm. For a quicker set, use the freezer for about 15 minutes.
- Break into pieces: Once fully set, lift the parchment or silicone mat off the baking sheet. Use a sharp knife or pizza cutter to cut into irregular pieces, or break by hand. Aim for pieces about 2-3 inches (5-7 cm) across.
- Serve or store: Transfer the broken pieces to a serving platter or storage container. Serve at room temperature.
Notes
For best results, use good quality white chocolate with cocoa butter. Press candy corn into warm chocolate to prevent it from falling off. The bark tastes even better after a day or two as flavors meld. Store in an airtight container at room temperature for up to 2 weeks. Freezes well for up to 3 months.
Nutrition
- Serving Size: 1 piece (about 2 oun
- Calories: 220
- Sugar: 26
- Sodium: 95
- Fat: 11
- Saturated Fat: 7
- Carbohydrates: 30
- Protein: 2
Keywords: candy corn bark, easy fall treat, Halloween dessert, white chocolate bark, kid-friendly dessert, no-bake dessert