Love this? Save it for later!
Share the inspiration with your friends
I wasn’t expecting cooking advice from my accountant, but there I was, hunched over a pile of W-2 forms in late October, listening to him describe exactly how to make mummy pizza bites for his annual Halloween bash. Frank is this quiet guy—wire-rimmed glasses, always talks about his cat Morrissey—and I’d never pegged him for a party host, let alone a guy who hand-shapes dough into spooky shapes. But he was so animated, so genuinely thrilled about these little pizza mummies, that I scribbled his instructions on the back of an envelope right there. Honestly, that envelope is still taped inside my recipe binder, sauce-stained and everything.
Let me tell you, these mummy pizza bites are the real deal. They’re everything you want in a Halloween appetizer: ridiculously cute, totally customizable, and they disappear faster than candy on trick-or-treat night. Frank wasn’t kidding when he said they steal the show. The first time I made them for a potluck, I watched a grown man in a hot dog costume literally fight a kid for the last one. That’s the power of a well-made mummy pizza bite, my friend.
Maybe you’ve been there—staring down a party platter of sad veggie trays and wondering where the fun is. These mummy pizza bites are the answer. They’re a conversation starter, a crowd-pleaser, and honestly, they make you look like you tried way harder than you actually did. I mean, who doesn’t love pizza? And when it’s dressed up in a little white bandage costume? Forget about it. This recipe has become my go-to for every Halloween gathering, potluck, and even just a fun Friday night movie marathon. It’s the kind of recipe that makes people ask, “Wait, you made these?” and you get to nod smugly while chewing.
Why You’ll Love This Recipe
- Quick & Easy: From fridge to table in under 30 minutes. Perfect for last-minute party prep or when the kids (or adults) get hangry.
- Simple Ingredients: You probably already have crescent roll dough, pizza sauce, mozzarella, and pepperoni in your kitchen. No weird specialty items required.
- Perfect for Halloween Parties: These are the ultimate festive finger food. They’re portable, easy to eat while holding a drink, and they look amazing on a platter.
- Crowd-Pleaser: Kids and adults go absolutely bonkers for them. I’ve seen picky eaters devour four in a row. They’re basically pizza—who says no to pizza?
- Unbelievably Delicious: The flaky, buttery crescent roll exterior paired with gooey cheese and zesty sauce is next-level comfort food. The little pepperoni eyes peeking out just make it better.
What makes these mummy pizza bites different from every other Halloween recipe out there? It’s the technique. I tested this a dozen times—too much dough, not enough cheese, the eyes kept falling off. The secret is using a very sharp knife to cut the dough strips and wrapping them just right so the “bandages” look authentically messy but don’t completely hide the filling. Also, I use a specific trick to keep the pepperoni eyes from sliding off during baking—you’ll see it in the method. This isn’t just another version of a Halloween snack. It’s the best version. The one that makes you the hero of the party.
This recipe is for the host who wants to impress without stress. The one who wants to spend time with their guests, not stuck in the kitchen. These mummy pizza bites are your secret weapon. They’re fun, they’re festive, and they taste incredible. Honestly, they make me close my eyes after the first bite every single time. Comfort food reimagined for a spooky night.
What Ingredients You Will Need
This recipe uses simple, everyday ingredients to create something truly special. The magic is in how they come together—each component plays a role in delivering that perfect bite of flaky, cheesy, saucy goodness. Here’s what you’ll need to gather.
For the Mummy Pizza Bites
- 1 can (8 oz) refrigerated crescent roll dough (I recommend Pillsbury for the flakiest texture. Look for the sheet-style dough if you can find it—it saves you from pressing seams together.)
- 1/2 cup pizza sauce (Use your favorite jarred sauce or make a quick one. I love Rao’s for its rich flavor, but any brand works.)
- 1 cup shredded low-moisture mozzarella cheese (Fresh mozzarella is too watery. Low-moisture gives you that perfect stretch without making the dough soggy.)
- 24-30 small pepperoni slices (These become the mummy’s eyes. Look for the mini pepperoni or use regular slices cut in half.)
- 1 tablespoon unsalted butter, melted (This is for brushing on top to get that golden-brown finish. Adds richness and helps the “bandages” look shiny.)
- 1/2 teaspoon garlic powder (Optional, but I add it to the melted butter for a little extra savory punch. Trust me on this.)
- 1/4 teaspoon salt (A pinch for the butter wash.)
For the Dipping Sauce (Optional but Recommended)
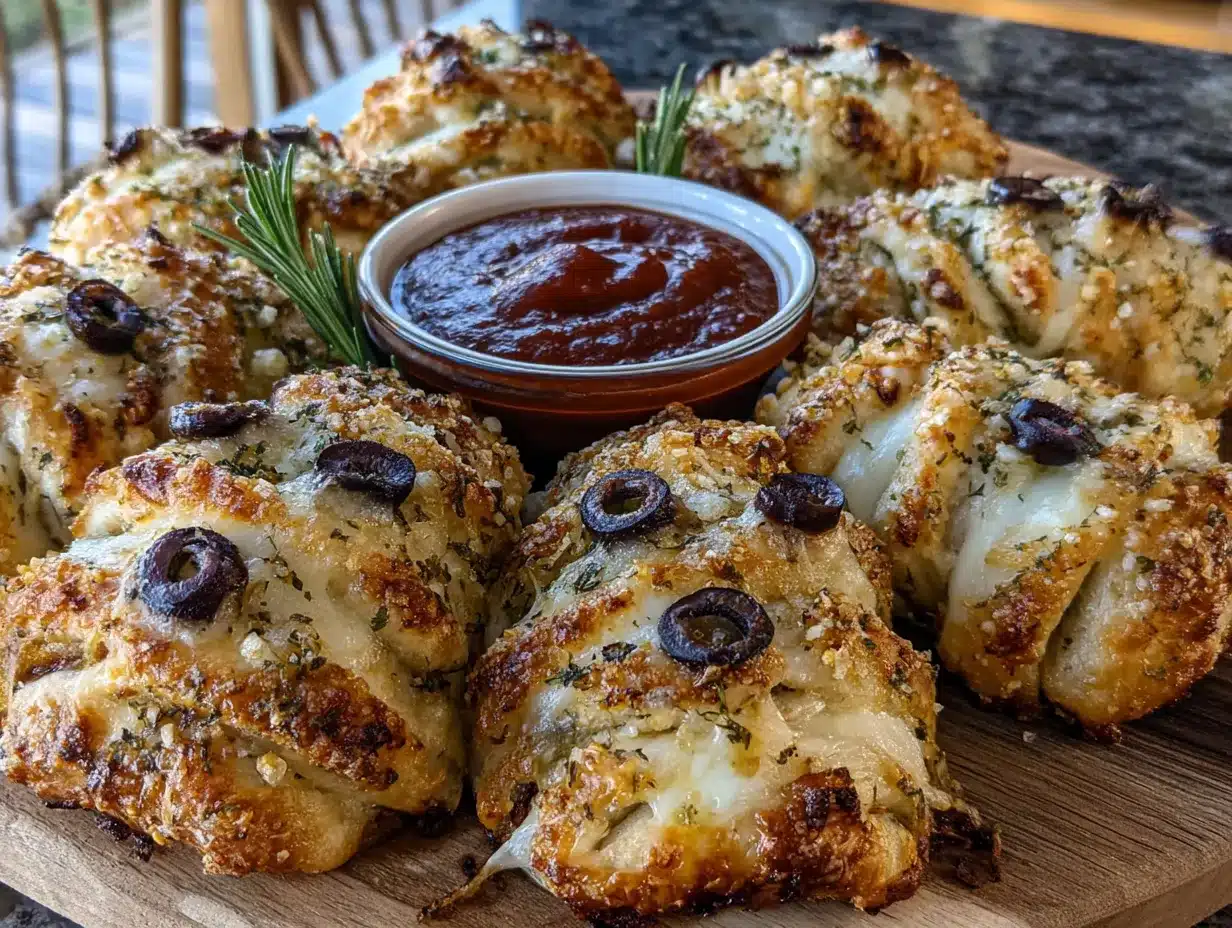
- 1/2 cup pizza sauce or marinara (Warm it up for serving. Adds a cozy, dippable element.)
- 1 tablespoon grated Parmesan cheese (For sprinkling on top of the finished mummies. Adds a salty, nutty finish.)
- Fresh parsley or basil, chopped (For garnish. Makes them look extra fancy on the platter.)
Ingredient Selection Tips: For the best results, use a refrigerated crescent roll dough that’s cold—not room temperature. Cold dough is easier to cut and handle. If you’re using sheet-style dough, you’ll need to cut it into triangles yourself. If you’re using the perforated triangles, just press the seams together gently and then cut. Also, look for pepperoni that’s not too greasy. The less oil, the better it holds its shape during baking.
Substitution Guidance: Want to make these vegetarian? Skip the pepperoni and use small slices of black olive or a tiny piece of red bell pepper for the eyes. Need a gluten-free option? Use gluten-free crescent roll dough (it’s available at most major grocery stores now) and check your pizza sauce label. For a dairy-free version, use dairy-free mozzarella shreds and a plant-based butter. The texture will be a little different, but the flavor is still fantastic.
Equipment Needed
You don’t need any fancy gadgets for this recipe, which is part of its charm. Here’s what you’ll need to have on hand.
- Baking sheet (A standard 13×18 inch sheet works great. Line it with parchment paper for easy cleanup.)
- Parchment paper (Non-stick and saves you from scrubbing. I never bake without it.)
- Sharp knife or pizza cutter (For cutting the dough into strips. A pizza cutter is faster, but a sharp chef’s knife gives you more control.)
- Pastry brush (For brushing the melted butter on top. A silicone brush is my favorite—it doesn’t shed bristles.)
- Small bowl (For mixing the melted butter and garlic powder.)
- Measuring cups and spoons (You’ll need these for the sauce and butter.)
- Cooling rack (Optional, but helps the mummies stay crispy on the bottom instead of getting steamy on the baking sheet.)
Budget-Friendly Options: Don’t have a pastry brush? Use a spoon to drizzle the butter over the dough. No cooling rack? Just transfer the mummies to a plate after a minute or two on the sheet. Honestly, I’ve made these with just a baking sheet and a butter knife, and they turned out great. The tools help, but the technique is what matters.
Maintenance Tip: If you use a pizza cutter, make sure it’s sharp. A dull cutter will drag and tear the dough instead of slicing cleanly. I learned this the hard way after a frustrating batch of ragged strips. A quick sharpen makes all the difference.
Preparation Method
Let’s get to the fun part. These mummy pizza bites come together in about 25 minutes, and the process is almost as enjoyable as eating them. Follow these steps carefully, and you’ll have a platter of adorable, delicious mummies ready for your Halloween party.
Step 1: Preheat and Prep (5 minutes)
Preheat your oven to 375°F (190°C). Line your baking sheet with parchment paper. This is non-negotiable for easy cleanup and to prevent sticking. While the oven heats, take your crescent roll dough out of the fridge. Unroll it onto a clean cutting board or countertop. If you’re using perforated triangles, press the seams together gently with your fingers to create one solid sheet of dough.
Step 2: Cut the Dough into Strips (5 minutes)
Using a sharp knife or pizza cutter, cut the dough sheet into long strips about 1/2 inch wide. You should get about 12-14 strips from one can. Don’t worry if they’re not perfectly even—the mummies look better with slightly irregular bandages. It adds to the “wrapped” effect. If the dough starts to get too soft, pop it in the fridge for 5 minutes to firm up.
Step 3: Assemble the Mummies (10 minutes)
Take one strip of dough. Spread a small spoonful of pizza sauce (about 1 teaspoon) down the center of the strip. Don’t go overboard—too much sauce will make the dough soggy. Sprinkle a generous pinch of shredded mozzarella on top of the sauce. Place two pepperoni slices at one end of the strip, slightly apart—these will be the mummy’s eyes. Now, fold the dough over the filling, wrapping it loosely like a bandage. Start from the end opposite the eyes, wrapping around and around, leaving the pepperoni eyes exposed. Tuck the end of the dough underneath to secure it. Place the assembled mummy on the prepared baking sheet, seam-side down. Repeat with the remaining strips and filling. You should get about 12-14 mummies.
Pro Tip from My Kitchen: Don’t wrap the dough too tightly. You want the “bandages” to have some loose folds and gaps so you can see the cheese and sauce peeking through. It looks more authentic and more appetizing. My first batch looked like tight little burritos—still tasty, but not very mummy-like.
Step 4: The Butter Wash (2 minutes)
In a small bowl, mix the melted butter with the garlic powder and salt. Using your pastry brush, gently brush the butter mixture over each mummy. This is what gives them that gorgeous golden-brown color and makes the bandages look shiny and slightly crispy. Don’t skip this step—it’s the difference between pale dough and beautiful mummies.
Step 5: Bake to Perfection (10-12 minutes)
Place the baking sheet in the preheated oven. Bake for 10-12 minutes, or until the dough is golden brown and the cheese is bubbly and melted. The pepperoni eyes will get slightly crispy around the edges—that’s perfect. Keep an eye on them after 10 minutes; ovens vary, and you don’t want to over-bake. The mummies should be firm to the touch but still flaky.
Step 6: Cool and Serve (2 minutes)
Remove the baking sheet from the oven. Let the mummies cool on the sheet for 2 minutes—this allows the cheese to set slightly so it doesn’t ooze out when you pick them up. Transfer them to a cooling rack or a serving platter. Sprinkle with grated Parmesan and fresh parsley if you’re feeling fancy. Serve warm with extra pizza sauce for dipping.
Sensory Cue: The kitchen should smell like a pizzeria crossed with a buttery bakery. The mummies will look like little golden cocoons with two adorable pepperoni eyes staring up at you. The cheese will be stretchy and the dough will shatter slightly when you bite into it. Pure magic.
Cooking Tips & Techniques
After making these mummy pizza bites about a dozen times (and messing up plenty), I’ve gathered some hard-won wisdom. Here’s what I’ve learned so you don’t have to make the same mistakes.
Keep the Dough Cold
This is the number one tip. Cold dough is manageable dough. If it gets warm and sticky, it’s a nightmare to cut and wrap. If you’re working slowly, pop the dough back in the fridge for 5 minutes between batches. I once tried to rush through assembly with warm dough, and the strips turned into a sticky, unworkable mess. Lesson learned.
Don’t Overfill
It’s tempting to load up on sauce and cheese, but resist the urge. Too much filling makes the mummies burst open during baking, and you end up with a puddle of cheese on the baking sheet. A teaspoon of sauce and a generous pinch of cheese is plenty. You want the filling to be a surprise inside the bandages, not the main event spilling out everywhere.
Pepperoni Eye Placement
Place the pepperoni slices at the very end of the dough strip before you start wrapping. Make sure they’re slightly separated—if they’re too close together, it looks like one giant cyclops eye instead of two cute mummy eyes. Also, don’t cover them completely with dough. The whole point is to see those little pepperoni eyes peeking out. If a slice falls off during wrapping, just press it back into place on top of the dough.
Multitasking Strategy
While the mummies are baking, warm up your dipping sauce in a small saucepan or microwave. Chop your parsley garnish. Set out your serving platter. This way, everything is ready the moment they come out of the oven. The mummies are best served warm, so timing is everything.
Consistency is Key
For uniform baking, try to make all the mummies roughly the same size. If some are much bigger than others, the smaller ones will over-bake while the larger ones are still doughy. I use a ruler to cut my strips—okay, that’s a little obsessive, but it works. Aim for strips that are about the same width and length.
Variations & Adaptations
One of the best things about this recipe is how easy it is to customize. Here are some variations I’ve tried and loved.
Spicy Sausage Mummies
Swap the pepperoni for cooked, crumbled spicy Italian sausage. The sausage adds a savory, slightly spicy kick that pairs beautifully with the buttery dough. Use a small spoonful of sausage instead of the pepperoni slices for the “filling” and use a tiny piece of red bell pepper for the eyes. These are a hit with the grown-up crowd.
Vegetarian Harvest Mummies
Skip the pepperoni entirely. For the eyes, use a small slice of black olive or a sliver of roasted red pepper. Add some finely chopped mushrooms or spinach to the cheese mixture for extra flavor and texture. I made these for a vegetarian friend, and she said they were the best thing at the party. High praise.
Cheesy Garlic Mummies
For a super simple variation, skip the pepperoni and just use cheese. Add a pinch of dried oregano and a small clove of minced garlic to the butter wash. These are perfect for kids who might be scared of pepperoni “eyes” (yes, that’s a thing). They’re essentially cheesy garlic bread in mummy form.
Air Fryer Method
Yes, you can make these in an air fryer. Preheat the air fryer to 350°F (175°C). Place the mummies in the basket in a single layer (you might need to work in batches). Cook for 6-8 minutes, flipping halfway through, until golden brown. The air fryer makes the dough extra crispy. I actually prefer this method when I’m only making a small batch.
Gluten-Free Adaptation
Use a gluten-free crescent roll dough. The texture is slightly different—a bit more crumbly—but the flavor is still great. Handle the dough gently, as it can tear more easily. Bake for the same amount of time, but check a minute or two early to prevent over-browning.
Serving & Storage Suggestions
These mummy pizza bites are best served warm, straight from the oven. The cheese is stretchy, the dough is flaky, and the pepperoni eyes are perfectly crispy. Here’s how to make them shine at your Halloween party.
Serving Presentation
Arrange the mummies on a large platter in a circle, with the eyes facing outward. Place a small bowl of warm pizza sauce in the center for dipping. Sprinkle with fresh parsley or basil for a pop of green. If you want to get really festive, use a black or orange serving platter. Add a few fake spiderwebs or plastic spiders around the platter for a spooky touch. Your guests will lose their minds.
What to Serve Alongside
These mummies are perfect as a standalone appetizer, but they pair beautifully with other Halloween party snacks. Serve them alongside a bowl of spicy pumpkin dip for a festive spread. A crisp green salad with a tangy vinaigrette balances the richness of the cheese. For drinks, try a blood orange mocktail or a pumpkin spice latte for the adults. You could also set up a “mummy bar” with extra toppings like sliced olives, jalapeños, and different dipping sauces.
Storage Instructions
If you have leftovers (unlikely, but possible), store them in an airtight container in the refrigerator for up to 3 days. The dough will soften slightly, but they’re still delicious. To reheat, pop them in a 350°F oven for 5-7 minutes, or in the air fryer for 3-4 minutes. Avoid the microwave—it makes the dough soggy and sad. I don’t recommend freezing these, as the texture of the crescent roll dough can become gummy after thawing.
How Flavors Develop
Honestly, these are best fresh. The magic is in the contrast between the crispy, warm dough and the gooey cheese. That said, they’re still pretty tasty cold the next day—kind of like cold pizza. I’ve been known to eat them straight from the fridge at 11 PM. No judgment.
Nutritional Information & Benefits
Let’s be real—these mummy pizza bites are a treat, not a health food. But they’re made with real ingredients, and there are a few bright spots worth mentioning.
Estimated Nutritional Values (per mummy, based on 12 servings)
- Calories: 120-140
- Fat: 7-9g
- Carbohydrates: 10-12g
- Protein: 4-5g
- Fiber: <1g
- Sugar: 2-3g
Note: These values are estimates and will vary based on the specific brands and quantities you use.
Health Benefits of Key Ingredients
The mozzarella cheese provides a good amount of calcium and protein, which is great for bone health and muscle repair. The pizza sauce contains lycopene from the tomatoes, a powerful antioxidant linked to heart health. The crescent roll dough, while not exactly a superfood, provides carbohydrates for quick energy—perfect for powering through a Halloween party.
Dietary Considerations
This recipe is vegetarian if you skip the pepperoni. It can be made gluten-free and dairy-free with the right substitutions. It is not suitable for a vegan diet due to the cheese and butter, but you could experiment with vegan alternatives. Potential allergens include wheat (gluten), dairy, and soy (in some crescent roll doughs). Always check your ingredient labels.
From a personal perspective, I love that this recipe lets me indulge without guilt. It’s a treat for a special occasion, and it brings so much joy to the table. That’s worth more than a few extra calories, in my book.
Conclusion
These crowd-pleasing mummy pizza bites are the recipe you didn’t know you needed for your Halloween party. They’re fun, they’re delicious, and they’re surprisingly easy to make. The story behind them—a quiet accountant with a passion for party snacks—reminds me that the best recipes often come from the most unexpected places.
I honestly can’t recommend these enough. They’ve become a staple at my Halloween gatherings, and I love seeing people’s faces light up when they see the little pepperoni eyes staring up at them. The best part is how customizable they are. Make them spicy, make them vegetarian, make them your own. That’s the beauty of a simple recipe done right.
So go ahead—grab a can of crescent rolls, some cheese, and a handful of pepperoni. Make a batch of these mummies for your next Halloween party. Your guests will thank you. And if you come up with a fun variation, I’d love to hear about it. Drop a comment below or tag me in your photos. Let’s make this Halloween the tastiest one yet. Happy haunting, and happy eating!
Frequently Asked Questions
Can I make these mummy pizza bites ahead of time?
You can assemble them up to 4 hours ahead and keep them covered in the refrigerator. Bake them just before serving for the best texture. If you bake them ahead, they’ll lose their crispy magic.
Can I use puff pastry instead of crescent roll dough?
Absolutely. Puff pastry will give you a flakier, more buttery result. Just cut it into strips and follow the same assembly instructions. The baking time might be slightly longer—about 14-16 minutes—so keep an eye on them.
How do I keep the pepperoni eyes from falling off during baking?
Make sure the pepperoni slices are pressed gently into the dough before wrapping. You can also use a tiny dab of sauce or cheese to “glue” them in place. If one does fall off, just press it back on as soon as the mummies come out of the oven—the residual heat will stick it.
Can I make these in a toaster oven?
Yes, a toaster oven works great. Preheat it to 375°F and bake for 8-10 minutes. Check them a minute or two early, as toaster ovens can run hot. You might need to rotate the pan halfway through for even browning.
What’s the best way to reheat leftovers?
The oven or air fryer is your best bet. Reheat at 350°F for 5-7 minutes (oven) or 3-4 minutes (air fryer). The microwave will make the dough soft and chewy, which isn’t ideal. Trust me, I’ve tried all three methods.
Pin This Recipe!
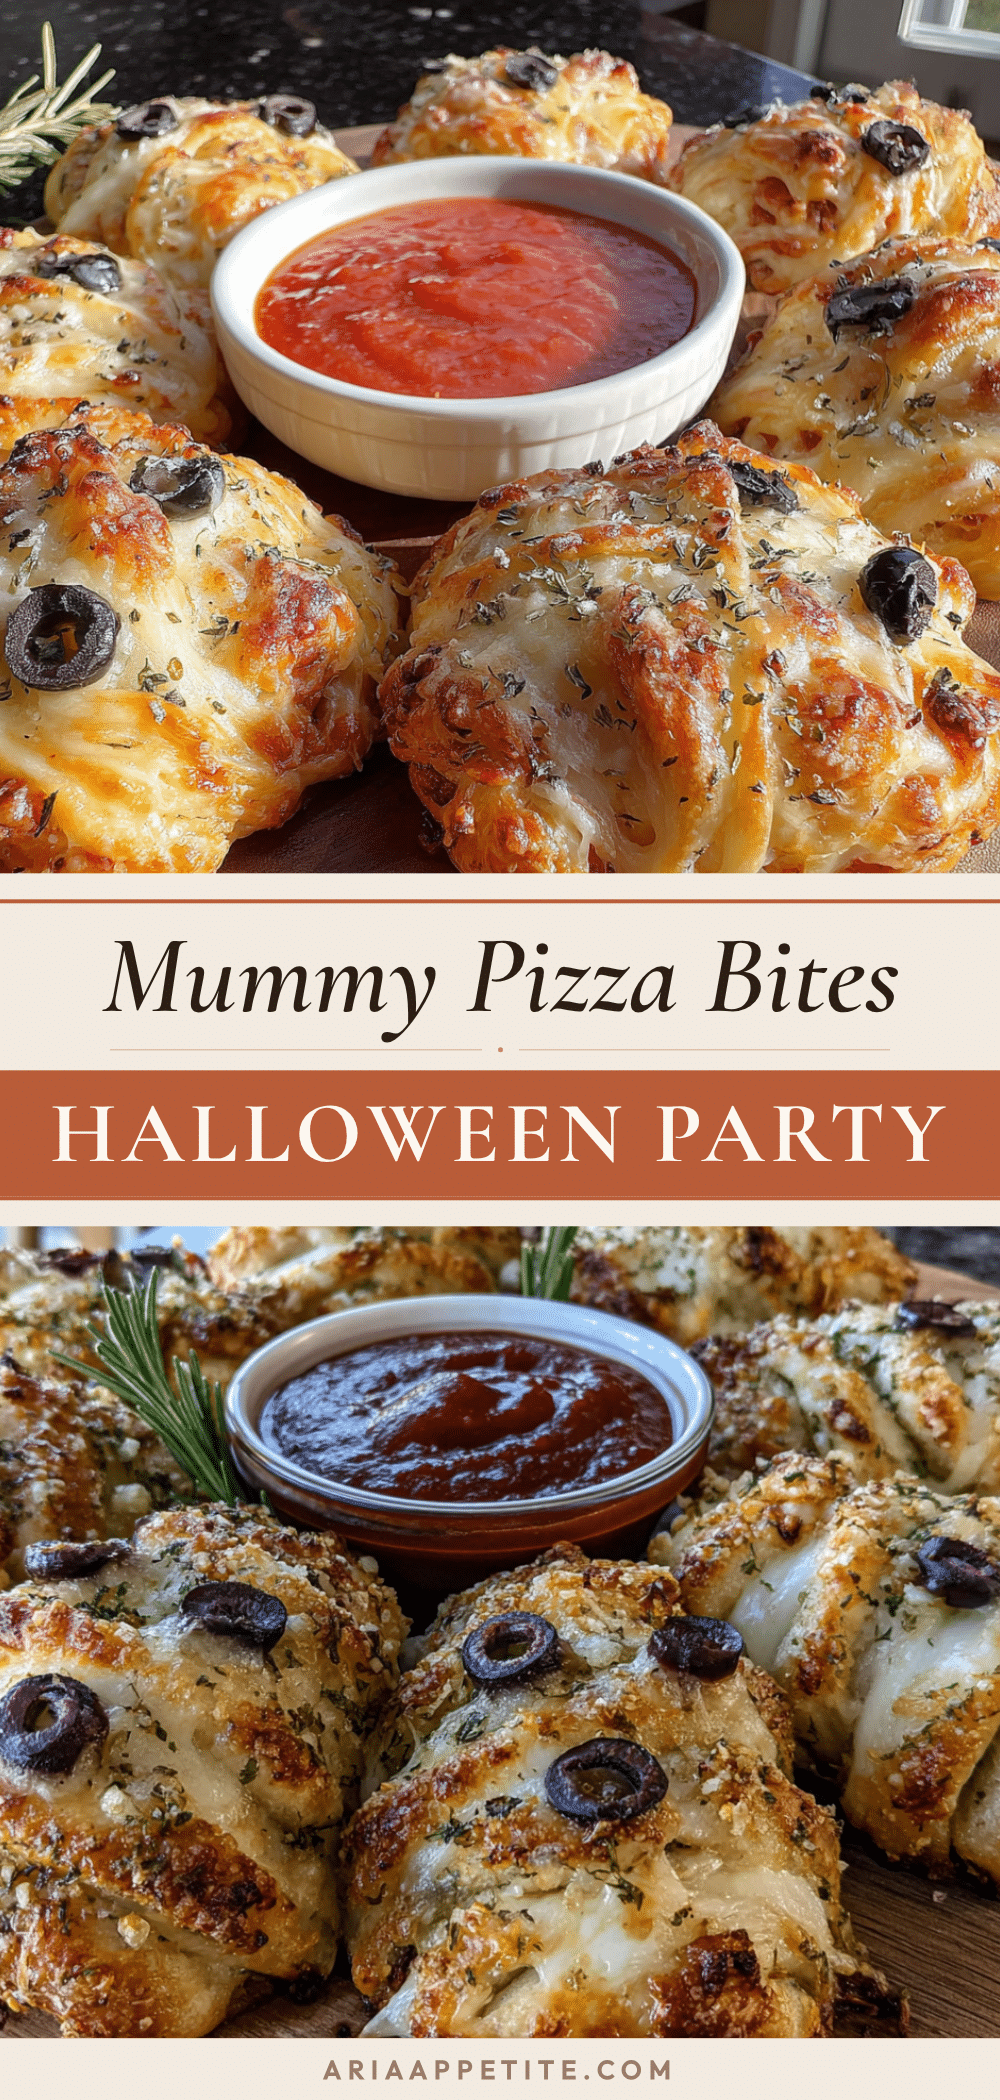
Crowd-Pleasing Mummy Pizza Bites: Easy Halloween Party Recipe

These adorable mummy pizza bites are the ultimate Halloween appetizer—quick, easy, and totally customizable. Made with crescent roll dough, pizza sauce, mozzarella, and pepperoni, they’re a crowd-pleaser that disappears faster than candy on trick-or-treat night.
- Prep Time: 15 minutes
- Cook Time: 12 minutes
- Total Time: 27 minutes
- Yield: 12-14 mummies 1x
- Category: Appetizer
- Cuisine: American
Ingredients
- 1 can (8 oz) refrigerated crescent roll dough
- 1/2 cup pizza sauce
- 1 cup shredded low-moisture mozzarella cheese
- 24–30 small pepperoni slices
- 1 tablespoon unsalted butter, melted
- 1/2 teaspoon garlic powder
- 1/4 teaspoon salt
- 1/2 cup pizza sauce or marinara (for dipping)
- 1 tablespoon grated Parmesan cheese (for garnish)
- Fresh parsley or basil, chopped (for garnish)
Instructions
- Preheat oven to 375°F (190°C). Line a baking sheet with parchment paper.
- Unroll crescent roll dough onto a clean surface. If using perforated triangles, press seams together to form a solid sheet.
- Using a sharp knife or pizza cutter, cut dough into long strips about 1/2 inch wide (12-14 strips).
- Take one strip of dough. Spread about 1 teaspoon of pizza sauce down the center. Sprinkle a generous pinch of mozzarella on top. Place two pepperoni slices at one end for eyes.
- Fold the dough over the filling, wrapping loosely like a bandage, leaving the pepperoni eyes exposed. Tuck the end underneath to secure. Place seam-side down on the prepared baking sheet. Repeat with remaining strips.
- In a small bowl, mix melted butter with garlic powder and salt. Brush the butter mixture over each mummy.
- Bake for 10-12 minutes, until golden brown and cheese is bubbly.
- Let cool on the baking sheet for 2 minutes. Transfer to a serving platter. Sprinkle with Parmesan and fresh parsley. Serve warm with extra pizza sauce for dipping.
Notes
Keep dough cold for easier handling. Don’t overfill to prevent bursting. For vegetarian version, use black olive or red bell pepper slices for eyes. For gluten-free, use gluten-free crescent roll dough. For dairy-free, use dairy-free mozzarella and plant-based butter.
Nutrition
- Serving Size: 1 mummy
- Calories: 130
- Sugar: 2.5
- Sodium: 280
- Fat: 8
- Saturated Fat: 3
- Carbohydrates: 11
- Fiber: 0.5
- Protein: 4.5
Keywords: Halloween, mummy pizza bites, crescent roll appetizer, pepperoni, party snack, easy Halloween recipe


