Love this? Save it for later!
Share the inspiration with your friends
This was supposed to be a proper homemade pizza night. I had the dough rising, the sauce simmering, and a plan for a beautiful, rustic margherita. But somewhere between the school pickup and the third “are we there yet” about Halloween, I completely lost track of time. The dough was over-proofed, the kids were hungry, and I was already running late for the neighborhood costume parade. I stared at the sad, puffy dough and the clock, ready to scrap the whole idea. Then my eyes landed on the bag of string cheese and the jar of olive slices in the fridge, and a ridiculous, desperate idea popped into my head. What if I just made the pizza into little faces?
I mean, honestly, it was a panic move. I rolled the dough into small balls, flattened them into ovals, and started wrapping strips of string cheese around them like bandages. I added little olive eyes and threw them in the oven, fully expecting a gooey, stringy mess. What came out was nothing like the plan — and better. The cheese had melted into perfect, crispy white wrappings, and the olives looked like tiny, terrified eyes peeking out. The kids went absolutely bonkers. They forgot all about the candy for a solid five minutes, which, let me tell you, is a Halloween miracle. These Easy Mummy Halloween Pizza Bites were born from a total kitchen failure, and now they are the only thing I make for Halloween dinner.
Maybe you’ve been there — the night before a holiday, the clock ticking, and the Pinterest-worthy plan falling apart. These little guys are the save. They are fun, fast, and honestly, they taste way better than a stressed-out homemade pizza ever would. They’ve become our official October 31st tradition, and I have a feeling they are about to become yours too.
Why You’ll Love This Recipe
Let me tell you why these Easy Mummy Halloween Pizza Bites are about to become your new favorite Halloween tradition. I’ve tested this recipe about six times now — tweaking the dough thickness, the cheese-to-sauce ratio, and the baking time — and this version is absolutely foolproof. It’s the kind of recipe that makes you look like a kitchen hero with almost zero effort.
- Quick & Easy: From start to finish, these are ready in under 25 minutes. Perfect for that pre-trick-or-treating chaos when everyone is hangry and in costume.
- Simple Ingredients: No fancy grocery trips needed. You likely already have pizza dough, string cheese, marinara, and olives in your kitchen. I always keep a tube of refrigerated pizza dough in the fridge just for emergencies like this.
- Perfect for Halloween: Great for parties, school lunches, or a fun dinner before the candy hunt. They are spooky but not scary — even the littlest ghouls will love them.
- Crowd-Pleaser: Always gets rave reviews from kids and adults alike. I’ve seen grown-ups sneak three of these before dinner even started.
- Unbelievably Delicious: The combination of crispy, golden dough, melted mozzarella, and tangy marinara is next-level comfort food. The “mummy” wrappings get perfectly browned and chewy — it’s pure magic.
What makes this recipe different from the rest? It’s the texture. By using string cheese instead of shredded mozzarella, you get these beautiful, defined strips that crisp up on the edges while staying gooey in the middle. It’s not just another pizza roll — it’s a little work of art that tastes incredible. This recipe isn’t just good — it is the kind that makes you close your eyes after the first bite. It’s comfort food reimagined for Halloween — faster, cuter, but with the same soul-soothing satisfaction.
What Ingredients You Will Need
This recipe uses simple, wholesome ingredients to deliver bold flavor and satisfying texture without the fuss. Most of these are pantry staples, especially if you keep a well-stocked fridge for pizza nights.
- Pizza Dough: 1 pound (450g) store-bought or homemade pizza dough. I recommend Pillsbury refrigerated pizza dough for convenience, but any brand works. If using homemade, make sure it’s at room temperature for easy rolling.
- String Cheese: 8 sticks (about 240g) mozzarella string cheese. This is the secret to the mummy look. Don’t substitute with shredded cheese — it won’t wrap the same way. I prefer Sargento or Frigo brands for the best peel-ability.
- Marinara Sauce: 1/2 cup (120ml) of your favorite marinara or pizza sauce. I use Rao’s for its rich flavor, but any jarred sauce works. You can also use leftover spaghetti sauce in a pinch.
- Black Olives: 16 whole black olives, pitted. These become the mummy eyes. Look for large, firm olives like California black olives — they hold their shape better during baking.
- Egg Wash: 1 large egg, beaten with 1 tablespoon (15ml) of water. This gives the dough a beautiful golden shine. You can skip it for a more matte look, but I love the glossy finish.
- Garlic Powder: 1 teaspoon (3g) for sprinkling on top. Adds a savory depth that makes these irresistible. I use McCormick, but any brand is fine.
- Italian Seasoning: 1 teaspoon (2g) for extra flavor. Optional, but I never skip it. It makes the kitchen smell incredible.
- Flour: For dusting your work surface. Just a light sprinkle to prevent sticking.
- Optional Dipping Sauce: Extra marinara, ranch dressing, or garlic butter for serving. The kids love ranch, but I’m a marinara purist.
For the best texture, look for string cheese that’s fresh and not too dry. If the cheese cracks when you peel it, it’s a bit old — use a fresh batch for perfect mummy wrappings. You can also use fresh mozzarella cut into thin strips, but string cheese is much easier and gives more consistent results.
Equipment Needed
You don’t need any fancy gadgets for these Easy Mummy Halloween Pizza Bites. Here’s what I use every time:
- Baking Sheet: A standard 13×18 inch (33×46 cm) rimmed baking sheet. I prefer light-colored metal sheets for even browning. Dark sheets can burn the bottoms.
- Parchment Paper: Absolutely essential for easy cleanup and preventing sticking. I never bake these directly on the pan.
- Rolling Pin: For rolling out the dough evenly. A wine bottle works in a pinch — I’ve done it.
- Sharp Knife or Pizza Cutter: For cutting the dough into strips and slicing the olives. A pizza cutter makes the straightest cuts.
- Small Bowl: For the egg wash. Any small dish works.
- Pastry Brush: For brushing the egg wash. A silicone brush is easiest to clean.
- Cutting Board: For prepping the olives and dough.
- Measuring Spoons: For the garlic powder and Italian seasoning.
If you don’t have a rolling pin, just press the dough out with your hands — it doesn’t need to be perfect. The mummies look better when they’re a little uneven anyway! I got my baking sheet from a restaurant supply store for under $10, and it’s lasted me years. No need to splurge on expensive equipment here.
Preparation Method
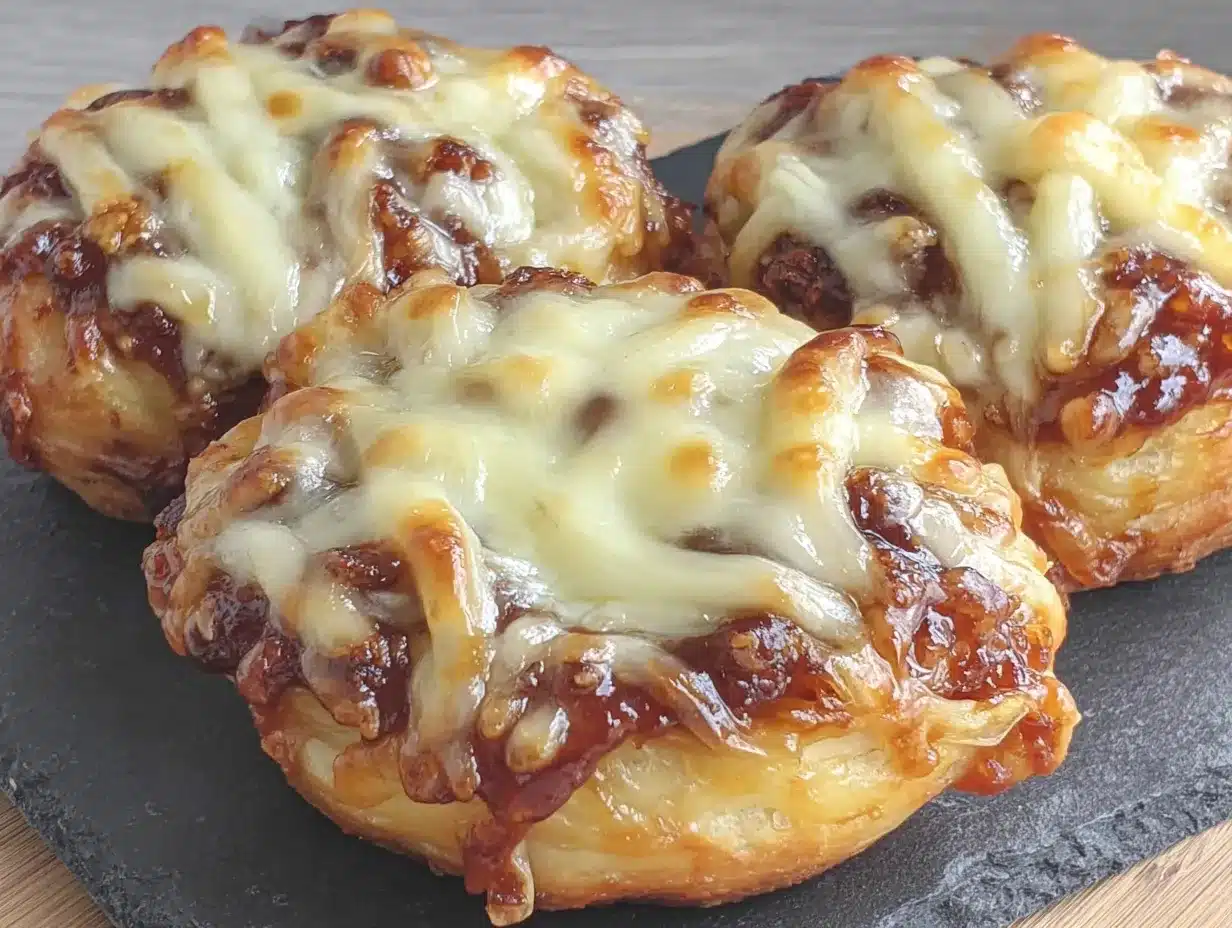
Follow these steps carefully, and you’ll have the cutest Halloween dinner on the table in no time. I’ve included all my little tricks for perfect results every time.
- Preheat your oven to 400°F (200°C). Line your baking sheet with parchment paper. This is non-negotiable — the cheese will stick to a bare pan. Trust me, I learned the hard way.
- Prepare your work surface. Lightly dust a clean counter or cutting board with flour. Unroll or place your pizza dough on the floured surface. If using refrigerated dough, let it sit at room temperature for 10 minutes — it’s much easier to work with when it’s not cold.
- Roll out the dough. Using a rolling pin, roll the dough into a large rectangle, about 1/4 inch (6mm) thick. Don’t stress about perfect edges — the mummies will hide any imperfections. If the dough springs back, let it rest for 5 minutes and try again.
- Cut the dough into strips. Using a pizza cutter or sharp knife, cut the dough into 8 equal rectangles. Each rectangle should be about 4×6 inches (10×15 cm). Then, cut each rectangle lengthwise into 4-5 thin strips, leaving the top inch connected. This creates a “fringe” that will become the mummy wrappings. I like to leave a solid section at the top for the head.
- Prepare the mummy bodies. Take one piece of string cheese and place it in the center of the solid top section of a dough strip. Fold the dough over the cheese to cover it. Then, start wrapping the fringed dough strips around the cheese, crisscrossing them like bandages. Leave a small gap near the top for the eyes. Don’t wrap too tightly — the cheese needs room to expand as it melts. Repeat with all 8 pieces of string cheese.
- Place on baking sheet. Arrange the mummies on the prepared baking sheet, spacing them about 2 inches (5 cm) apart. They will puff up a bit, so give them room to breathe.
- Add the egg wash. In a small bowl, beat the egg with 1 tablespoon of water. Using a pastry brush, lightly brush the tops of each mummy with the egg wash. This gives them that gorgeous golden color. Don’t soak them — just a light coat.
- Season the mummies. Sprinkle the garlic powder and Italian seasoning evenly over the tops. Be generous — this is where the flavor lives.
- Bake for 12-15 minutes. Bake until the dough is golden brown and the cheese is melted and bubbly. The edges of the dough strips should be crispy. Watch them closely after 12 minutes — ovens vary, and you don’t want burnt mummies.
- Add the eyes. While the mummies bake, cut each black olive in half crosswise. You’ll have two round “eye” pieces per olive. Set aside. As soon as the mummies come out of the oven, gently press two olive halves into the exposed cheese gap to create the eyes. The heat will help them stick. Be careful — the cheese is hot!
- Let them rest. Allow the mummies to cool on the baking sheet for 5 minutes. This lets the cheese set slightly so they hold their shape when you move them. Serve warm with your favorite dipping sauce.
A quick sensory note: when they’re done, the kitchen will smell like a pizzeria crossed with a cozy fall evening. The dough will be golden and puffed, the cheese will be oozing just a little, and the olive eyes will look adorably terrified. That’s how you know they’re perfect.
Cooking Tips & Techniques
I’ve made these Easy Mummy Halloween Pizza Bites more times than I care to admit, and I’ve collected a few hard-won lessons along the way. Here are my best tips for perfect mummies every time.
Don’t overwork the dough. When you’re wrapping the cheese, handle the dough gently. If you stretch it too much, it will shrink back in the oven and leave your mummies looking bald. I learned this after my first batch looked more like sad, naked worms than mummies. Just a light, gentle wrap is all you need.
Keep the cheese cold. Leave the string cheese in the fridge until the last minute. Cold cheese melts more slowly, which gives the dough time to cook through before the cheese turns into a puddle. If the cheese is too warm, it will ooze out everywhere and you’ll lose the mummy shape. I’ve had that happen — it’s still delicious, but not as cute.
Use a light hand with the egg wash. Too much egg wash can make the dough soggy instead of crispy. Just a thin, even coat is enough. I use a silicone brush and tap off the excess before applying. You can also skip the egg wash entirely if you prefer a softer, more matte finish.
Watch the oven like a hawk. These little guys go from perfectly golden to burnt in about 60 seconds. I set a timer for 12 minutes and then check every minute after that. Every oven is different — my friend’s runs hot and hers are done at 11 minutes. Know your oven and adjust accordingly.
Multitasking strategy: While the mummies are baking, set out your dipping sauces and arrange the serving platter. You can also prep the olive eyes during this time. This way, everything is ready to go the second they come out of the oven. Hot mummies don’t wait!
Variations & Adaptations
One of the best things about this recipe is how flexible it is. I’ve tried several variations over the years, and they’ve all been winners. Here are some of my favorites:
Gluten-Free Version: Use your favorite gluten-free pizza dough. I like the one from Against the Grain — it’s sturdy enough to hold the cheese without falling apart. Just note that gluten-free doughs can be stickier, so use plenty of flour on your work surface. The baking time might be slightly longer, about 15-18 minutes.
Vegetarian & Vegan Option: Swap the string cheese for vegan mozzarella sticks or even strips of firm tofu that have been pressed and marinated in nutritional yeast and garlic powder. For the egg wash, use a splash of plant-based milk. I made these for a vegan friend’s Halloween party, and they were gone in ten minutes. The tofu version has a different texture but is surprisingly good.
Spicy Mummies: Add a pinch of red pepper flakes to the marinara sauce or sprinkle some cayenne pepper over the dough before wrapping. My husband loves these — he says they have a nice kick that cuts through the richness of the cheese. If you’re making these for kids, keep the spice on the side so everyone can customize.
Pesto Mummies: Instead of marinara, spread a thin layer of pesto on the dough before wrapping the cheese. The basil flavor pairs beautifully with the mozzarella. I tried this one summer when I had a glut of basil from the garden, and it was a revelation. It’s less traditional for Halloween, but it tastes incredible.
Mini Mummy Bites: Use smaller pieces of string cheese (or cut them in half) and smaller dough strips to make bite-sized mummies. These are perfect for party platters. Reduce the baking time to 8-10 minutes. I made these for a school Halloween party, and the kids went crazy for them.
Serving & Storage Suggestions
These Easy Mummy Halloween Pizza Bites are best served warm, right out of the oven. The cheese is perfectly melty, and the dough is at its crispiest. I like to arrange them on a large platter with a bowl of warm marinara sauce in the center for dipping. A sprinkle of fresh parsley or basil on top adds a pop of green that looks great in photos.
For a full Halloween spread, pair them with some spooky spider deviled eggs and a bowl of witch’s brew punch. The combination is always a hit at parties. You can also serve them alongside a simple green salad to balance out the richness.
Storage: If you have leftovers (which is rare in my house), let them cool completely, then store them in an airtight container in the refrigerator for up to 3 days. The dough will soften a bit, but they’ll still taste great. I don’t recommend freezing them — the texture of the cheese changes and becomes grainy.
Reheating: The best way to reheat these is in the oven or air fryer. Preheat to 350°F (175°C) and bake for 5-7 minutes, or until warmed through and crispy again. The microwave works in a pinch (30-45 seconds), but the dough will be soft, not crispy. If you’re in a hurry, the microwave is fine — they’re still delicious.
Make-Ahead Tip: You can assemble the mummies up to 4 hours ahead of time. Arrange them on the baking sheet, cover with plastic wrap, and refrigerate. When you’re ready to bake, just add the egg wash and seasonings, then pop them in the oven. This is a lifesaver for Halloween parties when you’re juggling a thousand things.
Nutritional Information & Benefits
While these are definitely a treat, they’re not as bad as you might think. Here’s the estimated nutritional breakdown per serving (2 mummy bites):
| Nutrient | Amount |
|---|---|
| Calories | 320 |
| Total Fat | 14g |
| Saturated Fat | 7g |
| Cholesterol | 45mg |
| Sodium | 680mg |
| Total Carbohydrates | 34g |
| Dietary Fiber | 2g |
| Sugars | 4g |
| Protein | 16g |
| Calcium | 280mg (22% DV) |
The mozzarella cheese provides a good amount of calcium and protein, which helps keep everyone full and satisfied. The olives add healthy monounsaturated fats and a dose of vitamin E. If you use whole wheat pizza dough, you’ll get extra fiber and B vitamins. For a lower-carb option, you can use a cauliflower-based pizza dough, though the texture will be different.
These are not gluten-free unless specified, and they contain dairy and eggs. For those with allergies, the vegan and gluten-free variations above work beautifully. I always make a batch of the gluten-free version for my friend Sarah, and she says they’re even better than the original — but she might just be being nice!
Conclusion
These Easy Mummy Halloween Pizza Bites are proof that the best recipes come from happy accidents. What started as a failed pizza night turned into a tradition that my kids look forward to all year. They’re fun, they’re fast, and they’re absolutely delicious. I love how they bring everyone together around the table before the chaos of trick-or-treating begins.
I encourage you to make these your own — add your favorite toppings, experiment with different cheeses, or let the kids help with the wrapping. That’s the beauty of this recipe: it’s forgiving, flexible, and always a hit. Whether you’re hosting a Halloween party or just looking for a fun dinner idea, these mummies deliver every single time.
I’d love to hear how yours turn out! Drop a comment below and let me know what variations you tried, or tag me in your photos on social media. Happy Halloween, and happy cooking!
Frequently Asked Questions
Can I use homemade pizza dough for this recipe?
Absolutely! Homemade dough works wonderfully. Just make sure it’s at room temperature before rolling, and adjust the baking time slightly if your dough is thicker or thinner than store-bought. I’ve used my favorite no-knead recipe many times with great results.
Can I make these ahead of time for a party?
Yes! You can assemble the mummies up to 4 hours ahead and keep them in the fridge. Bake them just before serving for the best texture. If you need to reheat leftovers, the oven or air fryer works best to restore crispiness.
What can I use instead of string cheese?
Fresh mozzarella cut into thin strips works well, though it’s a bit trickier to wrap. You can also use provolone or even cheddar strips for a different flavor. Just avoid pre-shredded cheese — it won’t hold together the same way.
Can I freeze the baked mummies?
I don’t recommend freezing them after baking, as the cheese texture changes and becomes grainy. However, you can freeze the unbaked, assembled mummies on a baking sheet, then transfer to a freezer bag. Bake directly from frozen, adding 3-5 minutes to the cooking time.
How do I prevent the olive eyes from falling off?
Press the olive halves into the cheese while it’s still hot and melty — the heat helps them stick. If they’re still loose, you can dab a tiny bit of marinara sauce behind them as “glue.” Also, make sure your olives are well-drained so they don’t slide around.
Pin This Recipe!
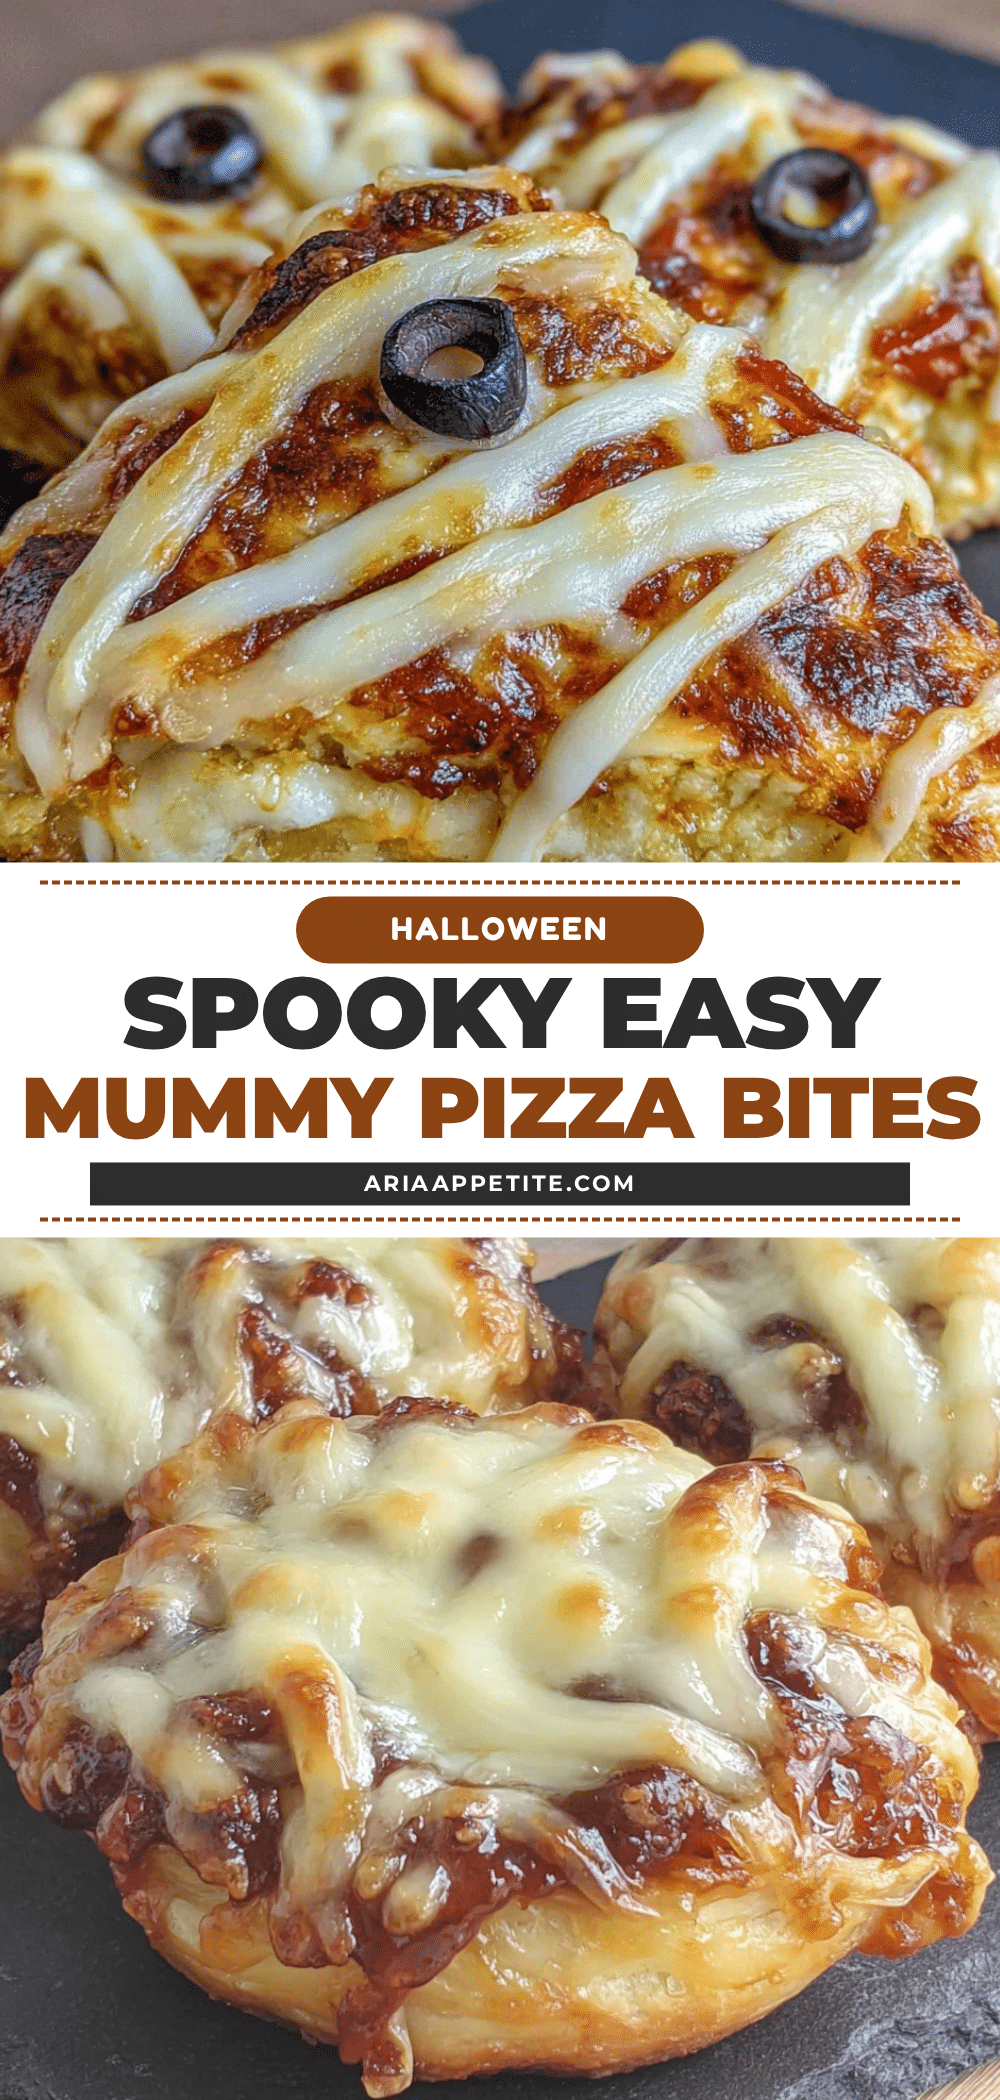
Best Easy Mummy Pizza Bites Halloween Recipe
These Easy Mummy Halloween Pizza Bites are fun, fast, and delicious—perfect for a spooky dinner before trick-or-treating. Made with pizza dough, string cheese, and olives, they come together in under 25 minutes.
- Prep Time: 10 minutes
- Cook Time: 15 minutes
- Total Time: 25 minutes
- Yield: 4 servings (2 mummy bites per serving) 1x
- Category: Appetizer
- Cuisine: American
Ingredients
- 1 pound (450g) pizza dough, store-bought or homemade
- 8 sticks (about 240g) mozzarella string cheese
- 1/2 cup (120ml) marinara sauce
- 16 whole black olives, pitted
- 1 large egg, beaten with 1 tablespoon (15ml) water (for egg wash)
- 1 teaspoon (3g) garlic powder
- 1 teaspoon (2g) Italian seasoning
- Flour, for dusting
- Optional: extra marinara, ranch dressing, or garlic butter for dipping
Instructions
- Preheat your oven to 400°F (200°C). Line a baking sheet with parchment paper.
- Lightly dust a clean counter or cutting board with flour. Unroll or place the pizza dough on the floured surface. If using refrigerated dough, let it sit at room temperature for 10 minutes.
- Roll the dough into a large rectangle, about 1/4 inch (6mm) thick.
- Using a pizza cutter or sharp knife, cut the dough into 8 equal rectangles (about 4×6 inches / 10×15 cm each). Then cut each rectangle lengthwise into 4-5 thin strips, leaving the top inch connected to create a ‘fringe’.
- Place one piece of string cheese in the center of the solid top section of a dough strip. Fold the dough over the cheese to cover it. Wrap the fringed dough strips around the cheese, crisscrossing like bandages, leaving a small gap near the top for the eyes. Repeat with all 8 pieces of string cheese.
- Arrange the mummies on the prepared baking sheet, spacing them about 2 inches (5 cm) apart.
- In a small bowl, beat the egg with 1 tablespoon of water. Lightly brush the tops of each mummy with the egg wash.
- Sprinkle the garlic powder and Italian seasoning evenly over the tops.
- Bake for 12-15 minutes, until the dough is golden brown and the cheese is melted and bubbly.
- While the mummies bake, cut each black olive in half crosswise to create two round ‘eye’ pieces per olive.
- As soon as the mummies come out of the oven, gently press two olive halves into the exposed cheese gap to create the eyes.
- Allow the mummies to cool on the baking sheet for 5 minutes. Serve warm with your favorite dipping sauce.
Notes
For best results, keep the string cheese cold until the last minute to prevent it from melting too quickly. Don’t overwork the dough—handle it gently. Watch the oven closely after 12 minutes to avoid burning. You can assemble the mummies up to 4 hours ahead and refrigerate until ready to bake.
Nutrition
- Serving Size: 2 mummy bites
- Calories: 320
- Sugar: 4
- Sodium: 680
- Fat: 14
- Saturated Fat: 7
- Carbohydrates: 34
- Fiber: 2
- Protein: 16
Keywords: Halloween, pizza bites, mummy, easy, kid-friendly, party food, string cheese, olives


