Love this? Save it for later!
Share the inspiration with your friends
It was 10:47 PM on a rainy Tuesday, and I had a deep, almost primal craving for chili. The kind of chili that simmers for hours, fills the house with a heavy, smoky scent, and demands a whole Saturday afternoon. I didn’t have that kind of time, or frankly, that kind of energy. I didn’t have a chuck roast to dice, dried beans that needed soaking, or even the patience for a proper slow cooker. But I had a pound of ground beef, a can of fire-roasted tomatoes I’d bought on a whim, and a half-empty jar of my favorite salsa verde sitting in the fridge. The idea was simple, maybe a little ridiculous: could I fake the deep flavor of a long-simmered chili in a single pot, in under thirty minutes, using mostly pantry staples? I figured if it was a disaster, no one would know but me and the cat. Honestly, that late-night, no-audience cooking session turned into my go-to weeknight dinner. The secret, I discovered, wasn’t time—it was technique and the right combination of umami-packed ingredients. This is that recipe: a family favorite that tastes like it cooked all day, but comes together in a flash. Maybe you’ve been there, staring into the fridge at 10 PM, wondering if you can make magic from a few humble ingredients. Trust me, you can.
Why You’ll Love This Recipe
This isn’t just another chili recipe. It’s the one you’ll turn to on a busy Tuesday when everyone is hungry and you need dinner on the table, fast. It’s the recipe that proves you don’t need a slow cooker or hours of simmering to get that deep, complex, “all-day” flavor. I’ve tested this method at least a dozen times, tweaking the spices and the timing until it was absolutely perfect for a busy family.
- Quick & Easy: From fridge to table in under 30 minutes. No complicated steps, no fancy equipment—just one pot and a spoon. Perfect for those nights when hangry is a real threat.
- Simple Ingredients: Everything is a pantry or freezer staple. Ground beef, canned tomatoes, beans, and basic spices. You probably have most of it right now.
- Perfect for Family Meals: It’s hearty, filling, and pleases even the pickiest eaters (just go light on the chili powder for the kids!). It’s also budget-friendly, stretching a pound of beef to feed a crowd.
- Crowd-Pleaser: I’ve brought this to potlucks and game day gatherings, and it always gets devoured. The topping bar (cheese, sour cream, onions) makes it fun for everyone to customize.
- Unbelievably Delicious: The texture is perfect—not too thin, not too thick. The flavor has a deep savoriness from the beef and a little smoky kick from the spices. It’s comfort food at its finest, without the wait.
What makes this recipe different? It’s the secret weapon of browning the beef really well and adding a splash of Worcestershire sauce and a spoonful of tomato paste. These two ingredients create a flavor base that tastes like it’s been cooking for hours. It’s not just another quick chili—it’s your new best version. This is the kind of meal that makes you close your eyes after the first bite, not because it’s fancy, but because it’s so satisfyingly good. It’s soul food, reimagined for a busy weeknight.
What Ingredients You Will Need
This recipe uses simple, wholesome ingredients to deliver that big, bold chili flavor without any fuss. Most of these are pantry staples, making it perfect for a last-minute dinner idea. The combination creates a deeply savory and slightly smoky broth that clings perfectly to the beef and beans.
- For the Chili Base:
- 1 tablespoon olive oil (or any neutral cooking oil like avocado or canola)
- 1 large yellow onion, diced (about 1 ½ cups, adds sweetness and depth)
- 3 cloves garlic, minced (fresh is best, but 1 teaspoon of garlic powder in a pinch works)
- 1 pound ground beef (I prefer 80/20 for flavor, but 85/15 works great too; drain excess fat if needed)
- 2 tablespoons tomato paste (the key to deep, concentrated tomato flavor)
- 1 tablespoon Worcestershire sauce (adds that savory, umami kick that makes it taste slow-cooked)
- For the Spice Blend:
- 2 tablespoons chili powder (use a good quality one like McCormick or a local brand; this is the backbone of the flavor)
- 1 teaspoon ground cumin (adds warmth and earthiness)
- 1 teaspoon smoked paprika (for that subtle smoky flavor; regular paprika works too)
- ½ teaspoon dried oregano (Mexican oregano is fantastic if you have it)
- ¼ teaspoon cayenne pepper (optional, for a little heat; skip for kids or sensitive palates)
- Salt and black pepper to taste (start with 1 teaspoon salt and ½ teaspoon pepper)
- For the Liquids & Beans:
- 1 (15-ounce) can fire-roasted diced tomatoes (don’t drain them; the juices are flavor gold. Regular diced tomatoes are fine too)
- 1 (15-ounce) can kidney beans, drained and rinsed (or black beans, pinto beans, or a mix)
- 1 cup low-sodium beef broth (or chicken broth, or even water with a bouillon cube)
- For Serving (Optional, but Highly Recommended):
- Shredded cheddar cheese
- Sour cream or Greek yogurt
- Fresh cilantro, chopped
- Diced red onion or green onions
- Crushed tortilla chips or oyster crackers
- Lime wedges
Ingredient Tips: For the best texture, I recommend using 80/20 ground beef from a brand like ButcherBox or your local butcher. The extra fat renders down and creates a richer sauce. If you want a leaner chili, you can drain the fat after browning the beef, but you might lose a little flavor. For a vegetarian version, substitute the beef with two cans of black beans and use vegetable broth. The fire-roasted tomatoes are a game-changer—they add a subtle charred flavor that mimics a slow-cooked chili.
Equipment Needed
You don’t need a fancy kitchen to make this chili. In fact, you probably already have everything you need. The beauty of this recipe is its simplicity.
- Large Dutch Oven or Heavy-Bottomed Pot: A 5- to 6-quart pot is ideal. A Le Creuset or Staub is a dream, but a good-quality stainless steel or non-stick pot works perfectly. The heavy bottom helps distribute heat evenly and prevents burning.
- Wooden Spoon or Silicone Spatula: For stirring and scraping up the browned bits from the bottom of the pot—that’s where the flavor lives!
- Sharp Knife and Cutting Board: For dicing the onion and mincing the garlic.
- Can Opener: A sturdy one makes opening those cans a breeze.
- Measuring Spoons and Cups: For accurate spice and liquid measurements.
- Ladle: For serving.
Budget-Friendly Alternatives: If you don’t have a Dutch oven, any large, deep skillet or saucepan with a lid will work. Just make sure it’s at least 4 quarts. A cheap, heavy-bottomed pot from a restaurant supply store is a fantastic investment and will last for years. I’ve even made this in a large non-stick wok in a pinch!
Preparation Method

This is where the magic happens. Follow these steps, and you’ll have a pot of chili that tastes like it’s been simmering all day. Trust the process, especially the browning step—it’s non-negotiable for deep flavor.
- Start the Aromatics (5 minutes): Place your large pot over medium-high heat. Add the olive oil and let it shimmer for about 30 seconds. Add the diced onion and cook, stirring occasionally, until it becomes soft and translucent, about 3-4 minutes. You want it to be fragrant but not browned. Add the minced garlic and cook for another 30 seconds until it’s fragrant—be careful not to burn it, or it will become bitter.
- Brown the Beef (5-7 minutes): Add the ground beef to the pot, breaking it up with your wooden spoon. Let it cook undisturbed for a full 2-3 minutes. This is crucial for getting a good sear. Then, start breaking it into smaller pieces. Continue cooking until the beef is fully browned and no longer pink. Don’t drain the fat unless there’s a ton of it (more than 2 tablespoons). That fat is flavor! Sensory Cue: You should hear a nice sizzle when the beef hits the pot. The kitchen will start to smell incredible.
- Bloom the Spices (1 minute): This is the secret step that makes all the difference. Sprinkle the chili powder, cumin, smoked paprika, oregano, and cayenne (if using) over the browned beef. Add the tomato paste and Worcestershire sauce. Stir everything together vigorously for about 1 minute. You’ll see the paste darken and the spices become incredibly fragrant. This “blooming” step wakes up the dried spices and deepens their flavor. Troubleshooting Tip: If the paste starts to stick to the bottom of the pot, that’s okay—just keep stirring. It will deglaze later.
- Add the Liquids & Beans (2 minutes): Pour in the can of fire-roasted diced tomatoes (with their juices), the drained and rinsed kidney beans, and the beef broth. Stir everything together, scraping up any browned bits from the bottom of the pot. That’s pure flavor you’re incorporating into the sauce.
- Simmer and Thicken (15-20 minutes): Bring the chili to a gentle boil, then immediately reduce the heat to low. Cover the pot with a lid and let it simmer for 15 minutes. After 15 minutes, remove the lid and let it simmer for another 5 minutes to thicken slightly. Sensory Cue: The chili should be bubbling gently, not rapidly. The liquid will reduce and the flavors will meld. The color will deepen to a rich, dark red.
- Season and Serve (2 minutes): Taste the chili and add salt and black pepper as needed. I usually start with 1 teaspoon of salt and ½ teaspoon of pepper, then adjust from there. Remember that the beans and broth already have some salt, so taste first! Serve hot with your favorite toppings.
Cooking Tips & Techniques
I’ve made this chili at least fifty times, and I’ve learned a few things the hard way. Here are my best tips to guarantee success every single time.
- Don’t skip the browning. I know it’s tempting to just dump everything in the pot and let it boil, but the Maillard reaction (browning the beef) is where the deep, savory flavor comes from. It’s the single most important step. Let the beef sit undisturbed for 2-3 minutes before you start breaking it up. Trust me on this.
- Bloom your spices. Adding the spices to the hot fat and tomato paste for a minute before adding the liquid is a game-changer. It releases their essential oils and makes them taste toasted and complex, not raw and dusty. I once forgot to do this, and the chili tasted flat and one-dimensional. Never again.
- Use fire-roasted tomatoes. This is a little cheat code for instant depth. The charred flavor from the canning process mimics the smoky notes you’d get from a long-simmered chili. If you can’t find them, add a pinch of smoked paprika (which we already do!) and ½ teaspoon of liquid smoke for a similar effect.
- Control the heat. If you’re feeding kids or spice-sensitive folks, start with just 1 tablespoon of chili powder and omit the cayenne. You can always add more heat at the table with hot sauce or red pepper flakes. It’s easier to add heat than to take it away.
- Let it rest. If you have 10 extra minutes, let the chili sit off the heat, covered, for 10 minutes before serving. This allows the flavors to meld even further. It’s also the perfect time to prep your toppings!
Variations & Adaptations
This chili is a fantastic base recipe, and I love how easily it adapts to different tastes and dietary needs. Don’t be afraid to make it your own.
- Vegetarian Chili: Swap the ground beef for 2 (15-ounce) cans of black beans and 1 (15-ounce) can of pinto beans, drained and rinsed. Use vegetable broth instead of beef broth. For a meaty texture, you can also add 8 ounces of finely chopped cremini mushrooms and sauté them with the onions. It’s surprisingly hearty!
- Spicy Chipotle Chili: For a smoky, spicy kick, add 1-2 chipotle peppers in adobo sauce, minced, along with the tomatoes. This adds a deep, smoky heat that’s incredible. Start with one pepper and taste—they can be very spicy.
- White Chicken Chili Twist: This is a completely different dish but uses the same 30-minute method. Swap the beef for 1 pound of ground chicken or shredded rotisserie chicken. Use cannellini beans instead of kidney beans, and swap the fire-roasted tomatoes for a 4-ounce can of diced green chiles. Use chicken broth and add a teaspoon of cumin and a pinch of oregano. Finish with a splash of lime juice and heavy cream. It’s my go-to for a change of pace.
- Slow Cooker Adaptation: To make this in a slow cooker, brown the beef and bloom the spices in a skillet first. Then transfer everything (including the liquids and beans) to your slow cooker. Cook on low for 6-8 hours or high for 3-4 hours. It will be even more flavorful!
Serving & Storage Suggestions
This chili is incredibly versatile, and the leftovers are even better the next day. Here’s how to serve, store, and reheat it for maximum enjoyment.
Serving: Serve the chili piping hot in deep bowls. Set up a toppings bar with shredded cheddar, sour cream, diced red onion, fresh cilantro, and sliced jalapeños. A squeeze of fresh lime juice right before eating brightens all the flavors. It’s fantastic with a side of warm cornbread or crusty bread for dipping. For a fun weeknight meal, serve it over a baked potato, or use it as a topping for hot dogs or nachos.
Storage: Let the chili cool completely before storing. Transfer it to an airtight container and refrigerate for up to 5 days. The flavors will actually deepen and meld together as it sits, making day-two chili even more delicious. This is one of those dishes that’s perfect for meal prep.
Freezing: This chili freezes beautifully. Portion it into freezer-safe containers or zip-top bags (lay them flat for easy stacking). It will keep for up to 3 months. Thaw overnight in the refrigerator before reheating.
Reheating: Reheat the chili in a pot over medium-low heat, stirring occasionally, until warmed through. You may need to add a splash of water or broth if it has thickened too much. You can also reheat individual portions in the microwave—just cover the bowl to prevent splatters.
Nutritional Information & Benefits
While this is a hearty comfort food, it also packs a surprising nutritional punch. The following estimates are per serving (about 1 ½ cups), based on 6 servings, using 80/20 ground beef and including all the recommended toppings.
| Nutrient | Amount Per Serving |
|---|---|
| Calories | ~450 kcal |
| Protein | ~30g |
| Fat | ~22g |
| Carbohydrates | ~35g |
| Fiber | ~10g |
| Sugar | ~8g |
| Sodium | ~900mg |
Health Benefits: This chili is a fantastic source of protein and fiber, which will keep you feeling full and satisfied. The kidney beans are packed with soluble fiber, which is great for heart health. The tomatoes are rich in lycopene, a powerful antioxidant. By using lean ground beef and controlling the salt, you can make this a healthier option for a busy weeknight. It’s a balanced meal in a bowl.
Dietary Considerations: This recipe is naturally dairy-free and gluten-free (just check your Worcestershire sauce label). To make it lower in fat, use 90/10 ground beef and drain the fat after browning. For a lower-sodium version, use no-salt-added canned tomatoes and beans, and low-sodium broth. Always check labels if you have specific dietary needs.
Conclusion
This 30-Minute Stovetop Beef Chili is proof that you don’t need all day to make a meal that tastes like you spent all day. It’s the recipe that saved my sanity on countless busy weeknights, and I have a feeling it will do the same for you. It’s forgiving, adaptable, and always, always delicious. Whether you serve it with a mountain of cheese and sour cream or keep it simple with a sprinkle of cilantro, it’s guaranteed to become a new family favorite.
I’d love to hear how it turns out for you! Did you add a secret ingredient? Did the kids go back for seconds? Share your wins (and your happy accidents) in the comments below. And if you’re looking for another quick, one-pot dinner, you’ve got to try my creamy tuscan chicken—it’s just as fast and just as satisfying. Happy cooking, friends!
Frequently Asked Questions
Can I use a different type of meat?
Absolutely! Ground turkey, ground chicken, or even ground pork work wonderfully in this recipe. Just keep in mind that leaner meats like turkey may need a little extra oil to prevent sticking, and they won’t have quite as much flavor as beef. You can also use half ground beef and half ground sausage for a different flavor profile.
Can I make this chili in an Instant Pot?
Yes! Use the Sauté function to brown the beef and bloom the spices, just as you would on the stovetop. Then add the liquids and beans, close the lid, and cook on Manual (High Pressure) for 10 minutes. Do a quick release of the pressure, and you’re done. It’s even faster than the stovetop version!
How can I thicken my chili if it’s too thin?
If your chili is too watery, there are a few easy fixes. First, let it simmer uncovered for an extra 5-10 minutes to allow the liquid to evaporate. You can also mash some of the beans against the side of the pot with a fork—the starch will naturally thicken the chili. Alternatively, mix 1 tablespoon of cornstarch with 2 tablespoons of cold water to create a slurry, then stir it into the simmering chili. It will thicken almost instantly.
Can I use dried beans instead of canned?
You can, but it will dramatically increase the cooking time. Dried beans need to be soaked and then simmered for 1-2 hours before they are tender. If you want to use dried beans, I recommend making this in a slow cooker (see the variation above) and cooking it on low for 6-8 hours. For a quick 30-minute meal, canned beans are the way to go.
What are the best toppings for this chili?
The possibilities are endless! My family’s favorites are sharp cheddar cheese, a dollop of sour cream, and some crunchy tortilla chips. But you can also try diced avocado, pickled jalapeños, a drizzle of hot honey, pickled red onions, or a sprinkle of cotija cheese. A squeeze of fresh lime juice is non-negotiable in my house—it makes all the flavors pop.
Pin This Recipe!
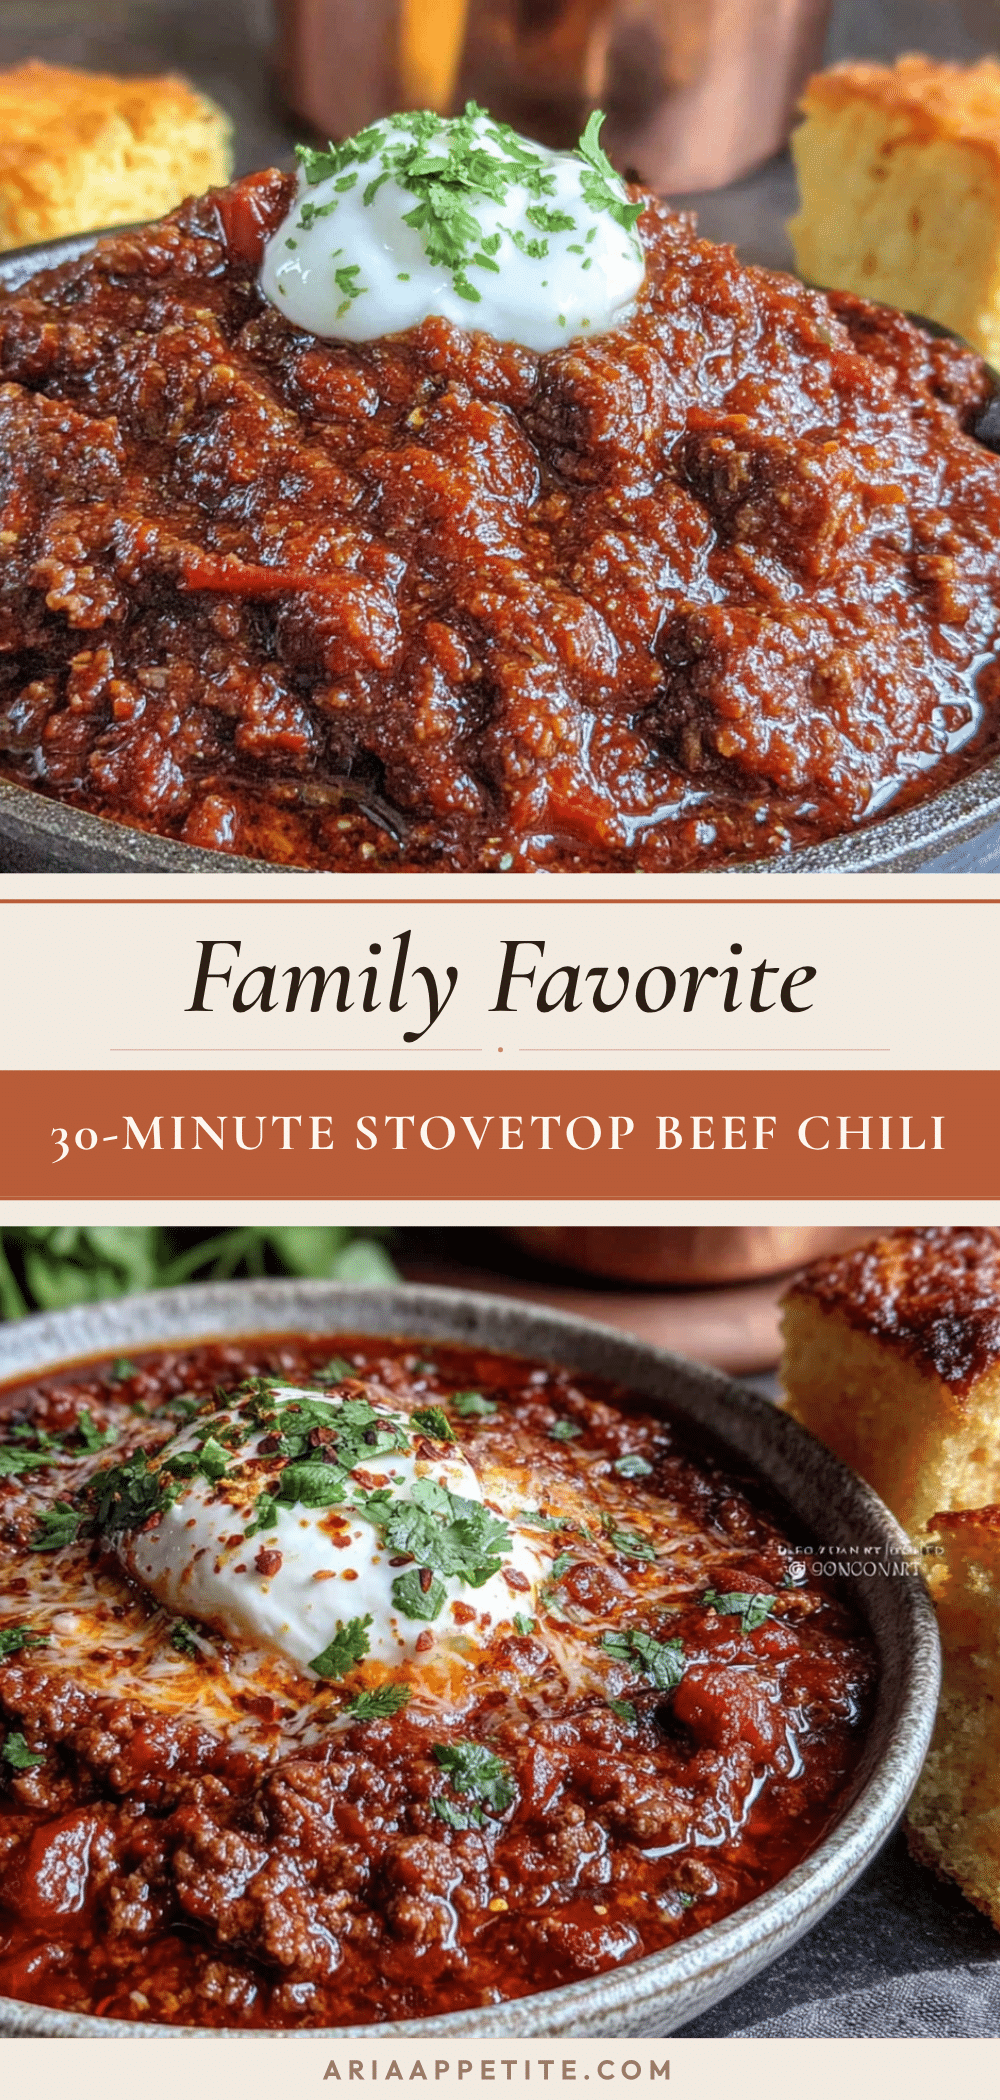
Best 30-Minute Stovetop Beef Chili Recipe

This 30-Minute Stovetop Beef Chili is proof that you don’t need all day to make a meal that tastes like you spent all day. It’s the recipe that saved my sanity on countless busy weeknights, and I have a feeling it will do the same for you.
- Prep Time: 10 minutes
- Cook Time: 20 minutes
- Total Time: 30 minutes
- Yield: 6 servings 1x
- Category: Main Course
- Cuisine: American
Ingredients
- 1 tablespoon olive oil
- 1 large yellow onion, diced (about 1 ½ cups)
- 3 cloves garlic, minced
- 1 pound ground beef (80/20 preferred)
- 2 tablespoons tomato paste
- 1 tablespoon Worcestershire sauce
- 2 tablespoons chili powder
- 1 teaspoon ground cumin
- 1 teaspoon smoked paprika
- ½ teaspoon dried oregano
- ¼ teaspoon cayenne pepper (optional)
- Salt and black pepper to taste (start with 1 teaspoon salt and ½ teaspoon pepper)
- 1 (15-ounce) can fire-roasted diced tomatoes (undrained)
- 1 (15-ounce) can kidney beans, drained and rinsed
- 1 cup low-sodium beef broth
- For serving: shredded cheddar cheese, sour cream or Greek yogurt, fresh cilantro, diced red onion or green onions, crushed tortilla chips or oyster crackers, lime wedges
Instructions
- Start the Aromatics (5 minutes): Place your large pot over medium-high heat. Add the olive oil and let it shimmer for about 30 seconds. Add the diced onion and cook, stirring occasionally, until it becomes soft and translucent, about 3-4 minutes. Add the minced garlic and cook for another 30 seconds until fragrant.
- Brown the Beef (5-7 minutes): Add the ground beef to the pot, breaking it up with your wooden spoon. Let it cook undisturbed for a full 2-3 minutes for a good sear. Then break it into smaller pieces. Continue cooking until the beef is fully browned and no longer pink. Do not drain the fat unless there is more than 2 tablespoons.
- Bloom the Spices (1 minute): Sprinkle the chili powder, cumin, smoked paprika, oregano, and cayenne (if using) over the browned beef. Add the tomato paste and Worcestershire sauce. Stir vigorously for about 1 minute until the paste darkens and the spices become fragrant.
- Add the Liquids & Beans (2 minutes): Pour in the can of fire-roasted diced tomatoes (with their juices), the drained and rinsed kidney beans, and the beef broth. Stir everything together, scraping up any browned bits from the bottom of the pot.
- Simmer and Thicken (15-20 minutes): Bring the chili to a gentle boil, then immediately reduce the heat to low. Cover the pot with a lid and let it simmer for 15 minutes. After 15 minutes, remove the lid and let it simmer for another 5 minutes to thicken slightly.
- Season and Serve (2 minutes): Taste the chili and add salt and black pepper as needed. Serve hot with your favorite toppings.
Notes
For best flavor, use 80/20 ground beef and do not skip browning the beef or blooming the spices. Fire-roasted tomatoes add depth. Let chili rest 10 minutes before serving for melded flavors. Leftovers keep refrigerated up to 5 days or frozen up to 3 months.
Nutrition
- Serving Size: 1 ½ cups
- Calories: 450
- Sugar: 8
- Sodium: 900
- Fat: 22
- Saturated Fat: 8
- Carbohydrates: 35
- Fiber: 10
- Protein: 30
Keywords: 30-minute chili, stovetop chili, beef chili, quick chili, easy chili, weeknight dinner, one-pot meal


