Love this? Save it for later!
Share the inspiration with your friends
This was supposed to be a full-fledged maple pecan pie. I had the pie plate buttered, the rolling pin dusted with flour, and a very specific vision of that glossy, caramelized top that makes everyone at the table go quiet. But somewhere between the maple syrup bottle and the third cup of sugar, I froze. The whole point of this endeavor was to make something I could actually feel good about eating on a Tuesday night, not just a holiday. And a traditional pecan pie, let’s be honest, is basically a sugar bomb wrapped in butter. So I stood there, staring at the bag of pecans, and just… stopped. I put the rolling pin away. I grabbed my mini muffin tin instead. Honestly, it felt a little like giving up at first.
The filling was a bit of a gamble. I swapped out half the corn syrup for extra maple syrup and mashed up a ripe banana to add sweetness and moisture without the heavy cream. I was convinced it would be a runny disaster. I filled those little muffin cups, pressed the crust in with my thumbs (not gracefully, let me tell you), and baked them with a healthy dose of skepticism. When I pulled them out, they looked like tiny, perfect pies. The smell was incredible—warm maple and toasted nuts filling the whole kitchen. I had to let them cool for a solid ten minutes before I could even try one without burning my mouth. You know that feeling when you’re bracing for disappointment, but the first bite just completely changes your mood?
That little bite was everything I wanted the big pie to be. The crust was buttery and crisp, the filling was rich and sweet but not cloying, and the pecan on top gave it that perfect crunch. I mean, I was genuinely shocked. I made them again the next day just to make sure it wasn’t a fluke. It wasn’t. These lightened-up maple pecan pie bites have become my go-to for when I want dessert to feel a little special but not like a whole production. They’re the kind of treat that proves you don’t have to sacrifice flavor to eat a little smarter. And honestly, that happy accident in my kitchen is a mistake I’ll keep making on purpose.
Why You’ll Love These Lightened-Up Maple Pecan Pie Bites
Let’s be real for a second. Most “lightened-up” desserts taste like a compromise. You take a bite and you can immediately tell something is missing—the richness, the texture, the soul. These maple pecan pie bites are not that. They are the rare exception where cutting back on the sugar and fat actually made the flavor better. I’ve tested this recipe about six times now, tweaking the banana-to-maple ratio and the bake time, and I can confidently say this is the version that works. Here is why you are going to love them:
- Quick & Easy : From start to finish, these come together in about 30 minutes. No rolling out dough, no blind baking, no fuss. Perfect for a last-minute dessert craving or a weeknight treat.
- Simple Ingredients : You probably have most of these in your pantry right now. No weird health-food store ingredients, no expensive sugar substitutes. Just real food that happens to be a little lighter.
- Perfect for Portion Control : This is the real genius of the mini muffin tin. You get that full pie experience in two perfect bites. It satisfies the craving without leaving you with a whole pie on the counter calling your name.
- Crowd-Pleaser : I brought these to a potluck last month and nobody guessed they were “lightened up.” They just ate them and asked for the recipe. Kids love them, adults love them, and they disappear fast.
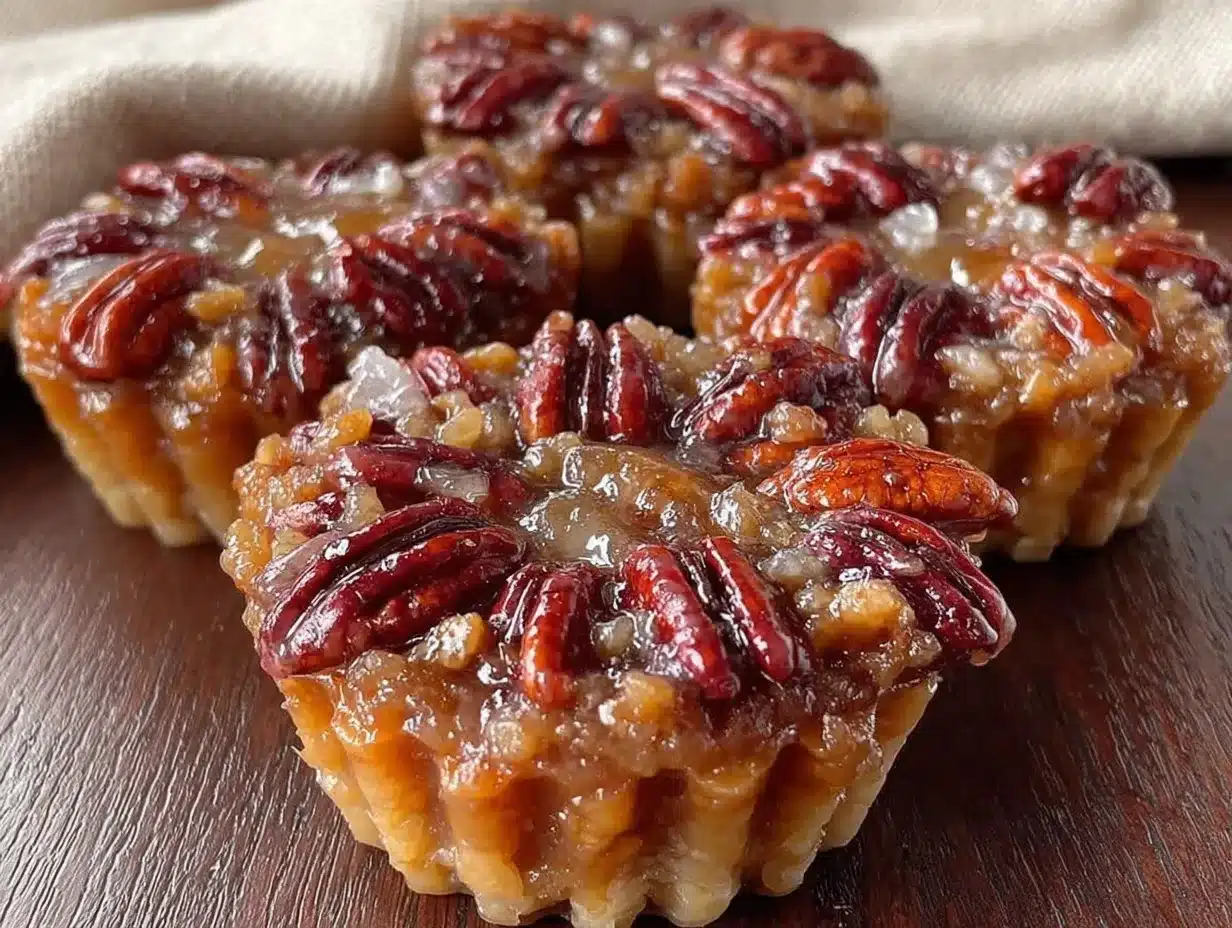
- Unbelievably Delicious : The texture is spot-on. The filling is gooey and rich, the crust is flaky, and the maple flavor is front and center. You will not miss the extra sugar one bit.
What makes this recipe different from every other pecan pie bite out there is the secret ingredient—a ripe banana. It adds natural sweetness and moisture, which lets you cut back on the maple syrup and skip the heavy cream entirely. It is not a gimmick. It genuinely works. This is comfort food reimagined—healthier, faster, but with the same soul-soothing satisfaction that makes you close your eyes after the first bite. Perfect for impressing guests without stress, or turning a simple Tuesday into something a little sweet.
What Ingredients You Will Need
This recipe uses simple, wholesome ingredients to deliver that classic pecan pie flavor without the heavy load. Most of these are pantry staples, and the substitutions are easy if you need them. Here is what you will need:
For the Crust
- 1 ½ cups all-purpose flour (spooned and leveled; you can use whole wheat pastry flour for a nuttier flavor)
- ½ cup cold unsalted butter, cubed (I use Kerrygold for the flavor, but any good butter works—make sure it is very cold)
- ¼ teaspoon salt
- 3-4 tablespoons ice water (add one tablespoon at a time until the dough holds together)
For the Filling
- 1 large ripe banana, mashed (the riper, the better—brown spots are your friend here for sweetness)
- ⅓ cup pure maple syrup (do not use pancake syrup; the real stuff makes a huge difference in flavor)
- 1 large egg (room temperature for easier mixing)
- 1 teaspoon vanilla extract
- 2 tablespoons melted coconut oil or unsalted butter (coconut oil keeps it dairy-free, butter adds richness)
- ¾ cup chopped pecans (plus 24 pecan halves for topping)
- ¼ teaspoon cinnamon
- Pinch of nutmeg (freshly grated if you have it)
- Pinch of salt
I recommend using a good-quality maple syrup for this—it is the star of the show. I personally love the dark amber grade for its robust flavor. For the pecans, look for fresh ones that smell nutty, not stale. If you are gluten-free, you can swap the all-purpose flour for a 1:1 gluten-free baking blend, but add an extra tablespoon of ice water to the crust. For a vegan version, use a flax egg (1 tablespoon flaxseed meal + 3 tablespoons water) and coconut oil instead of butter. The texture will be slightly different, but still delicious.
Equipment Needed
You do not need a lot of fancy gear for these bites, which is part of the appeal. Here is what you will need:
- Mini muffin tin (standard 24-cup size; non-stick is ideal, but any will work with good greasing)
- Mixing bowls (one medium, one small)
- Pastry blender or two forks (for cutting butter into the flour)
- Rolling pin (or a wine bottle in a pinch—I have done it)
- 2-inch round cookie cutter (or a small glass with a similar diameter)
- Measuring cups and spoons
- Whisk
- Spatula
If you do not have a mini muffin tin, you can use a regular muffin tin and just make bigger bites—adjust the baking time to about 18-20 minutes. A food processor can speed up the crust-making process, but I actually prefer doing it by hand. It is more forgiving and you are less likely to overwork the dough. Plus, it is a little therapeutic, you know? Just make sure your butter is very cold, and do not skip the chilling step for the crust.
Preparation Method
Alright, let’s make these little guys. The process is straightforward, but there are a few tricks to get that perfect texture. I have learned some of these the hard way, so pay attention to the notes.
- Make the crust dough. In a medium bowl, whisk together the flour and salt. Add the cold, cubed butter. Use a pastry blender or two forks to cut the butter into the flour until the mixture looks like coarse sand with some pea-sized butter pieces remaining. Drizzle in 3 tablespoons of ice water and stir with a fork. If the dough is still dry, add the remaining tablespoon. It should hold together when you squeeze it. Form it into a disk, wrap it in plastic wrap, and refrigerate for at least 20 minutes. Do not skip this—it makes the crust flaky.
- Preheat and prep. Preheat your oven to 350°F (175°C). Lightly grease your mini muffin tin with non-stick spray or butter. I use a pastry brush to get into all the little crevices.
- Roll and cut the crust. On a lightly floured surface, roll the chilled dough out to about ⅛-inch thickness. Use your 2-inch cookie cutter to cut out 24 rounds. If you do not have a cutter, use the rim of a small glass. Re-roll the scraps once to get all 24 rounds.
- Press into the muffin tin. Gently press each dough round into a mini muffin cup. Make sure it goes all the way to the bottom and up the sides. Do not worry if the edges are a little uneven—it adds character. Prick the bottom of each crust a few times with a fork to prevent bubbles.
- Make the filling. In a small bowl, mash the ripe banana with a fork until it is smooth. Whisk in the maple syrup, egg, vanilla extract, and melted coconut oil or butter until everything is well combined. Stir in the chopped pecans, cinnamon, nutmeg, and a pinch of salt. The mixture will look a little thin, but that is okay.
- Fill the cups. Spoon the filling into each crust-lined cup, filling them almost to the top. Do not overfill—they will puff up slightly. Place one pecan half on top of each bite for that classic look.
- Bake. Bake for 14-16 minutes, or until the filling is set and the edges of the crust are golden brown. The filling will still be slightly jiggly in the center when you pull them out, but it will set as they cool. Let them cool in the tin for 10 minutes before carefully removing them with a small spatula or butter knife.
- Cool completely. Transfer the bites to a wire rack to cool completely. This is the hardest part—waiting. But trust me, they are much better when they are fully set. The filling firms up beautifully as it cools.
A quick note on the crust: if it cracks when you press it into the tin, do not panic. Just patch it with a little piece of extra dough. It bakes together and nobody will ever know. I have done this more times than I care to admit.
Cooking Tips & Techniques
I have made these maple pecan pie bites about a dozen times now, and I have definitely had my share of kitchen failures. Here are the things I wish I had known from the start:
Do not overwork the crust. This is the number one mistake people make. Overworking the dough develops the gluten and makes the crust tough. Mix it just until it comes together, and handle it as little as possible. If the dough gets too warm while you are rolling it, pop it back in the fridge for 10 minutes. Cold butter is your best friend for a flaky crust.
The banana matters. I tried this recipe with a barely ripe banana once, and the filling was not sweet enough and had a weird, starchy texture. Use a banana that is covered in brown spots. It should be soft and almost mushy. That is when it is at its sweetest and will blend seamlessly into the filling. If you do not have a ripe banana, you can roast a yellow one in a 300°F oven for 15 minutes to soften it up.
Watch the bake time. Every oven runs a little different. My first batch came out a bit dry because I left them in for 18 minutes. Start checking at the 14-minute mark. The edges should be golden, and the filling should be set around the edges but still slightly soft in the center. They will continue to cook from the residual heat as they cool. When in doubt, pull them out a minute early rather than a minute late.
Let them cool completely. I know, I know. The smell is intoxicating and you want to eat one right away. But if you try to remove them from the tin while they are still warm, they will fall apart. The filling needs time to set. I learned this lesson the hard way with a sticky, delicious mess that I had to eat with a spoon. It was still good, but not as pretty.
Multitask smartly. While the crust is chilling, make your filling. While the bites are baking, clean up your workspace. This recipe moves fast, so having everything ready to go makes the process smooth and stress-free.
Variations & Adaptations
One of the best things about this recipe is how easy it is to tweak. Here are some variations I have tried and loved:
- Chocolate Maple Pecan Bites : Add 2 tablespoons of mini chocolate chips to the filling before spooning it into the cups. The chocolate melts into the maple filling and creates these little pockets of richness. My niece declared these “the best thing I have ever eaten.”
- Gluten-Free Version : Use a 1:1 gluten-free baking flour blend for the crust. I have tested this with Bob’s Red Mill 1:1 and it works beautifully. You may need to add an extra tablespoon of ice water since gluten-free flours tend to be more absorbent.
- Spiced Maple Pecan Bites : Add ¼ teaspoon of ground ginger and a pinch of cloves to the filling along with the cinnamon and nutmeg. It gives the bites a warm, almost chai-like flavor that is perfect for fall.
- Savory-Sweet Twist : Sprinkle a tiny pinch of flaky sea salt on top of each bite right after they come out of the oven. The salt cuts through the sweetness and makes the maple flavor pop. I do this every time now.
- Nut-Free Option : Substitute the pecans with toasted pumpkin seeds (pepitas) for the chopped part and skip the pecan half on top. It is a different texture, but still delicious and crunchy.
I tried the chocolate version on a whim one rainy Sunday, and honestly, it might be my new favorite. The combination of maple and dark chocolate is just unbeatable. Feel free to experiment—this recipe is very forgiving.
Serving & Storage Suggestions
These bites are best served at room temperature, straight from the cooling rack. They are perfect on their own, but if you want to dress them up, a light dusting of powdered sugar or a tiny dollop of whipped cream makes them feel extra fancy. They pair beautifully with a cup of black coffee or a hot mug of spiced tea.
For storage, place the cooled bites in an airtight container. They will keep at room temperature for up to 3 days, but I doubt they will last that long. If you need to store them longer, pop them in the refrigerator for up to a week. The crust stays surprisingly crisp, and the filling gets even more fudgy as it sits. Honestly, I think they taste even better on day two.
You can also freeze these bites for up to 3 months. Arrange them in a single layer on a baking sheet and freeze until solid, then transfer them to a freezer-safe bag or container. To reheat, just let them thaw at room temperature for about 30 minutes, or pop them in a 300°F oven for 5 minutes to warm them through. They are a lifesaver when unexpected guests show up or when you just need a little something sweet after dinner.
Nutritional Information & Benefits
Here is a rough estimate for one maple pecan pie bite (based on 24 bites):
- Calories : Approximately 110-120
- Fat : 7g (mostly from healthy nuts and butter/coconut oil)
- Carbohydrates : 12g
- Sugar : 6g (naturally occurring from maple syrup and banana)
- Protein : 2g
- Fiber : 1g
The banana not only adds sweetness but also provides potassium and fiber, which you do not get from a traditional pecan pie. The pecans themselves are packed with healthy fats, magnesium, and antioxidants. By swapping out the heavy corn syrup and cream, we have cut the sugar content by almost half compared to a classic recipe. These bites are also naturally vegetarian and can easily be made gluten-free or vegan. They are a treat you can feel good about, whether you are watching your sugar intake or just trying to eat a little more mindfully. I love having a dessert option that does not leave me feeling sluggish or guilty—it is a small win that makes a big difference in my week.
Conclusion
These lightened-up maple pecan pie bites are proof that you do not need a mountain of sugar and butter to make something truly satisfying. They have all the flavor and texture of the classic pie, but in a perfectly portioned, guilt-free little package that comes together in under 30 minutes. Whether you are making them for a holiday gathering, a potluck, or just a quiet night in, they deliver every single time.
I love that this recipe started as a mistake and turned into something I actually prefer over the original. It is a reminder that sometimes the best things come from letting go of the plan and just going with what feels right in the moment. So go ahead and give these a try—play around with the variations, make them your own, and do not stress if the crust cracks a little. It all works out in the end.
I would love to hear how yours turn out! Drop a comment below and let me know if you tried any fun twists or if these became a new favorite in your kitchen. And if you loved them, share this post with a friend who needs a little sweetness in their life. Happy baking!
Frequently Asked Questions
Can I use a regular muffin tin instead of a mini one?
Yes, you absolutely can. Just use a 12-cup regular muffin tin and increase the baking time to about 18-20 minutes. You will get bigger bites, so adjust your portion expectations accordingly.
Can I make the crust ahead of time?
Definitely. You can make the crust dough up to 3 days in advance and keep it wrapped tightly in the refrigerator. You can also freeze the dough for up to 3 months. Just thaw it in the fridge overnight before rolling it out.
My filling came out runny. What did I do wrong?
This usually happens if the banana was not ripe enough or if the bites were underbaked. Make sure your banana is very ripe and let the bites cool completely in the tin before removing them. The filling sets as it cools.
Can I skip the crust entirely for a low-carb option?
Yes! You can make these as crustless bites by greasing the muffin tin well and spooning the filling directly into the cups. Bake for about 10-12 minutes. They will be more like little pecan clusters, but still delicious.
How do I prevent the crust from sticking to the tin?
Grease the tin generously with butter or non-stick spray, making sure to get into all the corners. Let the bites cool for 10 minutes in the tin before trying to remove them. If they still stick, run a thin knife or small spatula around the edges to loosen them.
Pin This Recipe!
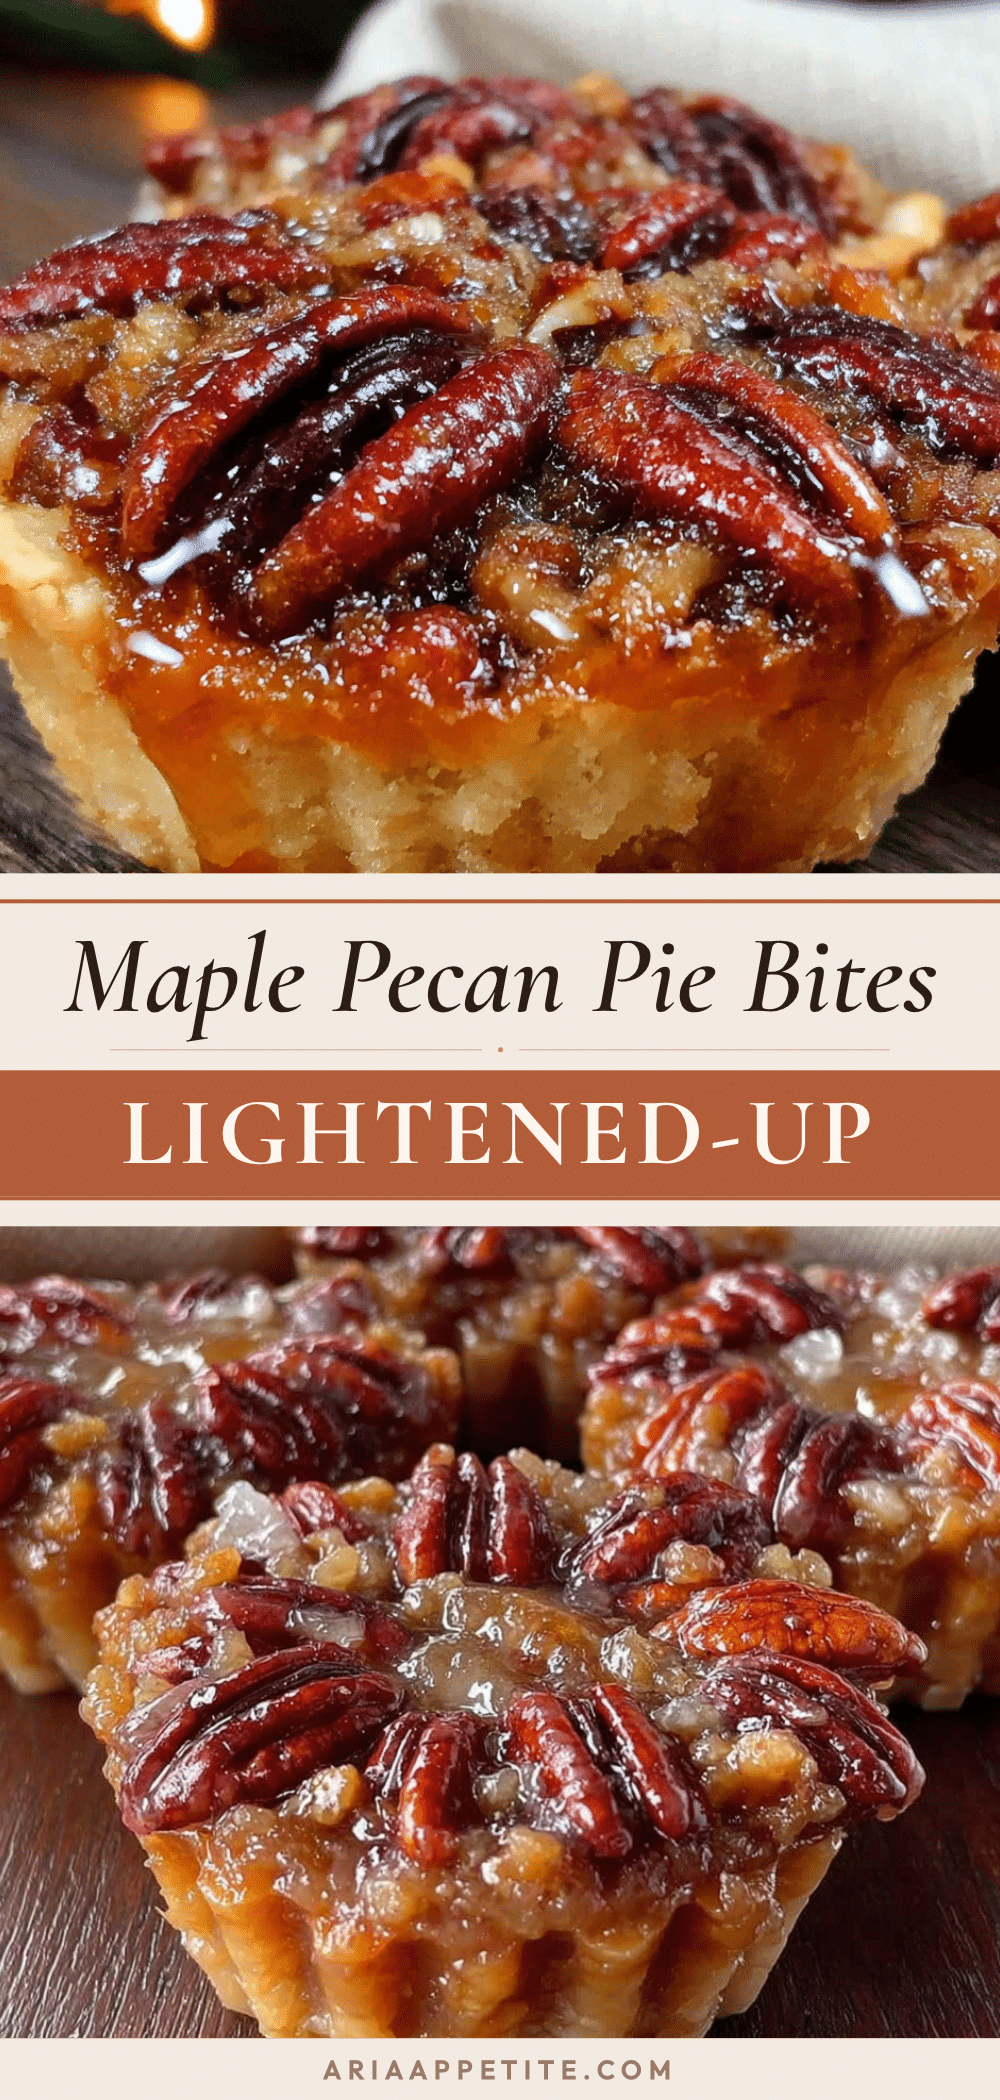
Lightened-Up Maple Pecan Pie Bites: Easy Mini Desserts
These lightened-up maple pecan pie bites are perfectly portioned mini desserts with a buttery crust and a rich, sweet filling made with maple syrup and ripe banana. They come together in about 30 minutes and are a guilt-free treat that doesn’t compromise on flavor.
- Prep Time: 15 minutes
- Cook Time: 16 minutes
- Total Time: 31 minutes
- Yield: 24 servings 1x
- Category: Dessert
- Cuisine: American
Ingredients
- 1 ½ cups all-purpose flour (spooned and leveled)
- ½ cup cold unsalted butter, cubed
- ¼ teaspoon salt
- 3–4 tablespoons ice water
- 1 large ripe banana, mashed
- ⅓ cup pure maple syrup
- 1 large egg, room temperature
- 1 teaspoon vanilla extract
- 2 tablespoons melted coconut oil or unsalted butter
- ¾ cup chopped pecans
- 24 pecan halves (for topping)
- ¼ teaspoon cinnamon
- Pinch of nutmeg
- Pinch of salt
Instructions
- Make the crust dough. In a medium bowl, whisk together the flour and salt. Add the cold, cubed butter. Use a pastry blender or two forks to cut the butter into the flour until the mixture looks like coarse sand with some pea-sized butter pieces remaining. Drizzle in 3 tablespoons of ice water and stir with a fork. If the dough is still dry, add the remaining tablespoon. It should hold together when you squeeze it. Form it into a disk, wrap it in plastic wrap, and refrigerate for at least 20 minu…
- Preheat and prep. Preheat your oven to 350°F (175°C). Lightly grease your mini muffin tin with non-stick spray or butter.
- Roll and cut the crust. On a lightly floured surface, roll the chilled dough out to about ⅛-inch thickness. Use a 2-inch cookie cutter to cut out 24 rounds. Re-roll the scraps once to get all 24 rounds.
- Press into the muffin tin. Gently press each dough round into a mini muffin cup. Make sure it goes all the way to the bottom and up the sides. Prick the bottom of each crust a few times with a fork to prevent bubbles.
- Make the filling. In a small bowl, mash the ripe banana with a fork until it is smooth. Whisk in the maple syrup, egg, vanilla extract, and melted coconut oil or butter until everything is well combined. Stir in the chopped pecans, cinnamon, nutmeg, and a pinch of salt.
- Fill the cups. Spoon the filling into each crust-lined cup, filling them almost to the top. Place one pecan half on top of each bite.
- Bake. Bake for 14-16 minutes, or until the filling is set and the edges of the crust are golden brown. Let them cool in the tin for 10 minutes before carefully removing them with a small spatula or butter knife.
- Cool completely. Transfer the bites to a wire rack to cool completely.
Notes
Do not overwork the crust; handle as little as possible. Use a very ripe banana for best sweetness and texture. Start checking bake time at 14 minutes; filling should be slightly jiggly in center when removed. Let bites cool completely in tin before removing to prevent breaking. For gluten-free, use a 1:1 gluten-free baking blend and add an extra tablespoon of ice water. For vegan, use a flax egg and coconut oil.
Nutrition
- Serving Size: 1 bite
- Calories: 115
- Sugar: 6
- Sodium: 45
- Fat: 7
- Saturated Fat: 3
- Carbohydrates: 12
- Fiber: 1
- Protein: 2
Keywords: maple pecan pie bites, mini desserts, lightened-up, healthy pecan pie, banana pecan bites, easy dessert, portion control


