Love this? Save it for later!
Share the inspiration with your friends
Marta wasn’t trying to impress anyone. I’d stopped by her house that Tuesday afternoon to borrow a bundt pan—mine had mysteriously vanished after last year’s potluck—and the smell of chocolate and warm vanilla hit me before I even got through the screen door. She was standing at her kitchen counter, hands dusted in cocoa, with a tray of what looked like little lollipops cooling on the counter. “Oh, these?” she said when I asked, barely looking up. “Just something silly for the kids’ school thing tomorrow.”
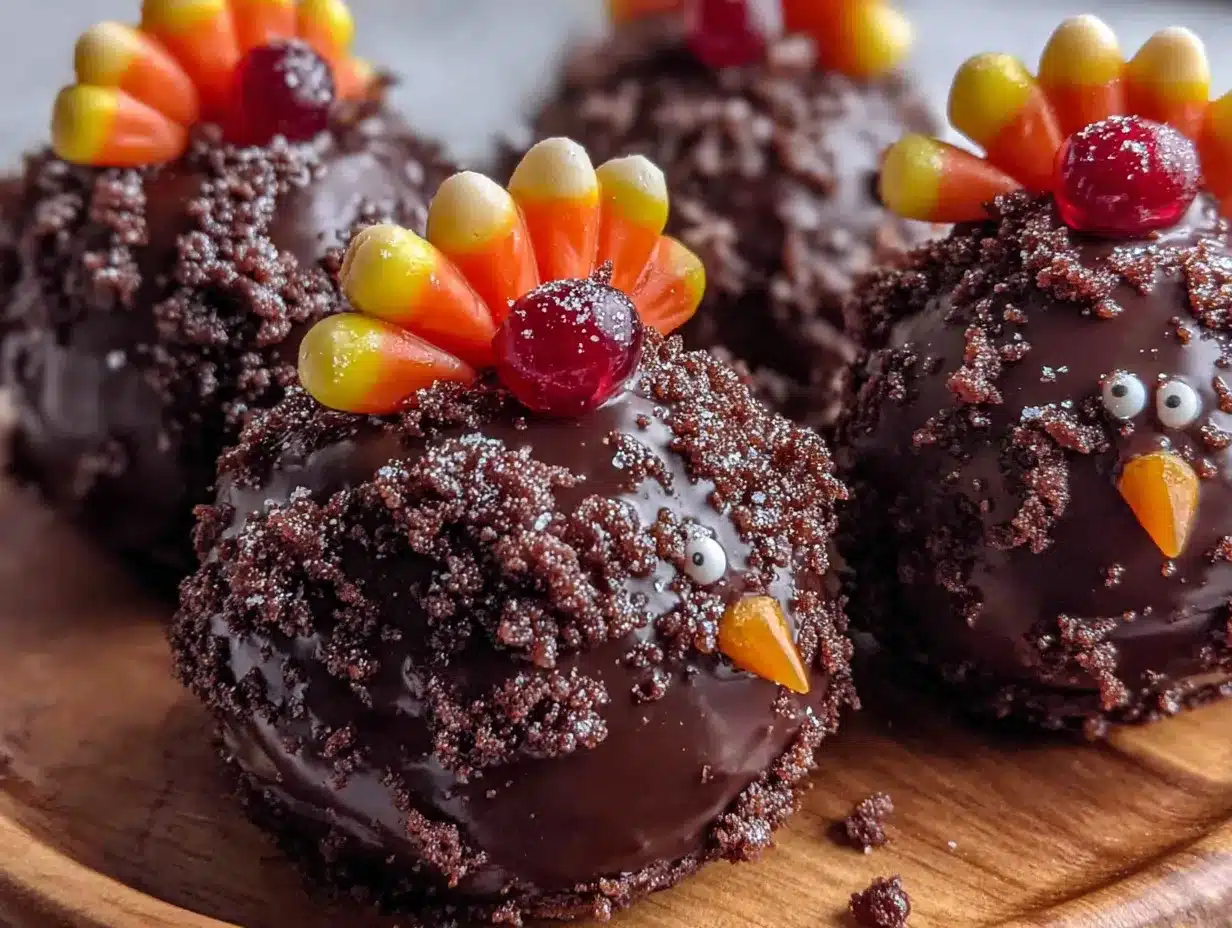
They weren’t just silly. They were tiny turkeys made out of cake pops—little chocolate bodies with candy corn feathers and candy eyes that somehow looked both ridiculous and completely charming. I stood there watching her dip and decorate for a solid ten minutes, and she acted like she was just making peanut butter sandwiches. You know that feeling when someone does something effortlessly that you just know would take you three tries and a meltdown? That was this moment. I asked for the recipe, and she shrugged and said, “It’s just cake and frosting, really.”
But here’s the thing—it’s not just cake and frosting. It’s a whole vibe. These Thanksgiving turkey cake pops have become my secret weapon for holiday gatherings. They’re the thing people walk past, then stop, then pick up, then laugh at, then eat three of. Honestly, I’ve brought fancy pies and elaborate trifles to Thanksgiving dinners that got polite nods, but these little guys? They steal the show every single time. Maybe you’ve been there—spending hours on a complicated dessert that everyone barely touches because they’re too full from dinner. These cake pops solve that problem. They’re bite-sized, adorable, and somehow make everyone at the table feel like a kid again.
Why You’ll Love This Recipe
Let me tell you straight—I’ve tested this recipe at four different Thanksgiving gatherings, one Friendsgiving, and a random Tuesday when I just needed something to make me smile. It works. Every single time. Here’s why these Thanksgiving turkey cake pops deserve a spot on your holiday menu:
- Completely Foolproof : If you’ve ever had cake pops that fell apart or looked like sad little blobs, I’ve been there too. This method uses a specific frosting-to-cake ratio that holds together beautifully. No crumbling, no cracking, no tears.
- Make-Ahead Magic : You can prep these two days before your gathering. The cake balls freeze like a dream, and you can dip and decorate the morning of. Perfect for when you’re already juggling a turkey, sides, and your aunt’s opinion on your gravy.
- Crowd-Pleaser Guaranteed : I’ve watched grown adults light up like children when they see these. Kids love them, grandparents love them, and that one cousin who’s “not really a dessert person” will eat four. They’re conversation starters and palate cleansers all in one.
- No Special Skills Needed : You don’t need to be a pastry chef or have steady hands. The turkey design is forgiving—actually, the slightly imperfect ones look more charming. Trust me on this.
- Scales Beautifully : Need 20? Easy. Need 60? Just double the batch. The process is the same, and they freeze in batches so you can work at your own pace.
What makes this recipe different from the dozens of other turkey cake pop tutorials out there is the texture. I spent three batches getting the cake-to-frosting ratio just right—too dry and they crack when you dip them, too wet and they slide off the stick. This version uses a slightly denser cake base that holds its shape perfectly, and the chocolate coating has a secret ingredient (a teaspoon of coconut oil) that gives it that professional snap when you bite into it. It’s not just another version. It’s the version I’d serve to anyone who’s ever doubted that cake pops can actually taste as good as they look.
What Ingredients You Will Need
This recipe uses simple, mostly pantry-staple ingredients to create something that looks way more complicated than it actually is. The beauty of these Thanksgiving turkey cake pops is that nothing here is fancy—it’s all about how you put it together.
For the Cake Base
- 1 box chocolate cake mix (I prefer Duncan Hines Devil’s Food for the moistest crumb, but any brand works)
- 3 large eggs (room temperature—this matters for even mixing)
- 1/2 cup vegetable oil (canola or avocado oil also work fine)
- 1 cup water (or substitute brewed coffee for a deeper chocolate flavor)
For the Frosting Binder
- 1/2 cup chocolate frosting (store-bought is fine—I use Duncan Hines Creamy Chocolate; the texture is consistent and it holds well)
- 2 tablespoons cream cheese (softened—this is my secret for a binder that’s sturdy but not greasy)
For the Coating
- 12 ounces chocolate candy melts (Wilton brand works great, or use Ghirardelli melting wafers for a richer taste)
- 1 teaspoon coconut oil (this thins the coating and gives it that glossy finish)
- 1/2 cup orange candy melts (for the turkey feathers—you can also use white melts with orange food coloring)
For Decorating
- 48 candy corn pieces (these become the feathers—get the classic ones, not the autumn mix with weird flavors)
- 24 candy eyes (the little white and black ones from the baking aisle—Wilton brand is reliable)
- 24 orange candy-coated sunflower seeds (for the beak—or use small orange M&Ms if you can’t find these)
- Red decorating gel (for the wattle—that little red dangly bit under the beak)
- 24 lollipop sticks (6-inch size works best)
- 1 block styrofoam (for drying the pops upright—a cardboard box with holes poked in it works in a pinch)
Ingredient Tips
I’ve made these with homemade cake, and honestly? The box mix works better. It’s more consistent, stays moist longer, and has the right crumb structure for rolling into balls. For the candy melts, avoid the cheap generic brands—they seize up and get clumpy. Wilton or Ghirardelli are worth the extra dollar. And don’t skip the coconut oil in the coating—I once did because I thought it was optional, and my cake pops looked like they’d been dipped in matte paint. Learn from my mistakes, friends.
Equipment Needed
You don’t need a professional bakery setup for these Thanksgiving turkey cake pops, but having the right tools makes the difference between a fun afternoon and a frustrating one.
- 9×13 baking pan (for baking the cake—metal pans work better than glass for even browning)
- Large mixing bowl (for crumbling the cake—I use my grandmother’s old ceramic one, but any big bowl works)
- Electric hand mixer or stand mixer (for getting the frosting smooth; you can do it by hand, but your arm will hate you)
- Cookie scoop or small ice cream scoop (for uniform cake balls—this is non-negotiable for even sizing)
- Baking sheet lined with parchment paper (for freezing the cake balls)
- Microwave-safe bowl (for melting the candy coating—glass is better than plastic)
- Lollipop sticks (6-inch size—don’t use the short ones meant for cake pop stands)
- Styrofoam block or cake pop stand (for drying upright—I’ve used a cardboard box with pencil holes in a pinch)
- Small piping bags or zip-top bags (for the decorating gel and any detailed work)
- Tweezers (for placing the candy eyes and small decorations—your fingers are too big and you’ll smudge everything)
If you don’t have a cookie scoop, use a tablespoon measure and level it off. If you don’t have a styrofoam block, poke holes in a cardboard box or use a colander upside down. I’ve made these in a friend’s kitchen with zero proper equipment, and they still came out great. The key is patience, not fancy tools.
Preparation Method
Step 1: Bake the Cake
Preheat your oven to 350°F (175°C). Grease your 9×13 pan with butter or cooking spray—don’t skip this, even if the box says “nonstick.” In a large bowl, combine the cake mix, eggs, oil, and water. Mix on medium speed for 2 minutes until smooth. Pour into the prepared pan and bake for 28-32 minutes, until a toothpick inserted in the center comes out clean. Let the cake cool completely in the pan—this takes about an hour. I’ve made the mistake of rushing this step, and the cake was too warm to crumble properly. Patience here saves you later.
Step 2: Make the Cake Balls
Once the cake is completely cool, crumble it into a large bowl using your hands. You want fine, even crumbs—no chunks bigger than a pea. In a separate small bowl, mix the chocolate frosting and softened cream cheese until smooth. Add this mixture to the cake crumbs, 2 tablespoons at a time, mixing with your hands after each addition. You’re looking for a texture that holds together when squeezed but isn’t greasy or sticky. It should feel like slightly damp sand. For me, this usually takes about 6 tablespoons of frosting mixture total, but it depends on your cake’s moisture level.
Step 3: Form and Freeze
Using your cookie scoop, portion out equal amounts of the cake mixture. Roll each portion into a smooth ball between your palms—they should be about 1.5 inches in diameter. Place them on a parchment-lined baking sheet. You should get 24 balls from this recipe. Insert a lollipop stick about halfway into each ball, then freeze for at least 30 minutes. This step is crucial—cold cake balls hold their shape when you dip them. If they’re room temperature, they’ll slide right off the stick into your melted chocolate. Ask me how I know this.
Step 4: Melt and Dip
About 15 minutes before your cake balls are done freezing, melt your chocolate candy melts with the coconut oil in a microwave-safe bowl. Microwave in 30-second intervals, stirring after each, until smooth. Don’t overheat—chocolate burns easily and gets grainy. When the cake balls are frozen solid, dip each one into the melted chocolate, tapping gently on the side of the bowl to remove excess. Don’t swirl—just dip and lift. Place the dipped pop upright in your styrofoam block. Work quickly; the cold cake balls will start to sweat if they sit out too long.
Step 5: Add the Feathers
While the chocolate coating is still wet, carefully press 3 candy corn pieces into the back of each cake pop in a fan pattern. The pointed ends should face outward, like turkey tail feathers. This is where tweezers come in handy—your fingers will get chocolate everywhere. If the chocolate starts to set before you add the feathers, just dip the pop again quickly or use a tiny dab of melted chocolate as glue.
Step 6: Create the Face
Once all the pops have their feathers and the chocolate has fully set (about 15 minutes at room temperature), it’s time for the faces. Using a small dot of melted chocolate as glue, attach two candy eyes to the front of each pop. Place one orange sunflower seed or M&M below the eyes for the beak, pointed end down. Finally, use the red decorating gel to draw a small wattle—just a little teardrop shape under the beak. Don’t overthink this part. Some of my best turkeys have slightly crooked beaks and wandering eyes. It adds character.
Step 7: Set and Serve
Let the decorated pops sit in the styrofoam block for at least 30 minutes to ensure everything is secure. You can serve them immediately or store them for later. If you’re bringing them to a gathering, transport them upright in the styrofoam block—laying them down will smush the feathers and faces.
Cooking Tips & Techniques
I’ve made approximately 847 cake pops in my life (okay, maybe not that many, but it feels like it), and I’ve learned some things the hard way. Here are the tips I wish someone had told me before my first disastrous batch.
Don’t overmix the cake balls. When you add the frosting to the crumbled cake, mix just until everything comes together. Overmixing makes the texture dense and greasy. You want it to feel like play-dough—moldable but not sticky.
The freezer is your best friend. I cannot emphasize this enough. Cake balls that aren’t properly chilled will fall apart in the melted chocolate. I once rushed this step because guests were arriving in an hour, and I ended up with chocolate soup with cake chunks floating in it. Give them the full 30 minutes minimum. An hour is even better.
Thin your coating properly. The coconut oil isn’t optional. It lowers the melting point of the chocolate so it flows smoothly around the cake ball instead of clumping. If your coating seems too thick, add another 1/2 teaspoon of coconut oil. If it’s too thin, add a few more candy melts. The perfect consistency is like warm honey.
Work in small batches. Only take 4-5 cake balls out of the freezer at a time. If you take them all out at once, they’ll start to warm up and sweat, which makes the chocolate coating bubble and crack. Keep the rest in the freezer until you’re ready for them.
Tap, don’t spin. When you dip a cake pop, don’t spin it around in the chocolate. Just dip it straight in and tap the stick gently on the edge of the bowl to let excess drip off. Spinning creates air bubbles that pop and leave holes in your coating.
Fix cracks with a second dip. If your coating cracks (this happens when the cake ball is too cold or the chocolate is too hot), just let the first layer set completely, then dip again. The second layer will cover the cracks. I’ve done this dozens of times, and nobody ever notices.
Variations & Adaptations
One of the best things about these Thanksgiving turkey cake pops is how adaptable they are. I’ve made about six different versions over the years, and each one has its own charm.
Vanilla Turkey Pops: Swap the chocolate cake mix for vanilla or yellow cake, and use vanilla frosting instead of chocolate. Coat in white candy melts and use candy corn for feathers. These look more like traditional turkeys with lighter coloring, and they’re perfect if you have kids who don’t love chocolate.
Pumpkin Spice Version: Use a spice cake mix and add 1 teaspoon of pumpkin pie spice to the crumbled cake before adding the frosting. Coat in orange-tinted white chocolate and use brown candy melts for the feathers. These taste like fall in a bite and are always a hit at Friendsgiving gatherings.
Gluten-Free Adaptation: Use your favorite gluten-free chocolate cake mix (King Arthur Flour makes an excellent one). The process is exactly the same—just make sure your candy melts and decorations are certified gluten-free. I’ve made these for my celiac friend Sarah, and she said they were better than the gluten version.
Nut-Free Option: This recipe is naturally nut-free if you use a cake mix that doesn’t contain nuts and check your candy melt labels. Some brands process nuts in the same facility, so read carefully if you’re serving someone with allergies.
Mini Turkey Pops: Use a smaller cookie scoop to make 36 mini pops instead of 24. These are perfect for kids’ parties or as little favors to send home with guests. Just reduce the freezing time to 20 minutes since they’re smaller.
Chocolate Peanut Butter: Add 2 tablespoons of creamy peanut butter to the frosting mixture before combining with the cake crumbs. Use milk chocolate coating and Reese’s Pieces for the feathers. This version is dangerous—I ate six in one sitting and don’t regret a single one.
Serving & Storage Suggestions
These Thanksgiving turkey cake pops are designed to be the star of your dessert table, but they play well with others too. Here’s how to serve and store them like a pro.
Serving Temperature: Serve them at room temperature for the best texture. If they’ve been refrigerated, let them sit out for 15-20 minutes before serving. The coating should have a slight snap when you bite into it, and the cake inside should be soft and fudgy.
Presentation Ideas: Arrange them upright in a styrofoam block covered with festive wrapping paper or a cloth napkin. You can also stick them into a pumpkin or a hollowed-out cabbage for a fun centerpiece. For a Thanksgiving table, I like to arrange them in a circle around a small vase of fall flowers—they look like little turkey soldiers guarding the centerpiece.
What to Serve Alongside: These pair beautifully with a warm apple cider or a spiced chai latte. For a dessert table, set them next to pumpkin pie and pecan tarts—they add a playful contrast to the more traditional desserts. If you’re hosting a kids’ table, these are the perfect activity: let the kids decorate their own after dinner.
Storage Instructions: Store uneaten pops in an airtight container in the refrigerator for up to 5 days. Place them upright if possible, or lay them in a single layer with parchment paper between layers. Don’t stack them—the decorations will smudge and the feathers will break.
Freezing for Later: You can freeze the undecorated cake balls (before dipping) for up to 3 months. Just place them on a baking sheet, freeze until solid, then transfer to a freezer bag. When you’re ready to use them, thaw in the refrigerator for 30 minutes, then dip and decorate as directed. I do this every year in early November so I’m not scrambling the day before Thanksgiving.
Reheating Note: These are served cold or at room temperature, so no reheating needed. If the coating looks a little dull after refrigeration, let them sit at room temperature for 10 minutes—the shine comes back naturally.
Nutritional Information & Benefits
Let’s be real—these are a treat, not a health food. But knowing what’s in them helps you enjoy them mindfully. Here’s the breakdown for one turkey cake pop (based on 24 servings):
| Nutrient | Amount Per Pop |
|---|---|
| Calories | 185 |
| Total Fat | 9g |
| Saturated Fat | 4g |
| Cholesterol | 22mg |
| Sodium | 210mg |
| Total Carbohydrates | 26g |
| Dietary Fiber | 1g |
| Sugars | 18g |
| Protein | 2g |
Health Benefits to Note: The dark chocolate coating (if you use dark chocolate candy melts) contains antioxidants called flavonoids that support heart health. The eggs provide high-quality protein and choline, which is important for brain function. And the coconut oil contains medium-chain triglycerides that can provide a quick energy source. But honestly? The biggest benefit here is the joy these bring to a holiday table. Sometimes food is about more than nutrients—it’s about connection, celebration, and making people smile.
Dietary Considerations: This recipe contains gluten, dairy, eggs, and soy (in the chocolate). For gluten-free, dairy-free, or vegan versions, see the variations section above. Always check labels on candy melts and decorations, as some contain milk solids or are processed in facilities that handle nuts.
Conclusion
These Thanksgiving turkey cake pops have become as much a part of my holiday tradition as the turkey itself. Every year, I make them the Wednesday before Thanksgiving while listening to Christmas music (don’t judge me—I start early), and every year, they disappear faster than anything else on the dessert table. There’s something about the combination of rich chocolate, crunchy candy corn, and those ridiculous little faces that just makes people happy.
I love that this recipe is forgiving. It doesn’t demand perfection. Some of my best turkeys have lopsided eyes and beaks that look more like noses, and those are the ones people pick first. There’s a lesson in there somewhere about not taking ourselves too seriously, especially during the holidays.
I’d love to hear how yours turn out! Drop a comment below and tell me about your decorating adventures—did you add pilgrim hats? Santa hats? Did you make a whole turkey family? Share your photos and tag me on social media. And if you’ve got a variation that blew your guests away, I’m all ears. Happy Thanksgiving, friends—go make something that makes people smile.
Frequently Asked Questions
Can I make these turkey cake pops ahead of time?
Absolutely! You can make the undecorated cake balls up to 3 months ahead and freeze them. The fully decorated pops will keep in the refrigerator for up to 5 days. Just let them come to room temperature before serving for the best texture.
My cake balls keep falling off the sticks. What am I doing wrong?
This usually happens when the cake balls aren’t cold enough. Make sure they’re frozen solid before dipping—at least 30 minutes in the freezer. Also, don’t insert the stick too far. It should go about halfway into the ball, no deeper. If they’re still falling off, dip the tip of the stick in melted chocolate before inserting it into the cake ball.
Can I use homemade cake instead of box mix?
You can, but I don’t recommend it. Box mix has a specific texture and moisture level that works perfectly for cake pops. Homemade cake tends to be more delicate and can make the balls crumbly. If you do use homemade, make sure it’s a dense, moist cake recipe—angel food cake will not work here.
My chocolate coating is lumpy and thick. How do I fix it?
Your chocolate likely overheated or got moisture in it. If it’s just thick, add another teaspoon of coconut oil and stir gently. If it’s seized (turned into a grainy, lumpy mess), you’ll need to start over—unfortunately, seized chocolate can’t be saved. Next time, microwave in shorter intervals and stir more frequently.
Can I use white chocolate instead of dark for the coating?
Yes! White chocolate works beautifully. Just be extra careful when melting it—white chocolate burns more easily than dark. Use 30-second intervals in the microwave and stir thoroughly between each. You can also tint white chocolate with orange or yellow food coloring for a festive look.
Pin This Recipe!
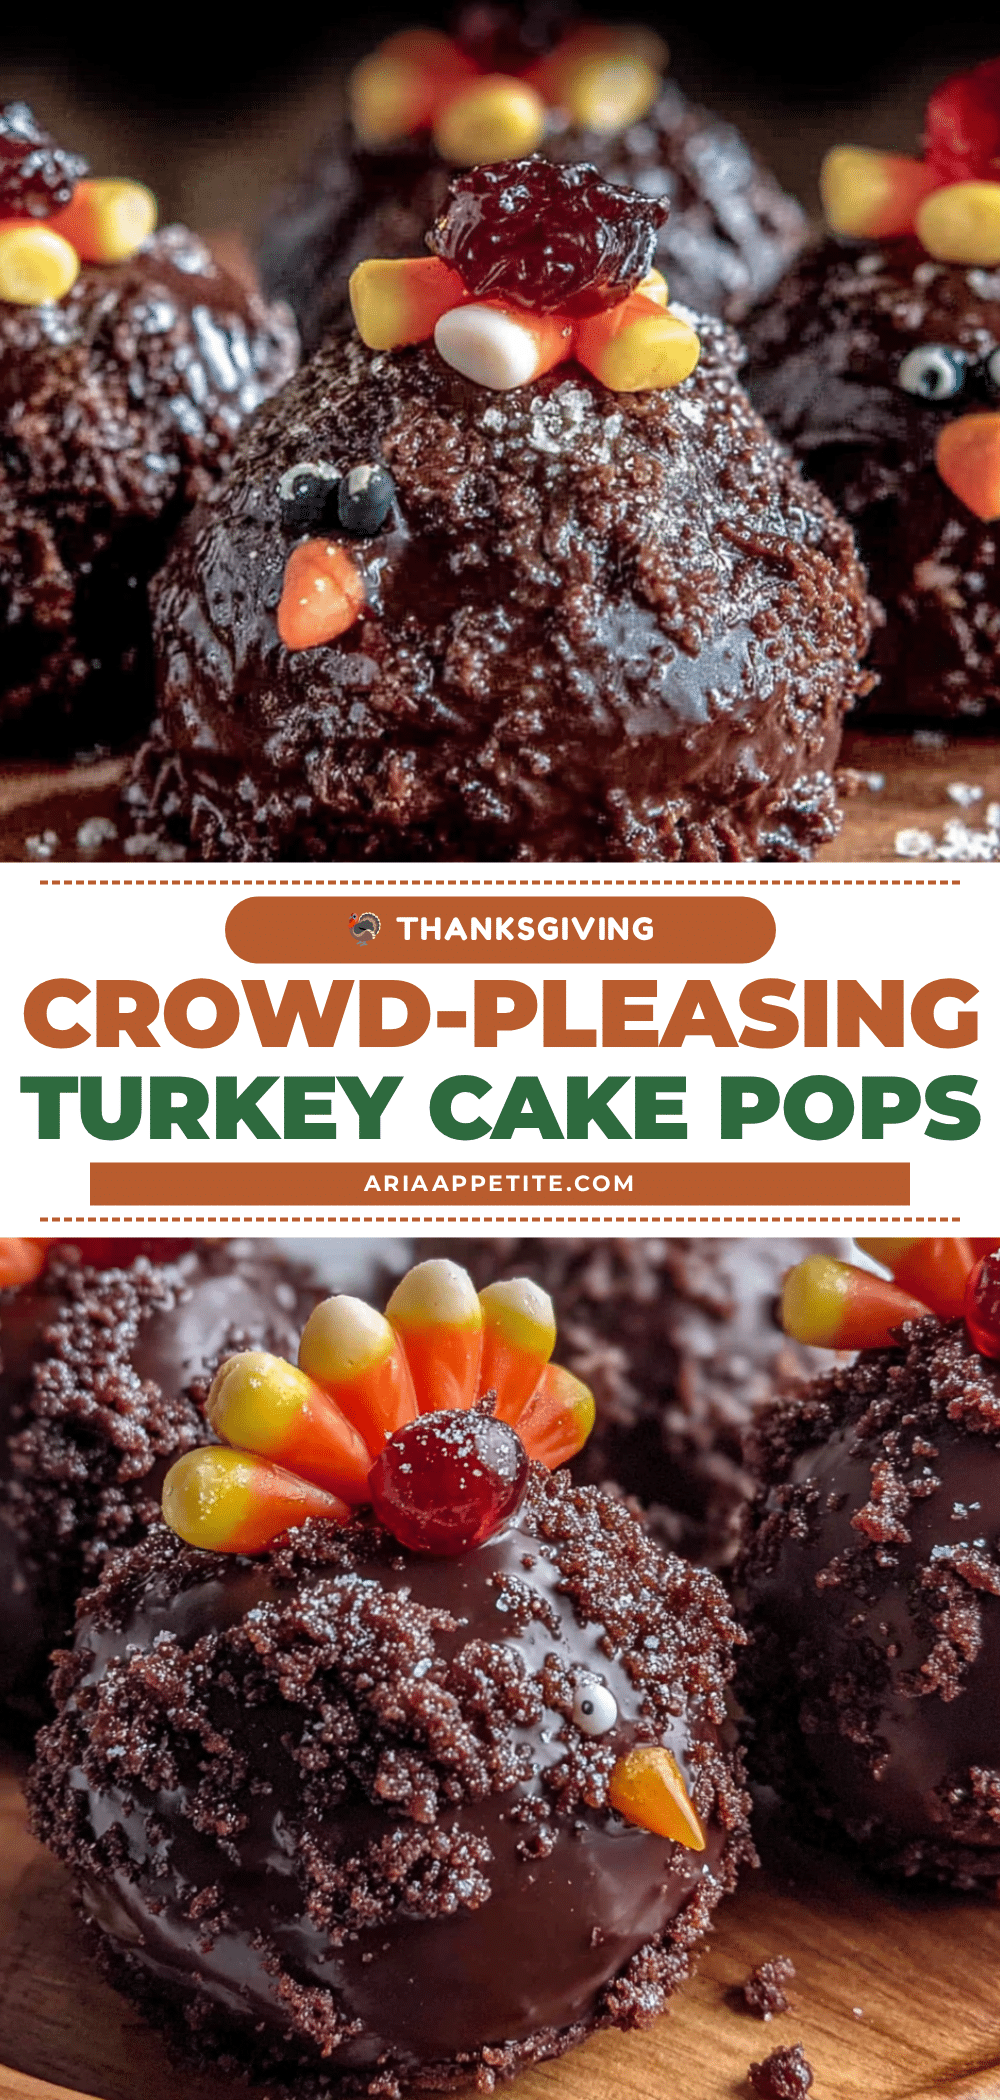
Best Homemade Thanksgiving Turkey Cake Pops: Easy Recipe
These adorable turkey cake pops are made with a moist chocolate cake base, creamy frosting binder, and a glossy chocolate coating. Decorated with candy corn feathers and candy eyes, they’re a fun and festive treat that’s perfect for Thanksgiving gatherings.
- Prep Time: 30 minutes
- Cook Time: 30 minutes
- Total Time: 1 hour 30 minutes (plus cooling and freezing time)
- Yield: 24 servings 1x
- Category: Dessert
- Cuisine: American
Ingredients
- 1 box chocolate cake mix (e.g., Duncan Hines Devil’s Food)
- 3 large eggs, room temperature
- 1/2 cup vegetable oil
- 1 cup water (or brewed coffee)
- 1/2 cup chocolate frosting (e.g., Duncan Hines Creamy Chocolate)
- 2 tablespoons cream cheese, softened
- 12 ounces chocolate candy melts (e.g., Wilton or Ghirardelli)
- 1 teaspoon coconut oil
- 1/2 cup orange candy melts (or white melts with orange food coloring)
- 48 candy corn pieces
- 24 candy eyes
- 24 orange candy-coated sunflower seeds (or small orange M&Ms)
- Red decorating gel
- 24 lollipop sticks (6-inch)
- 1 block styrofoam (for drying)
Instructions
- Preheat oven to 350°F (175°C). Grease a 9×13 baking pan. Combine cake mix, eggs, oil, and water; mix on medium speed for 2 minutes. Pour into pan and bake 28-32 minutes until a toothpick comes out clean. Cool completely.
- Crumble cooled cake into fine crumbs in a large bowl. Mix chocolate frosting and softened cream cheese until smooth. Add frosting mixture to crumbs, 2 tablespoons at a time, mixing with hands until mixture holds together when squeezed (like damp sand).
- Using a cookie scoop, portion mixture into 24 balls (about 1.5 inches). Roll smooth. Place on parchment-lined baking sheet. Insert a lollipop stick halfway into each ball. Freeze for at least 30 minutes.
- About 15 minutes before freezing is done, melt chocolate candy melts with coconut oil in a microwave-safe bowl in 30-second intervals, stirring until smooth. Dip frozen cake balls into melted chocolate, tapping gently to remove excess. Place upright in styrofoam block.
- While chocolate is still wet, press 3 candy corn pieces into the back of each pop in a fan pattern (pointed ends outward). Use tweezers if needed.
- Once chocolate sets (about 15 minutes), attach candy eyes to front with a dab of melted chocolate. Place one orange sunflower seed or M&M below eyes for beak (pointed end down). Use red decorating gel to draw a small wattle under the beak.
- Let pops set in styrofoam block for at least 30 minutes. Serve at room temperature or refrigerate. Transport upright in styrofoam block.
Notes
For best results, freeze cake balls solid before dipping. Don’t skip the coconut oil in the coating—it gives a glossy finish. Work in small batches, taking only 4-5 cake balls out of the freezer at a time. If coating cracks, let first layer set, then dip again.
Nutrition
- Serving Size: 1 cake pop
- Calories: 185
- Sugar: 18
- Sodium: 210
- Fat: 9
- Saturated Fat: 4
- Carbohydrates: 26
- Fiber: 1
- Protein: 2
Keywords: Thanksgiving, turkey cake pops, cake pops, holiday dessert, chocolate cake pops, easy dessert, turkey pops


