Love this? Save it for later!
Share the inspiration with your friends
I was standing in the frozen foods aisle last October, staring at a stack of pre-made pie crusts, when a strange thing happened. The cold air from the open freezer door hit my face, and suddenly I was seven years old, sitting cross-legged on my neighbor Mrs. Kowalski’s linoleum kitchen floor. She was rolling out dough on a flour-dusted counter, and the sound — that soft, rhythmic push and pull of the wooden pin — mixed with the smell of butter and cinnamon. It was so sharp and real I almost forgot where I was. I grabbed a frozen crust anyway, tossed it in my cart, and walked away feeling like I’d just cheated on something important.
That night, I sat on my couch and couldn’t shake the feeling. The frozen crust sat in my fridge for three days, untouched. Every time I opened the door, it stared back at me, all neat and plastic-wrapped and perfectly round. And I thought about Mrs. Kowalski’s hands — how she never measured anything, how she’d let me press my thumb into the leftover dough scraps and eat them raw. She passed away five years ago, and honestly, I think I’d been avoiding making her pie from scratch because it felt like admitting she was really gone. Maybe you’ve been there too — avoiding a recipe because making it feels too much like missing someone.
So I finally did it. I cleared my counter, pulled out the flour, and made this cozy homemade pumpkin pie from scratch with flaky crust. And let me tell you — the first bite didn’t just taste good. It tasted like a Tuesday afternoon in 1992, with a chipped ceramic pie plate and a woman who always smelled like vanilla and told the best stories. This recipe is my attempt to hold onto that feeling, and I hope it becomes one of yours too.
Why You’ll Love This Recipe
I’ve tested this cozy homemade pumpkin pie from scratch with flaky crust about seven times over the past two months. My neighbors have been very patient. My trash can has seen some sad, soggy crusts. But this version — this one is the keeper. Here’s why it’s different from every other pumpkin pie recipe you’ll find online.
- Truly From Scratch — No canned filling shortcuts here. You control the sweetness, the spice level, and the texture. And that crust? It’s all butter, all cold, all flaky.
- Simple Ingredients — You likely have most of these in your pantry right now. No weird specialty flours or obscure spices. Just real food.
- Perfect for Cozy Evenings — This pie is made for cold weather, slow afternoons, and the kind of dinner where you linger at the table. It’s comfort in a slice.
- Crowd-Pleaser — I brought this to a Friendsgiving last month, and three people asked for the recipe before I even finished my first glass of wine. It gets rave reviews from kids and adults alike.
- Unbelievably Flaky Crust — The secret is in the technique, not the ingredients. I’ll walk you through every step so you get those beautiful, buttery layers.
This isn’t just another pumpkin pie recipe. It’s the one where the filling is silky without being gluey, spiced without being overpowering, and sweet enough to feel like a treat but not so sweet that you regret the second slice. And that crust — honestly, it’s the kind of flaky that shatters when you press your fork into it. The kind that makes you close your eyes after the first bite. That’s the goal here.
What Ingredients You Will Need
This cozy homemade pumpkin pie from scratch with flaky crust uses simple, honest ingredients to deliver deep flavor and that perfect melt-in-your-mouth texture. No complicated shopping list — just good pantry staples and a few fresh items.
For the Flaky Pie Crust
- All-purpose flour — 2 ½ cups (315g). I prefer King Arthur Flour for consistent results, but any brand works.
- Unsalted butter — 1 cup (226g), very cold, cut into small cubes. This is non-negotiable for flakiness.
- Ice water — 6 to 8 tablespoons (90-120ml). You’ll need more or less depending on humidity.
- Salt — 1 teaspoon (6g). Fine sea salt is best.
- Sugar — 1 tablespoon (12g). Just a touch for balance.
For the Pumpkin Filling
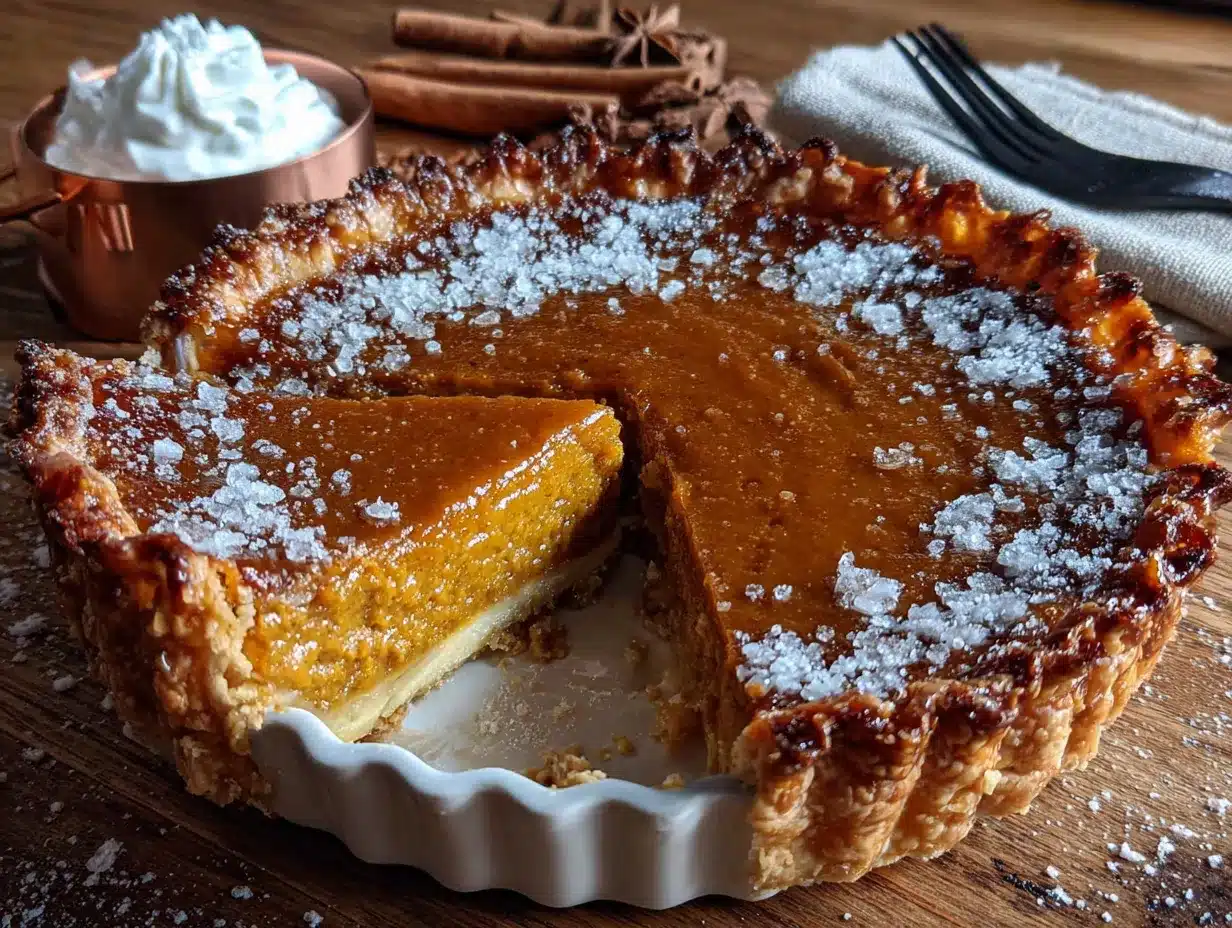
- Pumpkin puree — 1 can (15 oz or 425g). Look for 100% pure pumpkin, not pumpkin pie filling. Libby’s is my go-to brand.
- Heavy cream — 1 cup (240ml). Full-fat gives the silkiest texture. Half-and-half works in a pinch but won’t be as rich.
- Large eggs — 3, at room temperature. Cold eggs can seize the filling.
- Brown sugar — ¾ cup (150g), packed. Light or dark both work — dark gives deeper flavor.
- Granulated sugar — ¼ cup (50g).
- Vanilla extract — 2 teaspoons (10ml). Pure vanilla, not imitation.
For the Spice Blend
- Ground cinnamon — 2 teaspoons (5g). This is the backbone of the flavor.
- Ground ginger — 1 teaspoon (2g). Adds warmth without heat.
- Ground nutmeg — ½ teaspoon (1g). Freshly grated if you have it — it makes a difference.
- Ground cloves — ¼ teaspoon (0.5g). A little goes a long way.
- Salt — ½ teaspoon (3g). Don’t skip this — it brightens all the other flavors.
Ingredient Tips
For the best crust, make sure your butter is genuinely cold — like, stick it in the freezer for 15 minutes before you start. I’ve learned this the hard way after making a greasy, flat crust that tasted more like a cracker than pie pastry. Also, if you’re using a different brand of pumpkin puree, check the consistency. Some are more watery than others. If yours seems thin, let it drain in a fine-mesh sieve for 30 minutes before using. And for the spice blend, feel free to adjust based on what you have. I’ve made this with just cinnamon and nutmeg in a pinch, and it was still delicious — just less complex.
Equipment Needed
You don’t need a fancy kitchen to make this cozy homemade pumpkin pie from scratch with flaky crust. Here’s what you’ll actually use:
- 9-inch pie plate — Glass or ceramic works best. Metal can conduct heat too quickly and burn the crust edges. I use a deep-dish ceramic one that my aunt gave me — it’s chipped on the rim, but it bakes evenly every time.
- Rolling pin — A standard wooden one is perfect. If you don’t have one, a wine bottle works in a pinch. I’ve done it. It’s not ideal, but it’ll get the job done.
- Large mixing bowls — One for the crust, one for the filling.
- Pastry cutter or two forks — For cutting butter into the flour. A food processor works too, but be careful not to overmix.
- Plastic wrap — For chilling the dough.
- Parchment paper — For blind baking the crust. Aluminum foil works as a backup.
- Pie weights or dried beans — To weigh down the crust during blind baking. I keep a bag of old dried chickpeas in my pantry just for this purpose.
- Whisk — For the filling. A fork works too, but a whisk is easier.
- Measuring cups and spoons — Accuracy matters here, especially for the spices.
- Cooling rack — Essential for even cooling. Don’t skip this or the bottom will get soggy.
Budget-friendly tip: If you don’t have pie weights, dried beans or even uncooked rice work perfectly. Just line your crust with parchment and pour them in. You can reuse them for blind baking again and again — just don’t try to cook and eat them afterward.
Preparation Method
Let’s make this cozy homemade pumpkin pie from scratch with flaky crust. I’ll walk you through every step, including the little things I’ve learned from my own mistakes.
Step 1: Make the Crust Dough
In a large bowl, whisk together the flour, salt, and sugar. Add the cold butter cubes. Using a pastry cutter or two forks, cut the butter into the flour until the mixture looks like coarse meal with some pea-sized butter chunks remaining. This is crucial — those chunks create the flaky layers. Drizzle 6 tablespoons of ice water over the mixture and toss with a fork until the dough starts coming together. Squeeze a piece in your hand — if it holds together without crumbling, it’s ready. If not, add more water, one tablespoon at a time. I’ve had to add up to 8 tablespoons on dry days.
Step 2: Chill the Dough
Turn the dough onto a lightly floured surface and shape it into a disc about 1 inch thick. Wrap tightly in plastic wrap and refrigerate for at least 1 hour. Overnight is even better. This rest relaxes the gluten and keeps the butter cold, which equals a tender, flaky crust. I once skipped this step because I was in a hurry, and the crust shrunk in the oven like a sweater in the dryer. Don’t be me.
Step 3: Roll Out the Crust
On a floured surface, roll the chilled dough into a 12-inch circle, about ⅛ inch thick. Roll from the center outward, turning the dough occasionally to prevent sticking. Transfer to your pie plate by rolling the dough gently around your rolling pin, then unrolling it over the plate. Press it into the bottom and sides without stretching — stretching causes shrinking during baking. Trim the overhang to about ½ inch, fold it under, and crimp the edges with your fingers or a fork. Place the crust in the freezer for 15 minutes while you preheat the oven to 375°F (190°C).
Step 4: Blind Bake the Crust
Line the frozen crust with parchment paper and fill with pie weights or dried beans. Bake for 15 minutes. Remove the parchment and weights, then bake for another 10 minutes until the bottom looks dry and lightly golden. This step prevents the dreaded soggy bottom. Set the crust aside to cool slightly while you make the filling. Lower the oven temperature to 350°F (175°C).
Step 5: Make the Filling
In a large bowl, whisk together the pumpkin puree, heavy cream, and eggs until smooth. Add both sugars, vanilla, and all the spices. Whisk until fully combined and silky. Taste it — yes, raw eggs and all. I know it sounds weird, but a tiny taste on your finger will tell you if the spice level is right. I once forgot the ginger entirely and didn’t realize until the pie was baked. Learn from my mistake.
Step 6: Bake the Pie
Pour the filling into the pre-baked crust. It should come almost to the rim. Bake at 350°F (175°C) for 50 to 60 minutes. The center should be slightly jiggly — like set Jell-O, not liquid. A knife inserted near the center should come out mostly clean. If the crust edges are browning too quickly, tent them with foil or a pie shield after about 30 minutes.
Step 7: Cool Completely
Place the pie on a cooling rack and let it cool to room temperature, about 2 hours. Then refrigerate for at least 4 hours or overnight. This step is critical — the filling needs time to fully set. I’ve served this pie warm before, and it was a runny, sad mess. Patience pays off here.
Cooking Tips & Techniques
After making this cozy homemade pumpkin pie from scratch with flaky crust more times than I care to admit, I’ve gathered a few tricks that make a real difference.
Keep everything cold for the crust. I cannot stress this enough. Cold butter, ice water, and even chilling your flour for 10 minutes in the freezer before starting. Warm ingredients create a tough, greasy crust. I once made a crust in a hot kitchen in July, and it was a disaster — the butter melted before the dough even hit the oven.
Don’t overwork the dough. Overmixing develops gluten, which makes the crust tough. Mix just until it comes together. A few dry spots are fine — they’ll hydrate during the chilling time. I used to knead my dough like bread, and my crusts were always dense and chewy. Less is more.
Blind bake with confidence. This is the step most home bakers skip, and it’s the difference between a crisp crust and a soggy one. The frozen crust going into a hot oven creates steam that lifts the layers. Don’t skip the freezer step before baking.
Room temperature eggs matter. Cold eggs can seize the fat in the filling, creating a lumpy texture. Let your eggs sit on the counter for 30 minutes before using. If you forget, place them in a bowl of warm water for 5 minutes.
Watch for the jiggle. Overbaking is the most common mistake. The filling should still wobble slightly in the center when you shake the pan. It will continue to set as it cools. A cracked top means it’s overbaked — still edible, just not as pretty.
Let it rest overnight. I know it’s hard to wait, but a fully chilled pie slices cleanly and tastes better. The flavors meld and deepen. I’ve done side-by-side taste tests, and the next-day pie always wins.
Variations & Adaptations
This cozy homemade pumpkin pie from scratch with flaky crust is pretty perfect as written, but I love playing around with variations. Here are a few I’ve tried and loved.
Dairy-Free Version
Substitute the heavy cream with full-fat coconut cream. The texture is slightly less silky but still rich and delicious. Use a vegan butter stick for the crust — I like the Miyoko’s brand. The crust won’t be quite as flaky, but it’s still darn good.
Gluten-Free Option
Use a 1:1 gluten-free flour blend for the crust. I’ve had the best luck with Bob’s Red Mill Gluten-Free 1-to-1 Baking Flour. Add an extra tablespoon of ice water, as gluten-free flours tend to be more absorbent. The filling is naturally gluten-free, so no changes needed there.
Spice It Up
Add ½ teaspoon of cardamom or allspice to the spice blend for a more complex flavor profile. I tried this last Thanksgiving on a whim, and my brother-in-law — who claims to hate pumpkin pie — ate two slices. He didn’t even notice the difference until I told him.
Maple Sweetened
Replace the granulated sugar with ⅓ cup (80ml) of pure maple syrup. Reduce the heavy cream by 2 tablespoons to compensate for the extra liquid. The flavor is warmer and more autumnal. Just don’t use pancake syrup — it’s not the same thing.
Individual Mini Pies
Use a muffin tin instead of a pie plate. Roll the crust, cut into circles, and press into greased muffin cups. Fill and bake for about 25 minutes. Perfect for parties or portion control. I made these for a potluck once, and they disappeared in minutes.
Serving & Storage Suggestions
This cozy homemade pumpkin pie from scratch with flaky crust is best served cold or at room temperature. I actually prefer it straight from the fridge — the filling firms up beautifully and the flavors are more pronounced. Let it sit out for about 15 minutes before slicing if you want it slightly softer.
What to serve with it: A dollop of lightly sweetened whipped cream is the classic choice, and for good reason — the cool, airy cream balances the rich, spiced filling. For an extra treat, drizzle with caramel sauce or sprinkle with candied pecans. I’ve also served it with a scoop of vanilla bean ice cream, and honestly, it’s life-changing. On the beverage side, a cup of black coffee or a warm chai latte pairs beautifully.
Storage: Cover the pie loosely with plastic wrap or aluminum foil and refrigerate for up to 5 days. Do not leave it at room temperature for more than 2 hours — the dairy-based filling needs to stay cold. I’ve made this pie up to 2 days in advance of a gathering, and it actually tastes better after a day in the fridge.
Freezing: You can freeze the fully baked and cooled pie for up to 3 months. Wrap it tightly in plastic wrap, then a layer of foil. Thaw overnight in the refrigerator before serving. Do not freeze the unbaked filling — it will separate and become watery. I learned this the hard way when I tried to prep a pie a month in advance. The texture was grainy and sad.
Reheating: If you prefer warm pie, place individual slices on a baking sheet and warm in a 300°F (150°C) oven for 10 minutes. The microwave will make the crust soggy — avoid it if you can.
Nutritional Information & Benefits
Here’s the honest truth about this cozy homemade pumpkin pie from scratch with flaky crust: it’s a dessert, not a health food. But that doesn’t mean it’s without merit. Each slice (based on 8 servings) contains approximately:
- Calories: 380
- Fat: 22g
- Carbohydrates: 42g
- Protein: 6g
- Fiber: 3g
- Sugar: 24g
Pumpkin itself is a nutritional powerhouse — it’s loaded with vitamin A (over 200% of your daily needs in a single serving), vitamin C, potassium, and fiber. The spices — cinnamon, ginger, nutmeg, and cloves — are all anti-inflammatory and packed with antioxidants. So while this pie isn’t exactly a salad, it’s not empty calories either.
For dietary considerations: This recipe contains gluten, dairy, and eggs. It can be adapted to be gluten-free or dairy-free using the variations above. It’s naturally nut-free, though check your spice blends for cross-contamination if that’s a concern.
My personal take? I believe in enjoying real food in moderation. This pie is made from scratch with whole ingredients — no preservatives, no artificial flavors, no high-fructose corn syrup. That counts for something. And honestly, sharing a slice of homemade pie with people you love is good for the soul, even if it’s not tracked in a nutrition app.
Conclusion
Making this cozy homemade pumpkin pie from scratch with flaky crust is more than just following a recipe — it’s about slowing down, getting your hands in some flour, and creating something that tastes like care. That frozen crust I bought weeks ago? It’s still sitting in my freezer. I think I’ll donate it to a neighbor who’s short on time. Because now I know that the real magic of this pie isn’t just the flaky layers or the silky filling — it’s the act of making it yourself.
I hope you’ll try this recipe, not because it’s perfect on paper, but because it’s forgiving and honest and tastes like all the best autumn memories wrapped in butter. Maybe you’ll add a little extra cinnamon, or forget the ginger like I did once, or serve it with way too much whipped cream. That’s the point. Make it your own. And when you do, I’d love to hear about it — leave a comment below and tell me how it turned out, what you changed, or who you shared it with. That’s my favorite part of this whole thing.
Now go preheat your oven. Your cozy slice is waiting.
Frequently Asked Questions
Can I use canned pumpkin pie filling instead of pure pumpkin?
You can, but you’ll need to adjust the sugar and spices since the filling is already sweetened and spiced. I’d recommend starting with one can of pumpkin pie filling and omitting the brown sugar, granulated sugar, and spice blend from this recipe. The texture will be slightly different — canned filling often contains thickeners. For the best results, stick with 100% pure pumpkin and control the flavor yourself.
Why did my pie crust shrink during baking?
This usually happens for two reasons: the dough wasn’t chilled enough before baking, or it was stretched too much when you pressed it into the pie plate. Always chill the shaped crust for at least 15 minutes in the freezer before blind baking. And when you transfer the dough to the pie plate, let it settle naturally instead of stretching it to fit. Stretched dough will snap back in the oven like a rubber band.
How do I know when the pie is done baking?
The center should be slightly jiggly — think set Jell-O, not liquid. A knife inserted about an inch from the center should come out mostly clean. The edges should be set and slightly puffed. If the top cracks, it’s slightly overbaked but still fine to eat. If it’s still very liquid after 60 minutes, give it another 5-10 minutes and check again.
Can I make this pie ahead of time?
Absolutely. In fact, I recommend it. This pie tastes better after a day in the fridge — the flavors meld and deepen. You can bake it up to 2 days in advance. Cool it completely, cover it loosely, and refrigerate. You can also freeze the baked pie for up to 3 months. Just thaw overnight in the refrigerator before serving.
Why is my pumpkin pie filling watery?
Watery filling can happen for a few reasons. First, your pumpkin puree might have been too watery — some brands are thinner than others. Try draining the puree in a fine-mesh sieve for 30 minutes before using. Second, the pie might not have baked long enough. The filling needs time to set properly. Finally, cutting into the pie while it’s still warm will release steam and make it seem watery. Always let it cool to room temperature and then refrigerate for at least 4 hours before slicing.
Pin This Recipe!
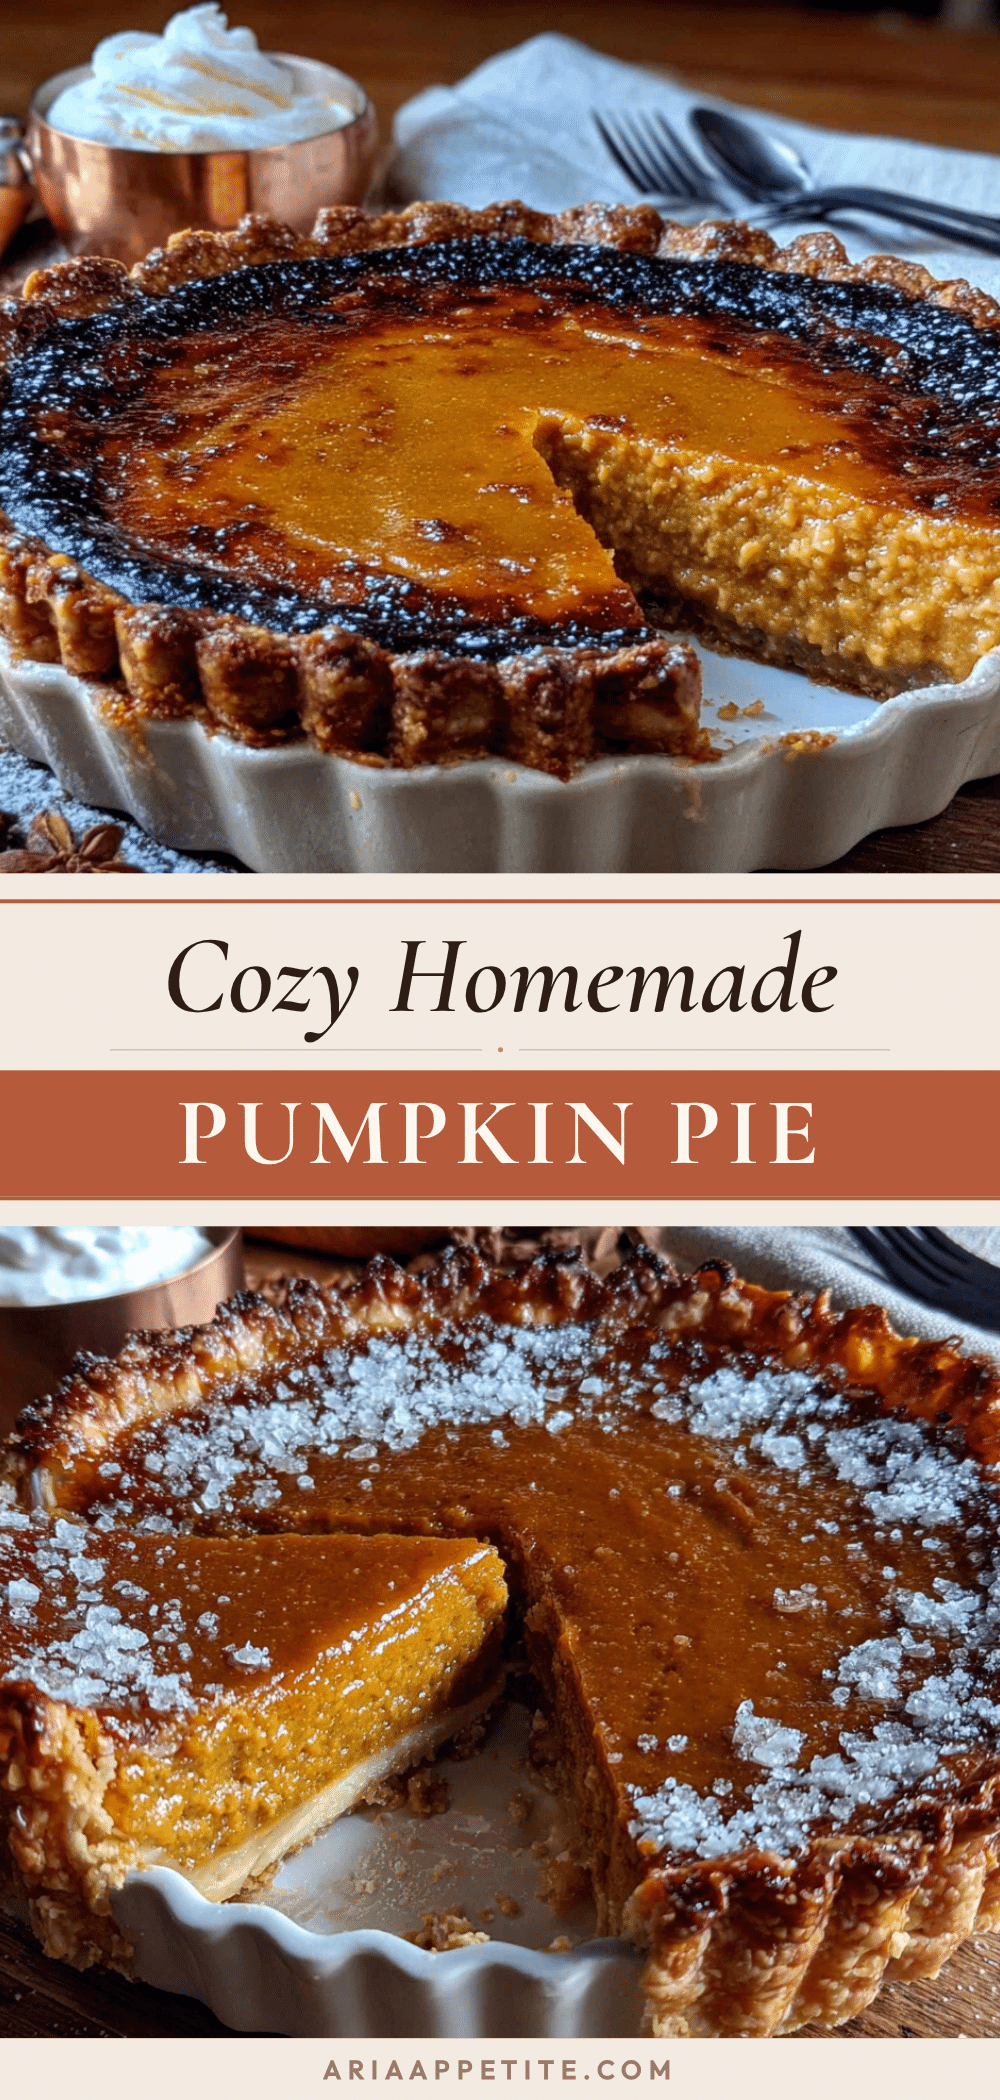
Cozy Homemade Pumpkin Pie from Scratch with Flaky Crust
A nostalgic, from-scratch pumpkin pie with a flaky, all-butter crust and a silky, perfectly spiced filling. This recipe is made for cozy evenings and will become a cherished tradition.
- Prep Time: 30 minutes
- Cook Time: 1 hour 10 minutes
- Total Time: 5 hours 40 minutes (includes chilling and cooling)
- Yield: 8 servings 1x
- Category: Dessert
- Cuisine: American
Ingredients
- 2 ½ cups (315g) all-purpose flour
- 1 cup (226g) unsalted butter, very cold, cut into small cubes
- 6 to 8 tablespoons (90-120ml) ice water
- 1 teaspoon (6g) fine sea salt
- 1 tablespoon (12g) sugar
- 1 can (15 oz or 425g) 100% pure pumpkin puree
- 1 cup (240ml) heavy cream
- 3 large eggs, at room temperature
- ¾ cup (150g) packed brown sugar (light or dark)
- ¼ cup (50g) granulated sugar
- 2 teaspoons (10ml) pure vanilla extract
- 2 teaspoons (5g) ground cinnamon
- 1 teaspoon (2g) ground ginger
- ½ teaspoon (1g) ground nutmeg
- ¼ teaspoon (0.5g) ground cloves
- ½ teaspoon (3g) salt
Instructions
- Make the crust dough: In a large bowl, whisk together flour, salt, and sugar. Add cold butter cubes. Using a pastry cutter or two forks, cut the butter into the flour until the mixture looks like coarse meal with some pea-sized butter chunks remaining. Drizzle 6 tablespoons of ice water over the mixture and toss with a fork until the dough starts coming together. Squeeze a piece in your hand — if it holds together without crumbling, it’s ready. If not, add more water, one tablespoon at a time.
- Chill the dough: Turn the dough onto a lightly floured surface and shape it into a disc about 1 inch thick. Wrap tightly in plastic wrap and refrigerate for at least 1 hour, or overnight.
- Roll out the crust: On a floured surface, roll the chilled dough into a 12-inch circle, about ⅛ inch thick. Transfer to a 9-inch pie plate. Press it into the bottom and sides without stretching. Trim the overhang to about ½ inch, fold it under, and crimp the edges. Place the crust in the freezer for 15 minutes while you preheat the oven to 375°F (190°C).
- Blind bake the crust: Line the frozen crust with parchment paper and fill with pie weights or dried beans. Bake for 15 minutes. Remove the parchment and weights, then bake for another 10 minutes until the bottom looks dry and lightly golden. Set aside to cool slightly. Lower the oven temperature to 350°F (175°C).
- Make the filling: In a large bowl, whisk together pumpkin puree, heavy cream, and eggs until smooth. Add both sugars, vanilla, and all the spices. Whisk until fully combined and silky.
- Bake the pie: Pour the filling into the pre-baked crust. Bake at 350°F (175°C) for 50 to 60 minutes. The center should be slightly jiggly. If the crust edges are browning too quickly, tent them with foil after about 30 minutes.
- Cool completely: Place the pie on a cooling rack and let it cool to room temperature, about 2 hours. Then refrigerate for at least 4 hours or overnight before serving.
Notes
For the best crust, keep all ingredients cold. Do not overwork the dough. Blind baking is essential to prevent a soggy bottom. Let the pie cool completely and refrigerate for at least 4 hours before slicing for clean slices. The pie can be made up to 2 days in advance and tastes even better the next day.
Nutrition
- Serving Size: 1 slice
- Calories: 380
- Sugar: 24
- Sodium: 380
- Fat: 22
- Saturated Fat: 13
- Carbohydrates: 42
- Fiber: 3
- Protein: 6
Keywords: pumpkin pie, homemade pie, from scratch, flaky crust, Thanksgiving, fall dessert, comfort food