Love this? Save it for later!
Share the inspiration with your friends
My neighbor Sarah wasn’t trying to impress anyone. I’d stopped by to borrow a whisk—mine had vanished into the mysterious kitchen drawer abyss—and the smell hit me before I even got through the screen door. Buttery, warm, and something else. Something savory and a little bit smoky. She was at the counter, laughing at something on her phone, while her two kids stood on chairs beside her, their little hands covered in dough.
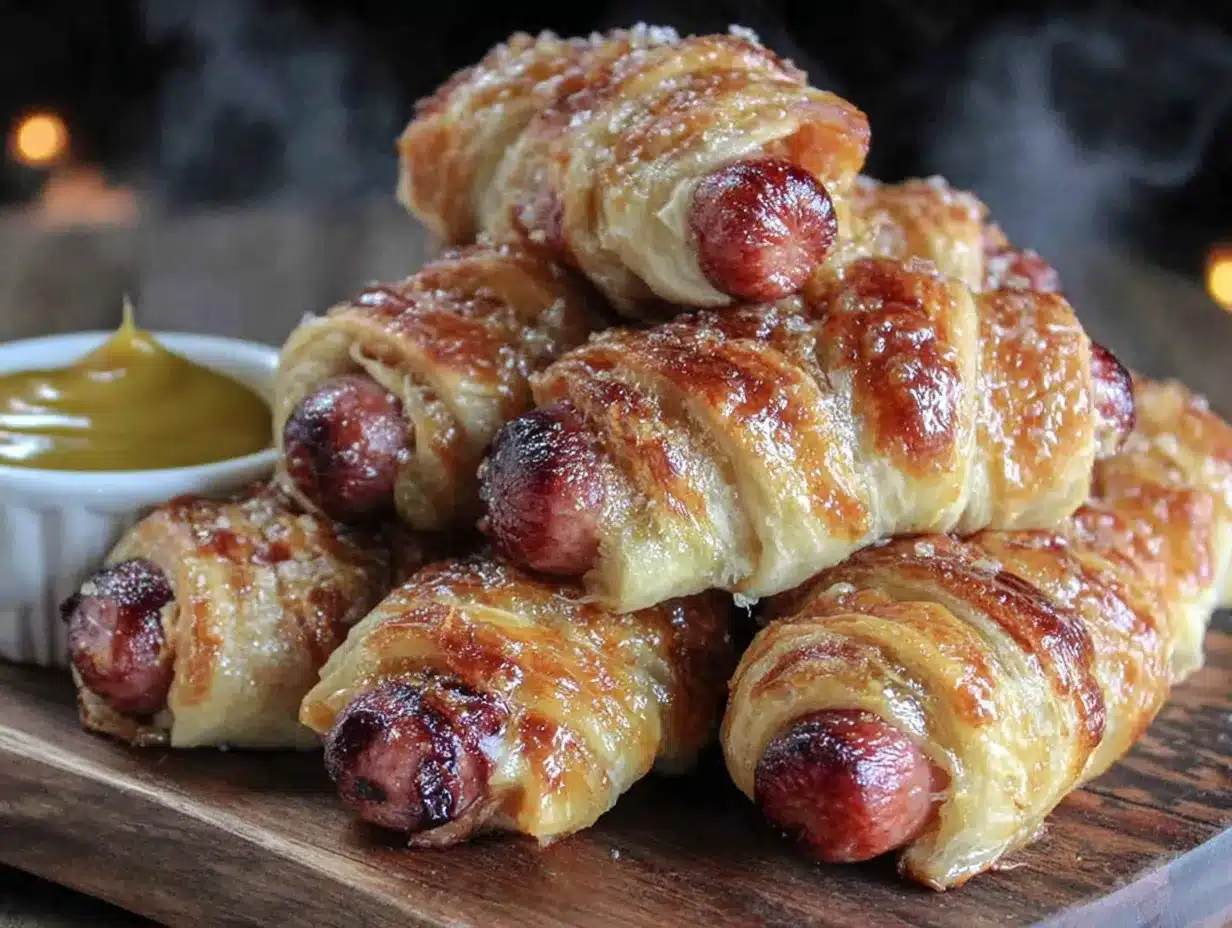
“Oh, we’re just making dinner,” she said, like it was nothing. Like she wasn’t creating the most adorable thing I’d seen in weeks. There they were—these little mummy hot dogs wrapped in golden, flaky strips of crescent dough, with tiny mustard eyes peeking out. The kids were naming each one. “This is Frank. He’s a friendly mummy.” I mean, honestly, I almost asked to borrow more than a whisk.
Maybe you’ve been there—standing in someone else’s kitchen, watching them do something so simple yet so brilliant, and wondering why you never thought of it yourself. That’s exactly how I felt. I stood there for a solid ten minutes, just watching. Sarah shrugged and said they make them every year for Halloween. No fuss. No stress. Just a box of crescent rolls, some hot dogs, and a kid who really wanted to name a mummy Frank.
I asked for the recipe, and she literally handed me the crescent roll tube and said, “There you go.” That’s when I knew this was something special. Not because it was complicated, but because it wasn’t. It was the kind of recipe that lets you actually enjoy the moment instead of stressing over the stove. I’ve been making them ever since, and let me tell you—they never get old.
Why You’ll Love This Recipe
Look, I’ve tested a lot of Halloween recipes over the years. Some are cute but take forever. Others are quick but look, well, questionable. These mummy hot dogs hit that sweet spot where fun meets genuinely easy. Here’s why I keep coming back to them:
- Ready in under 20 minutes — From fridge to table in about 15 minutes of actual work. Perfect for those school nights when Halloween festivities are already running late.
- Only 3 main ingredients — Crescent rolls, hot dogs, and mustard. That’s it. You probably have everything already if you keep basic pantry staples around.
- Kid-approved and kid-friendly — My niece helped me wrap the last batch, and she ate three before dinner was officially “ready.” Even picky eaters gobble these up.
- Customizable for any taste — Swap the hot dogs for turkey dogs, cheese-filled sausages, or even veggie dogs. The crescent dough works with just about anything.
- No special equipment needed — You don’t need a piping bag, cookie cutters, or any fancy tools. Just your hands and a baking sheet.
What makes these different from other Halloween recipes? It’s the flaky, buttery crescent dough against the savory hot dog. The texture is just right—crispy on the outside, soft and warm on the inside. And the mustard eyes? That little detail makes everyone smile. Honestly, I’ve brought these to three different Halloween parties, and they’re always the first thing to disappear. It’s comfort food with a costume, and that’s exactly what Halloween should be about.
What Ingredients You Will Need
This recipe uses simple, everyday ingredients that come together to create something way more fun than the sum of their parts. Here’s what you’ll need:
- 1 can (8 oz) refrigerated crescent roll dough — I prefer Pillsbury for the most consistent flaky layers, but store brands work fine too. Look for the seamless sheet version if you want to cut your own strips, but the perforated triangles work perfectly.
- 8 hot dogs — Standard-sized hot dogs work best. I usually go with beef hot dogs for richer flavor, but turkey or chicken dogs are great lighter options. For a fun twist, try cheese-filled hot dogs—the melted cheese inside is amazing.
- Mustard for eyes — Yellow mustard gives the best color contrast against the golden dough. You can use a squeeze bottle or just dip a toothpick in mustard and dot it on. Alternatively, use ketchup, sriracha, or even small dots of cream cheese for a milder look.
- Optional: Cooking spray or butter — Lightly greasing the baking sheet helps prevent sticking. I sometimes brush the finished mummies with melted butter for extra golden color.
- Optional: Everything bagel seasoning or sesame seeds — Sprinkle these on before baking for a savory crunch. Not traditional, but honestly, so good.
Ingredient Tips: For the best results, make sure your crescent dough is cold when you start working with it. Warm dough gets sticky and harder to cut into clean strips. If your kitchen is warm, pop the dough in the fridge for 10 minutes before opening. Also, look for hot dogs that are uniform in size—this helps them cook evenly. I’ve found that Oscar Mayer and Hebrew National both work consistently well.
Substitution Guidance: Need a gluten-free option? Use gluten-free crescent dough if you can find it, or try gluten-free puff pastry sheets cut into strips. For a lower-sodium version, use reduced-sodium hot dogs and low-sodium crescent rolls. Dairy-free? Most crescent doughs contain butter, but you can find vegan versions at specialty stores. The beauty of this recipe is its flexibility—don’t stress about exact brands.
Equipment Needed
You don’t need much for this recipe, which is honestly my favorite part. Here’s what I use:
- Baking sheet — A standard half-sheet pan works perfectly. Line it with parchment paper for easy cleanup. I’ve forgotten parchment before, and let me tell you, scraping baked-on mustard is not fun.
- Sharp knife or pizza cutter — A pizza cutter makes slicing the crescent dough into strips incredibly easy. A sharp chef’s knife works too, but a pizza cutter is my go-to for clean, even strips.
- Small bowl or plate — For holding the mustard or any toppings you want to add before baking.
- Toothpick or small brush — For dotting the mustard eyes. A toothpick gives you more control than a squeeze bottle if you’re going for precise little dots.
- Cooling rack — Optional, but helps the mummies cool evenly without getting soggy on the bottom.
If you don’t have a pizza cutter, don’t worry. I’ve used scissors before—just cut the dough right over the baking sheet. It’s not pretty, but it works. And honestly, imperfect strips make the mummies look more authentic anyway. Mummies aren’t supposed to be perfect!
Preparation Method
Let me walk you through this step by step. I’ve made these dozens of times, so I’ve picked up a few tricks along the way.
- Preheat your oven to 375°F (190°C). Line a baking sheet with parchment paper. Trust me on the parchment—it saves you from scrubbing later.
- Unroll the crescent dough onto a clean cutting board or work surface. If you’re using the perforated triangle version, press the seams together gently with your fingers to create a solid sheet. If you have the seamless sheet, even better—you’re ready to go.
- Cut the dough into strips. Using a pizza cutter or sharp knife, slice the dough lengthwise into 8-10 thin strips, about ½ inch wide. Don’t worry if they’re not perfectly even—mummies look better with some variation. I’ve had strips break on me before, and I just pressed them back together. No one notices after baking.
- Pat the hot dogs dry with a paper towel. This helps the dough stick better and prevents steaming. Wet hot dogs make the dough slide off, and nobody wants a naked mummy.
- Wrap the hot dogs. Starting at one end of the hot dog, wrap a strip of dough around it at a slight angle, overlapping slightly as you go. Leave a small space near the top for the “face.” The dough should cover most of the hot dog, but leave about ½ inch exposed at one end for the eyes. Press the end of the dough gently to seal it. Repeat with all 8 hot dogs.
- Place the wrapped mummies on the prepared baking sheet, spacing them about 1 inch apart. They won’t spread much, but a little room helps them brown evenly.
- Bake for 10-12 minutes, or until the dough is golden brown and cooked through. The hot dogs should be heated through and slightly plump. I usually check at the 10-minute mark—ovens vary, and you don’t want burnt mummies.
- Let them cool for 2-3 minutes on the baking sheet. This is important—the dough is fragile right out of the oven, and moving them too soon can cause the strips to break apart.
- Add the eyes. Once they’re cool enough to handle, use a toothpick or squeeze bottle to add small dots of mustard for eyes. I usually do two dots per mummy, but my niece likes to add a third dot for a “third eye” mummy. Get creative!
- Serve warm. These are best enjoyed within 15-20 minutes of baking, while the dough is still flaky and the hot dog is warm.
Cooking Tips & Techniques
After making these more times than I can count, I’ve learned a few things the hard way. Here are my best tips:
- Don’t overwork the dough. Crescent dough gets tough if you handle it too much. Cut your strips quickly and wrap gently. If the dough starts feeling sticky or warm, pop it in the fridge for 5 minutes.
- Leave space for the face. I learned this after my first batch came out looking like fully wrapped burritos. Leave about ½ inch of hot dog exposed at one end so you have room for the mustard eyes. It makes a huge difference in how “mummy-like” they look.
- Use a light touch when wrapping. You want the strips to be snug but not tight. If you pull the dough too tight, it can tear during baking. Think of it like wrapping a gift—firm but gentle.
- Check your oven temperature. I once made these at a friend’s house, and her oven ran hot. The mummies were golden on the outside but the dough was still raw in the middle. If your oven runs hot, lower the temperature to 350°F and bake a few minutes longer.
- Make ahead tip. You can assemble the mummies up to 4 hours ahead and keep them in the fridge. Just add a few extra minutes to the baking time since they’ll be cold. I’ve done this for parties, and it’s a lifesaver.
One mistake I still make sometimes? Forgetting to pat the hot dogs dry. The moisture creates steam, which makes the dough slide off during baking. You end up with a pile of dough next to a naked hot dog. Not the look we’re going for. So pat them dry—it takes two seconds and makes a real difference.
Variations & Adaptations
The beauty of this recipe is how easy it is to tweak. Here are some variations I’ve tried and loved:
- Cheese-Stuffed Mummies: Before wrapping, slice the hot dog lengthwise halfway through and stuff a strip of cheddar or mozzarella cheese inside. The cheese melts into the hot dog as it bakes. My husband requests these every time.
- Spicy Mummies: Use spicy Italian sausage or chorizo-style hot dogs instead of regular ones. Add a tiny dot of sriracha for the eyes instead of mustard. These are great for adults who want a little heat with their Halloween fun.
- Veggie Mummy Dogs: Swap the hot dogs for vegetarian or vegan hot dogs. I like the Field Roast brand for this—they hold up well and have great texture. Everything else stays the same.
- Puff Pastry Mummies: If you don’t have crescent dough, use frozen puff pastry sheets (thawed). Cut them into strips and wrap the same way. They come out extra flaky and buttery. Bake at 400°F for 12-15 minutes.
- Breakfast Mummies: Use breakfast sausage links instead of hot dogs. Serve with a side of maple syrup for dipping. I made these for a Halloween morning breakfast, and the kids went wild.
My personal favorite variation? The cheese-stuffed version with a sprinkle of everything bagel seasoning on top. The saltiness of the seasoning against the buttery dough and melted cheese is just incredible. I stumbled onto this combo by accident—I was out of sesame seeds and grabbed the everything seasoning instead. Now I do it on purpose every time.
Serving & Storage Suggestions
These are best served warm, straight from the oven. The dough is at its flakiest within the first 15 minutes, and the hot dog is perfectly warm. I like to arrange them on a platter with a small bowl of extra mustard for dipping. Sometimes I add a few celery sticks and carrot slices on the side to balance out the indulgence—plus, it looks festive on the table.
For a Halloween party, I’ve served these alongside a bowl of warm queso or marinara sauce for dipping. The kids love dunking them, and honestly, so do the adults. If you’re doing a full Halloween spread, they pair perfectly with:
- Pumpkin-shaped cheese crackers — A fun, easy side that keeps with the theme.
- Fruit skewers — For a pop of color and freshness.
- Warm apple cider — The perfect drink to round out the meal.
Storage: Leftover mummies can be stored in an airtight container in the refrigerator for up to 3 days. To reheat, pop them in a 350°F oven for 5-7 minutes, or until warmed through. The microwave works in a pinch, but the dough won’t be as crispy. I don’t recommend freezing these—the texture of the hot dog changes when thawed, and the dough can get soggy.
One thing I’ve noticed: the flavors actually meld together a bit after a day in the fridge. The mustard soaks into the dough slightly, and the whole thing becomes more cohesive. They’re not as pretty the next day, but they still taste great.
Nutritional Information & Benefits
Let’s be real—these are a treat, not a health food. But here’s what you’re looking at per serving (one mummy hot dog):
- Calories: Approximately 220-250
- Protein: 8-10 grams
- Fat: 14-16 grams
- Carbohydrates: 16-18 grams
- Sodium: 600-700 mg
Dietary Considerations: This recipe contains gluten (from the crescent dough) and dairy (from the butter in the dough). For a gluten-free version, use gluten-free crescent dough or gluten-free puff pastry. For a dairy-free version, look for vegan crescent dough options. The hot dogs themselves can be swapped for turkey, chicken, or plant-based versions to reduce fat and calories.
Health Benefits: While these aren’t a health food, hot dogs do provide a decent amount of protein, which helps keep you full. If you use turkey or chicken hot dogs, you’re looking at a lower-fat option with similar protein content. The crescent dough provides carbohydrates for quick energy—useful for a night of trick-or-treating!
My personal take? These are a fun, occasional treat. I don’t stress about the nutritional stats because they’re part of a holiday celebration. Pair them with a side of veggies or fruit, and you’ve got a balanced enough meal for a special night.
Conclusion
These mummy hot dogs have become a non-negotiable part of my Halloween tradition. They’re the recipe I bring to parties, the one I make with my niece, and the one that always, always gets photographed before anyone takes a bite. There’s something about the combination of flaky, buttery dough and savory hot dog that just works—and the little mustard eyes make everyone smile.
What I love most is how adaptable they are. You can make them exactly as written, or you can tweak them to fit your family’s tastes. Add cheese, change the protein, experiment with different seasonings—the possibilities are endless. And because they come together in under 20 minutes, you can spend less time in the kitchen and more time actually enjoying Halloween.
I’d love to hear how yours turn out! Did your kids name their mummies? Did you try a fun variation? Drop a comment below and let me know—I read every single one. And if you’re looking for more easy, family-friendly recipes, don’t forget to check out this Halloween snack board that pairs perfectly with these mummies. Happy Halloween, and happy cooking!
Frequently Asked Questions
Can I make these mummy hot dogs ahead of time?
Absolutely! You can assemble the mummies up to 4 hours ahead and keep them covered in the refrigerator. When you’re ready to bake, add 2-3 minutes to the baking time since they’ll be cold. I’ve done this for parties, and it works perfectly.
Can I use puff pastry instead of crescent dough?
Yes, definitely! Puff pastry works beautifully and gives an extra-flaky texture. Just thaw the sheets according to package directions, cut them into strips, and wrap the hot dogs the same way. Bake at 400°F for 12-15 minutes.
How do I keep the dough from unraveling during baking?
Make sure you’re pressing the end of the dough strip gently against the hot dog to seal it. Also, pat the hot dogs dry before wrapping—moisture can cause the dough to slide off. If you’re still having trouble, you can use a tiny dab of water to help seal the dough.
What can I use instead of mustard for the eyes?
You’ve got options! Ketchup works well and gives a red “angry mummy” look. Sriracha adds spice and a similar texture. For a milder option, use cream cheese or even small pieces of black olive. My niece likes to use small dots of chocolate sauce—not traditional, but she loves it.
Can I freeze these mummy hot dogs?
I don’t recommend freezing them after baking, as the texture of the hot dog changes and the dough can get soggy. However, you can freeze them before baking. Assemble the mummies, place them on a baking sheet, and freeze until solid. Transfer to a freezer bag and store for up to 2 months. Bake from frozen, adding 5-7 minutes to the baking time.
Pin This Recipe!

Easy Mummy Hot Dogs: Best Kid-Friendly Halloween Recipe

These adorable mummy hot dogs wrapped in golden, flaky strips of crescent dough with tiny mustard eyes are the perfect Halloween treat. Ready in under 20 minutes with only 3 main ingredients, they’re kid-approved and endlessly customizable.
- Prep Time: 10 minutes
- Cook Time: 12 minutes
- Total Time: 22 minutes
- Yield: 8 servings 1x
- Category: Appetizer
- Cuisine: American
Ingredients
- 1 can (8 oz) refrigerated crescent roll dough
- 8 hot dogs
- Mustard for eyes
- Optional: Cooking spray or butter
- Optional: Everything bagel seasoning or sesame seeds
Instructions
- Preheat your oven to 375°F (190°C). Line a baking sheet with parchment paper.
- Unroll the crescent dough onto a clean cutting board or work surface. If using perforated triangle version, press the seams together gently with your fingers to create a solid sheet.
- Using a pizza cutter or sharp knife, slice the dough lengthwise into 8-10 thin strips, about ½ inch wide.
- Pat the hot dogs dry with a paper towel to help the dough stick better.
- Starting at one end of the hot dog, wrap a strip of dough around it at a slight angle, overlapping slightly as you go. Leave about ½ inch exposed at one end for the face. Press the end of the dough gently to seal it. Repeat with all 8 hot dogs.
- Place the wrapped mummies on the prepared baking sheet, spacing them about 1 inch apart.
- Bake for 10-12 minutes, or until the dough is golden brown and cooked through.
- Let them cool for 2-3 minutes on the baking sheet.
- Once cool enough to handle, use a toothpick or squeeze bottle to add small dots of mustard for eyes.
- Serve warm.
Notes
For best results, keep crescent dough cold when working with it. Pat hot dogs dry to prevent dough from sliding off. Assemble up to 4 hours ahead and refrigerate before baking. Leftovers can be stored in an airtight container in the refrigerator for up to 3 days. Reheat in a 350°F oven for 5-7 minutes.
Nutrition
- Serving Size: 1 mummy hot dog
- Calories: 235
- Sugar: 3
- Sodium: 650
- Fat: 15
- Saturated Fat: 5
- Carbohydrates: 17
- Protein: 9
Keywords: mummy hot dogs, Halloween recipe, kid-friendly, crescent rolls, easy appetizer, Halloween party food


