Love this? Save it for later!
Share the inspiration with your friends
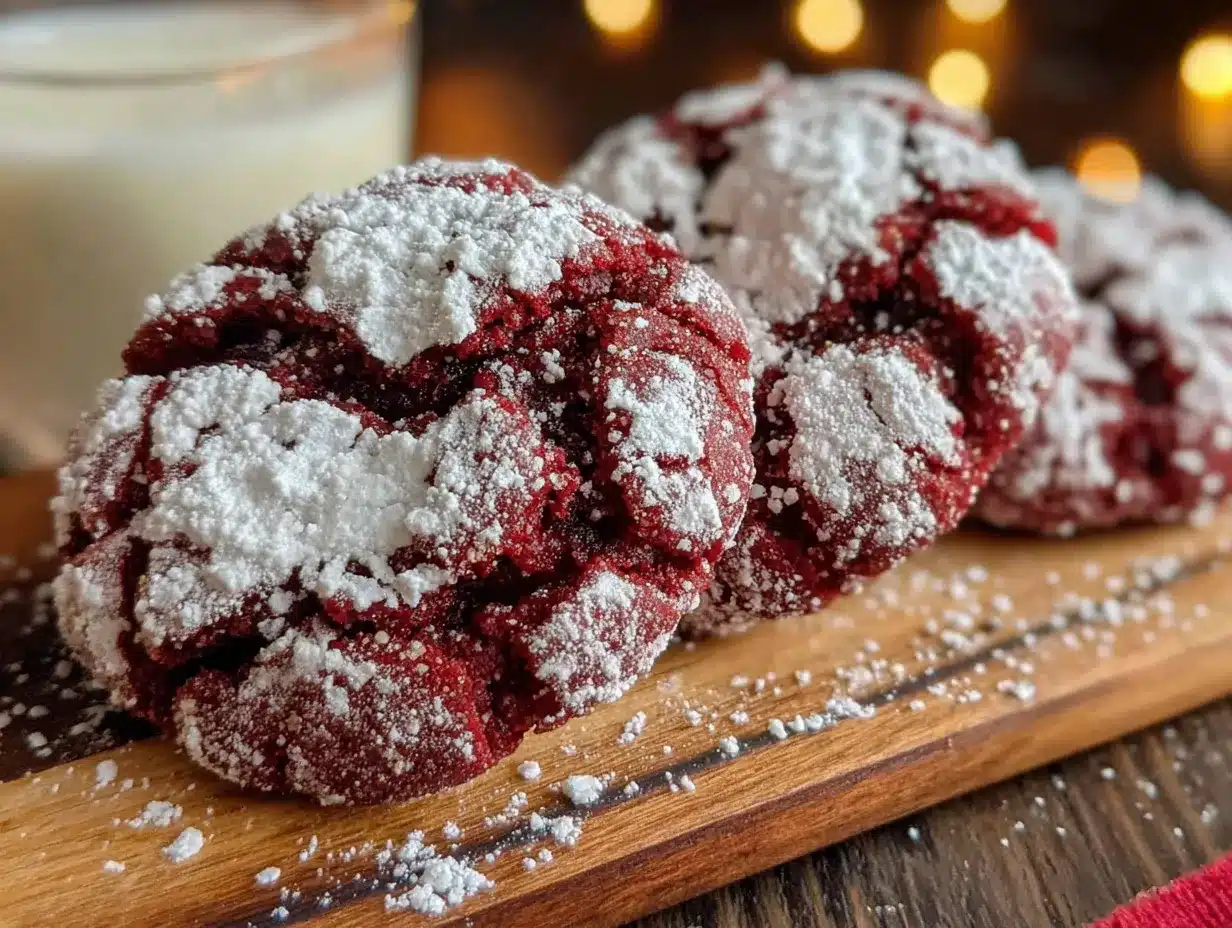
My neighbor wasn’t trying to impress anyone. I’d stopped by to borrow a cup of sugar—how cliché, right?—and the smell of something rich and faintly chocolaty hit me before I even got to her kitchen door. It was a Tuesday afternoon, nothing special, just a random errand. She was standing there in her slippers, casually pulling a tray of the most beautiful red cookies I had ever seen out of the oven. They were crackled, almost like stained glass, with a delicate dusting of powdered sugar that looked like the first snow of the year. She shrugged and said, “Oh, it’s just a quick thing I threw together.” Just a quick thing. Honestly, I almost laughed. I had been wrestling with complicated layer cakes for weeks, and here she was, making these perfect red velvet crinkle cookies like it was absolutely nothing.
I stood there, probably staring a little too long, while she plopped one onto a napkin and handed it to me. The cookie was still warm, the edges slightly chewy, and the center was so soft it practically melted. That first bite had this unexpected tang from the buttermilk, balanced by a whisper of cocoa. I mean, I’d had red velvet cake before, but this was different. This was a cookie that felt both special and completely unfussy. Maybe you’ve been there—you taste something at a friend’s house and you know you’ll be thinking about it for days. That was me. I asked for the recipe, and she scribbled it on a sticky note while her dog barked at the mailman. It was a mess of a moment, but the cookies were anything but. I’ve been making them ever since, and let me tell you, they never fail to stop people in their tracks.
Why You’ll Love This Recipe
After testing this recipe about a dozen times in my own kitchen—and yes, I had a few batches that spread into flat, sad puddles—I can confidently say this version is foolproof. It’s the kind of recipe that makes you look like a hero without the stress. Here’s why it stands out:
- Quick & Easy: From start to finish, these cookies come together in about 30 minutes of active work. The dough needs a quick chill, but that’s mostly hands-off time.
- Simple Ingredients: No fancy grocery trips needed. You probably have most of these staples in your pantry right now—flour, sugar, cocoa powder, butter, and eggs.
- Perfect for Any Occasion: These are my go-to for Valentine’s Day, Christmas cookie swaps, or just a random Tuesday when you need a little sweetness.
- Crowd-Pleaser: I’ve brought these to potlucks and family dinners, and they disappear faster than anything else on the table. Kids and adults alike go crazy for that crackly top.
- Unbelievably Delicious: The texture is the real star here—a slightly crisp edge with a soft, fudgy center. The powdered sugar adds a delicate sweetness that balances the tangy buttermilk and rich cocoa.
What makes this recipe different from the rest? It’s the balance. I’ve tried versions that were too cakey or too greasy, but this one hits that sweet spot. The secret is a short chill time and the right ratio of butter to sugar. It’s not just another red velvet cookie—it’s the one you’ll come back to again and again.
What Ingredients You Will Need
This recipe uses simple, wholesome ingredients to deliver bold flavor and satisfying texture without the fuss. Most of these are pantry staples, which makes it perfect for spontaneous baking sessions.
- All-purpose flour (2 ¼ cups) – Provides structure. I recommend Gold Medal or King Arthur for consistent results.
- Unsweetened cocoa powder (2 tablespoons) – Use a high-quality brand like Ghirardelli for a deeper chocolate flavor. Don’t use Dutch-processed here; natural cocoa works best for the chemical reaction with the buttermilk.
- Baking powder (1 teaspoon) – Helps the cookies puff up slightly.
- Salt (½ teaspoon) – Balances the sweetness.
- Unsalted butter (½ cup, softened) – Adds richness. Make sure it’s at room temperature for easy creaming.
- Granulated sugar (1 cup) – Sweetens the dough and helps create that crackly top.
- Large egg (1, room temperature) – Binds the dough. If you’re in a hurry, place the egg in warm water for 5 minutes.
- Buttermilk (2 tablespoons) – Adds tang and tenderness. No buttermilk? Add 1 teaspoon of lemon juice or vinegar to regular milk and let it sit for 5 minutes.
- Vanilla extract (1 teaspoon) – Enhances the flavor.
- Red gel food coloring (1 tablespoon) – Gives that iconic red velvet color. I prefer gel over liquid for a more vibrant hue without thinning the dough.
- Powdered sugar (½ cup, for rolling) – Creates the signature crackled look. Sift it first to avoid clumps.
Equipment Needed
You don’t need a fancy kitchen for these cookies. Here’s what you’ll need:
- Mixing bowls – One large and one medium.
- Electric mixer – A hand mixer or stand mixer works well. I’ve made these with a whisk in a pinch, but it takes more elbow grease.
- Baking sheets – Two standard-sized sheets. Line them with parchment paper or silicone baking mats for easy cleanup.
- Cooling rack – Essential for letting the cookies set without getting soggy bottoms.
- Measuring cups and spoons – For accuracy.
- Spatula – A rubber spatula for scraping the bowl.
- Small bowl – For the powdered sugar.
If you don’t have a stand mixer, don’t worry. A hand mixer works just as well, and I’ve even used a wooden spoon when my mixer was on the fritz. Just be prepared for a bit of arm workout.
Preparation Method
Follow these steps carefully, and you’ll have perfect crinkle cookies every time.
- Whisk the dry ingredients. In a medium bowl, whisk together 2 ¼ cups all-purpose flour, 2 tablespoons cocoa powder, 1 teaspoon baking powder, and ½ teaspoon salt. Set aside. This ensures the leavening is evenly distributed.
- Cream the butter and sugar. In a large bowl, beat ½ cup softened unsalted butter and 1 cup granulated sugar together on medium speed until light and fluffy, about 2-3 minutes. Scrape down the sides of the bowl with a spatula. You want it to look pale and airy.
- Add the wet ingredients. Beat in 1 large egg, 2 tablespoons buttermilk, and 1 teaspoon vanilla extract until combined. The mixture might look slightly curdled—that’s normal.
- Add the food coloring. Pour in 1 tablespoon red gel food coloring and mix on low speed until the color is evenly distributed. The dough should be a vibrant red. If it looks too pale, add a few more drops.
- Combine wet and dry. Gradually add the flour mixture to the wet ingredients, mixing on low speed until just combined. Do not overmix, or the cookies will be tough. The dough will be soft and slightly sticky.
- Chill the dough. Cover the bowl with plastic wrap and refrigerate for at least 1 hour. This step is crucial—chilled dough spreads less and gives you those beautiful cracks. I’ve skipped this before, and the cookies turned into flat discs. Trust me, don’t rush it.
- Preheat the oven. About 15 minutes before you’re ready to bake, preheat your oven to 375°F (190°C). Line your baking sheets with parchment paper.
- Shape the cookies. Place ½ cup powdered sugar in a small bowl. Using a cookie scoop or tablespoon, portion out 1.5-tablespoon-sized balls of dough. Roll each ball between your palms to make it smooth, then roll it generously in the powdered sugar. Make sure it’s fully coated—this is what creates the crinkles.
- Bake. Place the dough balls 2 inches apart on the prepared baking sheets. Bake for 10-12 minutes, or until the edges are set and the tops are crackled. The centers will look slightly underdone—that’s okay. They’ll continue to set as they cool.
- Cool. Let the cookies cool on the baking sheet for 5 minutes, then transfer them to a wire rack to cool completely. The powdered sugar will develop a beautiful crackled pattern as they cool.
Cooking Tips & Techniques
I’ve made plenty of mistakes with these cookies, so you don’t have to. Here are my best tips:
- Don’t skip the chill. I once thought I could get away with 20 minutes in the fridge. The cookies spread into thin, ugly pancakes. An hour is the minimum.
- Use gel food coloring. Liquid food coloring can throw off the dough’s consistency. Gel gives a vibrant color without adding extra liquid.
- Roll generously in powdered sugar. This is non-negotiable. The sugar creates the signature crinkles. If you skimp, you’ll get pale, flat cookies.
- Bake one sheet at a time. If you crowd the oven, the heat circulates unevenly. I learned this the hard way when my first batch came out half-baked.
- Check for doneness early. Ovens vary. Start checking at 10 minutes. The edges should be set, but the center should still look soft.
- Let them cool on the sheet. The cookies are fragile right out of the oven. Give them 5 minutes to firm up before moving them.
Variations & Adaptations
These cookies are versatile, and I’ve tried a few twists over the years:
- Gluten-Free Version: Substitute the all-purpose flour with a 1:1 gluten-free baking blend. I’ve used Bob’s Red Mill with great results. Add an extra tablespoon of buttermilk to keep the dough moist.
- Vegan Option: Use vegan butter, a flax egg (1 tablespoon flaxseed meal + 3 tablespoons water), and plant-based buttermilk (add 1 teaspoon lemon juice to almond milk). The texture will be slightly softer but still delicious.
- Chocolate Lover’s Twist: Add ½ cup mini chocolate chips to the dough. The extra chocolate chunks make every bite richer.
- Peppermint Red Velvet: Add ½ teaspoon peppermint extract along with the vanilla. Perfect for the holidays.
- Spiced Version: Add ½ teaspoon cinnamon and a pinch of nutmeg to the dry ingredients. It gives a warm, cozy flavor that’s great for fall.
Serving & Storage Suggestions
These cookies are best served slightly warm or at room temperature. The powdered sugar should be intact, so handle them gently.
- Serving: Pair them with a glass of cold milk, a cup of coffee, or a hot cocoa. For a dessert platter, they look stunning alongside brownies and sugar cookies.
- Storage: Store in an airtight container at room temperature for up to 5 days. Place a sheet of parchment paper between layers to prevent sticking.
- Freezing: You can freeze the baked cookies for up to 3 months. Thaw at room temperature for 30 minutes before serving. Alternatively, freeze the dough balls (before rolling in powdered sugar) for up to 3 months. Roll them in sugar right before baking.
- Reheating: Pop a cookie in the microwave for 10 seconds to get that fresh-from-the-oven softness.
Flavors actually develop over time. I find these cookies taste even better on day two, when the tangy buttermilk has had time to mellow out.
Nutritional Information & Benefits
Here’s an approximate breakdown per cookie (based on 24 cookies):
- Calories: 145
- Fat: 6g
- Carbohydrates: 22g
- Protein: 2g
- Sugar: 14g
While these are a treat, the cocoa powder provides a small dose of antioxidants. The buttermilk adds calcium and probiotics (if using traditional cultured buttermilk). If you’re watching your sugar intake, you can reduce the granulated sugar to ¾ cup, but the texture will be slightly less tender. These cookies are not gluten-free or vegan as written, but see the variations section for adaptations.
Honestly, I don’t make these for health reasons—I make them for joy. And sometimes, that’s exactly what you need.
Conclusion
These perfect red velvet crinkle cookies are everything I want in a dessert: they’re beautiful without being fussy, delicious without being complicated, and they always bring a smile to people’s faces. Whether you’re baking for a holiday party, a bake sale, or just because it’s Tuesday, this recipe will not let you down.
I encourage you to make them your own. Play with the variations, adjust the color to your liking, and don’t be afraid to get a little powdered sugar on your counter. That’s part of the fun. I’d love to hear how they turn out—drop a comment below and let me know if you tried any fun twists. Happy baking, friend!
Frequently Asked Questions
Why did my cookies not crackle?
This usually happens if the dough wasn’t chilled long enough or if you didn’t roll them generously enough in powdered sugar. Make sure the dough is cold and the sugar coating is thick.
Can I use liquid food coloring instead of gel?
You can, but you’ll need more to get the same vibrant color, and the extra liquid can make the dough sticky. Gel is strongly recommended for best results.
How do I keep the cookies from spreading too much?
Chill the dough for at least 1 hour, use room-temperature butter (not melted), and measure your flour correctly by spooning it into the cup and leveling it off.
Can I make the dough ahead of time?
Absolutely. The dough can be refrigerated for up to 3 days or frozen for up to 3 months. Just let it soften slightly at room temperature before shaping if it’s too hard.
Why did my cookies turn out cakey instead of chewy?
Overmixing the dough develops too much gluten, leading to a cakey texture. Mix until just combined, and don’t overbake—take them out when the centers still look soft.
Pin This Recipe!

Perfect Red Velvet Crinkle Cookies Recipe: Easy Homemade Treat

These red velvet crinkle cookies are beautifully crackled, soft, and fudgy with a tangy buttermilk flavor. They’re easy to make and perfect for any occasion.
- Prep Time: 15 minutes
- Cook Time: 12 minutes
- Total Time: 1 hour 27 minutes
- Yield: 24 servings 1x
- Category: Dessert
- Cuisine: American
Ingredients
- 2 ¼ cups all-purpose flour
- 2 tablespoons unsweetened cocoa powder
- 1 teaspoon baking powder
- ½ teaspoon salt
- ½ cup unsalted butter, softened
- 1 cup granulated sugar
- 1 large egg, room temperature
- 2 tablespoons buttermilk
- 1 teaspoon vanilla extract
- 1 tablespoon red gel food coloring
- ½ cup powdered sugar, for rolling
Instructions
- Whisk the dry ingredients: In a medium bowl, whisk together flour, cocoa powder, baking powder, and salt. Set aside.
- Cream the butter and sugar: In a large bowl, beat softened butter and granulated sugar on medium speed until light and fluffy, about 2-3 minutes. Scrape down the sides.
- Add the wet ingredients: Beat in egg, buttermilk, and vanilla extract until combined. The mixture may look slightly curdled.
- Add the food coloring: Pour in red gel food coloring and mix on low speed until evenly distributed.
- Combine wet and dry: Gradually add the flour mixture to the wet ingredients, mixing on low speed until just combined. Do not overmix. The dough will be soft and slightly sticky.
- Chill the dough: Cover the bowl with plastic wrap and refrigerate for at least 1 hour.
- Preheat the oven: About 15 minutes before baking, preheat oven to 375°F (190°C). Line baking sheets with parchment paper.
- Shape the cookies: Place powdered sugar in a small bowl. Portion out 1.5-tablespoon-sized balls of dough. Roll each ball smooth, then roll generously in powdered sugar.
- Bake: Place dough balls 2 inches apart on prepared baking sheets. Bake for 10-12 minutes, until edges are set and tops are crackled. Centers will look slightly underdone.
- Cool: Let cookies cool on the baking sheet for 5 minutes, then transfer to a wire rack to cool completely.
Notes
Chill the dough for at least 1 hour to prevent spreading. Use gel food coloring for vibrant color. Roll generously in powdered sugar for crackled tops. Bake one sheet at a time for even heat. Cookies can be stored in an airtight container at room temperature for up to 5 days or frozen for up to 3 months.
Nutrition
- Serving Size: 1 cookie
- Calories: 145
- Sugar: 14
- Sodium: 95
- Fat: 6
- Saturated Fat: 3.5
- Carbohydrates: 22
- Fiber: 1
- Protein: 2
Keywords: red velvet, crinkle cookies, easy cookies, homemade cookies, holiday cookies, chocolate cookies