Love this? Save it for later!
Share the inspiration with your friends
It was 11:47 PM on a humid Wednesday in July, and I was supposed to be meal-prepping for a weekend camping trip. Instead, I found myself staring at a 12-pound brisket point that had been defrosting in my fridge for three days, wondering if I had lost my mind. I didn’t have a plan, I didn’t have a crowd to feed, and honestly, I didn’t even have the energy to fire up the smoker. But I had this beautiful hunk of meat, and a wild idea that just wouldn’t leave me alone—what if I skipped the whole brisket thing and went straight for the burnt ends?
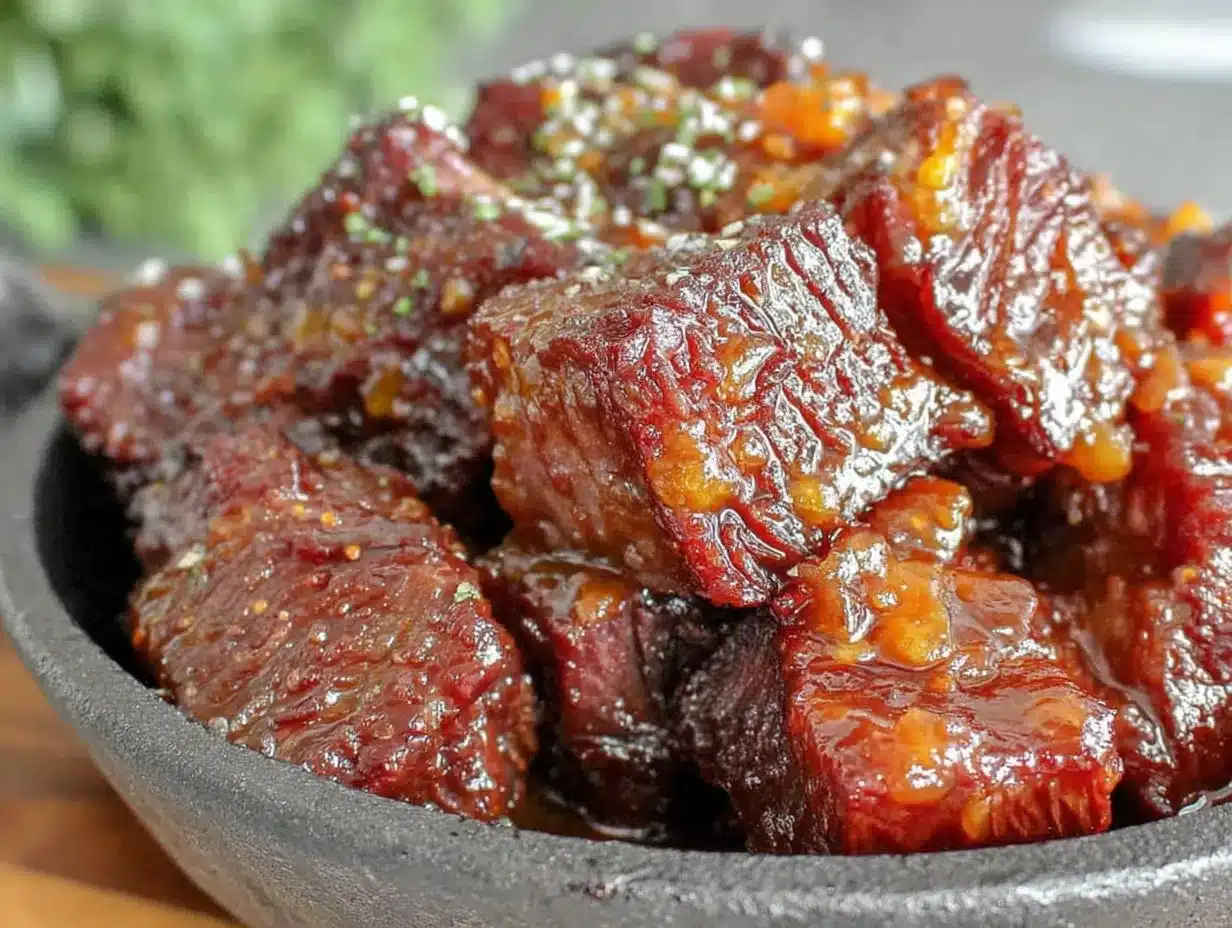
Now, if you’ve never had burnt ends, let me tell you—you’re missing out on what might be the single best bite of barbecue on the planet. These little cubes of smoked brisket, caramelized with a sticky-sweet glaze and rendered down until they’re practically butter, are the kind of thing that makes people close their eyes when they eat them. I first tried them at a tiny BBQ joint in Kansas City back in 2018, and I’ve been obsessed ever since. But that night, standing in my kitchen at nearly midnight with a brisket point and a bottle of brown sugar, I decided to figure out how to make them myself.
The first batch was a disaster, honestly. I cut the cubes too small, they dried out, and I nearly set off the smoke detector. But the second batch? That was the one. The third was even better. And by the time I had perfected the method, I knew this was the recipe I’d be bringing to every Labor Day BBQ from here on out. There’s something about burnt ends that just screams celebration—they’re indulgent, they’re impressive, and they disappear faster than you can make them. Maybe you’ve been there, standing over a cutting board at some ungodly hour, chasing a flavor memory you just can’t let go of. That’s exactly how this recipe was born.
Why You’ll Love This Recipe
Let me be straight with you—these burnt ends are not just another barbecue recipe. After dozens of test batches, countless hours of smoking, and more than a few burned fingers, I can confidently say this is the method that delivers every single time. I’ve tested this recipe with different smokers, different woods, and different cuts of brisket, and what I’m sharing with you is the absolute best version I’ve found.
- Foolproof Method : Even if you’re new to smoking meat, this recipe breaks everything down into simple, manageable steps. No guesswork, no crossed fingers.
- Incredible Flavor : The combination of smoky brisket, sweet brown sugar glaze, and tangy barbecue sauce creates a flavor profile that’s absolutely addictive. You won’t find this depth of flavor in any restaurant.
- Perfect for Labor Day : These burnt ends are made for feeding a crowd. They’re the kind of dish that shows up at a party and becomes the only thing anyone talks about.
- Better Than Restaurant Quality : Most BBQ joints rush their burnt ends or use low-quality cuts. When you make them at home with this method, you control every variable—and the results speak for themselves.
- Make-Ahead Friendly : You can smoke the brisket point a day ahead, then finish the burnt ends on the grill or in the oven right before serving. Perfect for holiday entertaining.
What makes this recipe different from the rest is the double-glaze technique. Most recipes just toss the cubes in sauce and call it done. I developed a method where the burnt ends get a dry rub, a wet glaze, and then a final caramelization that creates this incredible crust while keeping the inside unbelievably tender. It’s the kind of recipe that makes you look like a pitmaster even if you’ve never touched a smoker before.
What Ingredients You Will Need
This recipe uses simple, straightforward ingredients to create something truly spectacular. The magic happens through technique and timing, not fancy ingredients you’ll never use again. Most of these are probably already in your pantry.
For the Brisket
- Brisket point , 4-5 pounds (the point end of a whole packer brisket, or ask your butcher for just the point—it has more fat and marbling, which is exactly what you want for burnt ends)
- Yellow mustard , 1/4 cup (acts as a binder for the rub; you won’t taste it, I promise)
For the Dry Rub
- Coarse black pepper , 2 tablespoons (freshly ground is best)
- Kosher salt , 2 tablespoons (I use Diamond Crystal—it’s less salty by volume, so adjust if using Morton’s)
- Smoked paprika , 1 tablespoon (adds that deep, smoky color and flavor)
- Garlic powder , 1 tablespoon (not garlic salt—we’re controlling the salt separately)
- Onion powder , 1 tablespoon
- Brown sugar , 1 tablespoon (light or dark both work; dark adds more molasses flavor)
- Cayenne pepper , 1 teaspoon (optional, for heat—leave it out if you’re feeding kids or spice-sensitive folks)
For the Glaze
- Butter , 1/2 cup (1 stick), cut into small cubes (use unsalted so you control the salt level)
- Brown sugar , 1/2 cup, packed (this creates that signature sticky-sweet crust)
- Honey , 1/4 cup (adds floral sweetness and helps with caramelization)
- Your favorite barbecue sauce , 1 cup (I recommend Sweet Baby Ray’s for a classic flavor, or use a Kansas City-style sauce for authenticity)
- Worcestershire sauce , 2 tablespoons (adds umami depth)
- Apple cider vinegar , 1 tablespoon (cuts through the sweetness and adds tang)
For the Smoking
- Wood chunks or chips , about 2 cups (hickory is traditional and gives the best flavor, but oak or pecan work beautifully too)
- Beef broth or apple juice , 1 cup (for the foil pan, keeps the meat moist during the second phase of cooking)
One thing I’ve learned through trial and error—don’t skimp on the brisket. A good quality, well-marbled point makes all the difference. I’ve tried this with cheaper cuts, and while it still tastes good, the texture just isn’t the same. Look for a point that has nice, even fat distribution and feels firm but pliable.
Equipment Needed
You don’t need a professional-grade setup to make incredible burnt ends, but having the right tools makes the process smoother and the results more consistent.
- Smoker or grill : Any smoker works—offset, pellet, electric, or even a charcoal kettle grill set up for indirect cooking. I’ve made these on all of them, and each gives slightly different results but all are delicious.
- Instant-read thermometer : This is non-negotiable. You need to know the internal temperature of your meat, and guessing just doesn’t work. I use a Thermapen, but any reliable instant-read will do.
- Aluminum foil pans : Disposable half-size pans work perfectly for the braising step. Get a few—you’ll need one for the meat and one for the glaze.
- Sharp chef’s knife : A good 8-inch knife makes cutting the brisket into uniform cubes much easier and safer.
- Cutting board : Preferably large enough to hold the whole brisket point. I use a wooden board, but plastic works fine too.
- Spray bottle : For spritzing the brisket during the smoke (optional but helpful).
- Tongs : Long-handled tongs for moving hot meat around without burning yourself.
- Heavy-duty aluminum foil : For wrapping the brisket if needed, though we’ll be using a foil pan instead.
If you don’t have a smoker, don’t worry—I’ve included an oven method in the variations section that works surprisingly well. It won’t have quite the same smoky depth, but it’s still head and shoulders above anything you’d buy at a store.
Preparation Method
Alright, let’s get to the good stuff. This process takes time—we’re talking 6-8 hours from start to finish—but most of that is hands-off smoking time. The actual work is maybe 45 minutes total.
Step 1: Prep the Brisket (15 minutes)
Take your brisket point out of the fridge about 45 minutes before you plan to start cooking. Let it come up slightly in temperature—this helps the rub adhere and promotes more even cooking. While it’s resting, trim off any really thick, hard fat caps, but leave a nice 1/4-inch layer. The fat is what keeps the meat moist during the long smoke.
Pat the brisket dry with paper towels. This is important—if the surface is wet, the rub won’t stick properly. Apply a thin, even layer of yellow mustard all over the meat. Don’t go crazy; you just want enough to act as a glue for the rub. It sounds weird, I know, but trust me on this one.
Step 2: Apply the Rub (10 minutes)
In a small bowl, mix together all the dry rub ingredients. Sprinkle the rub generously over all sides of the brisket, patting it in gently with your hands. You want a nice, even coating—not so thick that it’s clumping, but enough that you can’t see the meat through it. Let the seasoned brisket sit at room temperature while you get your smoker ready, about 20-30 minutes.
Step 3: Set Up the Smoker (20 minutes)
Preheat your smoker to 225°F. If you’re using a charcoal smoker, set it up for indirect heat. Add your wood chunks or chips—hickory is my go-to for brisket, but pecan gives a milder, sweeter smoke that’s also fantastic. You want a thin, blue smoke, not thick white smoke. Thick smoke means incomplete combustion and will make your meat taste bitter.
Fill a spray bottle with a mixture of half apple cider vinegar and half water. This will be your spritzing liquid throughout the cook.
Step 4: Smoke the Brisket Point (4-5 hours)
Place the seasoned brisket point on the smoker grate, fat side up. Close the lid and let it smoke undisturbed for 2 hours. After 2 hours, start spritzing the brisket every 45 minutes with your vinegar-water mixture. This keeps the surface moist and helps the rub form a beautiful bark.
The brisket is ready for the next step when it reaches an internal temperature of around 165°F. This usually takes 4-5 hours, depending on your smoker and the weather. Don’t rush this—low and slow is the name of the game here.
Step 5: Cube the Brisket (15 minutes)
Once the brisket hits 165°F, carefully transfer it to a cutting board. Let it rest for 10 minutes—this makes it easier to handle. Using your sharp knife, cut the brisket into 1-inch cubes. Try to make them as uniform as possible so they cook evenly. Some pieces will be more fatty than others, and that’s perfect—the fat renders down and keeps everything moist.
Place the cubes in a disposable aluminum foil pan. Don’t pack them too tightly; you want some space between the pieces so the glaze can coat everything.
Step 6: Make the Glaze (10 minutes)
In a small saucepan over medium heat, combine the butter, brown sugar, honey, barbecue sauce, Worcestershire sauce, and apple cider vinegar. Stir until the butter is melted and everything is well combined. Let it simmer for 2-3 minutes until it thickens slightly. Taste it and adjust—if you want more heat, add a pinch of cayenne. If you want it tangier, add a splash more vinegar.
Step 7: The Braise (1.5-2 hours)
Pour about half of the glaze over the cubed brisket in the foil pan, along with 1/2 cup of beef broth or apple juice. Toss everything gently to coat. Cover the pan tightly with aluminum foil and return it to the smoker (or transfer to your oven preheated to 275°F). Let it cook for 1.5 to 2 hours, until the cubes are tender and starting to fall apart when you poke them with a fork.
Step 8: The Final Glaze (30 minutes)
Remove the foil from the pan. Drain off most of the liquid, leaving just a little bit in the bottom. Pour the remaining glaze over the burnt ends and toss to coat. Increase your smoker or oven temperature to 325°F. Return the uncovered pan to the heat and cook for another 20-30 minutes, until the glaze is sticky and caramelized, and the edges of the cubes are dark and slightly crispy.
This is the moment of truth—the glaze should be bubbling and the kitchen should smell like heaven. Let the burnt ends rest for 5 minutes before serving.
Cooking Tips & Techniques
I’ve made this recipe more times than I can count, and I’ve made just about every mistake possible along the way. Here’s what I’ve learned so you don’t have to repeat my failures.
The biggest mistake people make is cutting the brisket too early. I did this my first time—I was impatient and cubed the meat before it had a chance to develop a proper bark. The result was burnt ends that were more like tough, dry cubes than the tender, melt-in-your-mouth bites I was after. Wait until the brisket hits at least 165°F before you even think about cutting. The bark needs that time to set.
Temperature management is everything. I remember one particularly windy day when my smoker temperature kept dropping. I was chasing it all afternoon, opening and closing vents, adding charcoal, and generally driving myself crazy. The burnt ends turned out okay, but they weren’t my best work. Now I know to check the weather forecast before I start smoking. Wind and cold are your enemies. If it’s a rough day outside, I’ll use the oven for the braising step—it’s more consistent and still gives great results.
Don’t skip the spritzing. I used to think this was optional, but it really makes a difference. The moisture helps the rub form a better bark, and it keeps the meat from drying out during the long smoke. Every 45 minutes is perfect—set a timer on your phone so you don’t forget.
Let the burnt ends rest. I know it’s hard when they smell this good, but letting them sit for 5-10 minutes after the final glaze allows the juices to redistribute. If you cut into them immediately, all that goodness runs out onto the cutting board instead of staying in the meat.
For the best texture, use a mix of fatty and lean pieces. When you cube the brisket, you’ll get some pieces that are mostly fat and some that are mostly lean. Don’t separate them—the variety is what makes burnt ends so good. The fatty pieces render down and become incredibly tender, while the leaner pieces hold their shape and give you something to chew on.
Variations & Adaptations
One of the things I love about this recipe is how adaptable it is. Here are a few variations I’ve tried and loved.
Oven Method (No Smoker Required)
If you don’t have a smoker, you can still make incredible burnt ends. Season the brisket point as directed, then roast it in a 275°F oven on a wire rack set over a baking sheet. Cook until it reaches 165°F internal temperature, about 3-4 hours. Then proceed with the cubing and glazing steps as written. The flavor won’t be as smoky, but you can add a teaspoon of liquid smoke to the glaze to help compensate. I’ve done this several times when the weather just wouldn’t cooperate, and honestly, they’re still fantastic.
Spicy Honey Chipotle Version
For those who like heat, substitute the brown sugar in the glaze with 1/4 cup honey and add 2 minced chipotle peppers in adobo sauce along with 1 tablespoon of the adobo sauce. This gives the burnt ends a smoky, spicy kick that’s absolutely addictive. I made this version for a Super Bowl party last year and they disappeared in minutes.
Sweet and Tangy Kansas City Style
For a more traditional take, use a Kansas City-style barbecue sauce (like KC Masterpiece or Gates) and add an extra 2 tablespoons of apple cider vinegar to the glaze. This gives the burnt ends a brighter, tangier flavor that cuts through the richness of the meat. This is my go-to when I’m serving them with classic barbecue sides like coleslaw and baked beans.
Low-Carb/Keto Adaptation
To make this recipe keto-friendly, omit the brown sugar from both the rub and the glaze. Use a sugar-free barbecue sauce and substitute the honey with a keto-friendly sweetener like allulose or monk fruit. The brown sugar in the rub can be replaced with an additional tablespoon of smoked paprika. I’ve tested this version for a friend who’s on keto, and while the glaze isn’t quite as sticky, the flavor is still outstanding.
Serving & Storage Suggestions
Burnt ends are incredibly versatile when it comes to serving. Here are my favorite ways to enjoy them.
Classic BBQ Platter : Serve the burnt ends piled high on a platter with extra barbecue sauce on the side for dipping. Add pickles, pickled onions, and white bread to round out the experience. This is how they’re served in Kansas City BBQ joints, and it’s the perfect way to showcase the meat.
Burnt End Tacos : Warm up some corn or flour tortillas, add a generous scoop of burnt ends, and top with pickled red onions, fresh cilantro, and a squeeze of lime. This is my secret weapon for using up leftovers—assuming there are any leftovers, which is rare.
Over Rice or Grits : Serve the burnt ends over a bed of creamy cheese grits or steamed white rice. Spoon some of the glaze from the pan over the top. It’s comfort food at its finest, and perfect for a cozy dinner.
Storage : Leftover burnt ends will keep in an airtight container in the refrigerator for up to 4 days. The flavors actually meld and deepen over time, so they’re often even better the next day. To reheat, place them in a covered baking dish with a splash of beef broth or water and warm in a 300°F oven until heated through, about 15-20 minutes.
Freezing : Burnt ends freeze beautifully. Let them cool completely, then transfer to a freezer-safe container or zip-top bag. They’ll keep for up to 3 months. To reheat from frozen, thaw overnight in the refrigerator, then reheat in a covered dish in a 300°F oven.
Make-Ahead Tip : You can smoke the brisket point up to 2 days ahead of time. After it reaches 165°F, let it cool, wrap it tightly in foil, and refrigerate. When you’re ready to serve, cube the cold brisket and proceed with the glazing and braising steps. This is a lifesaver for holiday entertaining.
Nutritional Information & Benefits
Let’s be real—burnt ends aren’t health food, and that’s okay. They’re a celebration dish, meant for special occasions like Labor Day barbecues. But here’s what you should know.
Per serving (approximately 6 ounces of finished burnt ends):
- Calories : 420-480
- Protein : 28-32g
- Fat : 28-34g
- Carbohydrates : 18-22g (mainly from the glaze)
- Fiber : 0g
- Sugar : 14-18g
Beef brisket is actually a good source of several important nutrients. It’s rich in high-quality protein, which is essential for muscle repair and growth. It also provides significant amounts of iron (important for healthy blood), zinc (supports immune function), and B vitamins (especially B12, which is crucial for nerve health).
The fat content comes primarily from the brisket itself, which is a fattier cut of beef. While you can trim some of the excess fat, a certain amount is necessary for the texture and flavor of burnt ends. If you’re watching your saturated fat intake, consider this more of an occasional treat than an everyday meal.
For those with dietary restrictions, this recipe contains gluten (from Worcestershire sauce and some barbecue sauces—use gluten-free versions if needed) and dairy (from butter). The brown sugar and honey make it unsuitable for strict low-carb diets unless you use the keto adaptation I mentioned above.
Conclusion
These smoked brisket burnt ends have become my signature dish for a reason. Every time I make them, whether it’s for a Labor Day barbecue or a quiet dinner at home, I’m reminded of that late-night kitchen experiment that turned into something truly special. They’re the kind of recipe that makes you look like a hero without making you feel like you’re showing off.
What I love most about this recipe is how forgiving it is. Once you understand the basic principles—low heat, patience, and a good glaze—you can adapt it to whatever equipment and ingredients you have on hand. Don’t be afraid to experiment. Try different woods, different sauces, different spice combinations. The burnt ends you make will be uniquely yours, and that’s exactly how it should be.
I’d love to hear how these turn out for you. Drop a comment below and let me know what variations you tried, or tag me in your photos on social media. Did you go with the classic version or try something wild? Did anyone at your barbecue ask for the recipe? Because I guarantee they will. Happy smoking, and have a fantastic Labor Day weekend!
Frequently Asked Questions
Can I use a whole brisket instead of just the point?
You can, but I don’t recommend it. The flat end of the brisket is leaner and tends to dry out when cubed and cooked for the extended time required for burnt ends. If you have a whole packer brisket, separate the point and flat before cooking. Use the flat for slicing and save the point for burnt ends. That way, you get two amazing dishes from one piece of meat.
Why are my burnt ends tough instead of tender?
This usually happens for one of three reasons: you didn’t cook them long enough during the braising step, your smoker temperature was too high, or you cut the cubes too large. The braising step is crucial—it needs to be at least 1.5 hours at 275°F, and sometimes longer if your cubes are on the larger side. The meat should be fork-tender before you add the final glaze. If it’s still tough, give it more time.
How do I get a better bark on my burnt ends?
A good bark comes from a combination of factors: a generous dry rub, consistent low temperature (225°F), and regular spritzing. Make sure your smoker is producing thin, blue smoke—not thick, white smoke. The moisture from spritzing helps the rub form a crust rather than just sitting on top of the meat. Also, don’t wrap the brisket during the initial smoke phase. Let that bark develop naturally.
Can I make these in advance for a party?
Absolutely! In fact, I often make them a day ahead. Follow the recipe through the braising step (Step 7), then let the burnt ends cool completely in the pan. Cover and refrigerate. The next day, remove the solidified fat from the surface, add the final glaze, and reheat in a 325°F oven for 20-30 minutes. The flavors are even better the next day, and it saves you a ton of stress on party day.
What’s the best wood for smoking brisket burnt ends?
Hickory is the classic choice and gives that traditional smoky barbecue flavor that most people associate with brisket. Oak is a close second—it’s milder and more versatile. Pecan gives a sweeter, nuttier smoke that’s fantastic with the sweet glaze. I’ve even used cherry wood for a milder, fruitier smoke. Avoid strong woods like mesquite, which can overpower the meat and make it taste bitter, especially with the sweet glaze.
Pin This Recipe!
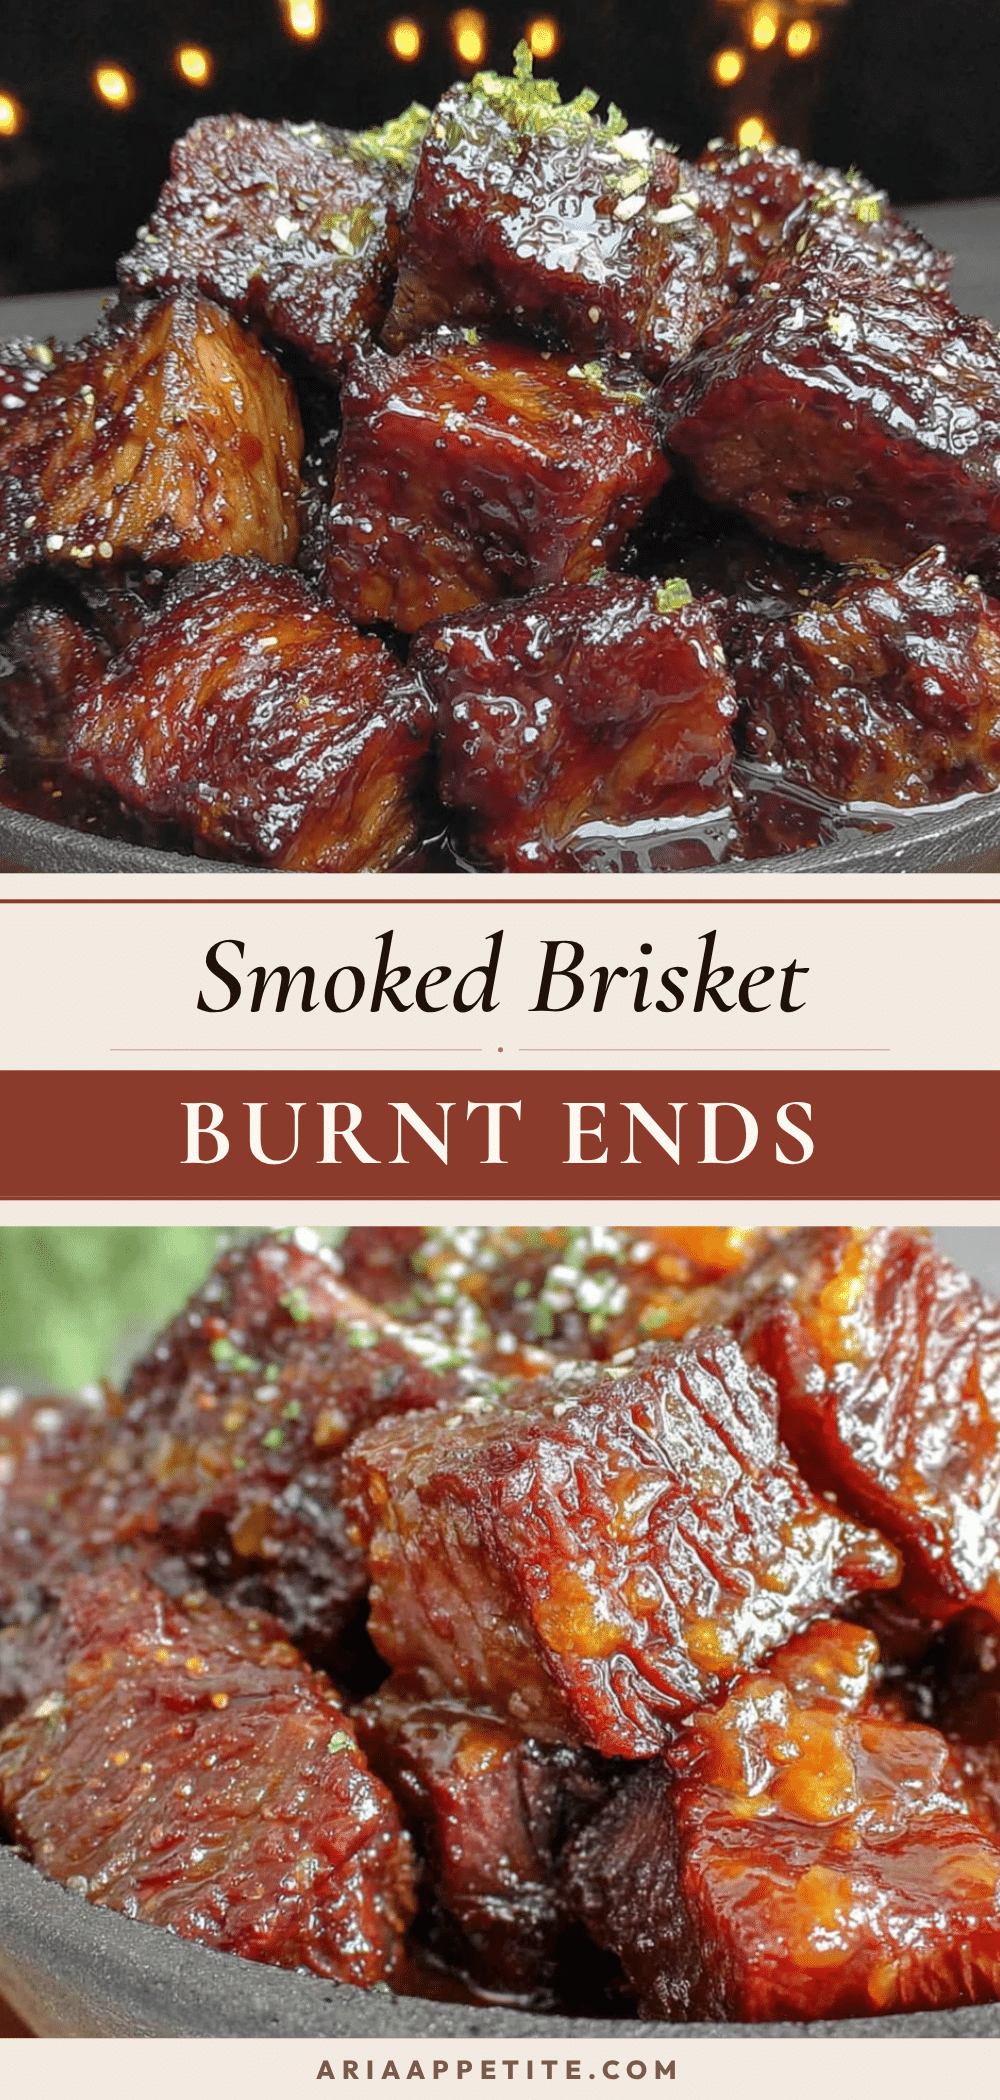
Easy Smoked Brisket Burnt Ends for Labor Day
These smoked brisket burnt ends are caramelized with a sticky-sweet glaze and rendered until they’re practically butter. Perfect for Labor Day barbecues, this foolproof method delivers incredible flavor every time.
- Prep Time: 15 minutes
- Cook Time: 6-8 hours
- Total Time: 6-8 hours 15 minutes
- Yield: 8-10 servings 1x
- Category: Main Course
- Cuisine: American
Ingredients
- 4–5 pounds brisket point
- 1/4 cup yellow mustard
- 2 tablespoons coarse black pepper
- 2 tablespoons kosher salt
- 1 tablespoon smoked paprika
- 1 tablespoon garlic powder
- 1 tablespoon onion powder
- 1 tablespoon brown sugar
- 1 teaspoon cayenne pepper (optional)
- 1/2 cup butter (1 stick), cut into small cubes
- 1/2 cup brown sugar, packed
- 1/4 cup honey
- 1 cup your favorite barbecue sauce
- 2 tablespoons Worcestershire sauce
- 1 tablespoon apple cider vinegar
- 2 cups wood chunks or chips (hickory, oak, or pecan)
- 1 cup beef broth or apple juice
Instructions
- Take the brisket point out of the fridge about 45 minutes before cooking. Trim off any thick, hard fat caps, leaving a 1/4-inch layer. Pat dry with paper towels. Apply a thin, even layer of yellow mustard all over the meat.
- In a small bowl, mix together the coarse black pepper, kosher salt, smoked paprika, garlic powder, onion powder, 1 tablespoon brown sugar, and cayenne pepper (if using). Sprinkle the rub generously over all sides of the brisket, patting it in gently. Let it sit at room temperature for 20-30 minutes while you prepare the smoker.
- Preheat your smoker to 225°F. Set up for indirect heat and add wood chunks or chips. Aim for thin, blue smoke. Fill a spray bottle with half apple cider vinegar and half water.
- Place the seasoned brisket point on the smoker grate, fat side up. Smoke undisturbed for 2 hours. After 2 hours, spritz the brisket every 45 minutes with the vinegar-water mixture. Continue smoking until the internal temperature reaches 165°F, about 4-5 hours total.
- Once the brisket hits 165°F, transfer it to a cutting board and let it rest for 10 minutes. Cut the brisket into 1-inch cubes, trying to make them as uniform as possible. Place the cubes in a disposable aluminum foil pan, leaving some space between pieces.
- In a small saucepan over medium heat, combine the butter, 1/2 cup packed brown sugar, honey, barbecue sauce, Worcestershire sauce, and apple cider vinegar. Stir until the butter is melted and the mixture is well combined. Let it simmer for 2-3 minutes until slightly thickened.
- Pour about half of the glaze over the cubed brisket in the foil pan, along with 1/2 cup of beef broth or apple juice. Toss gently to coat. Cover the pan tightly with aluminum foil and return to the smoker (or transfer to an oven preheated to 275°F). Cook for 1.5 to 2 hours, until the cubes are tender and starting to fall apart when poked with a fork.
- Remove the foil from the pan. Drain off most of the liquid, leaving a little in the bottom. Pour the remaining glaze over the burnt ends and toss to coat. Increase the smoker or oven temperature to 325°F. Return the uncovered pan to the heat and cook for another 20-30 minutes, until the glaze is sticky and caramelized, and the edges of the cubes are dark and slightly crispy. Let rest for 5 minutes before serving.
Notes
For the best texture, use a mix of fatty and lean pieces when cubing the brisket. Don’t skip the spritzing—it helps form a better bark. Let the burnt ends rest for 5-10 minutes after the final glaze to allow juices to redistribute. You can smoke the brisket point up to 2 days ahead; after it reaches 165°F, let it cool, wrap tightly in foil, and refrigerate. When ready to serve, cube the cold brisket and proceed with the glazing and braising steps.
Nutrition
- Serving Size: 6 ounces
- Calories: 450
- Sugar: 16
- Sodium: 800
- Fat: 31
- Saturated Fat: 12
- Carbohydrates: 20
- Protein: 30
Keywords: smoked brisket burnt ends, burnt ends recipe, Labor Day BBQ, smoked brisket, barbecue burnt ends, Kansas City burnt ends