Love this? Save it for later!
Share the inspiration with your friends
“You know that moment when you’re juggling a million things at a summer BBQ, and someone hands you a snack that just makes everything feel a little easier, a little brighter?” That was me last July Fourth, standing in my friend’s backyard with a plate of these festive 4th of July berry charcuterie cones. Honestly, I wasn’t expecting much when my neighbor, Helen, casually handed me a cone filled with juicy berries, creamy cheese, and crunchy crackers. But that simple, colorful cone turned out to be the perfect handheld party treat.
Helen isn’t exactly what you’d call a party planner—she’s more the kind of person who brings a folding chair and a smile—but her berry charcuterie cones stole the show. The way the red strawberries, white cheese, and blue blueberries were layered just felt like summer on a stick. I mean, who needs a plate when you can stroll around chatting, munching on these little cones of joy? The best part? They were easy, breezy, and impossible to mess up, even with a few interruptions (like when her dog decided to help by grabbing a cracker!).
I kept thinking about how this simple recipe could save me from the usual party spread chaos. Maybe you’ve been there—trying to prepare a bunch of dishes, and somehow the snacks end up looking like an afterthought. These berry charcuterie cones aren’t just pretty; they bring the festive spirit without the fuss. That’s why I kept making them all summer—and now, I’m sharing the recipe with you for your next summer party.
Why You’ll Love This Recipe
After testing these festive 4th of July berry charcuterie cones across several summer parties, I can confidently say they’re a crowd-pleaser for so many reasons. Whether you’re a seasoned host or someone who just wants to bring something easy and impressive, this recipe has your back.
- Quick & Easy: You can whip these up in about 15 minutes, making them perfect for last-minute gatherings or spontaneous celebrations.
- Simple Ingredients: No need to hunt down fancy items—just fresh berries, your favorite cheeses, and crunchy crackers you probably already have.
- Perfect for Summer Parties: They’re portable and mess-free, ideal for outdoor events like picnics, backyard barbecues, or poolside hangouts.
- Crowd-Pleaser: Kids and adults alike love them, partly because who can resist berries paired with creamy cheese?
- Unbelievably Delicious: The combination of juicy fruit, savory cheese, and crisp crackers hits every flavor and texture note just right.
What really sets this recipe apart is the presentation and the balance of flavors. Instead of a traditional charcuterie board that can get messy or complicated, these cones put everything in a neat, handheld package. Plus, I found that using a blend of cream cheese and goat cheese gives the creamy layer a slight tang that perfectly complements the sweet berries. Honestly, this isn’t just another berry snack—it’s the kind of recipe that makes you pause, take a bite, and smile while everyone else is still fussing over the grill.
What Ingredients You Will Need
This recipe uses simple, wholesome ingredients to deliver bold flavor and satisfying texture without the fuss. Most of these are pantry staples or easy-to-find fresh items, so you won’t have to make special trips to the store.
- Fresh Berries: Strawberries (hulled and halved), blueberries, and raspberries (about 1 cup each) – these provide the festive red and blue colors and juicy sweetness.
- Cheese: 4 ounces cream cheese, softened (adds smooth richness) and 4 ounces goat cheese (for a tangy twist) – both spreadable and easy to mix.
- Crackers: About 30 small, sturdy crackers like water crackers or multigrain rounds – they hold up well in the cones.
- Honey: 2 tablespoons for drizzling (optional, adds a touch of natural sweetness).
- Fresh Mint Leaves: A handful, torn or chopped (adds a refreshing finish).
- Lemon Zest: From one lemon (adds bright aroma and balances the flavors).
For the cones themselves, you can use pre-made paper cones (easy to find online or at craft stores) or DIY with parchment paper. I recommend using parchment because it’s food-safe and lets you customize the size. If you want to swap out the goat cheese, a mild feta or ricotta works well too. For a dairy-free take, vegan cream cheese paired with almond milk yogurt is a tasty alternative.
Equipment Needed
- Mixing bowls: One medium bowl for the cheese mixture and another for the berries.
- Spatula or spoon: For mixing and spreading the cheese.
- Cone holders or a stand: Optional but handy for keeping the cones upright while assembling or serving.
- Sharp knife: To hull and halve strawberries precisely.
- Microplane or fine grater: For zesting the lemon.
If you don’t have a cone holder, a simple workaround is to use a tall glass or cup to keep the cones standing. I once tried assembling these cones while holding them by hand, and let’s just say a few berries sneaked out mid-presentation—lesson learned! Also, sharpening your knife before prepping makes a noticeable difference in cutting the berries cleanly without squishing them.
Preparation Method
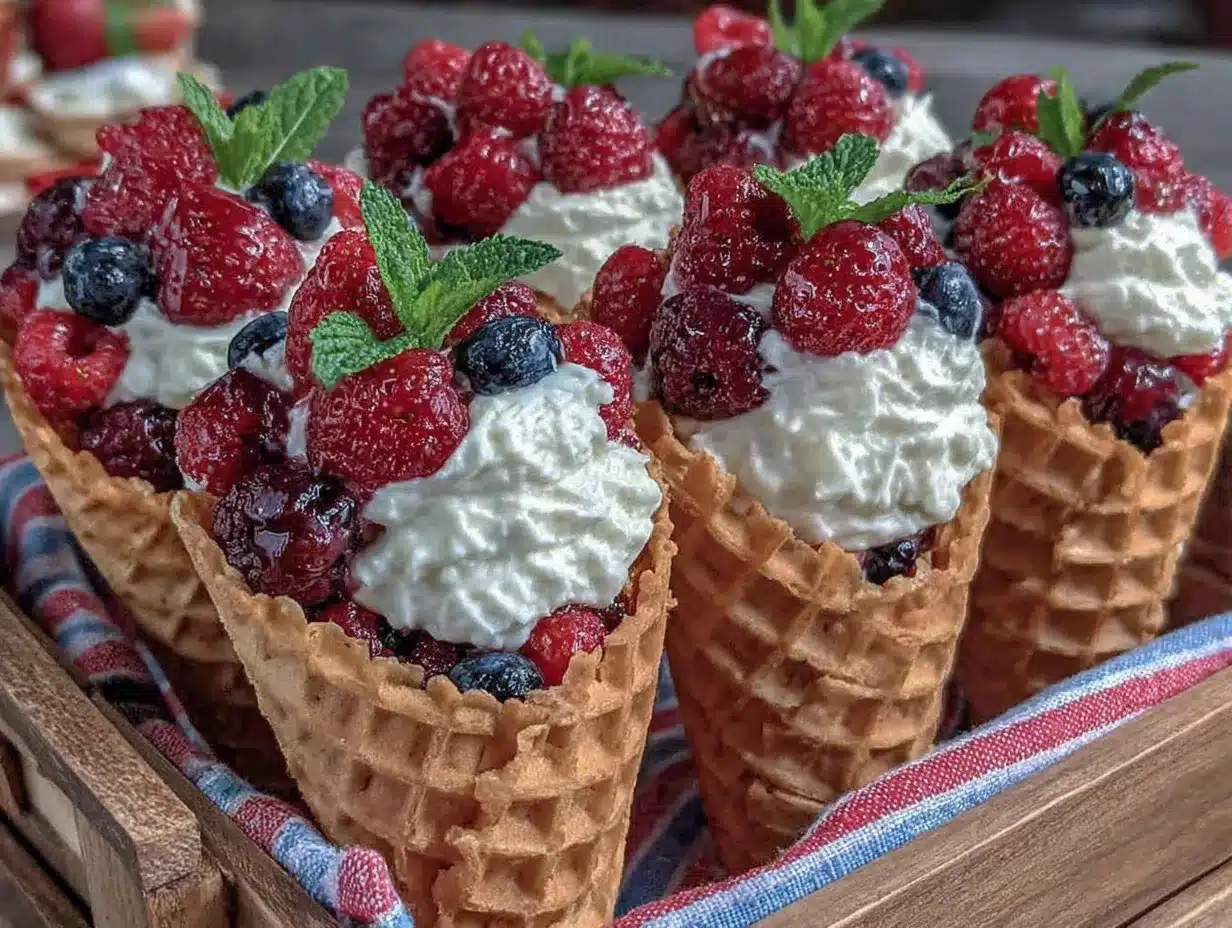
- Prepare the Cheese Mixture (5 minutes): In a medium bowl, combine the softened cream cheese and goat cheese. Use a spatula to blend until smooth and creamy. Add the lemon zest and stir well. This mixture should be spreadable but not runny.
- Prep the Berries (5 minutes): Rinse all berries gently under cold water and pat dry with a paper towel. Hull and halve the strawberries carefully, keeping the blueberries and raspberries whole. Toss the berries lightly with half the torn mint leaves to infuse freshness.
- Assemble the Cones (10 minutes): Take each paper cone and spread about 2 tablespoons of the cheese mixture inside, coating the bottom and sides. Layer a small handful of mixed berries on top, packing them gently but not squashing. Sprinkle a few more mint leaves and a drizzle of honey over each cone for added flavor.
- Final Touches: Arrange the cones upright in a holder or serving tray. If you’re making these ahead, cover loosely with plastic wrap and refrigerate until ready to serve. They’re best enjoyed within 2 hours of assembly to keep the crackers crisp.
When spreading the cheese, I like to use the back of a spoon for a smooth finish. Also, be careful not to overfill the cones, or the berries might spill out as you walk around. If you want to add a bit of crunch, sprinkle some chopped toasted almonds over the top right before serving. Oh, and don’t forget to wash your hands mid-assembly—berries can get sticky fast!
Cooking Tips & Techniques
Keeping the cheese mixture smooth is key here. If your cream cheese is too cold, it won’t blend well with the goat cheese, so let them sit at room temperature for about 30 minutes before mixing. You can even soften cream cheese faster by microwaving it in 10-second bursts, but watch closely to avoid melting.
Another tip: dry your berries thoroughly after rinsing. Wet berries make the crackers soggy fast, which kills the whole portable snack vibe. I learned this the hard way at a picnic when my cones started falling apart before the first toast!
When assembling, work on a cool surface to keep the cheese firm and the berries fresh-looking. If you plan to make these cones in advance, assemble the cheese and berries separately, then put them together right before serving to avoid sogginess.
Lastly, timing your prep around when guests arrive is helpful. These cones don’t need to sit too long, so assembling about 30 minutes before guests come is a sweet spot. Multitasking by prepping the cheese while washing berries saves precious minutes.
Variations & Adaptations
- Seasonal Berries: Swap in blackberries or cherries in summer, or use frozen berries gently thawed (pat dry) if fresh aren’t available.
- Cheese Options: For a milder flavor, replace goat cheese with ricotta or mascarpone. For a sharper bite, try blue cheese crumbles instead of goat cheese.
- Nut-Free Variation: Skip any nut toppings and use seed crackers for those with allergies.
- Sweet Twist: Mix in a spoonful of fruit preserves (like raspberry or strawberry) into the cheese blend for an extra burst of sweetness.
- Vegan Adaptation: Use plant-based cream cheese and coconut yogurt, and swap honey for agave syrup or maple syrup.
I once tried adding a sprinkle of chili powder for a subtle kick, and it surprisingly worked, especially with the cream cheese’s coolness. If you’re feeling adventurous, a dash of fresh cracked black pepper over the cheese can also add a nice contrast.
Serving & Storage Suggestions
Serve these festive 4th of July berry charcuterie cones chilled or at room temperature. They’re perfect as handheld snacks for mingling guests. Pair them with sparkling lemonade, iced tea, or a light rosé to keep the summer vibes flowing.
If you need to store leftovers, wrap the cones individually in plastic wrap and refrigerate for up to 24 hours. The crackers might soften a bit, but reheating briefly in a warm oven (about 300°F/150°C for 5 minutes) can bring back some crunch—just keep an eye to avoid melting the cheese.
Flavors deepen when the berries and cheese mingle slightly, so if you prep a bit early, you’ll notice a lovely harmony of sweet, tangy, and fresh notes. Still, I recommend assembling close to serving time for the best texture contrast.
Nutritional Information & Benefits
Each festive 4th of July berry charcuterie cone offers a balanced mix of protein, fiber, and antioxidants. Berries are rich in vitamin C and antioxidants, which help fight inflammation and boost immunity. The cream cheese and goat cheese provide calcium and protein, supporting bone health and satiety.
This recipe is naturally gluten-free if you choose gluten-free crackers, and low in added sugars. It’s a light yet satisfying snack that fits well into many dietary preferences, including vegetarian and low-carb if you watch the cracker quantity.
Personally, I appreciate that these cones feel indulgent without being heavy or overly processed, making them a refreshing option during long summer days when you want something wholesome but festive.
Conclusion
This festive 4th of July berry charcuterie cones recipe is a refreshing, easy way to bring color, flavor, and convenience to your summer parties. I love how the handheld cones encourage mingling and snacking without the usual mess or fuss. Plus, the simple ingredients combine to create something that tastes like a special treat but takes hardly any effort.
Feel free to customize with your favorite berries, cheeses, or add-ins to make it your own. I hope these cones find a spot on your summer party menu—they certainly have on mine! When you try them, I’d love to hear how you made them yours or any fun twists you added. Share your thoughts and recipes below, and let’s keep the summer celebrations tasty and easy!
FAQs
What type of cones should I use for berry charcuterie cones?
Food-safe parchment paper cones are ideal and easy to make at home. You can also find pre-made paper cones online or at craft stores. Avoid waffle or ice cream cones as they don’t hold savory ingredients well.
Can I prepare the cones a day in advance?
It’s best to assemble the cones no more than 2 hours before serving to keep crackers crisp. You can prep the cheese and berries separately a day ahead and combine just before your party.
Are these cones suitable for kids?
Absolutely! The sweet berries and mild cheese flavors appeal to kids and adults alike. Just be mindful of any allergies and choose kid-friendly crackers.
Can I make this recipe vegan?
Yes! Use plant-based cream cheese and coconut yogurt, swap honey for maple or agave syrup, and choose vegan crackers to keep it fully plant-based.
What can I serve alongside these berry charcuterie cones?
They pair wonderfully with light beverages like iced tea, lemonade, or sparkling water. For food, think grilled chicken skewers, fresh salads, or crispy garlic chicken to complement the fresh flavors.
Pin This Recipe!

Festive 4th of July Berry Charcuterie Cones

These handheld berry charcuterie cones combine fresh berries, creamy cheese, and crunchy crackers for an easy, festive summer party snack that’s portable and mess-free.
- Prep Time: 15 minutes
- Cook Time: 0 minutes
- Total Time: 15 minutes
- Yield: 15 cones 1x
- Category: Appetizer
- Cuisine: American
Ingredients
- 1 cup strawberries, hulled and halved
- 1 cup blueberries
- 1 cup raspberries
- 4 ounces cream cheese, softened
- 4 ounces goat cheese
- About 30 small sturdy crackers (water crackers or multigrain rounds)
- 2 tablespoons honey (optional)
- A handful fresh mint leaves, torn or chopped
- Zest of 1 lemon
Instructions
- Prepare the Cheese Mixture: In a medium bowl, combine softened cream cheese and goat cheese. Blend with a spatula until smooth and creamy. Stir in lemon zest.
- Prep the Berries: Rinse berries gently under cold water and pat dry. Hull and halve strawberries, keep blueberries and raspberries whole. Toss berries lightly with half the torn mint leaves.
- Assemble the Cones: Spread about 2 tablespoons of cheese mixture inside each paper cone, coating bottom and sides. Layer a small handful of mixed berries on top, packing gently. Sprinkle remaining mint leaves and drizzle honey over each cone.
- Final Touches: Arrange cones upright in a holder or serving tray. Cover loosely with plastic wrap and refrigerate if making ahead. Best enjoyed within 2 hours to keep crackers crisp.
Notes
Let cream cheese sit at room temperature for 30 minutes before mixing for smooth blending. Dry berries thoroughly to avoid soggy crackers. Assemble cones close to serving time for best texture. Use parchment paper cones or pre-made paper cones; avoid waffle or ice cream cones. For vegan version, use plant-based cream cheese, coconut yogurt, and vegan crackers.
Nutrition
- Serving Size: 1 cone
- Calories: 120
- Sugar: 7
- Sodium: 120
- Fat: 7
- Saturated Fat: 3.5
- Carbohydrates: 12
- Fiber: 2
- Protein: 3
Keywords: 4th of July, berry charcuterie, summer party, easy appetizer, handheld snack, berries, cheese, crackers, festive


