Love this? Save it for later!
Share the inspiration with your friends
It was 11:47 PM on a random Thursday in mid-October, and I had a ridiculous craving for something light and sweet. I didn’t have any candy in the house—typical—but I had a carton of eggs that were about to expire and a bag of sugar that was almost full. The idea just sort of arrived, fully formed, like a ghost floating through my kitchen window. I’d make meringues, but not just any meringues. I’d make them look like the little ghosts that were probably haunting my pantry. Honestly, it felt a little unhinged at that hour, piping tiny spirits onto a baking sheet while the rest of the neighborhood was asleep. But something about the late night loosened the usual rules. I didn’t overthink the piping technique. I didn’t worry if they looked perfect. I just let the egg whites whip into a glossy cloud, folded in the sugar, and started shaping these adorable little phantoms. By the time the oven was preheating, I was grinning like a kid who just discovered a secret passage. These Spooky Ghost Meringue Cookies for Halloween became my new favorite thing, and I’ve been making them every October since. If you’ve ever wanted a Halloween treat that’s actually fun to make and doesn’t leave you with a sugar coma, you’re in the right place.
Why You’ll Love This Recipe
Let me tell you, I’ve tested a lot of meringue recipes over the years. Some turned into flat puddles. Others were so sticky they glued themselves to the parchment paper. But this version? It’s the one. I’ve perfected the technique through trial and error—and a few spectacular failures that involved egg whites on the ceiling. These Spooky Ghost Meringue Cookies for Halloween are everything you want in a festive treat.
- Quick & Easy: From start to finish, you’re looking at about 2 hours including bake time. The active prep is only 15 minutes.
- Simple Ingredients: You probably already have eggs and sugar in your kitchen. No fancy grocery trips needed for this one.
- Perfect for Halloween Parties: These little ghosts are the star of any dessert table. Kids love them, adults can’t resist them, and they look incredible on a platter.
- Surprisingly Forgiving: Even if your piping skills are shaky, these meringues end up looking charmingly spooky. Imperfection is part of the aesthetic.
- Naturally Gluten-Free & Low-Fat: No butter, no flour, no guilt. Just pure, airy sweetness.
What makes this recipe different from the dozens of others out there? It’s the technique. I use a stable Swiss meringue method that gives you a silky, marshmallowy interior with a crisp shell. Plus, I add a touch of vanilla and a pinch of cream of tartar for that perfect structure. This isn’t just another ghost cookie—it’s the ghost cookie that will haunt your dreams (in a good way).
What Ingredients You Will Need
This recipe uses simple, pantry-friendly ingredients to create something that looks like it came from a fancy bakery. The magic is in the technique, not the shopping list.
- Egg Whites: 4 large egg whites, at room temperature. (Room temperature is crucial—cold eggs won’t whip up as high. Separate them while cold, then let them sit out for 30 minutes.)
- Granulated Sugar: 1 cup (200g). Use fine granulated sugar for best results. Superfine sugar dissolves even faster, but regular works great.
- Cream of Tartar: 1/2 teaspoon. This stabilizes the egg whites and helps them hold their shape. No substitutes here, but you can use 1 teaspoon of lemon juice in a pinch.
- Vanilla Extract: 1 teaspoon. Pure vanilla extract adds warmth and depth. I prefer Nielsen-Massey for its rich flavor.
- Black Gel Food Coloring: For the ghost faces. Gel coloring is thicker and won’t mess with the meringue texture like liquid drops would. I use Americolor Super Black.
- Mini Chocolate Chips: Optional, for eyes. About 24 chips. You can also use black sprinkles or just pipe the faces with the black gel.
A quick note on the eggs: Use fresh eggs from a trusted source. Older eggs actually whip up better because the whites are thinner, but I’ve had great success with both. If you’re looking for a plant-based option, aquafaba (the liquid from canned chickpeas) works surprisingly well as a substitute, though the texture is slightly different.
Equipment Needed
You don’t need a professional pastry kit for these Spooky Ghost Meringue Cookies for Halloween, but a few key tools make the process much smoother.
- Stand Mixer or Hand Mixer: A stand mixer with a whisk attachment is ideal. I use my KitchenAid Artisan for this. If you’re using a hand mixer, expect to hold it for about 8-10 minutes.
- Large Mixing Bowl: Glass or stainless steel works best. Make sure it’s completely clean and dry—any grease will ruin the meringue.
- Piping Bag with Round Tip: A Wilton #12 round tip is perfect. If you don’t have a piping bag, a zip-top bag with the corner snipped off works fine.
- Baking Sheets: Two large baking sheets lined with parchment paper. Silpat mats also work well.
- Digital Kitchen Scale: Not strictly necessary, but weighing your egg whites and sugar ensures consistent results every time.
- Small Paintbrush or Toothpick: For adding the ghost faces with gel food coloring.
Pro tip from someone who learned the hard way: Use room-temperature equipment. If your bowl is cold, the egg whites won’t whip up properly. Run it under warm water and dry it thoroughly before you start.
Preparation Method
- Preheat and Prep: Preheat your oven to 200°F (93°C). Line two baking sheets with parchment paper. Set aside.
- Create a Double Boiler: Fill a medium saucepan with about 2 inches of water and bring it to a simmer. In a heatproof bowl, combine the egg whites, sugar, and cream of tartar. Place the bowl over the simmering water (make sure the bottom doesn’t touch the water).
- Whisk Constantly: Whisk the mixture gently but continuously until the sugar is completely dissolved and the mixture is warm to the touch, about 3-4 minutes. Rub a bit between your fingers—if it feels gritty, keep whisking. If it’s smooth, you’re good.
- Whip the Meringue: Transfer the warm mixture to your stand mixer bowl. Beat on medium speed for 2 minutes, then increase to high speed. Whip until stiff, glossy peaks form and the bowl feels cool to the touch, about 6-8 minutes. Add the vanilla extract during the last minute of whipping.
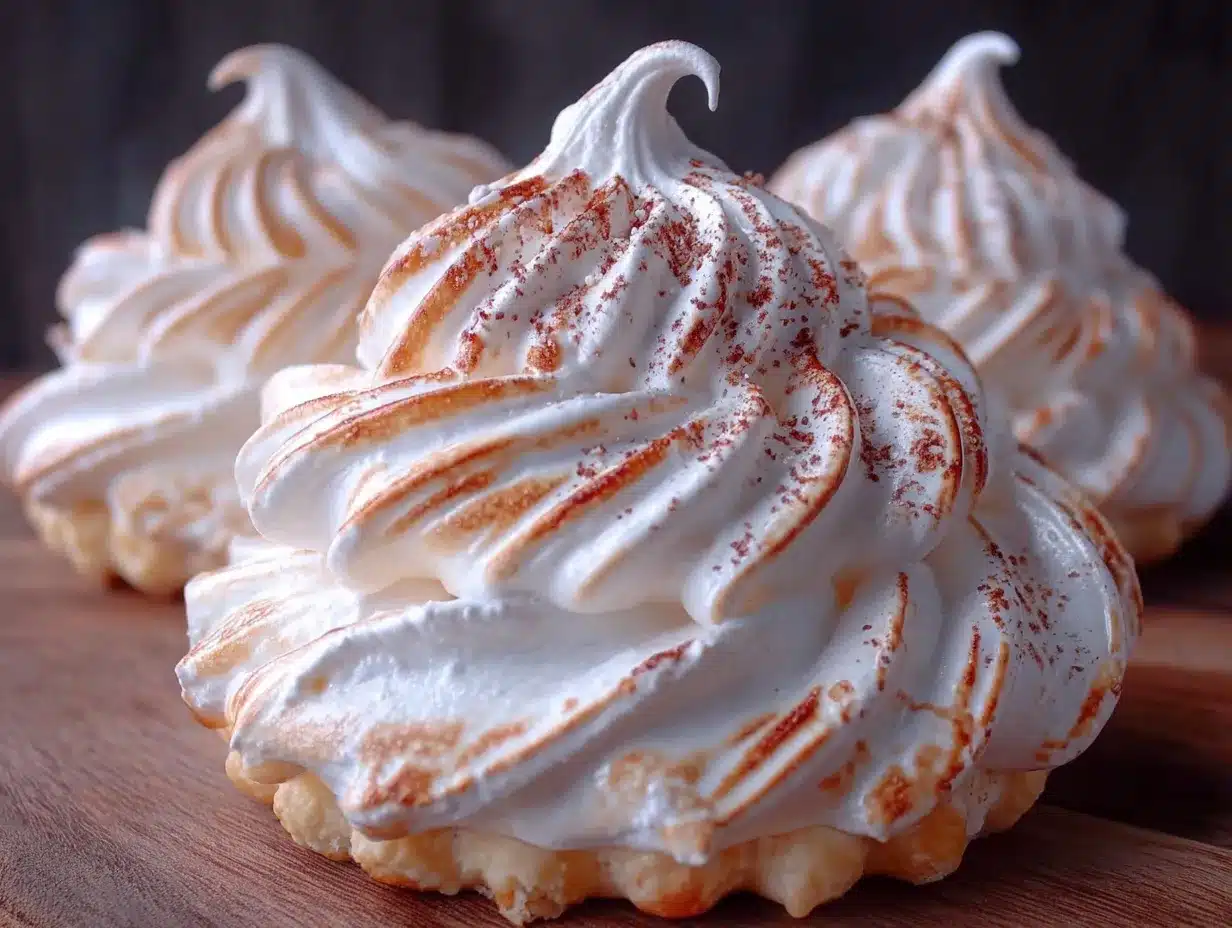
- Pipe the Ghosts: Transfer the meringue to your piping bag fitted with the round tip. Hold the bag perpendicular to the baking sheet, about 1/2 inch above the surface. Pipe a tall, teardrop shape: start with a small circle for the head, then pull upward slightly and release pressure to create a tail. For a ghostly effect, pipe a few small peaks on the sides to look like wispy edges.
- Add Faces: If using mini chocolate chips, gently press two into each ghost for eyes and one for the mouth. If using black gel, wait until the meringues are baked and cooled, then paint on the faces with a small brush or toothpick.
- Bake Low and Slow: Bake for 60-75 minutes, rotating the pans halfway through. The meringues are done when they lift easily off the parchment and sound hollow when tapped on the bottom. They should be dry to the touch but still white—if they start browning, your oven is too hot.
- Cool Completely: Turn off the oven and leave the meringues inside with the door slightly ajar for 30 minutes. This prevents cracking from sudden temperature changes. Then transfer to a wire rack to cool completely.
A quick warning: Don’t try to rush the baking. If you crank up the heat, you’ll end up with brown ghosts that look more like toasted marshmallows. Trust the low-and-slow method—it’s worth the wait.
Cooking Tips & Techniques
I’ve made these Spooky Ghost Meringue Cookies for Halloween at least a dozen times, and I’ve learned a few things the hard way. Let me save you some trouble.
The No-Grease Rule: This is non-negotiable. Any trace of fat will deflate your meringue. Wash your bowl and whisk with hot, soapy water and dry them thoroughly. Avoid plastic bowls—they can hold onto grease even after washing. I once used a plastic bowl that had seen better days, and my meringue never got past the soupy stage. Glass or metal is your friend.
Humidity is the Enemy: Meringues hate humid days. The sugar absorbs moisture from the air, making them sticky and chewy instead of crisp. If it’s raining or muggy outside, save this recipe for a dry day. I learned this one August afternoon when my meringues turned into sad, sticky blobs. Now I check the weather forecast before I start.
Piping Consistency: If your meringue is too stiff, it will be hard to pipe smoothly. If it’s too soft, the ghosts will spread and lose their shape. The perfect texture is glossy and holds a peak when you lift the whisk. If you over-whip, the meringue will look curdled and grainy—start over if that happens.
Multitasking Strategy: While the meringue is whipping, line your baking sheets and prepare your piping bag. This saves a few minutes and keeps you from scrambling at the last minute. Also, set a timer for the double boiler step—it’s easy to lose track of time when you’re whisking.
Variations & Adaptations
One of the best things about these Spooky Ghost Meringue Cookies for Halloween is how customizable they are. Here are a few ways to make them your own.
Vegan Version: Substitute the egg whites with aquafaba (the liquid from a can of chickpeas). Use 1/2 cup of aquafaba and add 1/4 teaspoon of cream of tartar. The whipping time is a bit longer—about 12-15 minutes—but the result is surprisingly similar. I tried this for a vegan friend’s Halloween party, and no one could tell the difference.
Flavor Twists: Instead of vanilla, try peppermint extract for a cool, candy-cane vibe. Or add a tablespoon of cocoa powder for chocolate ghosts. For a citrusy version, swap in lemon or orange extract. Just be careful with extracts—they’re potent, so start with 1/2 teaspoon and adjust.
Colorful Ghosts: Divide the meringue into separate bowls and add a few drops of gel food coloring for purple, green, or orange ghosts. Swirl the color in gently for a marbled effect. My niece requested pink ghosts last year, and they were adorable.
Different Shapes: If ghosts aren’t your thing, pipe the meringue into pumpkins, bats, or spider webs. Use a small offset spatula to create ridges on pumpkins, or pipe tiny bats with two small wings. The same recipe works for any Halloween shape.
Serving & Storage Suggestions
These meringues are best served at room temperature, right after they’ve cooled. The contrast between the crisp shell and the soft, marshmallowy center is pure magic. Arrange them on a black platter for maximum spooky effect, or scatter them across a cake stand for a Halloween dessert table.
For beverages, these pair beautifully with hot apple cider, pumpkin spice lattes, or a simple cup of black tea. The sweetness of the meringue balances the tartness of cider and the boldness of coffee. If you’re serving adults, a glass of late-harvest Riesling or a creamy stout is a lovely match.
Storage: Store leftover meringues in an airtight container at room temperature for up to 2 weeks. Do not refrigerate—the moisture will make them sticky. If you live in a humid climate, add a silica gel packet to the container to keep them crisp. You can also freeze them for up to 3 months. Just layer them between sheets of parchment paper in a freezer-safe container and thaw at room temperature for 30 minutes before serving.
One thing I love about these cookies is that the flavor actually improves after a day or two. The vanilla mellows out, and the texture becomes even more delicate. Just make sure no one sneaks them before the party!
Nutritional Information & Benefits
Here’s the honest truth about these Spooky Ghost Meringue Cookies for Halloween: they’re mostly sugar and air. But that’s not necessarily a bad thing. Each cookie (assuming you get about 24 ghosts from this batch) contains roughly:
- Calories: 35
- Fat: 0g
- Carbohydrates: 8g
- Sugar: 8g
- Protein: 0.5g
- Sodium: 10mg
Compared to a typical Halloween candy bar, which can pack 200+ calories and 12 grams of fat, these meringues are practically guilt-free. They’re naturally fat-free, gluten-free, and dairy-free. The egg whites provide a small amount of protein, and the cream of tartar adds a touch of potassium.
From a wellness perspective, I love that these cookies satisfy a sweet craving without the heavy, greasy feeling that comes from butter-laden treats. They’re light, airy, and almost ethereal—like ghosts themselves. Plus, the act of piping and decorating is surprisingly meditative. It’s a great way to unwind on a fall evening.
If you’re watching your sugar intake, you can reduce the sugar to 3/4 cup, but the texture will be slightly less stable. I’ve tested it, and it works, but the ghosts won’t hold their shape as well. For a sugar-free version, try using a monk fruit sweetener blend, though results vary by brand.
Conclusion
These Spooky Ghost Meringue Cookies for Halloween are the kind of recipe that makes you feel like a kitchen wizard. They’re simple enough for a weeknight project but impressive enough to steal the show at any Halloween gathering. I love how they capture the playful spirit of Halloween without relying on artificial colors or complicated techniques.
I hope you give them a try. And if you do, I’d love to hear how they turn out. Did you add a silly face? Did you try a different flavor? Share your ghost creations in the comments below, or tag me on Pinterest with your spooky masterpieces. Honestly, the best part of this recipe is seeing how everyone puts their own spin on it.
So grab your eggs, crank up some spooky music, and get ready to pipe the cutest ghosts you’ve ever seen. Happy Halloween, friends!
Frequently Asked Questions
Can I make these ghost meringues without a piping bag?
Absolutely! You can use a zip-top bag with the corner snipped off, or even a spoon to drop dollops of meringue onto the baking sheet. They won’t look as defined, but they’ll still be delicious and ghost-like.
Why did my meringue turn out sticky and chewy?
This usually happens when the humidity is high or the meringues weren’t baked long enough. Make sure you’re baking on a dry day and that the meringues are completely dry before you turn off the oven. If they’re still sticky, pop them back in the oven at 200°F for another 15 minutes.
Can I use liquid food coloring for the ghost faces?
I don’t recommend it. Liquid food coloring will thin out the meringue and make it runny. Stick with gel or paste food coloring for the best results. If you only have liquid, add just a tiny drop and mix it in gently.
How do I get my meringues to hold their shape better?
Make sure you’re whipping the meringue to stiff peaks—the mixture should be glossy and hold a peak when you lift the whisk. Also, using cream of tartar helps stabilize the egg whites. If your meringue is still soft, you may have under-whipped it.
Can I double this recipe?
Yes, you can easily double the ingredients. Just make sure your mixer bowl is large enough to handle the volume. You may need to bake the meringues in batches or use multiple oven racks. Rotate the pans halfway through baking for even results.
Pin This Recipe!
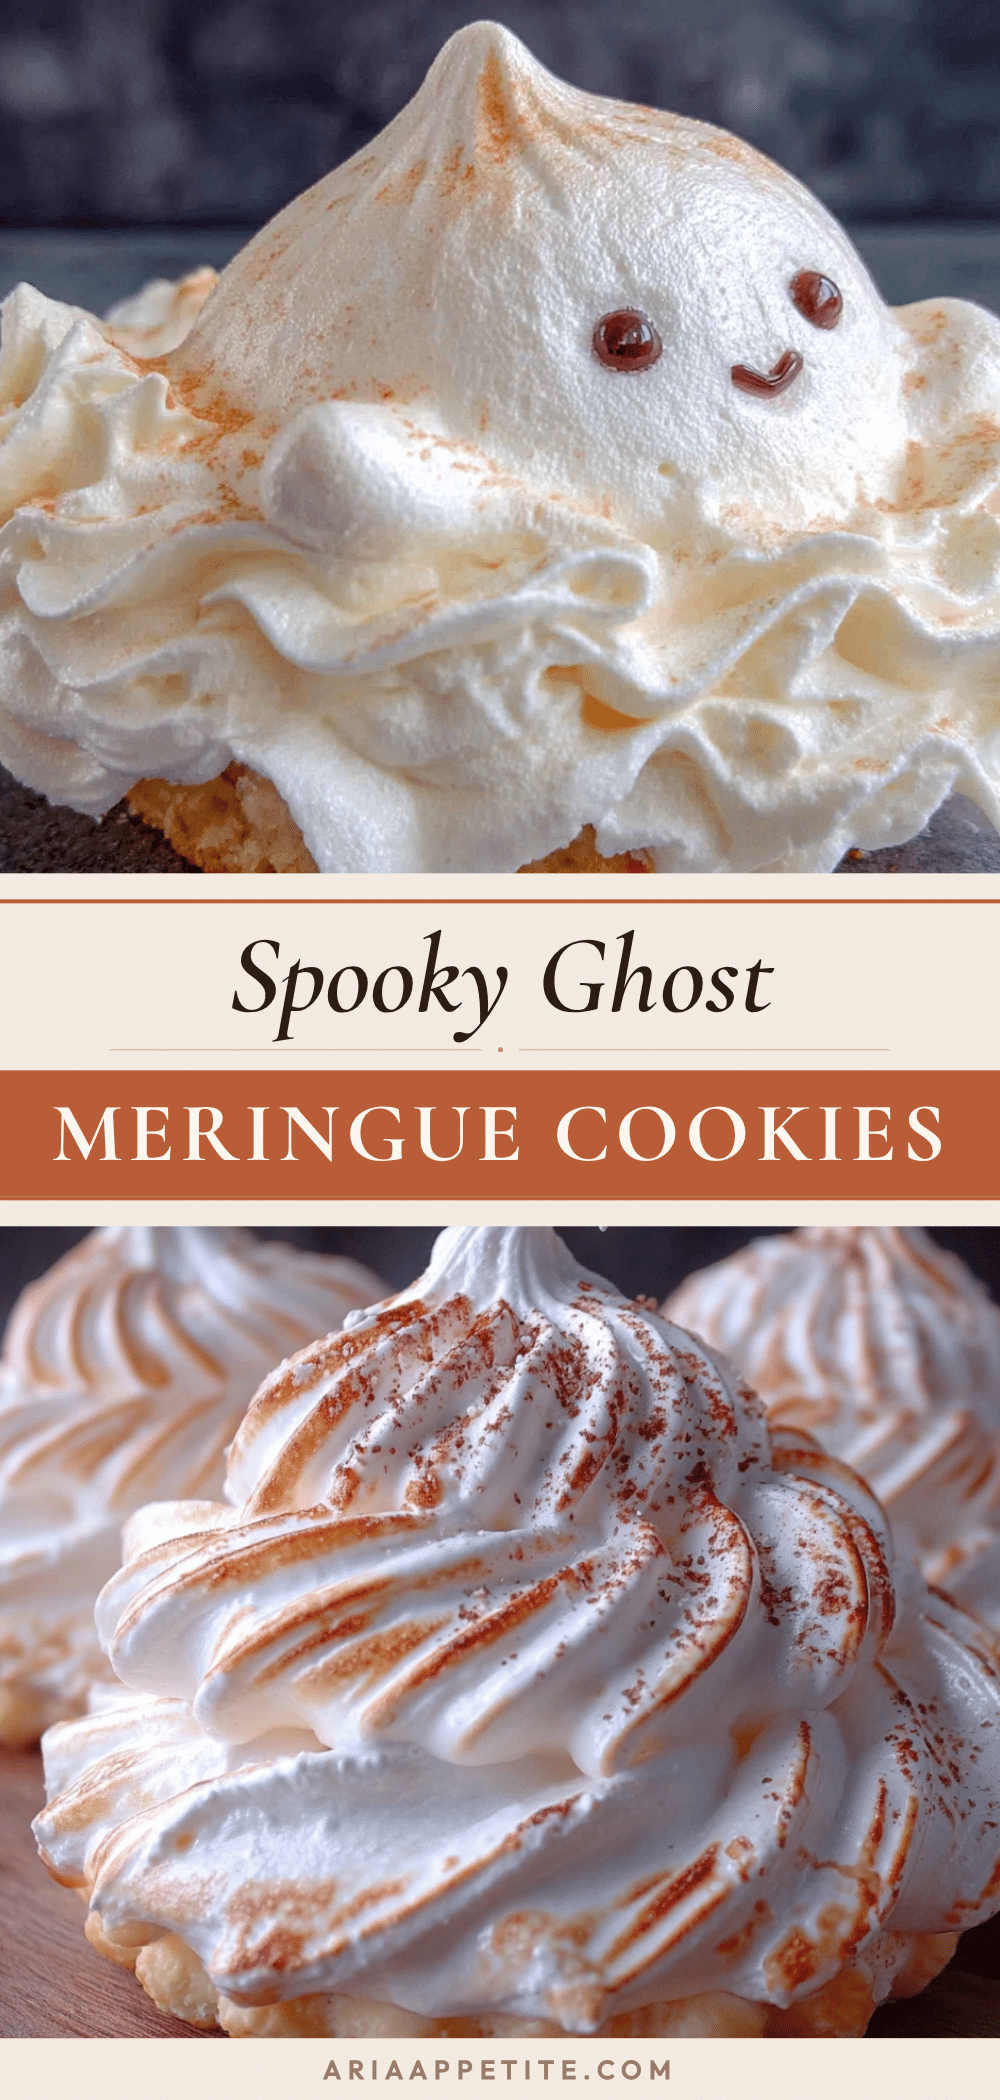
Spooky Ghost Meringue Cookies: Easy Halloween Treat
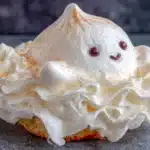
These light and airy meringue cookies are shaped like adorable ghosts, making them the perfect Halloween treat. They are naturally gluten-free, low-fat, and surprisingly easy to make with simple ingredients.
- Prep Time: 15 minutes
- Cook Time: 60-75 minutes
- Total Time: 2 hours (including cooling)
- Yield: 24 servings 1x
- Category: Dessert
- Cuisine: American
Ingredients
- 4 large egg whites, at room temperature
- 1 cup (200g) granulated sugar
- 1/2 teaspoon cream of tartar
- 1 teaspoon vanilla extract
- Black gel food coloring (for faces)
- Mini chocolate chips (optional, for eyes, about 24 chips)
Instructions
- Preheat your oven to 200°F (93°C). Line two baking sheets with parchment paper.
- Fill a medium saucepan with about 2 inches of water and bring to a simmer. In a heatproof bowl, combine the egg whites, sugar, and cream of tartar. Place the bowl over the simmering water (bottom should not touch water).
- Whisk the mixture gently but continuously until the sugar is completely dissolved and the mixture is warm to the touch, about 3-4 minutes. Rub a bit between your fingers—if it feels gritty, keep whisking; if smooth, you’re good.
- Transfer the warm mixture to a stand mixer bowl. Beat on medium speed for 2 minutes, then increase to high speed. Whip until stiff, glossy peaks form and the bowl feels cool to the touch, about 6-8 minutes. Add the vanilla extract during the last minute of whipping.
- Transfer the meringue to a piping bag fitted with a round tip (Wilton #12). Hold the bag perpendicular to the baking sheet, about 1/2 inch above the surface. Pipe a tall, teardrop shape: start with a small circle for the head, then pull upward slightly and release pressure to create a tail. For a ghostly effect, pipe a few small peaks on the sides.
- If using mini chocolate chips, gently press two into each ghost for eyes and one for the mouth. If using black gel, wait until the meringues are baked and cooled, then paint on the faces with a small brush or toothpick.
- Bake for 60-75 minutes, rotating the pans halfway through. The meringues are done when they lift easily off the parchment and sound hollow when tapped on the bottom. They should be dry to the touch but still white.
- Turn off the oven and leave the meringues inside with the door slightly ajar for 30 minutes to prevent cracking. Then transfer to a wire rack to cool completely.
Notes
Use room-temperature egg whites for best volume. Avoid making meringues on humid days. Ensure all equipment is completely clean and grease-free. For vegan version, substitute egg whites with 1/2 cup aquafaba and add 1/4 teaspoon cream of tartar; whip for 12-15 minutes.
Nutrition
- Serving Size: 1 cookie
- Calories: 35
- Sugar: 8
- Sodium: 10
- Carbohydrates: 8
- Protein: 0.5
Keywords: Halloween, ghost, meringue, cookies, easy, gluten-free, low-fat, spooky