Love this? Save it for later!
Share the inspiration with your friends
The church bake sale was in six hours and I’d completely forgotten. Not just forgotten—I’d blocked it out entirely, the way you do with dentist appointments and car registrations. My neighbor Margaret had texted me the week before, and I’d replied “Got it!” without a second thought. Now it was 6 AM on Saturday and I was staring into my pantry like it had personally betrayed me.
Everyone else would be bringing those elaborate layered cakes with fondant flowers, or the kind of cookies that take three days and a pastry degree. I had a can of pumpkin puree from last Thanksgiving, a bag of chocolate chips I’d bought for a different recipe I never made, and the vague memory of a Bundt cake my aunt used to throw together when company showed up unannounced. Honestly, I was panicking. I mean, have you ever tried to compete with Margaret’s rum balls? They’re legendary.
But here’s the thing about desperation—it makes you creative. I grabbed that can of pumpkin, dumped it in a bowl, and started throwing things together like a contestant on a cooking show. The batter came together in about twelve minutes flat. I poured it into my dusty Bundt pan (yes, it had cobwebs on the handle, let’s be real), and crossed my fingers while it baked.
The smell that filled my kitchen was ridiculous. Like autumn had exploded in there. When I pulled that cake out of the oven, it was this perfect golden brown with little chocolate flecks peeking through the top. I let it cool, flipped it onto a plate, and honestly almost didn’t want to take it to the sale. But I did. And you know what happened? It sold out in twenty minutes. Margaret herself came looking for the recipe. That cake—this Perfect Chocolate Chip Pumpkin Bundt Cake—stole the show without even trying. And that’s why I keep making it, every single fall, for every single occasion that sneaks up on me.
Why You’ll Love This Recipe
Let me tell you why this cake is different from every other pumpkin recipe you’ve seen. I’ve tested this thing about seven times now (the sacrifices I make for you people), and each time it got better. This isn’t just another pumpkin cake—it’s the one that makes people close their eyes when they take a bite.
- Quick & Easy: From start to oven in under 20 minutes. No mixer required, no complicated techniques. Just a bowl, a whisk, and a little patience while it bakes.
- Simple Ingredients: You probably have most of this stuff already. Pumpkin puree, chocolate chips, basic baking staples. No trip to a specialty store needed.
- Perfect for Fall Gatherings: Thanksgiving, potlucks, office parties, bake sales—this cake fits everywhere. It’s my go-to for the PTA bake sale every November.
- Crowd-Pleaser: Kids love the chocolate chips. Adults love the warm pumpkin spice. Everyone loves that it’s not too sweet, not too dense, just perfectly balanced.
- Unbelievably Delicious: The texture is what gets me every time. It’s moist without being heavy, tender without being fragile. And the chocolate chips? They melt into these little pockets of gooey goodness throughout the cake.
What makes this recipe stand out is the technique. Most pumpkin cakes use oil, which is fine, but I use a combination of melted butter and sour cream. The butter gives you that rich flavor you can’t get from oil, and the sour cream keeps everything incredibly moist. Plus, I’ve figured out the exact ratio of pumpkin to flour so your cake doesn’t turn into a dense brick. Trust me—I’ve made that mistake more times than I want to admit.
This cake is comfort food at its finest. It’s the kind of dessert that makes you slow down and actually taste what you’re eating. The kind that reminds you why fall is the best season for baking. And honestly? It’s the kind of recipe that makes you look like you spent hours in the kitchen when you really didn’t.
What Ingredients You Will Need
This recipe uses simple, wholesome ingredients that work together to create something truly special. Most of these are pantry staples, which is exactly what you want when a pumpkin craving hits unexpectedly.
For the Cake
- All-purpose flour – 2 cups (240g), spooned and leveled. Don’t scoop straight from the bag or you’ll pack in too much flour and end up with a dry cake.
- Baking soda – 1 teaspoon. This helps the cake rise and gives it that tender crumb.
- Baking powder – 1 teaspoon. Double leavening agents for extra lift.
- Salt – ½ teaspoon. Balances the sweetness and brings out the pumpkin flavor.
- Pumpkin pie spice – 2 teaspoons. I prefer McCormick for consistent flavor, but any brand works. You can also make your own with cinnamon, nutmeg, ginger, and cloves.
- Cinnamon – 1 teaspoon. Because you can never have too much cinnamon in a pumpkin recipe.
- Unsalted butter – ½ cup (1 stick, 113g), melted and slightly cooled. Use unsalted so you control the salt level.
- Granulated sugar – 1 cup (200g). Adds sweetness and helps with browning.
- Light brown sugar – ½ cup (100g), packed. Adds moisture and a deeper, caramel-like sweetness.
- Large eggs – 2, room temperature. Room temperature eggs blend more evenly into the batter.
- Vanilla extract – 2 teaspoons. Pure vanilla, not imitation. It makes a difference.
- Pumpkin puree – 1 can (15 oz, about 425g). Not pumpkin pie filling—make sure you get 100% pure pumpkin.
- Sour cream – ¼ cup (60g), room temperature. This is my secret ingredient for extra moisture. Full-fat works best.
- Semi-sweet chocolate chips – 1 cup (175g). I like Guittard or Ghirardelli for the best melt and flavor. You can also use dark chocolate or milk chocolate chips.
For the Glaze (Optional but Recommended)
- Powdered sugar – 1 cup (120g), sifted to avoid lumps.
- Milk – 2-3 tablespoons, or as needed for consistency. Whole milk gives a richer glaze.
- Vanilla extract – ½ teaspoon.
- Pinch of cinnamon – Optional, for extra warmth.
Substitution Notes: If you’re out of sour cream, plain Greek yogurt works perfectly. For a dairy-free version, use melted coconut oil instead of butter and a dairy-free yogurt. Gluten-free? Swap the all-purpose flour with a 1:1 gluten-free baking blend—I’ve tested this with King Arthur Measure for Measure and it works great.
Equipment Needed
You don’t need a fancy kitchen to make this cake. Here’s what you’ll actually use:
- 10-cup Bundt pan – The star of the show. If you don’t have one, you can use a 9×5-inch loaf pan (bake time will be longer, about 55-65 minutes) or a 9-inch round cake pan (check at 30 minutes).
- Large mixing bowl – For the dry ingredients.
- Medium mixing bowl – For the wet ingredients.
- Whisk – A good sturdy whisk. I prefer OXO Good Grips because they don’t bend.
- Rubber spatula – For folding in the chocolate chips and scraping every last bit of batter.
- Measuring cups and spoons – Standard set. I use metal measuring cups for dry ingredients and glass for liquids.
- Kitchen scale – Optional but highly recommended for consistent results. I use my Escali scale every time.
- Cooling rack – Essential for even cooling. A wire rack lets air circulate so your cake doesn’t get soggy on the bottom.
- Non-stick baking spray with flour – This is non-negotiable for Bundt pans. Regular cooking spray won’t cut it. I swear by Baker’s Joy.
If you don’t have a Bundt pan, don’t let that stop you. I’ve made this as muffins (bake 18-22 minutes) and even as a sheet cake (bake 25-30 minutes). The shape changes but the flavor stays the same.
Preparation Method
- Preheat your oven to 350°F (175°C). Position the rack in the center. While it’s heating, generously spray your Bundt pan with non-stick baking spray. Get into all those nooks and crannies—I mean really coat it. Nothing’s worse than a cake that won’t release.
- Whisk the dry ingredients together. In your large bowl, combine 2 cups all-purpose flour, 1 teaspoon baking soda, 1 teaspoon baking powder, ½ teaspoon salt, 2 teaspoons pumpkin pie spice, and 1 teaspoon cinnamon. Whisk until everything is evenly distributed. This takes about 30 seconds. Set aside.
- Mix the wet ingredients. In your medium bowl, whisk together ½ cup melted butter (make sure it’s not hot—just melted and cooled), 1 cup granulated sugar, and ½ cup packed brown sugar. Whisk until smooth and combined, about 1 minute. The mixture should look like wet sand.
- Add the eggs and vanilla. Crack in 2 room-temperature eggs, one at a time, whisking after each. Then add 2 teaspoons vanilla extract. Whisk until the mixture is pale and slightly thickened, about 2 minutes. It should look like a thin caramel sauce.
- Incorporate the pumpkin and sour cream. Add the entire can of pumpkin puree and ¼ cup sour cream. Whisk until smooth. Don’t overmix—just until no streaks remain. The batter will be thick and gorgeous, a deep orange color that smells like fall already.
- Combine wet and dry ingredients. Pour the wet mixture into the dry ingredients. Use your rubber spatula to fold everything together. Here’s the key: mix until just combined. A few streaks of flour are okay. Overmixing at this stage will make your cake tough, and we don’t want that.
- Fold in the chocolate chips. Add 1 cup semi-sweet chocolate chips and fold them in gently. I like to reserve about 2 tablespoons to sprinkle on top of the batter once it’s in the pan—this gives you those pretty chocolate chips on top of the cake.
- Pour the batter into the prepared pan. Use your spatula to spread it evenly. Give the pan a gentle tap on the counter to release any air bubbles. Sprinkle the reserved chocolate chips on top.
- Bake for 45-55 minutes. Start checking at 45 minutes. The cake is done when a wooden skewer inserted into the center comes out clean or with just a few moist crumbs. If you hit a chocolate chip, try a different spot. The top should be golden brown and spring back when lightly touched.
- Cool in the pan for 15 minutes. Set the pan on a cooling rack. This rest time is crucial—it lets the cake firm up so it doesn’t fall apart when you flip it. Don’t skip this step, no matter how impatient you are.
- Flip the cake out onto the rack. Place the cooling rack on top of the pan, hold them together firmly, and flip. Lift the pan off gently. If it sticks, give the pan a gentle tap. Let the cake cool completely before glazing, about 1 hour.
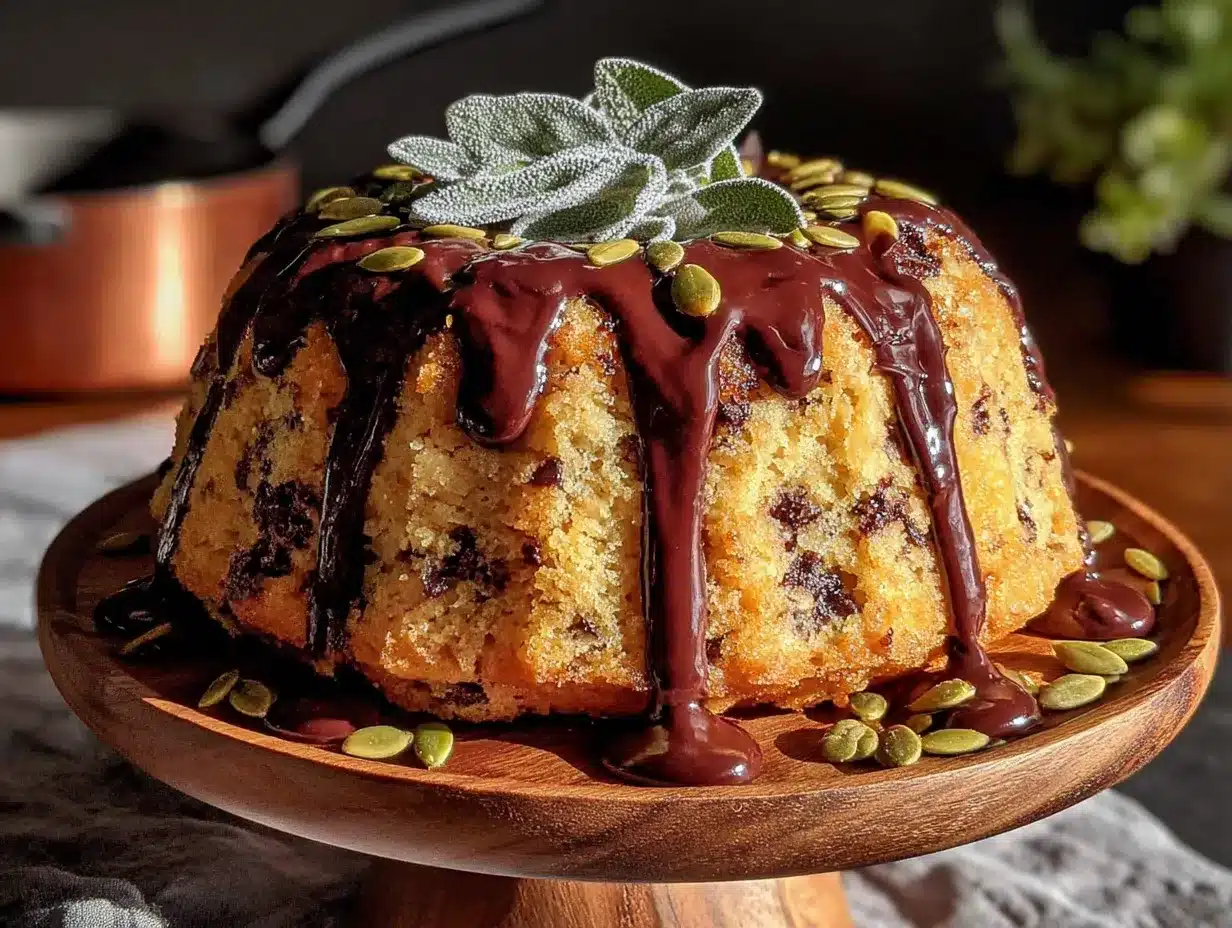
- Make the glaze (optional). In a small bowl, whisk together 1 cup sifted powdered sugar, 2 tablespoons milk, and ½ teaspoon vanilla extract. Add more milk a teaspoon at a time until you reach a pourable consistency. Drizzle over the cooled cake. Let the glaze set for about 15 minutes before slicing.
Cooking Tips & Techniques
I’ve made this cake more times than I can count, and let me tell you—I’ve learned some things the hard way. Here’s what I wish someone had told me the first time.
Don’t overmix the batter. This is the number one mistake people make with quick breads and cakes. Once you add the flour to the wet ingredients, you’re developing gluten. Too much gluten means a tough, dense cake. Mix until you don’t see dry flour anymore, then stop. I’ve ruined a batch by getting distracted and overmixing—it came out like a hockey puck.
Room temperature ingredients matter. I know, I know, you’re busy. But cold eggs and cold sour cream won’t blend smoothly into your batter. You’ll end up with lumps. Leave your eggs and sour cream on the counter for 30 minutes before you start. Or if you’re like me and forget, place the eggs in a bowl of warm water for 5 minutes.
Grease that pan like you mean it. Bundt pans are notorious for sticking. Use a baking spray that contains flour—regular cooking spray isn’t enough. I use Baker’s Joy and I’ve never had a cake stick since. Get into every crevice. I mean it—every single one.
Check for doneness properly. A toothpick test is your best friend, but chocolate chips can trick you. If you insert a skewer and it comes back with melted chocolate, test in a different spot. Look for clean or with just a few crumbs. The cake should also pull away slightly from the edges of the pan.
Let it cool before glazing. I know you want that drizzle immediately. But if you glaze a warm cake, the glaze will melt and slide right off, pooling at the bottom. Wait until the cake is completely cool—about an hour. Your patience will be rewarded with beautiful, defined drips.
Timing strategy: I like to make this cake the night before I need it. It actually tastes better the next day—the flavors meld together and the texture becomes even more moist. Just wrap it tightly in plastic wrap once it’s completely cool, and glaze it the next morning.
Variations & Adaptations
One of the best things about this recipe is how flexible it is. Here are some variations I’ve tried and loved:
Gluten-Free Version: Swap the all-purpose flour with a 1:1 gluten-free baking blend. I’ve had great results with King Arthur Measure for Measure. Add an extra tablespoon of sour cream to help with moisture, since gluten-free flours tend to dry out faster.
Dairy-Free Version: Use melted coconut oil instead of butter, and substitute the sour cream with a dairy-free yogurt or coconut cream. The texture will be slightly different—a bit more tender—but still delicious. I made this for a friend with dairy allergies and she asked for the recipe before she even finished her slice.
Add Nuts: Fold in ½ cup of chopped pecans or walnuts along with the chocolate chips. Toast them first in a dry pan for 3-4 minutes to bring out their flavor. The crunch adds a lovely contrast to the soft cake.
Spice It Up: Add ¼ teaspoon of ground ginger or cloves to the spice mix for a more complex flavor profile. I did this accidentally once (grabbed the wrong jar) and it was honestly amazing.
Change the Chocolate: White chocolate chips create a beautiful contrast against the orange cake. Dark chocolate chips (60% cacao or higher) give a more sophisticated, less sweet result. I’ve even used chopped chocolate bars when I ran out of chips—worked perfectly.
Make It a Loaf: Pour the batter into a greased 9×5-inch loaf pan and bake for 55-65 minutes. Check at 55 minutes and go from there. The loaf version is great for slicing and toasting for breakfast (yes, I’ve done this, no regrets).
Pumpkin Chocolate Chip Muffins: Divide the batter among 12 lined muffin cups and bake at 350°F for 18-22 minutes. These freeze beautifully and make perfect grab-and-go breakfasts.
Serving & Storage Suggestions
Serving: This cake is best at room temperature. If you’ve glazed it, let the glaze set completely before slicing. Use a serrated knife for clean cuts—a regular knife will squish the cake. Serve slices on their own or with a dollop of whipped cream for extra indulgence.
For a truly decadent presentation, dust the top with a little extra cinnamon or powdered sugar before serving. I like to arrange the slices on a wooden board with some fresh rosemary sprigs and a few whole pecans for that cozy fall aesthetic.
What to Serve With It: A hot cup of coffee or chai tea is perfect. For a dessert spread, pair it with vanilla ice cream or a drizzle of caramel sauce. I’ve also served it alongside a cheese board at a fall gathering—the sweetness balances beautifully with sharp cheddar.
Storage: Keep the cake in an airtight container at room temperature for up to 3 days. If you’ve glazed it, let the glaze set before storing, and place a piece of wax paper between the cake and the lid to prevent sticking.
Freezing: This cake freezes like a dream. Wrap the completely cooled, unglazed cake tightly in plastic wrap, then in aluminum foil. Freeze for up to 3 months. When you’re ready to serve, thaw overnight in the refrigerator, bring to room temperature, then glaze. The flavor actually improves after freezing—the spices have time to meld.
Reheating: For that fresh-from-the-oven experience, warm individual slices in the microwave for 15-20 seconds. Or place slices on a baking sheet in a 300°F oven for 5-7 minutes. The chocolate chips get all melty again. Be careful not to overheat or the cake will dry out.
Flavor Development: Honestly, this cake tastes better on day two. The pumpkin and spice flavors deepen overnight. If you can resist eating it the day you make it, you’re stronger than I am. But if you can wait, you’ll be rewarded.
Nutritional Information & Benefits
Here’s the approximate nutritional breakdown per slice (based on 12 servings, without glaze):
- Calories: 320
- Total Fat: 14g
- Saturated Fat: 8g
- Cholesterol: 55mg
- Sodium: 280mg
- Total Carbohydrates: 47g
- Dietary Fiber: 2g
- Sugars: 28g
- Protein: 5g
Health Benefits: Pumpkin is packed with vitamin A (beta-carotene), which supports eye health and immune function. It’s also a good source of fiber, which helps with digestion. The chocolate chips provide antioxidants, and the eggs add protein. Is this a health food? No. But it’s a dessert that gives you a little something extra beyond just sugar and butter.
Dietary Considerations: This recipe can be made gluten-free and dairy-free with simple substitutions (see variations section). It contains eggs, dairy, and gluten in its standard form. The pumpkin adds a serving of vegetables (yes, I count it) and makes the cake more nutrient-dense than a standard pound cake.
My Take: I believe in balance. This cake is a treat, not a daily breakfast. But I feel better about serving it knowing that it has real food ingredients—pumpkin, eggs, butter—rather than artificial flavors and preservatives. It’s homemade, it’s real, and it’s worth every single calorie.
Frequently Asked Questions
Can I use pumpkin pie filling instead of pumpkin puree?
No, please don’t. Pumpkin pie filling is pre-sweetened and spiced, which will throw off the sugar and spice amounts in this recipe. Stick with 100% pure pumpkin puree. Look for the label that says “pumpkin” not “pumpkin pie mix.”
My cake stuck to the pan! What did I do wrong?
This happens to the best of us. Most likely, you didn’t grease the pan thoroughly enough. Use a baking spray that contains flour, and get into every crevice. Also, make sure you let the cake cool in the pan for exactly 15 minutes—not less, not more. If it’s still stuck after that, gently run a thin spatula around the edges and try tapping the pan on the counter.
Can I make this cake ahead of time?
Absolutely! In fact, I prefer it. Make the cake a day ahead, wrap it tightly in plastic wrap once completely cool, and store at room temperature. Glaze it the day you’re serving. The flavors deepen overnight and the texture stays perfectly moist.
Why did my cake turn out dense and heavy?
Two common culprits: overmixing the batter and too much flour. Mix only until the flour disappears—overmixing develops gluten and makes the cake tough. When measuring flour, spoon it into your measuring cup and level it off. Scooping directly from the bag packs in too much flour, which leads to a dense cake.
Can I use fresh pumpkin instead of canned?
Yes, but you’ll need to cook and puree it first. Fresh pumpkin has more water than canned, so you’ll want to strain the puree through cheesecloth or a fine-mesh sieve to remove excess moisture. I’ve done this and it works, but canned pumpkin is more consistent and saves a lot of time. I usually stick with canned.
Conclusion
This Perfect Chocolate Chip Pumpkin Bundt Cake has become my fall baking staple for good reason. It’s the recipe that saves you when you forget about the bake sale, when company shows up unexpectedly, or when you just need something warm and comforting on a chilly autumn afternoon. It’s simple enough for a Tuesday night but impressive enough for Thanksgiving dessert.
What I love most about this cake is how forgiving it is. You can swap ingredients, change the add-ins, make it gluten-free, turn it into muffins—and it still works. It’s the kind of recipe that becomes yours after you make it a few times. You’ll start tweaking it, adding your own touches, remembering where you were the first time you made it.
So go ahead—preheat that oven and dig out your Bundt pan. Whether you’re making it for a crowd or just for yourself with a cup of coffee, I promise this cake will deliver. And when someone asks for the recipe (they will), you can smile and say it’s your little secret. Well, our secret now.
I’d love to hear how yours turns out! Drop a comment below and let me know if you tried any variations, or tag me in your photos on social media. Happy baking, friends.
Pin This Recipe!
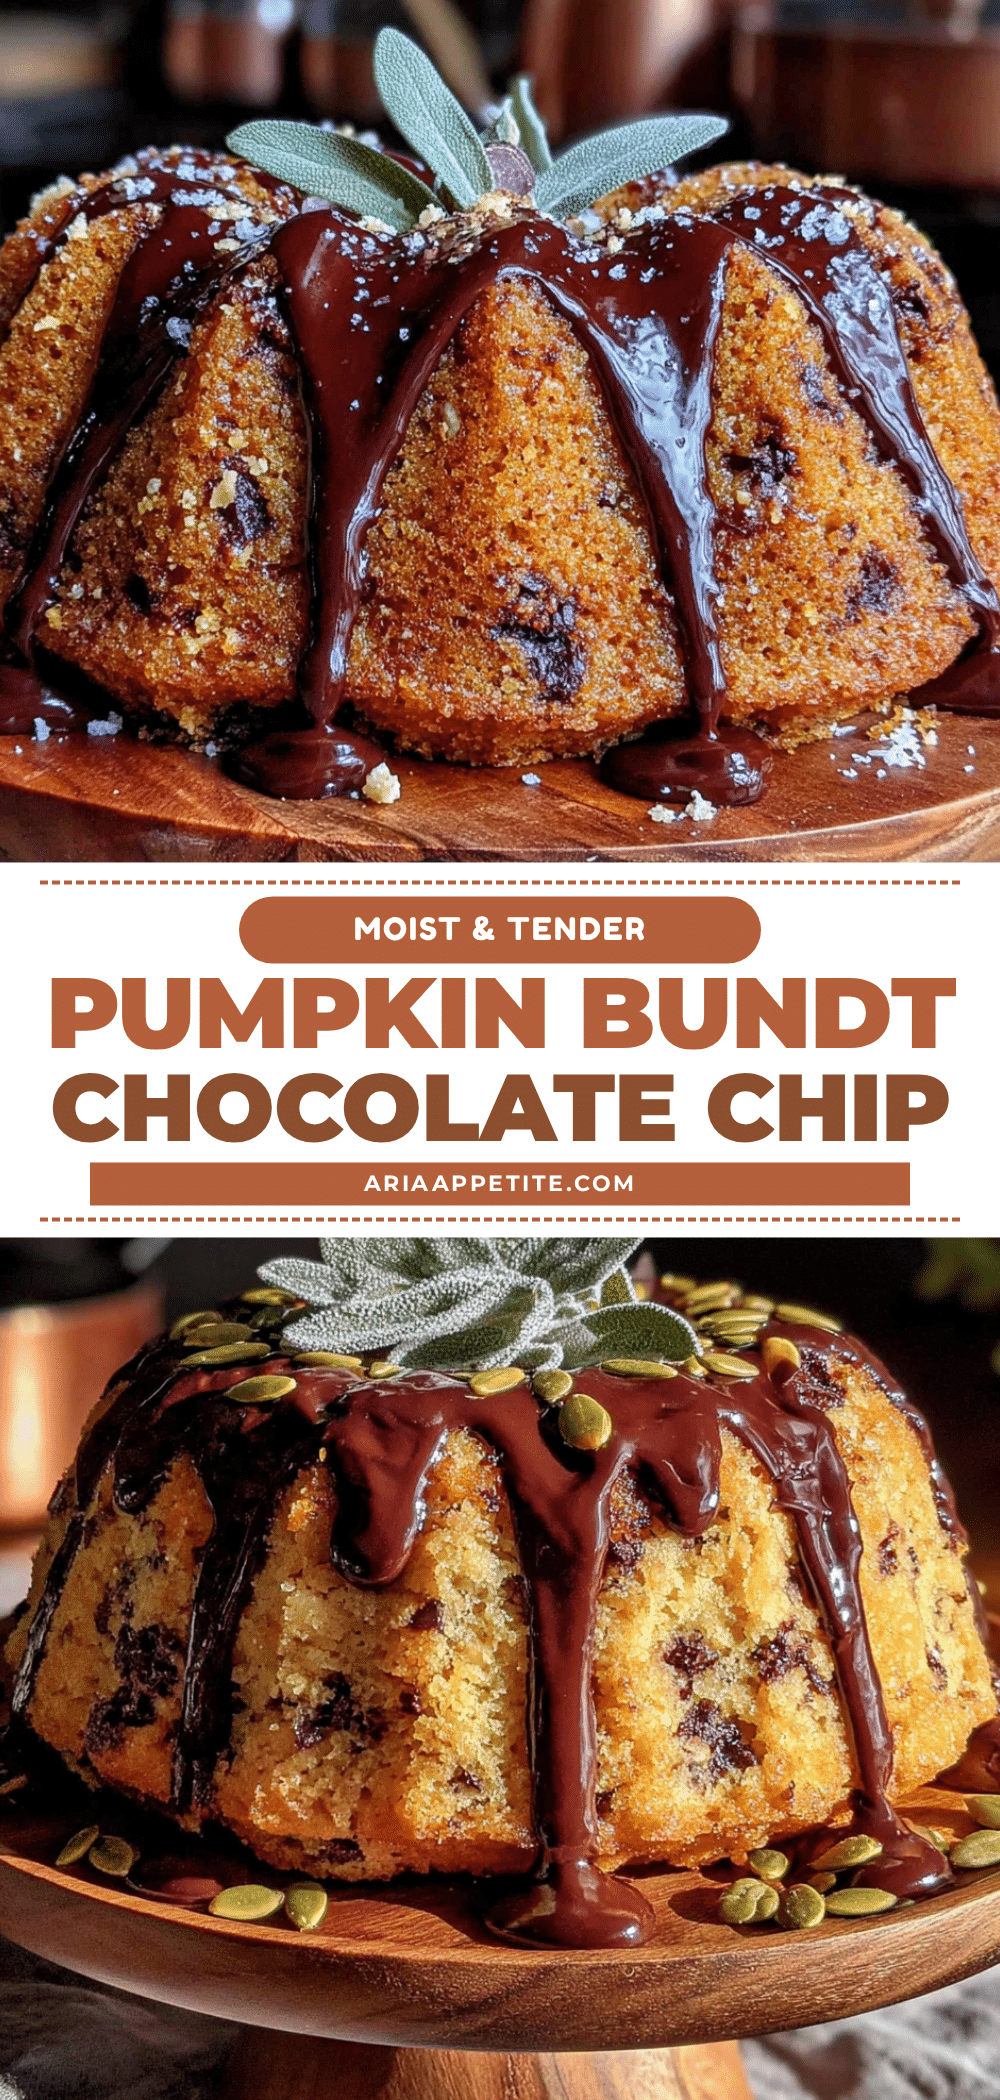
Perfect Chocolate Chip Pumpkin Bundt Cake: Easy Fall Recipe
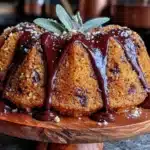
This Perfect Chocolate Chip Pumpkin Bundt Cake is a quick and easy fall dessert that’s moist, tender, and packed with chocolate chips and warm pumpkin spice. It’s the perfect crowd-pleaser for bake sales, Thanksgiving, or any autumn gathering.
- Prep Time: 20 minutes
- Cook Time: 50 minutes
- Total Time: 1 hour 10 minutes
- Yield: 12 servings 1x
- Category: Dessert
- Cuisine: American
Ingredients
- 2 cups (240g) all-purpose flour, spooned and leveled
- 1 teaspoon baking soda
- 1 teaspoon baking powder
- ½ teaspoon salt
- 2 teaspoons pumpkin pie spice
- 1 teaspoon cinnamon
- ½ cup (1 stick, 113g) unsalted butter, melted and slightly cooled
- 1 cup (200g) granulated sugar
- ½ cup (100g) packed light brown sugar
- 2 large eggs, room temperature
- 2 teaspoons vanilla extract
- 1 can (15 oz, about 425g) 100% pure pumpkin puree
- ¼ cup (60g) sour cream, room temperature
- 1 cup (175g) semi-sweet chocolate chips
- 1 cup (120g) powdered sugar, sifted (for glaze)
- 2–3 tablespoons milk (for glaze)
- ½ teaspoon vanilla extract (for glaze)
- Pinch of cinnamon (optional, for glaze)
Instructions
- Preheat your oven to 350°F (175°C). Position the rack in the center. Generously spray a 10-cup Bundt pan with non-stick baking spray containing flour, getting into all crevices.
- In a large bowl, whisk together 2 cups all-purpose flour, 1 teaspoon baking soda, 1 teaspoon baking powder, ½ teaspoon salt, 2 teaspoons pumpkin pie spice, and 1 teaspoon cinnamon until evenly distributed.
- In a medium bowl, whisk together ½ cup melted butter, 1 cup granulated sugar, and ½ cup packed brown sugar until smooth and combined, about 1 minute.
- Add 2 room-temperature eggs, one at a time, whisking after each. Then add 2 teaspoons vanilla extract and whisk until pale and slightly thickened, about 2 minutes.
- Add the entire can of pumpkin puree and ¼ cup sour cream. Whisk until smooth, being careful not to overmix.
- Pour the wet mixture into the dry ingredients. Use a rubber spatula to fold together until just combined—a few streaks of flour are okay. Do not overmix.
- Fold in 1 cup semi-sweet chocolate chips gently. Reserve about 2 tablespoons to sprinkle on top of the batter once in the pan.
- Pour the batter into the prepared Bundt pan and spread evenly. Tap the pan gently on the counter to release air bubbles. Sprinkle reserved chocolate chips on top.
- Bake for 45-55 minutes, starting to check at 45 minutes. The cake is done when a wooden skewer inserted into the center comes out clean or with a few moist crumbs. The top should be golden brown and spring back when lightly touched.
- Cool in the pan on a cooling rack for 15 minutes. This rest time is crucial for the cake to firm up.
- Place the cooling rack on top of the pan, hold firmly, and flip. Lift the pan off gently. Let the cake cool completely before glazing, about 1 hour.
- For the glaze: In a small bowl, whisk together 1 cup sifted powdered sugar, 2 tablespoons milk, and ½ teaspoon vanilla extract. Add more milk a teaspoon at a time until pourable. Drizzle over the cooled cake. Let the glaze set for about 15 minutes before slicing.
Notes
For best results, use room temperature ingredients. Do not overmix the batter. Grease the Bundt pan thoroughly with a baking spray containing flour. The cake tastes even better the next day—wrap tightly in plastic wrap once cool and glaze before serving. For a dairy-free version, use melted coconut oil and dairy-free yogurt. For gluten-free, use a 1:1 gluten-free baking blend.
Nutrition
- Serving Size: 1 slice (1/12 of cak
- Calories: 320
- Sugar: 28
- Sodium: 280
- Fat: 14
- Saturated Fat: 8
- Carbohydrates: 47
- Fiber: 2
- Protein: 5
Keywords: pumpkin bundt cake, chocolate chip pumpkin cake, easy fall dessert, pumpkin cake recipe, bundt cake, fall baking, pumpkin chocolate chip