Love this? Save it for later!
Share the inspiration with your friends
I wasn’t expecting dessert advice from a plumber, but there I was, knee-deep in a kitchen renovation, listening to Marco explain exactly how to make the perfect salted caramel apple cheesecake bars. He was crouched under my sink, wrench in hand, and somehow between explaining pipe fittings and water pressure, he started talking about his grandmother’s apple orchard in upstate New York. Honestly, I was more focused on the dust and the fact that I hadn’t had a functioning sink in three days. But Marco—he was insistent. “You need to make her bars,” he said, wiping grease off his forehead. “They’re the only thing that got us through harvest season.”
I nodded politely, assuming this was just plumber small talk. But the next day, he showed up with a crumpled piece of paper, the edges stained with what I hoped was caramel. The recipe was handwritten in cursive, with notes like “add more salt if you’re feeling brave” scrawled in the margins. I mean, how could I not try it? So that weekend, with my sink still disconnected and a temporary bucket system in place, I made my first batch of these salted caramel apple cheesecake bars. The kitchen was a mess—flour on the floor, caramel stuck to the stove—but that first bite? Worth every bit of chaos.
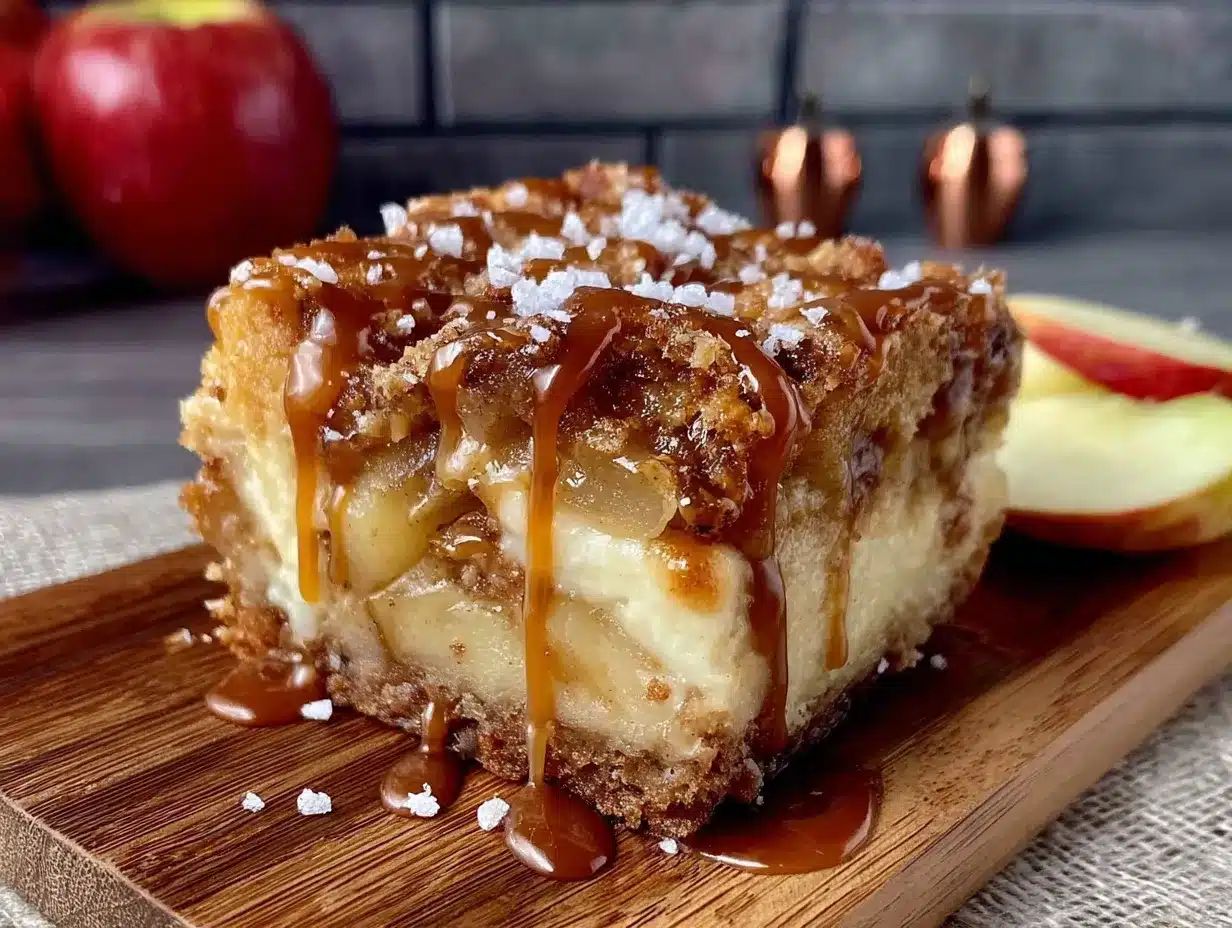
The combination of buttery shortbread, creamy cheesecake, tender apples, and that rich, salty caramel is the kind of thing that makes you close your eyes after the first bite. And the best part? For all their impressive flavor, these bars are surprisingly easy to pull together. No water bath, no complicated techniques—just honest, crowd-pleasing dessert magic. Maybe you’ve been there, staring at a pile of apples from a fall trip to the orchard, wondering what to do with them all. This is your answer. I’ve been making these bars for three years now, and they’ve never failed me. Not once.
Why You’ll Love This Recipe
Let me tell you why these salted caramel apple cheesecake bars have earned a permanent spot in my dessert rotation. After testing this recipe at least a dozen times—for potlucks, Thanksgiving, random Tuesday cravings—I can confidently say it delivers on every level. Here’s what makes it special:
- Quick & Easy: From start to finish, these bars come together in about an hour, with only 20 minutes of active prep. Perfect for those weeknights when you need a dessert that looks like you spent hours on it.
- Simple Ingredients: You probably already have most of what you need in your pantry. No fancy extracts or hard-to-find items—just butter, cream cheese, apples, and a few pantry staples.
- Perfect for Fall Gatherings: Whether it’s a Friendsgiving, a Sunday dinner, or just a cozy night in, these bars scream autumn comfort. They’re the kind of dessert that makes people ask for the recipe before they’ve even finished their first slice.
- Crowd-Pleaser: I’ve served these to kids, picky eaters, and serious dessert connoisseurs. The verdict is always the same—disappearing plates and requests for seconds. The salted caramel adds that grown-up touch without being overwhelming.
- Unbelievably Delicious: The texture is what gets me every time. That crunchy shortbread crust, the velvety cheesecake layer, the tender apple filling, and the gooey caramel on top—it’s a symphony of textures that somehow all work together perfectly.
What sets this recipe apart from the dozens of apple cheesecake bars out there is the technique. Instead of a complicated caramel sauce that can seize or separate, I use a simple stovetop method that gives you that deep, buttery caramel flavor without the stress. And the secret ingredient? A pinch of flaky sea salt right at the end. It sounds small, but it changes everything—it cuts through the sweetness and makes each bite more complex. This isn’t just another apple dessert; it’s the apple dessert you’ll come back to year after year.
I’ve tested this with Granny Smith, Honeycrisp, and even Fuji apples, and honestly, they all work beautifully. The key is to not overthink it. This recipe is forgiving, adaptable, and genuinely foolproof. Even on the first try, you’ll get something that looks and tastes like it came from a bakery. And isn’t that what we all want on a busy weeknight?
What Ingredients You Will Need
This recipe uses simple, wholesome ingredients to deliver bold flavor and satisfying texture without the fuss. Most of these are pantry staples, so you might not even need a trip to the store. Here’s everything you’ll need, broken down by component:
For the Shortbread Crust
- 1 ½ cups all-purpose flour (spooned and leveled for accuracy)
- ½ cup granulated sugar
- ½ cup unsalted butter, cold and cubed (I prefer Kerrygold for its rich flavor)
- ¼ teaspoon salt (fine sea salt works best)
For the Cheesecake Layer
- 16 oz cream cheese, softened (two 8-ounce blocks, full-fat for best texture)
- ½ cup granulated sugar
- 2 large eggs, room temperature (cold eggs can make the batter lumpy)
- 1 teaspoon vanilla extract (pure, not imitation, for a deeper flavor)
- 2 tablespoons all-purpose flour (helps stabilize the cheesecake)
For the Apple Layer
- 3 medium apples, peeled and thinly sliced (about 2 cups; Granny Smith or Honeycrisp are my go-to choices)
- 2 tablespoons granulated sugar
- 1 teaspoon ground cinnamon
- ¼ teaspoon ground nutmeg (freshly grated if you have it)
- 1 tablespoon all-purpose flour (to absorb excess moisture)
For the Salted Caramel Sauce
- ½ cup unsalted butter
- 1 cup packed light brown sugar
- ½ cup heavy cream (room temperature to prevent seizing)
- 1 teaspoon vanilla extract
- ½ teaspoon flaky sea salt (like Maldon; plus extra for sprinkling on top)
Ingredient Notes & Substitutions: If you need a gluten-free option, substitute the all-purpose flour with a 1:1 gluten-free baking blend. For a dairy-free version, use vegan butter and dairy-free cream cheese—just know the texture will be slightly different. I’ve tried this with oat milk cream cheese, and while it works, the bars won’t be as firm. For the apples, avoid Red Delicious or Gala as they can turn mushy. Stick with firmer varieties that hold their shape during baking. And if you’re out of heavy cream for the caramel, you can use half-and-half in a pinch, but the sauce will be a bit thinner.
Equipment Needed
You don’t need a professional kitchen to make these salted caramel apple cheesecake bars. Here’s what you’ll need:
- 9×13-inch baking pan (metal or glass both work; I prefer metal for even baking)
- Parchment paper (for easy removal and cleanup)
- Electric hand mixer or stand mixer (for the cheesecake layer)
- Medium saucepan (for the caramel sauce)
- Large mixing bowl (for the crust)
- Medium mixing bowl (for the apples)
- Spatula or wooden spoon
- Sharp knife and cutting board (for slicing apples)
- Measuring cups and spoons
- Whisk (for the caramel)
If you don’t have a hand mixer, you can mix the cheesecake filling by hand with a whisk, but it’ll take some elbow grease to get it smooth. I learned this the hard way when my mixer broke mid-recipe—my arm got a serious workout, but the bars still turned out great. For the pan, a glass dish works fine but may require an extra 5 minutes of baking time. And honestly, if you don’t have parchment paper, you can grease the pan generously with butter—just be prepared for a bit of sticking around the edges.
Preparation Method
Let’s get baking! I’ve broken this down into clear steps with time estimates and sensory cues so you know exactly what to look for at each stage. Trust me, if I can make these with a plumber giving me instructions over the sound of a pipe wrench, you can absolutely nail this.
Step 1: Preheat and Prep (5 minutes)
Preheat your oven to 350°F (175°C). Line your 9×13-inch baking pan with parchment paper, leaving some overhang on the long sides—this will be your “handle” to lift the bars out later. Lightly grease the parchment with butter or non-stick spray.
Step 2: Make the Shortbread Crust (10 minutes)
In a large mixing bowl, combine the flour, sugar, and salt. Add the cold, cubed butter. Using a pastry cutter or your fingertips, work the butter into the flour mixture until it resembles coarse crumbs with some pea-sized butter pieces remaining. Don’t overwork it—you want that shortbread texture. Press the mixture evenly into the bottom of your prepared pan. Bake for 15-18 minutes, until the edges are lightly golden. The crust should feel firm to the touch but not fully browned. Set aside to cool slightly while you prepare the filling.
Step 3: Prepare the Apple Filling (10 minutes)
While the crust bakes, peel and thinly slice your apples. I like them about ⅛-inch thick—thin enough to soften during baking but thick enough to hold their shape. In a medium bowl, toss the apple slices with sugar, cinnamon, nutmeg, and flour. The flour helps absorb the apple juices so your cheesecake layer doesn’t get watery. Let this sit while you make the cheesecake filling. You’ll notice the apples start to release some liquid—that’s normal. Don’t drain it; the flour will thicken it during baking.
Step 4: Make the Cheesecake Filling (10 minutes)
In a large bowl, beat the softened cream cheese with an electric mixer until smooth and creamy, about 2 minutes. Add the sugar and beat until combined, scraping down the sides as needed. Add the eggs one at a time, beating on low speed after each addition—overmixing at this stage can incorporate too much air, leading to cracks. Add the vanilla extract and flour, and mix just until combined. The batter should be smooth, thick, and velvety. Give it a taste (yes, raw eggs aside, I always sneak a tiny bit—it’s that good).
Step 5: Assemble the Bars (5 minutes)
Pour the cheesecake filling over the slightly cooled crust and spread it evenly with a spatula. Arrange the apple slices on top in an even layer—I like to overlap them slightly for a pretty presentation. Don’t press them into the cheesecake; let them sit on top. Bake for 30-35 minutes, until the edges are set and the center is slightly jiggly (like a firm jello). The cheesecake should be pale golden around the edges. A toothpick inserted near the center should come out with a few moist crumbs, not wet batter.
Step 6: Make the Salted Caramel Sauce (15 minutes)
While the bars bake, make your caramel. In a medium saucepan over medium heat, melt the butter. Add the brown sugar and whisk until combined. Cook for 2 minutes, whisking constantly—the mixture will bubble and thicken. Slowly pour in the heavy cream while whisking; it will bubble up vigorously, so be careful. Continue cooking for another 2-3 minutes, until the sauce is smooth and has deepened to a rich amber color. Remove from heat and stir in the vanilla extract and flaky sea salt. Let it cool for 5 minutes—it will thicken as it cools.
Step 7: Finish and Cool (30 minutes + chilling time)
Once the bars come out of the oven, let them cool in the pan for 10 minutes. Then, drizzle the warm caramel sauce generously over the top. Use a spatula to spread it evenly if needed. Sprinkle a little extra flaky sea salt on top for that signature salty-sweet contrast. Let the bars cool completely at room temperature (about 30 minutes), then refrigerate for at least 2 hours before slicing. This chilling step is crucial—it makes the bars firm enough to cut cleanly. I know it’s hard to wait, but trust me on this one.
Cooking Tips & Techniques
After making these salted caramel apple cheesecake bars more times than I can count, I’ve collected a few hard-earned tips that make a real difference. Let me share them so you don’t have to learn the hard way like I did.
Room temperature ingredients matter. I cannot stress this enough. Cold cream cheese leads to lumpy batter, and cold eggs can cause the mixture to curdle. Take your cream cheese and eggs out of the fridge at least 30 minutes before you start. If you’re in a hurry (and let’s face it, who isn’t?), you can soften cream cheese in the microwave at 50% power in 10-second bursts. Just watch it carefully—you want it soft, not melted.
Don’t overmix the cheesecake batter. I learned this after my first batch came out with cracks big enough to park a truck in. Overmixing incorporates too much air, which expands during baking and then collapses, causing cracks. Mix on low speed and stop as soon as the ingredients are combined. A few small lumps are totally fine—they’ll smooth out during baking.
Use a water bath alternative. Traditional cheesecakes use a water bath to prevent cracking, but for bars, it’s unnecessary. Instead, place a shallow pan of hot water on the oven’s bottom rack while the bars bake. The steam creates a humid environment that helps the cheesecake bake evenly without drying out. It’s a trick my grandmother used, and it works like a charm.
Watch your caramel closely. Caramel can go from perfect to burnt in seconds. When you add the heavy cream, the mixture will bubble up dramatically—this is normal. Keep whisking and don’t walk away. The sauce is done when it coats the back of a spoon and leaves a clean trail when you run your finger through it. If it seems too thin, don’t worry; it will thicken as it cools.
Slice with a hot knife. For clean, bakery-worthy slices, run your knife under hot water, dry it, then slice. Wipe the blade clean between cuts. This prevents the cheesecake from sticking and gives you those gorgeous, Instagram-worthy layers. I learned this trick after my first batch looked like a crime scene.
Variations & Adaptations
One of the things I love about this recipe is how adaptable it is. Here are some variations I’ve tried and loved:
Gluten-Free Version: Substitute the all-purpose flour in the crust and cheesecake with a 1:1 gluten-free baking blend. I’ve used Bob’s Red Mill with great results. The texture will be slightly more crumbly, but the flavor is just as good. For the apple layer, use cornstarch instead of flour to thicken the juices.
Vegan Option: Use vegan butter and dairy-free cream cheese (I like Miyoko’s for its creamy texture). Replace the eggs with ¼ cup of unsweetened applesauce or a flax egg (1 tablespoon ground flaxseed mixed with 3 tablespoons water). The caramel can be made with coconut cream instead of heavy cream. The texture will be softer, but the flavor is still incredible.
Seasonal Twists: In the fall, add ½ cup of chopped pecans or walnuts to the crust for extra crunch. In the summer, swap the apples for sliced pears or peaches—just reduce the sugar slightly since they’re sweeter. For a winter holiday version, add ¼ teaspoon of ground ginger and a pinch of cloves to the apple mixture.
Flavor Variations: Try adding 1 tablespoon of bourbon or dark rum to the caramel sauce for a boozy kick. Or swirl ¼ cup of salted caramel into the cheesecake batter before baking for a marbled effect. For a chocolate twist, sprinkle ½ cup of mini chocolate chips over the cheesecake layer before adding the apples.
Low-Sugar Option: Reduce the sugar in the cheesecake layer to ¼ cup and use a sugar substitute like monk fruit sweetener in the caramel. The apples will still provide natural sweetness. This version is still delicious, just a bit less indulgent.
Serving & Storage Suggestions
These salted caramel apple cheesecake bars are versatile when it comes to serving. Here’s how to get the most out of them:
Serving Temperature: I prefer these bars served slightly chilled, straight from the fridge. The cheesecake layer is firm and creamy, and the caramel is set but still soft. If you prefer a softer texture, let them sit at room temperature for 10-15 minutes before serving. For an extra indulgence, warm a slice in the microwave for 10 seconds—it softens the apples and makes the caramel gooey.
Presentation Ideas: Cut into 12 even bars and arrange on a platter. Drizzle a little extra caramel on top and sprinkle with flaky sea salt. A dollop of whipped cream or a scoop of vanilla ice cream on the side takes these over the top. For a fall-themed presentation, garnish with a cinnamon stick or a few fresh apple slices.
Complementary Pairings: These bars pair beautifully with a cup of hot coffee, spiced chai, or a glass of cold milk. For a dessert spread, serve them alongside a warm apple crisp or a slice of classic pumpkin pie. They also work wonderfully as part of a Thanksgiving dessert table—they’re less fussy than pie but just as satisfying.
Storage Instructions: Store leftover bars in an airtight container in the refrigerator for up to 5 days. Place a sheet of parchment paper between layers to prevent sticking. The flavors actually deepen over time, so day-old bars are often even better. For longer storage, freeze the bars (without the caramel drizzle) for up to 3 months. Wrap each bar individually in plastic wrap, then place in a freezer-safe bag. Thaw overnight in the refrigerator before adding the caramel and serving.
Reheating Tips: To restore that just-baked texture, reheat individual bars in a 300°F oven for 5-7 minutes. The microwave works in a pinch but can make the crust soggy. If you’ve frozen the bars, let them thaw in the fridge overnight, then warm them gently before serving.
Nutritional Information & Benefits
While these salted caramel apple cheesecake bars are definitely a treat, they do offer some redeeming qualities. Here’s a rough nutritional breakdown per bar (based on 12 servings):
| Nutrient | Amount per Serving |
|---|---|
| Calories | 380 |
| Total Fat | 22g |
| Saturated Fat | 13g |
| Cholesterol | 85mg |
| Sodium | 280mg |
| Total Carbohydrates | 42g |
| Dietary Fiber | 2g |
| Sugars | 30g |
| Protein | 5g |
Health Benefits: Apples are a great source of dietary fiber and vitamin C, and they contain antioxidants that support heart health. The cinnamon in this recipe has anti-inflammatory properties and can help regulate blood sugar. Cream cheese provides calcium and protein, though it’s also high in saturated fat—so moderation is key. If you’re watching your sugar intake, you can reduce the caramel drizzle or use a sugar substitute in the filling.
Dietary Considerations: This recipe contains gluten, dairy, and eggs. For gluten-free, dairy-free, or vegan options, see the variations section above. These bars are not suitable for a low-carb or keto diet due to the sugar content. If you have nut allergies, the base recipe is nut-free, but be cautious with any added toppings or variations.
Honestly, I don’t make these bars every week—they’re a special occasion dessert for me. But when I do make them, I savor every bite. Life’s too short to skip dessert, right?
Conclusion
These salted caramel apple cheesecake bars have become my go-to fall dessert for a reason. They’re the perfect balance of sweet and salty, creamy and crunchy, indulgent and comforting. Every time I make them, I think of Marco and his grandmother’s orchard, and I smile. There’s something magical about a recipe that comes from an unexpected place and ends up becoming a staple in your kitchen.
I hope you give these bars a try—whether it’s for a holiday gathering, a weeknight treat, or just because you have a few apples that need using up. Don’t be afraid to make them your own. Add more caramel if you’re feeling brave (Marco’s words, not mine). Swap in your favorite apple variety. Serve them warm with ice cream. The beauty of this recipe is that it’s forgiving enough to adapt and reliable enough to impress.
If you do make these, I’d love to hear about it. Leave a comment below and let me know how they turned out—did you add any twists? Did your family love them? Share a photo on social media and tag me so I can see your creation. And if you’re looking for more fall dessert ideas, check out my easy apple crisp or no-bake pumpkin cheesecake for more seasonal inspiration.
Happy baking, friends. May your caramel be golden, your apples tender, and your dessert plate always full.
Frequently Asked Questions
Can I use store-bought caramel sauce instead of making it from scratch?
Absolutely! While homemade caramel has a deeper, more buttery flavor, a high-quality store-bought caramel sauce works in a pinch. Just warm it slightly before drizzling so it spreads easily. Look for one that lists cream and butter as ingredients for the best results.
Why did my cheesecake layer crack?
Cracks usually happen from overmixing the batter or overbaking. Make sure your cream cheese and eggs are at room temperature, and mix on low speed just until combined. Also, don’t overbake—the center should still be slightly jiggly when you take it out. The steam pan trick I mentioned in the tips section also helps prevent cracking.
Can I make these bars ahead of time?
Yes! These bars actually taste better the next day. You can make them up to 2 days in advance and store them in the refrigerator. Wait to drizzle the caramel until just before serving for the best texture and appearance. If you need to make them further ahead, freeze the bars without caramel for up to 3 months.
What’s the best apple variety for this recipe?
I recommend Granny Smith for their tartness that balances the sweet caramel, or Honeycrisp for their firm texture and natural sweetness. Fuji and Braeburn also work well. Avoid soft varieties like Red Delicious or McIntosh, as they can turn mushy during baking.
Can I double this recipe for a larger crowd?
Definitely! Double all ingredients and bake in a larger pan (about 12×17 inches) or two 9×13 pans. The baking time may increase by 5-10 minutes, so keep an eye on it. The bars will be slightly thinner but just as delicious. Perfect for potlucks or big family gatherings.
Pin This Recipe!
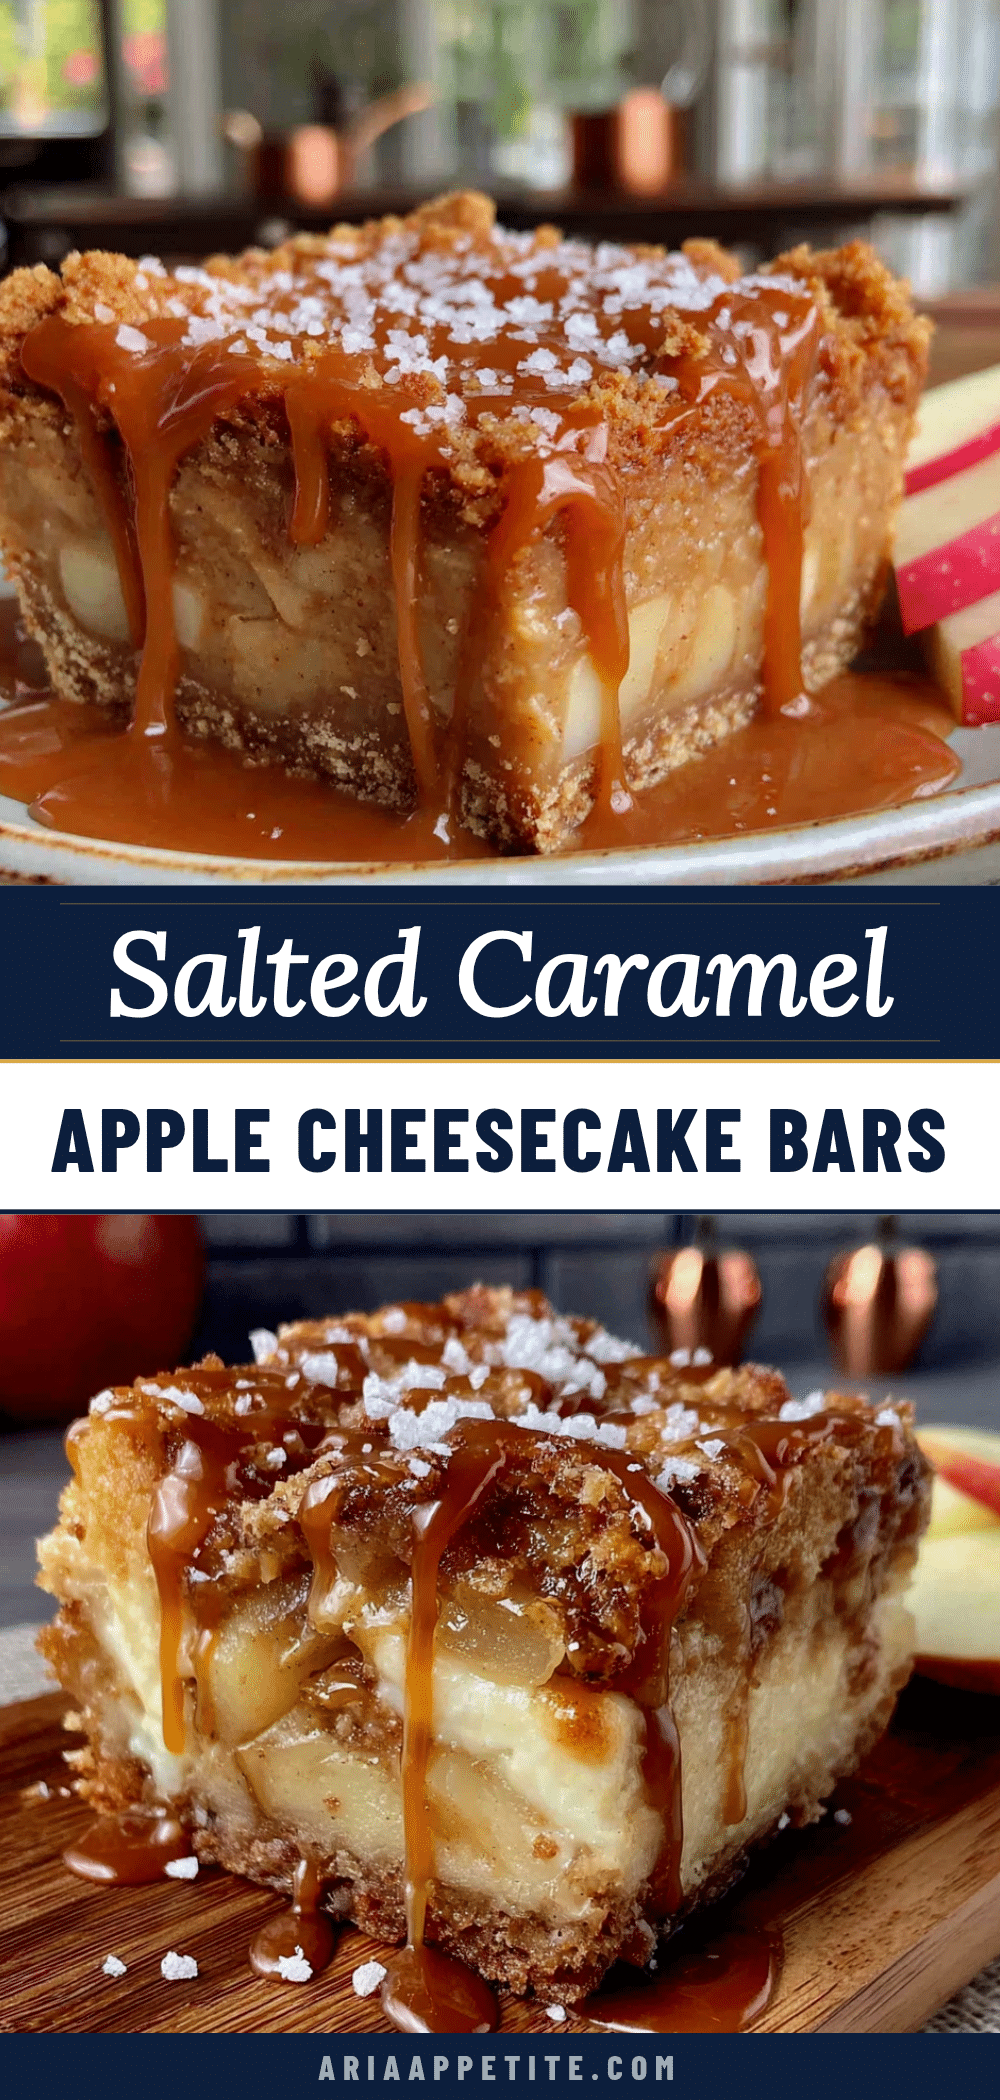
Easy Salted Caramel Apple Cheesecake Bars: Best Fall Dessert Recipe
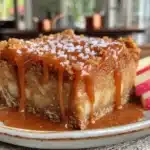
These salted caramel apple cheesecake bars combine a buttery shortbread crust, creamy cheesecake layer, tender apples, and rich salted caramel for the perfect fall dessert. Easy to make with simple ingredients, they’re a crowd-pleasing treat that looks impressive but comes together in about an hour.
- Prep Time: 20 minutes
- Cook Time: 45 minutes
- Total Time: 1 hour 5 minutes (plus 2 hours chilling)
- Yield: 12 servings 1x
- Category: Dessert
- Cuisine: American
Ingredients
- 1 ½ cups all-purpose flour (spooned and leveled)
- ½ cup granulated sugar
- ½ cup unsalted butter, cold and cubed
- ¼ teaspoon fine sea salt
- 16 oz cream cheese, softened (two 8-ounce blocks, full-fat)
- ½ cup granulated sugar
- 2 large eggs, room temperature
- 1 teaspoon pure vanilla extract
- 2 tablespoons all-purpose flour
- 3 medium apples, peeled and thinly sliced (about 2 cups; Granny Smith or Honeycrisp)
- 2 tablespoons granulated sugar
- 1 teaspoon ground cinnamon
- ¼ teaspoon ground nutmeg
- 1 tablespoon all-purpose flour
- ½ cup unsalted butter
- 1 cup packed light brown sugar
- ½ cup heavy cream, room temperature
- 1 teaspoon vanilla extract
- ½ teaspoon flaky sea salt (plus extra for sprinkling)
Instructions
- Preheat oven to 350°F (175°C). Line a 9×13-inch baking pan with parchment paper, leaving overhang on long sides. Lightly grease parchment with butter or non-stick spray.
- Make the shortbread crust: In a large bowl, combine 1 ½ cups flour, ½ cup sugar, and ¼ teaspoon salt. Add cold cubed butter. Using a pastry cutter or fingertips, work butter into flour mixture until it resembles coarse crumbs with some pea-sized butter pieces. Press evenly into prepared pan. Bake 15-18 minutes until edges are lightly golden. Set aside to cool slightly.
- Prepare apple filling: In a medium bowl, toss sliced apples with 2 tablespoons sugar, cinnamon, nutmeg, and 1 tablespoon flour. Let sit while making cheesecake filling.
- Make cheesecake filling: In a large bowl, beat softened cream cheese with electric mixer until smooth, about 2 minutes. Add ½ cup sugar and beat until combined. Add eggs one at a time, beating on low after each. Add 1 teaspoon vanilla and 2 tablespoons flour, mix just until combined. Batter should be smooth and thick.
- Assemble bars: Pour cheesecake filling over slightly cooled crust and spread evenly. Arrange apple slices on top in an even layer, slightly overlapping. Bake 30-35 minutes until edges are set and center is slightly jiggly. A toothpick near center should come out with moist crumbs.
- Make salted caramel sauce: In a medium saucepan over medium heat, melt ½ cup butter. Add brown sugar and whisk until combined. Cook 2 minutes, whisking constantly. Slowly pour in heavy cream while whisking (mixture will bubble). Cook 2-3 minutes until smooth and amber. Remove from heat, stir in 1 teaspoon vanilla and ½ teaspoon flaky sea salt. Let cool 5 minutes.
- Finish and cool: Let bars cool in pan 10 minutes. Drizzle warm caramel sauce over top, spread evenly. Sprinkle extra flaky sea salt on top. Cool completely at room temperature (about 30 minutes), then refrigerate at least 2 hours before slicing.
Notes
For clean slices, run knife under hot water and wipe clean between cuts. Room temperature ingredients are crucial for smooth cheesecake batter. Place a shallow pan of hot water on oven’s bottom rack while baking to prevent cracking. Caramel can be made ahead and stored in refrigerator for up to 2 weeks.
Nutrition
- Serving Size: 1 bar
- Calories: 380
- Sugar: 30
- Sodium: 280
- Fat: 22
- Saturated Fat: 13
- Carbohydrates: 42
- Fiber: 2
- Protein: 5
Keywords: salted caramel apple cheesecake bars, apple cheesecake bars, fall dessert, apple dessert, cheesecake bars, salted caramel, easy dessert recipe