Love this? Save it for later!
Share the inspiration with your friends
I was supposed to be making granola. That was the plan, anyway. I had the oats measured, the honey ready, and I was feeling pretty good about myself—like a real, organized person who meal preps on Sundays. Then my toddler decided the living room rug needed a full juice box baptism, and by the time I got back to the kitchen, I had already dumped the honey into the bowl without even thinking. No baking sheet. No oven preheated. Just a sticky, sweet mess staring back at me.
Honestly, I almost just threw it all in the trash. But I was tired, the rug was still wet, and I wasn’t about to waste a whole jar of good honey. So I grabbed some peanut butter, threw in a handful of chocolate chips, and pressed the whole thing into a pan. I figured I’d eat it with a spoon later and call it a win. What came out of the fridge an hour later was nothing like the plan—and better. Way better.
That first bite caught me off guard. It was chewy, sweet, and had just the right amount of crunch from the oats. My kid walked over, grabbed a piece, and actually said “more” without being asked. I mean, that never happens. I stood there in the kitchen, sticky-fingered and slightly disbelieving, realizing I had just stumbled onto something I’d be making for years.
Maybe you’ve been there—a kitchen fail that turns into a happy little accident. That’s exactly what these no-bake honey oat granola bars are. They’re the snack I didn’t know I needed, born from a distracted moment and a sticky mess. And now? I make them every single week.
Why You’ll Love This Recipe
Let me tell you why these homemade granola bars have earned a permanent spot in my kitchen. First off, they’re ridiculously easy. I’m talking no oven, no complicated steps, and zero special skills required. If you can stir and press, you can make these. I’ve tested this recipe about a dozen times now, tweaking the honey-to-oat ratio until it was just right, and I can say with confidence—this is the best version.
- Quick & Easy: Comes together in under 15 minutes. The hardest part is waiting for them to chill in the fridge.
- Simple Ingredients: You probably have everything in your pantry right now. Oats, honey, peanut butter, and a few mix-ins.
- Perfect for Busy Mornings: Grab one on your way out the door. They’re portable, mess-free, and actually filling.
- Crowd-Pleaser: Kids love them, adults love them, and they disappear fast at playdates or office snack tables.
- Unbelievably Delicious: The texture is chewy but not sticky, sweet but not cloying, with that nutty, toasty flavor from the oats.
What makes these different from other granola bar recipes? It’s the method. Instead of baking, you gently warm the honey and peanut butter together until they’re glossy and smooth. This creates a binder that holds the bars together without making them rock-hard. I’ve tried baking them before—honestly, they came out dry and crumbly. This no-bake approach keeps them soft and chewy, exactly the way a granola bar should be.
This recipe isn’t just good—it’s the kind that makes you close your eyes after the first bite. It’s comfort food reimagined, healthier than store-bought bars, but with the same soul-soothing satisfaction. Perfect for impressing guests without stress, or turning a simple snack into something memorable.
What Ingredients You Will Need
This recipe uses simple, wholesome ingredients to deliver bold flavor and satisfying texture without the fuss. Most of these are pantry staples, which means you can whip up a batch anytime the craving hits.
- Rolled Oats (2 cups / 180g) – Use old-fashioned rolled oats, not instant or steel-cut. Rolled oats give the bars the perfect chewy texture. I prefer Bob’s Red Mill for consistent quality.
- Honey (1/2 cup / 170g) – This is both the sweetener and the glue that holds everything together. Use a runny, liquid honey. If your honey is crystallized, warm it gently before using.
- Creamy Peanut Butter (1/2 cup / 130g) – Natural peanut butter works, but make sure it’s well-stirred. I’ve found that processed peanut butter (like Skippy or Jif) gives a more consistent texture because it doesn’t separate.
- Unsalted Butter (2 tablespoons / 28g) – Adds richness and helps the bars set properly. You can substitute coconut oil for a dairy-free option.
- Brown Sugar (2 tablespoons / 25g) – Packed light or dark brown sugar adds a subtle molasses flavor. Don’t skip it—it deepens the sweetness.
- Vanilla Extract (1 teaspoon) – Pure vanilla extract adds warmth and rounds out the flavors.
- Salt (1/4 teaspoon) – Just a pinch to balance the sweetness. If your peanut butter is salted, you can reduce this slightly.
- Mix-ins (1/2 cup total) – Choose your favorites: dark chocolate chips, dried cranberries, chopped almonds, or shredded coconut. I usually go with a mix of chocolate chips and dried cherries (adds a nice tart pop).
Ingredient Selection Tips: For the best texture, make sure your oats are fresh. Stale oats can make the bars taste flat. If you’re using a natural peanut butter that’s prone to oil separation, stir it vigorously before measuring. For a nut-free version, try sunflower seed butter—it works beautifully, though the color will be darker.
Substitution Guidance: Swap honey with maple syrup for a vegan option (the bars will be slightly softer). Use almond flour instead of oats for a gluten-free version, though the texture will be more delicate. Greek yogurt can replace peanut butter if you’re avoiding nuts, but reduce the liquid slightly to prevent sogginess.
Equipment Needed
You don’t need a fancy kitchen to make these bars. Here’s what you’ll actually use:
- 8×8-inch Baking Pan – This is the perfect size for thick, satisfying bars. If you only have a 9×9, the bars will be thinner and may need slightly less chilling time.
- Parchment Paper – Line the pan with parchment, leaving an overhang on two sides. This creates “handles” that make lifting the bars out super easy. Trust me, don’t skip this.
- Medium Saucepan – For warming the honey, peanut butter, and butter together. A heavy-bottomed pan works best to prevent scorching.
- Large Mixing Bowl – To combine the wet and dry ingredients. Any bowl will do, but a wider one makes stirring easier.
- Rubber Spatula – For scraping every last bit of the sticky mixture into the pan. A silicone spatula is ideal because nothing sticks to it.
- Measuring Cups and Spoons – Accurate measurements matter here. Too much honey and the bars won’t set; too little and they’ll crumble.
- Sharp Knife – For cutting the bars cleanly. A chef’s knife or a large serrated knife works well.
I’ve made these bars with just a bowl and a wooden spoon when I was camping—it’s doable, but a saucepan and spatula make the process much smoother. If you don’t have parchment, you can grease the pan well with butter, but lifting the bars out will be trickier.
Preparation Method
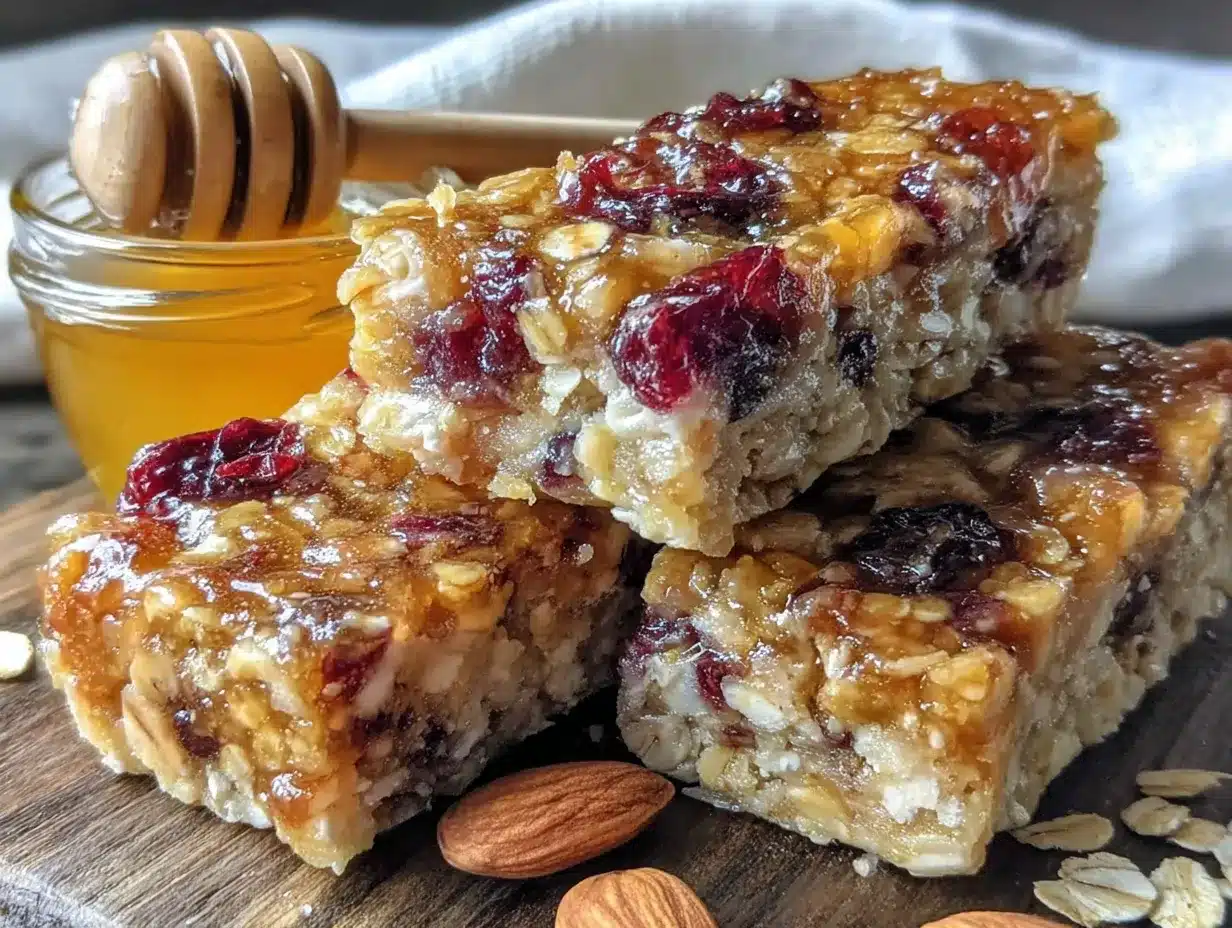
- Line your pan. Cut a piece of parchment paper to fit the bottom and sides of your 8×8-inch pan, leaving about 2 inches of overhang on two opposite sides. This will be your lifeline later. Set the pan aside.
- Combine the wet ingredients. In a medium saucepan over low heat, add the honey, peanut butter, butter, and brown sugar. Stir constantly with a rubber spatula until everything is melted and smooth. This takes about 3-4 minutes. Don’t walk away—this mixture can burn quickly if left unattended.
- Watch for the right consistency. The mixture should be glossy and slightly bubbling around the edges. When you lift the spatula, it should drip off in a thick ribbon. If it looks thin or watery, you’ve overheated it. Turn off the heat immediately.
- Add the vanilla and salt. Remove the saucepan from the heat. Stir in the vanilla extract and salt. The mixture will bubble up a bit—that’s normal.
- Combine with oats. Pour the warm peanut butter mixture over the rolled oats in a large mixing bowl. Stir until every oat is coated. This takes some elbow grease. The mixture will be thick and sticky—that’s exactly what you want.
- Fold in the mix-ins. Add your chocolate chips, dried fruit, or nuts. Stir gently until they’re evenly distributed. If you’re using chocolate chips, they might start to melt slightly from the warmth. That’s fine—it creates little pockets of melted chocolate throughout the bars.
- Press into the pan. Transfer the mixture to your prepared pan. Using a rubber spatula or your hands (lightly greased with a little butter), press the mixture down firmly and evenly. This is crucial—if you don’t press hard enough, the bars will fall apart when you cut them. I press down with the back of a measuring cup for extra leverage.
- Chill. Place the pan in the refrigerator for at least 2 hours, or until the bars are firm to the touch. For best results, let them chill overnight. The longer they set, the cleaner your cuts will be.
- Cut and serve. Once firm, lift the bars out using the parchment overhang. Place them on a cutting board. Use a sharp knife to cut into 12 even bars. If the knife sticks, wipe it clean between cuts. Store in the fridge until ready to serve.
Sensory Cues: At step 2, the mixture should smell nutty and sweet. At step 5, the oats should look uniformly coated—no dry spots. When pressing into the pan, the surface should feel dense and compact, not loose or crumbly.
Cooking Tips & Techniques
Here’s the thing I learned the hard way: the temperature of your wet ingredients matters more than you think. The first time I made these, I got distracted and let the honey mixture boil. The bars came out hard as a rock. You want to warm the mixture just until everything is melted and combined—no higher than a gentle simmer. If you see bubbles, you’ve gone too far.
Another tip? Don’t overmix the oats. I know it’s tempting to keep stirring until everything looks perfect, but overmixing can break down the oats and make the bars gummy. Fold just until combined, then stop.
If your bars are falling apart after cutting, it’s usually one of two things: either you didn’t press them firmly enough into the pan, or they didn’t chill long enough. Press with authority. I mean really lean into it. Use the bottom of a glass or a measuring cup to get an even, compact layer.
Timing is everything here. I like to make the mixture, press it into the pan, and then clean up the kitchen while it chills. That way, by the time I’m done wiping counters, the bars are ready to cut. Multitasking at its finest.
For clean cuts every time, run your knife under hot water and dry it before slicing. The warmth helps the blade glide through without dragging the sticky mixture. Wipe the blade clean between each cut.
Variations & Adaptations
One of the best things about this recipe is how flexible it is. I’ve made at least six different versions, and they’ve all been good in their own way.
- Chocolate Peanut Butter Dream: Swap 2 tablespoons of the honey for melted dark chocolate. Add an extra tablespoon of peanut butter. The result is a rich, fudgy bar that tastes like dessert.
- Vegan Maple Almond: Replace honey with maple syrup and butter with coconut oil. Use almond butter instead of peanut butter. Add sliced almonds for crunch. The bars will be slightly softer but just as delicious.
- Gluten-Free Berry Blast: Use certified gluten-free oats. Swap chocolate chips for freeze-dried strawberries (they add a tart, fruity pop). Add a tablespoon of chia seeds for extra fiber.
- Spiced Apple Cinnamon: Add 1/2 teaspoon of cinnamon and 1/4 teaspoon of nutmeg to the oat mixture. Toss in 1/4 cup of finely chopped dried apples. These taste like fall in bar form.
- Savory-Sweet Seed Bar: Replace half the oats with pumpkin seeds and sunflower seeds. Reduce honey to 1/3 cup. Add a pinch of flaky sea salt on top before chilling. Great for a pre-workout snack.
I once made a batch with leftover holiday candy—chopped up peppermint bark and white chocolate chips. It was a little messy, honestly, but the kids thought it was the best thing ever. Don’t be afraid to experiment with whatever you have in your pantry.
Serving & Storage Suggestions
These granola bars are best served chilled or at room temperature. I personally love them straight from the fridge—they’re firmer and hold together better. If you prefer a softer texture, let them sit out for 5-10 minutes before eating.
For serving, I like to arrange them on a plate with a few fresh berries on the side. They pair beautifully with a hot cup of coffee or a cold glass of milk. If I’m packing them for lunch, I wrap each bar individually in parchment paper and tie it with kitchen twine. It feels a little fancy, and it keeps them from sticking together.
Storage Instructions: Keep the bars in an airtight container in the refrigerator for up to 2 weeks. They’ll stay fresh and chewy the whole time. For longer storage, you can freeze them for up to 3 months. Just layer them between sheets of parchment paper in a freezer-safe bag or container.
Reheating Tips: These bars don’t really need reheating, but if you want a warm treat, pop one in the microwave for about 10 seconds. It softens the peanut butter and makes the chocolate chips gooey. Just don’t overdo it, or they’ll fall apart.
One thing I’ve noticed: the flavors actually get better after a day or two. The honey and oats meld together, and the texture becomes more uniform. So if you can resist eating them all on day one, you’re in for a treat.
Nutritional Information & Benefits
Here’s an approximate nutritional breakdown per bar (based on 12 bars with chocolate chips and peanut butter):
| Nutrient | Amount per Bar |
|---|---|
| Calories | 215 |
| Total Fat | 10g |
| Saturated Fat | 3.5g |
| Carbohydrates | 28g |
| Fiber | 3g |
| Sugar | 16g |
| Protein | 6g |
These bars are a solid source of energy, thanks to the complex carbohydrates from oats and the healthy fats from peanut butter. Oats are packed with beta-glucan, a type of soluble fiber that supports heart health and keeps you full longer. Honey provides natural antioxidants and a quick energy boost without the crash of refined sugar.
If you’re watching your sugar intake, you can reduce the honey to 1/3 cup and add an extra tablespoon of peanut butter. The bars will be less sweet but still satisfying. For a lower-fat option, substitute the butter with unsweetened applesauce—though the texture will be a bit more cake-like.
Potential allergens: Contains peanuts, dairy (butter), and gluten (oats). Use certified gluten-free oats and nut-free butter for allergy-friendly versions.
From a wellness perspective, I love that these bars give my family a snack that’s actually nourishing. No weird preservatives, no artificial flavors. Just real food that tastes good and makes you feel good.
FAQs
Can I use quick oats instead of rolled oats?
Yes, but the texture will be different. Quick oats are more finely chopped, so they absorb moisture faster and create a denser, softer bar. They’ll still taste great, just less chewy.
Why did my bars turn out crumbly?
This usually happens when the mixture wasn’t pressed firmly enough into the pan, or the bars weren’t chilled long enough. Make sure you press down with serious force, and give them at least 2 hours in the fridge.
Can I make these without peanut butter?
Absolutely. Use sunflower seed butter, almond butter, or even tahini. Each will give a slightly different flavor, but the bars will still hold together. Just note that sunflower seed butter can react with baking soda if used, but since this recipe doesn’t use baking soda, you’re fine.
How long do these bars last at room temperature?
They’ll hold up for about 2-3 days at room temperature, but I recommend storing them in the fridge for best texture. If it’s warm in your kitchen, the chocolate chips might get a little melty.
Can I double this recipe?
Yes! Double all ingredients and use a 9×13-inch pan. Increase chilling time to at least 3 hours. You’ll get about 24 bars—perfect for meal prep or feeding a crowd.
Conclusion
These no-bake honey oat granola bars are proof that the best recipes often come from the messiest moments. They’re simple enough for a beginner, versatile enough for a seasoned cook, and delicious enough to win over even the pickiest eaters. I’ve made them for playdates, road trips, lazy Sunday mornings, and everything in between. They never disappoint.
I’d love for you to try them and make them your own. Swap in your favorite mix-ins, adjust the sweetness to your liking, and don’t be afraid to experiment. When you do, come back and let me know how they turned out. Drop a comment below, share your tweaks, or tag me in your photos—I genuinely love seeing what you create.
Here’s to happy accidents in the kitchen and snacks that make life a little sweeter. Happy cooking, friend!
Pin This Recipe!
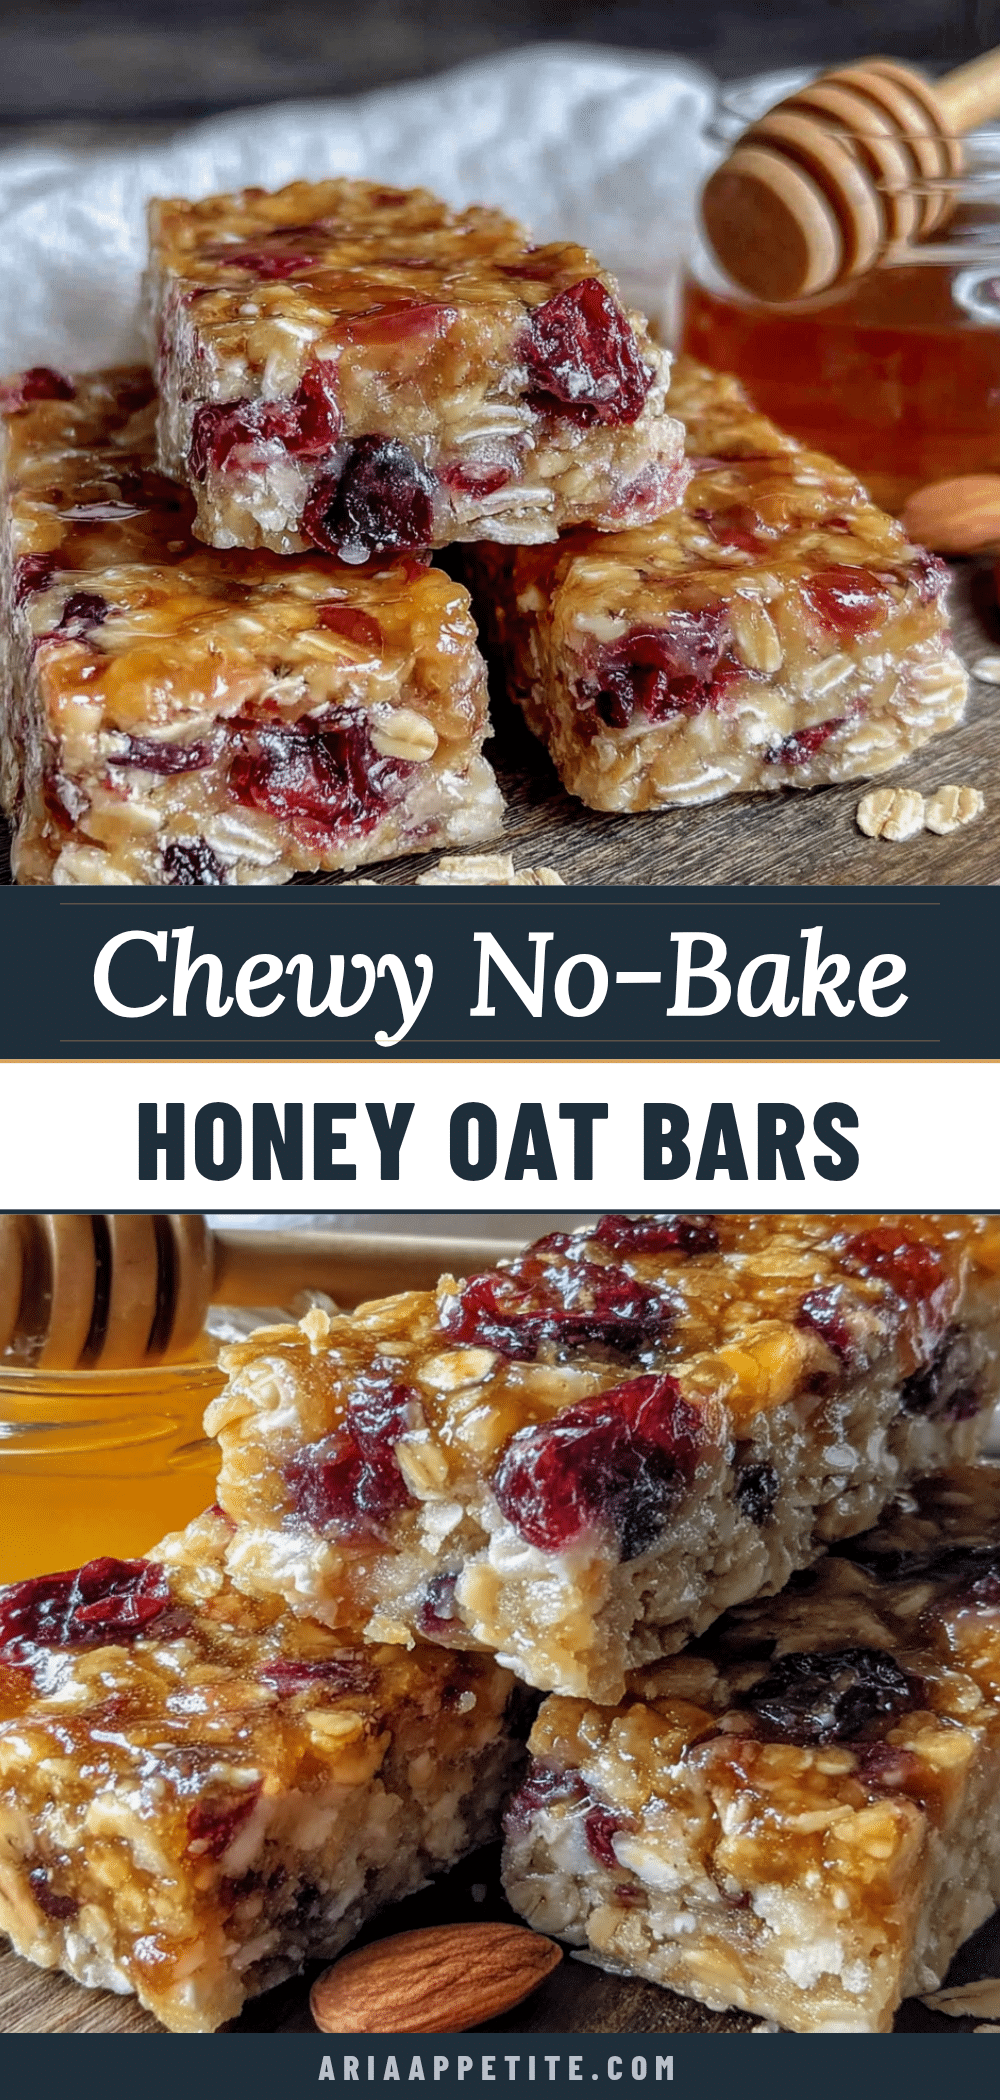
Easy No-Bake Honey Oat Granola Bars Recipe (Best Homemade Snack)
These no-bake honey oat granola bars are a quick and easy homemade snack made with simple pantry ingredients. They’re chewy, sweet, and perfect for busy mornings or a crowd-pleasing treat.
- Prep Time: 15 minutes
- Cook Time: 0 minutes
- Total Time: 2 hours 15 minutes (includes chilling)
- Yield: 12 bars 1x
- Category: Snack
- Cuisine: American
Ingredients
- 2 cups (180g) rolled oats
- 1/2 cup (170g) honey
- 1/2 cup (130g) creamy peanut butter
- 2 tablespoons (28g) unsalted butter
- 2 tablespoons (25g) brown sugar, packed
- 1 teaspoon vanilla extract
- 1/4 teaspoon salt
- 1/2 cup total mix-ins (e.g., dark chocolate chips, dried cranberries, chopped almonds, or shredded coconut)
Instructions
- Line an 8×8-inch baking pan with parchment paper, leaving about 2 inches of overhang on two opposite sides. Set aside.
- In a medium saucepan over low heat, combine honey, peanut butter, butter, and brown sugar. Stir constantly with a rubber spatula until melted and smooth, about 3-4 minutes. The mixture should be glossy and slightly bubbling around the edges.
- Remove from heat. Stir in vanilla extract and salt. The mixture will bubble up slightly.
- Pour the warm peanut butter mixture over the rolled oats in a large mixing bowl. Stir until every oat is coated. The mixture will be thick and sticky.
- Fold in the mix-ins gently until evenly distributed.
- Transfer the mixture to the prepared pan. Using a rubber spatula or lightly greased hands, press the mixture down firmly and evenly. Use the back of a measuring cup for extra leverage.
- Refrigerate for at least 2 hours, or until firm. For best results, chill overnight.
- Once firm, lift the bars out using the parchment overhang. Place on a cutting board and cut into 12 even bars with a sharp knife. Wipe the knife clean between cuts if it sticks.
- Store in the refrigerator until ready to serve.
Notes
For clean cuts, run your knife under hot water and dry it before slicing. The bars can be stored in an airtight container in the refrigerator for up to 2 weeks, or frozen for up to 3 months. The flavors improve after a day or two.
Nutrition
- Serving Size: 1 bar
- Calories: 215
- Sugar: 16
- Sodium: 95
- Fat: 10
- Saturated Fat: 3.5
- Carbohydrates: 28
- Fiber: 3
- Protein: 6
Keywords: no-bake granola bars, honey oat bars, homemade snack, easy granola bars, peanut butter granola bars


