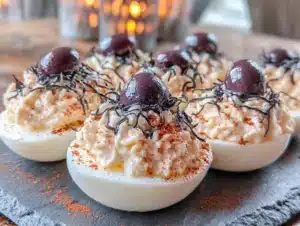
Love this? Save it for later!
Share the inspiration with your friends
The Halloween party was in six hours and I’d completely forgotten. I was standing in my kitchen, staring at a half-empty carton of eggs and a jar of olives that had been in the back of my fridge for who knows how long. Everyone else would be bringing elaborate graveyard cakes and those creepy finger-shaped cookies that take three days to make. I had hard-boiled eggs, some Greek yogurt, and a desperate hope that maybe—just maybe—I could pull something together that wouldn’t get me laughed out of the potluck. I mean, let’s be honest, deviled eggs are great, but spooky spider deviled eggs? That sounded like a Pinterest fail waiting to happen.
The power went out halfway through my first batch boiling. Classic. So I’m standing there in the dark, phone flashlight in my mouth, peeling eggs by feel. My neighbor’s kid knocked on the door asking for candy and I answered with olive juice on my shirt and eggshell in my hair. But here’s the thing—when I finally walked into that party with my tray of lighter spooky spider deviled eggs, something unexpected happened. People actually stopped mid-conversation to look. The kids went absolutely nuts for the olive spiders, and the adults kept going back for seconds because they couldn’t believe how creamy and light they tasted without all the heavy mayo.
Maybe you’ve been there—that moment when you’re sure your simple dish is going to get overshadowed by the elaborate stuff. But these lighter spooky spider deviled eggs ended up being the first thing to disappear from the table. The trick? Swapping out half the mayonnaise for Greek yogurt, which cuts the calories and adds this tangy freshness that regular deviled eggs just don’t have. And the spiders? Just black olives sliced just right. That’s it. Two ingredients you probably already have, and suddenly you’ve got the most talked-about dish at the party. I’ve made them for every Halloween gathering since, and honestly, I don’t think I’ll ever go back to the heavy, traditional version.
Why You’ll Love This Recipe
Let me tell you why these lighter spooky spider deviled eggs have become my go-to Halloween dish. I’ve tested this recipe about seven times now—yes, seven—tweaking the yogurt-to-mayo ratio until it was just right. My sister-in-law, who’s a nutritionist, actually gave me the idea to lighten things up, and I’ve never looked back.
- Quick & Easy: These come together in under 30 minutes, which is perfect when you’re scrambling last minute for a party or just want something fun for the kids without spending all day in the kitchen.
- Simple Ingredients: No fancy grocery trips needed. Eggs, Greek yogurt, a little mayo, mustard, and black olives. That’s literally it. You probably have everything right now.
- Perfect for Halloween: These are the ultimate spooky appetizer—fun enough for kids to love, elegant enough for adults to appreciate. They work for potlucks, classroom parties, or just a fun family dinner.
- Crowd-Pleaser: I’ve brought these to three different Halloween gatherings now, and every single time, someone asks for the recipe. Kids love the creepy spider look, and adults love how light and flavorful they are.
- Unbelievably Delicious: The texture is so creamy and smooth—you honestly won’t miss the extra mayo. The Greek yogurt adds this subtle tang that cuts through the richness of the yolks perfectly.
What makes this recipe different from all the other spider deviled eggs out there? It’s the lighter approach without sacrificing any of the flavor. Most recipes drown the filling in mayonnaise, but using half Greek yogurt means you get all the creaminess with way less fat and calories. The seasoning is perfectly balanced too—just a touch of mustard for warmth, a pinch of paprika for color, and salt and pepper to bring it all together. It’s not just another version of deviled eggs. It’s the version that makes you close your eyes after that first bite and think, “Okay, this is actually genius.”
These eggs are comfort food reimagined—healthier, faster, but with the same soul-soothing satisfaction. Perfect for impressing guests without the stress, or turning a simple Halloween snack into something memorable.
What Ingredients You Will Need
This recipe uses simple, wholesome ingredients to deliver that classic deviled egg flavor with a lighter twist. Most of these are pantry staples, so you probably don’t need to make a special trip to the store.
- 6 large eggs, hard-boiled and peeled (look for fresh eggs for easier peeling—older eggs actually peel better, so plan ahead)
- 2 tablespoons plain Greek yogurt (I prefer Fage or Chobani for their thick, creamy texture—avoid watery yogurts)
- 2 tablespoons mayonnaise (use a good quality one like Hellmann’s or Duke’s for the best flavor)
- 1 teaspoon yellow mustard (or Dijon if you want a sharper kick)
- 1/4 teaspoon salt (adjust to taste)
- 1/8 teaspoon black pepper (freshly ground is best)
- 1/4 teaspoon paprika, plus extra for garnish (smoked paprika adds a lovely depth if you have it)
- 12 black olives (whole, pitted—look for large, firm olives for easier slicing)
- Fresh chives or parsley, chopped (optional, for garnish)
Ingredient Selection Tips: For the best texture, use eggs that are at least a week old—they peel much easier than super fresh ones. When it comes to Greek yogurt, don’t use the non-fat kind if you can help it. The 2% or full-fat versions give you that creamy consistency without being watery. For the olives, I’ve found that the canned black olives from Lindsay work perfectly because they’re firm enough to slice into legs without falling apart. If you’re dairy-free, you can substitute the Greek yogurt with a dairy-free version, just make sure it’s thick and not runny.
Substitution Guidance: Need it even lighter? Use all Greek yogurt and skip the mayo entirely—just add an extra teaspoon of mustard for flavor. Want it richer? Reverse the ratio and use more mayo than yogurt. For a gluten-free option, you’re already good since this recipe is naturally gluten-free. If you’re watching your sodium, use low-sodium olives and skip the added salt.
Equipment Needed
You don’t need much for this recipe, which is part of the beauty. Here’s what you’ll need:
- Medium saucepan for boiling the eggs (any pot works, but a wider one helps the eggs cook evenly)
- Large bowl of ice water for shocking the eggs after boiling
- Sharp knife for slicing the eggs and olives (a paring knife is perfect)
- Cutting board
- Small mixing bowl for the filling
- Fork or potato masher for mashing the yolks
- Piping bag or zip-top bag for filling the eggs (optional, but makes it look professional)
- Serving platter
I’ve made these with just a fork and a plastic sandwich bag when I couldn’t find my piping bag, and they turned out fine. Honestly, the piping bag just makes them look prettier, but if you’re going for rustic charm, a spoon works too. If you don’t have a potato masher, a fork does the job—just takes a little more elbow grease. For the olive spiders, a sharp knife is non-negotiable. Dull knives will squish the olives and you’ll end up with olive mush instead of spider legs.
Preparation Method
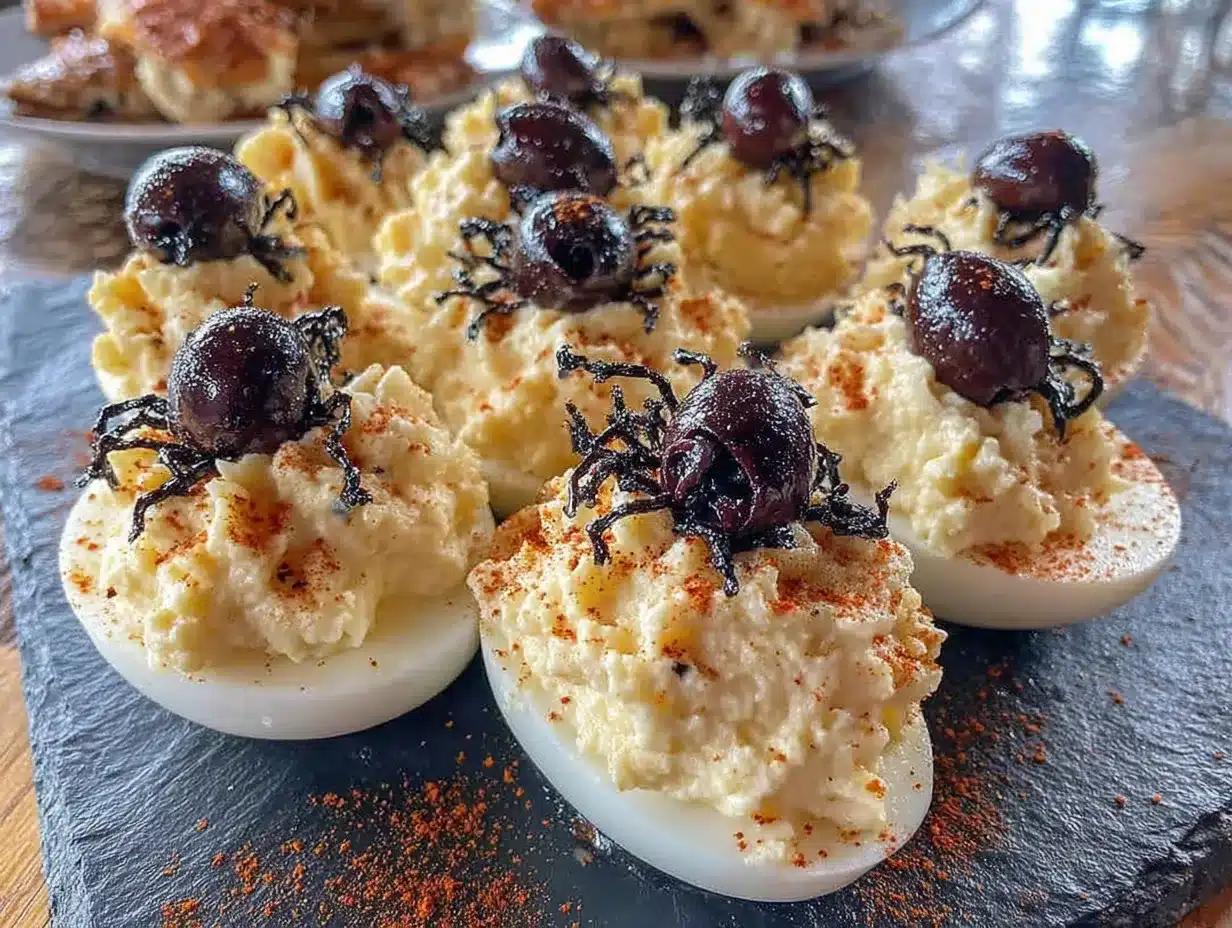
Alright, let’s get into the nitty-gritty. I’ve broken this down step by step so you don’t miss anything. Trust me, I’ve made every mistake possible so you don’t have to.
- Hard-boil the eggs: Place your 6 eggs in a single layer in a medium saucepan. Cover them with cold water by about an inch. Bring the water to a rolling boil over high heat—you’ll see big bubbles breaking the surface. Once it’s boiling, cover the pot, turn off the heat, and let it sit for exactly 12 minutes. This gives you perfectly cooked yolks without that weird green ring around the outside. While the eggs are sitting, prepare a large bowl of ice water.
- Shock the eggs: After 12 minutes, transfer the eggs to the ice water bath using a slotted spoon. Let them sit for at least 5 minutes. This stops the cooking process and makes them way easier to peel. I’ve skipped this step before when I was in a hurry, and let me tell you, peeling warm eggs is a nightmare. Don’t do it.
- Peel the eggs: Gently tap each egg on the counter to crack the shell all over, then roll it between your palms to loosen the shell. Start peeling from the wider end where the air pocket is—it’s easier to get under the membrane there. Rinse the peeled eggs under cold water to remove any tiny shell fragments. Pat them dry with a paper towel.
- Slice the eggs: Using a sharp knife, slice each egg in half lengthwise. Carefully pop out the yolks into a small mixing bowl. Arrange the egg white halves on your serving platter, cut side up. If some of the whites tear, don’t panic—just use those ones for the back of the platter where nobody will notice.
- Make the filling: Add the Greek yogurt, mayonnaise, yellow mustard, salt, pepper, and paprika to the bowl with the yolks. Mash everything together with a fork until it’s smooth and creamy. I like to mash for about 2 minutes to get it really silky. Taste it and adjust the seasoning—maybe a pinch more salt or an extra dash of paprika. This is your moment to get it right.
- Fill the eggs: Spoon the filling into a piping bag fitted with a star tip, or just snip the corner off a zip-top bag. Pipe the filling into each egg white half, mounding it slightly. If you don’t have a bag, you can use two small spoons to carefully fill each egg. Aim for about a tablespoon of filling per egg half.
- Make the spider legs: This is the fun part. Take your black olives and slice each one in half lengthwise. Now take each half and slice it into thin strips lengthwise—you want about 4 to 5 strips per olive half. These will be your spider legs. You should get about 24 legs total (8 per egg, since you’ll use 3 eggs worth of olives for 6 spiders).
- Assemble the spiders: Take one whole olive and place it on top of a filled egg half to form the spider’s body. Then arrange 8 olive strips around it—4 on each side—to look like legs. Press them gently into the filling so they stay put. Repeat for all 6 spiders. If you have extra egg halves, you can leave them as regular deviled eggs or make more spiders.
- Garnish and serve: Sprinkle a light dusting of paprika over the eggs for color. Add a few chopped chives or parsley if you want a pop of green. Serve immediately or refrigerate until ready to serve.
Sensory Cues: When you’re mashing the yolks, you’re looking for a texture that’s smooth and spreadable—not too dry and not too wet. It should hold its shape when piped but still feel creamy on the tongue. The olive legs should stick to the filling without sliding off. If they’re slipping, your filling might be too wet, so add a tiny bit more yogurt or mayo to thicken it up.
Cooking Tips & Techniques
I’ve made this recipe enough times to know where things can go wrong. Here are my best tips to save you from my mistakes.
The Perfect Boil: The number one mistake people make is overcooking the eggs. That green ring around the yolk? That’s from cooking them too long or at too high a temperature. The 12-minute off-heat method gives you perfectly cooked yolks every time. I learned this the hard way after serving green-tinged eggs at a party and wondering why nobody ate them.
Peeling Without Tears: If your eggs are fresh (less than a week old), they’re going to be a pain to peel. I once spent 15 minutes picking shell fragments out of an egg while my kids laughed at me. Use older eggs if you can, or add a teaspoon of baking soda to the boiling water—it helps loosen the shells. Also, peeling under running water helps wash away tiny shell pieces.
The Yogurt-Mayo Balance: I’ve tried this recipe with all yogurt and all mayo, and the half-and-half ratio is truly the sweet spot. All yogurt makes the filling too tangy and a bit thin. All mayo is delicious but heavy. That 50/50 split gives you creaminess with a lighter finish. If you’re nervous, start with 1.5 tablespoons of each and adjust from there.
Olive Spider Assembly: Cut the olive legs as thinly as you can without breaking them. Thicker legs look clumsy and fall off easier. I ruined my first batch by making the legs too thick—they looked more like caterpillars than spiders. Also, press the legs into the filling at a slight angle so they look like they’re crawling. It makes a huge difference visually.
Timing and Multitasking: You can boil the eggs a day ahead and keep them in the fridge unpeeled. Then the day of your party, just peel, fill, and assemble. This cuts your active time down to about 15 minutes. I do this for every Halloween party now, and it makes the whole process so much less stressful.
Variations & Adaptations
One of the best things about this recipe is how easy it is to customize. Here are some variations I’ve tried and loved.
Spicy Spider Eggs: Add 1/4 teaspoon of cayenne pepper or a dash of hot sauce to the filling for a spicy kick. I made these for a Halloween party where everyone was doing spicy food, and they were a huge hit. The heat pairs surprisingly well with the cool, creamy filling.
Avocado Spider Eggs: Swap the mayonnaise for mashed avocado. This makes the filling even lighter and gives it a beautiful green tint. Just add a squeeze of lemon juice to keep the avocado from browning. I tried this when I was out of mayo one day, and honestly, it might be my new favorite version.
Bacon Spider Eggs: Crumble a slice of crispy bacon over each spider egg before adding the olive body. The smoky, salty crunch is incredible against the creamy filling. My husband, who’s not usually a deviled egg fan, ate six of these in one sitting.
Dairy-Free Version: Use a dairy-free Greek yogurt alternative (like Kite Hill or Siggi’s plant-based) and you’re good to go. The texture might be slightly thinner, so add an extra tablespoon of mayo to compensate. I made these for a friend with a dairy allergy and she couldn’t tell the difference.
Smoked Paprika Version: Swap the regular paprika for smoked paprika in both the filling and the garnish. It adds this deep, smoky flavor that makes the eggs taste almost like they’ve been grilled. This is my go-to version when I’m serving them at a more adult gathering.
Serving & Storage Suggestions
These lighter spooky spider deviled eggs are best served chilled or at room temperature. I like to arrange them on a black platter or a dark-colored plate to make the spider design really pop. A bed of fresh arugula or lettuce leaves underneath adds a nice touch of green and keeps the eggs from sliding around.
What to Serve With Them: These pair beautifully with other Halloween appetizers like mummy hot dogs, pumpkin-shaped cheese balls, or a bowl of bloody red pepper hummus with veggie sticks. For drinks, a crisp white wine or a sparkling apple cider complements the tangy filling perfectly. If you’re serving kids, they love these with a side of apple slices and caramel dip.
Storage Instructions: Store any leftover deviled eggs in an airtight container in the refrigerator for up to 2 days. The olive legs might soften slightly over time, but they’ll still look good. I do not recommend freezing these—the texture of the filling will become watery and grainy when thawed.
Reheating Notes: These are meant to be served cold, so no reheating needed. If you’ve refrigerated them, just let them sit at room temperature for about 10 minutes before serving to take the chill off. The flavors actually develop more after a few hours in the fridge, so they taste even better the next day.
Flavor Development: I’ve noticed that the filling gets more flavorful after sitting overnight. The mustard and paprika really meld together, and the yogurt tang becomes more pronounced. So if you’re making these for a party, feel free to assemble them a day ahead—just add the olive spiders right before serving so they stay fresh and crisp.
Nutritional Information & Benefits
Here’s the breakdown for one spider deviled egg (one egg half with filling and olive spider):
| Nutrient | Amount |
|---|---|
| Calories | 65 |
| Protein | 6g |
| Fat | 4g |
| Saturated Fat | 1.5g |
| Carbohydrates | 1g |
| Fiber | 0g |
| Sugar | 0.5g |
| Sodium | 180mg |
Health Benefits: Eggs are packed with high-quality protein and essential nutrients like vitamin B12, vitamin D, and choline, which is great for brain health. Greek yogurt adds probiotics for gut health and extra protein without the saturated fat of extra mayo. Black olives provide healthy monounsaturated fats and antioxidants. This lighter version has about 40% less fat and 30% fewer calories than traditional deviled eggs, making it a smart choice for health-minded eaters who still want to enjoy Halloween treats.
Dietary Considerations: This recipe is naturally gluten-free and low-carb. It’s also vegetarian-friendly. For those watching their sodium, use low-sodium olives and skip the added salt. The main allergen to be aware of is eggs, so this isn’t suitable for anyone with an egg allergy.
Conclusion
These lighter spooky spider deviled eggs are proof that you don’t need elaborate ingredients or hours in the kitchen to create something truly memorable. They’re fun without being fussy, healthy without sacrificing flavor, and impressive without the stress. Whether you’re bringing them to a Halloween party, making them for a classroom celebration, or just want to surprise your family with something spooky and delicious, these eggs deliver every single time.
I love this recipe because it reminds me that sometimes the simplest ideas are the best ones. That desperate, last-minute scramble to make something out of almost nothing turned into a recipe I genuinely look forward to making every year. And the best part? You can make it your own. Add your favorite spices, swap in different toppings, or just keep it classic—the spiders are already creepy enough to steal the show.
I’d love to hear how yours turn out! Drop a comment below and let me know if your kids loved the spiders, if you tried a fun variation, or if you have any questions. Don’t forget to share this recipe with your Halloween-loving friends—and if you’re looking for more spooky snack ideas, check out our mummy hot dogs or pumpkin hummus for the full Halloween spread. Happy Halloween, and happy cooking!
Frequently Asked Questions
Can I make these spider deviled eggs ahead of time?
Absolutely! You can boil and peel the eggs up to 2 days in advance and store them in the fridge. Assemble the filling and fill the eggs up to 1 day ahead, but wait to add the olive spiders until just before serving so they stay fresh and crisp.
How do I keep the olive spider legs from falling off?
Make sure your filling is thick enough to hold them—if it’s too runny, the legs will slide off. Press the legs gently into the filling at a slight angle, and use thin slices so they’re lightweight. If you’re really worried, you can use a tiny dab of cream cheese to “glue” them in place.
Can I use a different type of olive for the spiders?
You can, but black olives work best because their dark color contrasts beautifully with the yellow filling. Green olives would work in a pinch, but they’re usually brinier and might affect the flavor. Kalamata olives are too soft and will fall apart when you try to slice them.
How can I make these spider deviled eggs vegan?
You can use a vegan egg substitute like silken tofu or a commercial vegan egg alternative for the whites, and make the filling with vegan mayo and dairy-free yogurt. The olive spiders remain the same. I’ve tested a tofu version and it works, though the texture is slightly different from traditional eggs.
Why did my eggs turn out with green rings around the yolks?
That’s from overcooking! The green ring is caused by a reaction between iron in the yolk and sulfur in the white when eggs are cooked at too high a temperature for too long. Use the 12-minute off-heat method I described above, and shock them in ice water immediately to stop the cooking process. This should give you perfectly yellow yolks every time.
Pin This Recipe!
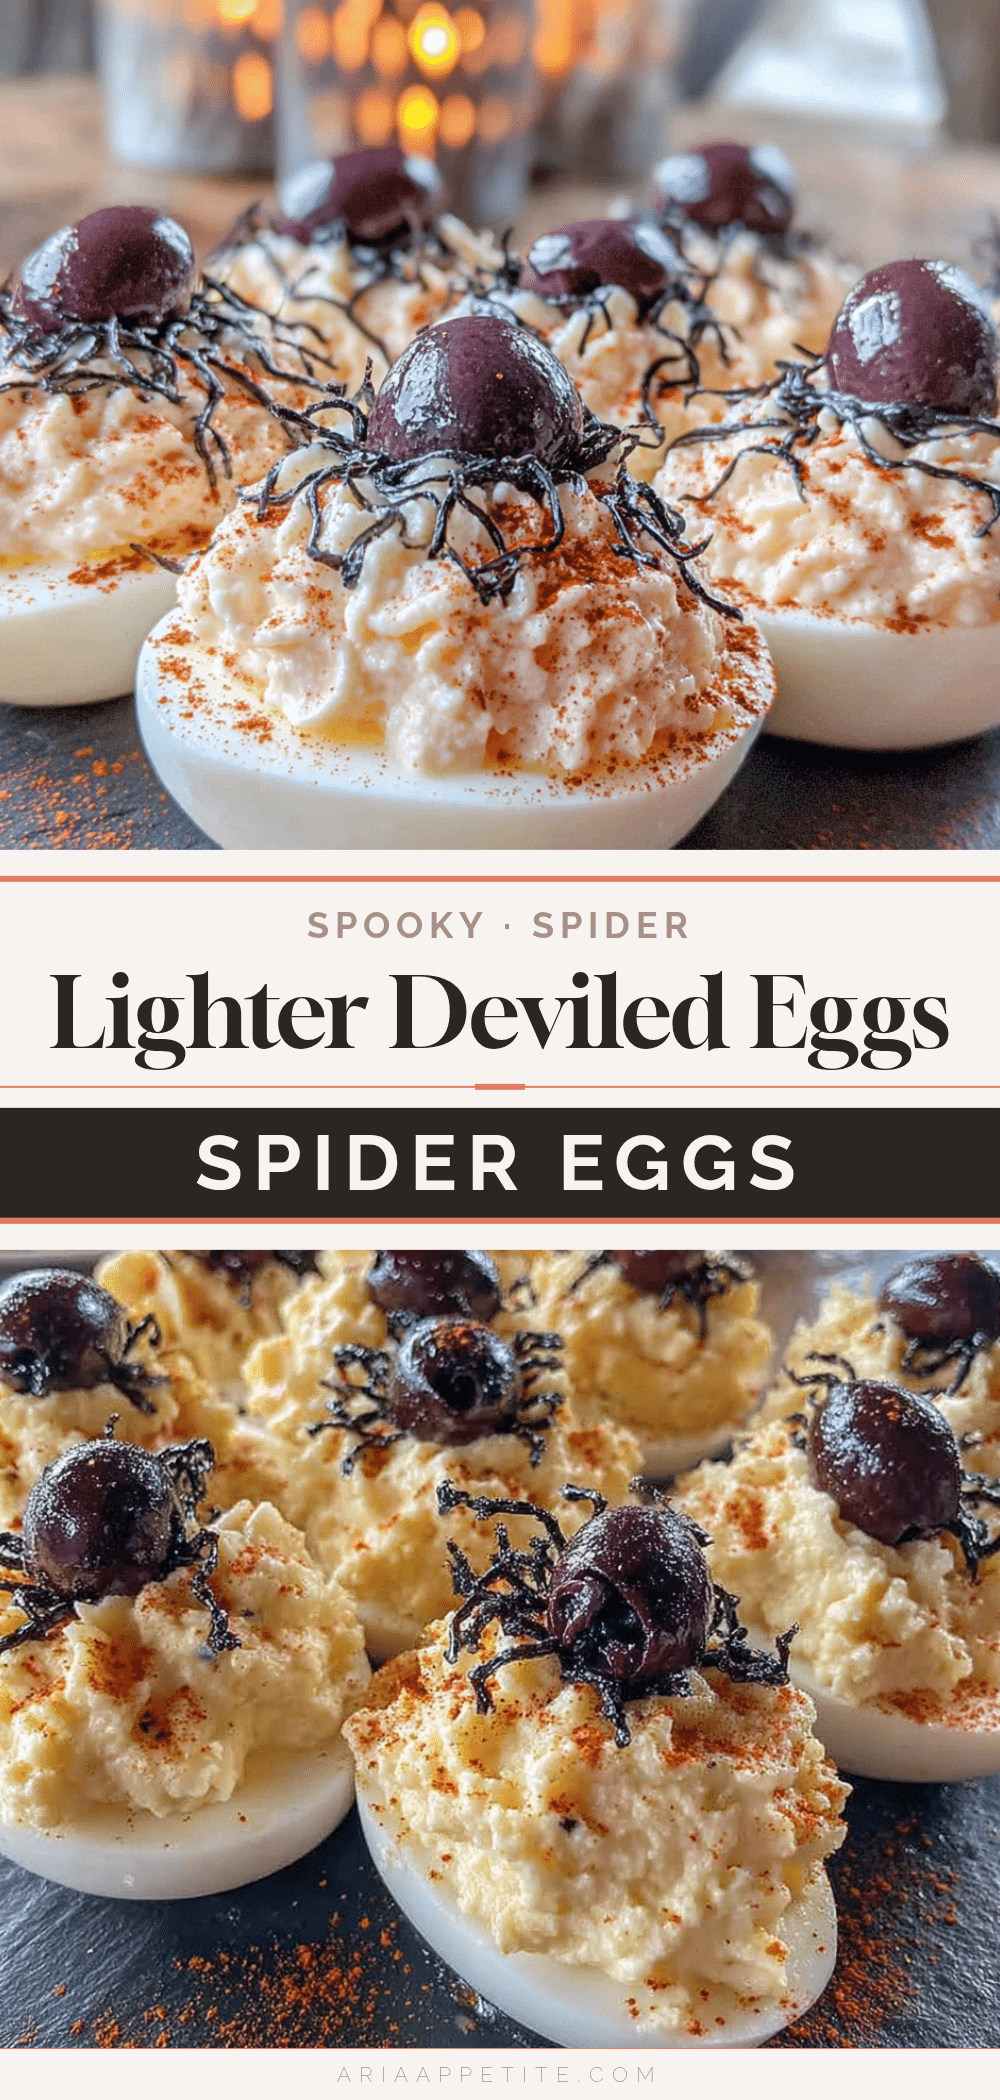
Easy Lighter Spooky Spider Deviled Eggs Recipe
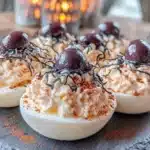
These lighter spooky spider deviled eggs are a fun and healthy Halloween appetizer made with Greek yogurt and mayonnaise for a creamy, tangy filling. Topped with olive spiders, they’re a crowd-pleasing treat that’s quick to prepare and perfect for parties.
- Prep Time: 15 minutes
- Cook Time: 12 minutes
- Total Time: 27 minutes
- Yield: 6 servings (12 deviled egg halves) 1x
- Category: Appetizer
- Cuisine: American
Ingredients
- 6 large eggs, hard-boiled and peeled
- 2 tablespoons plain Greek yogurt
- 2 tablespoons mayonnaise
- 1 teaspoon yellow mustard
- 1/4 teaspoon salt
- 1/8 teaspoon black pepper
- 1/4 teaspoon paprika, plus extra for garnish
- 12 black olives, whole and pitted
- Fresh chives or parsley, chopped (optional, for garnish)
Instructions
- Hard-boil the eggs: Place eggs in a single layer in a medium saucepan. Cover with cold water by about an inch. Bring to a rolling boil over high heat. Once boiling, cover the pot, turn off the heat, and let sit for exactly 12 minutes. Meanwhile, prepare a large bowl of ice water.
- Shock the eggs: After 12 minutes, transfer eggs to the ice water bath using a slotted spoon. Let sit for at least 5 minutes to stop cooking and make peeling easier.
- Peel the eggs: Gently tap each egg on the counter to crack the shell all over, then roll between palms to loosen. Start peeling from the wider end. Rinse under cold water to remove shell fragments. Pat dry.
- Slice the eggs: Using a sharp knife, slice each egg in half lengthwise. Pop out the yolks into a small mixing bowl. Arrange egg white halves on a serving platter, cut side up.
- Make the filling: Add Greek yogurt, mayonnaise, yellow mustard, salt, pepper, and paprika to the bowl with the yolks. Mash together with a fork until smooth and creamy, about 2 minutes. Taste and adjust seasoning.
- Fill the eggs: Spoon filling into a piping bag fitted with a star tip, or snip the corner off a zip-top bag. Pipe filling into each egg white half, mounding slightly. Alternatively, use two small spoons.
- Make the spider legs: Slice each black olive in half lengthwise. Then slice each half into thin strips lengthwise (4 to 5 strips per half) to create spider legs. You should get about 24 legs total.
- Assemble the spiders: Place one whole olive on top of a filled egg half to form the spider’s body. Arrange 8 olive strips around it (4 on each side) to look like legs. Press gently into the filling. Repeat for all 6 spiders.
- Garnish and serve: Sprinkle a light dusting of paprika over the eggs. Add chopped chives or parsley if desired. Serve immediately or refrigerate until ready to serve.
Notes
For easier peeling, use eggs that are at least a week old. The 12-minute off-heat method prevents green rings around the yolks. The filling gets more flavorful after sitting overnight. Add olive spiders just before serving to keep them fresh.
Nutrition
- Serving Size: 1 deviled egg half
- Calories: 65
- Sugar: 0.5
- Sodium: 180
- Fat: 4
- Saturated Fat: 1.5
- Carbohydrates: 1
- Protein: 6
Keywords: spider deviled eggs, Halloween appetizer, healthy deviled eggs, Greek yogurt deviled eggs, spooky eggs, easy Halloween recipe