Love this? Save it for later!
Share the inspiration with your friends
“I wasn’t planning on making anything fancy that Fourth of July,” I confessed to my neighbor, Lisa, as we stood chatting over the fence. It was a blazing hot summer afternoon, and honestly, I just wanted something quick and fun for the kids to enjoy. Lisa smiled and handed me a popsicle mold she swore by, teasing me that I could whip up something festive in no time. That’s when the idea of these Easy Kid-Friendly Red White and Blue Layered Jello Pops was born.
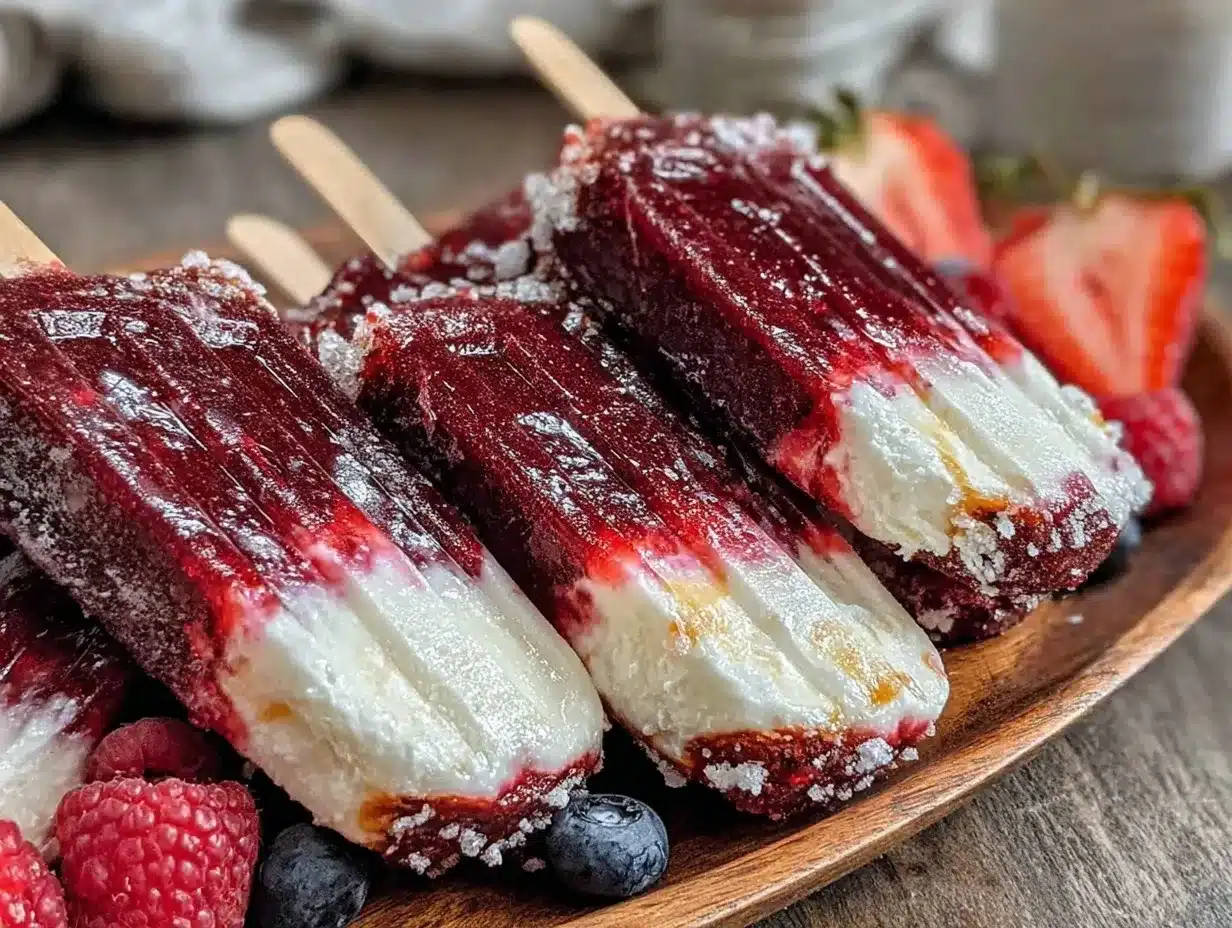
The whole thing happened kind of by accident, actually. I had all these jello packets in the pantry leftover from last year’s party, and the kids were bouncing off the walls with energy. So, I thought, why not put them to good use? I mixed the flavors, layered them carefully, and before long, the fridge was filled with these vibrant, patriotic popsicles that looked way more complicated than they actually were.
What really stuck with me was how simple it was to get the layers just right — no fancy kitchen gadgets, just a little patience and a lot of excitement from my tiny taste testers. You know that moment when a recipe makes the kids smile wide, and you catch yourself sneaking a bite (or three) too? Yeah, that one. Maybe you’ve been there, juggling last-minute plans and hoping to impress the neighborhood crowd without breaking a sweat.
These Easy Kid-Friendly Red White and Blue Layered Jello Pops have since become my go-to for not only Independence Day but any time I want to make a quick, colorful treat that feels special. Let me tell you, they’re as fun to make as they are to eat, and they bring a little sparkle to any summer gathering.
Why You’ll Love This Recipe
After testing this recipe more times than I can count (and trust me, the kids volunteered eagerly every time), here’s why it’s such a winner in our household:
- Quick & Easy: You can have these layered jello pops ready to chill in under 30 minutes, perfect for those last-minute snack cravings or spontaneous celebrations.
- Simple Ingredients: No need to hunt for exotic items—just a few common jello flavors and some water, and you’re good to go.
- Perfect for Patriotic Occasions: These pops are ideal for 4th of July parties, Memorial Day barbecues, or any day you want to add a little red, white, and blue flair.
- Crowd-Pleaser: Kids love the bright colors and fun layers, and adults appreciate the nostalgic, refreshing taste.
- Unbelievably Delicious: The texture is delightfully jiggly but firm, with the flavors balancing out perfectly without being overly sweet.
What sets this recipe apart? Honestly, it’s the layering technique that gives each pop a perfect tri-color effect without mixing the colors (a trick I picked up after a messy first attempt). Plus, you can swap in sugar-free jello or even add a splash of sparkling water for a grown-up twist.
For me, making these pops isn’t just about the taste—it’s about the joy of creating something that brings a smile and a little bit of magic to a simple summer day. I find myself looking forward to the “popping” moment when each layer sets just right. I bet you’ll feel the same way.
What Ingredients You Will Need
This recipe uses straightforward, pantry-friendly ingredients that come together to create bold color and a fun texture without fuss. Here’s a quick rundown of what you’ll need:
- Red Layer:
- 1 package (3 oz / 85 g) strawberry or cherry flavored jello (I prefer Jell-O brand for consistent flavor)
- 1 cup (240 ml) boiling water
- 1/2 cup (120 ml) cold water
- White Layer:
- 1 package (3 oz / 85 g) unflavored gelatin powder (like Knox)
- 1 cup (240 ml) boiling water
- 1/2 cup (120 ml) cold milk (whole or 2% works best; can substitute with almond or oat milk for dairy-free)
- 2 tablespoons (30 ml) sweetened condensed milk or white chocolate chips (optional, for creamier taste)
- Blue Layer:
- 1 package (3 oz / 85 g) blue raspberry flavored jello
- 1 cup (240 ml) boiling water
- 1/2 cup (120 ml) cold water
- Extras:
- Wooden or plastic popsicle sticks
- Popsicle molds or small paper cups (I like silicone molds for easy release)
You can usually find all these ingredients at your local grocery store, but if you want to switch things up, using fresh fruit juices instead of water in the jello layers can add a nice touch. Just remember that the gelatin needs the correct liquid ratios to set properly.
Equipment Needed
- Mixing bowls: At least three, to prepare each jello layer separately.
- Whisk or spoon: For stirring the gelatin until fully dissolved.
- Popsicle molds or small paper cups: Silicone molds make unmolding easier, but paper cups work fine too.
- Popsicle sticks: Wooden sticks are traditional and budget-friendly.
- Measuring cups: For accurate liquid measurement, which is key for texture.
If you don’t have popsicle molds, no worries! Small paper or plastic cups are a great alternative, and you can just insert the sticks once the first layer has partially set. Just be patient—it’s worth the wait.
Personally, I keep a set of silicone molds in my freezer stash—they’ve survived years of use and still look great. For cleaning, a quick rinse with warm water usually does the trick, no need for harsh scrubbing.
Preparation Method
- Prepare the Red Layer: In a mixing bowl, pour 1 cup (240 ml) of boiling water over the strawberry or cherry jello powder. Stir gently for about 2 minutes until the powder fully dissolves.
- Add 1/2 cup (120 ml) cold water to the dissolved jello mixture and stir well. Pour the red jello evenly into each popsicle mold, filling about one-third of the way.
- Place the molds in the freezer for 30 to 40 minutes, or until the red layer is firm but not completely frozen (it should be slightly tacky to the touch).
- Prepare the White Layer: While the red layer sets, sprinkle the unflavored gelatin over 1/2 cup (120 ml) cold milk in a small bowl and let it bloom for 5 minutes.
- Heat 1 cup (240 ml) boiling water and add it to the gelatin-milk mixture. Stir until completely dissolved.
- Add 2 tablespoons (30 ml) sweetened condensed milk or melt white chocolate chips into the mixture for a creamy texture, if desired. Stir well.
- Let the white mixture cool to room temperature (about 10 minutes) but do not allow it to set.
- Carefully pour the white layer over the red layer in the molds, filling another one-third of each mold.
- Return to the freezer for another 30 to 40 minutes until the white layer is firm but still slightly tacky.
- Prepare the Blue Layer: Repeat the jello dissolving process with the blue raspberry jello and liquids as with the red layer: 1 cup boiling water, stir until dissolved, then add 1/2 cup cold water.
- Let the blue mixture cool to room temperature before pouring it over the white layer to avoid melting the layers underneath.
- Fill the remaining space in the molds with the blue jello mixture and insert popsicle sticks if you haven’t already.
- Freeze the pops for at least 4 hours or overnight to ensure they’re fully set.
- To unmold, run warm water briefly on the outside of the molds, then gently pull the pops out.
Pro tip: If you notice your layers are mixing slightly, try letting each layer chill a bit longer next time. Also, pouring slowly and from a small height helps keep those crisp layers.
Cooking Tips & Techniques
One of the trickiest parts of making these layered jello pops is the timing. You want each layer firm enough to hold the next one, but not rock solid—otherwise, the layers won’t stick.
Here’s what I learned from a few early mishaps (like the time the white layer sank right through the red):
- Always let the jello cool to room temperature before pouring the next layer. Hot jello can melt the layer underneath, causing colors to blend and the layers to lose their distinct look.
- Use a spoon to gently pour the jello over the previous layer. This slows the flow and helps keep the layers separate.
- Keep an eye on the freezer time—30 to 40 minutes is usually perfect for each layer to get tacky without freezing solid.
- If you’re short on time, chill the molds in the fridge first to speed up setting, but the freezer works best for a quicker firm-up.
- Don’t rush unmolding! Running warm water on the mold’s exterior helps loosen the pops without melting them.
It’s honestly a fun little science experiment that kids love to watch. I often let my kids help with pouring the layers—it’s messy, but totally worth it for the excitement it brings.
Variations & Adaptations
Want to switch things up? Here are a few variations I’ve tried (and loved):
- Dairy-Free Option: Swap milk in the white layer with canned coconut milk or almond milk, and use coconut cream with a touch of sweetener for creaminess.
- Fruit-Infused Layers: Replace cold water with freshly squeezed fruit juice (like blueberry or raspberry juice) to intensify natural flavors.
- Alcoholic Twist: For grown-ups, add a splash of vodka or rum to each jello layer once it’s cooled but before pouring—just keep the kids’ pops separate!
- Mini Pops: Use mini cupcake liners or ice cube trays with sticks for bite-sized treats that are perfect for parties.
Personally, I once tried adding a thin layer of crushed graham crackers between the white and blue layers for a fun texture surprise. It was a hit at our neighborhood barbecue, though admittedly a bit tricky to layer perfectly.
Serving & Storage Suggestions
Serve these Easy Kid-Friendly Red White and Blue Layered Jello Pops chilled straight from the freezer. They’re best enjoyed on a hot day when that cool, fruity pop is just what the doctor ordered.
For presentation, I like to line them up on a festive platter with a few fresh berries scattered around. They pair wonderfully with a light lemonade or iced tea for a complete summer snack.
To store, keep the popsicles in an airtight container or tightly sealed plastic bag in the freezer. They’ll stay fresh for up to a week, but honestly, they rarely last that long in my house!
If you need to reheat slightly (say, if they’re too frozen), just let them sit at room temperature for 5 minutes or run warm water briefly on the outside of the mold.
Flavors actually mellow and blend a bit after a day or two in the freezer, which some folks might like. But I personally prefer fresh-from-the-freezer crispness.
Nutritional Information & Benefits
Each layered jello pop contains roughly 70-90 calories depending on the ingredients used (like milk type or added sweeteners). They’re low in fat and contain no artificial preservatives if you choose natural gelatin brands.
Gelatin itself is a good source of protein and supports joint and skin health, which is a nice bonus for a fun treat.
This recipe can easily be made gluten-free and dairy-free with simple ingredient swaps. Just watch out for added sugars if you’re managing sugar intake.
From a wellness perspective, I appreciate that these pops provide a sweet but light option compared to heavy desserts, making them a guilt-free way to satisfy a sweet tooth—especially for kids.
Conclusion
These Easy Kid-Friendly Red White and Blue Layered Jello Pops are such a simple way to bring a burst of color and flavor to any summer celebration. I love how they combine nostalgia with a fun, interactive process that kids enjoy helping with (and sneaking bites of!)
Feel free to play around with the flavors and layers to match your family’s tastes and dietary needs. Honestly, once you get the hang of the layering technique, the possibilities are endless.
If you give this recipe a try, I’d love to hear how your pops turned out, or what creative twists you added. Drop a comment below or share your photos—you never know who might be inspired to make their own!
Happy popping, and here’s to many bright, joyful summer moments ahead.
FAQs About Easy Kid-Friendly Red White and Blue Layered Jello Pops
How long does each jello layer need to set before adding the next?
About 30 to 40 minutes in the freezer is ideal. The layer should be firm but still slightly tacky to the touch to hold the next layer well.
Can I make these pops without popsicle molds?
Absolutely! Small paper cups or even silicone muffin liners work well. Just insert the sticks after the first layer has partially set.
What if my layers are mixing together?
This usually happens if the new layer is too warm or the previous layer isn’t set enough. Let layers cool fully and pour slowly to keep them distinct.
Can I prepare these jello pops ahead of time?
Yes, they can be made up to a day in advance and stored in the freezer. Just keep them well-covered to avoid freezer odors.
Are there any allergy-friendly substitutions?
For dairy-free, swap milk with almond or coconut milk in the white layer. Use gelatin alternatives if you need a vegetarian option, but note the texture may change.
By the way, if you enjoy festive treats, you might like trying a crispy garlic chicken recipe for your next backyard party or a cool batch of homemade lemonade to serve alongside these pops!
Pin This Recipe!
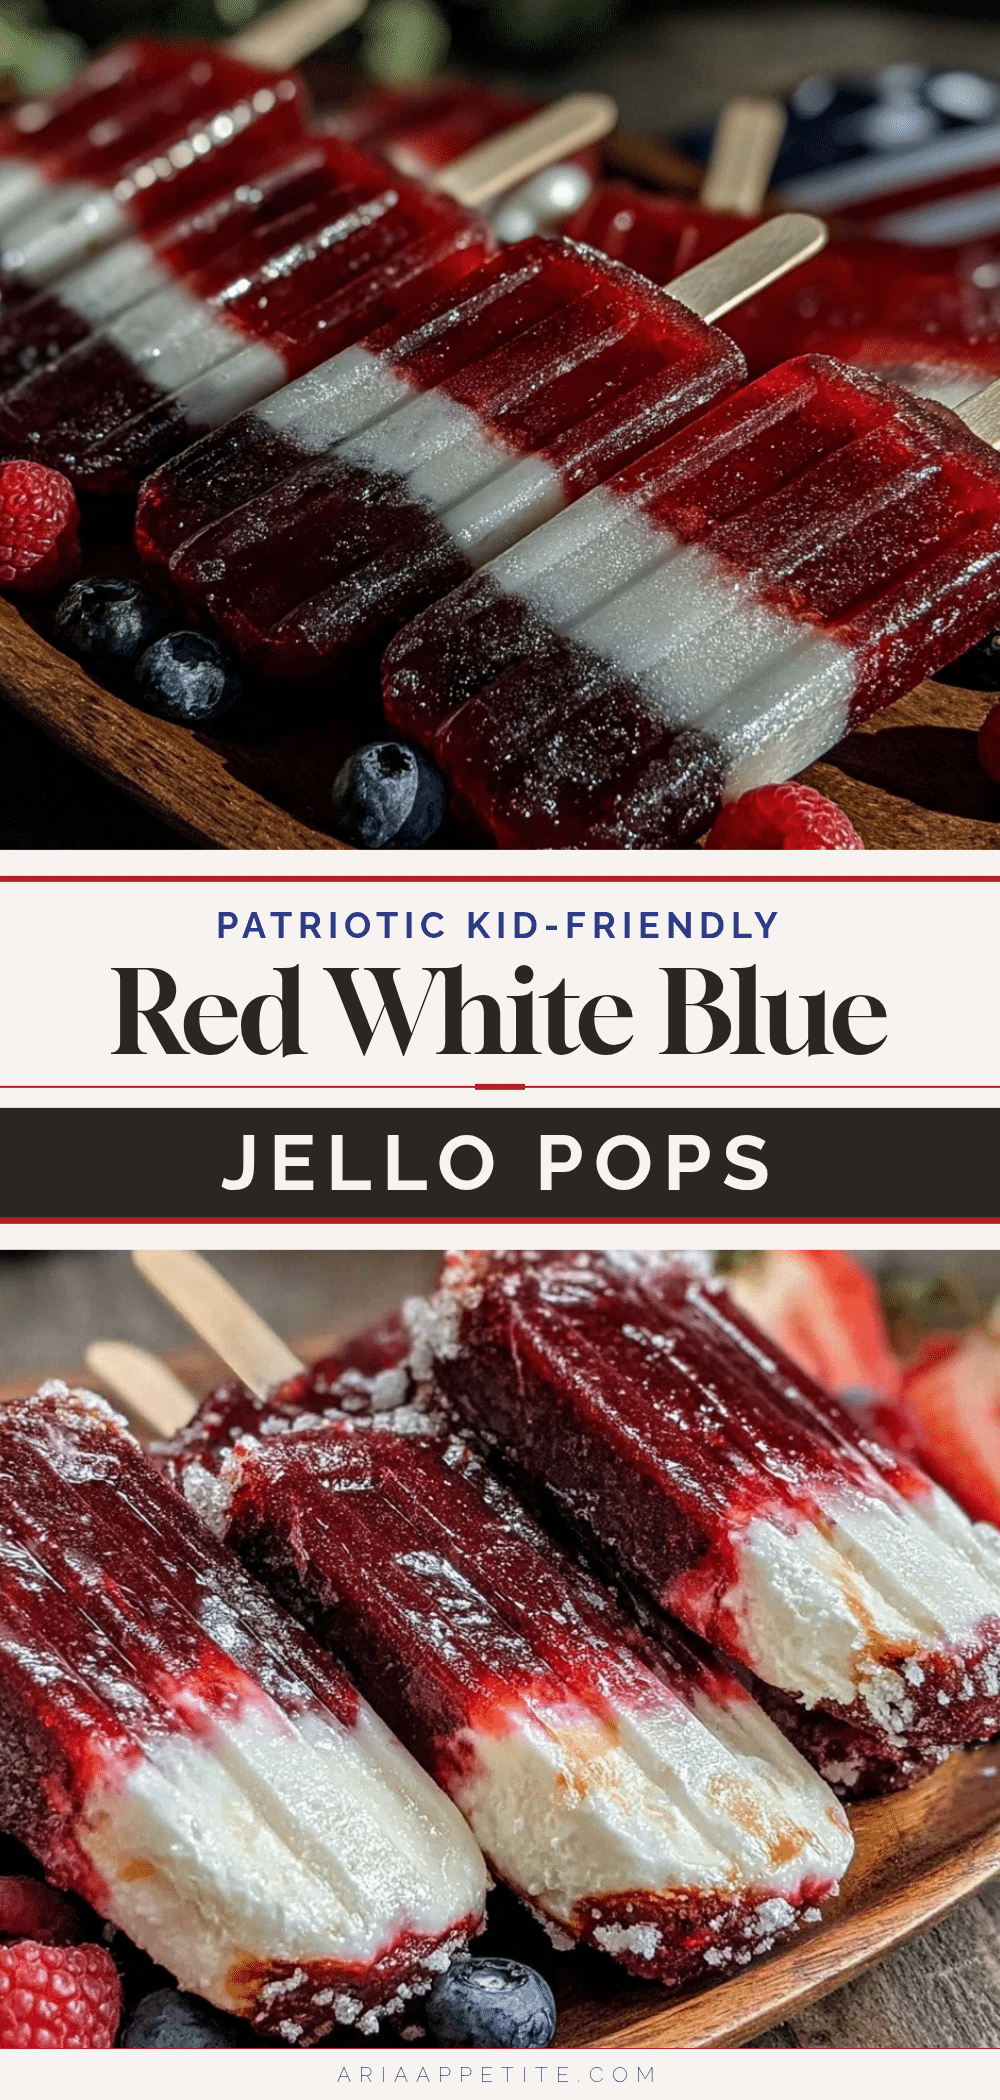
Easy Kid-Friendly Red White and Blue Layered Jello Pops
A quick and fun patriotic treat perfect for kids and summer celebrations, featuring vibrant red, white, and blue layered jello popsicles that are simple to make and delicious to eat.
- Prep Time: 15 minutes
- Cook Time: 4 hours 40 minutes
- Total Time: 4 hours 55 minutes
- Yield: 8 popsicles 1x
- Category: Snack
- Cuisine: American
Ingredients
- 1 package (3 oz / 85 g) strawberry or cherry flavored jello
- 1 cup (240 ml) boiling water
- 1/2 cup (120 ml) cold water
- 1 package (3 oz / 85 g) unflavored gelatin powder
- 1 cup (240 ml) boiling water
- 1/2 cup (120 ml) cold milk (whole or 2%) or almond/oat milk for dairy-free
- 2 tablespoons (30 ml) sweetened condensed milk or white chocolate chips (optional)
- 1 package (3 oz / 85 g) blue raspberry flavored jello
- 1 cup (240 ml) boiling water
- 1/2 cup (120 ml) cold water
- Wooden or plastic popsicle sticks
- Popsicle molds or small paper cups
Instructions
- Prepare the Red Layer: In a mixing bowl, pour 1 cup boiling water over the strawberry or cherry jello powder. Stir gently for about 2 minutes until fully dissolved.
- Add 1/2 cup cold water to the dissolved jello mixture and stir well. Pour the red jello evenly into each popsicle mold, filling about one-third of the way.
- Place the molds in the freezer for 30 to 40 minutes, or until the red layer is firm but slightly tacky to the touch.
- Prepare the White Layer: Sprinkle the unflavored gelatin over 1/2 cup cold milk in a small bowl and let it bloom for 5 minutes.
- Heat 1 cup boiling water and add it to the gelatin-milk mixture. Stir until completely dissolved.
- Add 2 tablespoons sweetened condensed milk or melted white chocolate chips for creaminess, if desired. Stir well.
- Let the white mixture cool to room temperature (about 10 minutes) but do not allow it to set.
- Carefully pour the white layer over the red layer in the molds, filling another one-third of each mold.
- Return to the freezer for another 30 to 40 minutes until the white layer is firm but still slightly tacky.
- Prepare the Blue Layer: Repeat the jello dissolving process with the blue raspberry jello and liquids as with the red layer: 1 cup boiling water, stir until dissolved, then add 1/2 cup cold water.
- Let the blue mixture cool to room temperature before pouring it over the white layer to avoid melting the layers underneath.
- Fill the remaining space in the molds with the blue jello mixture and insert popsicle sticks if not already inserted.
- Freeze the pops for at least 4 hours or overnight to ensure they are fully set.
- To unmold, run warm water briefly on the outside of the molds, then gently pull the pops out.
Notes
Let each jello layer chill until firm but still tacky to the touch before adding the next layer to prevent mixing. Pour layers slowly and from a small height. Use silicone molds for easier unmolding. For dairy-free, substitute milk with almond or coconut milk. Can add a splash of sparkling water or alcohol for adult versions. Store popsicles in an airtight container in the freezer for up to one week.
Nutrition
- Serving Size: 1 popsicle
- Calories: 7090
- Sugar: 1418
- Sodium: 50100
- Fat: 1
- Saturated Fat: 0.5
- Carbohydrates: 1520
- Protein: 12
Keywords: jello pops, layered jello, patriotic snacks, 4th of July treats, kid-friendly popsicles, red white and blue dessert, summer snacks