Love this? Save it for later!
Share the inspiration with your friends
I wasn’t expecting cooking advice from my accountant, but there I was, elbow-deep in tax receipts on a rainy Saturday, listening to Mr. Henderson describe exactly how to make the perfect ham and cheese sliders. He’d been my family’s accountant for years—a quiet, unassuming man who seemed more comfortable with spreadsheets than spatulas. But when he noticed me scribbling notes about a potluck I was supposed to bring food for, he closed my file and started talking about Hawaiian rolls, butter, and ham like he was reciting poetry.
“You gotta use the good ham,” he said, leaning back in his chair. “None of that pre-packaged stuff. Go to the deli counter and ask them to slice it thick.” I nodded along, honestly thinking this was going to be just another recipe story. But then he pulled out his phone—yes, my accountant—and showed me a photo of a tray of sliders that looked like they belonged on a magazine cover. “I make a double batch every month,” he said. “Freeze one, eat one. Changed my life.”
I laughed at the time, but let me tell you, I went home and made them that very weekend. And then I made them again the next weekend. And the weekend after that. These easy freezer-friendly ham and cheese sliders have become my secret weapon for everything from last-minute dinners to holiday gatherings. The best part? They taste just as incredible after a month in the freezer as they do fresh out of the oven. Maybe you’ve been there—standing in front of your freezer at 5 PM with absolutely no plan for dinner. These sliders are the answer to that particular brand of panic.
Why You’ll Love This Recipe
After testing this recipe more times than I care to admit (my neighbors have become very well-fed), I can confidently say these are the best make-ahead sliders you’ll ever make. Here’s what makes them special:
- Quick & Easy: From start to finish, these come together in about 20 minutes of active prep time. The oven does the rest of the work in 15 minutes—perfect for those evenings when you need dinner on the table fast.
- Simple Ingredients: You probably already have most of these ingredients in your kitchen. No fancy grocery store trips required, just good old-fashioned pantry staples.
- Perfect for Any Occasion: Game day, potlucks, holiday brunches, busy weeknights—these sliders fit every scenario. They’re fancy enough for guests but easy enough for Tuesday night dinner.
- Crowd-Pleaser: I’ve served these to picky kids, foodie friends, and everyone in between. The reaction is always the same—people grab two or three before the tray even hits the table.
- Freezer-Friendly Magic: Here’s the real game-changer. You can assemble these weeks ahead, freeze them, and bake them straight from frozen. It’s like having a restaurant-quality meal waiting in your freezer whenever you need it.
What sets this recipe apart is the sauce. I spent weeks perfecting the balance of savory, sweet, and tangy flavors. Most slider recipes use a simple butter and mustard topping, but mine includes a secret combination that makes people ask for the recipe every single time. It’s not just another version—it’s the version you’ll come back to again and again.
Honestly, the first time I bit into one of these after pulling it from the freezer, I closed my eyes. The bread was perfectly soft, the cheese was melty and gooey, and the ham was warm and savory. It’s comfort food at its finest—simple, satisfying, and somehow exactly what you need, no matter the occasion.
What Ingredients You Will Need
This recipe uses simple, wholesome ingredients to deliver bold flavor and satisfying texture without the fuss. Most of these are pantry staples, so you can whip up a batch whenever the craving strikes.
For the Sliders
- 12-count package Hawaiian sweet rolls (I recommend King’s Hawaiian for that perfect soft, slightly sweet texture)
- 1 pound deli-sliced ham (ask for it sliced medium-thick—about 1/8 inch—for the best texture; honey ham or black forest ham both work beautifully)
- 8 slices Swiss cheese (Gruyère is a lovely substitute if you want a nuttier flavor)
- 4 tablespoons unsalted butter (melted; salted butter works too, just reduce the added salt slightly)
For the Signature Sauce

- 2 tablespoons Dijon mustard (whole grain mustard adds a nice texture if you prefer)
- 1 tablespoon honey (or maple syrup for a slightly different sweetness)
- 1 teaspoon Worcestershire sauce (adds that umami depth you can’t quite identify but definitely notice when it’s missing)
- 1/2 teaspoon onion powder (not onion salt—we’re controlling the saltiness ourselves)
- 1/4 teaspoon garlic powder (fresh garlic can burn under the broiler, so stick with powder here)
- Pinch of salt and black pepper (to taste)
For the Topping
- 1 tablespoon poppy seeds (optional but highly recommended for that classic deli look and subtle nutty flavor)
- 1 tablespoon dried minced onion (adds a lovely texture and mild onion flavor without being overpowering)
Ingredient Selection Tips: For the ham, I’ve found that Boar’s Head or Dietz & Watson brands give the best flavor and texture. If you’re using leftover holiday ham, slice it about 1/4 inch thick for the best results. For the cheese, always buy it sliced from the deli counter rather than pre-packaged—it melts so much better. And here’s a little trick I learned from my accountant (yes, him again): warm the Hawaiian rolls slightly before slicing them open. They’re less likely to tear or crumble.
Substitution Guidance: Need a gluten-free option? Use gluten-free Hawaiian rolls or slider buns. For a dairy-free version, swap the Swiss cheese with dairy-free Swiss-style cheese and use vegan butter. You can also swap the ham for turkey or roast beef if that’s what you have on hand. The sauce works beautifully with any deli meat.
Equipment Needed
You don’t need a fancy kitchen to make these sliders. Here’s what you’ll need:
- 9×13-inch baking dish (glass or ceramic works best for even heating; a metal pan works too but may brown the bottoms faster)
- Sharp knife (for slicing the rolls in half horizontally; a serrated bread knife works beautifully)
- Small bowl (for mixing the sauce)
- Pastry brush (for brushing the sauce over the tops; a spoon works in a pinch)
- Aluminum foil (for covering during baking and for freezer storage)
- Plastic wrap (for freezer storage if you’re making these ahead)
- Cutting board (larger than your baking dish for easy assembly)
If you don’t have a pastry brush, don’t worry—I’ve used the back of a spoon more times than I can count. It’s not as neat, but it gets the job done. For the baking dish, I actually prefer a slightly smaller one (11×7 inches) if I want the sliders to be more crowded and cozy—they hold together better that way. And honestly, my favorite tip? Use a bench scraper to slice through all the sliders at once after baking. It’s cleaner than a knife and keeps the sauce from smearing everywhere.
Preparation Method
Let me walk you through this step by step. I’ve made these sliders dozens of times, and these are the exact methods that work best.
Step 1: Preheat and Prep (5 minutes)
Preheat your oven to 350°F (175°C). While it’s heating, take the Hawaiian rolls out of the package. Don’t separate them yet—keep the whole slab intact. Using a sharp serrated knife, carefully slice the entire slab of rolls in half horizontally, like you’re splitting a giant hamburger bun. You should have one solid top half and one solid bottom half.
Step 2: Make the Sauce (3 minutes)
In a small bowl, whisk together the melted butter, Dijon mustard, honey, Worcestershire sauce, onion powder, garlic powder, salt, and pepper. Taste it—yes, taste it straight. It should be savory with a hint of sweetness and a tiny tang. If it tastes flat, add another pinch of salt. Set aside about 2 tablespoons of this mixture for brushing the tops later.
Step 3: Assemble the Sliders (10 minutes)
Place the bottom half of the rolls in your 9×13-inch baking dish. Layer the Swiss cheese slices evenly over the bottom rolls, overlapping slightly to cover every bit of bread. Next, layer the ham slices evenly over the cheese. I like to slightly overlap the ham slices too—you want every bite to have a good amount of meat. Place the top half of the rolls over the ham.
Step 4: Brush and Top (3 minutes)
Using your pastry brush, generously brush the reserved sauce mixture over the tops of the rolls. Make sure you get the edges and the sides—those bits get beautifully golden and crispy. Sprinkle the poppy seeds and dried minced onion evenly over the top. Don’t skip this step—it adds so much texture and visual appeal.
Step 5: Bake or Freeze (15 minutes for fresh, or freeze for later)
To bake immediately: Cover the dish with aluminum foil and bake for 12 minutes at 350°F. Remove the foil and bake for another 3-5 minutes until the tops are golden brown and the cheese is bubbly. Let them rest for 5 minutes before slicing and serving. This rest time is crucial—it lets the cheese set slightly so the sliders hold their shape.
To freeze for later: After brushing the tops with sauce (but before baking), cover the dish tightly with plastic wrap, then a layer of aluminum foil. Label with the date and baking instructions. Freeze for up to 3 months. When you’re ready to bake, you don’t even need to thaw them! Just remove the plastic wrap, cover with foil, and bake at 350°F for 25-30 minutes. Remove the foil for the last 5 minutes to brown the tops. Let rest for 5 minutes before serving.
Troubleshooting Tips
- Rolls are falling apart? You might be slicing them too thin. The slab should be about 1.5 inches tall total.
- Cheese isn’t melting? Your oven might run cool. Try an extra 2-3 minutes covered before removing the foil.
- Sauce is too runny? Don’t worry—it thickens as it bakes and gets absorbed into the rolls.
- Bottoms are soggy? Next time, place the rolls on a wire rack set inside the baking dish for the last few minutes of baking.
The first time I made these, I forgot to cover them with foil and the tops burned while the cheese was still solid. Learn from my mistake—that foil is not optional! And here’s another thing I learned the hard way: use a sharp knife to cut through the entire slab after baking. A dull knife will squish the rolls and push all that lovely filling out the sides.
Cooking Tips & Techniques
After making these sliders more times than I can count, here are the tips that make a real difference:
The Secret to Perfectly Melted Cheese
Always place the cheese on the bottom half of the rolls, directly against the bread. This creates a barrier that prevents the ham juices from making the bottom rolls soggy. The cheese melts into the bread while the ham stays perfectly moist on top.
Temperature Matters
If you’re baking from frozen, don’t be tempted to increase the oven temperature to speed things up. Low and slow (350°F for 25-30 minutes) ensures the center warms through without burning the tops. I learned this the hard way when I tried 400°F once and ended up with blackened tops and cold centers.
Multitasking Strategy
While the oven is preheating, make the sauce and slice the rolls. While the sliders are baking (or during the covered portion), clean up your workspace and set the table. By the time the sliders are done, your kitchen is clean and you’re ready to eat. This is my favorite strategy for stress-free cooking.
Consistency Tips
For the most consistent results, use a kitchen scale to portion your ham. I aim for about 2.5-3 ounces per slider, which means about 2 pounds total for a 12-count package. And always, always let the sliders rest for 5 minutes after baking. I know it’s hard to wait, but those 5 minutes make the difference between sliders that fall apart and sliders that hold together beautifully.
My Biggest Failure
I once tried to double the recipe in a single baking dish. Don’t do it. The sliders need space to expand slightly as they bake, and overcrowding leads to uneven cooking and soggy centers. Use two separate dishes if you’re making a double batch—trust me on this one.
Variations & Adaptations
One of the best things about this recipe is how adaptable it is. Here are some variations I’ve tried and loved:
Spicy Southwest Sliders
Swap the Swiss cheese for pepper jack, add a layer of sliced jalapeños, and mix 1 teaspoon of chipotle powder into the sauce. The smoky heat pairs beautifully with the sweet Hawaiian rolls. I made these for a Super Bowl party and they disappeared in minutes.
Breakfast Sliders
Replace the ham with breakfast sausage patties (cooked first), swap the Swiss for cheddar, and add a scrambled egg layer. Use maple syrup instead of honey in the sauce. These are incredible for brunch or holiday mornings—you can assemble them the night before and bake them fresh in the morning.
Turkey and Cranberry Sliders
Perfect for using up Thanksgiving leftovers. Use sliced turkey instead of ham, swap the Swiss for brie, and add a thin layer of cranberry sauce between the meat and cheese. The tangy cranberry cuts through the richness of the brie beautifully.
Vegetarian Version
Replace the ham with roasted portobello mushrooms sliced thin, or use your favorite plant-based deli slices. Add some caramelized onions for extra depth. The sauce works perfectly as-is with these substitutions.
Low-Carb Adaptation
Use keto-friendly rolls or large lettuce cups instead of Hawaiian rolls. The filling and sauce work beautifully on their own—just reduce the baking time since you’re not waiting for bread to warm through.
My personal favorite variation is the Turkey and Cranberry version—I stumbled onto it the day after Thanksgiving when I had leftovers to use up, and honestly, it might be even better than the original. The sweetness of the cranberry sauce with the buttery brie is just incredible.
Serving & Storage Suggestions
Serving Temperature and Presentation
These sliders are best served warm, straight from the oven. Arrange them on a large platter or wooden board—they look gorgeous with the golden tops and poppy seeds. For a casual gathering, let people grab their own. For a more polished presentation, slice them individually and arrange them in neat rows.
What to Serve With Them
These sliders pair beautifully with:
- Classic coleslaw (the crunch and acidity balance the richness)
- Sweet potato fries (baked or air-fried for a complete meal)
- Fresh fruit salad (especially during summer gatherings)
- Pickles or pickled vegetables (the acidity cuts through the buttery richness)
- A simple green salad with a tangy vinaigrette
For drinks, I love serving these with iced tea, lemonade, or a crisp lager. The sweetness of the rolls pairs beautifully with something cold and refreshing.
Storage Instructions
Refrigerator: Store leftover sliders in an airtight container in the refrigerator for up to 4 days. To reheat, place them on a baking sheet and warm in a 350°F oven for 8-10 minutes. The microwave works in a pinch, but the rolls will be softer and less crispy.
Freezer: As mentioned, these freeze beautifully unbaked for up to 3 months. You can also freeze baked sliders—just let them cool completely, wrap individually in plastic wrap, and place in a freezer bag. Reheat directly from frozen in a 350°F oven for 12-15 minutes.
How Flavors Develop
Honestly, these sliders taste even better the next day. The flavors meld together overnight, and the sauce soaks into the rolls beautifully. If you’re making them for a party, I actually recommend assembling them a day ahead and refrigerating overnight before baking. The difference is subtle but real—the rolls become even more flavorful and tender.
Nutritional Information & Benefits
Here’s the approximate nutritional breakdown for one slider (based on 12 servings):
- Calories: 285
- Protein: 16g
- Carbohydrates: 22g
- Fat: 15g
- Saturated Fat: 8g
- Cholesterol: 55mg
- Sodium: 780mg
- Fiber: 1g
- Sugar: 8g
These values will vary based on your specific ingredients and portion sizes. The ham provides a good source of protein, while the Swiss cheese adds calcium. The Hawaiian rolls offer quick energy, making these sliders a satisfying meal option.
Health Benefits of Key Ingredients: Swiss cheese is rich in calcium and protein, while ham provides B vitamins and iron. The onion and garlic in the sauce offer antioxidants and anti-inflammatory properties. If you’re watching your sodium, look for low-sodium ham or reduce the added salt in the sauce.
Dietary Considerations: This recipe contains gluten, dairy, and eggs (in the rolls). For a gluten-free version, use gluten-free rolls. For dairy-free, use vegan cheese and butter. The recipe is not suitable for low-sodium diets without modifications.
From my wellness perspective, these sliders are about balance. They’re not an everyday meal, but they’re perfect for occasions when you want something satisfying and delicious. I love that I can control the quality of ingredients—choosing good ham, real cheese, and wholesome rolls makes a difference in both taste and nutrition.
Conclusion
These easy freezer-friendly ham and cheese sliders have genuinely changed the way I approach meal planning. They’re the kind of recipe that makes you feel like you’ve hacked the system—delicious, homemade food that’s ready whenever you need it, with almost no effort on the day you serve it.
What I love most about this recipe is how forgiving it is. You can swap ingredients, adjust the sauce to your taste, or double the batch without any stress. It’s the kind of recipe that builds confidence in the kitchen because it works every single time. Whether you’re feeding a crowd or just stocking your freezer for busy nights, these sliders deliver.
I’d love to hear how yours turn out! Did you try any variations? Did you freeze a batch for later? Drop a comment below and let me know—your adaptations might inspire someone else to try something new. And if you loved these, you might also enjoy my crispy garlic chicken for another easy weeknight win, or these sweet potato casserole bites that are perfect for holiday gatherings. Happy cooking, friends—your freezer is about to become your favorite kitchen tool!
Frequently Asked Questions
Can I use a different type of bread?
Absolutely! While Hawaiian sweet rolls are traditional, you can use any soft slider buns or dinner rolls. Just keep them connected in a slab if possible for easier assembly. Brioche buns work beautifully too, though they’re slightly richer.
How long do these sliders last in the freezer?
Properly wrapped and stored, these sliders will stay fresh in the freezer for up to 3 months. Make sure they’re tightly sealed with both plastic wrap and aluminum foil to prevent freezer burn. Label them with the date so you know when you made them.
Can I make these sliders in an air fryer?
Yes! Preheat your air fryer to 325°F. Place the assembled sliders in the basket (you may need to work in batches) and cook for 8-10 minutes, checking halfway through. The tops get beautifully crispy. Just keep an eye on them—air fryers run hot and can burn the tops quickly.
What’s the best way to reheat frozen sliders?
For the best results, bake frozen sliders directly from the freezer at 350°F for 25-30 minutes, covered with foil for the first 20 minutes. Remove the foil for the last 5-10 minutes to let the tops get golden. If you’re in a hurry, you can microwave them, but the texture won’t be as good.
Can I add vegetables to these sliders?
Definitely! Sautéed mushrooms, caramelized onions, roasted red peppers, or fresh arugula all work beautifully. Just make sure any vegetables are cooked and well-drained before adding them, or they’ll make the sliders soggy. A layer of fresh spinach leaves right before baking adds nice color and nutrition.
Pin This Recipe!
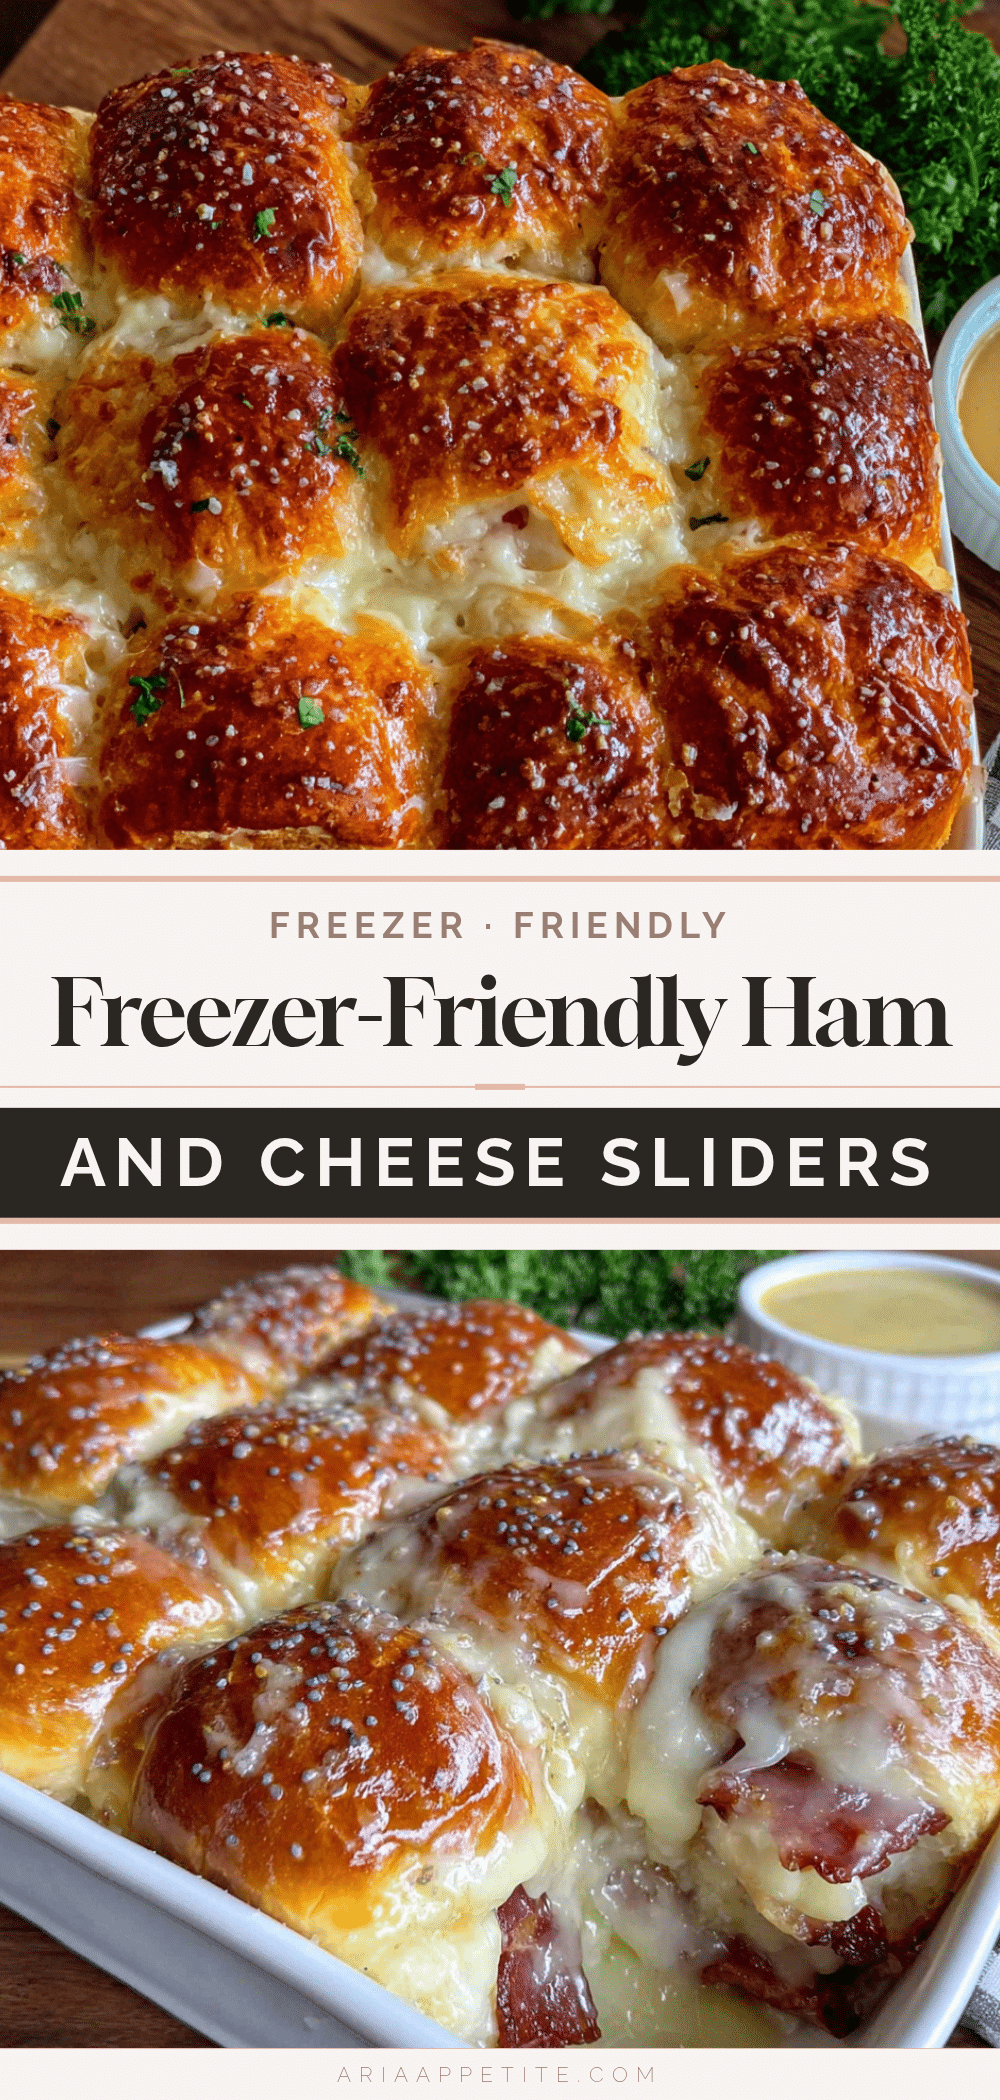
Easy Freezer Ham and Cheese Sliders: Best Make-Ahead Recipe

These easy freezer-friendly ham and cheese sliders are perfect for last-minute dinners, potlucks, or holiday gatherings. Made with Hawaiian sweet rolls, deli ham, Swiss cheese, and a signature savory-sweet sauce, they can be assembled ahead and baked straight from the freezer.
- Prep Time: 20 minutes
- Cook Time: 15 minutes
- Total Time: 35 minutes
- Yield: 12 servings 1x
- Category: Main Course
- Cuisine: American
Ingredients
- 12-count package Hawaiian sweet rolls (e.g., King’s Hawaiian)
- 1 pound deli-sliced ham (medium-thick, about 1/8 inch; honey ham or black forest ham)
- 8 slices Swiss cheese (or Gruyère)
- 4 tablespoons unsalted butter (melted; salted butter works, reduce added salt)
- 2 tablespoons Dijon mustard (or whole grain mustard)
- 1 tablespoon honey (or maple syrup)
- 1 teaspoon Worcestershire sauce
- 1/2 teaspoon onion powder
- 1/4 teaspoon garlic powder
- Pinch of salt and black pepper (to taste)
- 1 tablespoon poppy seeds (optional)
- 1 tablespoon dried minced onion
Instructions
- Preheat oven to 350°F (175°C). Keep the slab of Hawaiian rolls intact; using a sharp serrated knife, slice the entire slab horizontally to create one solid top half and one solid bottom half.
- In a small bowl, whisk together melted butter, Dijon mustard, honey, Worcestershire sauce, onion powder, garlic powder, salt, and pepper. Set aside about 2 tablespoons of this mixture for brushing the tops later.
- Place the bottom half of the rolls in a 9×13-inch baking dish. Layer Swiss cheese slices evenly over the bottom rolls, overlapping slightly. Layer ham slices evenly over the cheese, slightly overlapping. Place the top half of the rolls over the ham.
- Using a pastry brush, generously brush the reserved sauce mixture over the tops of the rolls, including the edges and sides. Sprinkle poppy seeds and dried minced onion evenly over the top.
- To bake immediately: Cover the dish with aluminum foil and bake for 12 minutes at 350°F. Remove the foil and bake for another 3-5 minutes until tops are golden brown and cheese is bubbly. Let rest for 5 minutes before slicing and serving.
- To freeze for later: After brushing tops with sauce (before baking), cover dish tightly with plastic wrap, then a layer of aluminum foil. Label with date and baking instructions. Freeze for up to 3 months. When ready to bake, remove plastic wrap, cover with foil, and bake at 350°F for 25-30 minutes. Remove foil for last 5 minutes to brown tops. Let rest 5 minutes before serving.
Notes
For best results, use deli-sliced ham from the counter (Boar’s Head or Dietz & Watson recommended). Warm Hawaiian rolls slightly before slicing to prevent tearing. Always let sliders rest 5 minutes after baking to help them hold their shape. For frozen sliders, do not thaw before baking. The sauce can be adjusted to taste; if it tastes flat, add another pinch of salt.
Nutrition
- Serving Size: 1 slider
- Calories: 285
- Sugar: 8
- Sodium: 780
- Fat: 15
- Saturated Fat: 8
- Carbohydrates: 22
- Fiber: 1
- Protein: 16
Keywords: ham and cheese sliders, freezer sliders, make-ahead sliders, Hawaiian roll sliders, easy sliders, potluck recipe, game day food