Love this? Save it for later!
Share the inspiration with your friends
I wasn’t expecting cooking advice from my accountant, but there I was, sitting in his cluttered office during tax season, watching him eat lunch at his desk. He pulled out this container of chicken thighs that smelled absolutely incredible—crispy, golden, and nothing like the sad desk lunches you usually see. I asked him about it, half-expecting him to say his wife made it or he picked it up somewhere. Instead, he grinned and said, “Air fryer. Changed my life.”
Honestly, I almost laughed. This was a man who once told me to track my grocery receipts in a color-coded spreadsheet. But the chicken? It was perfect. The skin was shatteringly crisp, the meat was juicy, and he’d seasoned it with stuff I already had in my pantry. He scribbled the basic method on a sticky note—I still have it somewhere in my recipe box, slightly smudged but totally legible. That sticky note turned into the most requested dinner in my house.
Let me tell you, I’ve made a lot of chicken dinners that ended up dry or boring. You know that feeling when you spend an hour cooking and everyone just picks at their plate? This recipe is the opposite of that. These crispy air fryer chicken thighs come out perfect every single time, and they cost next to nothing to make. I’ve tweaked the seasoning and timing over dozens of batches, and what I’m sharing with you today is the version my family begs for on repeat. Maybe you’ve been looking for that one chicken recipe that actually delivers—the kind that makes everyone quiet at the table because they’re too busy eating. This is it.
Why You’ll Love This Recipe
I’ve tested this recipe more times than I can count—probably close to thirty batches over the last year. I wanted to make sure it worked with different air fryer models, different seasoning blends, and different schedules. Here’s why this one stands out from every other chicken thigh recipe you’ll find online.
- Quick & Easy : From prep to plate in under 30 minutes. No marinating overnight, no complicated steps. Just simple seasoning and an air fryer basket.
- Simple Ingredients : You probably have everything in your kitchen right now. Paprika, garlic powder, salt, pepper, and a little oil. That’s it.
- Perfect for Busy Weeknights : This is the dinner I make when I’ve had a long day and don’t want to think about cooking. It comes together while I’m unloading the dishwasher or helping with homework.
- Crowd-Pleaser : My kids used to push chicken around their plates. Now they ask for seconds. Even my picky eater, who claims to hate anything with “skin on it,” devours these.
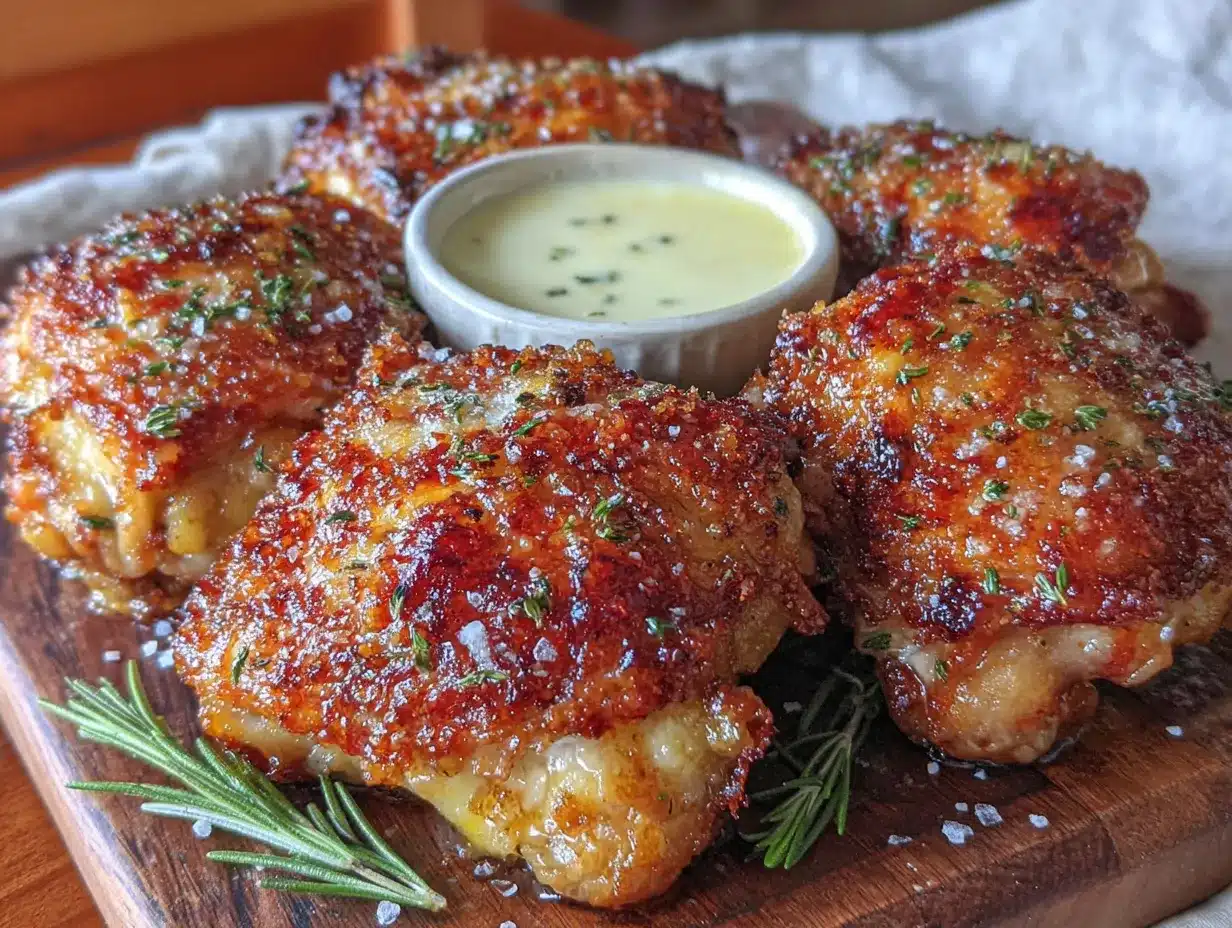
- Unbelievably Delicious : The skin gets so crispy it crackles when you bite into it. The meat stays tender and juicy on the inside. It’s the kind of texture contrast that makes you close your eyes after the first bite.
What makes this recipe different from the rest is the technique. Most air fryer chicken recipes tell you to just toss the thighs in and hope for the best. I figured out that patting the skin completely dry, using a specific oil-to-seasoning ratio, and flipping halfway through makes all the difference. It’s not just another version of air fryer chicken—it’s the best version I’ve ever made, and I’ve tried a lot of them.
This recipe is comfort food reimagined—healthier than deep-frying, faster than oven-baking, but with the same soul-soothing satisfaction. It’s perfect for impressing guests without stress, or turning a simple Tuesday dinner into something memorable. And honestly, anything that gets my family to the table without complaints is a winner in my book.
What Ingredients You Will Need
This recipe uses simple, wholesome ingredients to deliver bold flavor and satisfying texture without the fuss. Most of these are pantry staples you probably already have on hand.
- Bone-in, skin-on chicken thighs (4-6 pieces, about 2 pounds) : This is non-negotiable for the crispiest results. The skin protects the meat during cooking, and the bone keeps everything juicy. I prefer thighs from Bell & Evans or Perdue for consistent quality. Look for thighs that are similar in size so they cook evenly.
- Olive oil (2 tablespoons) : Helps the seasoning stick and promotes browning. You can use avocado oil if you prefer a higher smoke point, but olive oil works great here. Don’t skip it—dry seasoning won’t crisp up the same way.
- Paprika (2 teaspoons) : Adds color and a mild, smoky sweetness. I use Simply Organic paprika for the best flavor. Smoked paprika works too if you want a deeper, more intense taste.
- Garlic powder (1 teaspoon) : Gives savory depth without burning like fresh garlic would in the air fryer. Stick with powder here—fresh garlic can turn bitter at high temperatures.
- Onion powder (1 teaspoon) : Adds a subtle sweetness that balances the savory notes. Don’t skip it—it rounds out the flavor beautifully.
- Salt (1 teaspoon) : I use fine sea salt for even distribution. If you’re using kosher salt, you’ll need about 1.5 teaspoons.
- Black pepper (½ teaspoon) : Freshly ground is best, but pre-ground works in a pinch. Adjust to your family’s preference.
- Optional: Cayenne pepper (¼ teaspoon) : Adds a gentle kick without overwhelming the dish. Leave it out if you’re cooking for kids or spice-sensitive eaters.
- Optional: Dried thyme or rosemary (½ teaspoon) : Adds an herby note that pairs beautifully with chicken. I sometimes add this when I want a more rustic flavor profile.
Ingredient Selection Tips: Look for chicken thighs that are plump and have the skin still attached—not torn or hanging off. The skin should be a pale yellow color, not grayish. If you’re buying frozen, thaw them completely in the refrigerator overnight and pat them very dry before seasoning. Wet skin won’t crisp up properly, and nobody wants soggy chicken.
Substitution Guidance: You can use boneless, skinless thighs if that’s all you have, but reduce the cooking time to 12-15 minutes and expect less crispiness. For a dairy-free option, this recipe is already dairy-free. If you’re watching sodium, use a salt-free seasoning blend and add a light sprinkle of salt at the end instead.
Equipment Needed
You don’t need much for this recipe, which is part of why I love it so much. Here’s what you’ll need:
- Air fryer (any model) : I use a Cosori Pro II 5.8-quart air fryer, but any basket-style air fryer works. If yours is smaller, cook in batches to avoid overcrowding. Oven-style air fryers work too, but you may need to add a few minutes to the cooking time.
- Paper towels : For patting the chicken completely dry. This step matters more than you think.
- Mixing bowl (medium-sized) : For tossing the chicken with oil and seasonings. A glass or stainless steel bowl works best.
- Tongs : For flipping the chicken halfway through cooking. Metal tongs with silicone tips are my favorite—they grip well without scratching the air fryer basket.
- Instant-read thermometer : Optional but highly recommended. Chicken is safe to eat at 165°F, but thighs taste best at 175-185°F because the extra heat breaks down connective tissue.
- Cutting board and knife : For trimming any excess skin or fat if needed. I rarely need to trim mine, but it’s good to have on hand.
Budget-Friendly Options: If you don’t have an air fryer yet, check secondhand stores or Facebook Marketplace. I found my first air fryer for $15 at a garage sale, and it worked perfectly for years. You can also use a convection oven set to 400°F—just spread the thighs on a wire rack set inside a baking sheet and cook for 25-30 minutes, flipping halfway.
Maintenance Tip: Clean your air fryer basket thoroughly after each use. Built-up grease can cause smoking and affect the flavor of future batches. Most baskets are dishwasher-safe, but I find a quick hand wash with warm soapy water keeps the nonstick coating in better shape longer.
Preparation Method
- Preheat your air fryer to 400°F (200°C). Most air fryers need about 3-5 minutes to preheat. I usually start preheating while I’m prepping the chicken so everything is ready at the same time. If your air fryer doesn’t have a preheat function, just run it empty for 3 minutes before adding the chicken.
- Pat the chicken thighs completely dry with paper towels. This is the most important step in the whole recipe. Wet skin steams instead of crisps, and nobody wants rubbery chicken skin. Take your time here—use 3-4 paper towels and press firmly to absorb as much moisture as possible. I’ve ruined batches by rushing this step, so trust me on this one.
- In a medium mixing bowl, combine the olive oil, paprika, garlic powder, onion powder, salt, pepper, and cayenne if using. Stir until it forms a thick, fragrant paste. The smell alone will tell you this is going to be good. If you’re adding dried herbs, mix them in now.
- Add the dried chicken thighs to the bowl and toss with your hands until each piece is evenly coated. Make sure you get the seasoning under the skin too—gently lift the skin with your fingers and rub a little of the mixture directly onto the meat. This is a trick I learned from a chef friend, and it makes the flavor penetrate deeper.
- Arrange the thighs in the air fryer basket in a single layer, skin side up. Don’t overcrowd the basket—leave at least half an inch of space between each piece so the hot air can circulate properly. If your air fryer is small, cook in two batches. It’s worth the extra few minutes.
- Cook at 400°F for 18-22 minutes, flipping halfway through. At the 9-minute mark, use your tongs to carefully flip each thigh over. The skin should be starting to brown nicely. After flipping, continue cooking for another 9-13 minutes. The total time depends on the size of your thighs and your specific air fryer model.
- Check for doneness. The internal temperature should reach at least 175°F (80°C) for the juiciest results. Insert the thermometer into the thickest part of the thigh, avoiding the bone. If you don’t have a thermometer, cut into the thickest part—the juices should run clear, and the meat should no longer be pink.
- Let the chicken rest for 5 minutes before serving. This is hard to do when everyone’s hungry, but it makes a real difference. The juices redistribute during resting, so every bite stays moist and flavorful. I usually use this time to toss a salad or warm up some vegetables.
Sensory Cues: At the halfway point, the kitchen should smell like paprika and garlic, and the chicken should look golden brown on the bottom. After the full cooking time, the skin should be deep golden brown and feel firm to the touch. When you tap it with a fork, you should hear a faint crackling sound. That’s how you know you’ve nailed it.
Cooking Tips & Techniques
I’ve made plenty of mistakes with air fryer chicken so you don’t have to. Here’s what I’ve learned the hard way:
Don’t skip the drying step. Early on, I was in a rush and barely patted the chicken dry. The skin came out pale and flabby, and my kids asked if we could order pizza instead. Lesson learned. Moisture is the enemy of crispiness, so take those extra 30 seconds to really dry the skin.
Flip carefully. I once flipped the chicken too aggressively and tore the skin on two thighs. It still tasted fine, but the presentation was a mess. Use tongs and a gentle hand—lift from the edge of the thigh, not the middle of the skin. If the skin sticks a little, don’t force it. Give it another minute or two of cooking, and it should release easily.
Watch for smoke. Chicken thighs are fatty, and that fat can drip into the bottom of your air fryer and start smoking. If you notice smoke, don’t panic. Just open the basket briefly to let some air out, and keep cooking. To prevent this, you can add a tablespoon of water to the bottom of the air fryer drawer before cooking—it helps reduce smoke without affecting the chicken.
Season generously. Chicken thighs can handle bold flavors. Don’t be shy with the seasoning—the skin acts as a barrier, so you need enough to penetrate through. I use slightly more salt than I think I need, and it always turns out perfectly seasoned.
Let the air fryer preheat. I know some people skip preheating to save time, but it makes a noticeable difference in crispiness. Starting with a hot basket ensures the skin starts sizzling immediately, which gives you that golden crust.
Batch cooking strategy. If you’re feeding a big family, cook the first batch while you prep a quick side dish. By the time the second batch is done, the first batch is rested and ready to serve. Everything comes together at the same time, and nobody waits hungry.
Variations & Adaptations
One of the best things about this recipe is how easy it is to change up. Here are some variations I’ve tried and loved:
Lemon Herb Version : Add the zest of one lemon, 1 teaspoon of dried oregano, and ½ teaspoon of dried thyme to the seasoning mix. Squeeze fresh lemon juice over the cooked chicken before serving. The brightness cuts through the richness beautifully. I make this version in spring and summer when I want something lighter.
Spicy Buffalo Style : After cooking, toss the thighs in ¼ cup of buffalo sauce mixed with 1 tablespoon of melted butter. Serve with ranch or blue cheese dressing and celery sticks. My husband goes crazy for this version—it’s our Sunday football staple.
Honey Garlic Glaze : In the last 3 minutes of cooking, brush each thigh with a mixture of 2 tablespoons honey, 1 tablespoon soy sauce, and 1 minced garlic clove. Watch carefully so the honey doesn’t burn. The result is sticky, sweet, and savory all at once. My kids beg for this one.
Dietary Adaptations : For a keto-friendly version, skip the honey glaze and use extra paprika and cayenne. For a lower-sodium option, use a salt-free seasoning blend and add just a pinch of salt at the end. This recipe is naturally gluten-free and dairy-free, so it works for most dietary needs without any changes.
Different Cooking Methods : If you don’t have an air fryer, bake the thighs on a wire rack set over a baking sheet at 425°F for 30-35 minutes. The wire rack lets air circulate underneath, which helps the bottom crisp up. You can also grill them over medium heat for 6-8 minutes per side—the smoky char adds amazing flavor.
Serving & Storage Suggestions
These crispy air fryer chicken thighs are incredibly versatile when it comes to serving. Here’s how I like to enjoy them:
Serving Temperature: Serve hot, straight from the air fryer. The skin starts to soften after about 15 minutes, so I try to time things so the chicken is the last thing to come out of the kitchen. If you’re serving a crowd, keep the cooked thighs on a wire rack in a warm oven (200°F) while you finish the rest of the batch.
What to Serve With Them: I usually pair these with simple sides that don’t steal the spotlight. Mashed potatoes, roasted vegetables, or a crisp green salad all work beautifully. Rice pilaf or garlic bread are great options too. My personal favorite is a simple coleslaw—the crunch and acidity balance the richness of the chicken perfectly.
Storage Instructions: Leftovers keep well in an airtight container in the refrigerator for up to 4 days. The skin will lose some crispiness, but the flavor stays excellent. I often make extra on purpose so I have lunch ready for the next day.
Reheating Methods: The air fryer is the best way to bring back the crispiness. Reheat at 375°F for 3-4 minutes, flipping once. The microwave works in a pinch, but the skin will be soft. If you’re meal-prepping, store the chicken without the skin, then reheat and add fresh crispy skin separately. That’s a pro tip I picked up from a meal prep blogger.
Freezer Instructions: Cooked chicken thighs freeze beautifully for up to 3 months. Let them cool completely, then wrap each thigh individually in plastic wrap and place in a freezer bag. To reheat, thaw in the refrigerator overnight, then crisp up in the air fryer at 375°F for 5-6 minutes.
Flavor Development: Honestly, these taste even better the next day. The seasoning has more time to penetrate the meat, and the flavors meld together beautifully. I’ve been known to make a double batch just so I can have leftovers for lunch.
Nutritional Information & Benefits
Here’s the estimated nutritional breakdown for one serving (one thigh, based on a recipe serving 4):
- Calories: 285
- Protein: 24g
- Fat: 20g
- Saturated Fat: 5g
- Carbohydrates: 2g
- Fiber: 0g
- Sugar: 0g
- Sodium: 620mg
Health Benefits: Chicken thighs are an excellent source of protein, which helps keep you full and supports muscle health. They also provide selenium, niacin, and vitamin B6—nutrients that support immune function and energy metabolism. The skin contains healthy fats that help your body absorb fat-soluble vitamins from the vegetables you serve alongside.
Dietary Considerations: This recipe is naturally gluten-free, dairy-free, and low-carb. It fits well into keto, paleo, and whole30 diets with no modifications needed. If you’re watching sodium, reduce the salt to ½ teaspoon and use a salt-free seasoning blend.
Personal Wellness Perspective: I love that this recipe lets me serve my family a satisfying dinner without spending hours in the kitchen or using unhealthy cooking methods. It’s proof that you don’t need deep fryers or complicated techniques to make food that tastes indulgent. We eat these about once a week, and I feel good about every single batch.
Conclusion
These crispy air fryer chicken thighs have become a staple in my kitchen for good reason. They’re quick, affordable, and delicious in a way that makes everyone at the table happy. Whether you’re feeding a family on a budget, looking for a reliable weeknight dinner, or just want to impress your taste buds without much effort, this recipe delivers every single time.
I love that this recipe came from such an unexpected source—my accountant’s sticky note lunch. It reminds me that great recipes can come from anywhere, and sometimes the best ones are the simplest. I’ve made these thighs for dinner parties, busy weeknights, and lazy Sundays, and they’ve never let me down.
Now I want to hear from you! Have you tried making crispy chicken in your air fryer? What seasonings do you love? Drop a comment below and share your favorite variation—I’m always looking for new ideas to try. And if you make these, tag me in your photos so I can see how they turned out. Happy cooking, friends!
Frequently Asked Questions
Can I use boneless, skinless chicken thighs for this recipe?
Yes, but the results will be different. Boneless, skinless thighs cook faster—about 12-15 minutes at 400°F—and won’t get as crispy. You’ll still get juicy, flavorful chicken, but the texture won’t be the same. If you’re using boneless thighs, I recommend adding a light coating of cornstarch to help with browning.
Why is my air fryer chicken skin not crispy?
The most common reason is moisture. If you didn’t pat the chicken completely dry before seasoning, the skin will steam instead of crisp. Other possible causes include overcrowding the basket, not preheating the air fryer, or using too much oil. Try drying the chicken more thoroughly and giving each piece plenty of space in the basket.
How do I prevent the air fryer from smoking when cooking chicken thighs?
Chicken thighs are fatty, and that fat can drip down and cause smoking. To reduce smoke, add a tablespoon of water to the bottom of the air fryer drawer before cooking. You can also line the bottom with a piece of aluminum foil (don’t cover the basket itself) to catch drips. If smoke starts, just open the basket briefly to let air circulate.
Can I meal prep these chicken thighs for the week?
Absolutely! Cook a big batch on Sunday, let them cool completely, and store in an airtight container in the refrigerator for up to 4 days. Reheat in the air fryer at 375°F for 3-4 minutes to restore some crispiness. They’re perfect for salads, wraps, or quick lunches throughout the week.
What’s the best way to reheat leftover air fryer chicken thighs?
The air fryer is your best bet. Reheat at 375°F for 3-4 minutes, flipping halfway through. This brings back most of the original crispiness. The microwave is faster but will make the skin soft. If you’re in a hurry, the microwave works fine—just know the texture will be different.
Pin This Recipe!

Crispy Air Fryer Chicken Thighs: Easy Family Dinner

These crispy air fryer chicken thighs come out perfect every single time, with shatteringly crisp skin and tender, juicy meat. Made with simple pantry ingredients and ready in under 30 minutes, this is the weeknight dinner your family will beg for.
- Prep Time: 10 minutes
- Cook Time: 20 minutes
- Total Time: 30 minutes
- Yield: 4 servings 1x
- Category: Main Course
- Cuisine: American
Ingredients
- 4–6 bone-in, skin-on chicken thighs (about 2 pounds)
- 2 tablespoons olive oil
- 2 teaspoons paprika
- 1 teaspoon garlic powder
- 1 teaspoon onion powder
- 1 teaspoon fine sea salt
- ½ teaspoon black pepper, freshly ground
- ¼ teaspoon cayenne pepper (optional)
- ½ teaspoon dried thyme or rosemary (optional)
Instructions
- Preheat your air fryer to 400°F (200°C). Most air fryers need about 3-5 minutes to preheat.
- Pat the chicken thighs completely dry with paper towels. Use 3-4 paper towels and press firmly to absorb as much moisture as possible.
- In a medium mixing bowl, combine the olive oil, paprika, garlic powder, onion powder, salt, pepper, and cayenne if using. Stir until it forms a thick, fragrant paste.
- Add the dried chicken thighs to the bowl and toss with your hands until each piece is evenly coated. Gently lift the skin with your fingers and rub a little of the mixture directly onto the meat.
- Arrange the thighs in the air fryer basket in a single layer, skin side up. Leave at least half an inch of space between each piece.
- Cook at 400°F for 18-22 minutes, flipping halfway through. At the 9-minute mark, use tongs to carefully flip each thigh over.
- Check for doneness. The internal temperature should reach at least 175°F (80°C) for the juiciest results. Insert the thermometer into the thickest part of the thigh, avoiding the bone.
- Let the chicken rest for 5 minutes before serving.
Notes
Patting the chicken completely dry is the most important step for crispy skin. Don’t overcrowd the basket—cook in batches if needed. For best results, let the chicken rest 5 minutes before serving. Leftovers keep in the refrigerator for up to 4 days and reheat well in the air fryer at 375°F for 3-4 minutes.
Nutrition
- Serving Size: 1 chicken thigh
- Calories: 285
- Sodium: 620
- Fat: 20
- Saturated Fat: 5
- Carbohydrates: 2
- Protein: 24
Keywords: air fryer chicken thighs, crispy chicken thighs, easy chicken dinner, weeknight dinner, gluten-free chicken, dairy-free chicken, keto chicken