Love this? Save it for later!
Share the inspiration with your friends
I had sworn off pumpkin scones for basically a decade. Let me tell you, it wasn’t a dramatic declaration or anything—more of a quiet, stubborn conviction that they were always dry, crumbly in the wrong way, and tasted more like cinnamon air than actual pumpkin. Then last October, I found myself at my neighbor’s kitchen table on a drizzly Tuesday morning. She pushed a plate toward me and said, “Just try one, I swear these are different.” I took a bite while mentally preparing my polite excuses, and honestly? I caught myself reaching for a second one before I’d even finished the first.
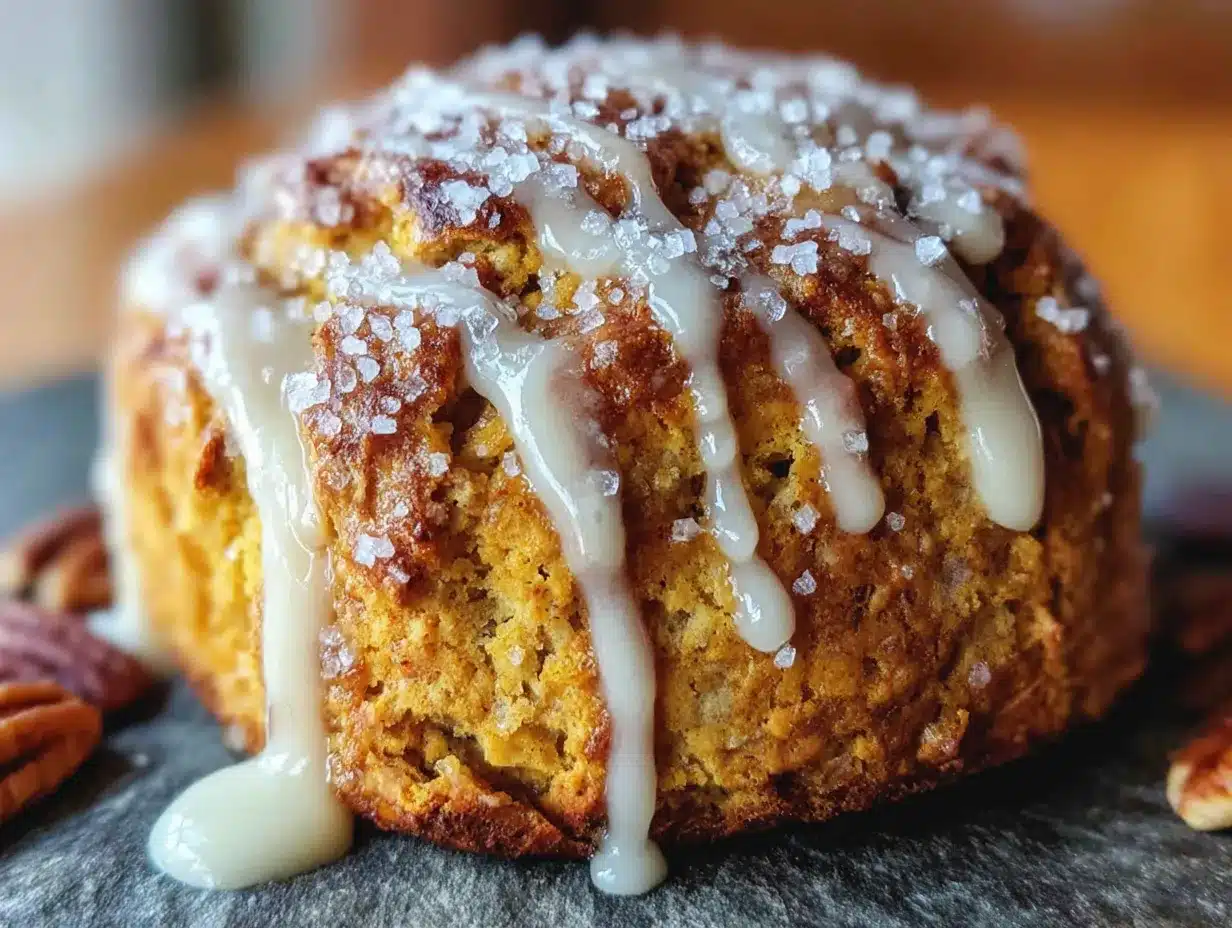
That was the moment my whole scone worldview shifted. These were tender, almost fluffy in the center with those gorgeous craggy edges that soak up icing perfectly. The pumpkin flavor was present but not overwhelming—like fall had been gently folded into butter and flour. The maple icing on top? That’s the part that got me. It’s not cloyingly sweet; it has this deep, slightly nutty warmth that makes you close your eyes for a second. I asked for the recipe on the spot, which felt bold since we’d only lived next door for three months.
I’ve tweaked it about six times since then, trying different spice ratios and testing how cold the butter needs to be for that ideal flaky texture. This version right here is the one I keep coming back to, and maybe you’ve been there too—looking for a pumpkin baked good that actually delivers on texture, not just the promise of fall flavor. These scones have become my Saturday morning ritual, and I think they’re about to become yours.
Why You’ll Love This Recipe
These pumpkin scones aren’t your average coffee shop pastry that looks better than it tastes. They’re genuinely soft, flaky, and packed with real pumpkin flavor without being dense or gummy. Here is why this recipe stands out from the dozens I’ve tested over the years:
- Quick & Easy: From mixing bowl to oven in under 20 minutes. No chilling time needed, which honestly surprised me the first time I made them.
- Simple Ingredients: You probably have most of these in your pantry right now. No weird stabilizers or hard-to-find extracts.
- Perfect for Fall Mornings: Great for brunch, Thanksgiving breakfast, or just a cozy Tuesday when you need something warm and sweet.
- Crowd-Pleaser: I brought these to a potluck and three people asked for the recipe before noon. Kids love the icing, adults love the subtle spice balance.
- Unbelievably Tender: The secret is using cold butter and not overworking the dough. The result is a scone that shatters slightly on the outside but stays soft inside.
What makes this recipe different from the rest is the technique of grating frozen butter into the flour mixture. It sounds fussy, but trust me—it creates these tiny pockets of butter that steam as they bake, giving you layers without any complicated folding. Plus, the maple icing isn’t just a drizzle; it’s a generous blanket that soaks into the warm scones just enough to make every bite perfect.
This isn’t just another pumpkin recipe. It’s the kind that makes you pause mid-bite and think, “Okay, this is what I wanted all along.” It’s comfort food that feels special but comes together with zero stress.
What Ingredients You Will Need
This recipe uses simple, wholesome ingredients to deliver that perfect balance of tender crumb and warm fall spice. Most of these are pantry staples, which makes these scones dangerously easy to whip up on a whim.
- All-purpose flour (2 ½ cups or 312g) – Provides structure without making the scones tough. Spoon and level your flour for best results.
- Granulated sugar (⅓ cup or 66g) – Just enough sweetness to balance the pumpkin and spices.
- Baking powder (1 tablespoon) – The main leavening agent. Make sure it’s fresh for proper rise.
- Pumpkin pie spice (2 teaspoons) – I use store-bought for convenience, but you can mix cinnamon, nutmeg, ginger, and cloves yourself.
- Ground cinnamon (½ teaspoon) – Adds extra warmth that complements the pumpkin beautifully.
- Salt (½ teaspoon) – Don’t skip this; it balances the sweetness and enhances the spices.
- Unsalted butter (½ cup or 113g, frozen) – This is the game-changer. Freeze it overnight or for at least 2 hours before grating.
- Pumpkin puree (¾ cup or 170g) – Use 100% pure pumpkin, not pumpkin pie filling. I prefer Libby’s for consistent texture.
- Heavy cream (¼ cup or 60ml) – Adds richness and tenderness. You can substitute whole milk in a pinch.
- Vanilla extract (1 teaspoon) – Use pure vanilla if you have it; it makes a subtle but noticeable difference.
- Large egg (1) – Binds everything together and adds structure.
For the Maple Icing:
- Powdered sugar (1 ½ cups or 180g) – Sift it if clumpy for a smooth glaze.
- Pure maple syrup (3 tablespoons) – Use real maple syrup, not pancake syrup. Grade A dark amber works beautifully here.
- Milk or heavy cream (1-2 tablespoons) – Adjust for desired consistency. Heavy cream makes the icing richer.
- Vanilla extract (½ teaspoon) – Optional but rounds out the maple flavor nicely.
If you need substitutions, use a gluten-free 1:1 flour blend for dietary needs, though the texture will be slightly less tender. For a dairy-free version, substitute cold coconut oil for the butter and use oat milk in the icing. I’ve tested both and they work well, just expect a slightly different crumb.
Equipment Needed
You don’t need fancy equipment for these scones, which is part of their charm. Here’s what you’ll want to have on hand:
- Box grater or food processor – For grating the frozen butter. A box grater works great and gives you more control.
- Large mixing bowl – For combining dry ingredients.
- Pastry cutter or two forks – For cutting butter into flour if you’re not grating it.
- Baking sheet – Line it with parchment paper for easy cleanup.
- Parchment paper – Prevents sticking and helps scones brown evenly.
- Bench scraper or sharp knife – For cutting the dough into wedges.
- Cooling rack – Essential for letting the icing set properly.
- Whisk – For mixing the icing smooth.
If you don’t have a box grater, you can cube the frozen butter and pulse it in a food processor with the flour mixture. I actually prefer the box grater method because I can see the butter shreds evenly distributed. Just watch your knuckles—I’ve nicked myself more times than I’d like to admit.
Preparation Method
Preheat your oven to 400°F (200°C) and line a baking sheet with parchment paper. This temperature gives you that golden exterior without drying out the inside.
- Grate the frozen butter. Take your frozen stick of butter and grate it on the large holes of a box grater. Work quickly so the butter stays cold. You should get fluffy shreds that look like cheese. Pop them back in the freezer while you measure your dry ingredients.
- Whisk dry ingredients together. In a large bowl, whisk together the flour, sugar, baking powder, pumpkin pie spice, cinnamon, and salt. Make sure there are no lumps, especially from the baking powder.
- Add the grated butter. Take the butter shreds out of the freezer and add them to the flour mixture. Toss gently with your fingers or a fork until the butter is evenly coated. You want the shreds to stay separate, not clump together. Work quickly here—warm hands are the enemy of flaky scones.
- Mix wet ingredients. In a separate bowl or a liquid measuring cup, whisk together the pumpkin puree, heavy cream, vanilla extract, and the egg until smooth. The mixture should be a uniform orange color with no streaks of egg white visible.
- Combine wet and dry. Pour the wet mixture into the flour-butter mixture. Use a rubber spatula to fold everything together gently. Stop as soon as the dough comes together—it will look shaggy and a little messy. Overmixing will make your scones tough, and nobody wants that.
- Shape the dough. Turn the dough out onto a lightly floured surface. Bring it together with your hands, patting it into a circle about ¾ inch thick. Don’t use a rolling pin; your hands give you better control and keep the dough from getting overworked. The dough will be slightly sticky, so dust your hands with flour if needed.
- Cut into wedges. Use a sharp knife or bench scraper to cut the circle into 8 equal wedges, like a pizza. Transfer each wedge to your prepared baking sheet, spacing them about 2 inches apart. They will spread slightly but not much.
- Bake. Place the baking sheet in the preheated oven and bake for 14-16 minutes, or until the scones are golden brown on the bottom and the edges look set. The tops should be lightly browned and feel firm to the touch. A toothpick inserted into the center should come out clean or with a few moist crumbs.
- Cool slightly. Let the scones cool on the baking sheet for 5 minutes, then transfer them to a cooling rack. This rest period lets them finish setting up inside.
- Make the maple icing. While the scones are still warm (but not hot), whisk together the powdered sugar, maple syrup, and 1 tablespoon of milk or cream. Add more liquid a teaspoon at a time until you reach a thick but pourable consistency. The icing should coat the back of a spoon and hold its shape briefly before melting back in.
- Ice the scones. Drizzle or spread the icing generously over the warm scones. The warmth will help the icing sink in slightly, creating that perfect top layer. Let the icing set for about 10 minutes before serving.
Sensory cue: When you pull these out of the oven, the kitchen will smell like a fall candle that actually delivers. The edges should be slightly darker than the center, and the maple icing will look glossy before it sets into that crackly top layer we all love.
Cooking Tips & Techniques
I’ve made these pumpkin scones about fifteen times now, and I’ve definitely learned some things the hard way. Here are the tips that make the difference between good scones and unforgettable ones:
Keep everything cold. This is the number one rule of scone-making. If your butter melts before it hits the oven, you’ll get flat, greasy discs instead of tall, flaky wedges. I sometimes pop my mixing bowl in the freezer for five minutes before adding the wet ingredients if my kitchen is warm.
Don’t overmix the dough. I ruined my first batch by treating the dough like bread and kneading it until smooth. Scone dough should look shaggy and almost messy. A few dry spots are totally fine—they’ll hydrate during baking. Overmixing develops gluten, which gives you tough, bready scones instead of tender ones.
Pat, don’t roll. Using your hands to shape the dough gives you better control and keeps you from overworking it. Plus, you can feel if the dough is too sticky or too dry and adjust accordingly. If it’s too sticky, add a tablespoon of flour. Too dry? Add a splash of cream.
Use a sharp cutter or knife. A dull knife squishes the edges of the dough together, which prevents them from rising properly. A sharp, clean cut gives the scones room to expand upward. I use a bench scraper for the cleanest cut.
Bake from chilled. If you have time, pop the shaped scones in the freezer for 10 minutes before baking. This firms up the butter again and gives you an even taller rise. I do this when I’m making scones for company and want them to look extra impressive.
Ice while warm. This is my favorite tip. Icing warm scones lets the glaze soak in just slightly on the surface, creating a thin crust that contrasts with the soft interior. If you ice them when they’re completely cool, the icing just sits on top like a hat instead of becoming part of the scone.
Variations & Adaptations
One of the best things about this recipe is how flexible it is. Here are some variations I’ve tried and loved:
Gluten-Free Version: Substitute the all-purpose flour with a 1:1 gluten-free baking blend that contains xanthan gum. I’ve used King Arthur’s Measure for Measure blend with great results. The texture is slightly more delicate, so handle the dough gently and don’t skip the chilling step.
Vegan Adaptation: Use cold coconut oil or vegan butter in place of regular butter. Replace the heavy cream with full-fat coconut milk or oat milk, and use a flax egg (1 tablespoon ground flaxseed mixed with 3 tablespoons water, let sit for 5 minutes). The texture will be a bit more crumbly but still delicious.
Spice It Up: If you love a stronger spice kick, add ¼ teaspoon of ground ginger and a pinch of ground cloves to the flour mixture. I did this once when I was craving chai-flavored scones, and it was a happy accident.
Add-Ins: Fold in ½ cup of chopped pecans, walnuts, or dried cranberries after combining the wet and dry ingredients. Toast the nuts first for extra flavor. I’ve also added white chocolate chips, which pair beautifully with the pumpkin and maple.
Savory Version: Skip the sugar and pumpkin pie spice, and add 1 teaspoon of dried sage, ½ teaspoon of black pepper, and ½ cup of shredded sharp cheddar cheese. Omit the maple icing and brush the tops with melted butter before baking. These are amazing alongside a bowl of soup.
Mini Scones: Pat the dough into a rectangle and cut into small squares or triangles. Reduce baking time to 10-12 minutes. Perfect for brunch buffets or snacking without committing to a full-sized scone.
Serving & Storage Suggestions
These pumpkin scones are best served slightly warm, when the maple icing is still a little soft and the interior is tender. I love them with a hot cup of coffee or chai latte in the morning, but they also shine as an afternoon treat with a cup of spiced tea.
For presentation, arrange the scones on a wooden board or a simple white platter. The orange-brown color of the scones against the white icing is gorgeous, especially with a few cinnamon sticks or star anise scattered around for visual interest. You can also drizzle extra maple syrup over the top for a more rustic look.
Storage: Keep leftover scones in an airtight container at room temperature for up to 2 days. The icing will soften slightly, which honestly isn’t a bad thing. If you live in a humid climate, they might get a bit sticky, so store them with a paper towel in the container to absorb excess moisture.
Freezing: These freeze beautifully. Freeze un-iced scones in a single layer on a baking sheet, then transfer to a freezer bag for up to 3 months. When ready to enjoy, thaw at room temperature and warm in a 300°F oven for 5 minutes before icing. You can also freeze the iced scones, but the icing might get a bit tacky upon thawing.
Reheating: Pop a scone in a 300°F oven for 5-7 minutes to bring back that fresh-baked warmth. The microwave works in a pinch (10-15 seconds), but the texture won’t be as nice. The oven really does make a difference here.
The flavor actually improves slightly on day two as the spices meld together. I’ve been known to make a batch on Saturday just so I can have them with my Sunday morning coffee.
Nutritional Information & Benefits
Here is the approximate nutritional breakdown per scone (based on 8 servings with icing):
| Nutrient | Amount per Scone |
|---|---|
| Calories | 320 |
| Total Fat | 14g |
| Saturated Fat | 8g |
| Cholesterol | 55mg |
| Sodium | 280mg |
| Total Carbohydrates | 46g |
| Dietary Fiber | 2g |
| Sugars | 24g |
| Protein | 4g |
Pumpkin is packed with vitamin A, which supports eye health and immune function. It’s also a good source of fiber, which helps keep you full longer. The butter and cream provide calcium and healthy fats that make these scones satisfying enough to be a meal accompaniment.
These scones are not low-calorie or low-sugar, and that’s okay. They’re a treat meant to be enjoyed mindfully. If you’re watching your sugar intake, you can reduce the maple syrup in the icing or use a sugar-free maple syrup alternative, but the texture and flavor will change slightly.
Potential allergens include dairy (butter, cream) and gluten (flour). For allergen-friendly versions, see the variations section above.
Conclusion
These cozy pumpkin scones with maple icing have officially earned a permanent spot in my fall baking rotation. They’re everything I want in a seasonal treat—tender, spiced just right, and topped with that dreamy maple glaze that makes you slow down and actually taste what you’re eating. I’ve made them for neighbors, holiday brunches, and quiet Saturday mornings when the only plan is to enjoy something warm and sweet.
What I love most about this recipe is how forgiving it is. Even on the days when I’m rushing or my butter wasn’t quite cold enough, these scones still turn out delicious. They don’t demand perfection; they just ask for a little patience and a willingness to get your hands messy. That’s my kind of baking.
I’d love to hear how yours turn out! Did you add pecans? Try the savory version? Drizzle extra maple syrup on top like I always do? Drop a comment below and let me know your favorite variation. And if you’re feeling generous, share this recipe with a friend who needs a little fall comfort in their life. Happy baking, friends!
Frequently Asked Questions
Can I use canned pumpkin pie filling instead of pumpkin puree?
No, I wouldn’t recommend it. Pumpkin pie filling is already sweetened and spiced, which will throw off the balance of this recipe. Stick with 100% pure pumpkin puree for the best texture and flavor.
Why did my scones turn out dry?
This usually happens from overmixing the dough or baking them a few minutes too long. Make sure you stop mixing as soon as the dough comes together, and check them at the 14-minute mark. Every oven runs a little differently.
Can I make the dough ahead of time?
Absolutely. Shape the scones, place them on a parchment-lined baking sheet, and refrigerate for up to 24 hours. You can even freeze them for up to 3 months. Bake from frozen, adding 2-3 minutes to the baking time.
Do I have to use frozen butter?
It makes a big difference, but if you forget to freeze it, cut very cold butter into small cubes and chill them in the freezer for 15 minutes before using. The key is keeping the butter solid until it hits the oven.
Can I skip the maple icing?
You can, but honestly, the icing is what makes these scones special. If you want a simpler option, brush the warm scones with melted butter and sprinkle with cinnamon sugar. It’s not the same, but it’s still good.
Pin This Recipe!
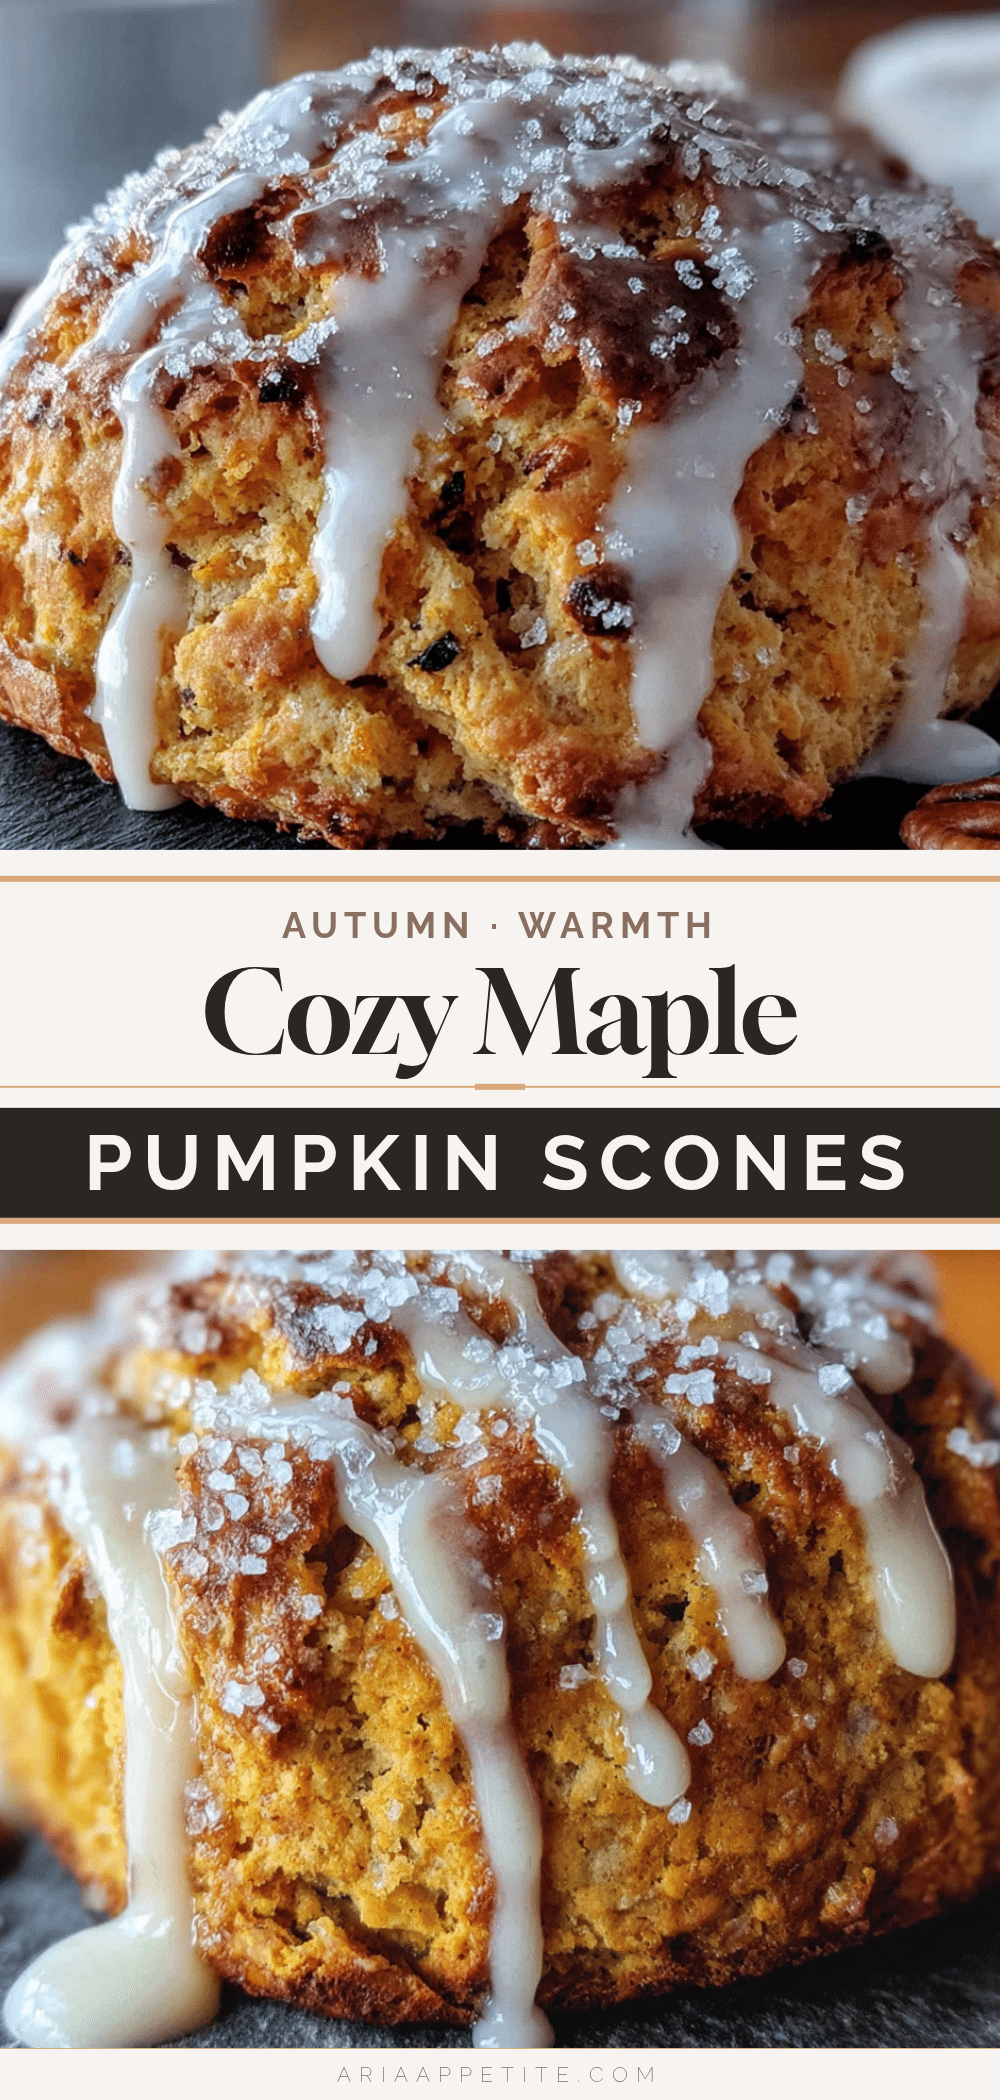
Cozy Pumpkin Scones with Easy Maple Icing Recipe

Tender, flaky pumpkin scones with a generous maple icing that soaks into the warm scones. Perfect for fall mornings, brunch, or a cozy treat.
- Prep Time: 20 minutes
- Cook Time: 16 minutes
- Total Time: 36 minutes
- Yield: 8 servings 1x
- Category: Breakfast, Brunch, Dessert
- Cuisine: American
Ingredients
- 2 ½ cups (312g) all-purpose flour
- ⅓ cup (66g) granulated sugar
- 1 tablespoon baking powder
- 2 teaspoons pumpkin pie spice
- ½ teaspoon ground cinnamon
- ½ teaspoon salt
- ½ cup (113g) unsalted butter, frozen
- ¾ cup (170g) pumpkin puree (100% pure)
- ¼ cup (60ml) heavy cream
- 1 teaspoon vanilla extract
- 1 large egg
- 1 ½ cups (180g) powdered sugar
- 3 tablespoons pure maple syrup
- 1–2 tablespoons milk or heavy cream
- ½ teaspoon vanilla extract (optional)
Instructions
- Preheat oven to 400°F (200°C) and line a baking sheet with parchment paper.
- Grate the frozen butter on the large holes of a box grater. Place shreds in the freezer while preparing dry ingredients.
- In a large bowl, whisk together flour, sugar, baking powder, pumpkin pie spice, cinnamon, and salt.
- Add grated butter to flour mixture and toss gently with fingers or a fork until evenly coated.
- In a separate bowl, whisk together pumpkin puree, heavy cream, vanilla extract, and egg until smooth.
- Pour wet mixture into flour-butter mixture and fold gently with a rubber spatula until just combined. Dough will be shaggy.
- Turn dough out onto a lightly floured surface. Pat into a circle about ¾ inch thick.
- Cut circle into 8 equal wedges and transfer to prepared baking sheet, spacing 2 inches apart.
- Bake for 14-16 minutes until golden brown on bottom and edges are set. Cool on baking sheet for 5 minutes, then transfer to a cooling rack.
- While scones are still warm, whisk together powdered sugar, maple syrup, and 1 tablespoon milk or cream. Add more liquid a teaspoon at a time until thick but pourable.
- Drizzle or spread icing generously over warm scones. Let set for about 10 minutes before serving.
Notes
Keep butter and dough cold for flakiest scones. Do not overmix. Ice while warm for best texture. Scones can be frozen un-iced for up to 3 months.
Nutrition
- Serving Size: 1 scone
- Calories: 320
- Sugar: 24
- Sodium: 280
- Fat: 14
- Saturated Fat: 8
- Carbohydrates: 46
- Fiber: 2
- Protein: 4
Keywords: pumpkin scones, maple icing, fall baking, easy scone recipe, pumpkin recipe, breakfast pastry