Love this? Save it for later!
Share the inspiration with your friends
I was standing in the baking aisle of our local grocery store last Tuesday when the smell of cinnamon and nutmeg hit me — and suddenly I was seven years old at my neighbor Mrs. Kowalski’s kitchen table, her flour-dusted hands shaping something small and round. She wasn’t one for fancy desserts, but every November she’d make these little cake pops that looked like turkeys, and I’d sit there watching, trying to figure out how she got the candy corn to stick just right. She passed away a few years back, and I haven’t thought about those afternoons in ages. But that smell, mixed with the crisp fall air coming through the automatic doors, just pulled me right back.
I grabbed a cart without really thinking and started tossing things in — cake mix, frosting, candy corn. My husband texted asking if we needed milk, and I typed back “turkey pops” like that explained anything. Honestly, I wasn’t even sure I remembered how to make them. Mrs. K never used a recipe; she just did everything by feel, humming along to the radio while I tried not to lick the frosting off my fingers when she wasn’t looking. I burned the first batch of cake because I got distracted trying to find my old phone with the photos from that time. The kitchen smelled like regret for a solid hour.
But I kept going, because that’s what you do when a memory grabs you by the collar. And let me tell you — after three attempts, I figured it out. These no-bake turkey cake pops aren’t just cute. They taste like that feeling of walking into a warm kitchen on a cold day, with someone who’s happy to see you. Maybe you’ve had a moment like that, where a recipe is really about the person who made it, not just the food itself. That’s what this is.
Why You’ll Love This Recipe
Let me be real with you — I’ve tested this recipe six times over the past two weeks, and I’ve got the frosting-stained aprons to prove it. I wanted to make sure these little guys were foolproof, because the last thing you need when you’re trying to create a fun fall treat is a kitchen meltdown. Here’s why these turkey cake pops are worth every minute:
- No Baking Required: We’re using pre-made cake and frosting, which means no oven time, no watching the clock, and no worrying about burning anything. You can literally make these in your pajamas.
- Simple Ingredients: Everything comes from the regular grocery store. No specialty baking shops, no hunting down obscure supplies. Candy corn, pretzels, and cake mix — that’s the whole list.
- Perfect for Fall Gatherings: Whether it’s a classroom party, a Friendsgiving potluck, or just a cozy afternoon with your kids, these little turkeys are guaranteed to make people smile.
- Crowd-Pleaser: I brought a batch to my book club last week, and they were gone in ten minutes. Even Sarah, who “doesn’t do sweets,” ate three. Three.
- Unbelievably Cute: Let’s face it — the candy corn feathers and pretzel beak are just adorable. They look way more impressive than the effort required, which is my favorite kind of recipe.
What makes this recipe different from all the other cake pop tutorials out there? It’s the no-bake approach, for starters. Traditional cake pops involve baking, crumbling, rolling, and hoping they don’t fall apart. Mine skip the baking entirely — we start with store-bought cake and build from there. I also figured out a trick for getting the candy corn to stay put without sliding off, which I’ll share in the tips section. This isn’t just another version of turkey cake pops. It’s the version that actually works on the first try.
These are the kind of treats that make you feel like a kitchen rockstar without the stress. Perfect for making memories with little hands helping out, or for surprising your coworkers with something that screams “I put in effort” when really it took you twenty minutes.
What Ingredients You Will Need
This recipe uses simple, everyday ingredients to create something that looks like it came from a fancy bakery window. Most of these are pantry staples or easy to find in the seasonal aisle at your grocery store. Here’s what you’ll need:
For the Cake Pops Base
- 1 store-bought pound cake or vanilla cake (about 10-12 ounces) — I prefer Sara Lee’s frozen pound cake for consistent texture, but any plain cake works
- 3 tablespoons cream cheese frosting (store-bought or homemade) — adds moisture and helps the pops hold together
- 1 teaspoon vanilla extract — just for that extra warmth (adds richness)
For the Turkey Decorations
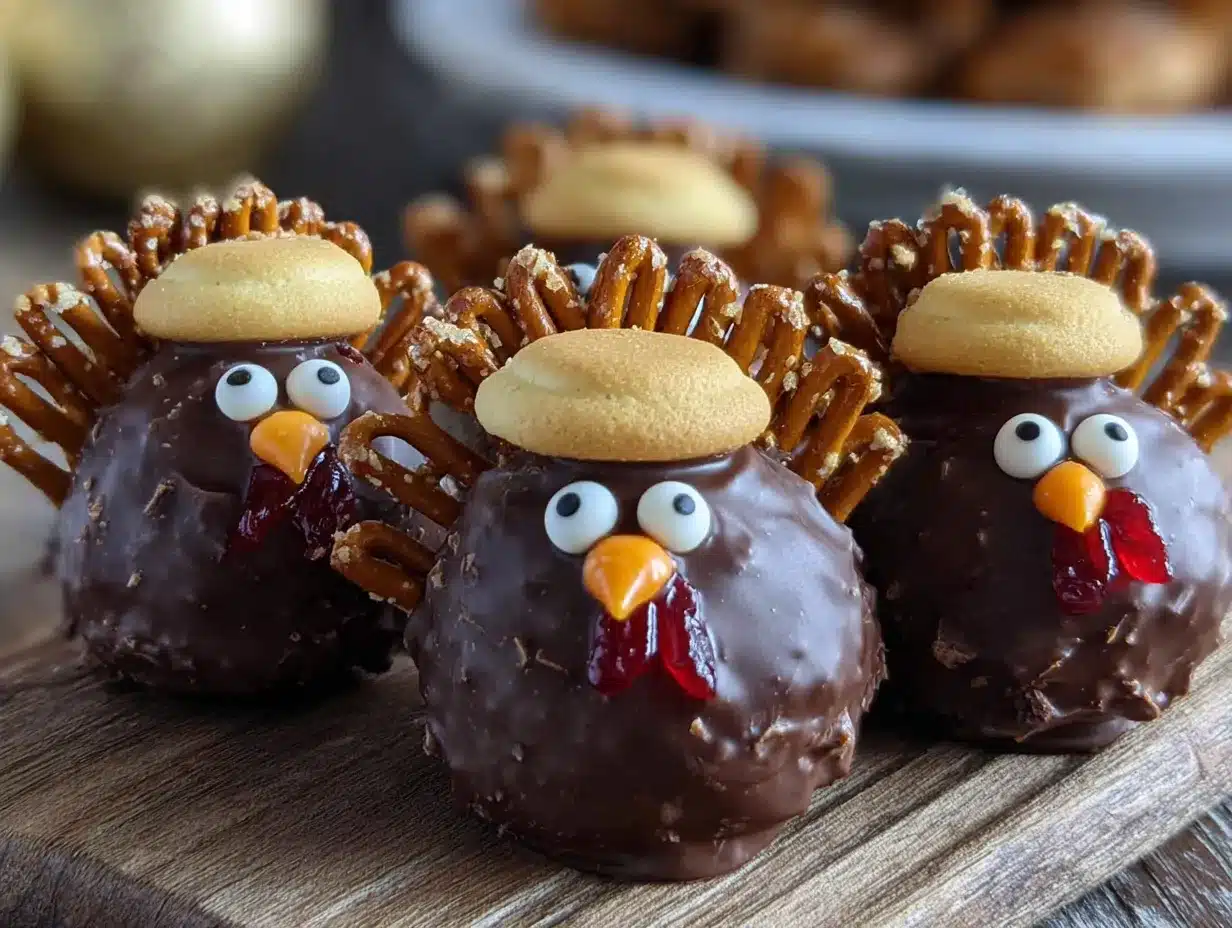
- 1 bag candy corn — these are your turkey feathers, so get the classic orange and yellow kind
- 1 bag candy eyes — the little white ones with black pupils, found in the baking aisle
- 1 bag pretzel sticks — these become the turkey legs and beak; break them in half for the beak
- 1 bag chocolate melting wafers (about 1 cup) — I recommend Ghirardelli or Wilton for smooth melting
- Orange sprinkles or orange sanding sugar — optional, but adds a nice touch to the beak area
- 1 tablespoon coconut oil or shortening — helps thin the chocolate for easier dipping
For Assembly & Dipping
- Lollipop sticks — 20-24 sticks, depending on how many pops you make
- Styrofoam block or floral foam — for holding the pops upright while they set
- Wax paper or parchment paper — for easy cleanup and drying
Ingredient Selection Tips: When choosing your cake, look for one that’s dense rather than fluffy. Pound cake works best because it crumbles nicely and holds together without getting mushy. If you’re using homemade cake, make sure it’s completely cooled — warm cake will make the frosting melt and create a sticky mess. Trust me on this one.
Substitution Notes: If you’re avoiding dairy, use a dairy-free cake and vegan cream cheese frosting. The chocolate wafers can be swapped for dairy-free chocolate chips mixed with a teaspoon of coconut oil. For a gluten-free version, use a gluten-free pound cake — just check the texture before mixing, as some gluten-free cakes can be crumbly.
Equipment Needed
You don’t need a professional bakery setup for these turkey cake pops, but having the right tools makes the process way smoother. Here’s what I use:
- Large mixing bowl — for crumbling the cake and mixing with frosting
- Fork or pastry cutter — for breaking the cake into fine crumbs
- Cookie scoop or tablespoon — for portioning even-sized balls (a #40 scoop works perfectly)
- Baking sheet lined with wax paper — for holding the formed pops before dipping
- Microwave-safe bowl — for melting the chocolate wafers
- Lollipop sticks — available at craft stores or online; Amazon has them in bulk for cheap
- Styrofoam block — for drying the dipped pops upright; you can also use a cardboard box with holes poked in it
- Small piping bag or zip-top bag — for attaching the candy eyes with melted chocolate
- Tweezers — honestly, these are a lifesaver for placing tiny candy eyes without smudging
Budget-Friendly Alternatives: If you don’t have a cookie scoop, just use a tablespoon and roll the mixture between your palms. No styrofoam block? Poke holes in a cardboard box or use a colander turned upside down. I’ve used a muffin tin with the pops balanced on the edges before — desperate times, you know?
Preparation Method
Alright, let’s get to the good stuff. I’ll walk you through this step by step, and I promise — if I can do this without losing my mind, you can too.
- Prepare the cake base: Crumble the pound cake into a large mixing bowl using your hands or a fork. You want fine, even crumbs — no chunks bigger than a pea. This takes about 2-3 minutes. Don’t rush it, because uneven crumbs mean lumpy pops.
- Add the frosting: Add the cream cheese frosting and vanilla extract to the crumbled cake. Mix with a fork or your hands until everything comes together like a soft dough. The mixture should hold together when squeezed but not feel greasy. If it’s too dry, add another teaspoon of frosting. Too wet? Add a tablespoon more cake crumbs.
- Shape the balls: Using your cookie scoop or tablespoon, portion out the mixture and roll into 1-inch balls. You should get about 20-24 pops depending on size. Place them on the wax paper-lined baking sheet. Pop them in the fridge for 15 minutes — this helps them firm up so they don’t fall apart when you dip them.
- Melt the chocolate: While the balls chill, melt the chocolate wafers in a microwave-safe bowl. Microwave in 30-second intervals, stirring between each, until smooth. Add the coconut oil or shortening and stir until glossy. Be careful not to overheat — chocolate that seizes is a nightmare to work with.
- Insert the sticks: Remove the chilled balls from the fridge. Dip the tip of each lollipop stick into the melted chocolate, then insert it about halfway into a cake ball. This chocolate “glue” helps the stick stay put. Return to the fridge for another 10 minutes to set.
- Dip the pops: Hold a cake pop by the stick and dip it into the melted chocolate, covering it completely. Gently tap the stick on the edge of the bowl to let excess chocolate drip off. Don’t swirl — that can cause the pop to fall off the stick. Place the dipped pop into your styrofoam block to dry.
- Add the feathers: While the chocolate is still wet, insert 3-4 candy corn pieces into the back of the pop in a fan pattern. Work quickly — the chocolate sets fast. If it hardens before you add the candy corn, dip the pop again briefly or use a dot of fresh chocolate to attach them.
- Attach the beak and eyes: Break a pretzel stick in half and insert the broken end into the front of the pop for the beak. Use a tiny dab of melted chocolate to attach two candy eyes above the beak. If you’re using orange sprinkles, add a small dot of chocolate and sprinkle them on for extra detail.
- Add the legs: Break two pretzel sticks in half and insert them into the bottom of the pop at an angle, so they look like turkey legs. Make sure they’re secure — nobody wants a legless turkey.
- Let them set completely: Allow the pops to dry in the styrofoam block for at least 30 minutes at room temperature, or 15 minutes in the fridge. The chocolate should be firm and the decorations should be secure before you handle them.
Sensory Cues: When you’re mixing the cake and frosting, the mixture should feel like slightly damp sand — it holds together but isn’t sticky. The melted chocolate should be thick enough to coat the back of a spoon but thin enough to drip off smoothly. When you tap the stick on the bowl, you should hear a soft tap-tap-tap as the excess falls.
Personal Tip: I always make an extra batch of the cake mixture and keep it in the fridge. If a pop falls apart during dipping (it happens!), I just re-roll it and try again. No wasted ingredients, no tears.
Cooking Tips & Techniques
I’ve made about fifty of these little turkeys over the past two weeks, and I’ve learned a few things the hard way. Here are my best tips so you don’t have to repeat my mistakes:
The Temperature Trap: Chocolate is picky about temperature. If your cake balls are too cold when you dip them, the chocolate will harden instantly and crack. Too warm, and the pop will slide right off the stick. The sweet spot is 15 minutes in the fridge — not the freezer. I learned this after losing three pops to the sink because they decided to take a swim in the chocolate.
Keep Your Hands Clean: Dip your fingers in cold water before rolling the cake balls. The moisture prevents the mixture from sticking to your hands. Just make sure your hands aren’t wet — damp is the goal. I keep a small bowl of water next to my workspace for this exact reason.
The Candy Corn Problem: Candy corn is surprisingly heavy, and it can slide off the pop if the chocolate is too thin. My solution? Dip the candy corn tips in melted chocolate before inserting them. It acts like glue and keeps everything in place. This was a game-changer for me after my first batch looked like sad, featherless birds.
Timing Is Everything: Work in small batches. Don’t dip all 20 pops at once — the chocolate will start to set, and you’ll be rushing. Dip 5 pops, add the decorations, then move on to the next batch. It takes a little longer, but the results are so much better.
Multitasking Strategy: While the first batch of cake balls is chilling, set up your decorating station. Lay out the candy corn, pretzels, and candy eyes in separate bowls. Have your tweezers ready. Once you start dipping, there’s no time to search for supplies — trust me, I’ve been there, chocolate dripping everywhere, frantically looking for the candy eyes.
Variations & Adaptations
One of the best things about this recipe is how easy it is to switch things up. Here are some variations I’ve tried and loved:
Chocolate Turkey Pops: Use chocolate cake instead of vanilla, and dip in white chocolate for a striking contrast. The dark cake against the white coating makes the candy corn really pop. I made these for a Halloween party last year, and they were a hit.
Pumpkin Spice Version: Add 1 teaspoon pumpkin pie spice to the cake mixture before rolling. Use orange candy melts instead of chocolate for the coating. These taste like autumn in every bite and are perfect for Thanksgiving.
Gluten-Free Adaptation: Use a gluten-free pound cake or vanilla cake. Most gluten-free cakes work well, but check the texture — some are more crumbly than others. Add an extra tablespoon of frosting if the mixture seems dry.
Vegan Option: Use a vegan cake (many store-bought options are accidentally vegan), vegan cream cheese frosting, and dairy-free chocolate. The process is exactly the same, and honestly, nobody will know the difference.
Mini Turkey Pops: Make smaller balls using a teaspoon instead of a tablespoon. Use mini candy corn (yes, it exists!) and smaller candy eyes. These are perfect for kids’ parties or as cupcake toppers.
Personal Variation: My favorite twist is adding a pinch of cinnamon and nutmeg to the cake mixture. It gives the pops a warm, spiced flavor that pairs perfectly with the sweet candy corn. I also like to drizzle a little white chocolate over the finished pops for an extra touch of elegance.
Serving & Storage Suggestions
These turkey cake pops are best served at room temperature, which is when the chocolate coating is firm but not hard, and the cake center is soft and tender. I like to arrange them on a platter with the candy corn feathers facing outward for maximum visual impact. They look especially cute on a rustic wooden board or a white cake stand.
What to Serve With Them: These pops pair beautifully with warm apple cider, pumpkin spice lattes, or a simple cup of hot chocolate. For a dessert table, arrange them alongside other fall treats like mini pumpkin pies or caramel apples. They also make fantastic party favors — just wrap each pop in a clear cellophane bag tied with a ribbon.
Storage Instructions: Store the pops in an airtight container at room temperature for up to 3 days. If you stack them, place a layer of wax paper between each layer to prevent the decorations from sticking. Do not refrigerate them for more than a day — the cake can dry out, and the candy corn might get sticky.
Freezer Tips: You can freeze the undipped cake balls for up to 2 months. Just place them on a baking sheet in the freezer until firm, then transfer to a freezer bag. When you’re ready to use them, thaw in the fridge overnight and proceed with dipping. The dipped pops don’t freeze well — the chocolate can bloom and lose its shine.
Flavor Development: These pops actually taste better the day after you make them. The flavors meld together, and the cake center becomes even more moist and flavorful. So if you’re making them for a party, prepare them a day ahead — your taste buds will thank you.
Nutritional Information & Benefits
Let’s be honest — these are a treat, not a health food. But here’s the breakdown if you’re curious:
Estimated Nutritional Values (per pop):
- Calories: 180-220
- Fat: 8-10g
- Carbohydrates: 28-32g
- Protein: 2-3g
- Sugar: 18-22g
Health Considerations: The pound cake provides some calcium and iron from enriched flour, and the chocolate contains antioxidants (yes, I’m reaching here, but it counts!). The cream cheese frosting adds a small amount of protein and calcium. Candy corn is essentially sugar with no nutritional value, but hey — it’s a holiday treat.
Dietary Notes: This recipe contains gluten, dairy, and soy (from the chocolate). For allergen-free versions, see the variations section above. If you’re watching your sugar intake, consider using sugar-free cake mix and frosting — just note that the texture might be slightly different.
My Personal Take: I believe in balance. These turkey cake pops are a once-a-year treat for most people, and that’s perfectly fine. Food is about joy, connection, and celebration. One batch of these won’t derail your wellness goals — but it might make your Thanksgiving table a whole lot happier.
Conclusion
These no-bake turkey cake pops are more than just a cute dessert. They’re a way to bring a little warmth and whimsy to your fall celebrations without spending hours in the kitchen. Whether you’re making them for a classroom party, a Friendsgiving gathering, or just because you need something to brighten up a gloomy Tuesday, they deliver every single time.
I love that this recipe lets you get creative — you can stick with the classic turkey design or try the variations I shared. Add your own twist, use different colors, or make them extra sparkly with edible glitter. The point is to have fun and make something that makes you smile.
I’d love to hear how your turkey cake pops turn out! Drop a comment below and tell me about your decorating adventures — did your kids help? Did you try a fun variation? Did you eat three before they made it to the party? (No judgment here, I’ve been there.) And if you share them on social media, tag me so I can see your beautiful creations. Happy fall, friends — go make some memories!
Frequently Asked Questions
Can I use homemade cake instead of store-bought?
Absolutely! Just make sure your cake is completely cooled before crumbling. Homemade cake can be more moist than store-bought, so you might need a little less frosting. Start with 2 tablespoons and add more if needed.
Why did my cake pops fall off the stick?
This usually happens when the cake balls are too warm or the chocolate is too thick. Make sure your balls are thoroughly chilled (15 minutes in the fridge) and that your chocolate is thin enough to coat smoothly. Adding a teaspoon of coconut oil to the chocolate helps with consistency.
Can I make these ahead of time?
Yes! You can prepare the cake balls up to 2 days in advance and store them in the fridge. Dip and decorate them the day you plan to serve them for the best appearance. The undipped balls can also be frozen for up to 2 months.
My candy corn keeps falling off. What am I doing wrong?
The chocolate needs to be wet enough to hold the candy corn in place. Dip the tips of the candy corn in melted chocolate before inserting them into the pop. This creates a strong bond that prevents sliding. Also, work quickly — chocolate sets fast!
Can I use white chocolate instead of dark?
Definitely! White chocolate gives a beautiful contrast with the candy corn. Just be careful when melting — white chocolate is more sensitive to heat and can seize easily. Use low power in the microwave and stir frequently.
Pin This Recipe!
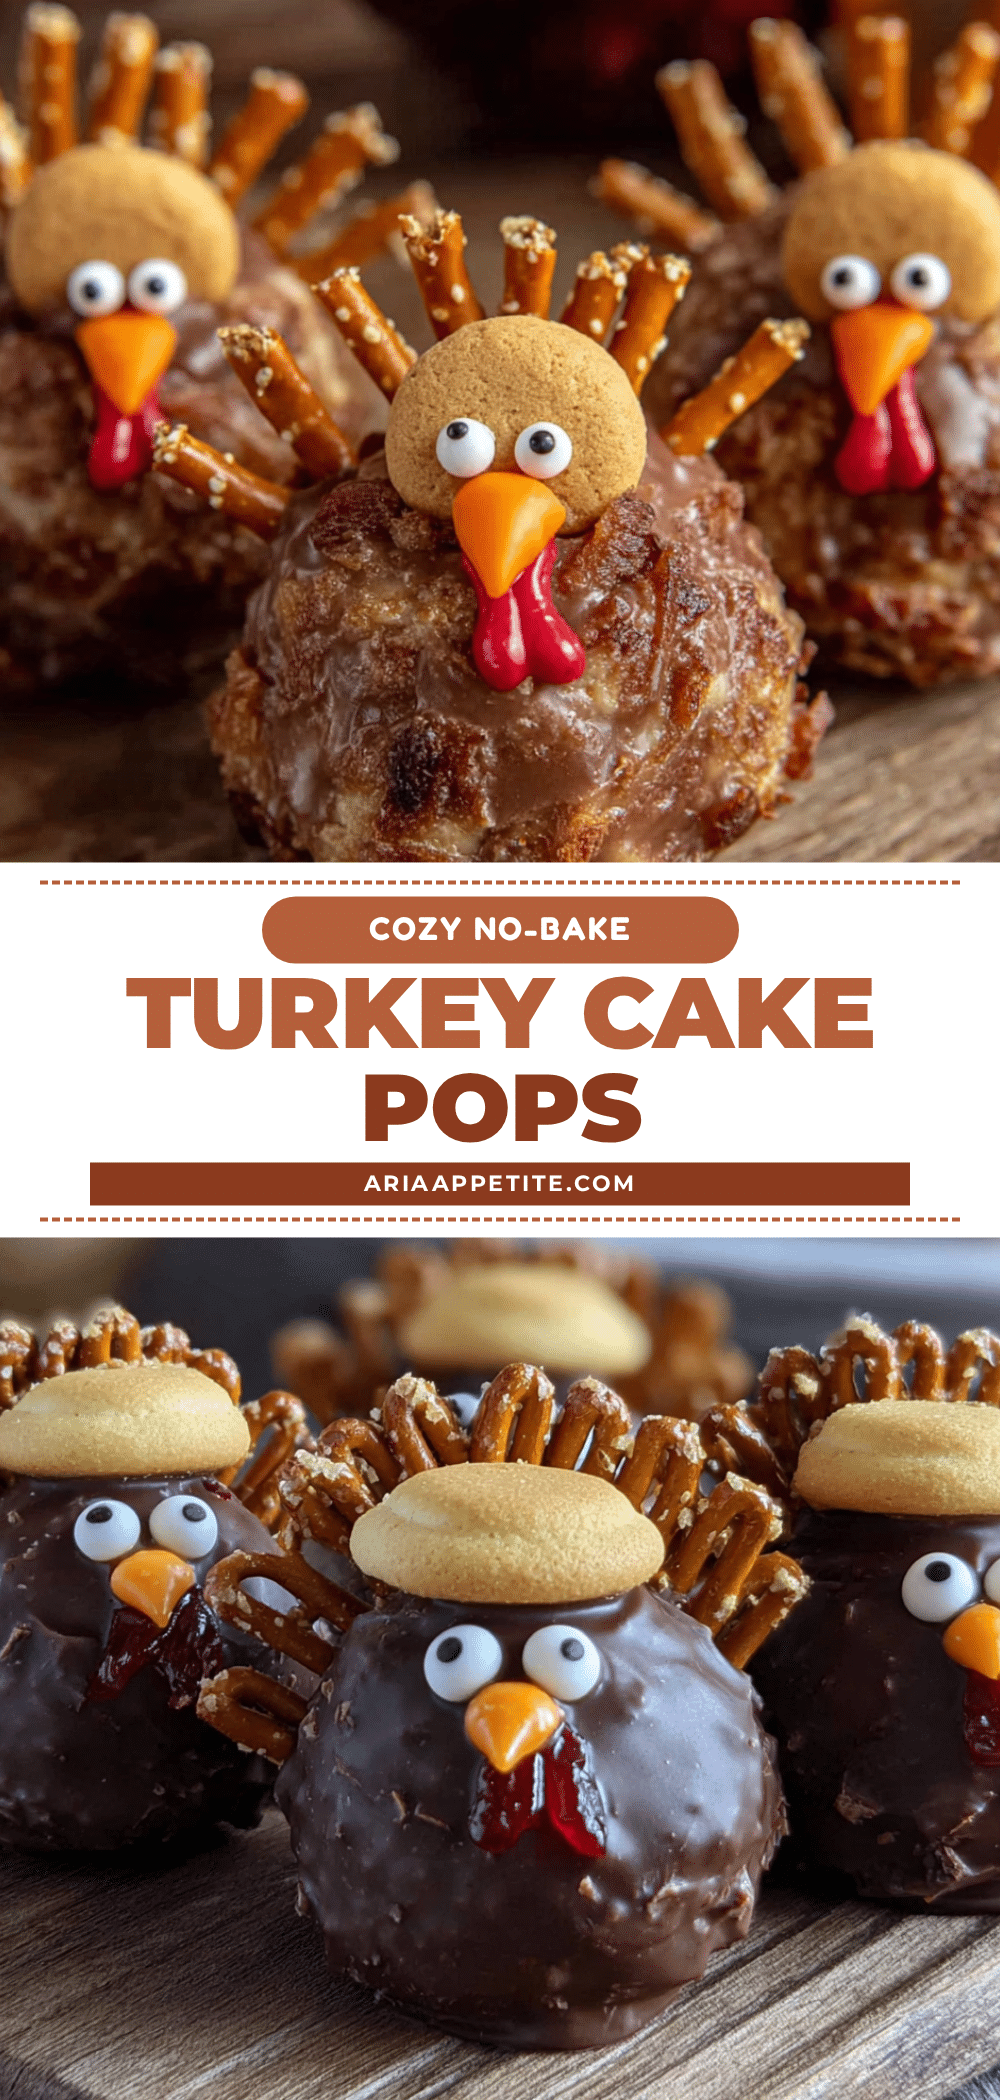
Quick No-Bake Turkey Cake Pops: Easy Fall Treat
These no-bake turkey cake pops are a fun and easy fall treat made with store-bought cake, candy corn, and pretzels. Perfect for Thanksgiving, classroom parties, or any autumn gathering, they require no baking and come together in minutes.
- Prep Time: 20 minutes
- Cook Time: 0 minutes
- Total Time: 1 hour 15 minutes
- Yield: 20-24 servings 1x
- Category: Dessert
- Cuisine: American
Ingredients
- 1 store-bought pound cake or vanilla cake (about 10–12 ounces)
- 3 tablespoons cream cheese frosting
- 1 teaspoon vanilla extract
- 1 bag candy corn
- 1 bag candy eyes
- 1 bag pretzel sticks
- 1 cup chocolate melting wafers
- Orange sprinkles or orange sanding sugar (optional)
- 1 tablespoon coconut oil or shortening
- 20–24 lollipop sticks
- Styrofoam block or floral foam
- Wax paper or parchment paper
Instructions
- Crumble the pound cake into a large mixing bowl using your hands or a fork until you have fine, even crumbs (no chunks bigger than a pea).
- Add the cream cheese frosting and vanilla extract to the crumbled cake. Mix with a fork or your hands until the mixture holds together like a soft dough. If too dry, add another teaspoon of frosting; if too wet, add more cake crumbs.
- Using a cookie scoop or tablespoon, portion the mixture into 1-inch balls (about 20-24). Place on a wax paper-lined baking sheet and refrigerate for 15 minutes.
- While the balls chill, melt the chocolate wafers in a microwave-safe bowl in 30-second intervals, stirring between each, until smooth. Add the coconut oil or shortening and stir until glossy.
- Remove the chilled balls from the fridge. Dip the tip of each lollipop stick into the melted chocolate, then insert it about halfway into a cake ball. Return to the fridge for another 10 minutes to set.
- Hold a cake pop by the stick and dip it into the melted chocolate, covering it completely. Gently tap the stick on the edge of the bowl to let excess chocolate drip off. Place the dipped pop into a styrofoam block to dry.
- While the chocolate is still wet, insert 3-4 candy corn pieces into the back of the pop in a fan pattern for feathers. Work quickly.
- Break a pretzel stick in half and insert the broken end into the front of the pop for the beak. Use a tiny dab of melted chocolate to attach two candy eyes above the beak. Optionally, add a small dot of chocolate and sprinkle with orange sprinkles.
- Break two pretzel sticks in half and insert them into the bottom of the pop at an angle for legs.
- Allow the pops to dry in the styrofoam block for at least 30 minutes at room temperature, or 15 minutes in the fridge, until the chocolate is firm and decorations are secure.
Notes
For best results, chill the cake balls thoroughly before dipping. Dip candy corn tips in melted chocolate before inserting to prevent them from sliding off. Work in small batches to avoid the chocolate setting too quickly. The undipped cake balls can be frozen for up to 2 months.
Nutrition
- Serving Size: 1 pop
- Calories: 200
- Sugar: 20
- Sodium: 150
- Fat: 9
- Saturated Fat: 4
- Carbohydrates: 30
- Fiber: 1
- Protein: 2.5
Keywords: turkey cake pops, no-bake, fall treat, Thanksgiving, candy corn, easy dessert, cake pops


