Love this? Save it for later!
Share the inspiration with your friends
My roommate Jen asked why I couldn’t just skip the pie plate entirely and press the crust into a square pan instead. It was a Tuesday night in late October, and I was mid-rant about how pumpkin pie always felt like too much effort for a Tuesday—all that blind baking, the careful pouring, the way the filling always seemed to crack no matter what I did. I started to explain why that wouldn’t work—the crust would be too thick, the baking time would be off, it just wasn’t how pie worked. Then I stopped. Honestly, I had no good reason. I just didn’t want to be wrong.
So I let her try it. I handed over my favorite shortbread recipe, told her to press it into a 9×9 pan, and stood there with my arms crossed like some kind of kitchen skeptic. She didn’t even flinch. She just pressed that buttery dough into the corners with her thumbs, poured in the pumpkin filling, and slid the whole thing into the oven. Twenty minutes later, the apartment smelled like November had moved in early. And when I took that first bite—warm, spiced, with that crumbly shortbread holding everything together—I had to admit it. She was right. I was wrong. And these cozy pumpkin pie bars were better than any pie I’d ever made.
Maybe you’ve been there—stubborn about a recipe, convinced there’s only one way to do it right. I get it. But sometimes the best thing you can do is hand over the spatula and let someone show you a better way. That’s what these bars are to me now: a reminder that good ideas come from unexpected places, and that pumpkin pie doesn’t need a plate to be perfect.
Why You’ll Love This Recipe
These cozy pumpkin pie bars are the kind of dessert that makes you wonder why you ever bothered with a traditional pie in the first place. I’ve tested this recipe at least seven times now—tweaking the butter ratio, adjusting the spice blend, figuring out the perfect bake time—and every single batch has disappeared faster than I could blink. Here’s why they work so well:
- No pie plate required — You press the crust into a square pan and call it done. No rolling, no crimping, no fuss.
- Buttery shortbread crust — It’s sturdy enough to hold the filling but tender enough to melt in your mouth. No soggy bottoms here.
- Perfect for fall gatherings — Whether it’s a Thanksgiving potluck or a cozy Saturday afternoon, these bars travel well and slice cleanly.
- Simple pantry ingredients — Butter, flour, sugar, pumpkin puree, eggs, and spices. You probably have everything already.
- Crowd-pleaser every time — I brought a batch to my neighbor’s harvest party last week, and three people asked for the recipe before the night was over.
What makes these different from every other pumpkin bar recipe out there? It’s the crust. Most recipes use a graham cracker or ginger snap base, which is fine, but this shortbread crust is something else entirely. It’s buttery without being greasy, firm without being hard, and it holds up to the creamy pumpkin filling without turning into mush. I tested it with a standard pastry crust first—too fussy. Then a cookie crust—too sweet. This shortbread version? It’s just right.
These bars are comfort food at its best. They’re the kind of dessert you make when you want something that feels special but doesn’t require a whole afternoon of effort. Close your eyes after that first bite. I promise it’s worth it.
What Ingredients You Will Need
This recipe uses simple, wholesome ingredients to deliver that classic pumpkin pie flavor with a buttery shortbread twist. Most of these are pantry staples, especially if you do any fall baking at all. Here’s what you’ll need:
For the Shortbread Crust
- 1 ½ cups all-purpose flour (I use King Arthur for consistent results)
- ½ cup granulated sugar
- ½ cup unsalted butter, cold and cut into small cubes (cold butter is key for that tender crumb)
- ¼ teaspoon salt
- 1 teaspoon vanilla extract
For the Pumpkin Filling
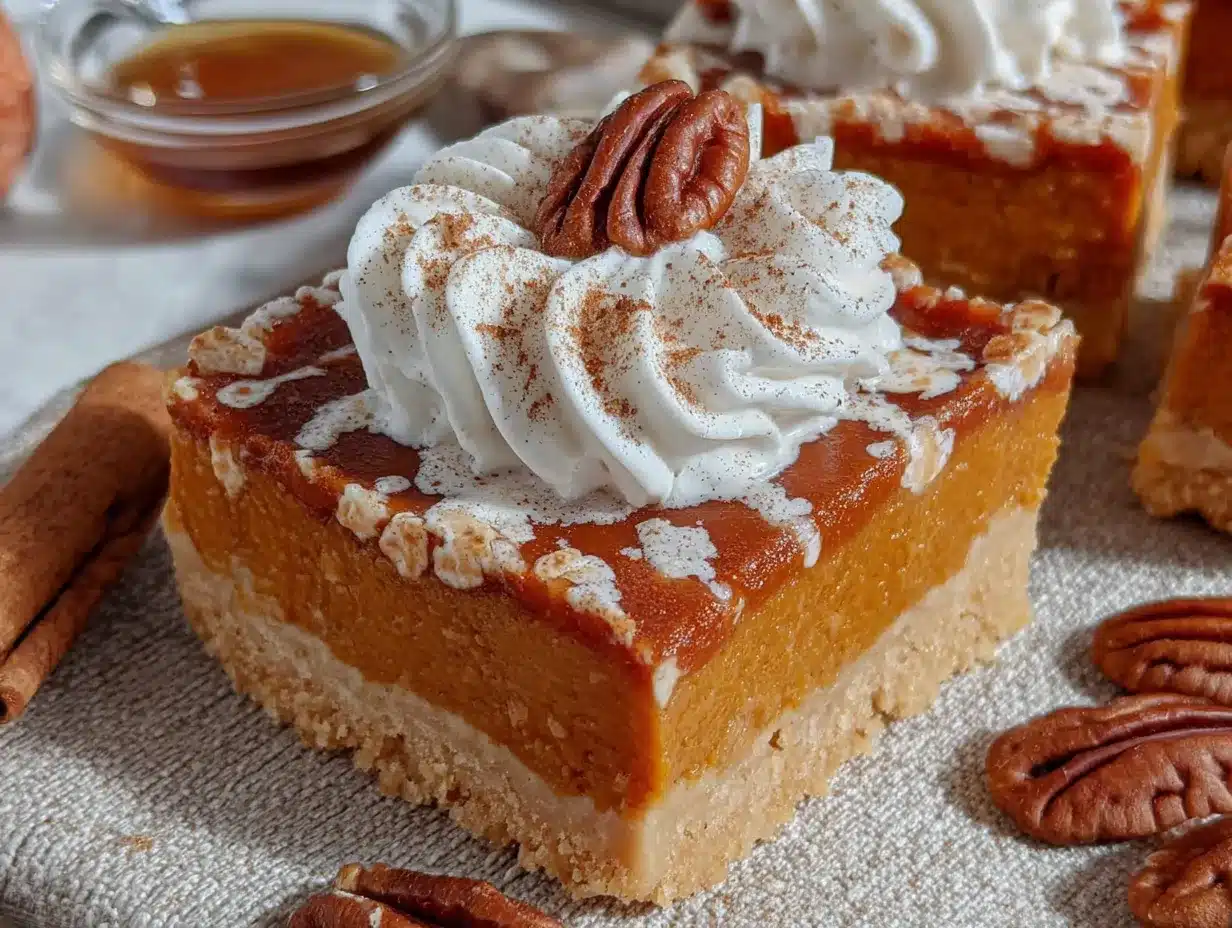
- 1 can (15 oz) pumpkin puree (not pumpkin pie filling—look for 100% pure pumpkin)
- ¾ cup granulated sugar
- 2 large eggs, room temperature
- 1 cup heavy cream (or half-and-half for a lighter version)
- 2 teaspoons pumpkin pie spice (or make your own: 1 tsp cinnamon, ½ tsp ginger, ¼ tsp nutmeg, ¼ tsp cloves)
- 1 teaspoon vanilla extract
- ¼ teaspoon salt
A few notes on ingredients before we get started. For the butter, I really recommend using unsalted so you control the salt level. If you only have salted butter on hand, just skip the added salt in the crust. For the pumpkin puree, I’ve tried several brands and Libby’s is my go-to—it’s consistently thick and not watery, which matters for the filling texture. If you’re using a store brand, just give it a quick stir in the can before measuring to make sure it’s evenly mixed.
For the heavy cream, you can substitute half-and-half or even whole milk if that’s what you have. The filling will be slightly less rich, but it still works beautifully. I’ve also made this with canned coconut cream for a dairy-free option, and honestly, it was fantastic—just make sure you use the thick part of the can, not the watery liquid.
The pumpkin pie spice is where you can really make this recipe your own. I buy the pre-mixed blend from Penzeys because it’s extra aromatic, but feel free to adjust the ratios. If you love cinnamon, add an extra half teaspoon. If you’re not a clove fan, leave it out. This is your kitchen, after all.
Equipment Needed
You don’t need anything fancy to make these cozy pumpkin pie bars, which is part of why I love this recipe so much. Here’s what you’ll need:
- 9×9-inch square baking pan — Glass, ceramic, or metal all work fine. If you use metal, just keep an eye on the bake time—it might cook a few minutes faster.
- Mixing bowls — One medium for the crust, one large for the filling.
- Pastry cutter or fork — For cutting the butter into the flour. You can also use your fingertips if you don’t mind getting a little messy.
- Whisk — For smoothing out the filling.
- Parchment paper — This is non-negotiable for easy removal. Leave an overhang on two sides so you can lift the bars out cleanly.
- Measuring cups and spoons — Standard set for dry and wet ingredients.
- Spatula — For scraping every last bit of filling into the pan.
If you don’t have a 9×9 pan, an 8×8 will work too—just expect a slightly thicker crust and filling, and add about 5 minutes to the bake time. I’ve also made these in a 9×13 pan, and they turn out thinner and more bar-like, which is great if you’re feeding a crowd. Just reduce the bake time by about 5 minutes.
One tip I learned the hard way: line your pan with parchment paper that hangs over the edges. The first time I made these, I greased the pan and hoped for the best. Let’s just say I spent twenty minutes chiseling crust out of the corners. Parchment paper makes life so much easier.
Preparation Method
Let’s make these cozy pumpkin pie bars. I’ve broken this down into clear steps so you can follow along without any confusion. Trust me, if my roommate Jen can nail this on her first try, so can you.
Step 1: Make the Shortbread Crust
Preheat your oven to 350°F (175°C). Line your 9×9-inch baking pan with parchment paper, leaving about 2 inches of overhang on two opposite sides. In a medium mixing bowl, whisk together the flour, sugar, and salt. Add the cold butter cubes and vanilla extract. Using a pastry cutter or your fingertips, work the butter into the flour mixture until it looks like coarse crumbs with some pea-sized butter pieces still visible. Don’t overwork it—you want the crust to be tender, not tough. Press the mixture evenly into the bottom of the prepared pan. I use the bottom of a measuring cup to really pack it down firmly. Bake for 18-20 minutes, until the edges are just starting to turn golden. The center will still look pale, and that’s exactly what you want. Set aside to cool slightly while you make the filling.
Step 2: Prepare the Pumpkin Filling
In a large bowl, whisk together the pumpkin puree and sugar until smooth. Add the eggs one at a time, whisking well after each addition. Pour in the heavy cream, pumpkin pie spice, vanilla extract, and salt. Whisk until everything is completely combined and silky. The mixture should be a beautiful deep orange color and smell like autumn in a bowl. If you see any lumps, keep whisking—you want this smooth.
Step 3: Assemble the Bars
Pour the pumpkin filling over the pre-baked crust. It will seem like a lot of liquid, but that’s okay—it sets up beautifully as it bakes. Gently tilt the pan to make sure the filling spreads evenly into the corners. Tap the pan on the counter a few times to release any air bubbles.
Step 4: Bake to Perfection
Bake at 350°F (175°C) for 40-45 minutes. The edges should be set and slightly puffed, while the center will still jiggle just a tiny bit when you gently shake the pan. That slight jiggle is your cue that the bars are done—they’ll continue to set as they cool. If the center looks liquid or sloshes around, give it another 5 minutes. Every oven is a little different, so trust your eyes more than the timer.
Step 5: Cool and Chill
Let the bars cool completely at room temperature on a wire rack. This takes about an hour. Once they’re cool, transfer the pan to the refrigerator and chill for at least 3 hours, or overnight. I know it’s hard to wait, but this step is crucial. The chilling time allows the filling to fully set so you get clean, beautiful slices. If you try to cut them while they’re still warm, you’ll end up with a delicious but messy situation.
Step 6: Slice and Serve
Once chilled, use the parchment paper overhang to lift the entire block of bars out of the pan. Place it on a cutting board and use a sharp knife to cut into squares. I usually go for 9 large bars (3×3 grid) or 16 smaller ones. Wipe the knife clean between cuts for the neatest edges.
Cooking Tips & Techniques
After making these cozy pumpkin pie bars more times than I care to count—including that first disastrous batch where I forgot the sugar entirely—I’ve picked up a few tricks that make a real difference. Let me share what I’ve learned.
Don’t overbake the crust. I know it’s tempting to leave it in until it’s golden brown all over, but the crust will continue to bake once you add the filling. A lightly baked crust stays tender and buttery. A dark brown crust can turn hard and almost crunchy, which isn’t what you want here.
Room temperature eggs matter. Cold eggs can cause the filling to seize up or create a slightly curdled texture. Just let your eggs sit on the counter for 30 minutes before you start. If you’re in a hurry, place them in a bowl of warm water for 5 minutes.
Watch for the jiggle. This is the single most important test for doneness. When you gently shake the pan, the center should wobble like firm Jell-O, not slosh like soup. The residual heat will finish cooking the center as the bars cool. Overbaked pumpkin filling gets cracks and a rubbery texture, so err on the side of slightly underdone.
Patience with chilling. I once tried to speed things up by putting the bars in the freezer for an hour instead of the fridge for three. The edges were frozen while the center was still soft, and cutting them was a nightmare. Just give them the full fridge time. Overnight is even better—the flavors meld and the texture becomes incredibly creamy.
Use a sharp knife for slicing. A dull knife will drag through the filling and ruin those clean edges. Run the knife under hot water, wipe it dry, and make one smooth cut. Repeat for each slice. It takes an extra minute, but the results are worth it.
Variations & Adaptations
One of the best things about this recipe is how easy it is to tweak. I’ve experimented with quite a few variations over the months, and here are my favorites:
Gluten-Free Version
Substitute the all-purpose flour with a 1:1 gluten-free baking flour blend. I’ve used Bob’s Red Mill with great results. The crust will be slightly more crumbly, so press it firmly into the pan. Everything else stays the same.
Dairy-Free Version
Use cold vegan butter (I like Miyoko’s) in the crust and full-fat coconut cream in place of heavy cream. The coconut flavor is subtle and actually complements the pumpkin spices beautifully. Just make sure your vegan butter is cold straight from the fridge.
Spiced-Up Variation
Add ¼ teaspoon of cardamom and a pinch of black pepper to the pumpkin filling. The cardamom adds a floral warmth, and the black pepper—trust me—brings out the sweetness without making it spicy. I tried this on a whim last Thanksgiving, and it was the first batch to disappear.
Maple Pecan Twist
Replace the granulated sugar in the filling with ¾ cup of pure maple syrup (reduce the heavy cream to ¾ cup to account for the extra liquid). Sprinkle chopped pecans over the top before baking. The maple flavor pairs perfectly with the pumpkin, and the pecans add a lovely crunch.
Chocolate Drizzle
Once the bars are chilled and sliced, drizzle melted dark chocolate over the top. Let it set for a few minutes before serving. The chocolate adds a touch of richness that feels extra indulgent. I did this for a friend’s birthday, and she said it was the best dessert she’d had all year.
Serving & Storage Suggestions
These cozy pumpkin pie bars are incredibly versatile when it comes to serving. Here’s how to make the most of them:
Serving temperature: I prefer these bars cold, straight from the fridge. The filling is firm and creamy, and the shortbread crust has a perfect snap. But they’re also wonderful at room temperature if you let them sit out for 15-20 minutes. Just don’t serve them warm—they won’t hold their shape.
Presentation ideas: Dust the tops with a light sprinkle of cinnamon or powdered sugar before serving. A dollop of whipped cream on each bar takes them over the top. For a fall presentation, arrange them on a wooden board with cinnamon sticks and small pumpkins around the edges.
What to serve alongside: These bars pair beautifully with a hot cup of coffee or spiced apple cider. For a dessert spread, serve them alongside vanilla ice cream or a warm caramel sauce. I once brought them to a Friendsgiving potluck, and they were gone before the pumpkin pie even got touched.
Storage instructions: Keep the bars in an airtight container in the refrigerator for up to 5 days. Place parchment paper between layers if you’re stacking them. The flavors actually deepen after a day or two, so don’t be afraid to make them ahead.
Freezing: These bars freeze beautifully. Wrap individual slices tightly in plastic wrap, then place them in a freezer-safe bag. They’ll keep for up to 3 months. To thaw, just transfer to the refrigerator overnight. I always keep a stash in my freezer for unexpected guests or late-night cravings.
Nutritional Information & Benefits
While these cozy pumpkin pie bars are definitely a treat, they do offer some nutritional perks worth mentioning. Here’s an approximate breakdown per serving (based on 9 bars):
| Nutrient | Amount per Serving |
|---|---|
| Calories | 310 |
| Total Fat | 18g |
| Saturated Fat | 11g |
| Carbohydrates | 35g |
| Fiber | 2g |
| Sugar | 22g |
| Protein | 4g |
| Vitamin A | 120% DV |
Pumpkin is packed with vitamin A, which supports eye health and immune function. It’s also a good source of fiber and antioxidants. The eggs add high-quality protein, and the butter provides fat-soluble vitamins. Of course, this is still a dessert, so enjoy it in moderation—but it’s nice to know there’s some nutritional value hiding in that creamy filling.
If you’re watching your sugar intake, you can reduce the sugar in the filling to ½ cup without compromising the texture too much. The bars will be less sweet, but the pumpkin and spice flavors will shine through even more.
Conclusion
These cozy pumpkin pie bars have become my go-to fall dessert for a reason. They’re simpler than a traditional pie, more portable, and honestly, I think they taste better. That buttery shortbread crust paired with the silky pumpkin filling is a combination I just can’t get enough of. And every time I make them, I think of Jen standing in my kitchen, rolling her eyes at my stubbornness, and proving me wrong with a pan of perfect bars.
I hope you’ll give these a try—and maybe even put your own spin on them. Add extra spice, drizzle on some chocolate, or swap in your favorite nut topping. The beauty of this recipe is that it’s forgiving enough to play with. Let me know how they turn out! Drop a comment below, share a photo, or tag me in your creations. I genuinely love hearing about your kitchen victories.
Here’s to cozy fall days, good friends, and the recipes that remind us it’s okay to be wrong sometimes. Happy baking!
Frequently Asked Questions
Can I use pumpkin pie filling instead of pumpkin puree?
I wouldn’t recommend it. Pumpkin pie filling already has sugar and spices added, which will throw off the sweetness and texture of these bars. Stick with 100% pure pumpkin puree for the best results. If you only have pie filling on hand, reduce the sugar in the recipe by half and skip the added spices.
Why did my pumpkin filling crack on top?
Cracks usually mean the bars were overbaked. The filling continues to cook as it cools, so it’s better to pull them out when the center still has a slight jiggle. If you’re seeing cracks, try reducing your bake time by 5 minutes next time. Also, make sure your oven temperature is accurate—an oven thermometer is a cheap investment that makes a big difference.
Can I make these bars ahead of time?
Absolutely! In fact, I recommend it. These bars need at least 3 hours of chilling time anyway, so making them the day before is perfect. They’ll keep in the fridge for up to 5 days, and the flavors actually get better after a day or two. Just keep them covered so they don’t absorb any fridge odors.
How do I get clean slices without the filling sticking to the knife?
Use a sharp knife and wipe it clean between each cut. For extra-clean slices, run the knife under hot water, dry it off, and make one smooth cut. Repeat for each slice. Chilling the bars thoroughly before cutting also helps—cold filling cuts much cleaner than room temperature filling.
Can I double this recipe for a larger pan?
Yes! Double all the ingredients and use a 9×13-inch pan. The bake time will be similar, around 40-45 minutes, but start checking at 35 minutes. You’ll get about 24 smaller bars this way, which is perfect for parties or holiday gatherings. Just make sure your pan has parchment overhang for easy removal.
Pin This Recipe!
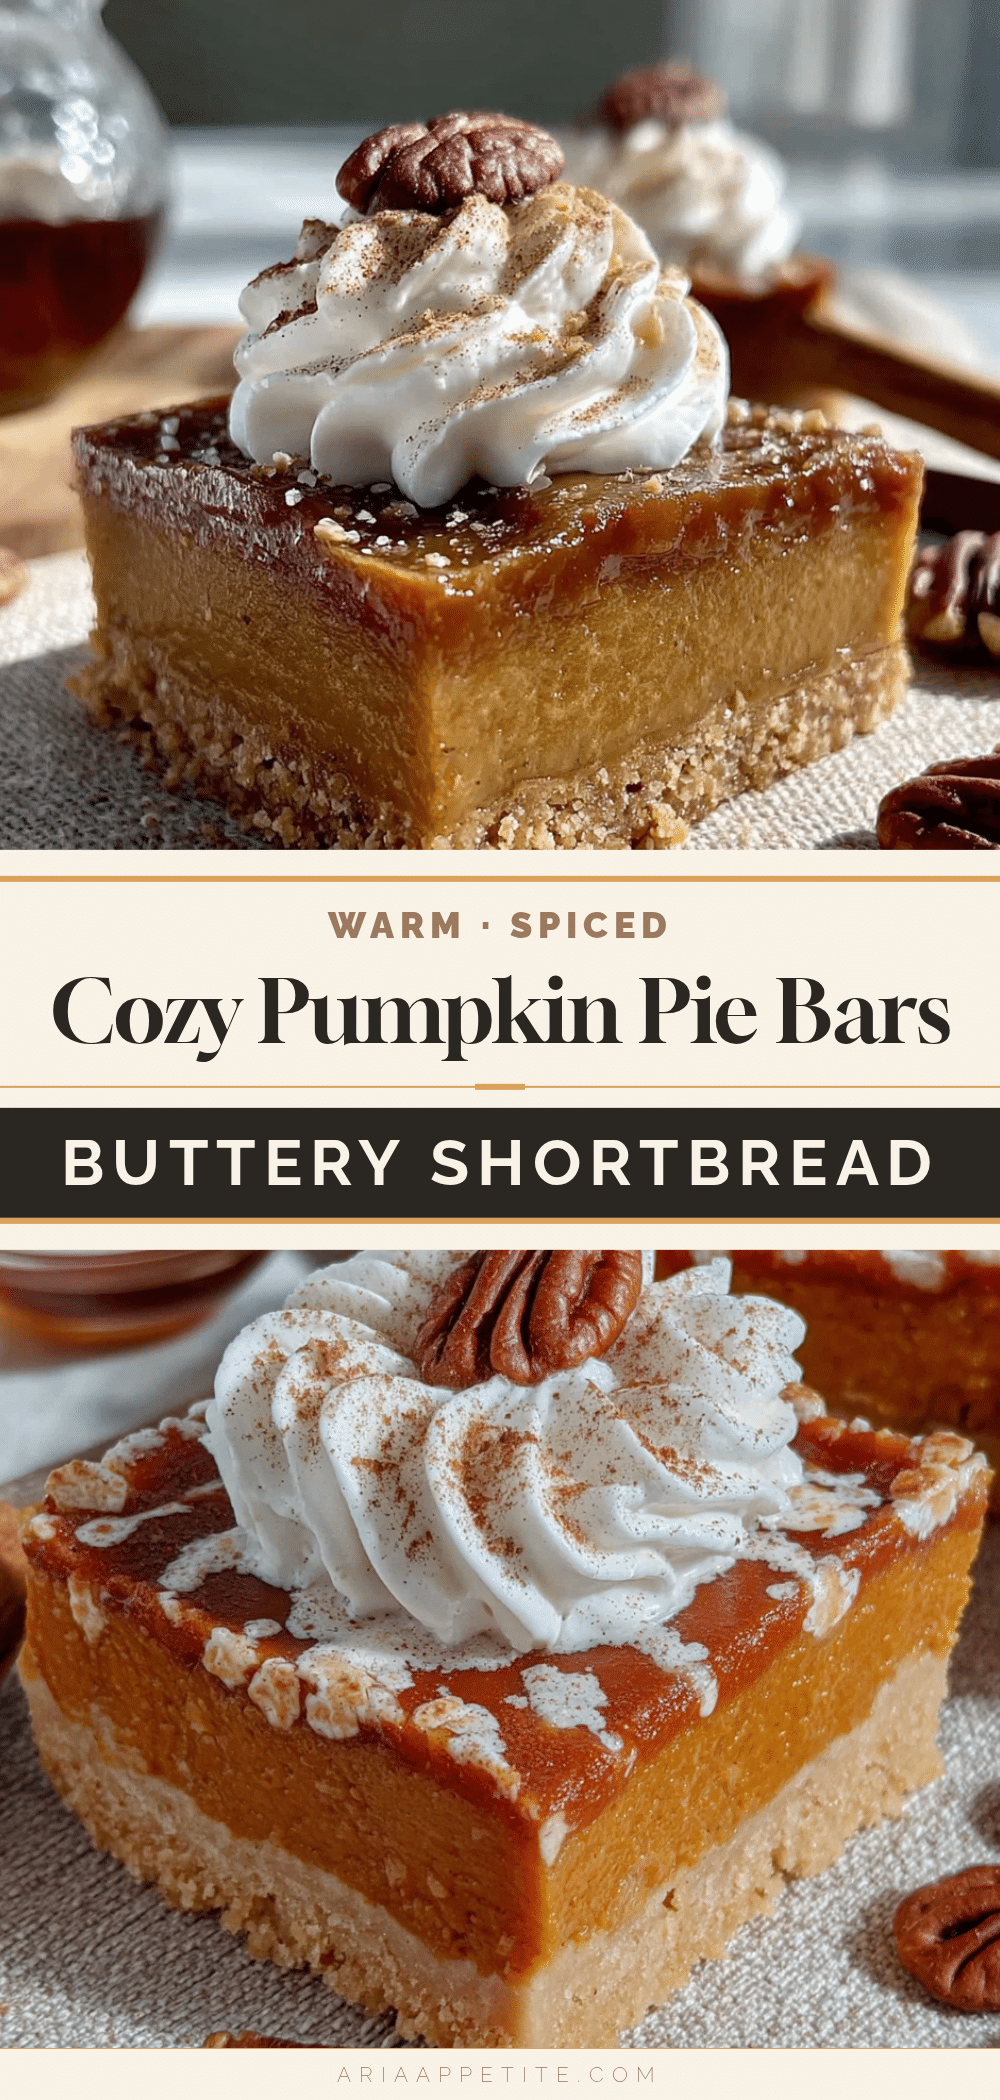
Cozy Pumpkin Pie Bars with Buttery Shortbread Crust
These cozy pumpkin pie bars feature a buttery shortbread crust and a silky pumpkin filling, all baked in a square pan for easy slicing and serving. They’re simpler than traditional pie, more portable, and perfect for fall gatherings.
- Prep Time: 20 minutes
- Cook Time: 40 minutes
- Total Time: 4 hours 20 minutes (includes chilling)
- Yield: 9 servings 1x
- Category: Dessert
- Cuisine: American
Ingredients
- 1 ½ cups all-purpose flour
- ½ cup granulated sugar
- ½ cup unsalted butter, cold and cut into small cubes
- ¼ teaspoon salt
- 1 teaspoon vanilla extract
- 1 can (15 oz) pumpkin puree
- ¾ cup granulated sugar
- 2 large eggs, room temperature
- 1 cup heavy cream
- 2 teaspoons pumpkin pie spice
- 1 teaspoon vanilla extract
- ¼ teaspoon salt
Instructions
- Preheat oven to 350°F (175°C). Line a 9×9-inch baking pan with parchment paper, leaving overhang on two sides.
- In a medium bowl, whisk together flour, ½ cup sugar, and ¼ teaspoon salt. Add cold butter cubes and 1 teaspoon vanilla. Cut in butter with a pastry cutter or fingertips until mixture resembles coarse crumbs with some pea-sized butter pieces.
- Press crust mixture evenly into the prepared pan. Bake for 18-20 minutes until edges are just golden. Set aside to cool slightly.
- In a large bowl, whisk together pumpkin puree and ¾ cup sugar until smooth. Add eggs one at a time, whisking well after each. Whisk in heavy cream, pumpkin pie spice, 1 teaspoon vanilla, and ¼ teaspoon salt until smooth.
- Pour filling over pre-baked crust. Gently tilt pan to spread evenly. Tap pan on counter to release air bubbles.
- Bake at 350°F (175°C) for 40-45 minutes, until edges are set and center jiggles slightly when shaken.
- Cool completely on a wire rack (about 1 hour), then refrigerate for at least 3 hours or overnight.
- Use parchment overhang to lift bars out of pan. Cut into squares with a sharp knife, wiping clean between cuts.
Notes
For clean slices, chill bars thoroughly and use a sharp knife wiped clean between cuts. The filling continues to set as it cools, so don’t overbake. For a dairy-free version, use cold vegan butter and full-fat coconut cream. For gluten-free, substitute 1:1 gluten-free flour blend.
Nutrition
- Serving Size: 1 bar (based on 9 ba
- Calories: 310
- Sugar: 22
- Sodium: 200
- Fat: 18
- Saturated Fat: 11
- Carbohydrates: 35
- Fiber: 2
- Protein: 4
Keywords: pumpkin pie bars, shortbread crust, fall dessert, Thanksgiving, pumpkin bars, easy pumpkin dessert


