Love this? Save it for later!
Share the inspiration with your friends
The PTA bake sale was in twelve hours and I’d completely forgotten. My son had reminded me three times that morning, and I’d nodded along while packing lunches, finding lost shoes, and pretending I had my life together. By 9 PM, with the kitchen a disaster zone from dinner and a sink full of dishes, I remembered. Everyone else would be bringing those gorgeous, bakery-window displays — the kind with perfect piping and edible glitter. I had a can of pumpkin puree, a block of cream cheese, and a box of gingersnaps that were already getting soft. Honestly, I almost just sent in store-bought cookies and called it a day. But then I remembered my mother-in-law’s trick for emergency desserts: if you can press it into a pan and chill it, you’re already halfway to a win.
So I crushed those sad gingersnaps with the bottom of a measuring cup (my rolling pin was buried somewhere, I’m sure), mixed up a quick filling with the pumpkin and cream cheese, and threw it all in the oven. I didn’t even have time to stress about it. The next morning, I cut the chilled bars into squares, dropped them off at the school, and braced myself for the polite “thanks for contributing” nod. But here’s the thing — my phone started buzzing during my 10 AM meeting. First one text: “What did you bring? It’s gone.” Then another: “Can I get that recipe?” And then my son’s teacher actually called. Called! To say the bars were the first thing to sell out, and could I please share the recipe for the school newsletter. I was genuinely stunned. I mean, I’d made these under duress, with half the concentration I’d give a Tuesday night meatloaf.
That’s how these pumpkin cheesecake bars with gingersnap crust became my go-to. Not because I planned them, but because they saved me when I needed them most. The gingersnap crust is the real hero here — it’s not too sweet, it’s got that warm, spicy kick, and it holds up beautifully against the creamy, tangy pumpkin filling. Maybe you’ve been there, staring into your pantry at 9 PM, wondering how you’re going to pull off something that looks like you tried. Trust me, this is your recipe. It’s the one that makes you look like you spent hours when you actually spent about twenty minutes of active work. And honestly? It tastes better than most of the fancy stuff anyway.
Why You’ll Love This Recipe
Let me tell you, I’ve tested a lot of pumpkin desserts over the years. Some were too dense, some were too sweet, and some just fell apart when you tried to cut them. These pumpkin cheesecake bars with gingersnap crust hit that perfect sweet spot — literally and figuratively. They’re the kind of dessert that makes people close their eyes after the first bite, and I’m not exaggerating.
- Quick & Easy: Comes together in under 30 minutes of active time. The oven does most of the work, and then you just chill them. Perfect for busy weeknights or last-minute holiday prep.
- Simple Ingredients: No fancy grocery trips needed. You probably have most of this in your kitchen right now — canned pumpkin, cream cheese, eggs, sugar, and a box of gingersnaps.
- Perfect for Family Gatherings: Great for Thanksgiving, potlucks, Halloween parties, or just a cozy Sunday dessert. They travel well and don’t need to be served warm.
- Crowd-Pleaser: Kids love the creamy texture and the crunchy crust. Adults love the sophisticated ginger-pumpkin combo. Everyone wins.
- Unbelievably Delicious: The texture is what gets me every time. That silky, smooth cheesecake layer against the crunchy, spiced crust — it’s next-level comfort food.
What makes this recipe different from all the other pumpkin cheesecake bars out there? It’s the crust. Most recipes use graham crackers, which are fine, but they’re boring. Gingersnaps add this deep, molasses-y warmth that just sings with pumpkin. Plus, I’ve perfected the baking time so you get a crack-free top every single time. No water bath needed, no complicated techniques. It’s the kind of recipe that makes you look like a pro baker without actually having to be one.
This recipe isn’t just good — it’s the kind that makes you feel like you’ve got a secret weapon in your back pocket. It’s comfort food reimagined: faster, simpler, but with the same soul-soothing satisfaction. Perfect for impressing your in-laws without stress, or turning a simple family dinner into something memorable.
What Ingredients You Will Need
This recipe uses simple, wholesome ingredients to deliver that rich, creamy texture and bold, spicy flavor. Most of these are pantry staples, especially if you do any fall baking. Let me walk you through each one so you know exactly what to look for.
For the Gingersnap Crust
- 2 cups (about 200g) gingersnap cookie crumbs — I prefer Nabisco or Anna’s ginger thins. You can crush them in a food processor or put them in a zip-top bag and smash them with a rolling pin. (The bag method is great for getting out some aggression!)
- 1/4 cup (50g) granulated sugar — Just regular white sugar. It helps the crust hold together and adds a touch of sweetness.
- 6 tablespoons (85g) unsalted butter, melted — Use real butter here, not margarine. It makes a huge difference in flavor and texture. I always use salted butter in a pinch and just skip the added salt.
- 1/4 teaspoon ground ginger — Even though the cookies already have ginger, this extra kick makes the crust pop. Trust me on this one.
For the Pumpkin Cheesecake Filling
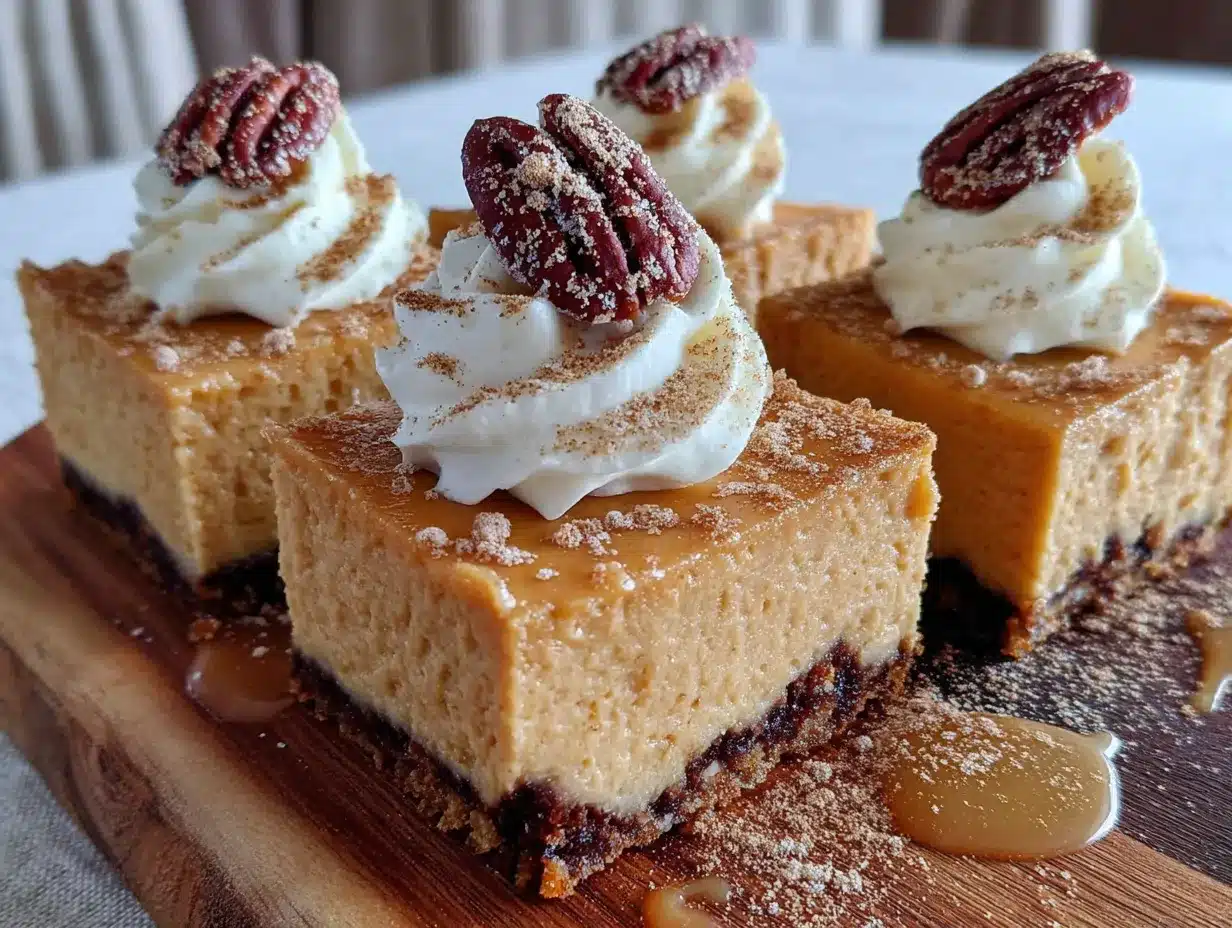
- 16 ounces (450g) cream cheese, softened — Full-fat is best here. Low-fat cream cheese can make the filling watery and less creamy. Leave it out on the counter for about an hour before you start.
- 3/4 cup (150g) granulated sugar — This gives the cheesecake just the right sweetness without being cloying.
- 1 cup (245g) canned pumpkin puree — Not pumpkin pie filling! Make sure you get pure pumpkin puree. Libby’s is my go-to brand. (I once grabbed the wrong can and ended up with a much sweeter, spiced filling — it still worked, but it was different.)
- 2 large eggs, room temperature — Cold eggs can make the filling lumpy. If you forgot to take them out, put them in a bowl of warm water for 5 minutes.
- 1 teaspoon vanilla extract — Pure vanilla extract is worth the splurge here. Imitation vanilla has a chemical aftertaste that you don’t want in your cheesecake.
- 1 teaspoon pumpkin pie spice — You can buy it pre-mixed or make your own with cinnamon, nutmeg, ginger, and cloves. I like the store-bought stuff for convenience.
- 1/2 teaspoon ground cinnamon — For that extra warmth. I always add a little more cinnamon than the recipe calls for because I love it.
- 1/4 teaspoon salt — Salt balances the sweetness and brings out all the other flavors. Don’t skip it.
Optional Toppings
- Whipped cream — Homemade is best, but store-bought works in a pinch.
- Extra crushed gingersnaps — For garnish and a little crunch on top.
- Caramel sauce — A drizzle of salted caramel takes these bars to another planet.
Equipment Needed
You don’t need a fancy kitchen to make these pumpkin cheesecake bars with gingersnap crust. Here’s what you’ll need:
- 9×9-inch baking pan — This is the perfect size for thick, satisfying bars. If you only have an 8×8, the bars will be a little thicker and may need an extra 5-7 minutes of baking time.
- Parchment paper — Line your pan with it, leaving some overhang on two sides. This makes lifting the bars out so much easier. I learned this the hard way after destroying my first batch trying to dig them out.
- Food processor or zip-top bag and rolling pin — For crushing the gingersnaps. The food processor is faster, but the bag method works great and is oddly satisfying.
- Electric hand mixer or stand mixer — You need this to get the cream cheese smooth and fluffy. A whisk will work, but your arm will get tired and the texture won’t be as good.
- Mixing bowls — One medium bowl for the crust, one large bowl for the filling.
- Rubber spatula — For scraping down the sides of the bowl and spreading the filling evenly.
- Measuring cups and spoons — For accuracy. Baking is a science, after all.
If you don’t have a 9×9 pan, you can use a 9-inch pie plate or even a 9-inch springform pan. Just adjust the baking time slightly. I’ve used my grandmother’s old Pyrex dish for years, and it works perfectly.
Preparation Method
Alright, let’s get to the good part. Here’s how to make these pumpkin cheesecake bars with gingersnap crust step by step.
- Preheat your oven to 350°F (175°C). Line your 9×9-inch baking pan with parchment paper, leaving some overhang on two opposite sides. This will help you lift the bars out later.
- Make the crust. In a food processor, pulse the gingersnap cookies until they become fine crumbs. You should have about 2 cups. If you don’t have a food processor, put the cookies in a zip-top bag and smash them with a rolling pin. It’s a great stress reliever, honestly.
- Mix the crust ingredients. In a medium bowl, combine the gingersnap crumbs, 1/4 cup sugar, and 1/4 teaspoon ground ginger. Pour in the 6 tablespoons of melted butter and stir until all the crumbs are evenly moistened. It should look like wet sand.
- Press the crust into the pan. Transfer the crumb mixture to your prepared pan. Press it down firmly and evenly using the bottom of a measuring cup or a glass. Make sure you get the edges and corners. This is important — a loose crust will fall apart when you cut the bars.
- Bake the crust. Place the pan in the preheated oven and bake for 10 minutes. The crust should be fragrant and just starting to brown at the edges. Remove it from the oven and let it cool slightly while you make the filling.
- Beat the cream cheese. In a large mixing bowl, beat the softened cream cheese with an electric hand mixer until it’s smooth and creamy, about 2 minutes. Scrape down the sides of the bowl with a rubber spatula.
- Add the sugar. Add the 3/4 cup of sugar to the cream cheese and beat until combined, about 1 minute. Scrape down the sides again.
- Add the pumpkin and wet ingredients. Add the pumpkin puree, eggs, and vanilla extract. Beat on low speed until just combined. Don’t overmix! Overmixing incorporates too much air and can cause cracks in your cheesecake.
- Add the spices. Sprinkle in the pumpkin pie spice, cinnamon, and salt. Beat on low speed until everything is evenly incorporated. The filling should be smooth, thick, and a beautiful orange color.
- Pour the filling over the crust. Pour the pumpkin cheesecake filling over the pre-baked crust. Use your spatula to spread it evenly to the edges.
- Bake the bars. Place the pan back in the oven and bake for 35-40 minutes. The edges should be set and slightly puffed, but the center should still jiggle slightly when you gently shake the pan. That’s the sign of a perfect, creamy cheesecake.
- Cool completely. Remove the pan from the oven and place it on a wire rack. Let the bars cool to room temperature, about 1 hour. Then transfer the pan to the refrigerator and chill for at least 4 hours, or overnight. This is crucial — the bars need time to set properly.
- Cut and serve. Once chilled, use the parchment paper overhang to lift the bars out of the pan. Place them on a cutting board and use a sharp knife to cut them into squares. For clean cuts, wipe the knife clean between each cut. I usually get 16 nice squares.
Cooking Tips & Techniques
I’ve made these pumpkin cheesecake bars with gingersnap crust more times than I can count, and I’ve learned a few things along the way. Here are my best tips for getting perfect results every time.
Room temperature ingredients are non-negotiable. I know, I know, it’s an extra step. But cold cream cheese creates lumps that no amount of beating will fix. Cold eggs can make the filling curdle. Take everything out of the fridge about an hour before you start. Your future self will thank you.
Don’t overmix the filling. This is the number one mistake I see home bakers make. Once you add the eggs, mix on low speed just until everything is combined. Overmixing incorporates too much air, which expands in the oven and then collapses, leaving you with cracks on top. A few small lumps are totally fine.
The jiggle test is your friend. When you think the bars are done, gently shake the pan. The edges should be set and firm, but the center should have a slight jiggle — like Jell-O, not like liquid. If the center is still wobbly, give it another 5 minutes. If it’s completely firm, you’ve overbaked it, and it might crack as it cools.
Cool slowly to prevent cracks. After you take the bars out of the oven, let them cool on the counter for a full hour before you put them in the fridge. If you rush this step, the sudden temperature change can cause the cheesecake to crack. I learned this the hard way when I was in a hurry for a party and ended up with a canyon running through my bars.
Chill overnight for best results. I know it’s tempting to dig in after 4 hours, but overnight chilling gives the flavors time to meld and the texture time to become perfectly creamy. The bars are significantly better the next day. Trust me on this one.
Variations & Adaptations
One of the best things about this recipe is how adaptable it is. Here are some ways to make these pumpkin cheesecake bars with gingersnap crust your own.
Dietary Variations
- Gluten-Free: Use gluten-free gingersnap cookies. Most major brands now offer a gluten-free option, and they work beautifully in this recipe.
- Dairy-Free: Use dairy-free cream cheese (like Kite Hill or Violife) and vegan butter. The texture will be slightly different, but still delicious.
- Lower Sugar: Reduce the sugar in the filling to 1/2 cup. You can also use a sugar substitute like monk fruit or erythritol, but I haven’t tested this personally.
Flavor Twists
- Chocolate Swirl: Melt 1/4 cup of semi-sweet chocolate chips and swirl it into the filling before baking. The chocolate-pumpkin combo is divine.
- Bourbon Pumpkin: Add 1 tablespoon of bourbon to the filling. It adds a warm, smoky depth that’s perfect for adult gatherings.
- Pecan Crunch: Sprinkle 1/2 cup of chopped pecans over the top before baking. They toast up beautifully and add a lovely crunch.
Different Cooking Methods
- Mini Cheesecake Bars: Use a mini muffin tin lined with paper liners. Press the crust into the bottom of each liner, fill with the cheesecake mixture, and bake for 15-18 minutes. Perfect for parties!
- No-Bake Version: For a no-bake option, use a pre-made graham cracker crust and chill the filling in the refrigerator for 6 hours. The texture will be softer, but it’s a great summer option.
Serving & Storage Suggestions
These pumpkin cheesecake bars with gingersnap crust are incredibly versatile when it comes to serving. Here’s how to make the most of them.
Serving Temperature: I prefer these bars cold, straight from the fridge. The filling is firm and creamy, and the crust stays nice and crunchy. If you prefer a softer texture, let them sit at room temperature for about 15 minutes before serving.
Presentation Ideas: Cut the bars into neat squares and arrange them on a platter. Top each one with a dollop of whipped cream and a sprinkle of cinnamon or crushed gingersnaps. For a fancier presentation, drizzle with caramel sauce and add a few candied pecans.
Complementary Dishes: These bars pair beautifully with a cup of hot coffee, spiced chai, or a glass of cold milk. They’re also wonderful alongside a scoop of vanilla ice cream for an extra indulgent dessert.
Storage Instructions: Store the bars in an airtight container in the refrigerator for up to 5 days. Make sure they’re completely cooled before you stack them, or they’ll stick together. I like to place a sheet of parchment paper between layers.
Freezing Instructions: These bars freeze beautifully! Wrap individual squares tightly in plastic wrap, then place them in a freezer-safe bag or container. They’ll keep for up to 3 months. To thaw, transfer them to the refrigerator overnight. The texture will be just as good as fresh.
Flavor Development: Honestly, these bars taste even better on day two or three. The flavors have time to meld and deepen, and the texture becomes perfectly creamy. If you can resist them for a day, you’ll be rewarded.
Nutritional Information & Benefits
While these pumpkin cheesecake bars with gingersnap crust are definitely a treat, they do offer some nutritional perks thanks to the pumpkin.
- Estimated per bar (based on 16 servings): Calories: 280, Fat: 18g, Saturated Fat: 10g, Carbohydrates: 28g, Sugar: 18g, Protein: 5g, Fiber: 1g, Sodium: 220mg.
- Pumpkin is a nutritional powerhouse: It’s packed with vitamin A (great for eye health), vitamin C, and fiber. Plus, it’s low in calories, so you’re getting some good stuff along with the indulgence.
- Cream cheese provides calcium and protein: While it’s high in fat, it also gives you a decent amount of calcium. Using full-fat cream cheese means you’ll feel more satisfied with a smaller portion.
- Dietary Considerations: This recipe is vegetarian. For gluten-free or dairy-free options, see the variations section above. It contains wheat (gingersnaps), dairy (cream cheese, butter), and eggs.
I’m not one to pretend dessert is health food, but I do feel a little better knowing there’s actual pumpkin in these bars. They’re a treat, and they should be enjoyed as such — in moderation, with a big smile on your face.
Conclusion
These pumpkin cheesecake bars with gingersnap crust have become a staple in my kitchen for good reason. They’re the recipe that saves me when I’m short on time, the one that impresses people without making me stress, and the one that my family requests again and again. The combination of that crunchy, spicy gingersnap crust and the silky, creamy pumpkin filling is just unbeatable.
I love that this recipe is forgiving enough for beginners but impressive enough for experienced bakers. It’s the kind of dessert that makes you look like you spent hours when you really didn’t. And honestly? That’s my favorite kind of recipe to share.
I’d love to hear how these turn out for you! Did you try any variations? Did your family love them as much as mine does? Drop a comment below and let me know. And if you’re looking for more fall favorites, be sure to check out our classic pumpkin pie recipe for another tried-and-true dessert that never fails to impress. Happy baking, friends — you’ve got this!
Frequently Asked Questions
Can I use a different type of cookie for the crust?
Absolutely! While gingersnaps are my favorite for that warm, spicy flavor, you can use graham crackers, vanilla wafers, or even chocolate cookies. Just keep the ratios the same: 2 cups of crumbs, 1/4 cup sugar, and 6 tablespoons of melted butter.
Why did my cheesecake crack on top?
Cracks usually happen from overbaking or a sudden temperature change. Make sure you pull the bars out when the center still has a slight jiggle, and let them cool slowly on the counter before refrigerating. Overmixing the filling can also cause cracks.
Can I make these bars ahead of time?
Yes! In fact, they taste better the next day. You can make them up to 3 days in advance and store them in the refrigerator. They also freeze beautifully for up to 3 months.
Can I use fresh pumpkin instead of canned?
You can, but you’ll need to cook and puree the pumpkin first, then drain off any excess liquid. Canned pumpkin is more consistent and convenient, so I usually stick with it. If you use fresh, make sure it’s thick and not watery.
How do I get clean, neat cuts?
Use a sharp knife and wipe it clean with a damp paper towel between each cut. For the cleanest cuts, chill the bars for at least 4 hours (overnight is best) before slicing. A hot knife (run it under hot water and dry it) also helps.
Pin This Recipe!
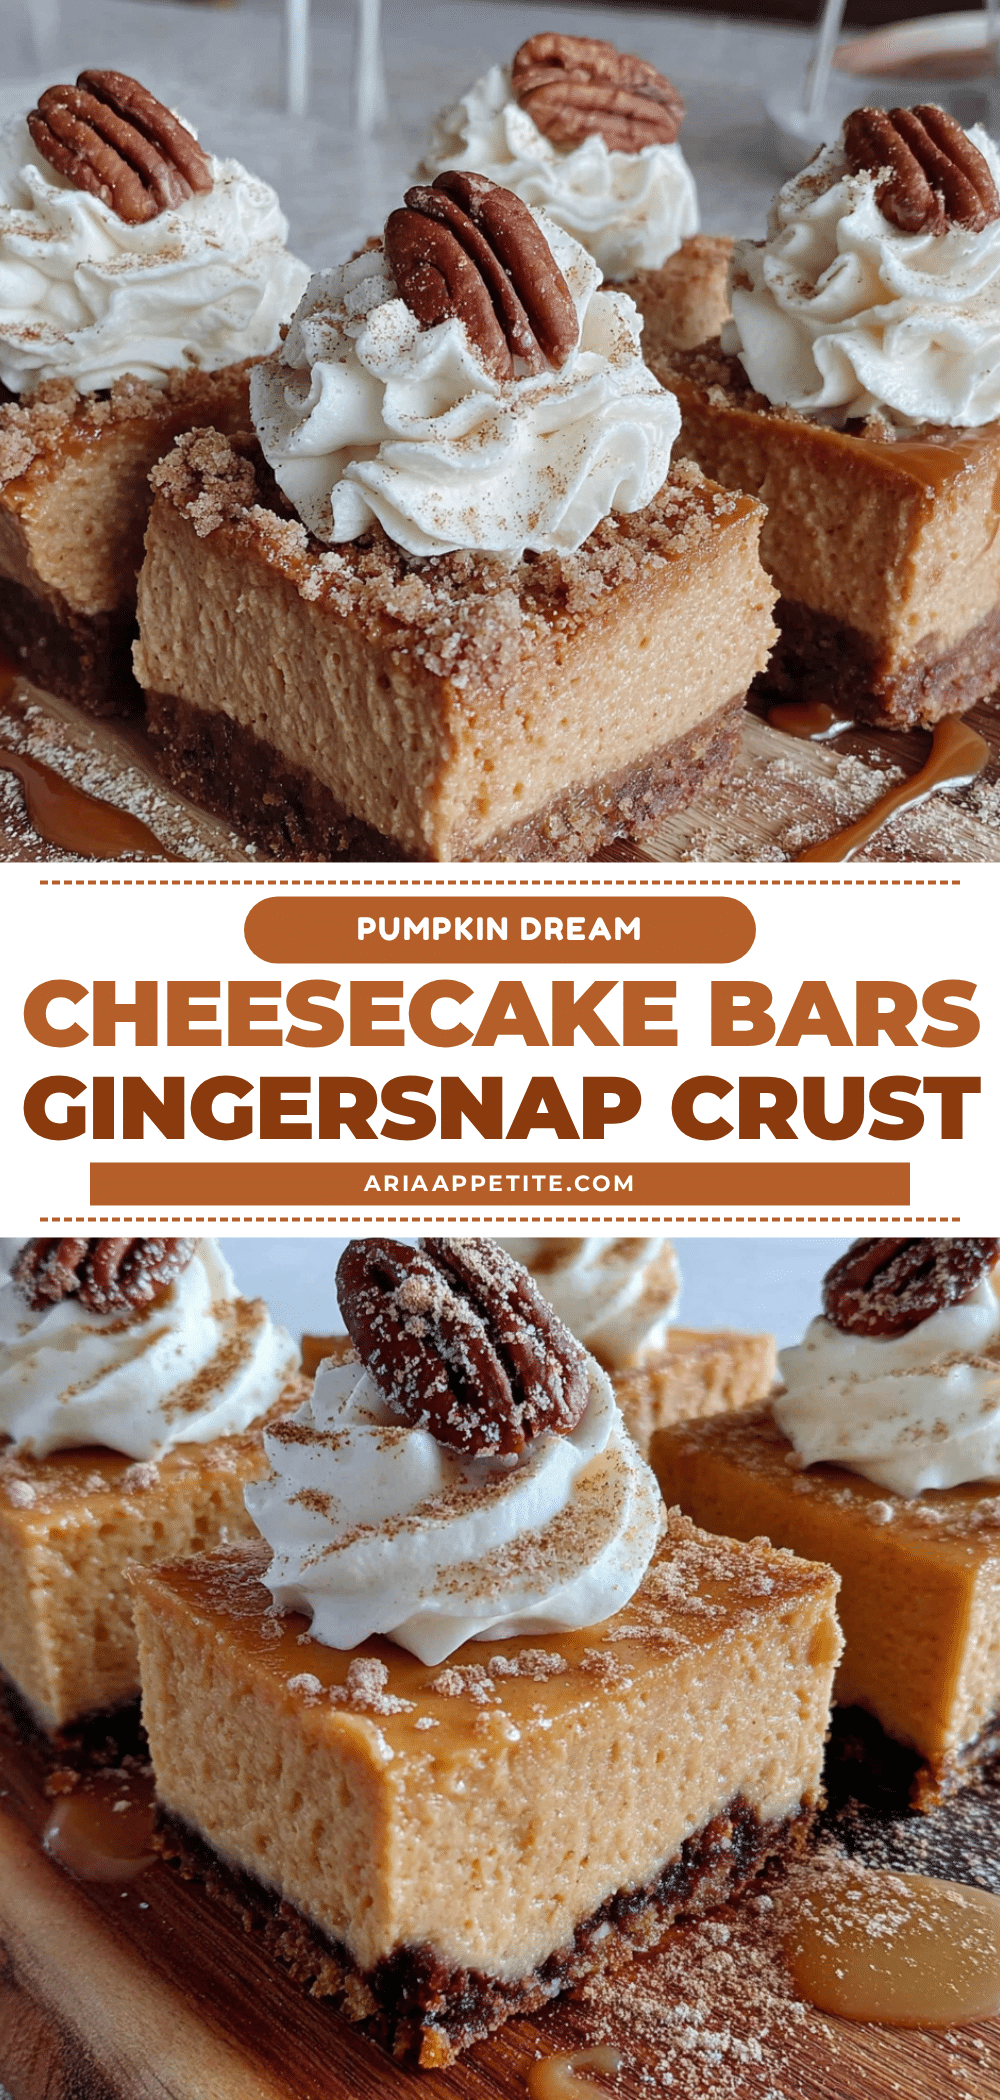
Easy Pumpkin Cheesecake Bars with Gingersnap Crust
These pumpkin cheesecake bars with a crunchy gingersnap crust are the perfect last-minute dessert. They come together in under 30 minutes of active time and are a crowd-pleaser at any gathering.
- Prep Time: 20 minutes
- Cook Time: 45 minutes
- Total Time: 5 hours 5 minutes (includes chilling)
- Yield: 16 servings 1x
- Category: Dessert
- Cuisine: American
Ingredients
- 2 cups (about 200g) gingersnap cookie crumbs
- 1/4 cup (50g) granulated sugar
- 6 tablespoons (85g) unsalted butter, melted
- 1/4 teaspoon ground ginger
- 16 ounces (450g) cream cheese, softened
- 3/4 cup (150g) granulated sugar
- 1 cup (245g) canned pumpkin puree
- 2 large eggs, room temperature
- 1 teaspoon vanilla extract
- 1 teaspoon pumpkin pie spice
- 1/2 teaspoon ground cinnamon
- 1/4 teaspoon salt
- Whipped cream (optional, for topping)
- Extra crushed gingersnaps (optional, for garnish)
- Caramel sauce (optional, for drizzling)
Instructions
- Preheat your oven to 350°F (175°C). Line a 9×9-inch baking pan with parchment paper, leaving overhang on two opposite sides.
- Make the crust: In a food processor, pulse gingersnap cookies until fine crumbs (about 2 cups). Alternatively, place cookies in a zip-top bag and crush with a rolling pin.
- In a medium bowl, combine gingersnap crumbs, 1/4 cup sugar, and 1/4 teaspoon ground ginger. Pour in melted butter and stir until all crumbs are evenly moistened (like wet sand).
- Press the crumb mixture firmly and evenly into the prepared pan using the bottom of a measuring cup or glass.
- Bake the crust for 10 minutes until fragrant and just starting to brown at edges. Remove and let cool slightly.
- In a large mixing bowl, beat softened cream cheese with an electric hand mixer until smooth and creamy, about 2 minutes. Scrape down sides.
- Add 3/4 cup sugar and beat until combined, about 1 minute. Scrape down sides again.
- Add pumpkin puree, eggs, and vanilla extract. Beat on low speed until just combined. Do not overmix.
- Sprinkle in pumpkin pie spice, cinnamon, and salt. Beat on low until evenly incorporated. Filling should be smooth, thick, and orange.
- Pour the filling over the pre-baked crust and spread evenly to edges.
- Bake for 35-40 minutes. Edges should be set and slightly puffed, but center should still jiggle slightly when shaken.
- Remove from oven and cool on a wire rack to room temperature, about 1 hour. Then refrigerate for at least 4 hours, or overnight.
- Once chilled, use parchment overhang to lift bars out. Cut into squares with a sharp knife, wiping clean between cuts. Makes 16 squares.
Notes
Room temperature ingredients are crucial for a smooth filling. Do not overmix after adding eggs to prevent cracks. The jiggle test is key: edges set, center slightly jiggly. Chill overnight for best flavor and texture. For clean cuts, wipe knife between slices.
Nutrition
- Serving Size: 1 bar
- Calories: 280
- Sugar: 18
- Sodium: 220
- Fat: 18
- Saturated Fat: 10
- Carbohydrates: 28
- Fiber: 1
- Protein: 5
Keywords: pumpkin cheesecake bars, gingersnap crust, easy pumpkin dessert, fall dessert, Thanksgiving dessert, cream cheese bars


