Love this? Save it for later!
Share the inspiration with your friends
My neighbor, Mrs. Kowalski, watched me trying to wrestle a wiggly toddler into a costume one October afternoon and didn’t say anything at first. Then she quietly handed me a plate through the fence—a little skull made of cheese cubes and grapes, with a tiny olive grin. I was so frazzled I almost dropped it, but my kid spotted it and went completely still. Then he giggled. That moment—the one where a snack stopped a meltdown in its tracks—is why I keep coming back to this Halloween charcuterie skulls recipe year after year. Honestly, it felt like magic.
Mrs. Kowalski grew up in Poland and told me her grandmother used to make “cheese faces” for holidays using whatever was in the pantry. No fancy molds, no special tools—just good cheddar, some fruit, and a lot of patience. I adapted her idea for our American Halloween traditions, swapping in cheddar blocks and seedless grapes because that’s what my kids actually eat. The first time I made it for our family Halloween party, my husband laughed, my mother-in-law took a photo, and my picky eater ate three helpings. Let me tell you, that never happens.
I mean, maybe you’ve been there—standing in the snack aisle, staring at bags of neon-orange chips and wondering if there’s a way to make Halloween fun without feeding your kids a chemistry experiment. This Halloween charcuterie skulls recipe is that solution. It’s simple enough for a Tuesday afternoon but cute enough to steal the show at any gathering. And the best part? You probably already have most of the ingredients in your fridge right now.
These little skulls have become our family’s Halloween tradition, and not just because they’re adorable. They’re the kind of snack that brings everyone to the table—literally. My kids help arrange the grapes, my husband sneaks extra cheese cubes, and I get to feel like a hero without spending hours in the kitchen. That’s the kind of Halloween magic I can get behind.
Why You’ll Love This Recipe
This isn’t just another Halloween snack—it’s the one that actually works for real families. I’ve tested it with my own kids, my neighbor’s grandkids, and even a classroom full of skeptical first-graders. Every single time, the skulls disappear first. Here’s why this recipe stands out from the crowd:
- Quick & Easy: You can assemble these Halloween charcuterie skulls in under 15 minutes. No baking, no boiling, no waiting. Just chop, arrange, and serve.
- Simple Ingredients: No weird Halloween-themed snacks or specialty items. Just cheddar cheese, grapes, and a few pantry staples you probably already have.
- Perfect for Halloween Parties: Whether it’s a classroom celebration, a family gathering, or a spooky movie night, these skulls fit right in without being too scary for little ones.
- Crowd-Pleaser: Kids love the fun shape, and adults appreciate the real food. It’s a win-win that doesn’t leave anyone reaching for the candy bowl.
- Unbelievably Delicious: The combination of sharp cheddar and sweet grapes is a classic for a reason. The texture contrast—creamy cheese, juicy fruit—keeps everyone coming back for more.
What makes this recipe different from the dozens of Halloween snack ideas you’ll find online? It’s the technique. Instead of using cookie cutters or molds that never quite work, I’ll show you how to shape the cheese by hand so it actually looks like a skull—no special equipment required. I’ve tried it every way imaginable, and this method gives you the best results with the least frustration.
This is comfort food reimagined for Halloween—healthier than candy, faster than baking, but with the same soul-soothing satisfaction. Perfect for impressing other parents without stressing yourself out, or turning a regular snack into something your kids will remember all year.
What Ingredients You Will Need
This recipe uses simple, wholesome ingredients to deliver a snack that’s both fun and satisfying. Most of these are pantry staples or easy to find at any grocery store. Here’s what you’ll need to make your own Halloween charcuterie skulls:
- Cheddar cheese block, 8 ounces (226 grams) – Use a sharp or medium cheddar in a solid block, not pre-sliced or shredded. The block shape makes it easier to carve. I prefer Tillamook or Cabot for their firm texture and rich flavor. (Look for a block that’s at least 1 inch thick for easier shaping.)
- Red seedless grapes, 1 cup (about 150 grams) – These add sweetness and a pop of color. Green grapes work too, but red gives a more dramatic contrast against the yellow cheese. Wash and dry them thoroughly so they don’t make the cheese slippery.
- Green seedless grapes, 1/2 cup (about 75 grams) – For variety and a slightly different flavor. You can skip these if you only have red, but the mix looks nicer on the platter.
- Black olives, pitted, 1/4 cup (about 30 grams) – These become the skull’s eyes and mouth. Use canned black olives, drained and patted dry. (Save a few extra for snacking—trust me.)
- Pretzel sticks, 1/4 cup (about 20 grams) – These act as the skull’s teeth or can be used as handles for dipping. Mini pretzel sticks work best. (Gluten-free pretzels are a great substitute if needed.)
- Cream cheese, 2 tablespoons (30 grams) – Softened to room temperature. This acts as a natural “glue” to hold the olive features in place. (Use dairy-free cream cheese if needed.)
- Fresh rosemary sprigs, optional – For garnish, to look like spooky “hair” or grass around the skulls. Totally optional, but it adds a nice touch for photos.
- Crackers or sliced baguette, for serving – Any neutral cracker works. I like buttery Ritz or simple water crackers. (Gluten-free crackers work perfectly.)
For the cheese, I recommend buying a block that’s at least 8 ounces because you need enough height to carve the skull shape. Pre-shredded cheese won’t work here—it doesn’t hold together when you try to shape it. The cream cheese is your secret weapon; just a tiny dab keeps the olive eyes from rolling off. And please, please use seedless grapes. Nobody wants to deal with seeds while trying to enjoy a spooky snack.
Equipment Needed
You don’t need a lot of fancy tools to make these Halloween charcuterie skulls. Here’s what I use every time:
- Cutting board – A large, stable one. I prefer wood because it doesn’t get slippery, but plastic works fine too.
- Sharp knife – A paring knife is perfect for carving the cheese. A dull knife will just frustrate you and crush the cheese.
- Small cookie cutters (optional) – If you have a skull-shaped cutter, great. But honestly, hand-cutting works better and gives you more control. I’ve tried both and prefer the handmade look.
- Toothpicks – For securing the olive features if the cream cheese isn’t enough. Also useful for arranging grapes.
- Serving platter – A dark-colored platter makes the skulls pop. I use a black slate board, but any flat plate works.
- Small bowl – For the cream cheese “glue.” A ramekin works perfectly.
- Paper towels – For drying grapes and olives. Wet ingredients make everything slide around.
If you don’t have a paring knife, a small serrated knife works in a pinch—just be careful not to tear the cheese. And if you’re making these with kids, let them handle the grape arranging while you do the cheese carving. It’s safer and more fun for everyone.
Preparation Method
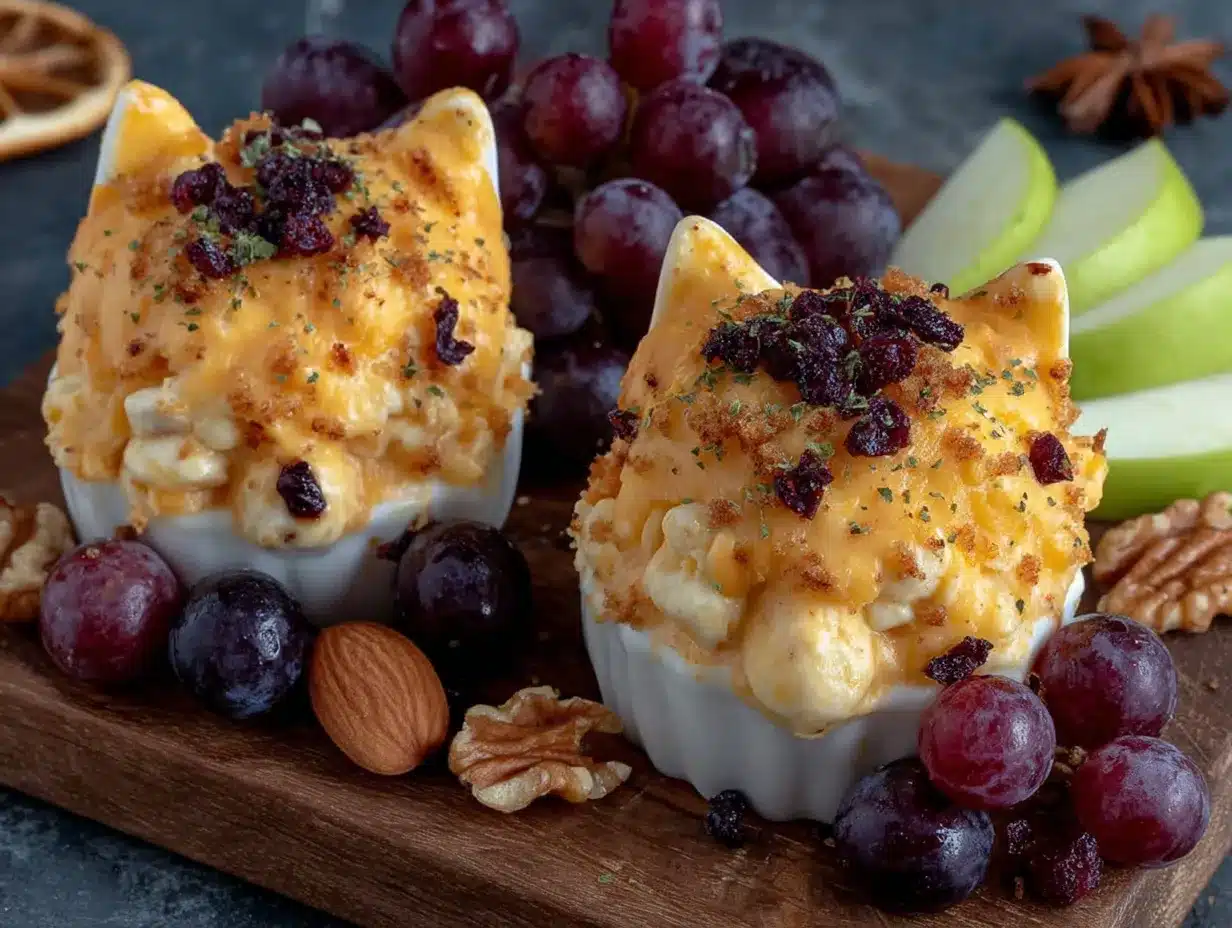
Making these Halloween charcuterie skulls is easier than you think. I’ve broken it down step by step so you can follow along without any stress. Take your time, and don’t worry if the first one isn’t perfect—mine never is.
- Prepare your ingredients (5 minutes)
Start by washing your grapes and olives thoroughly. Pat them completely dry with paper towels—any moisture will make the cheese slippery and hard to work with. Let your cream cheese sit out to soften while you prep everything else. Cut your cheddar block in half crosswise so you have two shorter blocks. Each half will become one skull.
- Shape the cheese base (3 minutes per skull)
Take one half of the cheddar block and hold it in your non-dominant hand. Using your paring knife, round off the top corners to create a dome shape—this becomes the top of the skull. Don’t worry about perfection; skulls are supposed to look a little lumpy. The bottom should remain flat so the skull sits steady on the platter. If your cheese cracks, just press the pieces back together with your fingers. I’ve done it a dozen times, and it always works.
- Carve the eye sockets (2 minutes per skull)
Using the tip of your paring knife, carefully scoop out two small oval indentations where the eyes should go. Make them about 1/2 inch deep and wide enough to hold an olive half. Don’t cut all the way through—you want a little cheese left at the bottom. If you accidentally cut through, just patch it with a bit of cream cheese. Nobody will know but you.
- Create the mouth (2 minutes per skull)
Below the eyes, carve a horizontal line for the mouth. Make it about 1/4 inch deep. Then, using the tip of your knife, make small vertical cuts along this line to create “teeth” gaps. You can leave the mouth open for a surprised look or fill it with pretzel stick pieces for teeth. My kids prefer the teeth version—they think it’s funnier.
- Add the olive features (2 minutes per skull)
Slice your black olives in half lengthwise. Dab a tiny amount of softened cream cheese onto the back of each olive half and press it into the eye sockets. For the nose, use a small triangle-shaped piece of olive or just leave it out—skulls look fine either way. For the mouth, you can either leave it open or insert small pieces of pretzel stick as teeth. Press gently so everything stays put.
- Arrange the grapes (3 minutes)
Now comes the fun part. Arrange your red and green grapes around the skulls on your serving platter. I like to create a “halo” effect by placing grapes in a circle around each skull, but you can also scatter them randomly. The grapes represent the “body” of the charcuterie, so don’t be shy—pile them up. If you’re using rosemary sprigs, tuck them around the skulls to look like spooky grass or hair.
- Add the crackers (2 minutes)
Fill in any empty spaces on the platter with crackers. Arrange them in small clusters so guests can grab and go. If you’re using the pretzel sticks as teeth, make sure you’ve saved enough for snacking too. I always hide a few extra in my pocket for emergencies.
- Final touches (1 minute)
Take a step back and look at your platter. Does anything look empty? Add more grapes. Are the skulls lopsided? That’s fine—it adds character. Sprinkle a few extra olive slices around for color. Your Halloween charcuterie skulls are ready to serve. Snap a photo before the kids dig in, because once they see it, it won’t last long.
Cooking Tips & Techniques
After making these Halloween charcuterie skulls more times than I can count, I’ve learned a few tricks that make the process smoother. Here are my best tips for success:
- Chill the cheese first: If your cheddar is too soft, it will crumble when you try to carve it. Pop the block in the freezer for 10 minutes before you start. It makes the cheese firm enough to hold its shape but still soft enough to cut easily. I learned this the hard way after my first skull turned into a pile of cheese dust.
- Use a melon baller for the eyes: If you have a small melon baller, it works perfectly for scooping out the eye sockets. It creates a uniform shape and saves time. I didn’t have one for years and just used the tip of my knife, but the melon baller is a game-changer if you’re making multiple skulls.
- Don’t overthink the face: Skulls are supposed to look a little creepy, so imperfections actually make them better. If one eye is bigger than the other, it just looks more authentic. My first skull had a crooked mouth and lopsided eyes, and my kids loved it more than the “perfect” ones I made later.
- Keep the grapes dry: Wet grapes make the cheese slide around and create a soggy mess on the platter. After washing, spread the grapes on a paper towel-lined plate and pat them dry. Let them sit for a few minutes while you carve the cheese.
- Prep ahead of time: You can carve the cheese skulls up to 24 hours in advance. Store them in an airtight container in the fridge, and add the grapes and olives just before serving. The cream cheese “glue” will hold the features in place overnight.
- Double the recipe: Trust me, these disappear fast. I always make at least two skulls per platter, and I’ve never had leftovers. If you’re serving a crowd, make four or five skulls and arrange them on a large board with extra grapes and crackers.
Variations & Adaptations
One of the best things about this recipe is how easy it is to customize. Here are some variations I’ve tried and loved:
- Cheese Swap: Not a cheddar fan? Use Gouda, Colby Jack, or even pepper jack for a spicy kick. Softer cheeses like mozzarella are harder to carve but work if you chill them well. I made a version with smoked Gouda once, and it was incredible—the smoky flavor paired beautifully with the sweet grapes.
- Fruit Alternatives: If grapes aren’t your thing, try small apple slices, pear chunks, or even dried apricots. Blueberries work well for a smaller, more delicate look. Just make sure whatever you use is dry and firm so it doesn’t make the cheese soggy.
- Veggie Skulls: For a healthier twist, surround the cheese skulls with cucumber slices, cherry tomatoes, and bell pepper strips. The crunch adds a nice texture contrast. My kids actually eat vegetables this way—they can’t resist anything shaped like a skull.
- Gluten-Free Option: Use gluten-free crackers or rice cakes instead of regular crackers. The recipe is naturally gluten-free if you skip the pretzel sticks or use gluten-free pretzels. I’ve served this at parties where half the guests had dietary restrictions, and everyone was happy.
- Sweet Version: For a dessert-style platter, use cream cheese or Brie as the base, and surround it with chocolate-covered raisins, strawberries, and graham crackers. It’s less Halloween-y but still delicious. I made this for a non-scary Halloween party, and the kids went wild.
- Mini Skulls: If you’re serving a crowd, make smaller skulls using 2-ounce cheese blocks. They’re perfect for individual servings and look adorable lined up on a platter. Just adjust the eye and mouth sizes accordingly.
Serving & Storage Suggestions
These Halloween charcuterie skulls are best served at room temperature, so take them out of the fridge about 15 minutes before your guests arrive. The cheese softens slightly and the flavors become more pronounced. Arrange the skulls on a dark platter for maximum visual impact—black slate boards are my favorite, but any dark plate works.
For a complete Halloween spread, pair the skulls with other spooky snacks like spider web dip, mummy hot dogs, or pumpkin-shaped cookies. The combination of savory and sweet keeps the party going. For drinks, apple cider or a simple punch works perfectly with the cheese and grapes.
If you have leftovers (unlikely, but possible), store the cheese skulls in an airtight container in the refrigerator for up to 3 days. The grapes should be stored separately to prevent them from making the cheese soggy. To refresh the platter, simply add fresh grapes and crackers before serving again. The cheese skulls hold their shape well, so you can even make them a day ahead for a party.
One thing I’ve noticed is that the flavors actually get better after a few hours. The cream cheese “glue” sets, the olive flavors mellow, and the cheddar becomes more pronounced. So if you’re making these for a party, assembling them a few hours ahead is actually a good idea. Just keep them covered in the fridge until you’re ready to serve.
Nutritional Information & Benefits
Here’s the approximate nutritional breakdown for one serving (one skull with grapes and crackers):
| Nutrient | Amount per Serving |
|---|---|
| Calories | 280 |
| Protein | 12g |
| Carbohydrates | 22g |
| Fat | 16g |
| Fiber | 2g |
| Sugar | 12g |
| Sodium | 420mg |
This snack offers some real nutritional benefits. Cheddar cheese is a good source of calcium and protein, which helps keep kids full and focused during Halloween activities. Grapes provide vitamin C and antioxidants, plus natural sweetness without added sugar. The combination of protein and carbohydrates makes this a balanced snack that won’t cause a sugar crash—unlike the candy that usually dominates Halloween.
For parents watching sugar intake, this is a great alternative to typical Halloween treats. You can easily make it lower in sodium by choosing low-sodium crackers or skipping the pretzel sticks altogether. The recipe is naturally vegetarian and can be made gluten-free with simple substitutions. Just be aware that cheddar contains dairy, so it’s not suitable for vegan diets without modifications.
Conclusion
I know Halloween can feel overwhelming—between the costumes, the decorations, and the endless candy, sometimes it’s hard to find a moment to breathe. That’s why I love this Halloween charcuterie skulls recipe. It’s simple enough to make on a random Tuesday afternoon, but special enough to be the star of your Halloween party. Every time I make it, I think of Mrs. Kowalski and her grandmother’s cheese faces, and I feel grateful that a simple snack can bring so much joy.
I hope you’ll try this recipe and make it your own. Maybe you’ll use a different cheese, or add your kids’ favorite fruits, or arrange the skulls in a funny pattern. That’s the beauty of this recipe—it’s meant to be customized. Don’t worry about making it perfect. My first skull looked more like a potato than a skull, and my kids still adored it.
If you make these Halloween charcuterie skulls, I’d love to hear about it. Leave a comment below and tell me how your family liked them, or share a photo of your creation. Did you add any fun variations? Did your kids help arrange the grapes? I read every comment, and your stories make my day. Happy Halloween, and happy snacking!
Frequently Asked Questions
Can I make these Halloween charcuterie skulls ahead of time?
Yes! You can carve the cheese skulls up to 24 hours in advance. Store them in an airtight container in the refrigerator, and add the grapes, olives, and crackers just before serving. The cream cheese “glue” holds the features in place overnight without any issues.
What if my cheese crumbles while I’m carving?
Don’t panic. If your cheddar is too cold, it can crack. Let it sit at room temperature for 5 minutes, then gently press the crumbled pieces back together. A tiny dab of cream cheese works as a “glue” for larger cracks. Remember, skulls are supposed to look a little rough—imperfections add character.
Can I use pre-shredded cheese instead of a block?
I wouldn’t recommend it. Pre-shredded cheese is coated with anti-caking agents that prevent it from sticking together, so you won’t be able to shape it into a skull. A solid block of cheddar is essential for this recipe. If you only have shredded cheese, try making cheese balls instead and decorating them with olive features.
How do I keep the olive eyes from falling off?
The key is using softened cream cheese as “glue.” Dab a tiny amount on the back of each olive half before pressing it into the carved eye socket. Let the cream cheese sit at room temperature for 10 minutes before using it so it’s spreadable but not runny. Toothpicks can also help secure the olives if needed.
What other fruits can I use besides grapes?
Small apple slices, pear chunks, blueberries, raspberries, or dried apricots all work beautifully. Just make sure whatever fruit you use is firm and dry so it doesn’t make the cheese soggy. For a fall-themed variation, try sliced apples tossed in lemon juice to prevent browning.
Pin This Recipe!
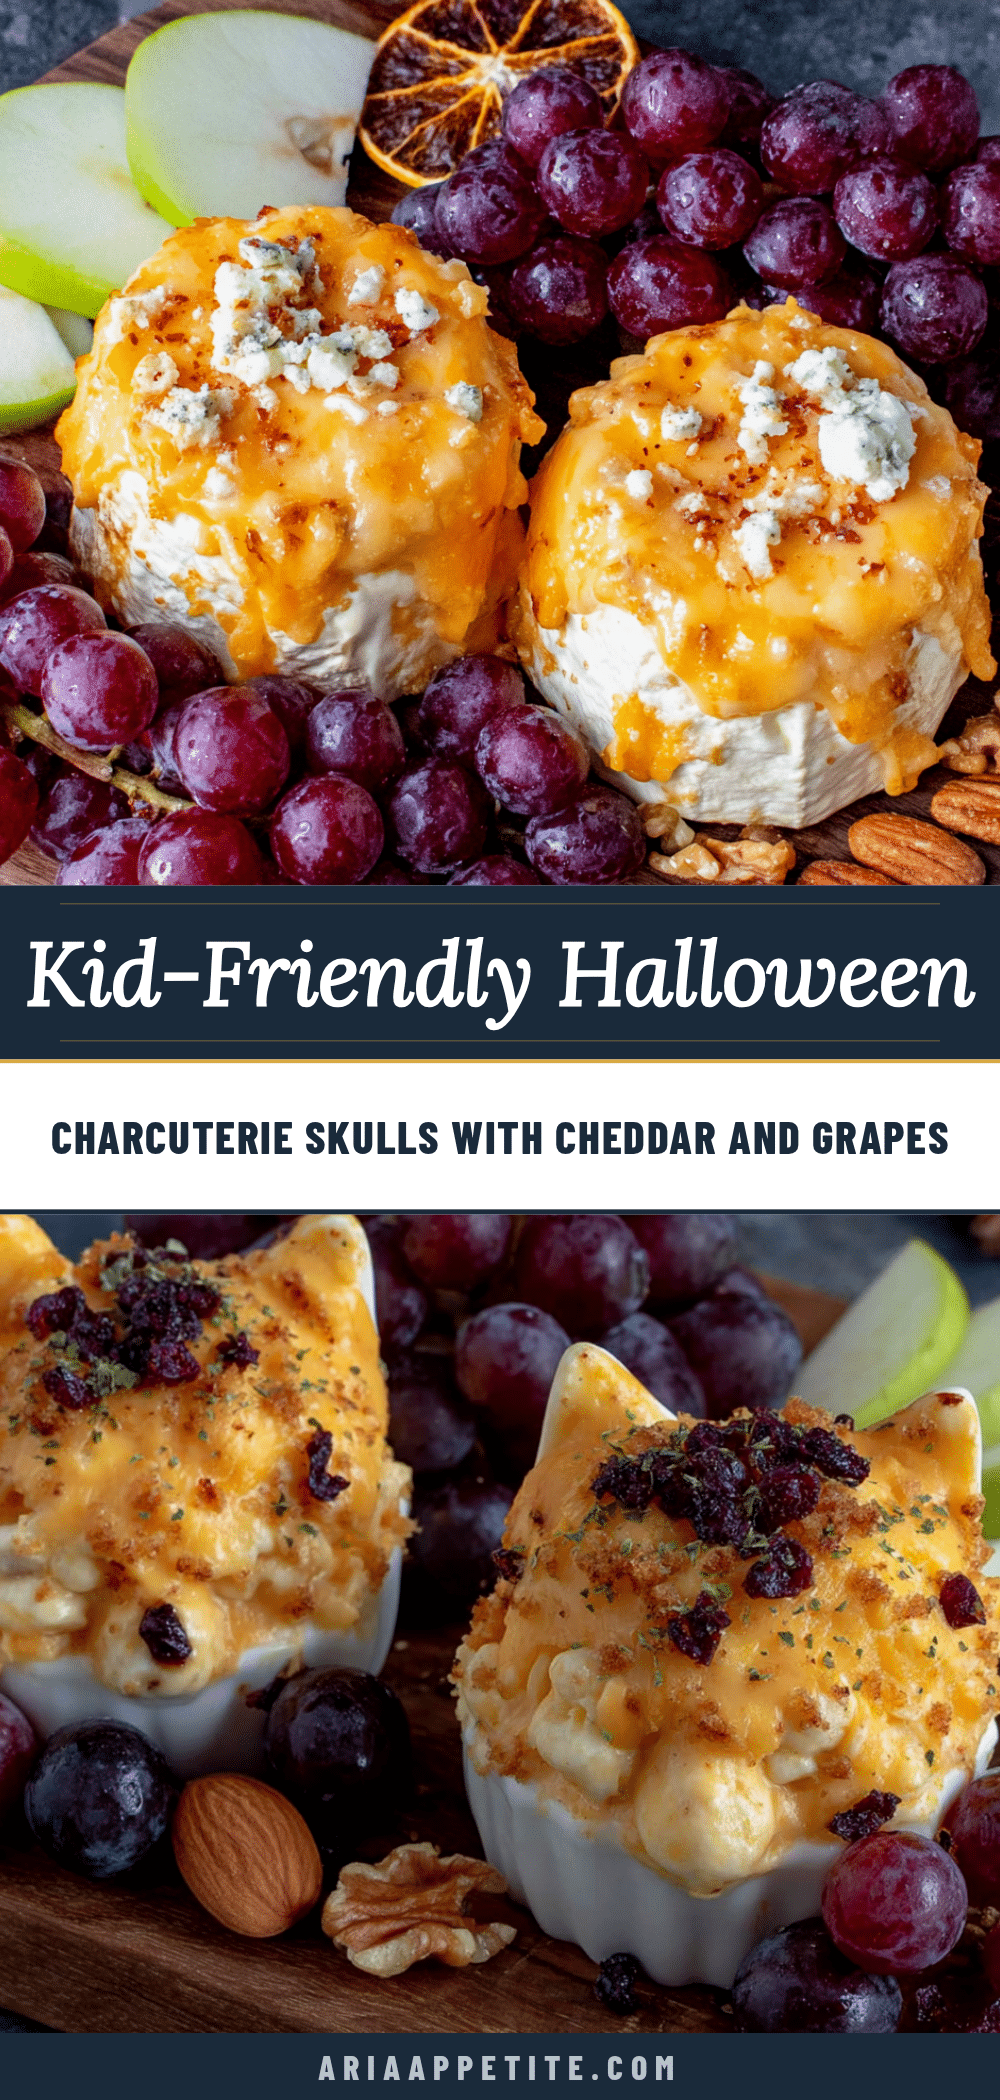
Best Easy Halloween Charcuterie Skulls with Cheddar
These adorable Halloween charcuterie skulls are made with cheddar cheese, grapes, and olives, and come together in under 15 minutes. A fun, no-bake snack that’s perfect for parties and guaranteed to delight kids and adults alike.
- Prep Time: 15 minutes
- Cook Time: 0 minutes
- Total Time: 15 minutes
- Yield: 4 servings 1x
- Category: Appetizer
- Cuisine: American
Ingredients
- 8 ounces (226 grams) cheddar cheese block
- 1 cup (about 150 grams) red seedless grapes
- 1/2 cup (about 75 grams) green seedless grapes
- 1/4 cup (about 30 grams) pitted black olives
- 1/4 cup (about 20 grams) pretzel sticks
- 2 tablespoons (30 grams) cream cheese, softened
- Fresh rosemary sprigs (optional, for garnish)
- Crackers or sliced baguette, for serving
Instructions
- Prepare your ingredients: Wash and thoroughly dry grapes and olives. Let cream cheese soften. Cut cheddar block in half crosswise to make two shorter blocks.
- Shape the cheese base: Round off the top corners of each cheddar half to create a dome shape. Keep the bottom flat so the skull sits steady.
- Carve the eye sockets: Using a paring knife, scoop out two small oval indentations about 1/2 inch deep for the eyes.
- Create the mouth: Carve a horizontal line below the eyes about 1/4 inch deep. Make small vertical cuts along this line to create teeth gaps. Optionally fill with pretzel stick pieces.
- Add the olive features: Slice black olives in half lengthwise. Dab softened cream cheese on the back of each olive half and press into the eye sockets. For the nose, use a small triangle of olive or leave it out. For the mouth, insert small pretzel stick pieces as teeth.
- Arrange the grapes: Place red and green grapes around the skulls on a serving platter, creating a halo or scattering them. Tuck rosemary sprigs around if using.
- Add the crackers: Fill empty spaces on the platter with crackers in small clusters.
- Final touches: Adjust any gaps, add more grapes if needed, and serve immediately or refrigerate until ready.
Notes
Chill the cheese block in the freezer for 10 minutes before carving to prevent crumbling. Use a melon baller for uniform eye sockets. Imperfections add character—skulls are supposed to look a little creepy. Keep grapes dry to avoid making the cheese slippery. Carve cheese skulls up to 24 hours in advance; add grapes and olives just before serving. Double the recipe for a crowd.
Nutrition
- Serving Size: 1 skull with grapes
- Calories: 280
- Sugar: 12
- Sodium: 420
- Fat: 16
- Saturated Fat: 10
- Carbohydrates: 22
- Fiber: 2
- Protein: 12
Keywords: Halloween charcuterie, cheese skulls, Halloween snack, cheddar skulls, spooky appetizer, no-bake Halloween


