Love this? Save it for later!
Share the inspiration with your friends
My brother claimed he hated Halloween themed desserts for thirty-seven years. Thirty-seven years of watching him pass by frosted pumpkin cookies, push aside ghost shaped Rice Krispie treats, and politely decline anything with candy eyes staring up at him. “Too precious,” he’d say. “Too much effort for something that gets eaten in two bites.” Then last October, I made these Spooky Graveyard Dirt Pudding Cups for a neighborhood potluck, purely for the kids obviously, and found him standing over the dessert table at 9pm, empty spoon in hand, caught mid-scrape of the very last cup. “I was just checking the texture,” he mumbled, chocolate smear on his chin. I didn’t say a word. I just handed him another one from the fridge.
Honestly, I get the skepticism. A lot of Halloween desserts lean hard on looks over taste. You spend an hour piping orange frosting onto cookies only to realize they taste like sugar and regret. But these dirt pudding cups? They’re different. They taste like the best chocolate pudding you’ve ever had, the kind that makes you close your eyes for a second, with a crushed cookie “dirt” layer that actually adds texture instead of just decoration. And the gummy worms peeking out? That’s the fun part. The whole thing comes together in about twenty minutes of active work, which matters when you’re already wrestling with costume drama and pumpkin carving chaos.
Maybe you’ve been there, scrolling through Pinterest at 10pm the night before a Halloween party, wondering if you should just buy a bag of candy and call it a day. I’ve been there too. But this recipe changed my Halloween game completely. It’s the dessert that gets requested every single year now, even by my reformed dessert hater of a brother. Let me show you how to make it.
Why You’ll Love This Recipe
I’ve tested this recipe about seven times across three different Halloween seasons, and I can tell you with confidence, it works every single time. Here’s why this version stands out from the dozens of dirt cup recipes floating around the internet:
- No Bake & Quick to Assemble : This comes together in under 20 minutes of active time. The hardest part is waiting for the pudding to chill, which is exactly the kind of recipe we need when Halloween week turns into a chaos marathon.
- Simple Ingredients : You probably have most of these in your pantry right now. No specialty baking aisle hunts, no expensive extracts, no stress.
- Perfect for Halloween Parties : These individual cups are self-serve, mess free, and visually impressive without requiring any artistic talent. Kids love them, adults sneak them, and everyone asks for the recipe.
- Crowd Pleaser Across Ages : I’ve served these at parties with toddlers through grandparents, and every single age group goes back for seconds. The texture is silky, the crunch is satisfying, and the gummy worms create pure delight.
- Unbelievably Delicious : This isn’t just pudding with crushed cookies on top. The method of layering, the specific pudding to dirt ratio, and the chilling technique make a difference. The pudding stays creamy, the cookies stay slightly crunchy, and every spoonful gives you the full experience.
What makes this recipe different from the rest is the texture balance. Most dirt cups end up soggy within an hour because the cookies absorb moisture from the pudding. I figured out a trick, slightly under mixing the pudding so it sets firmer, and using a specific cookie that holds its crunch longer. The result is a dessert that actually tastes as good as it looks, even hours later.
This is the kind of recipe that makes you feel like a Halloween hero without breaking a sweat. It’s comfort food dressed up in costume, and honestly, that’s the best kind of holiday cooking.
What Ingredients You Will Need
This recipe uses simple, everyday ingredients to create something that feels special. Most of these are pantry staples, which means you can decide to make these on a whim without a special grocery trip.
- Chocolate instant pudding mix (two 3.9 ounce boxes) : Use the instant kind, not cook and serve. I prefer Jell-O brand for consistent results, but store brands work fine too. The instant pudding sets quickly and creates that silky texture we’re after.
- Cold whole milk (4 cups) : Whole milk gives the richest, creamiest pudding. You can use 2% in a pinch, but avoid skim milk, the pudding won’t set as firmly and you’ll end up with soup. For a dairy free version, use full fat oat milk, it has the closest texture to whole milk.
- Oreo cookies (one standard 14.3 ounce package) : This is non-negotiable for the “dirt” texture. The chocolate cookie with the white cream center crushes into perfect dirt consistency. Don’t use generic chocolate sandwich cookies, they don’t crush as evenly and the flavor is noticeably different. I’ve tested this, trust me.
- Cream cheese (8 ounces, softened) : This is my secret ingredient that most dirt cup recipes skip. It adds a slight tang, stabilizes the pudding, and makes the texture almost cheesecake like. Let it sit on the counter for thirty minutes before starting, cold cream cheese creates lumps.
- Powdered sugar (1 cup) : This dissolves into the cream cheese mixture smoothly, adding sweetness without grittiness. Don’t substitute granulated sugar, it won’t incorporate properly.
- Vanilla extract (1 teaspoon) : Pure vanilla extract adds warmth and depth. Imitation vanilla works in a pinch, but pure is noticeably better here since the flavor isn’t competing with much else.
- Whipped topping (one 8 ounce tub, thawed) : Cool Whip or any store brand frozen whipped topping works. Thaw it in the refrigerator for a few hours, not the microwave, or you’ll end up with liquid. You can use homemade whipped cream if you prefer, but it doesn’t hold up as well for leftovers.
- Gummy worms (about 24 pieces) : Get the sour or regular kind, whatever you prefer. I like the sour worms because they contrast nicely with the sweet pudding. Trolli and Black Forest both work well.
- Halloween sprinkles or candy eyes (optional) : These are purely decorative but kids love them. I use Wilton brand candy eyes and whatever Halloween sprinkle mix catches my eye at the store.
- Clear plastic cups (16, 7 ounce size) : Clear cups are essential for the visual effect. You want people to see the layers of dirt, pudding, and worms. I buy the Solo brand plastic cups at the grocery store, but any clear cup works.
That’s it. Ten ingredients, most of which you probably already have. The magic happens in the layering and the chilling, not in complicated techniques or hard to find items.
Equipment Needed
You don’t need fancy equipment for this recipe, which is part of why I love it so much. Here’s what you’ll need:
- Large mixing bowl (two) : One for the pudding mixture, one for the cream cheese mixture. I use my standard Pyrex glass bowls, they’re inexpensive and last forever.
- Electric hand mixer or stand mixer : You can whisk by hand if you have strong arms, but the cream cheese mixture needs thorough beating to avoid lumps. A hand mixer makes this effortless.
- Food processor or rolling pin : For crushing the Oreos into dirt. A food processor gives the most consistent texture, but a rolling pin and a zip top bag works perfectly too. I actually prefer the rolling pin method because it’s oddly satisfying and lets me control the chunkiness.
- Spatula : For scraping every last bit of pudding and cream cheese mixture into the cups. A silicone spatula is best.
- Measuring cups and spoons : Standard set for accurate measurements.
- Small offset spatula or butter knife : For smoothing the tops of the pudding layers.
- 16 clear plastic cups (7 ounce size) : As mentioned above, clear cups are key for showing off the layers. You can also use small glass jars or mason jars for a more rustic look.
- Baking sheet or large tray : For transporting the filled cups to the refrigerator. Trust me, carrying sixteen filled cups one by one is a disaster waiting to happen.
- Plastic wrap or lid : For covering the cups while they chill. This prevents the pudding from forming a skin on top.
The food processor is the only specialty item here, and even that’s optional. I’ve made these with a rolling pin and a zip top bag more times than I can count, and they turned out exactly the same.
Preparation Method
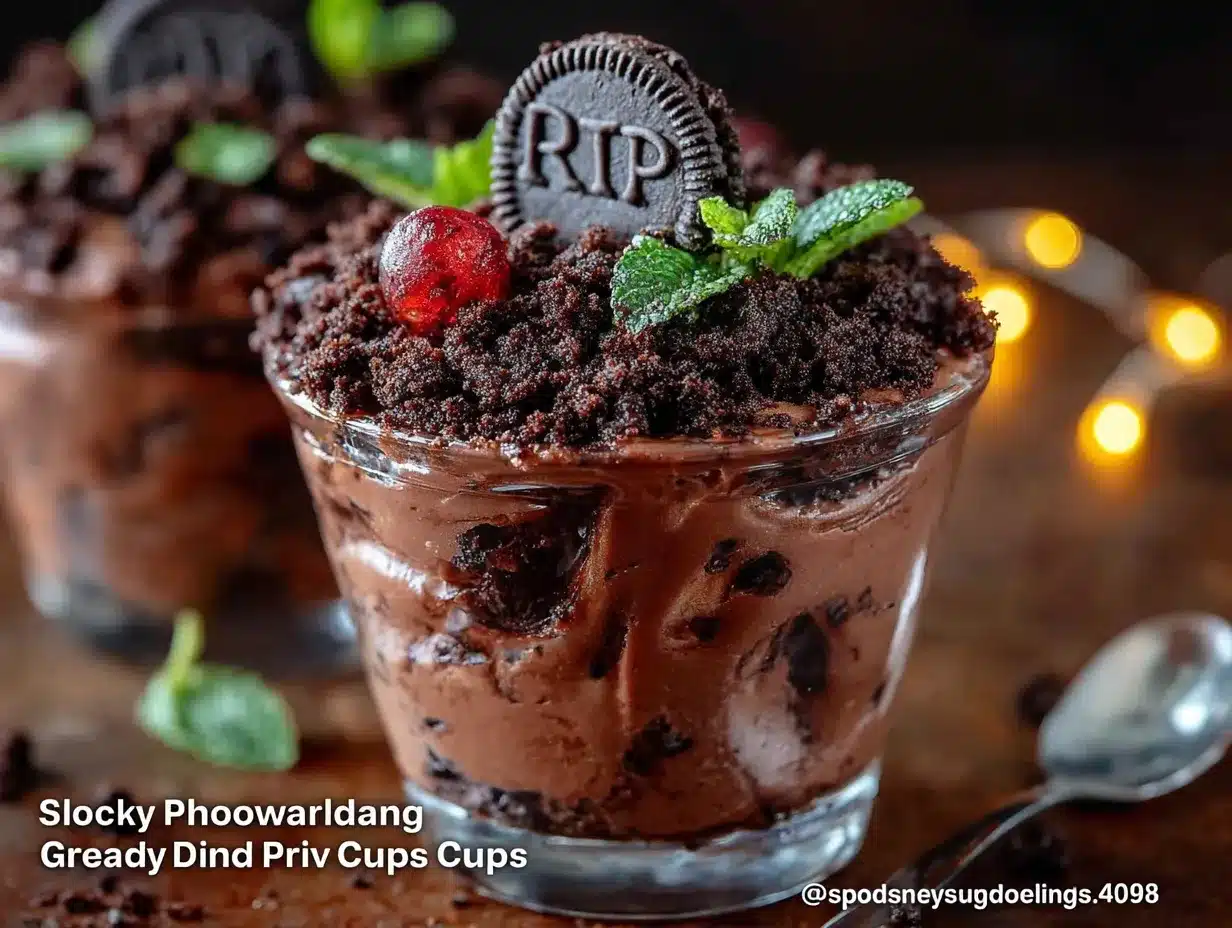
Let me walk you through this step by step. The process is straightforward, but a few small details make the difference between good dirt cups and unforgettable ones.
Step 1: Crush the Oreos
Place all the Oreos, cream filling included, into a food processor. Pulse about ten times until you get a crumbly texture that looks like potting soil. You want some tiny pieces and a few slightly larger bits, not a fine powder. If using a rolling pin, put the cookies in a gallon zip top bag, seal it, and roll over them firmly until crushed. Set aside about half a cup of the finer crumbs for topping later.
Step 2: Make the cream cheese base
In a large bowl, beat the softened cream cheese with an electric mixer on medium speed until smooth and fluffy, about two minutes. Scrape down the sides of the bowl with a spatula. Add the powdered sugar and vanilla extract, then beat again until fully combined and creamy. This should take another minute. The mixture should be smooth with no lumps. If you see lumps, your cream cheese wasn’t soft enough, keep beating, they’ll eventually break up.
Step 3: Prepare the pudding
In a separate large bowl, whisk together both boxes of instant pudding mix with the 4 cups of cold milk. Whisk vigorously for about two minutes until the pudding starts to thicken. Here’s the important part, don’t whisk until it’s fully set. Stop when it’s still slightly loose, about the consistency of thin milkshake. This helps it incorporate with the cream cheese mixture more evenly. Let it sit for two minutes to start setting.
Step 4: Combine everything
Add the cream cheese mixture to the pudding mixture. Beat with the electric mixer on low speed until just combined. Don’t overmix, or the pudding can become thin. Fold in the thawed whipped topping gently with a spatula until no white streaks remain. The final mixture should be thick, creamy, and pale brown. Taste it. Yes, it’s good. Stop yourself from eating it all right now.
Step 5: Layer the cups
This is where the visual magic happens. Spoon about one and a half tablespoons of crushed Oreo crumbs into the bottom of each clear cup. Press down gently with the back of a spoon to create an even base layer. This is the “underground” layer that the worms will peek out from.
Spoon or pipe the pudding mixture on top of the cookie layer, filling each cup about two-thirds full. An easy way to do this without making a mess is to transfer the pudding mixture to a large piping bag or a gallon zip top bag with the corner snipped off. Pipe the mixture into each cup, then tap the cups gently on the counter to settle the pudding and eliminate air pockets.
Step 6: Add the worms
This is the fun part. Take two or three gummy worms per cup and push them into the pudding so they’re partially buried. Let one end stick out of the pudding, like worms wiggling up from the dirt. Position some worms so they appear to be crawling up the sides of the cup, visible through the clear plastic. This creates the best visual effect.
Step 7: Top with dirt
Sprinkle the reserved finer Oreo crumbs generously over the top of each cup, covering the entire surface of the pudding. This is your “dirt” layer. The crumbs should completely hide the pudding, creating a realistic dirt surface. Add a few extra crumbs around the worms to make it look like they’ve pushed through the dirt.
Step 8: Decorate and chill
Add Halloween sprinkles or candy eyes to the top if desired. I like to press a few candy eyes into the dirt layer, it gives the cups a slightly creepy, fun vibe. Cover each cup with plastic wrap or a lid, then place them on a baking sheet and refrigerate for at least 2 hours, preferably 4 hours. This chilling time is crucial, it allows the pudding to set fully and the flavors to meld. The texture transforms during this time from loose and fluffy to dense and creamy, like a mousse.
I once skipped the full chilling time because I was in a rush, and the cups were noticeably looser and less satisfying. Don’t be like me. Give them the full time.
Cooking Tips & Techniques
After making these Spooky Graveyard Dirt Pudding Cups for three consecutive Halloweens, multiple birthday parties, and one completely random Tuesday in November, I’ve collected some lessons the hard way so you don’t have to.
The biggest mistake people make is overmixing the pudding. I did this my first time, whisking until the pudding was fully set before adding the cream cheese. The result was a lumpy, uneven mixture that never smoothed out. The trick is to whisk the pudding just until it starts to thicken, then stop. The cream cheese mixture and the continued stirring will finish the job.
Don’t skip the cream cheese. I know it seems like an extra step, but it makes a massive difference. Without it, the pudding is just pudding, sweet and one note. The cream cheese adds tang, richness, and structure. The cups hold their shape better and taste more sophisticated. I tried a batch without it once to save time, and my husband asked, “What’s different? It’s not as good.” He never notices anything. That’s how important the cream cheese is.
Crush the Oreos to the right texture. Too fine and they turn into mud, not dirt. Too chunky and they don’t look realistic. You want a mix of fine crumbs and small pea sized pieces. The food processor gives the most control, but if using a rolling pin, crush them in batches and watch your texture.
Chill the cups on a flat surface. I once put them on a slightly uneven shelf in the fridge, and the pudding settled crooked in every single cup. It didn’t affect the taste, but it looked terrible. A baking sheet solves this completely.
Time your preparation wisely. These need at least two hours to chill, but they’re actually better after four to six hours. I make them the morning of Halloween, and they’re perfect by party time. You can even make them a day ahead, they hold up beautifully for 24 to 36 hours. After that, the Oreo crumbs start to soften and lose their crunch.
One more thing, don’t add the gummy worms too early. If you add them more than eight hours before serving, the moisture from the pudding can make them sticky and slightly mushy. Add them about two to four hours before serving for the best texture. If you’re making these a day ahead, add the worms the next morning.
Variations & Adaptations
This recipe is wonderfully flexible, and I’ve tried several variations over the years. Here are my favorites:
Peanut Butter Dirt Cups : Add half a cup of creamy peanut butter to the cream cheese mixture before beating. Beat until fully incorporated. The peanut butter adds richness and pairs beautifully with the chocolate. My nephew requests this version for his birthday every year. Just be aware, this isn’t nut free, so don’t serve it at school parties.
Gluten Free Version : Use gluten free chocolate sandwich cookies. I’ve tested this with the Glutino brand, and they work perfectly. Everything else in the recipe is naturally gluten free, including the pudding mix and cream cheese. Double check your pudding box, but most instant pudding is gluten free.
Pumpkin Patch Variation : For a fall twist, replace the gummy worms with small candy pumpkins and add a thin layer of orange tinted cream cheese mixture before the dirt layer. Use a toothpick to draw little “vines” on top with green icing. This version is perfect for Thanksgiving or fall harvest parties.
Individual Mason Jar Version : Use small 4 ounce mason jars instead of plastic cups. These make adorable party favors. Tie a small ribbon or twine around the jar with a little tag. The jars are reusable too, which makes this an eco friendlier option.
Spooky Spider Cups : Instead of gummy worms, top each cup with a plastic spider ring. The rings are inexpensive at party stores, and kids go absolutely wild for them. Just warn parents about the small parts for younger children.
Dairy Free Adaptation : Use full fat oat milk for the pudding, dairy free cream cheese (Miyoko’s is my favorite), and a coconut based whipped topping. The texture is slightly less rich, but still very good. I served this version at a party where several guests had dairy allergies, and no one guessed it was dairy free.
Each variation changes the character of the dessert while keeping the core structure intact. Don’t be afraid to experiment. The worst that happens is you end up with a bowl of delicious pudding, which is hardly a tragedy.
Serving & Storage Suggestions
These Spooky Graveyard Dirt Pudding Cups are best served cold, straight from the refrigerator. The contrast between the cold, creamy pudding and the crunchy Oreo dirt is part of the experience. Letting them sit at room temperature for more than fifteen minutes softens the texture and makes the cookies soggy.
For presentation, arrange the cups on a large tray or platter. I like to scatter a few extra gummy worms and candy eyes around the base of the cups for a dramatic effect. You can also add a few fake spider webs from the party store for an extra spooky touch. Just make sure they’re decorative only and don’t touch the food.
These pair beautifully with other Halloween treats. I often serve them alongside a bowl of popcorn balls and a pitcher of apple cider. The rich, creamy pudding balances the salty popcorn and the tart cider perfectly. For an adult gathering, they’re wonderful with a cup of hot coffee or a dark beer.
Storage Instructions:
- Refrigerator : Store covered cups in the refrigerator for up to 3 days. The texture is best within the first 24 hours, but they’re still delicious for another day or two. The Oreo crumbs will soften over time, so don’t expect the same crunch after day one.
- Freezer : I don’t recommend freezing these. The pudding becomes watery when thawed, and the texture is unappealing. Make them fresh or at most a day ahead.
- Transporting : Place the cups on a baking sheet with raised edges and cover with plastic wrap. Keep them level during transport. I learned this lesson when I hit a bump and lost two cups to the floor of my car. Tragic.
The flavors actually meld and improve after a few hours in the refrigerator. The pudding becomes denser and more mousse like, and the cream cheese flavor mellows into the background. If you can resist eating them immediately, you’ll be rewarded with a better dessert.
Nutritional Information & Benefits
Let’s be honest, these are a treat, not a health food. But knowing what’s in them helps you enjoy them mindfully. Here’s the approximate nutritional breakdown per serving, assuming sixteen servings:
- Calories : Approximately 280 per cup
- Total Fat : 14 grams
- Saturated Fat : 8 grams
- Carbohydrates : 36 grams
- Sugar : 26 grams
- Protein : 5 grams
- Calcium : 10% of daily value
Health highlights of key ingredients:
- Milk : Provides calcium and vitamin D for bone health. Whole milk also contains conjugated linoleic acid, which has some research backing its health benefits.
- Cream cheese : Contains some protein and calcium, though it’s also high in saturated fat. A small amount adds richness without overdoing it.
- Dark cocoa in Oreos : Contains antioxidants called flavonoids, though the sugar content outweighs the benefits here. Still, it’s nice to know there’s something beneficial in there.
Dietary considerations: This recipe contains dairy, gluten (from the cookies), and soy (from the pudding mix and cookies). For gluten free and dairy free options, see the variations section above. This recipe is not suitable for vegans in its current form, but can be adapted with plant based ingredients.
I personally view desserts like these as part of a balanced life. We don’t eat them every day, but when we do, we enjoy them fully. Halloween comes once a year, and these cups are worth every single calorie.
Conclusion
These Spooky Graveyard Dirt Pudding Cups have become my most requested Halloween recipe for good reason. They’re visually impressive without requiring artistic talent, they taste genuinely delicious instead of just looking cute, and they come together with minimal effort and maximum payoff. My brother, the former Halloween dessert hater, now asks me in September when I’m making them. That’s the kind of endorsement that matters.
What I love most about this recipe is how it brings people together. There’s something about assembling these cups, pushing gummy worms into pudding, sprinkling Oreo dirt on top, that makes everyone smile. Kids get involved in the decorating, adults sneak tastes of the pudding mixture, and by the time they’re chilling in the fridge, the kitchen feels like a party already started.
I encourage you to make this recipe your own. Swap the worms for spiders, add peanut butter, use mason jars instead of plastic cups. The structure is forgiving, and the result is always delicious. When you make them, tag me or leave a comment below. I genuinely love seeing how people customize these and hearing about the reactions they get. Did your kids shriek with delight? Did your husband get caught with chocolate on his face? Tell me everything.
Now go make some dirt. Halloween is waiting, and these cups deserve a spot on your dessert table.
Frequently Asked Questions
Can I make these Spooky Graveyard Dirt Pudding Cups a day ahead?
Yes, absolutely. These cups actually taste better when made a day ahead because the flavors have time to meld. The only caveat is that the Oreo dirt will soften slightly overnight. If you want maximum crunch, reserve some extra crushed Oreos and sprinkle a fresh layer on top just before serving. Also, wait to add the gummy worms until the morning of your event, as they can become sticky if buried in the pudding for too long.
How do I keep the Oreo crumbs from getting soggy?
This is the most common question I get. The key is the cream cheese in the pudding mixture. It makes the pudding denser and less watery, which means less moisture migrates into the cookie layer. Also, don’t press the crumbs into the pudding too firmly. A gentle pat is enough. And serve the cups within 24 hours for the best texture. After that, the crumbs will inevitably soften, but they’ll still taste good.
Can I use homemade pudding instead of instant?
You can, but I don’t recommend it for this recipe. Homemade pudding is thinner and less stable than instant pudding made with whole milk. It won’t set firmly enough to hold the layers, and the cream cheese won’t incorporate as smoothly. If you’re determined to use homemade, cook it until it’s very thick, cool it completely, and expect a softer final texture. The cups will still taste good, but they’ll be messier to eat.
What size cups work best for this recipe?
I use 7 ounce clear plastic cups, which are the standard size you find at grocery stores in the party section. They’re tall enough to show off the layers but not so large that the dessert becomes overwhelming. You can also use 4 ounce mason jars for smaller portions, or 9 ounce cups for a more generous serving. Just adjust the layering amounts accordingly. For 4 ounce jars, you’ll get about 24 servings instead of 16.
Are these Spooky Graveyard Dirt Pudding Cups safe for school parties?
That depends on your school’s allergy policies. This recipe contains dairy, gluten, and soy, which are three of the most common allergens. For a nut free version, simply use the base recipe without any peanut butter additions. For a school that allows homemade treats, these are usually a hit. However, many schools now require store bought treats only. If that’s the case, you can still make these for classroom celebrations by checking with the teacher first, or save them for your own Halloween party at home.
Pin This Recipe!
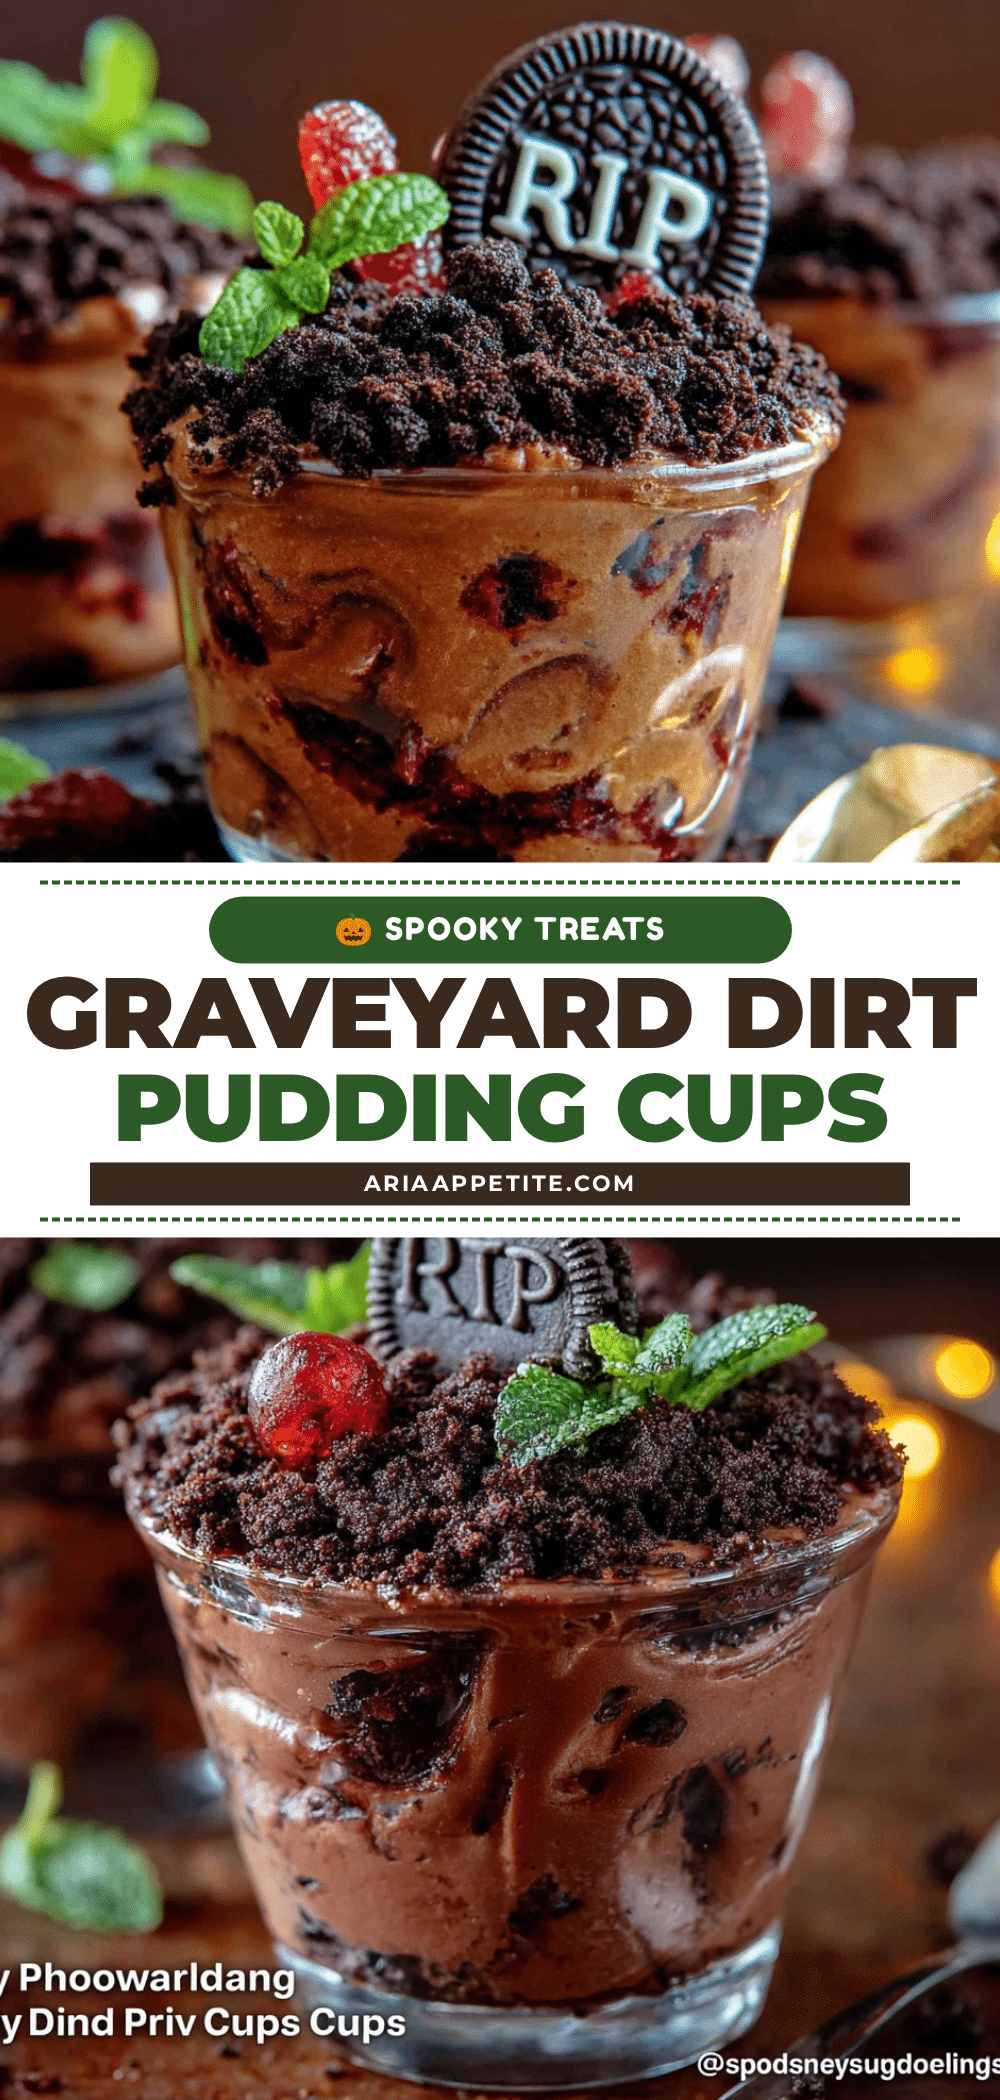
Spooky Graveyard Dirt Pudding Cups: Easy Halloween Dessert

These no-bake dirt pudding cups feature layers of creamy chocolate pudding, crushed Oreo ‘dirt,’ and gummy worms peeking out. They’re quick to assemble, visually impressive, and taste as good as they look.
- Prep Time: 20 minutes
- Cook Time: 0 minutes
- Total Time: 2 hours 20 minutes (includes chilling)
- Yield: 16 servings 1x
- Category: Dessert
- Cuisine: American
Ingredients
- 2 (3.9 ounce) boxes chocolate instant pudding mix
- 4 cups cold whole milk
- 1 (14.3 ounce) package Oreo cookies
- 8 ounces cream cheese, softened
- 1 cup powdered sugar
- 1 teaspoon vanilla extract
- 1 (8 ounce) tub whipped topping, thawed
- 24 gummy worms
- Halloween sprinkles or candy eyes (optional)
- 16 clear plastic cups (7 ounce size)
Instructions
- Crush the Oreos: Place all Oreos (cream filling included) in a food processor and pulse until crumbly, resembling potting soil. Set aside about 1/2 cup of finer crumbs for topping.
- Make the cream cheese base: In a large bowl, beat softened cream cheese with an electric mixer on medium speed until smooth and fluffy, about 2 minutes. Add powdered sugar and vanilla extract; beat until fully combined and creamy.
- Prepare the pudding: In a separate large bowl, whisk together both boxes of instant pudding mix with 4 cups cold milk. Whisk vigorously for about 2 minutes until the pudding starts to thicken but is still slightly loose (consistency of a thin milkshake). Let sit for 2 minutes.
- Combine mixtures: Add the cream cheese mixture to the pudding mixture. Beat on low speed until just combined. Gently fold in the thawed whipped topping with a spatula until no white streaks remain.
- Layer the cups: Spoon about 1 1/2 tablespoons of crushed Oreo crumbs into the bottom of each clear cup. Press down gently. Spoon or pipe the pudding mixture on top, filling each cup about two-thirds full. Tap cups gently on the counter to settle.
- Add the worms: Push 2-3 gummy worms into the pudding in each cup, letting one end stick out. Position some worms to appear crawling up the sides of the cup.
- Top with dirt: Sprinkle the reserved finer Oreo crumbs generously over the top of each cup, covering the entire surface. Add extra crumbs around the worms.
- Decorate and chill: Add Halloween sprinkles or candy eyes if desired. Cover each cup with plastic wrap or a lid, place on a baking sheet, and refrigerate for at least 2 hours, preferably 4 hours, until fully set.
Notes
For best texture, chill at least 4 hours. Add gummy worms 2-4 hours before serving to prevent them from becoming sticky. The cream cheese is key for a stable, creamy texture. For gluten-free, use gluten-free chocolate sandwich cookies. For dairy-free, use full-fat oat milk, dairy-free cream cheese, and coconut whipped topping.
Nutrition
- Serving Size: 1 cup
- Calories: 280
- Sugar: 26
- Sodium: 320
- Fat: 14
- Saturated Fat: 8
- Carbohydrates: 36
- Fiber: 1
- Protein: 5
Keywords: Halloween dessert, dirt pudding cups, graveyard dessert, no-bake dessert, chocolate pudding, Oreo dirt, gummy worms, easy Halloween treat


