Love this? Save it for later!
Share the inspiration with your friends
My friend Jen asked why I couldn’t just pour all the Jello layers at once. We were standing in her kitchen last October, surrounded by tiny plastic cups and three boxes of Jello, and I was about to launch into my whole spiel about setting times and why you absolutely need to wait between layers. I started to explain why that wouldn’t work — then stopped. Honestly, I had no good reason other than “that’s how I’ve always done it.” So I shrugged and said, “You know what, let’s try it your way.” She poured all three colors into a single cup, one right after the other, and we watched them blend into a murky brownish-orange mess. We laughed so hard we almost knocked over the vodka. It was a total disaster, but it taught me something I hadn’t expected: the layers matter, but the method matters more. That night, I went home and tested every timing combination I could think of until I got the perfect striped effect. The candy corn look is all about patience — and Jen learned that the hard way. But honestly? I learned more from her failed experiment than I did from all my “perfect” batches combined. Sometimes being wrong is the best teacher, especially when candy corn Jello shots for Halloween are on the line.
These Perfect Candy Corn Layered Jello Shots for Halloween have become my go-to party trick. They look impressive, taste like childhood nostalgia mixed with a grown-up kick, and they always get people talking. I mean, who doesn’t love a dessert that looks like candy corn but packs a punch? Let me tell you, the first time I nailed the layers after Jen’s experiment, I felt like a kitchen wizard. You know that feeling when something just works? That’s this recipe.
Why You’ll Love This Recipe
These layered Jello shots aren’t just another party drink — they’re a conversation starter. I’ve tested this recipe at least a dozen times to get the layers perfect, and I’m finally confident enough to share it with you. Here’s why you’re going to love making these:
- Visually Stunning : The three-layer candy corn effect is pure Halloween magic. Your guests will think you spent hours on them.
- Surprisingly Simple : Despite the fancy look, the technique is straightforward once you understand the timing. No culinary degree required.
- Perfect for Parties : These disappear fast at Halloween gatherings, costume parties, or spooky movie nights.
- Make-Ahead Friendly : Prep them the day before and relax while your guests rave about them.
- Customizable Strength : You can adjust the alcohol amount to suit your crowd without ruining the layers.
What makes these different from every other Jello shot recipe out there? It’s the timing. I’ve cracked the code on how long to let each layer set so you get that clean, sharp line between colors. No more muddy brown middle layers or bleeding edges. Plus, I use a specific ratio of liquid to gelatin that keeps the shots firm enough to hold their shape but soft enough to jiggle when you pick them up.
These are the kind of Jello shots that make people say “Wait, you made these?” They’re comfort food meets party trick — familiar enough to be nostalgic, but impressive enough to feel special. Whether you’re hosting a Halloween bash or just want to surprise your friends, these layered beauties deliver every single time.
What Ingredients You Will Need
This recipe uses simple, pantry-friendly ingredients to create that iconic candy corn look. You probably already have most of these on hand, except maybe the flavored gelatin boxes — but those are cheap and easy to find at any grocery store.
- 3 boxes (3 oz each) of Jello gelatin — You’ll need one box each of orange, lemon, and unflavored gelatin. The orange gives you the middle layer, lemon creates the yellow top, and unflavored gelatin mixes with the cream layer for the white bottom. I prefer Jello brand for consistent results, but store brands work fine too.
- 1 can (14 oz) sweetened condensed milk — This creates the creamy white bottom layer that mimics the white tip of candy corn. Don’t substitute with evaporated milk — it won’t give you the same thick, creamy texture.
- 1 cup boiling water — Divided into three portions for dissolving each gelatin packet. Use freshly boiled water for best results.
- 1 cup cold water — Divided into three portions. Cold water helps the gelatin set properly.
- 1 ½ cups vodka or unflavored alcohol — Divided equally among the three layers. You can use plain vodka, vanilla vodka for a sweeter taste, or substitute with white rum. For non-alcoholic versions, use cold water instead.
- Cooking spray or vegetable oil — For lightly greasing the plastic cups so the Jello shots release easily if you want to pop them out for serving.
Ingredient selection tips: Look for lemon Jello rather than pineapple — lemon gives a clearer yellow that looks more like candy corn. The unflavored gelatin is crucial for the white layer because it doesn’t add color, just structure. I’ve tried using vanilla pudding mix instead, but it doesn’t set firm enough to hold the layers. Stick with the unflavored gelatin for best results.
Substitution guidance: If you want a stronger candy corn flavor, use orange and lemon extracts in the unflavored gelatin layers. For a dairy-free version, use coconut cream instead of sweetened condensed milk — just know the texture will be slightly different. And if you’re serving kids or designated drivers, simply replace the alcohol with cold water or ginger ale for a fizzy twist.
Equipment Needed
You don’t need fancy tools for these Jello shots, but having the right equipment makes the layering process much smoother.
- Small plastic shot cups (2 oz size) — You’ll need about 24 cups for this recipe. The clear cups let the layers show through beautifully. I buy mine at party supply stores or online in bulk.
- Three small mixing bowls — One for each layer color. Glass or ceramic works best because they don’t retain odors.
- Measuring cups and spoons — Precision matters here, especially for the liquid ratios. Use a liquid measuring cup for the water and alcohol.
- Whisk or fork — For stirring the gelatin until completely dissolved. A whisk works faster and reduces lumps.
- Small funnel or measuring cup with a spout — This makes pouring the liquid into tiny cups much less messy. I use a narrow-neck measuring cup that I reserve just for Jello shots.
- Baking sheet or tray — To hold the cups while they set. A rimmed baking sheet catches any spills and makes moving them to the fridge easier.
- Refrigerator space — You’ll need a flat, level spot in your fridge for at least 4 hours. Clear a shelf beforehand so you don’t have to juggle leftovers.
If you don’t have small plastic cups, you can use shot glasses or even small mason jars. Just adjust the layering amounts accordingly. I’ve also used silicone ice cube trays for fun shapes — the layers look amazing in star or pumpkin shapes for Halloween.
Preparation Method
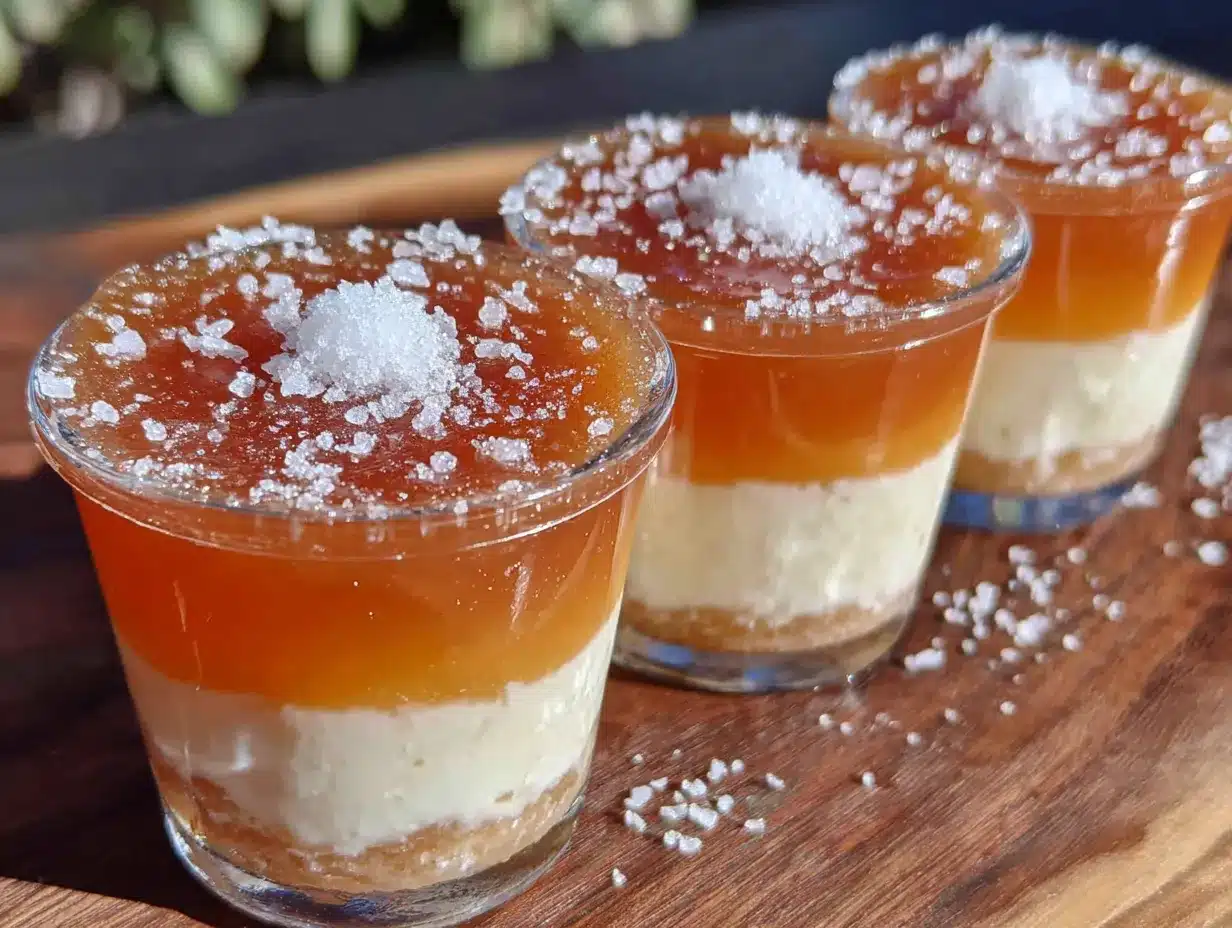
Making these layered Jello shots requires a little patience, but the results are worth every minute. Follow these steps carefully, and you’ll get those perfect candy corn stripes.
Step 1: Prepare Your Workspace (5 minutes)
Arrange 24 plastic shot cups on a baking sheet. Make sure they’re stable and not touching each other. Lightly spray the inside of each cup with cooking spray if you plan to pop them out later. Clear a shelf in your refrigerator where the baking sheet will sit flat without being disturbed.
Step 2: Make the White Bottom Layer (10 minutes)
In a small bowl, combine 1 packet of unflavored gelatin with ⅓ cup cold water. Let it sit for 2 minutes to bloom — it will look thick and grainy. Add ⅓ cup boiling water and stir until the gelatin dissolves completely. Pour in ½ cup sweetened condensed milk and ½ cup vodka. Stir until smooth and fully combined. The mixture should be creamy white and slightly thick. Pour about 1 tablespoon into each cup — enough to fill about one-third of the cup. Place the baking sheet in the refrigerator for 30-40 minutes, or until the layer is firm to the touch but not completely solid. You want it set enough that the next layer won’t sink in.
Step 3: Make the Orange Middle Layer (10 minutes)
While the white layer sets, prepare the orange layer. In a second bowl, combine the orange Jello powder with ⅓ cup boiling water. Stir for 2 minutes until completely dissolved. Add ⅓ cup cold water and ½ cup vodka. Stir well. Let the mixture cool to room temperature — about 10 minutes. You don’t want it hot when you pour it over the set white layer, or it will melt the cream layer. Once the white layer is firm, carefully pour the orange mixture over it, filling each cup about two-thirds full. Return the baking sheet to the refrigerator for another 30-40 minutes.
Step 4: Make the Yellow Top Layer (10 minutes)
In the third bowl, combine the lemon Jello powder with ⅓ cup boiling water. Stir until dissolved. Add ⅓ cup cold water and ½ cup vodka. Stir and let cool to room temperature. Once the orange layer is set — it should feel firm but still slightly jiggly — pour the yellow mixture over it, filling each cup almost to the top. Leave a tiny gap at the top to prevent spills. Refrigerate for at least 4 hours, or overnight for best results.
Step 5: Check and Serve (5 minutes)
After the final layer has set, check that all three layers are clearly visible. The white should be at the bottom, orange in the middle, and yellow on top — just like candy corn. If any layers look cloudy or mixed, you may have poured too quickly or the previous layer wasn’t set enough. Don’t worry, they’ll still taste amazing. Serve chilled directly from the cups, or gently pop them out onto a platter for a fancier presentation.
Pro tip: If you’re short on time, you can speed up the setting process by placing the cups in the freezer for 15 minutes between layers — just watch them closely so they don’t freeze solid.
Cooking Tips & Techniques
After making these Jello shots more times than I care to admit, I’ve learned a few tricks that make the process foolproof. Let me save you from the mistakes I made along the way.
Timing is everything. The biggest mistake people make is not letting each layer set long enough. I know it’s tempting to rush, but if you pour the next layer too soon, the colors will bleed together and you’ll end up with a muddy mess. Trust me, I’ve done it. Set a timer for each layer and resist the urge to peek. Thirty to forty minutes per layer is the sweet spot.
Temperature matters. Always let your Jello mixture cool to room temperature before pouring it over a set layer. Hot liquid will melt the layer underneath and ruin your stripes. I usually let mine sit on the counter for 10 minutes while I clean up between steps. If you’re in a hurry, place the bowl in an ice bath for 5 minutes, but stir constantly to prevent lumps.
Pour gently. When adding each layer, pour the liquid slowly against the side of the cup rather than dropping it directly into the center. This minimizes disturbance to the layer below. I use a small funnel or a measuring cup with a narrow spout for better control. A steady hand makes all the difference.
Use room temperature ingredients. Cold vodka or cold water can cause the gelatin to seize up and form lumps. Let your alcohol and water sit out for 15 minutes before mixing. This ensures a smooth, silky texture in every layer.
Don’t skip the bloom. For the unflavored gelatin layer, letting it sit in cold water for 2 minutes before adding hot water is crucial. This blooming process ensures the gelatin dissolves evenly and sets properly. Skipping this step leads to a grainy, uneven texture.
One of my biggest failures? I once tried to make these with sugar-free Jello to cut calories. The layers never set properly, and the texture was rubbery and weird. Stick with regular Jello for the best results. Some things are worth the extra sugar.
Variations & Adaptations
Once you’ve mastered the basic candy corn layers, feel free to get creative. Here are some variations I’ve tried and loved.
Spooky Color Swaps : Instead of candy corn colors, try a Halloween twist with green, purple, and black layers. Use lime, grape, and black cherry Jello for a witchy vibe. The layering technique stays the same — just swap the colors. I made these for a costume party last year, and they were a hit with the vampire crowd.
Non-Alcoholic Version : Replace the vodka with cold water, ginger ale, or white grape juice. The bubbles in the ginger ale add a fun fizz, but let it go flat before adding to the gelatin so it doesn’t create air pockets. Kids and designated drivers can enjoy these without feeling left out.
Dairy-Free Adaptation : Use full-fat coconut cream instead of sweetened condensed milk for the white layer. The coconut flavor pairs surprisingly well with the citrus Jello. Just make sure to whisk it thoroughly to avoid lumps. The texture will be slightly softer, so let the white layer set a bit longer — about 45 minutes.
Extra Boozy Version : For a stronger kick, replace half the cold water in each layer with additional vodka. Keep the total liquid volume the same to maintain the gelatin structure. I don’t recommend going over 1 cup of alcohol per layer, or the Jello won’t set properly. Trust me, I learned that lesson the hard way at a New Year’s party.
Fruity Flavor Twist : Use different Jello flavors to create a rainbow effect. Try strawberry, lime, and blue raspberry for a patriotic theme, or peach, mango, and pineapple for a tropical vibe. The possibilities are endless, and each combination gives you a new party theme.
My personal favorite variation? I swap the lemon Jello for pineapple and add a splash of coconut rum to the white layer. It tastes like a tropical vacation in a cup — perfect for summer parties or a mid-winter escape.
Serving & Storage Suggestions
These Jello shots are best served chilled, straight from the refrigerator. The cold temperature keeps the layers firm and the texture perfectly jiggly. Arrange them on a platter or baking sheet for easy grabbing at parties.
For presentation, I like to place the cups on a black or orange tray to make the candy corn colors pop. You can also sprinkle a little orange or yellow sanding sugar on top just before serving for extra sparkle. If you’re feeling fancy, add a tiny candy corn on top of each shot as a garnish — it’s cute and tells guests exactly what flavor to expect.
Storage Instructions : Store leftover Jello shots in the refrigerator, covered with plastic wrap or in an airtight container, for up to 5 days. The layers will stay intact for the first 3 days, but may start to bleed slightly after that. They’ll still taste fine, just won’t look as pretty.
Freezing : You can freeze these Jello shots for up to 1 month, but the texture will change. They become more like ice pops than Jello shots. Thaw them in the refrigerator for 2 hours before serving. The layers may not be as crisp after freezing, so I only recommend this if you’re making them way ahead of time.
Reheating : Don’t. Just don’t. Jello shots are meant to be served cold. Heating them turns them into a soupy mess. If they’ve been in the fridge too long and seem too firm, let them sit at room temperature for 10 minutes before serving.
The flavors actually develop and meld together after a day in the fridge. I find these taste even better on day two — the citrus notes from the Jello mellow out and blend with the creamy white layer. Just be sure to keep them covered so they don’t absorb other odors from your fridge.
Nutritional Information & Benefits
Let’s be real — these are Jello shots, not health food. But here’s what you’re looking at per shot, based on a standard 2-ounce serving:
- Calories : Approximately 110-130 calories per shot
- Carbohydrates : 18-22 grams (mostly from sugar in the Jello and condensed milk)
- Sugar : 16-20 grams
- Fat : 2-3 grams (from the condensed milk)
- Protein : 2-3 grams (from the gelatin and milk)
- Alcohol Content : Roughly 0.5 ounces of vodka per shot
Health Benefits : Gelatin is a good source of collagen, which supports joint health and skin elasticity. The sweetened condensed milk provides calcium and vitamin D. Of course, these benefits are minimal given the sugar content — but hey, it’s Halloween. Everything in moderation, right?
Dietary Considerations : These shots contain dairy (from the condensed milk) and are not suitable for vegans. They are gluten-free as long as you use certified gluten-free vodka. For a lower-sugar option, use sugar-free Jello and a sugar-free condensed milk alternative — just know the texture won’t be quite the same.
Potential Allergens : Dairy, and possibly corn (from the gelatin). Check your Jello boxes for specific allergen information.
I personally see these as a treat — something fun and festive that you enjoy once a year. They’re not an everyday indulgence, and that’s what makes them special. Balance is key, and a few Jello shots at a Halloween party won’t derail your health goals.
Conclusion
These Perfect Candy Corn Layered Jello Shots for Halloween are more than just a party trick — they’re a testament to what happens when you’re willing to be wrong. Jen’s disastrous “pour it all at once” experiment taught me more than any successful batch ever did. Sometimes the best recipes come from failures, and these Jello shots are proof of that.
I love making these because they bring people together. There’s something magical about watching someone’s face light up when they see those perfect candy corn stripes. They’re fun, festive, and surprisingly easy once you understand the timing. Plus, they’re endlessly customizable — you can switch up flavors, colors, and strengths to make them your own.
I’d love to hear how yours turn out! Leave a comment below and tell me about your layering adventures. Did you try a fun color combination? Did your friends love them? Share your photos on social media and tag me — I might feature your creation in a future post. And if you have any questions, don’t hesitate to ask. Happy Halloween, and happy layering!
Frequently Asked Questions
How long do these Jello shots need to set?
Each layer needs about 30-40 minutes in the refrigerator, plus at least 4 hours for the final set. For best results, make them the day before your party and let them set overnight.
Can I use sugar-free Jello?
You can, but the texture will be slightly different. Sugar-free Jello sets softer and may not hold the layers as cleanly. If you use it, add an extra 5-10 minutes to each layer’s setting time.
Why did my layers bleed together?
This usually happens when you pour the next layer too soon or the liquid is too warm. Make sure each layer is firm to the touch before adding the next, and let your Jello mixture cool to room temperature before pouring.
Can I make these without alcohol?
Absolutely! Replace the vodka with cold water, ginger ale, or white grape juice. The shots will still look amazing and taste great — perfect for kids or anyone who prefers non-alcoholic treats.
How do I get the Jello shots out of the cups?
Lightly spray the cups with cooking spray before adding the first layer. Once set, run a thin knife around the edge of each cup and gently pop the shot out. You can also dip the cups in warm water for 5 seconds to loosen the edges.
Pin This Recipe!
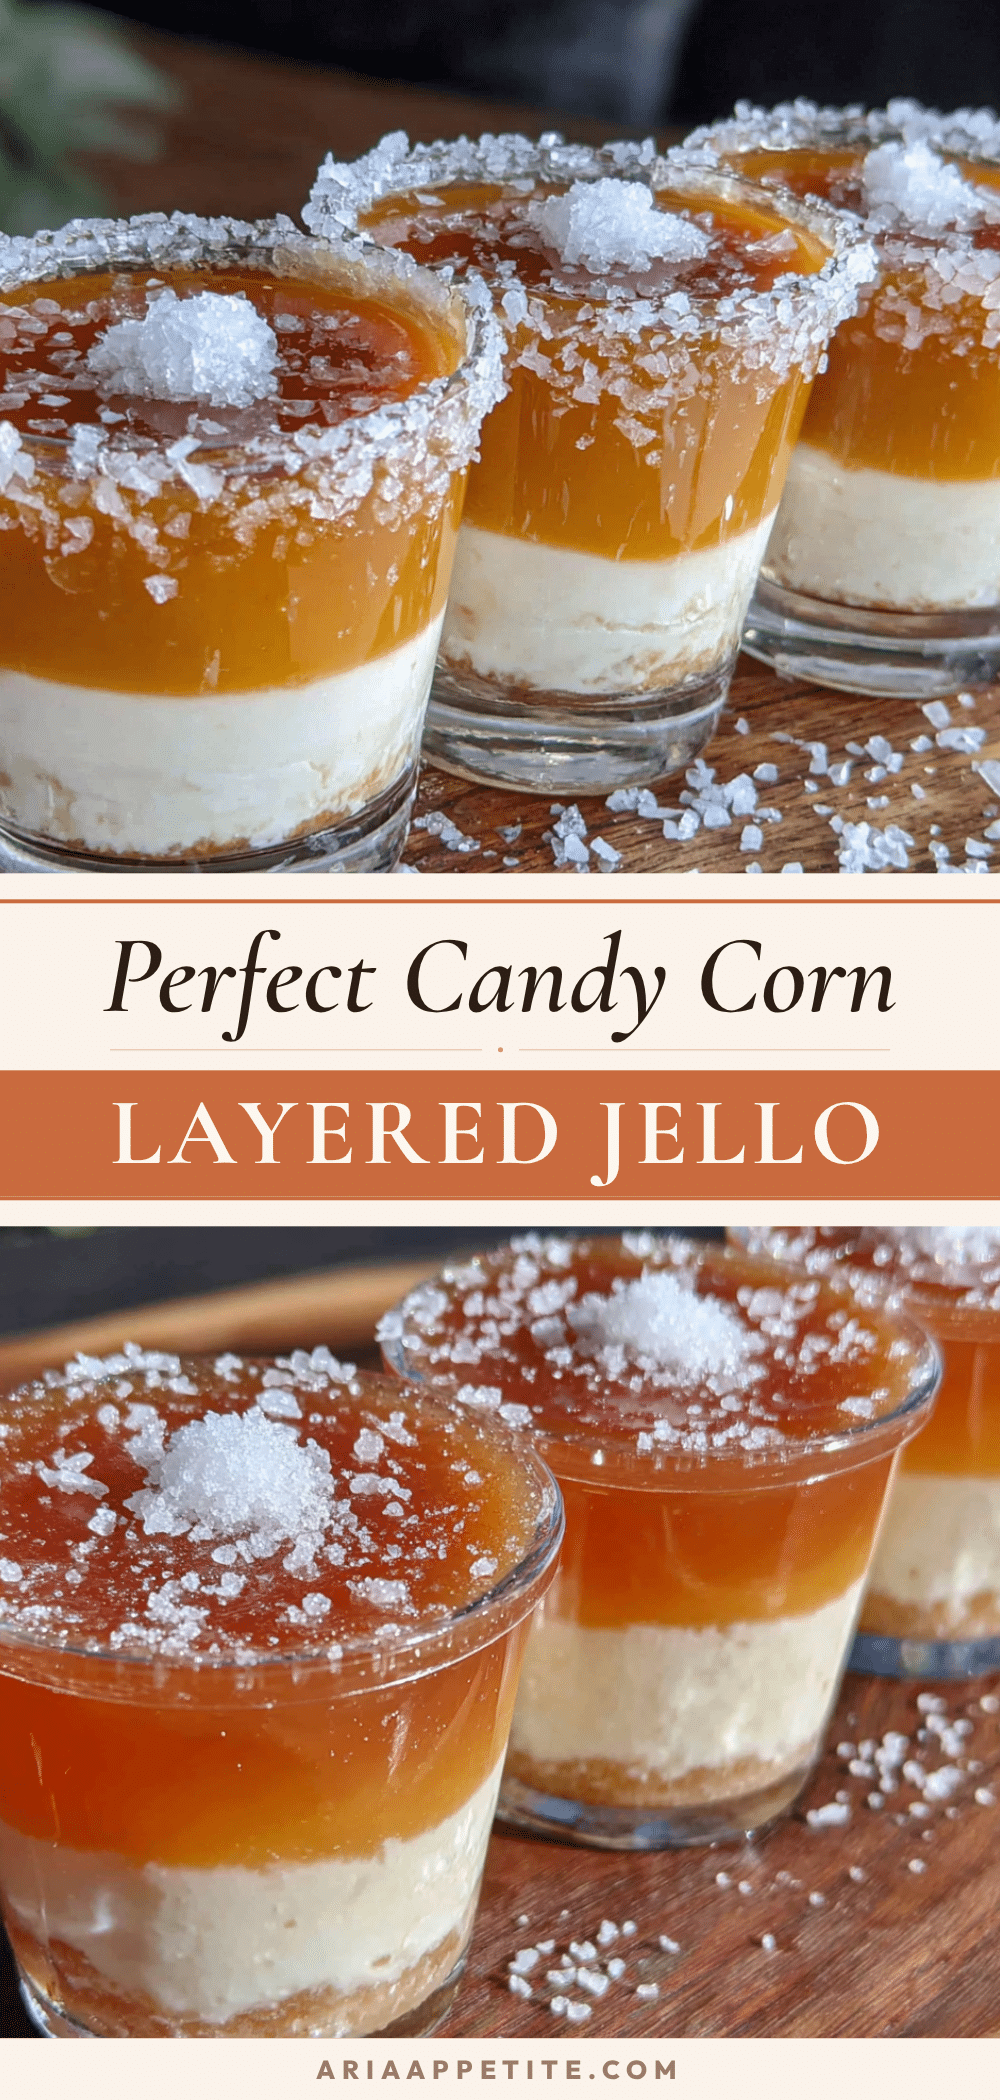
Perfect Candy Corn Layered Jello Shots for Halloween
These layered Jello shots mimic the iconic candy corn look with a creamy white bottom, orange middle, and yellow top. They’re a fun, festive party trick that tastes like childhood nostalgia with a grown-up kick.
- Prep Time: 15 minutes
- Cook Time: 0 minutes
- Total Time: 5 hours 30 minutes (includes setting time)
- Yield: 24 servings 1x
- Category: Dessert
- Cuisine: American
Ingredients
- 3 boxes (3 oz each) Jello gelatin (1 orange, 1 lemon, 1 unflavored)
- 1 can (14 oz) sweetened condensed milk
- 1 cup boiling water, divided into 3 portions
- 1 cup cold water, divided into 3 portions
- 1 ½ cups vodka or unflavored alcohol, divided into 3 portions
- Cooking spray or vegetable oil (for greasing cups)
Instructions
- Prepare your workspace: Arrange 24 plastic shot cups (2 oz size) on a baking sheet. Lightly spray the inside of each cup with cooking spray if you plan to pop them out later. Clear a shelf in your refrigerator.
- Make the white bottom layer: In a small bowl, combine 1 packet unflavored gelatin with ⅓ cup cold water. Let sit for 2 minutes to bloom. Add ⅓ cup boiling water and stir until dissolved. Pour in ½ cup sweetened condensed milk and ½ cup vodka. Stir until smooth. Pour about 1 tablespoon into each cup (fill about one-third full). Refrigerate for 30-40 minutes until firm to the touch.
- Make the orange middle layer: In a second bowl, combine orange Jello powder with ⅓ cup boiling water. Stir for 2 minutes until dissolved. Add ⅓ cup cold water and ½ cup vodka. Stir well and let cool to room temperature (about 10 minutes). Once the white layer is firm, carefully pour the orange mixture over it, filling each cup about two-thirds full. Refrigerate for another 30-40 minutes.
- Make the yellow top layer: In a third bowl, combine lemon Jello powder with ⅓ cup boiling water. Stir until dissolved. Add ⅓ cup cold water and ½ cup vodka. Stir and let cool to room temperature. Once the orange layer is set, pour the yellow mixture over it, filling each cup almost to the top. Refrigerate for at least 4 hours, or overnight for best results.
- Check and serve: After the final layer has set, check that all three layers are clearly visible (white bottom, orange middle, yellow top). Serve chilled directly from the cups, or gently pop them out onto a platter for a fancier presentation.
Notes
Timing is crucial: let each layer set 30-40 minutes before adding the next. Always let the Jello mixture cool to room temperature before pouring over a set layer to prevent melting. For a non-alcoholic version, replace vodka with cold water or ginger ale. For dairy-free, use full-fat coconut cream instead of sweetened condensed milk. Store in the refrigerator for up to 5 days.
Nutrition
- Serving Size: 1 shot (2 oz)
- Calories: 120
- Sugar: 18
- Sodium: 60
- Fat: 2.5
- Saturated Fat: 1.5
- Carbohydrates: 20
- Protein: 2.5
Keywords: candy corn, jello shots, Halloween, layered jello, party shots, vodka jello, Halloween dessert


