Love this? Save it for later!
Share the inspiration with your friends
This was supposed to be a full-blown cheese board with three kinds of brie, fig jam I’d simmered for hours, and those fancy little crackers that cost seven dollars a box. I had it all planned out for our anniversary—the kind of spread you see on magazine covers, you know, where everything looks impossibly perfect. But then Tuesday happened. I got stuck at work until 6:30, the grocery store was out of my favorite goat cheese, and I realized I’d forgotten to soak the dried figs. I stood in my kitchen at 7:15 PM holding a bag of honey-roasted nuts and a single block of cheddar, feeling like a complete failure. Honestly, I almost just ordered pizza.
But my husband was already home, and he’d put on that one jazz playlist we love, and the candles were lit. So I grabbed a wooden board, tossed on what I had—the nuts, some apple slices, a handful of dark chocolate chips I found in the pantry—and drizzled honey over everything in a last-ditch attempt to look intentional. I called it a “rustic snack situation” and braced for disappointment. What came out was nothing like the plan. And better. So much better.
That night, we ate with our fingers, laughing about how the “fancy” board I’d stressed over would’ve probably been too fussy anyway. This honey nut charcuterie board took fifteen minutes, used ingredients I already had, and somehow felt more romantic than anything I could’ve bought. The sweetness of the honey against the salty nuts, the crunch, the sticky fingers—it was perfect. Maybe you’ve been there, standing in your kitchen with a half-baked idea and a clock ticking. Let me tell you, this board is the happy accident you didn’t know you needed.
Why You’ll Love This Recipe
Look, I’ve tested a lot of charcuterie boards in my time—some took hours, others cost a small fortune. This one is different. It’s the board I make when I want to feel fancy without actually doing any real work. Here’s why it works:
- Quick & Easy: This board comes together in under 15 minutes. No cooking, no complicated steps—just assembly. Perfect for those nights when you want to impress but you’re running on fumes.
- Simple Ingredients: You probably already have honey, nuts, and a few cheese options in your fridge. No fancy grocery trips required. I used what I had on hand, and it turned out better than any planned board I’ve ever made.
- Perfect for Date Night: Whether it’s an anniversary, Valentine’s Day, or just a Tuesday that needs a little spark, this board sets the mood without the stress. The honey drizzle alone feels indulgent.
- Crowd-Pleaser: I’ve served this at small gatherings and even a casual book club meeting. Everyone goes for the nuts first, then the cheese, then the honey-soaked fruit. It disappears fast.
- Unbelievably Delicious: The combination of salty roasted nuts, creamy cheese, and sweet honey is next-level comfort food. The textures alone—crunchy, smooth, sticky—keep you coming back for more.
What makes this board different from the rest? It’s the honey. Not just any honey, but a good-quality one that you drizzle generously right before serving. That golden thread tying everything together transforms simple ingredients into something memorable. Plus, there’s no rulebook here. You can swap nuts, change cheeses, add whatever fruit you have. It’s your best version, not mine.
This recipe isn’t just good—it’s the kind that makes you close your eyes after the first bite. It’s date night reimagined: faster, simpler, but with the same soul-soothing satisfaction. Perfect for impressing someone without breaking a sweat, or turning a regular evening into something special.
What Ingredients You Will Need
This recipe uses simple, wholesome ingredients to deliver bold flavor and satisfying texture without the fuss. Most of these are pantry staples or easy to find at any grocery store. Here’s what you’ll need:
For the Nuts (The Star of the Board)
- 1 cup mixed roasted nuts (unsalted or lightly salted) – I prefer a mix of almonds, cashews, and pecans. The variety gives different textures. If you can find honey-roasted nuts, even better—they double down on the sweetness.
- 1 tablespoon honey (plus extra for drizzling) – Use a good-quality honey. I like local wildflower honey for its floral notes, but any runny honey works. Avoid creamed honey here—it won’t drizzle properly.
- 1/2 teaspoon flaky sea salt (like Maldon) – This balances the sweetness and adds that satisfying crunch. Don’t skip it!
- 1/4 teaspoon cinnamon (optional) – Adds warmth and a subtle spice that pairs beautifully with the honey. I add this when I’m feeling cozy.
For the Cheese (The Creamy Base)
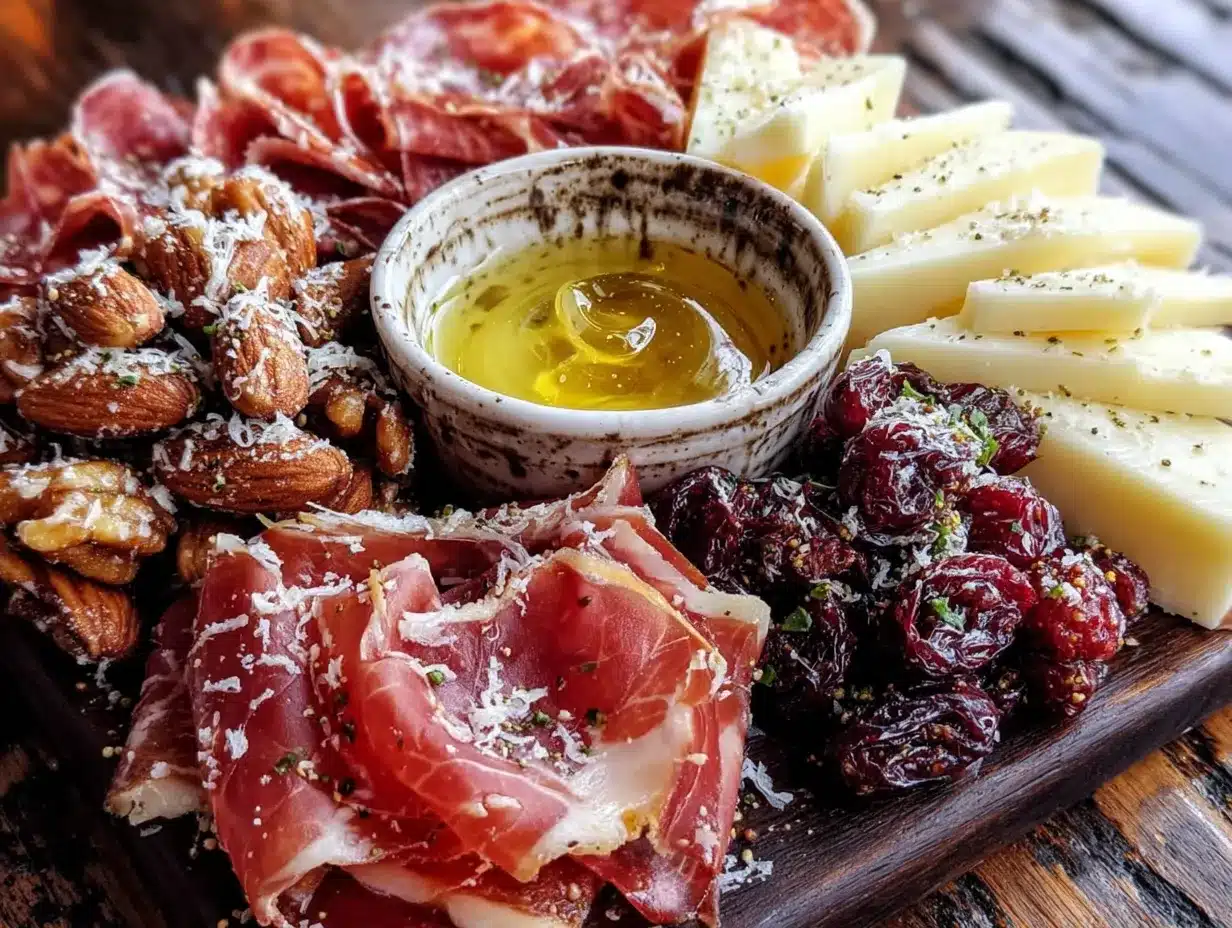
- 4-6 ounces brie or camembert (at room temperature) – The creaminess contrasts perfectly with the crunchy nuts. I’ve also used goat cheese log when I wanted something tangier.
- 4 ounces sharp cheddar (sliced or cubed) – Adds a savory, salty bite. I recommend an aged cheddar for maximum flavor.
- 2 ounces blue cheese (optional, for bold flavor) – If you’re a blue cheese fan, this adds a wonderful pungent note. Gorgonzola or Roquefort work great.
For the Fruit (The Fresh Element)
- 1 apple or pear (sliced thin) – The crispness cuts through the richness. I prefer Honeycrisp apples or Bosc pears for their firm texture. Toss them in a little lemon juice to prevent browning if you’re prepping ahead.
- 1/2 cup dried apricots or figs – Chewy and sweet, they add a lovely contrast. I like Turkish apricots for their intense flavor.
- 1/2 cup fresh grapes (red or green) – Pop them in the freezer for 10 minutes before serving—they get this amazing icy-cold crunch that’s addictive.
For the Sweet & Crunchy Additions
- 1/4 cup dark chocolate chips or chunks (70% cocoa or higher) – The bitterness balances the honey’s sweetness. I use Ghirardelli or Lindt.
- 2 tablespoons honeycomb (optional, but amazing) – If you can find it, this adds a chewy, honey-packed texture that’s next-level. Look for it at specialty stores or farmers’ markets.
- Fresh rosemary sprigs (for garnish) – Not just for looks! The herbaceous aroma complements the honey beautifully. Plus, it makes the board look intentional.
For Serving
- Crackers or baguette slices – I like water crackers for their neutral flavor, or a crusty sourdough baguette sliced thin. Gluten-free rice crackers work too.
- Extra honey for drizzling – Trust me, you’ll want more. Warm it slightly in the microwave (10 seconds) for an easier drizzle.
Substitution Guidance: Use almond flour crackers for a gluten-free option. Swap brie with dairy-free cashew cheese if needed. For a nut-free version, replace the mixed nuts with roasted chickpeas or pumpkin seeds—they still give that crunch factor. If you don’t have honey, maple syrup works in a pinch, though the flavor will be slightly different.
Equipment Needed
You don’t need much for this board, which is honestly my favorite part. Here’s what I use:
- Large wooden board or serving platter – I use a 12×16-inch acacia wood board I found at a home goods store for $15. A large cutting board, marble slab, or even a baking sheet lined with parchment paper works. The key is having enough surface area to spread everything out.
- Small bowls or ramekins – For the honey and any loose items like dried fruit. I use two small ceramic bowls that cost me three dollars each at a thrift store. They keep things organized and prevent honey from running everywhere.
- Cheese knife or small spreader – One for the brie, one for the cheddar. If you don’t have a cheese knife, a butter knife works fine—just wipe it between uses.
- Honey dipper or small spoon – For drizzling. I actually prefer a small spoon; it gives more control. A honey dipper is pretty but can be messy.
- Cutting board and knife – For slicing apples, pears, and cheese. A sharp chef’s knife makes clean slices.
- Small serving tongs or toothpicks – Optional but nice for guests. I usually just use my fingers—it’s more casual.
Budget-Friendly Tip: Don’t have a wooden board? A large dinner plate or a flipped-over baking sheet works beautifully. I’ve used a clean cutting board in a pinch. The presentation matters less than the experience.
Preparation Method
This board comes together in about 15 minutes. Here’s how I do it, step by step:
- Prep your cheese (5 minutes before serving). Take the brie and cheddar out of the fridge 20-30 minutes before you start assembling. Room temperature cheese tastes creamier and more flavorful. If you forgot to do this (I do all the time), place the wrapped cheese in a bowl of warm water for 5 minutes—it helps take the chill off.
- Toast the nuts (optional, 3 minutes). If you want extra warmth and crunch, toss the mixed nuts in a dry skillet over medium heat for 2-3 minutes, shaking frequently until fragrant. Watch them closely—they burn fast. Let them cool slightly before adding honey. I skip this step in summer when I want a cold board, but in winter, warm nuts are everything.
- Honey-coat the nuts (2 minutes). In a small bowl, combine the toasted or room-temperature nuts with 1 tablespoon honey, the flaky sea salt, and cinnamon if using. Stir gently until every nut is glistening. The salt should stick to the honey—if it doesn’t, add another tiny pinch. Set aside.
- Slice the fruit (3 minutes). Core the apple or pear and slice it thinly—about 1/4-inch thick. If you’re prepping ahead, toss the slices in a little lemon juice to keep them from browning. Rinse and pat dry the grapes. Leave the dried apricots whole or slice them in half for easier grabbing.
- Arrange the cheese on the board (2 minutes). Place the brie whole on one corner of the board. I like to cut a small wedge out of it to show the creamy interior—it looks inviting. Arrange the cheddar slices in a fan pattern opposite the brie. If using blue cheese, crumble it into a small pile nearby.
- Add the nuts and fruit (3 minutes). Spoon the honey-coated nuts into a small bowl or directly onto the board in a cluster. Arrange the apple slices, dried apricots, and grapes around the cheese, leaving space for crackers. I like to create little “zones” so everything is easy to reach without digging.
- Scatter the chocolate and extras (1 minute). Sprinkle the dark chocolate chunks in the gaps between ingredients. If using honeycomb, place it near the brie—it pairs beautifully. Tuck fresh rosemary sprigs here and there for color and aroma.
- Drizzle with honey (30 seconds). This is the moment! Warm 2 tablespoons of honey in the microwave for 10 seconds, then drizzle it generously over the brie, the nuts, and the apple slices. Don’t be shy—the honey is the star. Let it pool slightly on the board; it adds to the rustic feel.
- Add crackers and serve. Arrange crackers or baguette slices around the edges of the board, filling any empty spaces. Serve immediately. The honey should still be slightly warm and runny.
Sensory Cues: When you drizzle the honey, watch for that golden ribbon falling slowly—it should look like liquid amber. The nuts should be glossy and sticky, with visible salt crystals. The brie should feel soft to the touch but hold its shape. If you press it gently, it should give slightly. The apple slices should be crisp, not mealy—if they bend without breaking, they’re perfect.
Personal Tip: I always taste a nut before serving. If it’s not sweet-salty enough, I add another tiny drizzle of honey and a pinch of salt. Trust your taste buds over the recipe.
Cooking Tips & Techniques
I’ve made this board probably thirty times now, and I’ve learned a few things the hard way. Here’s what I wish someone had told me:
Don’t overthink the arrangement. My first few boards looked like I was trying to win a competition. Everything was perfectly spaced, symmetrically placed, and honestly, it looked stiff. Now I just pile things on in clusters. It looks more natural, more inviting. People want to eat from a board that looks like it was thrown together with love, not precision.
Temperature matters more than you think. I once served this board with cold brie straight from the fridge, and it was a disaster—the cheese was firm and bland. Let your cheese sit out for at least 20 minutes. If you’re short on time, microwave the brie for 10-15 seconds on low power. It’s not ideal, but it works in a pinch.
The honey drizzle is a timing thing. If you drizzle the honey too early, it runs everywhere and makes the crackers soggy. Drizzle it right before serving. I’ve made the mistake of drizzling, then getting distracted by a phone call, and coming back to a sticky mess. Trust me, wait until the last second.
One mistake I made early on: I used cheap honey once because I was trying to save money. The flavor was flat, and the board felt underwhelming. Good honey makes a difference. It doesn’t have to be expensive—just look for one that’s pure and not blended with corn syrup. Your taste buds will thank you.
Multitasking strategy: While the cheese is coming to room temperature, toast the nuts and slice the fruit. That way, by the time the cheese is ready, everything else is prepped. I set a timer on my phone for 20 minutes so I don’t forget the cheese. It’s happened more times than I’d like to admit.
For consistency: Taste each component before assembling. Nuts too salty? Add a little more honey. Cheese too mild? Add a stronger blue cheese to balance. The board should be a harmony of flavors, not a competition. I adjust every single time based on what I’m tasting.
Variations & Adaptations
This board is endlessly adaptable. Here are some of my favorite variations:
Spicy-Sweet Board
Add 1/4 teaspoon cayenne pepper or chili flakes to the honey-coated nuts. The heat cuts through the sweetness and keeps you reaching for more. I made this for a game night, and it was the first thing to disappear. Pair with a sharp cheddar and apple slices—the combination is electric.
Mediterranean-Inspired Board
Swap the brie for feta or halloumi. Replace the mixed nuts with pistachios and almonds. Add olives, sun-dried tomatoes, and fresh mint instead of rosemary. Drizzle with honey and a splash of balsamic glaze. This version is tangier and more savory—perfect for a summer evening with a glass of rosé.
Vegan-Friendly Board
Use a dairy-free cashew cheese or almond-based brie alternative. Replace honey with maple syrup or agave nectar. Add roasted chickpeas for crunch instead of nuts. I’ve served this to vegan friends, and they loved it. The key is using a creamy plant-based cheese that spreads well—I like Miyoko’s brand.
Seasonal Fruit Swap
In fall, use sliced figs and persimmons instead of apples. In summer, add fresh peaches and blackberries. In winter, try pomegranate seeds and sliced oranges. The honey ties everything together regardless of the fruit. I made a winter version with blood oranges and pomegranate, and it was stunning—the colors alone were worth it.
Nut-Free Version
Replace the mixed nuts with roasted pumpkin seeds, sunflower seeds, or crispy chickpeas. The texture changes slightly, but the honey coating works just as well. I’ve also used pretzel sticks for a salty-crunchy element. My nephew has a nut allergy, and this version makes him feel included.
Serving & Storage Suggestions
This board is best served immediately, while the honey is still glossy and the cheese is at room temperature. But here’s how to handle leftovers and make ahead:
Serving Temperature: Serve the board at room temperature. If you’ve refrigerated any components, let them sit out for 20 minutes before serving. The honey should be warm enough to drizzle—if it’s too thick, microwave it for 10 seconds. I like to serve the board in the center of the table, with small plates and napkins for everyone to grab what they want.
Complementary Dishes: This board pairs beautifully with a light salad (think arugula with lemon vinaigrette) or a bowl of olives. For drinks, a crisp Sauvignon Blanc or a dry rosé cuts through the richness. In winter, I serve it with mulled wine or hot cider. In summer, a sparkling water with lemon is refreshing.
Storage Instructions: If you have leftovers (unlikely, but possible), separate the components. Store the cheese wrapped in wax paper in the fridge—it stays fresh for 3-4 days. Keep the honey-coated nuts in an airtight container at room temperature for up to a week. The fruit should be eaten within a day or two, as sliced apples and pears brown quickly. The crackers will go stale if left out—store them in a sealed bag.
Reheating Tips: If the nuts lose their crunch, spread them on a baking sheet and warm them in a 300°F oven for 3-4 minutes. Let them cool before serving. The cheese should be brought back to room temperature before eating—don’t microwave it unless you absolutely have to.
How Flavors Develop: The honey-coated nuts actually taste better after a day—the flavors meld together, and the salt dissolves into the honey. I sometimes make the nuts a day ahead for this reason. The cheese, however, is best fresh. So prep the nuts in advance, then assemble the board just before serving.
Nutritional Information & Benefits
While this board is indulgent, it also offers some surprising nutritional perks. Here’s a rough estimate per serving (based on 4 servings):
- Calories: Approximately 350-400 per serving (depending on cheese and nut quantities)
- Protein: 12-15g (from nuts and cheese)
- Healthy Fats: 25-30g (mostly monounsaturated from nuts and cheese)
- Fiber: 4-6g (from nuts, fruit, and dark chocolate)
- Sugar: 20-25g (naturally occurring from honey and fruit)
Health Benefits: Nuts are packed with heart-healthy fats, vitamin E, and magnesium. Honey contains antioxidants and has antibacterial properties. Dark chocolate (70% or higher) is rich in flavonoids that support heart health. Apples provide fiber and vitamin C. Even the cheese offers calcium and protein—in moderation, it’s part of a balanced diet.
Dietary Considerations: This recipe is naturally gluten-free (check your crackers) and can be made dairy-free with substitutions. It contains nuts and dairy, so be mindful of allergies. If you’re watching sugar intake, reduce the honey drizzle or use a sugar-free alternative. I personally love that this board feels indulgent but isn’t loaded with processed ingredients—it’s real food, just arranged beautifully.
My Perspective: I don’t believe in labeling food as “good” or “bad.” This board is about enjoyment, connection, and treating yourself. The nutritional benefits are a bonus, not the goal. If you’re sharing this with someone you love, that’s the real nourishment.
Conclusion
This honey nut charcuterie board started as a total accident—a stressed-out attempt to salvage a date night that felt like it was slipping away. But honestly, I think that’s why it works. There’s no pressure, no perfectionism, no fancy techniques. It’s just good ingredients, a little honey, and the willingness to make something beautiful out of what you have.
I’ve made this board for anniversaries, lazy Sundays, and even a solo dinner when I needed a pick-me-up. Every time, it delivers. The sweetness of the honey, the crunch of the nuts, the creaminess of the cheese—it’s a combination that feels special without trying too hard. And isn’t that what we all want? Something that makes us feel like we’ve put in effort, when really, we just showed up?
So go ahead—grab whatever nuts you have, that block of cheese in the back of the fridge, and that bottle of honey you bought on a whim. Drizzle it all on a board and call it dinner. I promise you, it’ll be the best accident you ever made. If you try this recipe, I’d love to hear how it turned out. Leave a comment below or tag me in your photos—I want to see your honey-drizzled creations!
Happy snacking, friend. You’ve got this.
Frequently Asked Questions
Can I make this board ahead of time?
Yes, partially. You can honey-coat the nuts and slice the fruit up to a day in advance. Store the nuts in an airtight container and the fruit in the fridge with a little lemon juice to prevent browning. Assemble the board and drizzle the honey just before serving for the best texture.
What if I don’t have a wooden board?
No problem! Use a large dinner plate, a cutting board, a marble slab, or even a baking sheet lined with parchment paper. The presentation is about the ingredients, not the surface. I’ve used a clean pizza pan in a pinch, and it worked fine.
Can I use different nuts?
Absolutely. This recipe is flexible. Try walnuts, pecans, almonds, cashews, or even macadamia nuts. Just make sure they’re roasted for the best flavor. If using raw nuts, toast them in a dry skillet for 2-3 minutes first.
How do I prevent the apple slices from browning?
Toss them in a mixture of 1 tablespoon lemon juice and 1 tablespoon water. This will keep them fresh for several hours. Alternatively, use pear slices instead—they brown less quickly. I’ve also used apple wedges instead of thin slices, which seem to hold up better.
Is this board suitable for a crowd?
Yes, just double or triple the ingredients. Use a larger board or multiple boards to give everything room. I’ve served this at parties with 8-10 people by making two boards—one with the honey nut mix and another with a savory version. They disappeared within 20 minutes.
Pin This Recipe!
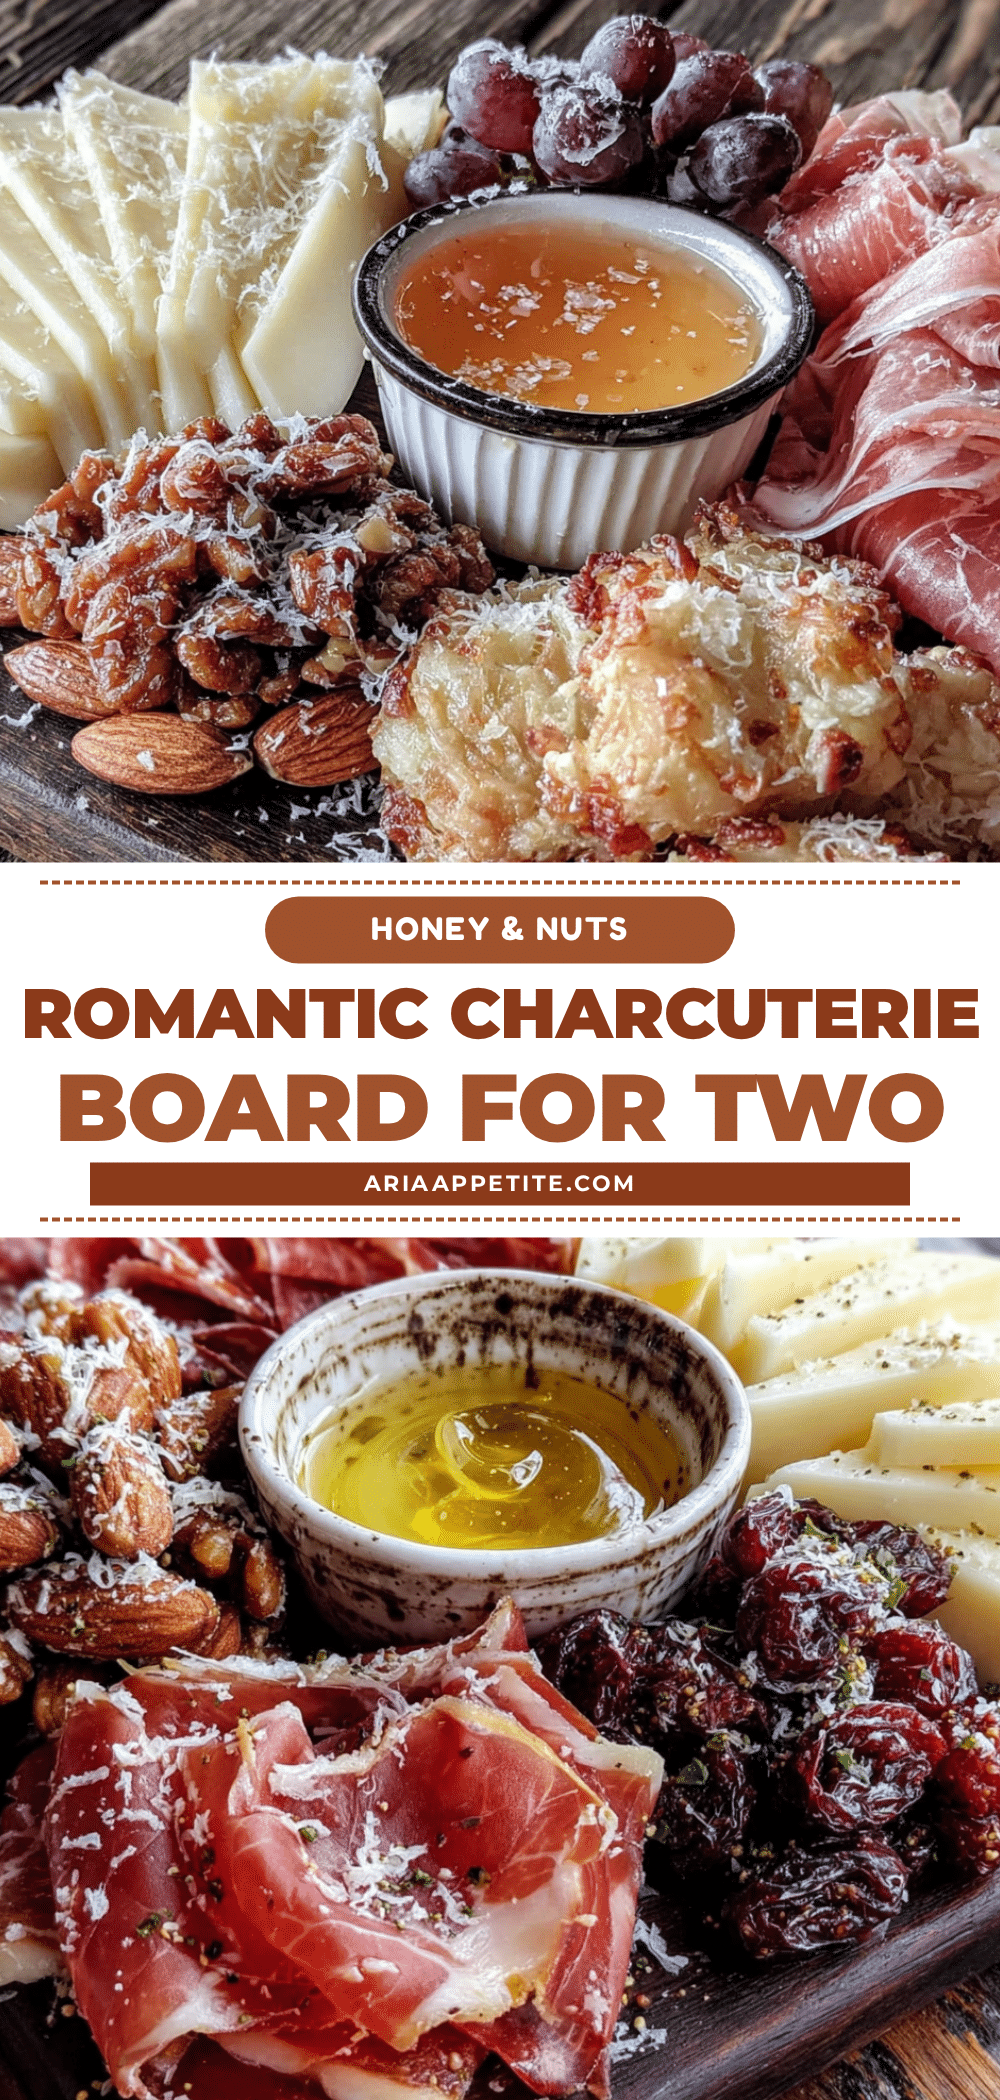
Quick Romantic Honey Nut Charcuterie Board (Easy 15-Minute Recipe)
A quick and romantic honey nut charcuterie board that comes together in just 15 minutes with simple ingredients. Perfect for date night or any occasion where you want to impress without the stress.
- Prep Time: 15 minutes
- Cook Time: 0 minutes
- Total Time: 15 minutes
- Yield: 4 servings 1x
- Category: Appetizer
- Cuisine: American
Ingredients
- 1 cup mixed roasted nuts (unsalted or lightly salted)
- 1 tablespoon honey (plus extra for drizzling)
- 1/2 teaspoon flaky sea salt
- 1/4 teaspoon cinnamon (optional)
- 4–6 ounces brie or camembert (at room temperature)
- 4 ounces sharp cheddar (sliced or cubed)
- 2 ounces blue cheese (optional)
- 1 apple or pear (sliced thin)
- 1/2 cup dried apricots or figs
- 1/2 cup fresh grapes (red or green)
- 1/4 cup dark chocolate chips or chunks (70% cocoa or higher)
- 2 tablespoons honeycomb (optional)
- Fresh rosemary sprigs (for garnish)
- Crackers or baguette slices
- Extra honey for drizzling
Instructions
- Prep your cheese: Take the brie and cheddar out of the fridge 20-30 minutes before assembling. If forgotten, place wrapped cheese in a bowl of warm water for 5 minutes.
- Toast the nuts (optional): Toss mixed nuts in a dry skillet over medium heat for 2-3 minutes until fragrant. Let cool slightly.
- Honey-coat the nuts: In a small bowl, combine nuts with 1 tablespoon honey, flaky sea salt, and cinnamon if using. Stir gently until glistening.
- Slice the fruit: Core apple or pear and slice thinly (about 1/4-inch thick). Toss with lemon juice if prepping ahead. Rinse and pat dry grapes. Leave dried apricots whole or halve them.
- Arrange the cheese on the board: Place brie whole on one corner, cut a small wedge to show interior. Arrange cheddar slices in a fan pattern opposite. Crumble blue cheese nearby if using.
- Add the nuts and fruit: Spoon honey-coated nuts into a small bowl or directly onto board. Arrange apple slices, dried apricots, and grapes around cheese, leaving space for crackers.
- Scatter the chocolate and extras: Sprinkle dark chocolate chunks in gaps. Place honeycomb near brie if using. Tuck fresh rosemary sprigs for color and aroma.
- Drizzle with honey: Warm 2 tablespoons honey in microwave for 10 seconds, then drizzle generously over brie, nuts, and apple slices.
- Add crackers and serve: Arrange crackers or baguette slices around edges. Serve immediately while honey is still warm and runny.
Notes
Don’t overthink the arrangement; cluster ingredients naturally. Let cheese sit at room temperature for at least 20 minutes. Drizzle honey right before serving to prevent sogginess. Taste a nut before serving and adjust honey/salt as needed.
Nutrition
- Serving Size: 1 serving (approxima
- Calories: 375
- Sugar: 22
- Sodium: 480
- Fat: 28
- Saturated Fat: 10
- Carbohydrates: 22
- Fiber: 5
- Protein: 14
Keywords: charcuterie board, honey nut, romantic, quick, easy, date night, appetizer, cheese board


