Love this? Save it for later!
Share the inspiration with your friends
It was 11:47 PM on a random Tuesday in October, and I had a very specific, almost ridiculous craving for something sweet, savory, and deeply roasted. I didn’t have the fancy cheese or the puff pastry that a proper squash tart would need, but I had a bag of honeynut squats from the farmers’ market that were starting to look at me with judgment from the counter. And I had butter. Lots of butter. The idea that arrived, half-asleep and a little reckless, was simple: just roast the squash until it’s jammy, then drown it in brown butter and crispy sage. Honestly, it felt too easy to be good.
I stood there in my pajamas, listening to the butter sizzle and pop, and I’ll be honest, I was skeptical. I mean, could something this simple really be the answer to my late-night hankering? But the smell—that nutty, toasty, almost caramel-like aroma—started filling the kitchen, and I knew I was onto something. I forgot to set a timer, so I just watched the butter, swirling the pan until it turned the color of a warm penny. It was a tiny, imperfect moment, but it felt like a victory.
That first bite, at nearly midnight, had this unexpected depth. The squash was silky and sweet, the butter was rich and nutty, and the sage was crackly and earthy. It was pure comfort, and it cost me almost nothing. Maybe you’ve been there, standing in your kitchen late at night, just wanting something that feels like a hug. This recipe stayed with me because it proved that the best food doesn’t need a lot of fuss. It just needs a little bit of faith and a lot of butter.
Why You’ll Love This Recipe
Let’s be real for a second. We’re all busy, and the last thing you need is a recipe that requires a trip to three different stores. This cozy honeynut squash with brown butter and sage is the opposite of that. It’s the kind of side dish that makes you look like a hero without any of the stress. I’ve tested this recipe probably a dozen times now, tweaking the roasting time and the butter ratio, and I can tell you with total confidence: it’s foolproof.
- Quick & Easy: Comes together in under 40 minutes, most of which is hands-off oven time. Perfect for a busy weeknight or when you need a last-minute dish for a potluck.
- Simple Ingredients: No fancy grocery trips needed. You likely already have butter, sage, salt, and pepper. The only star you need to find is the honeynut squash itself.
- Perfect for Fall Gatherings: This dish is a showstopper at Thanksgiving, Friendsgiving, or any cozy dinner party. It’s elegant enough for a holiday table but simple enough for a Tuesday.
- Crowd-Pleaser: I’ve served this to kids, picky eaters, and full-on food snobs. Everyone loves it. The sweetness of the squash and the savory butter is a combo that just works.
- Unbelievably Delicious: The texture is what gets me every time. The squash gets all caramelized and tender on the inside, with these slightly crispy, golden edges. Then you add that brown butter and sage, and it’s next-level comfort food.
What makes this recipe different from every other roasted squash out there? It’s the technique. I don’t just toss the squash in oil and hope for the best. I roast it cut-side down first to get that deep, caramelized crust, then flip it to let the edges crisp up. And the brown butter? That’s the secret weapon. It’s not just melted butter; it’s butter that’s been cooked until the milk solids turn a toasty brown, giving it a nutty, almost hazelnut-like flavor. It’s a little thing that makes a huge difference.
This recipe isn’t just good—it’s the kind that makes you close your eyes after the first bite. It’s comfort food reimagined: healthier than a creamy casserole, faster than a stuffed squash, but with the same soul-soothing satisfaction. It’s perfect for impressing guests without stress, or turning a simple Tuesday night meal into something memorable. And for a family on a budget? This is a win. Honeynut squash is usually cheap, and the rest is pantry staples. Plus, the leftovers reheat beautifully, which is a total game-changer for busy parents.
What Ingredients You Will Need
This recipe uses simple, wholesome ingredients to deliver bold flavor and satisfying texture without the fuss. Most of these are pantry staples or easy to find at any grocery store. Here’s what you’ll need to grab:
- Honeynut Squash (2-3 medium): These little guys are the star of the show. They’re smaller and sweeter than butternut squash, with a thin skin that you can actually eat after roasting (though I usually peel it for a nicer texture). Look for ones that feel heavy for their size and have a deep orange color. If you can’t find honeynut, you can use butternut squash, just cut it into smaller chunks.
- Unsalted Butter (4 tablespoons, 1/2 stick): This is the heart of the sauce. I use unsalted so I can control the salt level. Kerrygold is my go-to for its rich flavor, but any good-quality butter works. The magic happens when we brown it.
- Fresh Sage Leaves (10-12 leaves): Don’t even think about using dried sage here. The fresh leaves are what get crispy and delicious in the hot butter. They add an earthy, slightly peppery note that’s perfect with the sweet squash.
- Extra-Virgin Olive Oil (2 tablespoons): For roasting the squash. It helps get those edges nice and golden. A good quality oil makes a difference, but you don’t need the fancy stuff for roasting.
- Kosher Salt (1 teaspoon, plus more for seasoning): I use Diamond Crystal brand. It’s less salty by volume than other brands, so adjust if you’re using something else. Salt is crucial here to balance the sweetness.
- Black Pepper (1/2 teaspoon, freshly ground): Freshly ground is always better. It adds a little warmth and bite.
- Maple Syrup (optional, 1 tablespoon): I only add this if the squash isn’t super sweet. It’s a little insurance policy for that perfect caramelized glaze. Use pure maple syrup, not the pancake stuff.
- Flaky Sea Salt (for finishing, like Maldon): This is non-negotiable for me. That little pop of salt on top just makes everything sing. It’s the final touch that makes it taste restaurant-quality.
Ingredient Tips & Substitutions:
- For a dairy-free version, you can use a high-quality vegan butter or ghee for the brown butter. Ghee works especially well because it’s already clarified and browns beautifully.
- If you don’t have fresh sage, you can use fresh thyme or rosemary. The flavor will be different, but still delicious. Just add the sprigs to the butter while it browns.
- For a touch of heat, add a pinch of red pepper flakes to the brown butter. It’s a nice contrast to the sweetness.
Equipment Needed
You don’t need a lot of fancy gear for this one, which is part of the beauty. Here’s what you’ll want to have on hand:
- Large Baking Sheet or Sheet Pan: A rimmed baking sheet is best to catch any juices. I use a half-sheet pan (18×13 inches) for even roasting. If you don’t have one, a large casserole dish will work, but the squash might not get as crispy.
- Parchment Paper or Aluminum Foil: This makes cleanup a breeze. I prefer parchment for non-stick roasting, but foil works in a pinch. Just be aware the squash might stick a little more.
- Chef’s Knife: A sharp one is key for cutting the squash in half. Honeynut squash is dense, so a dull knife is a recipe for disaster (and a potential trip to the ER).
- Cutting Board: A sturdy one that won’t slip.
- Medium Skillet or Saucepan: For browning the butter. A light-colored skillet (like stainless steel) is best so you can see the butter change color. I’ve used my trusty old non-stick pan for years, and it works fine, you just have to watch it closely.
- Wooden Spoon or Silicone Spatula: For stirring the butter as it browns. A wooden spoon is great because it doesn’t scratch your pans.
- Small Bowl: To hold the finished brown butter and sage.
Budget-Friendly Options: Honestly, you probably already have everything you need. If you don’t have a baking sheet, a cast-iron skillet works beautifully for roasting the squash too. And if you don’t have a light-colored pan for the butter, just pay extra attention—any pan will work, you just have to watch for the color change.
Preparation Method
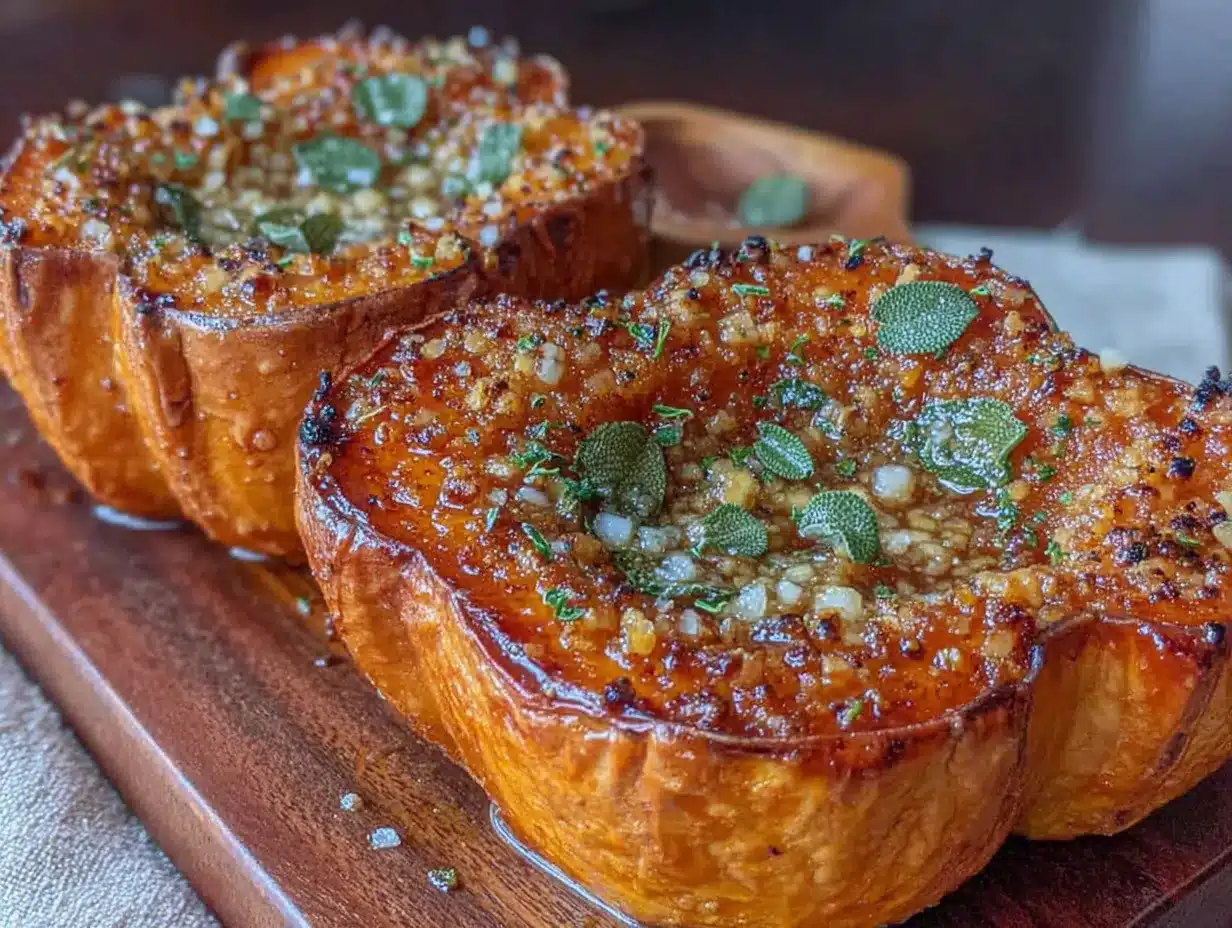
Alright, let’s get cooking. This is where the magic happens. Follow these steps, and you’ll have a dish that tastes like you spent hours in the kitchen when really, it was barely any work at all.
- Preheat Your Oven: Crank it up to 425°F (220°C). A hot oven is key for getting that caramelized exterior on the squash. While it’s heating, line your baking sheet with parchment paper for easy cleanup.
- Prep the Squash: This is the most dangerous part, so be careful. Using a sharp chef’s knife, carefully cut each honeynut squash in half lengthwise. Don’t try to cut through the stem; just cut around it. Scoop out the seeds and stringy bits with a spoon. You can save the seeds to roast later if you want, but I usually just toss them.
- Season the Squash: Place the squash halves cut-side up on the prepared baking sheet. Drizzle with the olive oil, then sprinkle with the kosher salt and black pepper. Use your hands to rub the oil and seasoning all over the cut sides and the skin. If you’re using the maple syrup, drizzle it over the cut sides now.
- Roast the Squash (First Stage): Place the squash cut-side down on the baking sheet. This is the secret to the best texture. Roasting them cut-side down first creates a steamy environment that cooks the flesh evenly and creates a deep caramelized crust. Roast for 20 minutes.
- Flip and Roast Again: After 20 minutes, carefully flip the squash halves over so they’re cut-side up. Return to the oven and roast for another 10-15 minutes, until the squash is tender and easily pierced with a fork, and the edges are starting to brown and crisp up. The total roasting time should be 30-35 minutes.
- Make the Brown Butter: While the squash is finishing its second roast, start the brown butter. Place the butter in a medium skillet over medium heat. Let it melt completely, then start swirling the pan gently. The butter will foam up, then subside. Watch it carefully. After about 3-4 minutes, the milk solids at the bottom will start to turn a golden brown, and the butter will smell nutty and amazing. This is your cue.
- Add the Sage: As soon as the butter is browned, toss in the fresh sage leaves. They’ll sizzle and crisp up in about 30 seconds. Don’t let them burn—they should be dark green and crackly. Immediately remove the pan from the heat to stop the cooking.
- Assemble and Serve: Transfer the roasted squash halves to a serving platter. Spoon the brown butter and crispy sage leaves over the top. Finish with a generous sprinkle of flaky sea salt. Serve immediately while everything is hot and the sage is still crispy.
Troubleshooting Tips:
- If your squash isn’t browning, your oven might not be hot enough. Make sure it’s fully preheated to 425°F.
- If the butter starts to burn (it will smell acrid and look dark brown/black), you’ve gone too far. Start over. It’s a cheap mistake, and the flavor of burnt butter is not recoverable.
- If you’re short on time, you can microwave the squash for 2-3 minutes before cutting to soften it up. Just poke a few holes in it first.
Cooking Tips & Techniques
I’ve made this recipe so many times that I’ve learned a few things the hard way. Let me save you some trouble.
The Secret to Perfect Brown Butter: The biggest mistake people make is walking away from the pan. Brown butter can go from perfect to burnt in about 15 seconds. I once got distracted by a phone call and ended up with a pan of black, bitter butter. It was a sad, expensive lesson. So here’s my tip: use a light-colored pan so you can actually see the color change. And once the butter starts foaming, keep your eyes on it. The moment you see the milk solids turn a warm, golden brown, pull it off the heat. The residual heat will continue to cook it a little bit, so it’s better to pull it a second too early than a second too late.
Getting the Squash Just Right: The cut-side-down roasting trick is a game-changer. It creates a beautiful, caramelized crust that you just can’t get by roasting cut-side up the whole time. But here’s a pro tip: don’t overcrowd the pan. Give the squash halves some space. If they’re touching, they’ll steam instead of roast, and you’ll lose that crispy edge. I usually do two or three squash per pan, max.
Timing and Multitasking: This recipe is actually great for multitasking. While the squash is roasting, you have a solid 25-30 minutes to do other things—set the table, make a salad, pour yourself a glass of wine. I like to start the brown butter right when I flip the squash. That way, everything finishes at the same time, and the butter is hot and fresh when I pour it over the squash.
Consistency is Key: For the most even cooking, try to pick squash that are roughly the same size. If you have one giant squash and one tiny one, the small one will be done way before the big one. If that happens, just remove the small one from the pan when it’s tender and let the big one keep roasting.
Variations & Adaptations
This recipe is a fantastic base, and it’s easy to adapt to your own tastes or what you have in the fridge. Here are a few of my favorite variations:
- Spicy Maple Version: Add 1/2 teaspoon of red pepper flakes and 1 tablespoon of maple syrup to the brown butter as it finishes. The heat and sweetness are a perfect match for the earthy squash. I tried this on a whim one night when I wanted a little kick, and now it’s my default.
- Cheesy Squash: After you flip the squash, sprinkle the cut sides with grated Parmesan or crumbled feta cheese. Return to the oven for the last 10 minutes of roasting. The cheese gets all melty and golden. It’s a great way to make it a more substantial side dish, almost a meal on its own.
- Herb and Nut Crunch: Toast 1/4 cup of chopped pecans or walnuts in the brown butter along with the sage. The nuts add a wonderful crunch and toasty flavor. This is my go-to for holiday dinners because it feels extra special.
- Dairy-Free Adaptation: Use a high-quality vegan butter or ghee for the brown butter. Ghee works beautifully because it’s already clarified and browns easily. The sage will still crisp up perfectly.
- Different Squash: If you can’t find honeynut, this recipe works great with butternut squash (cut into 1-inch cubes and roasted for 25-30 minutes) or even delicata squash (which has an edible skin, so you don’t have to peel it).
Serving & Storage Suggestions
This dish is best served hot, straight from the oven, when the sage is still crackly and the butter is bubbling. But it’s also pretty delicious at room temperature, which makes it perfect for potlucks or buffets.
How to Serve: I like to serve the squash halves on a big platter, drizzled with all that brown butter and topped with the crispy sage. A final sprinkle of flaky sea salt right before serving is a must. It pairs beautifully with roasted chicken, pork chops, or a simple herb-crusted pork tenderloin. For a vegetarian meal, serve it alongside a hearty grain salad or lentil soup. It’s also a fantastic side for your classic Thanksgiving turkey.
Storage: If you have leftovers (which is rare in my house, but it happens), store them in an airtight container in the refrigerator for up to 4 days. The flavors actually meld together and get even better overnight, so don’t be sad about leftovers.
Reheating: The best way to reheat this is in the oven. Pop the squash on a baking sheet at 350°F (175°C) for about 10 minutes, until warmed through. The sage won’t be as crispy, but the flavor will still be amazing. You can also microwave it in 30-second bursts, but the texture won’t be as good. Honestly, I’ve been known to eat it cold, straight from the fridge, and it’s still delicious.
Flavor Development: One thing I’ve noticed is that the brown butter sauce gets even more flavorful after a day in the fridge. The squash soaks up all that nutty, sage-y goodness. So if you’re meal prepping, this is a great dish to make ahead. Just reheat it gently before serving.
Nutritional Information & Benefits
This recipe is a great example of how comfort food can also be good for you. Honeynut squash is packed with vitamins and fiber, and the brown butter adds a little richness that makes it feel indulgent without being heavy.
Estimated Nutritional Values (per serving, 1/2 squash):
| Nutrient | Amount |
|---|---|
| Calories | 220 |
| Fat | 16g |
| Saturated Fat | 8g |
| Carbohydrates | 20g |
| Fiber | 4g |
| Sugar | 8g |
| Protein | 3g |
| Vitamin A | 200% DV |
| Vitamin C | 25% DV |
Health Benefits: Honeynut squash is a fantastic source of Vitamin A, which is great for your eyes and immune system. It’s also high in fiber, which helps keep you full and happy. The sage in this recipe isn’t just for flavor—it’s also known for its anti-inflammatory properties. And while butter is high in fat, it’s a natural source of Vitamin A and butyrate, which is good for gut health. So go ahead, enjoy it without guilt.
Dietary Considerations: This recipe is naturally gluten-free and can be made dairy-free with a simple swap. It’s also low-carb friendly if you’re watching your intake. Just be mindful of the maple syrup if you’re on a strict keto diet.
Conclusion
This cozy honeynut squash with brown butter and sage is the kind of recipe that feels like a secret. It’s so simple, yet so incredibly satisfying. Every time I make it, I’m reminded that the best food doesn’t need to be complicated. It just needs to be made with a little care and a lot of love.
I hope you give this recipe a try. Don’t be afraid to make it your own—tweak the seasonings, try a different squash, add some nuts or cheese. That’s the beauty of cooking. And when you do make it, I’d love to hear about it. Drop a comment below and let me know how it turned out. Did you add a twist? Did your kids gobble it up? Did you make it for a special occasion? Share your story!
And if you found this recipe helpful, please share it with a friend or save it to your Pinterest board. It helps other home cooks find it too. Until next time, happy cooking, and remember: a little butter makes everything better.
Frequently Asked Questions
Can I use butternut squash instead of honeynut?
Absolutely. Honeynut squash is smaller and sweeter, but butternut is a great substitute. Just peel it and cut it into 1-inch cubes. Roast the cubes at 425°F for 25-30 minutes, flipping halfway through. The brown butter and sage topping works perfectly with it.
How do I know when the brown butter is done?
Watch for the color change. The butter will melt, foam up, and then the foam will subside. At that point, you’ll see little brown specks forming at the bottom of the pan. The butter should smell nutty and toasty. As soon as you see that golden-brown color, pull it off the heat. It happens fast, so don’t walk away!
Can I make this recipe ahead of time?
Yes! You can roast the squash up to 2 days ahead and store it in the fridge. When you’re ready to serve, reheat it in a 350°F oven for about 10 minutes. Make the brown butter fresh right before serving for the best texture and flavor.
Is the skin of the honeynut squash edible?
Technically, yes. The skin is thin and becomes tender when roasted. However, I find it can be a little tough and chewy, so I prefer to scoop the flesh out of the skin before serving. It’s a personal preference, so try it both ways and see what you think!
What can I serve with this squash for a complete meal?
This squash is incredibly versatile. It pairs beautifully with roasted chicken, pork chops, or a simple garlic herb salmon. For a vegetarian meal, serve it over a bed of quinoa or farro with a simple green salad. It’s also a fantastic side dish for a holiday feast.
Pin This Recipe!
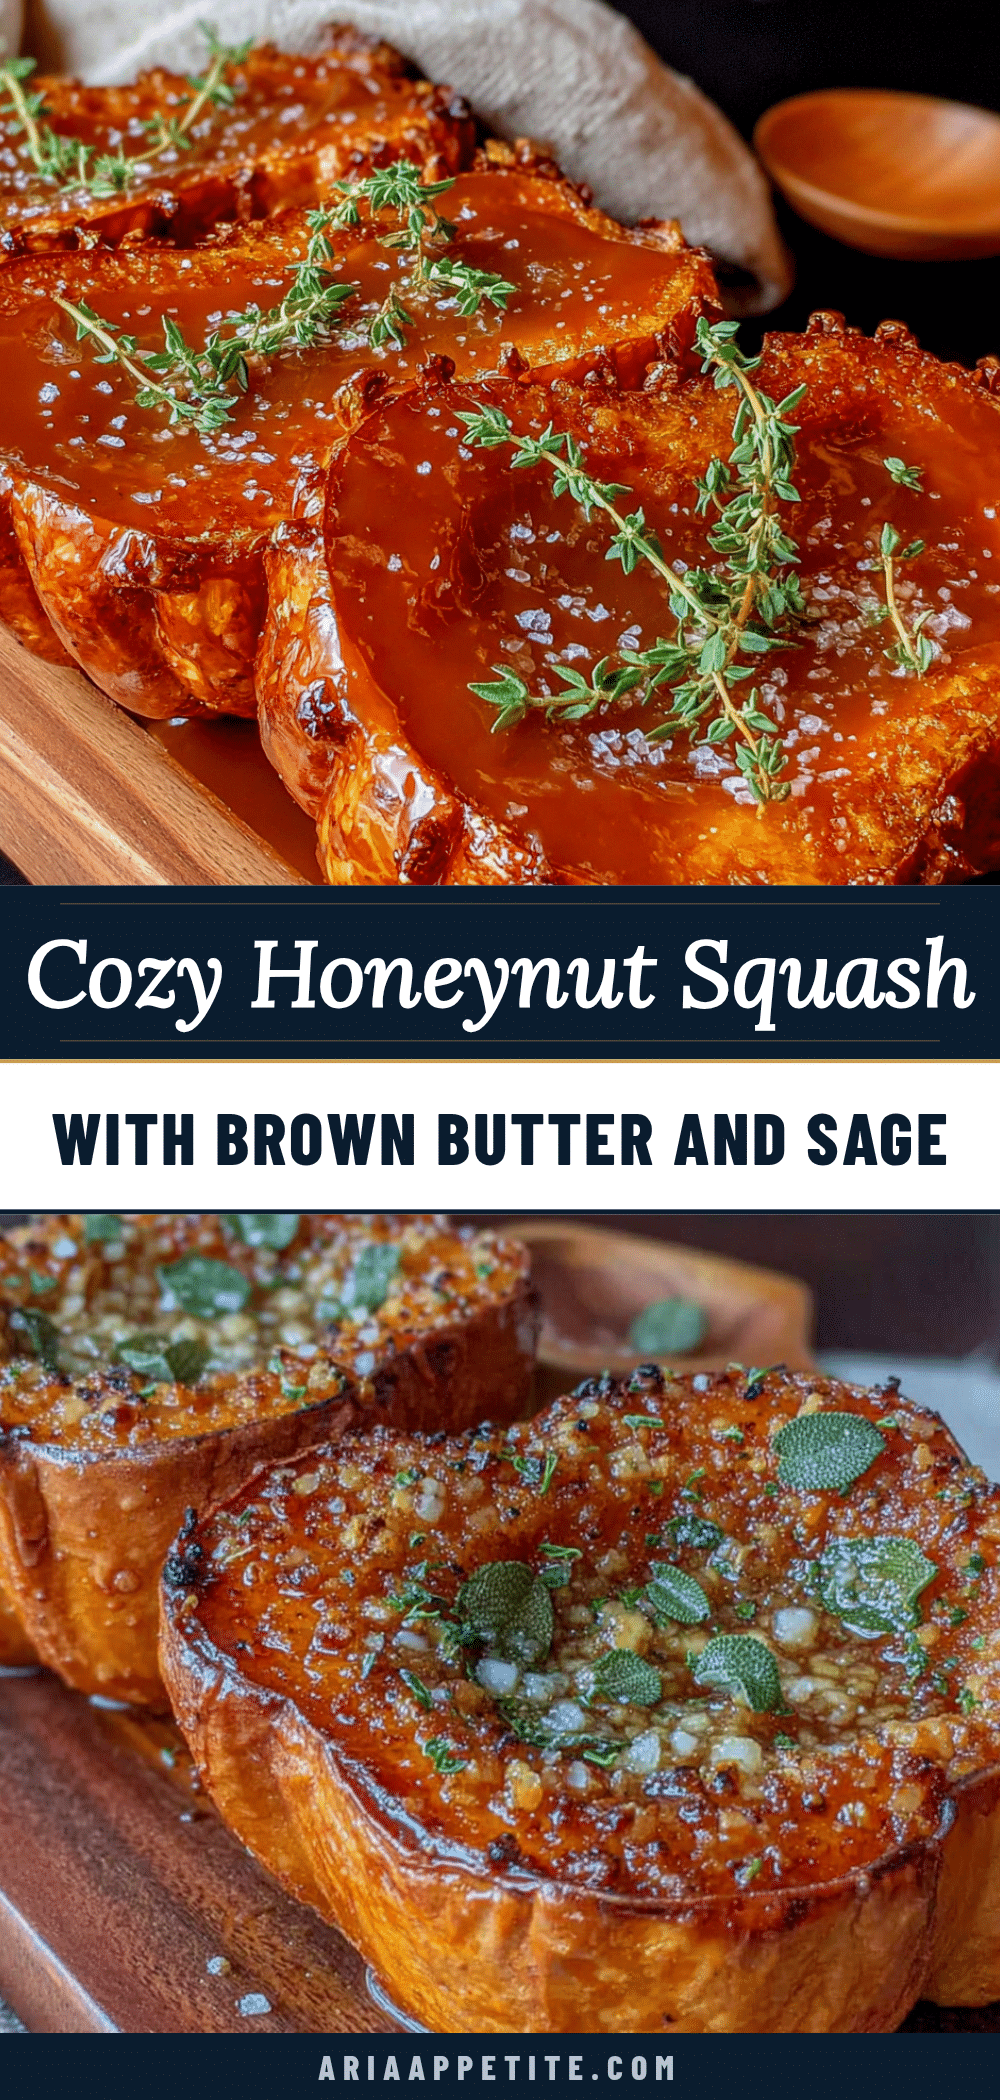
Cozy Honeynut Squash with Brown Butter and Sage
Roasted honeynut squash gets caramelized and tender, then drizzled with nutty brown butter and crispy sage. This simple, elegant side dish comes together in under 40 minutes and is perfect for fall gatherings or a cozy weeknight meal.
- Prep Time: 10 minutes
- Cook Time: 30 minutes
- Total Time: 40 minutes
- Yield: 4 servings 1x
- Category: Side Dish
- Cuisine: American
Ingredients
- 2–3 medium honeynut squash
- 4 tablespoons (1/2 stick) unsalted butter
- 10–12 fresh sage leaves
- 2 tablespoons extra-virgin olive oil
- 1 teaspoon kosher salt (plus more for seasoning)
- 1/2 teaspoon freshly ground black pepper
- 1 tablespoon maple syrup (optional)
- Flaky sea salt (for finishing, like Maldon)
Instructions
- Preheat your oven to 425°F (220°C). Line a large baking sheet with parchment paper.
- Carefully cut each honeynut squash in half lengthwise. Scoop out the seeds and stringy bits with a spoon.
- Place the squash halves cut-side up on the prepared baking sheet. Drizzle with olive oil, then sprinkle with kosher salt and black pepper. Rub the oil and seasoning all over the cut sides and skin. If using, drizzle maple syrup over the cut sides.
- Place the squash cut-side down on the baking sheet. Roast for 20 minutes.
- After 20 minutes, carefully flip the squash halves cut-side up. Return to the oven and roast for another 10-15 minutes, until tender and easily pierced with a fork, and the edges are starting to brown and crisp up (total roasting time: 30-35 minutes).
- While the squash finishes roasting, make the brown butter. Place the butter in a medium skillet over medium heat. Let it melt completely, then gently swirl the pan. The butter will foam, then subside. After about 3-4 minutes, the milk solids at the bottom will turn a golden brown and the butter will smell nutty. Immediately add the fresh sage leaves; they will sizzle and crisp up in about 30 seconds. Remove the pan from the heat.
- Transfer the roasted squash halves to a serving platter. Spoon the brown butter and crispy sage leaves over the top. Finish with a generous sprinkle of flaky sea salt. Serve immediately.
Notes
For a dairy-free version, use high-quality vegan butter or ghee. If you don’t have fresh sage, fresh thyme or rosemary can be substituted. For a touch of heat, add a pinch of red pepper flakes to the brown butter. To make ahead, roast the squash up to 2 days in advance and reheat in a 350°F oven for 10 minutes; make the brown butter fresh before serving.
Nutrition
- Serving Size: 1/2 squash
- Calories: 220
- Sugar: 8
- Sodium: 300
- Fat: 16
- Saturated Fat: 8
- Carbohydrates: 20
- Fiber: 4
- Protein: 3
Keywords: honeynut squash, brown butter, sage, roasted squash, fall side dish, easy side dish, Thanksgiving side