Love this? Save it for later!
Share the inspiration with your friends
The neighborhood Halloween party was in six hours and I’d completely forgotten. Everyone else would be bringing elaborate themed platters—I’d seen the group chat. There were promises of blood-drip cupcakes, graveyard dirt cakes, and hand-painted sugar cookies that looked like tiny works of art. I had a package of hot dogs and a can of crescent rolls in my fridge. Honestly, I almost just stopped at the store for a bag of chips and called it a day. But something—maybe stubbornness, maybe a touch of panic—made me open the fridge and stare at what I had.
I mean, let’s be real. I was the person who showed up to a cookie swap once with store-bought shortbread and tried to pass it off as homemade. Not my finest moment. So the idea of walking into this party with sad, plain hot dogs felt like a new low. But then I remembered something my neighbor mentioned last summer about wrapping dough around sausages for a kids’ party. It wasn’t a recipe, exactly—more of a vague concept. I figured I had nothing to lose.
So I grabbed the crescent dough, unrolled it, cut it into thin strips, and started wrapping. The first few looked like a mess, honestly. The dough kept tearing and the strips were uneven. But then I got into a rhythm—twist, wrap, tuck, repeat. By the time I added little mustard dots for eyes, they actually looked like mummies. Cute ones. Spooky but not terrifying. I threw them in the oven, crossed my fingers, and prayed they’d at least be edible.
You know that feeling when you show up somewhere expecting to be the underdog, and then people actually lose their minds over what you brought? That was me that night. The mummy hot dogs disappeared in about fifteen minutes. Kids were grabbing them by the handful. Grown-ups were asking for the recipe. I stood there feeling equal parts smug and confused—how did something so simple steal the show? That’s the thing about these easy mummy hot dogs. They’re not fancy. They’re not complicated. But they’re clever, they’re fun, and they make people smile. And honestly, that’s the whole point of a party appetizer, right?
Why You’ll Love This Recipe
Let me tell you why these mummy hot dogs have become my go-to for every Halloween gathering, potluck, and spooky movie night. I’ve tested this recipe more times than I care to admit, and every single time, it delivers. Here’s what makes it special:
- Quick & Easy : You can have these ready in under 25 minutes from start to finish. That’s faster than ordering pizza, and way more impressive.
- Simple Ingredients : You only need three main ingredients—hot dogs, crescent roll dough, and mustard. Chances are, you already have these in your kitchen right now.
- Perfect for Halloween Parties : These are the ultimate spooky appetizer for any gathering. They’re kid-friendly, adult-approved, and they look adorable on a platter.
- Crowd-Pleaser : I’ve served these at parties with 30 people and watched every single one disappear. Even picky eaters go back for seconds.
- Unbelievably Delicious : The flaky, buttery crescent dough paired with the smoky, savory hot dog is a combination that just works. It’s comfort food with a spooky twist.
What makes this recipe different from every other mummy hot dog recipe out there? It’s the technique I’ve perfected through trial and error. I learned the hard way that cutting the dough strips too wide makes the mummies look bulky instead of wrapped. Too thin, and they tear apart. I’ve also figured out the perfect baking time to get that golden, flaky exterior without burning the dough. This isn’t just another version—it’s the best version, tested and tweaked until it was just right.
And here’s the emotional part: this recipe isn’t just good—it’s the kind that makes people close their eyes after the first bite. There’s something about the warm, buttery dough wrapping around a juicy hot dog that feels like a hug in food form. It’s comfort food reimagined for Halloween—fun, festive, but with the same soul-soothing satisfaction. Perfect for impressing guests without any stress, or turning a simple snack into something memorable.
What Ingredients You Will Need
This recipe uses simple, everyday ingredients to create something that looks way more impressive than it actually is. The magic is in how you put them together, not in fancy or hard-to-find items. Here’s what you’ll need:
For the Mummy Hot Dogs:
- 1 package (8 count) hot dogs – I recommend using beef hot dogs for the best flavor. My personal preference is Nathan’s or Hebrew National for that smoky, satisfying taste. You can also use turkey or chicken hot dogs if you prefer a lighter option.
- 1 can (8 oz) refrigerated crescent roll dough – Pillsbury is my go-to brand because the dough is consistently flaky and easy to work with. Look for the original or buttermilk variety for the best texture.
- Yellow mustard or ketchup – For the mummy eyes. I prefer yellow mustard because the color pops against the golden dough, but ketchup works too. You can also use sriracha for a spicy twist.
- Cooking spray or melted butter – For greasing the baking sheet. I use a non-stick cooking spray for convenience, but brushing melted butter on top of the dough before baking adds extra flavor and helps achieve a golden-brown finish.
Optional Add-Ons for Extra Flavor:
- Everything bagel seasoning – Sprinkle this on top before baking for a savory, crunchy finish. It adds a nice texture contrast to the soft dough.
- Grated Parmesan cheese – A light sprinkle adds a salty, nutty flavor that pairs surprisingly well with the hot dog.
- Garlic powder or onion powder – Mix these into the dough before wrapping for an extra layer of savory goodness.
Ingredient Selection Tips:
When choosing hot dogs, look for ones that are plump and juicy—not the skinny, shriveled kind that get lost in the dough. The hot dog should be substantial enough to hold its shape and flavor against the crescent roll. If you’re using a brand that’s particularly long, you can cut them in half to make mini mummies, which are perfect for appetizer platters.
For the crescent roll dough, make sure it’s cold when you open it. Cold dough is easier to cut into clean strips without tearing. If the dough gets too warm and sticky, pop it in the fridge for 5 minutes before you start wrapping.
Substitution Guidance:
- Gluten-free option : Use gluten-free crescent roll dough or puff pastry sheets. The texture will be slightly different, but it still works beautifully.
- Vegan option : Use plant-based hot dogs and vegan crescent roll dough. Many brands now offer vegan-friendly options that taste surprisingly close to the real thing.
- Low-carb option : Wrap the hot dogs in thin slices of cheese or deli meat instead of dough. It won’t be exactly the same, but it’s a creative alternative for keto diets.
Equipment Needed
You don’t need any fancy kitchen gadgets for this recipe. That’s part of what makes it so great. Here’s what you’ll need:
- Baking sheet – A standard 13×18 inch baking sheet works perfectly. I like using a light-colored metal sheet because it helps the dough brown evenly. Dark sheets can cause the bottoms to burn before the tops are golden.
- Parchment paper or silicone baking mat – This prevents sticking and makes cleanup a breeze. I’ve forgotten to use parchment paper before, and scraping burnt dough off a baking sheet is not fun. Trust me on this one.
- Sharp knife or pizza cutter – For cutting the crescent dough into thin strips. A pizza cutter works like a charm because it glides through the dough without pulling or tearing it.
- Small bowl – For the mustard or ketchup that you’ll use to dot the eyes. You can also just squeeze it directly from the bottle, but a small bowl gives you more control.
- Toothpick or skewer – For applying the mustard dots. A toothpick gives you precision that you just can’t get with a squeeze bottle.
- Pastry brush (optional) – If you’re brushing melted butter on top of the dough before baking, a pastry brush makes it easy and even.
Budget-Friendly Alternatives:
If you don’t have a pizza cutter, a sharp chef’s knife works just fine. No pastry brush? No problem—just use a spoon to drizzle melted butter over the dough. And if you don’t have a silicone baking mat, aluminum foil lightly sprayed with cooking oil is a perfectly good substitute.
Preparation Method
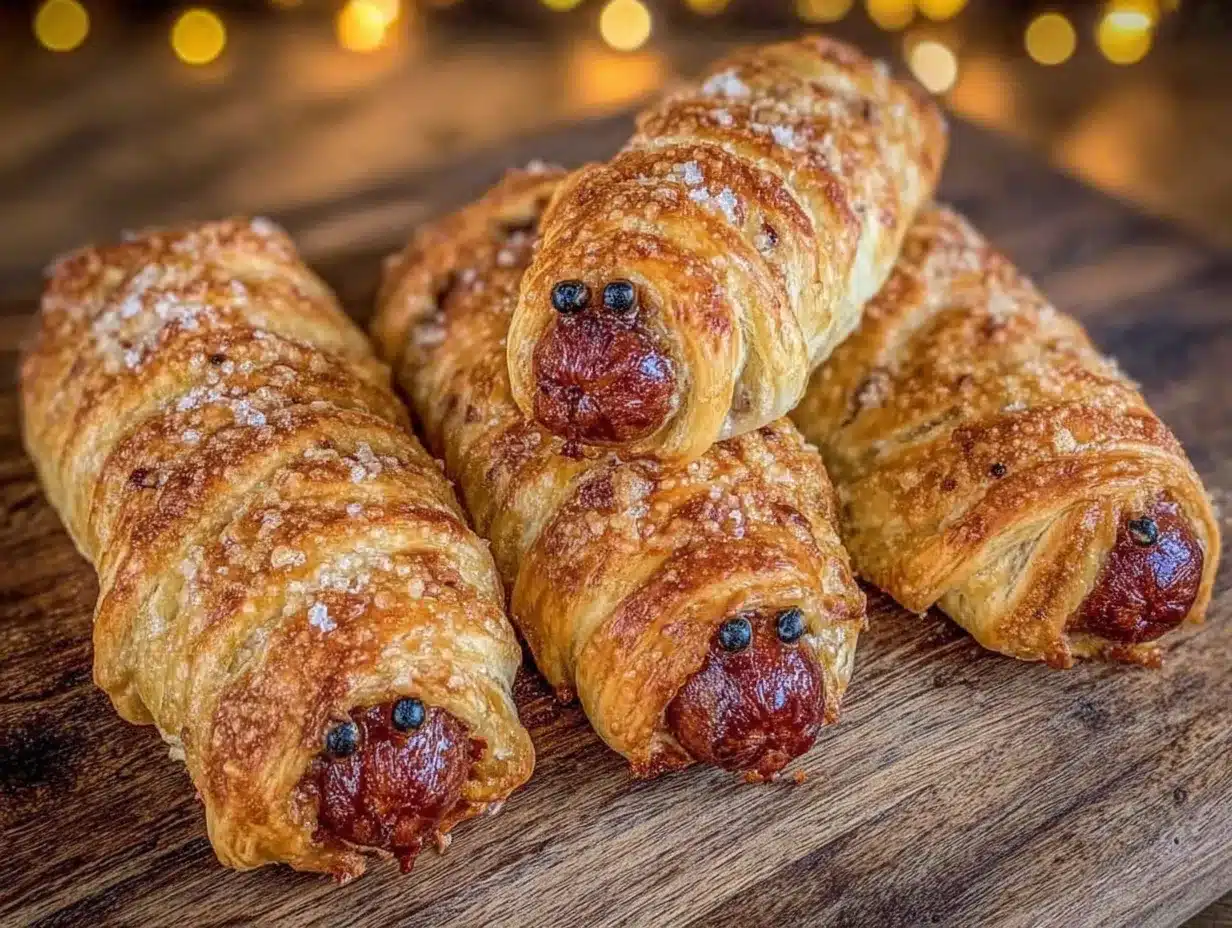
Alright, let’s get into the actual process. I’ve broken this down into clear, numbered steps so you can follow along without any confusion. Trust me, if I can do this while half-asleep and slightly panicking, you can too.
- Preheat your oven to 375°F (190°C) . This is important because you want the oven fully hot when the mummies go in. A cold oven will make the dough soggy instead of flaky. While the oven is heating, line your baking sheet with parchment paper or a silicone baking mat.
- Prepare the hot dogs . Pat the hot dogs dry with a paper towel. This helps the dough stick better. If your hot dogs are particularly long, you can cut them in half crosswise to make mini mummies. For standard-sized hot dogs, leave them whole.
- Unroll the crescent dough . Carefully unroll the crescent roll dough onto a clean cutting board. You’ll notice it’s perforated into triangle shapes—ignore those perforations for now. Use your fingers to gently press the seams together so you have one large rectangle of dough.
- Cut the dough into strips . Using a sharp knife or pizza cutter, cut the dough lengthwise into thin strips. Aim for strips that are about 1/4 to 1/2 inch wide. Don’t stress if they’re not perfectly even—that actually adds to the mummy look. You should get about 12-16 strips from one can of dough.
- Wrap the hot dogs . Take one strip of dough and start wrapping it around a hot dog at a slight angle, like you’re bandaging a mummy. Leave a small gap at the top for the face—about half an inch. Overlap the dough slightly as you wrap so it looks like layers of bandages. Tuck the end of the strip under the hot dog to secure it. Repeat with the remaining hot dogs and dough strips.
- Place on the baking sheet . Arrange the wrapped hot dogs on the prepared baking sheet, leaving about an inch of space between each one. They won’t spread much, but you want air to circulate for even browning.
- Brush with melted butter (optional) . If you’re using melted butter, brush a thin layer over the dough. This gives the mummies a beautiful golden color and adds a rich, buttery flavor. Skip this step if you’re watching calories—they’ll still turn out great.
- Bake for 12-15 minutes . Place the baking sheet in the preheated oven and bake until the dough is golden brown and puffy. The exact time will depend on your oven and how thick your dough strips are. Start checking at 12 minutes. The mummies should look golden and flaky, not pale or doughy.
- Add the eyes . Remove the baking sheet from the oven and let the mummies cool for 2-3 minutes. While they’re still warm but not hot, use a toothpick to dot two small eyes on the exposed part of each hot dog. Use yellow mustard for a classic look, or ketchup for a red-eyed monster vibe. Be gentle—the hot dog will be hot.
- Serve immediately . These are best enjoyed warm, right out of the oven. The dough is at its flakiest and the hot dog is juicy and hot. If you’re making them ahead of time, keep them warm in a low oven (200°F) until you’re ready to serve.
Sensory Cues: When the mummies are done, the dough should be a deep golden brown and feel firm to the touch. You’ll smell that wonderful buttery, baked aroma filling your kitchen. The hot dog inside should be hot and slightly plump. If the dough looks pale or feels soft, give it another 2 minutes in the oven.
Troubleshooting Tip: If your dough strips keep tearing, they’re probably too thin or too warm. Pop the dough back in the fridge for 5 minutes to firm up, then try again with slightly wider strips. And if the dough unwraps during baking, tuck the end underneath the hot dog more securely next time.
Cooking Tips & Techniques
After making these mummy hot dogs more times than I can count, I’ve picked up a few tricks that make the process smoother and the results better. Let me share what I’ve learned—including the mistakes I’ve made so you don’t have to repeat them.
The Dough Temperature Trap
Here’s something I learned the hard way: crescent dough that’s too warm is a nightmare to work with. The first time I made these, I left the dough on the counter while I prepped the hot dogs. By the time I started cutting strips, the dough was sticky, stretchy, and kept tearing. Now I keep the dough in the fridge until the very last minute. Cold dough cuts cleanly and wraps beautifully. If your kitchen is warm, you can even pop the wrapped mummies in the fridge for 10 minutes before baking—this helps the dough hold its shape.
The Strip Width Sweet Spot
I’ve experimented with different strip widths, and here’s what I’ve found: strips that are too wide (over 1/2 inch) make the mummies look bulky and the dough-to-hot-dog ratio gets thrown off. Strips that are too thin (under 1/4 inch) tear easily and don’t give that nice layered mummy look. The sweet spot is about 1/3 to 1/2 inch wide. And don’t worry about making them perfectly uniform—uneven strips actually look more like authentic mummy bandages.
The Mustard Eye Technique
This might seem trivial, but how you apply the mustard eyes makes a difference. Don’t squeeze the mustard directly from the bottle—you’ll end up with huge blobs that look more like alien eyes than mummy eyes. Instead, put a small amount of mustard in a bowl and use a toothpick to dot two small eyes. You can make them round or slightly oval, and you can even add a tiny dot above each eye for that classic mummy “angry eyebrow” look. It’s a small detail, but it makes them look so much cuter.
Multitasking Strategy
Here’s how I streamline the process: while the oven is preheating, I unroll the dough and cut the strips. Then I wrap all the hot dogs at once—assembly line style. By the time I’m done wrapping, the oven is hot and ready. This whole process takes about 10 minutes of active work. If you’re making a large batch, you can prep the mummies on the baking sheet and refrigerate them for up to 2 hours before baking. Just add 2-3 minutes to the baking time if they’re going in cold.
Common Mistake to Avoid
The biggest mistake I see people make is overbaking. The dough can go from perfectly golden to burnt in about 60 seconds. Set a timer for 12 minutes and check them. If they need more time, add it in 1-minute increments. Also, don’t crowd the baking sheet—give them room to breathe so the dough gets crispy all around, not just on top.
Variations & Adaptations
One of the best things about this recipe is how easy it is to customize. I’ve tried several variations over the years, and here are my favorites:
Spicy Mummy Hot Dogs
For those who like a kick, brush the hot dogs with sriracha or hot sauce before wrapping them in dough. You can also mix a pinch of cayenne pepper into the mustard before dotting the eyes. I made these for a Halloween party last year, and they were a hit with the adults who wanted something with a little heat.
Cheesy Mummy Hot Dogs
Before wrapping the hot dogs, cut a slit lengthwise down the center and stuff it with a thin strip of cheddar cheese or a string cheese stick. The cheese melts inside as the mummy bakes, creating a gooey, delicious surprise. Just be careful when eating—the cheese stays hot for a while. I learned this the messy way.
Vegetarian Mummy “Dogs”
Use plant-based hot dogs or even carrot dogs for a vegetarian version. For carrot dogs, peel a carrot, trim it to hot dog size, and roast it with a little soy sauce and liquid smoke before wrapping. It’s a completely different flavor, but surprisingly good. My vegetarian friend requested these for a party, and even the meat-eaters at the table enjoyed them.
Breakfast Mummies
Swap the hot dogs for breakfast sausage links and use pancake batter instead of crescent dough. Cook the wrapped sausages on a griddle or in a skillet until the pancake batter is golden and cooked through. Serve with maple syrup for dipping. This is a fun twist for a Halloween morning or a spooky brunch.
Dessert Mummies
For a sweet version, replace the hot dogs with chocolate-covered bananas or marshmallows. Wrap them in crescent dough strips and bake as directed. Dust with powdered sugar before serving. The warm, gooey center combined with the flaky dough is absolutely irresistible. I made these for a Halloween movie night once, and they disappeared faster than the savory ones.
Serving & Storage Suggestions
These mummy hot dogs are best served warm, straight from the oven. The flaky dough and juicy hot dog are at their peak when they’re fresh. Here’s how to make them shine at your party:
Presentation Tips
Arrange the mummies on a large platter in a circle, with the eyes facing outward. You can create a “graveyard” scene by adding some crushed chocolate cookies as “dirt” around the edges. Place a few gummy worms or plastic spiders on the platter for extra spooky vibes. If you’re serving them at a Halloween party, use a black or orange platter to match the theme.
What to Serve Alongside
These mummies pair perfectly with other finger foods. Serve them with dipping sauces like ketchup, mustard, ranch dressing, or spicy mayo. I also like to put out a bowl of popcorn, some veggie sticks with dip, and maybe a batch of spider deviled eggs for a complete Halloween spread. For drinks, apple cider or a festive punch works great.
Storage Instructions
If you have leftovers (which rarely happens, but just in case), store them in an airtight container in the refrigerator for up to 3 days. The dough will lose its crispiness, but they’ll still taste good. To reheat, place them on a baking sheet in a 350°F oven for 5-7 minutes, or until heated through. You can also microwave them for 30 seconds, but the dough will be soft rather than crispy.
Freezer Instructions
You can freeze the unbaked mummies for up to 2 months. Arrange them on a baking sheet and freeze until solid, then transfer to a freezer bag. When you’re ready to bake, place them on a baking sheet and bake straight from frozen, adding 3-5 minutes to the baking time. This is perfect for prepping ahead of a Halloween party.
Flavor Development Note
These are best eaten fresh, but I’ve noticed that the flavors actually meld together nicely after a day in the fridge. The mustard soaks into the hot dog slightly, creating a more unified taste. Just don’t expect the dough to stay crispy—it will soften, but it’s still delicious.
Nutritional Information & Benefits
Let’s be real—these mummy hot dogs are a treat, not a health food. But here’s what you should know about what’s in them:
Estimated Nutritional Values (per mummy hot dog):
- Calories: Approximately 180-220 calories per serving
- Protein: 6-8 grams
- Carbohydrates: 14-18 grams
- Fat: 10-14 grams
- Sodium: 450-550 mg
Health Considerations:
While these aren’t exactly a health food, there are a few things to note. Hot dogs are a good source of protein, and the crescent dough provides energy in the form of carbohydrates. If you’re watching your sodium intake, you can use low-sodium hot dogs or turkey dogs. For a slightly healthier version, use whole wheat crescent dough or wrap the hot dogs in lettuce leaves instead of dough.
Dietary Considerations:
- Gluten-Free: Use gluten-free crescent dough or hot dogs wrapped in cheese slices
- Low-Carb: Skip the dough and wrap hot dogs in bacon or cheese
- Vegetarian: Use plant-based hot dogs or carrot dogs
- Nut-Free: This recipe is naturally nut-free
Potential Allergens: This recipe contains wheat (gluten), dairy (if using butter), and soy (in most hot dogs). Check your ingredient labels if you have specific allergies.
My personal take? These are a fun, occasional treat for parties and celebrations. They’re not something you’d eat every day, but for a Halloween party or a spooky movie night, they’re absolutely worth the indulgence. Balance is key, and these mummies bring so much joy that I think they’re worth the splurge.
Conclusion
These easy mummy hot dogs have become my secret weapon for Halloween parties, and I honestly think they should be yours too. They’re simple enough to make on a whim, but clever enough to impress even the most dedicated party planners. The combination of flaky, buttery dough and juicy, smoky hot dog is a classic for a reason—it just works.
What I love most about this recipe is how it transforms something ordinary into something special. A plain hot dog becomes a conversation starter. A simple snack becomes a memory. That night at the Halloween party, when I watched people smile as they picked up these little mummies, I realized that cooking isn’t always about complexity or technique. Sometimes it’s about creating moments of joy—and these mummies deliver that every single time.
So go ahead and make these for your next gathering. Customize them with your favorite fillings, experiment with different dipping sauces, and have fun with the presentation. And when someone inevitably asks for the recipe, just smile and say it’s your secret. Or better yet, share it—good food is meant to be passed around.
I’d love to hear how yours turn out! Drop a comment below and let me know if you added any fun twists. Did you try the cheesy version? The spicy one? Did your kids help wrap the dough? Share your stories and photos—I read every single comment. And if you loved this recipe, don’t forget to pin it for later or share it with a friend who loves Halloween as much as you do. Happy haunting, and happy eating!
Frequently Asked Questions
Can I make these mummy hot dogs ahead of time?
Absolutely! You can prepare the wrapped mummies up to 2 hours ahead and keep them in the refrigerator. When you’re ready to serve, just bake them as directed, adding 2-3 minutes to the baking time since they’ll be cold. You can also freeze the unbaked mummies for up to 2 months.
What type of hot dog works best for this recipe?
Standard-sized beef hot dogs work best because they’re plump and hold their shape well. Turkey or chicken hot dogs are good alternatives, but they tend to be a bit thinner. Avoid jumbo hot dogs as they require too much dough to wrap properly.
Can I use puff pastry instead of crescent roll dough?
Yes, puff pastry works great! Cut it into thin strips just like you would with crescent dough. The texture will be even flakier and more buttery. Just note that puff pastry takes slightly longer to bake—about 15-18 minutes at 375°F.
How do I prevent the dough from unwrapping during baking?
Make sure to tuck the end of the dough strip securely under the hot dog before baking. You can also place the wrapped mummies seam-side down on the baking sheet. If you’re still having trouble, try pressing the end of the dough gently to seal it.
What can I use instead of mustard for the eyes?
Ketchup works well and gives the mummies a red-eyed look. You can also use sriracha for a spicy version, or even small dots of cream cheese for white eyes. For a completely different look, use black sesame seeds or tiny pieces of black olive.
Pin This Recipe!
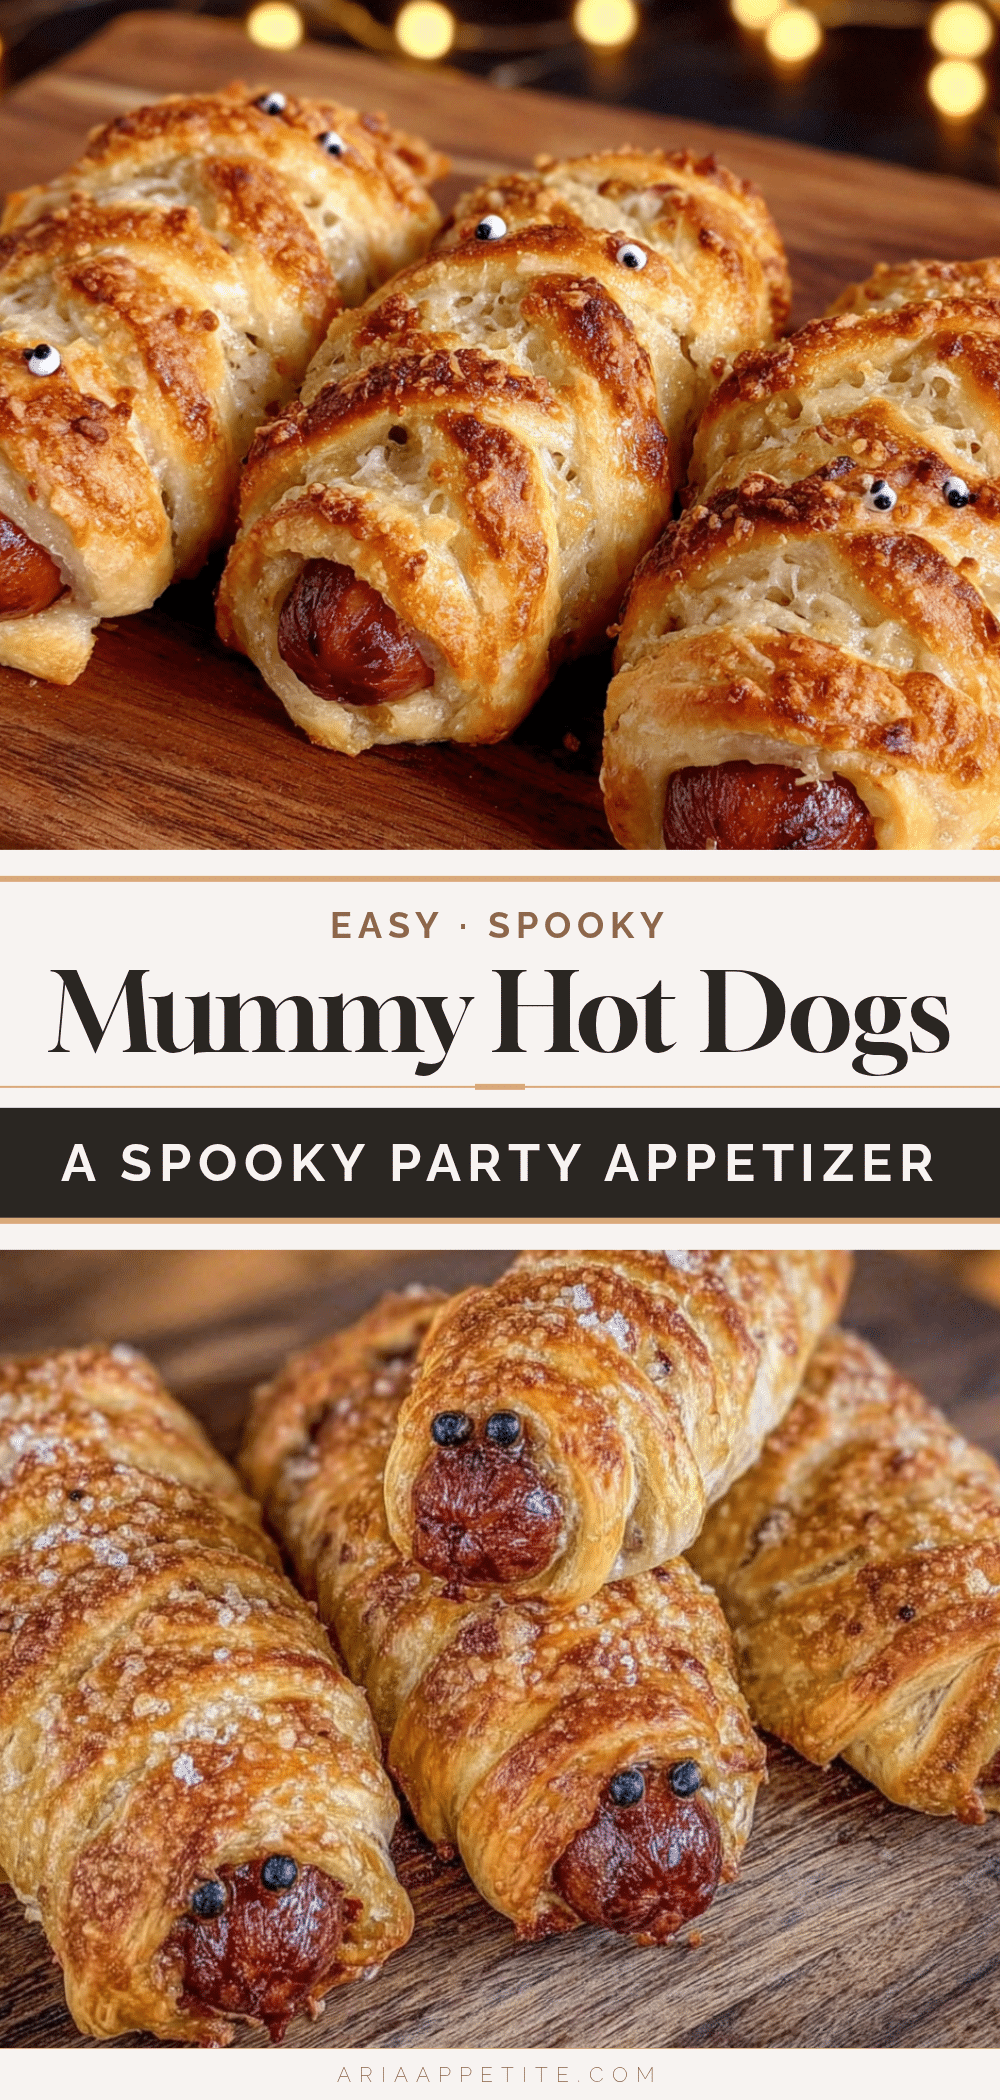
Easy Mummy Hot Dogs: Best Spooky Party Appetizer

These easy mummy hot dogs are a fun and clever Halloween party appetizer made with just hot dogs, crescent roll dough, and mustard. They’re quick to prepare, kid-friendly, and always a crowd-pleaser.
- Prep Time: 10 minutes
- Cook Time: 15 minutes
- Total Time: 25 minutes
- Yield: 8 servings 1x
- Category: Appetizer
- Cuisine: American
Ingredients
- 1 package (8 count) hot dogs (beef recommended, e.g., Nathan’s or Hebrew National)
- 1 can (8 oz) refrigerated crescent roll dough (e.g., Pillsbury original or buttermilk)
- Yellow mustard or ketchup (for eyes)
- Cooking spray or melted butter (for greasing)
- Optional: Everything bagel seasoning, grated Parmesan cheese, garlic powder, onion powder
Instructions
- Preheat oven to 375°F (190°C). Line a baking sheet with parchment paper or a silicone baking mat.
- Pat hot dogs dry with a paper towel. If desired, cut hot dogs in half crosswise for mini mummies.
- Unroll crescent dough onto a cutting board. Press seams together to form a rectangle.
- Using a sharp knife or pizza cutter, cut dough lengthwise into thin strips, about 1/4 to 1/2 inch wide.
- Wrap each hot dog with a dough strip at a slight angle, leaving about 1/2 inch exposed at the top for the face. Overlap dough slightly and tuck the end under the hot dog.
- Arrange wrapped hot dogs on prepared baking sheet, about 1 inch apart.
- Optional: Brush dough with melted butter for a golden finish.
- Bake for 12-15 minutes, until dough is golden brown and puffy.
- Let cool for 2-3 minutes. Using a toothpick, dot two small eyes on the exposed hot dog with mustard or ketchup.
- Serve immediately.
Notes
For best results, keep crescent dough cold until ready to use. If dough tears, refrigerate for 5 minutes. For a spicier version, brush hot dogs with sriracha before wrapping. For cheesy mummies, slit hot dogs and stuff with cheese before wrapping.
Nutrition
- Serving Size: 1 mummy hot dog
- Calories: 200
- Sugar: 3
- Sodium: 500
- Fat: 12
- Saturated Fat: 4
- Carbohydrates: 16
- Protein: 7
Keywords: mummy hot dogs, Halloween appetizer, spooky party food, easy hot dog recipe, crescent roll hot dogs


