Love this? Save it for later!
Share the inspiration with your friends
I was at the hardware store, of all places, picking up a new light fixture. You know how those Saturday errands just pile up? I was standing in line behind a woman who was explaining to the cashier, in great detail, why she needed three dozen eggs and a ten-pound bag of chicken breasts. She wasn’t a chef. She wasn’t a caterer. She was just a mom, like me, who had figured out the secret to surviving the school week without losing her mind.
She turned around, saw me eavesdropping, and just laughed. “You have kids, right?” she asked. I nodded. “Then you need my chicken nugget recipe.” She scribbled it on the back of a receipt—no fancy measurements, just handfuls and pinches. It was messy. It was perfect. And honestly, it changed my entire approach to weekday lunches. These easy baked chicken nuggets for school lunch aren’t just a recipe; they’re a survival strategy. I’ve made them every two weeks since that day, and I’ve tweaked the method just enough to call it my own.
Maybe you’ve been there, staring at a freezer case of overpriced, processed nuggets, wondering if there’s a better way. There is. This easy baked chicken nuggets recipe is it. It’s the kind of thing you make on a Sunday afternoon when you have a podcast playing and a cup of coffee going cold beside you. The result? A freezer full of lunchbox gold that makes the 6 AM school rush feel almost manageable. Let me tell you, that first bite of a homemade nugget, knowing you made it yourself, is a feeling worth chasing.
Why You’ll Love This Recipe
I’ve tested this recipe about a dozen times to get it just right. The first batch was too dry. The second batch fell apart. But the third? That was the one. What makes these baked chicken nuggets different is the technique—a quick buttermilk soak that keeps the meat tender even after it’s been frozen and reheated. It’s a small step, but it makes all the difference.
- Quick & Easy: From start to oven, you’re looking at about 30 minutes of active work. The rest is just baking and cooling time. Perfect for a lazy Sunday prep session.
- Simple Ingredients: You probably have everything in your pantry right now. No weird preservatives or mystery meat. Just real food.
- Perfect for School Lunches: These nuggets are designed to be packed cold or reheated. They hold up beautifully in a thermos and taste just as good at room temperature.
- Crowd-Pleaser: My kids fight over the last ones, and I’ve seen adults sneak them off the cooling rack when they think no one is looking.
- Unbelievably Delicious: The coating gets perfectly crispy in the oven without a drop of oil. The inside stays juicy. It’s the kind of texture that makes you forget you’re eating baked chicken.
This isn’t just another chicken nugget recipe. It’s the one that makes you close your eyes after the first bite because it actually tastes like something. It’s comfort food reimagined—healthier, faster, but with the same soul-soothing satisfaction that a good nugget should bring. Perfect for impressing your kids without the stress, or for turning a simple lunch into something they actually look forward to opening.
What Ingredients You Will Need
This recipe uses simple, wholesome ingredients to deliver bold flavor and satisfying texture without the fuss. Most of these are pantry staples, which makes this a go-to recipe even on weeks when you haven’t planned ahead.
- Chicken breasts: 2 pounds, boneless and skinless. I prefer to cut them myself into bite-sized pieces so I can control the size. Look for plump, even-sized breasts for uniform cooking.
- Buttermilk: 1 cup. This is the secret to tender nuggets. The acidity helps break down the protein, keeping the meat juicy. If you don’t have buttermilk, you can make a quick substitute by adding 1 tablespoon of lemon juice or vinegar to 1 cup of regular milk and letting it sit for 5 minutes.
- Panko breadcrumbs: 2 cups. They give the crispiest texture. I’ve tried regular breadcrumbs, and they just don’t compare. Panko is worth the extra shelf space.
- Grated Parmesan cheese: 1/2 cup. This adds a savory, nutty flavor that makes the coating irresistible. I use the stuff in the green can for convenience, but freshly grated works beautifully too.
- Garlic powder: 1 teaspoon. Don’t skip this. It adds a subtle depth without being overpowering.
- Paprika: 1 teaspoon. For color and a mild smokiness. Smoked paprika works great here if you want a bolder flavor.
- Salt: 1 teaspoon. I use fine sea salt.
- Black pepper: 1/2 teaspoon. Freshly ground is best.
- Olive oil spray: For coating the baking sheet and the nuggets. It helps the panko get golden without deep frying.
Substitution Guidance: If you need a gluten-free option, swap the panko for gluten-free panko or crushed pork rinds for a low-carb version. For a dairy-free version, use almond milk with a splash of lemon juice in place of buttermilk and skip the Parmesan—just add an extra 1/4 cup of panko and a pinch of nutritional yeast for that cheesy flavor. I’ve tried both variations, and they work surprisingly well.
Equipment Needed
You don’t need a fancy kitchen to make these easy baked chicken nuggets. Here’s what you’ll need:
- Baking sheets: Two large, rimmed baking sheets. I prefer light-colored metal ones because they promote even browning. Dark sheets can burn the bottoms.
- Parchment paper or silicone baking mats: This makes cleanup a breeze and prevents sticking without extra oil.
- Mixing bowls: Three medium bowls—one for the buttermilk, one for the panko mixture, and one for the raw chicken pieces.
- Sharp knife and cutting board: For cutting the chicken into uniform pieces. A sharp knife makes the job safer and faster.
- Tongs: For dipping the chicken in the buttermilk and then the breading. It keeps your hands relatively clean.
- Cooling rack: Optional, but highly recommended. Placing the breaded nuggets on a rack set inside a baking sheet helps the coating dry slightly before baking, which gives a better crunch.
- Freezer-safe bags or containers: For storing the baked and cooled nuggets. I use quart-sized freezer bags and squeeze out all the air before sealing.
If you don’t have a cooling rack, just place the breaded nuggets directly on the parchment-lined baking sheet. They’ll still turn out great, just slightly less crispy on the bottom.
Preparation Method
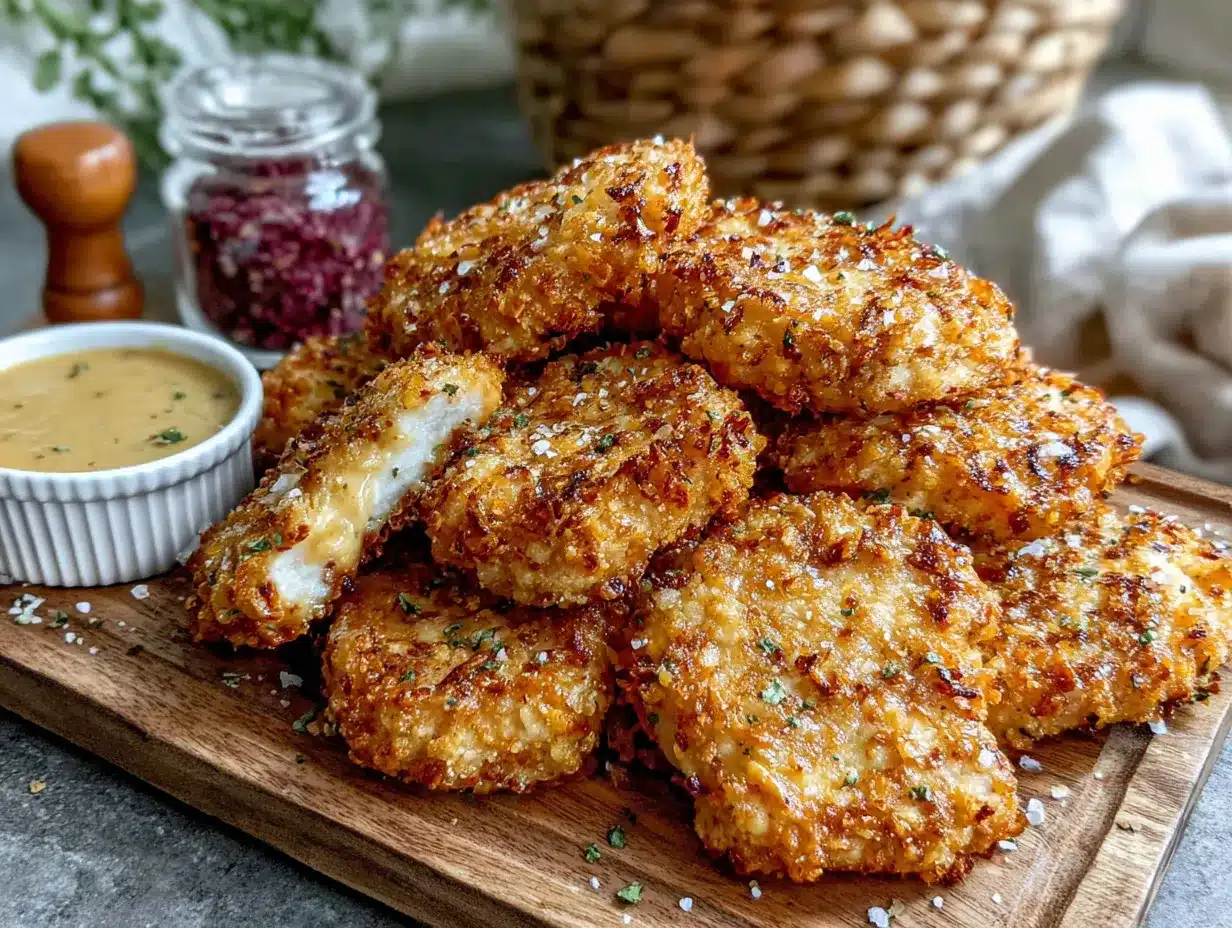
Let’s get cooking. This method is straightforward, but I’ve added some notes along the way to help you avoid the mistakes I made the first few times.
- Preheat your oven to 400°F (200°C). Line two large baking sheets with parchment paper or silicone mats. Set aside.
- Prepare the chicken: Cut 2 pounds of boneless, skinless chicken breasts into 1-inch pieces. Try to keep them uniform in size so they cook evenly. I aim for pieces that are about the size of a walnut. Place them in a medium bowl.
- Make the buttermilk soak: Pour 1 cup of buttermilk over the chicken pieces. Toss to coat. Let this sit for at least 15 minutes, or up to 30 minutes if you have the time. This step is non-negotiable for tender nuggets. While you wait, prepare the breading.
- Mix the breading: In a shallow bowl, combine 2 cups of panko breadcrumbs, 1/2 cup of grated Parmesan cheese, 1 teaspoon of garlic powder, 1 teaspoon of paprika, 1 teaspoon of salt, and 1/2 teaspoon of black pepper. Whisk with a fork to break up any clumps.
- Set up your assembly line: Place the bowl of buttermilk-soaked chicken, the bowl of panko mixture, and the prepared baking sheets in a row. Have your tongs ready.
- Bread the chicken: Using tongs, pick up a piece of chicken, letting the excess buttermilk drip off. Drop it into the panko mixture. Use your other hand (keep one hand dry!) to toss the chicken in the breading, pressing gently so the crumbs stick. Place the breaded nugget on the baking sheet. Repeat with the remaining chicken. Don’t overcrowd the sheets—leave about 1/2 inch between each nugget for air circulation.
- Spray with oil: Lightly spray the tops of the nuggets with olive oil spray. This is crucial for browning. Don’t skip it, or you’ll end up with pale, sad nuggets.
- Bake: Place the baking sheets in the preheated oven. Bake for 12 minutes, then flip each nugget with a spatula. Bake for another 10-12 minutes, until the nuggets are golden brown and the internal temperature reaches 165°F (74°C). The coating should feel firm and crispy to the touch.
- Cool completely: Transfer the baked nuggets to a wire rack to cool. This step is important if you’re freezing them—trapping steam in a bag with warm nuggets will make them soggy. Let them sit for at least 30 minutes until they’re completely room temperature.
- Freeze: Once cool, arrange the nuggets in a single layer on a baking sheet and pop them in the freezer for 1 hour. This flash-freeze step prevents them from clumping together. After an hour, transfer the frozen nuggets to a freezer-safe bag or container. Label with the date. They’ll keep for up to 3 months.
Cooking Tips & Techniques
I’ve made a lot of mistakes with chicken nuggets over the years. Here’s what I’ve learned so you don’t have to repeat them.
The buttermilk soak is crucial. I skipped it once because I was in a hurry, and the nuggets were noticeably drier. The acid in the buttermilk tenderizes the chicken in a way that a dry breading just can’t replicate. If you’re short on time, even a 10-minute soak is better than nothing.
Don’t overcrowd the baking sheets. If the nuggets are too close together, they’ll steam instead of bake. You want that hot air to circulate around each piece so the panko gets crispy. Use two sheets, and if you have to bake in batches, that’s fine too.
Flip halfway through. This seems obvious, but I’ve forgotten it more times than I’d like to admit. The bottom of the nugget gets soggy if it sits in its own juices. Flipping ensures both sides get that golden crunch.
Use a thermometer. Chicken is done at 165°F (74°C). I’ve pulled nuggets out too early and had to put them back in, which dries them out. A simple instant-read thermometer saves the day. Insert it into the thickest piece to check.
Multitasking tip: While the chicken is soaking in the buttermilk, prep your baking sheets and mix the breading. By the time the soak is done, you’re ready to go. This cuts your active time down significantly.
Variations & Adaptations
One of the best things about this recipe is how flexible it is. Here are a few variations I’ve tried and loved.
Spicy Buffalo Nuggets: Add 1 tablespoon of cayenne pepper to the panko mixture and serve with ranch or blue cheese dip. My husband loves these, and they’re a hit at game-day parties.
Gluten-Free Version: Swap the panko for gluten-free panko. I’ve also used crushed pork rinds for a low-carb, keto-friendly option. The texture is slightly different—crunchier, but in a good way. Just reduce the salt slightly since pork rinds are already salty.
Lemon Herb Nuggets: Add 1 tablespoon of dried Italian seasoning and the zest of one lemon to the panko mixture. This version is bright and fresh, perfect for spring lunches. I like to serve these with a simple yogurt dip.
Air Fryer Adaptation: If you have an air fryer, you can cook these at 375°F (190°C) for 8-10 minutes, shaking the basket halfway through. The air fryer makes the coating even crispier. Just be sure to spray the basket with oil first.
Cheesy Stuffed Nuggets: Cut the chicken pieces slightly larger, flatten them gently, and place a small cube of mozzarella in the center before folding and breading. Bake as directed. The melted cheese center is a fun surprise for kids.
Serving & Storage Suggestions
These nuggets are incredibly versatile when it comes to serving. Here’s how I like to do it.
Serving Temperature: They’re fantastic straight out of the oven, but they also hold up well at room temperature. For school lunches, I pack them cold in a container with an ice pack. They’re still delicious by lunchtime. If your kid prefers them warm, pop them in a thermos for a few minutes before packing.
What to Serve With: Classic pairings include ketchup, honey mustard, or barbecue sauce. I also love serving them with a side of roasted vegetables or a simple salad for a complete meal. For dipping, try my creamy ranch dip—it’s a game-changer. If you’re packing lunch, throw in some carrot sticks, apple slices, and a yogurt tube for a balanced meal.
Storage in the Fridge: Baked nuggets will keep in an airtight container in the refrigerator for up to 4 days. To reheat, place them on a baking sheet in a 350°F (175°C) oven for 5-7 minutes, or until heated through. The microwave works in a pinch, but the coating won’t be as crispy.
Freezer Storage: As mentioned, these nuggets freeze beautifully. After flash-freezing, transfer them to a freezer bag. They’ll keep for up to 3 months. To reheat from frozen, bake directly on a sheet pan at 375°F (190°C) for 12-15 minutes, flipping halfway. No need to thaw. The flavor actually seems to meld together after freezing, making them even better.
Flavor Development: I’ve noticed that the flavors in the coating become more pronounced after a day in the fridge. So don’t worry if they taste slightly different on day one—they’ll be even more delicious on day two.
Nutritional Information & Benefits
Here’s a rough estimate for a serving of 4-5 nuggets (about 4 ounces of chicken). Please note that these values are approximate and can vary based on specific ingredients and portion sizes.
| Nutrient | Amount per Serving |
|---|---|
| Calories | 280 |
| Protein | 32g |
| Fat | 8g |
| Saturated Fat | 2.5g |
| Carbohydrates | 18g |
| Fiber | 1g |
| Sugar | 3g |
| Sodium | 620mg |
Health Benefits: Chicken breast is a fantastic source of lean protein, which is essential for muscle growth and repair—perfect for growing kids. The buttermilk adds calcium and probiotics, while the Parmesan provides a small amount of calcium and protein. By baking instead of frying, you save on unnecessary fats and calories. This recipe is also lower in sodium than most store-bought nuggets, which is a win for heart health.
Dietary Considerations: This recipe is nut-free and can be made gluten-free and dairy-free with simple substitutions (see the Variations section). It’s a great option for families with common food allergies.
From a wellness perspective, I love that I know exactly what’s going into my kids’ lunches. No preservatives, no artificial flavors, just real food that tastes good. That peace of mind is worth the extra effort on a Sunday afternoon.
Conclusion
These easy baked chicken nuggets for school lunch have honestly become a staple in my house. They’re the recipe I turn to when I want to feel like I’ve got my act together, even on the most chaotic weeks. The fact that they freeze so well means I can make a big batch once and have lunch sorted for weeks. That’s a win in my book.
I hope you give this recipe a try and make it your own. Maybe you’ll add a little extra paprika or try the lemon herb version. Maybe you’ll double the batch because your kids can’t get enough. Whatever you do, just know that this recipe is forgiving and flexible. It’s meant to work for your life, not the other way around.
If you make these nuggets, I’d love to hear how they turned out. Drop a comment below and let me know your favorite dipping sauce or if you tried any fun variations. And if you’re looking for another easy lunch idea, don’t miss my make-ahead pizza muffins—they’re another freezer-friendly favorite. Happy cooking, friends!
Frequently Asked Questions
Can I use chicken thighs instead of breasts?
Absolutely. Chicken thighs will give you even juicier nuggets because they have a higher fat content. Just be aware that they might take a minute or two longer to cook. Cut them into similar 1-inch pieces and follow the same method.
How do I reheat frozen nuggets without an oven?
An air fryer is your best bet. Cook at 375°F (190°C) for 5-7 minutes. If you’re using a microwave, place the nuggets on a paper towel-lined plate and heat in 30-second intervals. The coating won’t be as crispy, but they’ll still taste great.
Can I make these nuggets ahead of time and refrigerate them before baking?
Yes, you can bread the nuggets and refrigerate them on the baking sheet for up to 24 hours before baking. Just cover them loosely with plastic wrap. This is a great option if you want to prep the night before and bake fresh in the morning.
Why did my breading fall off?
This usually happens if the chicken is too wet when you add it to the panko. Make sure you let the excess buttermilk drip off before breading. Also, pressing the breading gently onto the chicken helps it stick. If the coating still falls off, try dipping the chicken in a little flour before the buttermilk soak—it acts as a glue.
Can I double this recipe?
Definitely. This recipe scales beautifully. Just make sure you have enough baking sheets to avoid overcrowding. You may need to bake in batches. The flash-freeze step will take a little longer with more nuggets, but it’s totally doable.
Pin This Recipe!
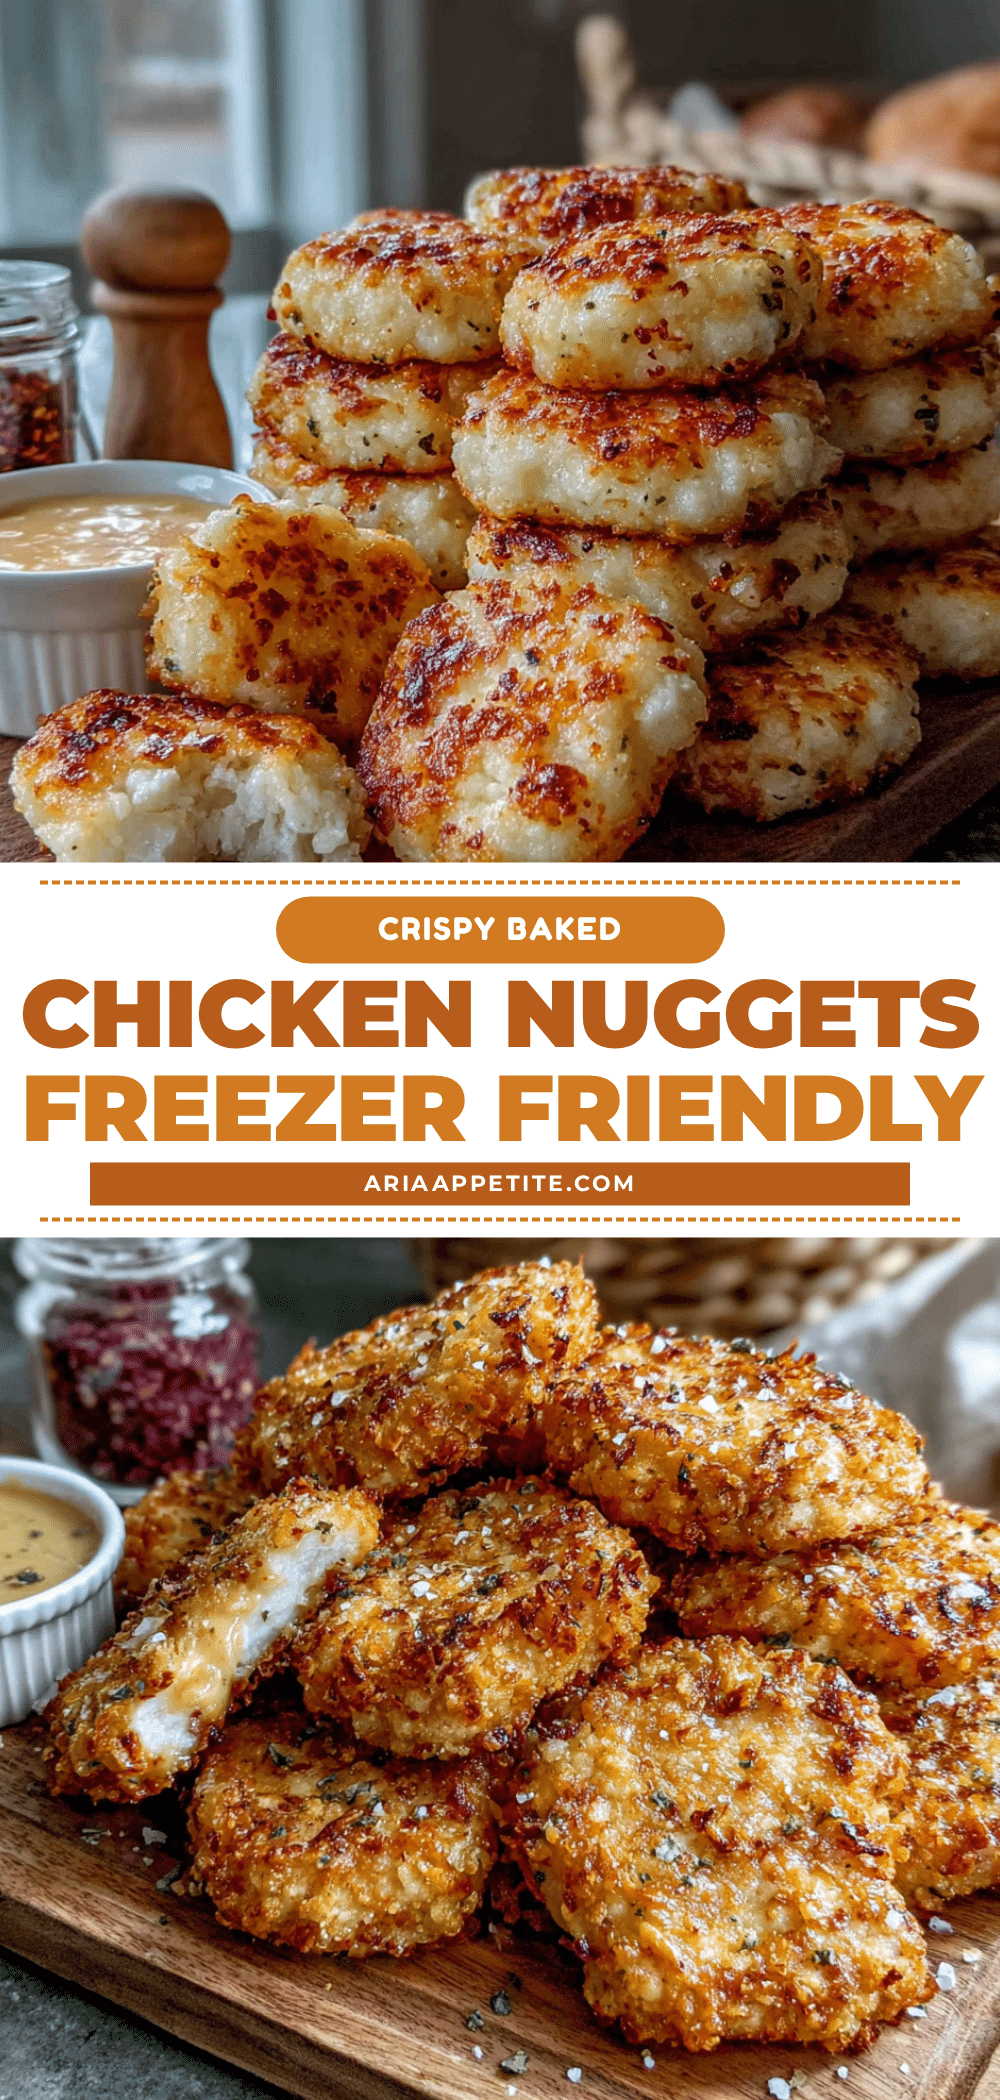
Easy Baked Chicken Nuggets: Best Freezer Batch for School Lunch
These easy baked chicken nuggets are a freezer-friendly, healthier alternative to store-bought nuggets. Perfect for school lunches, they stay tender and crispy even after reheating.
- Prep Time: 30 minutes
- Cook Time: 22-24 minutes
- Total Time: 1 hour 30 minutes (including cooling and flash freezing)
- Yield: 4 servings (about 4-5 nuggets per serving) 1x
- Category: Main Course
- Cuisine: American
Ingredients
- 2 pounds boneless, skinless chicken breasts, cut into 1-inch pieces
- 1 cup buttermilk
- 2 cups panko breadcrumbs
- 1/2 cup grated Parmesan cheese
- 1 teaspoon garlic powder
- 1 teaspoon paprika
- 1 teaspoon fine sea salt
- 1/2 teaspoon freshly ground black pepper
- Olive oil spray
Instructions
- Preheat oven to 400°F (200°C). Line two large baking sheets with parchment paper or silicone mats.
- Cut chicken breasts into 1-inch pieces and place in a medium bowl.
- Pour buttermilk over chicken, toss to coat, and let soak for at least 15 minutes (up to 30 minutes).
- In a shallow bowl, combine panko, Parmesan, garlic powder, paprika, salt, and pepper. Whisk to combine.
- Set up assembly line: buttermilk-soaked chicken, panko mixture, and prepared baking sheets.
- Using tongs, pick up a piece of chicken, let excess buttermilk drip off, then coat in panko mixture, pressing gently. Place on baking sheet. Repeat with remaining chicken, leaving 1/2 inch between nuggets.
- Lightly spray tops of nuggets with olive oil spray.
- Bake for 12 minutes, flip nuggets, then bake for another 10-12 minutes until golden brown and internal temperature reaches 165°F (74°C).
- Transfer nuggets to a wire rack and cool completely (at least 30 minutes).
- For freezing: Arrange cooled nuggets in a single layer on a baking sheet and freeze for 1 hour. Transfer to freezer-safe bags or containers. Label with date. Freeze for up to 3 months.
Notes
The buttermilk soak is crucial for tender nuggets. Do not skip it. For gluten-free, use gluten-free panko or crushed pork rinds. For dairy-free, use almond milk with lemon juice instead of buttermilk and omit Parmesan (add extra panko and nutritional yeast). Flash freezing prevents nuggets from clumping together.
Nutrition
- Serving Size: 4-5 nuggets (about 4
- Calories: 280
- Sugar: 3
- Sodium: 620
- Fat: 8
- Saturated Fat: 2.5
- Carbohydrates: 18
- Fiber: 1
- Protein: 32
Keywords: baked chicken nuggets, freezer meal, school lunch, healthy chicken nuggets, homemade nuggets


