Love this? Save it for later!
Share the inspiration with your friends
My niece Clara asked why I couldn’t just arrange the fruit in a pumpkin shape instead of carving a real one for the Halloween party. I started to explain why that wouldn’t work — then stopped. I mean, she was eight and had a point. Why was I sweating over a knife and a gourd that would rot in three days when I could make something edible and actually cute?
Honestly, I felt a little silly. Here I was, the “adult” who had been making themed snacks for years, and a kid had just outsmarted me. I had this vision of a sad pile of fruit that would look nothing like a pumpkin. But Clara was persistent, and I figured, what did I have to lose? A few oranges?
Turns out, I had everything to gain. That first attempt was a little lopsided — I used too many grapes and the stem fell off twice — but the look on Clara’s face when she saw it was pure magic. Now, this quick Halloween fruit tray pumpkin shaped with orange slices is my go-to for every fall gathering. It’s the kind of thing that makes you feel like a kitchen genius without actually doing much work. Maybe you’ve been there — staring at a Pinterest-perfect snack board and thinking, “I could never.” Trust me, you can. Let me show you how.
Why You’ll Love This Recipe
This isn’t just another fruit platter. This is a conversation starter, a crowd-pleaser, and a sanity-saver all rolled into one. After testing this for three different Halloween parties (and one very skeptical book club), I can tell you exactly why it works.
- Quick & Easy: Comes together in under 20 minutes. No baking, no boiling, no melting chocolate that seizes at the last second. Just slicing and arranging.
- Simple Ingredients: You likely already have most of this in your fridge. No fancy grocery trips to the specialty aisle required.
- Perfect for Halloween Parties: Great for classroom celebrations, office potlucks, or that chaotic hour before trick-or-treating starts.
- Crowd-Pleaser: Kids devour it. Adults appreciate having something healthy among the candy. It’s the rare dish that makes everyone happy.
- Unbelievably Delicious: The combination of sweet oranges, crisp apples, and juicy grapes is simple comfort food at its best.
What makes this different from other Halloween fruit trays? It’s the shape. Instead of a boring rectangle, you get a pumpkin. And instead of using a mold or a cookie cutter, you use the natural curve of orange slices to build the form. It’s a clever visual trick that looks way harder than it actually is.
This recipe is the kind that makes you close your eyes after the first bite — not because the fruit is life-changing (though it is good), but because you realize you pulled off something festive without the stress. It’s Halloween hosting reimagined: healthier, faster, and with the same satisfying “wow” factor.
What Ingredients You Will Need
This recipe uses simple, wholesome ingredients to deliver a bold visual impact and satisfying crunch without the fuss. Everything is a pantry or produce-aisle staple, so you can grab it all in one quick trip.
- For the Pumpkin Body:
- 4-5 large navel oranges, peeled and sliced into rounds (about 1/4-inch thick) — these form the main pumpkin shape
- 1 cup green seedless grapes — for the “vines” and stem area
- 1 small cucumber or celery stalk, cut into a small rectangle — this becomes the pumpkin stem (adds a nice crunch)
- For the Filling & Contrast:
- 1 cup red seedless grapes — adds color depth and sweetness (I like the Crimson variety for their firmness)
- 1 large Granny Smith apple, sliced thin — the tartness balances the sweet oranges (green also ties into the stem)
- 1 cup fresh blueberries or blackberries — creates a dark “background” that makes the orange pop
- For the Garnish (Optional but Recommended):
- Fresh mint leaves — for a pop of green that looks like pumpkin leaves (adds a fresh aroma)
- 1 small mandarin orange, halved — to place at the bottom as a “shadow” or base
Ingredient Selection Tips: Look for oranges that are firm and heavy for their size — they’ll slice cleaner. I recommend using organic navel oranges if possible, since you’re eating the peel-adjacent flesh. For the grapes, make sure they’re washed and completely dry before arranging; wet grapes make the platter slippery and can cause the “pumpkin” to slide apart.
Substitution Guidance: No oranges? Use large slices of cantaloupe or honeydew melon cut into half-moons. The shape will be less defined, but the flavor will still be great. For a lower-sugar option, swap the grapes for cucumber slices and the apples for jicama sticks. The crunch is similar, and the visual still works.
Equipment Needed
You don’t need any fancy tools for this one. Here’s what you’ll actually use:
- Large round or oval platter: At least 12 inches in diameter. A white or light-colored platter makes the pumpkin colors pop best. I use a simple ceramic one I got at a thrift store for three dollars.
- Sharp chef’s knife: For slicing oranges and apples cleanly. A dull knife will crush the fruit and make a mess.
- Cutting board: Preferably one with a juice groove to catch the orange juice. Trust me on this.
- Small offset spatula or butter knife: For arranging slices without smudging them. Your fingers work too, but the spatula keeps things tidy.
- Paper towels: For blotting excess moisture from the fruit before arranging. This is a non-negotiable step for a stable platter.
Budget-Friendly Options: No offset spatula? Use a clean ruler or a plastic knife. No fancy platter? A large baking sheet lined with parchment paper works perfectly. I’ve done this on a wooden cutting board before and it looked rustic and charming.
Preparation Method
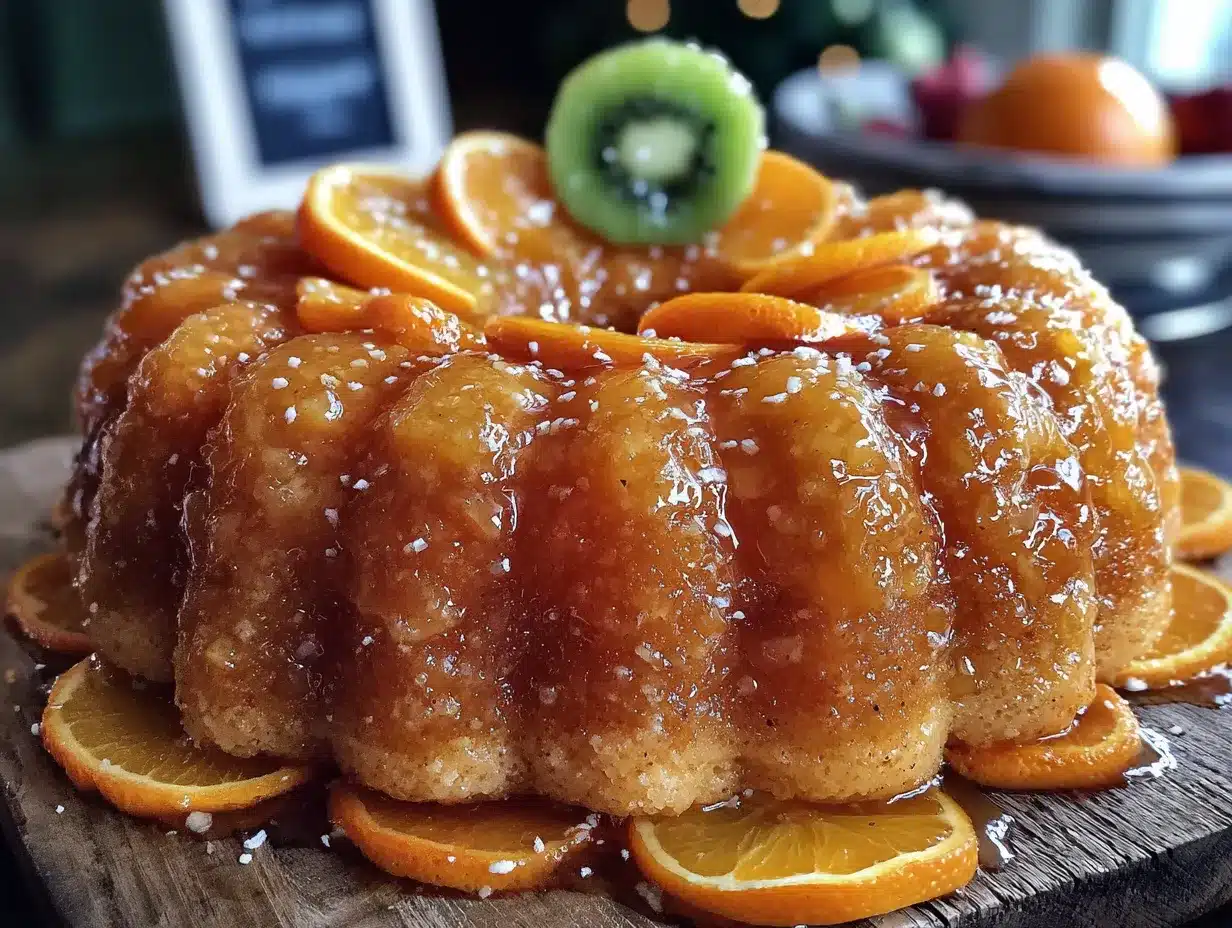
- Prep the oranges (5 minutes): Using your sharp knife, slice off the top and bottom of each orange so it sits flat on the cutting board. Then cut off the peel in strips, following the curve of the fruit. Once peeled, slice the oranges into rounds about 1/4-inch thick. Lay them out on paper towels to blot excess juice. You want them dry-ish so they don’t slide around.
- Prep the other fruit (5 minutes): Wash and dry all grapes thoroughly. Slice the apple into thin wedges — about 1/8-inch thick. Remove the seeds. If you’re using blueberries, rinse and dry them. Cut the cucumber or celery into a small rectangle about 2 inches long and 1/2 inch wide — this will be your stem.
- Create the base layer (3 minutes): On your platter, arrange the orange slices in a rough circle. Start with the largest slices in the center and work outward with smaller slices. The goal is to create a solid, overlapping circle of orange that looks like the body of a pumpkin. Don’t worry if it’s not perfect — you’ll fill in the gaps with other fruit.
- Build the pumpkin shape (5 minutes): Now, take your red and green grapes and start filling in any gaps between the orange slices. Place them in clusters to create the illusion of pumpkin ridges. The grapes should be nestled between the orange rounds, not piled on top. Think of it like a mosaic — you’re building a surface that looks cohesive from a few feet away.
- Add the stem and vine details (3 minutes): Place your cucumber or celery rectangle at the top center of the orange circle — this is the stem. Then take a few green grapes and arrange them in a small cluster around the base of the stem to look like vines or leaves. If you have mint leaves, tuck a few in here too.
- Fill the background (2 minutes): Sprinkle the blueberries or blackberries around the outer edge of the pumpkin shape. This creates a dark “shadow” that makes the orange pumpkin pop. It also gives people something to grab without disturbing the main design.
- Final touch (1 minute): Place the apple slices in a fan pattern at the bottom of the pumpkin, like a little “ground” for it to sit on. This adds a green element that ties the whole thing together. Step back and admire your work — you just made a pumpkin without carving a single gourd.
Sensory Cue: At this point, the platter should look vibrant and layered. The orange should be the star, with the grapes acting like little jewels filling the gaps. If it looks a little messy, that’s okay — the overall shape reads clearly from a distance.
Cooking Tips & Techniques
Here’s what I learned the hard way so you don’t have to.
Don’t overthink the symmetry. The first time I made this, I spent twenty minutes trying to make every orange slice perfectly aligned. It looked stiff and unnatural. Pumpkins are organic — they have lumps and bumps. Let your fruit tray have some personality. A little chaos makes it look homemade and approachable.
Blot, blot, blot. Wet fruit is the enemy of a stable platter. If your oranges are dripping juice, the grapes will slide right off. I learned this when my first attempt slid apart while I was carrying it to the table. Now I pat everything dry with paper towels before arranging. It takes an extra two minutes and saves a world of frustration.
Use the “three-finger rule” for arranging. When placing grapes, use three fingers to gently press them into the gaps between orange slices. This ensures they stay put without crushing the fruit. It sounds silly, but it works.
Make it ahead (partially). You can slice all the fruit up to 4 hours in advance and store it in separate airtight containers in the fridge. Just don’t arrange it until right before serving. The oranges will release juice over time and make the platter soggy. If you need to prep the night before, slice the apples and toss them in a little lemon juice to prevent browning, then slice the oranges fresh in the morning.
Pro tip for the stem: If your cucumber or celery piece won’t stay upright, cut a tiny slit in the top of an orange slice and wedge the stem into it. It acts like a natural holder. This trick saved my platter at a party where everything kept sliding.
Variations & Adaptations
This recipe is endlessly flexible. Here are a few ways I’ve adapted it:
- The “Jack-O’-Lantern” Face: Use blackberries or dark grapes to create a simple face on the orange pumpkin. Two triangles for eyes and a jagged smile. It takes an extra minute but makes it undeniably Halloween. My nephew insisted on this version last year and it was a hit.
- The Low-Carb Version: Swap the oranges and grapes for jicama slices, cucumber rounds, and bell pepper strips. The colors are different — more green and white — but the shape still reads as a pumpkin. You can use yellow bell pepper for the orange tone. It’s a great option for keto friends.
- The Tropical Twist: Use mango slices, kiwi rounds, and pineapple chunks instead of the traditional fruit. The yellow and green still create a pumpkin-like shape, and the tropical flavor is unexpected and refreshing. I made this for a Halloween party in Florida and it was perfect for the warm weather.
- The “Mini Pumpkin” Platter: Instead of one large pumpkin, make several small ones on individual plates or in lunchboxes. Use mandarin orange slices for the body and a single grape for the stem. These are adorable for classroom parties or as a healthy Halloween treat for kids.
- The Berry-Heavy Version: If oranges aren’t your thing, use a base of cantaloupe or honeydew melon cut into half-moons, then fill the gaps with raspberries, blackberries, and blueberries. The dark berries create a dramatic contrast against the pale melon.
Serving & Storage Suggestions
This fruit tray is best served cold, straight from the fridge. The contrast between the chilled fruit and the room-temperature party atmosphere is refreshing. I like to set it out about 10 minutes before guests arrive so it loses the chill but stays crisp.
Presentation Tip: Place the platter on a slightly elevated surface — a cake stand or a small box covered in a napkin — so it becomes a centerpiece. People naturally gravitate toward it when they walk in. I’ve found that putting it near the drinks table ensures it gets eaten quickly.
Complementary Dishes: This pairs beautifully with a warm dip like caramel apple dip or a yogurt-based fruit dip. For a savory balance, serve it alongside a cheese board with sharp cheddar and crackers. The sweet and salty combo is irresistible.
Storage: Leftovers can be stored in an airtight container in the fridge for up to 24 hours. The oranges will release juice, so the texture won’t be as crisp, but it’s still good for snacking. Do not freeze — the fruit will turn to mush when thawed.
Reheating: You don’t reheat fruit, but if the platter has been sitting out for more than 2 hours, it’s best to discard any cut fruit that wasn’t eaten. Safety first!
Flavor Development: Interestingly, the flavors meld together slightly after a few hours in the fridge. The orange juice mingles with the grapes and apples, creating a subtle fruit salad effect. Some people actually prefer it the next day for that reason.
Nutritional Information & Benefits
This is one of the healthiest Halloween treats you can make. Here’s a rough estimate per serving (about 1 cup of fruit):
| Nutrient | Amount per Serving |
|---|---|
| Calories | ~120 |
| Carbohydrates | 30g |
| Fiber | 4g |
| Sugar | 22g (natural) |
| Vitamin C | 70% DV |
| Potassium | 350mg |
Health Benefits: Oranges are packed with immune-boosting vitamin C, which is perfect for the cold and flu season that coincides with Halloween. Grapes contain antioxidants like resveratrol, and apples provide pectin for gut health. This is a treat that actually does your body good.
Dietary Considerations: This recipe is naturally gluten-free, dairy-free, vegan, and nut-free. It’s safe for most dietary restrictions. The only potential allergen is the fruit itself — some people with oral allergy syndrome may react to raw apples or melon.
Personal Wellness Perspective: I love that this recipe lets me participate in the Halloween fun without the sugar crash. My kids get to enjoy something festive, and I feel good about serving it. It’s a win-win.
Conclusion
This quick Halloween fruit tray pumpkin shaped with orange slices has become a non-negotiable part of my fall hosting. It’s the recipe that taught me to listen to the eight-year-olds in my life — and that sometimes the simplest ideas are the best ones.
I love that it’s forgiving. You don’t need to be a professional food stylist to pull it off. You just need some fruit, a platter, and the willingness to try. The first time might be a little messy, but that’s part of the charm. Every time you make it, you’ll get faster and more confident.
Now I want to see your version! Tag me in your photos or leave a comment below telling me how your pumpkin turned out. Did you add a face? Use a different fruit? I’d love to hear about it. Here’s to a Halloween that’s a little less about candy and a little more about real, delicious food.
Frequently Asked Questions
How far in advance can I make this fruit tray?
You can slice the fruit up to 4 hours ahead and store it in the fridge, but don’t arrange it until right before serving. The oranges release juice over time, which can make the platter slide apart. If you need to prep the night before, slice the apples and toss them in lemon juice to prevent browning, then do the oranges fresh in the morning.
Can I use canned oranges instead of fresh?
I don’t recommend it. Canned oranges are too soft and slippery to hold their shape. They’ll fall apart when you try to arrange them, and the extra syrup will make the platter sticky. Fresh oranges are worth the extra minute of peeling.
What if I don’t have a round platter?
No problem! Use a large baking sheet lined with parchment paper, a wooden cutting board, or even a clean pizza pan. The shape of the platter doesn’t matter as much as the arrangement of the fruit. A rectangular board can actually look rustic and charming.
How do I keep the apple slices from turning brown?
Toss the apple slices in a little lemon juice or lime juice right after slicing. The citric acid prevents oxidation. Blot them dry before adding to the platter so they don’t make everything sour. You can also use a commercial fruit preserver like Fruit-Fresh, but lemon juice works just fine.
Can I make this into a dip platter?
Absolutely! Place a small bowl of yogurt dip, caramel sauce, or chocolate hummus in the center of the pumpkin, then arrange the fruit around it. Just make sure the bowl is shallow enough that it doesn’t overwhelm the pumpkin shape. A small ramekin works perfectly.
Pin This Recipe!
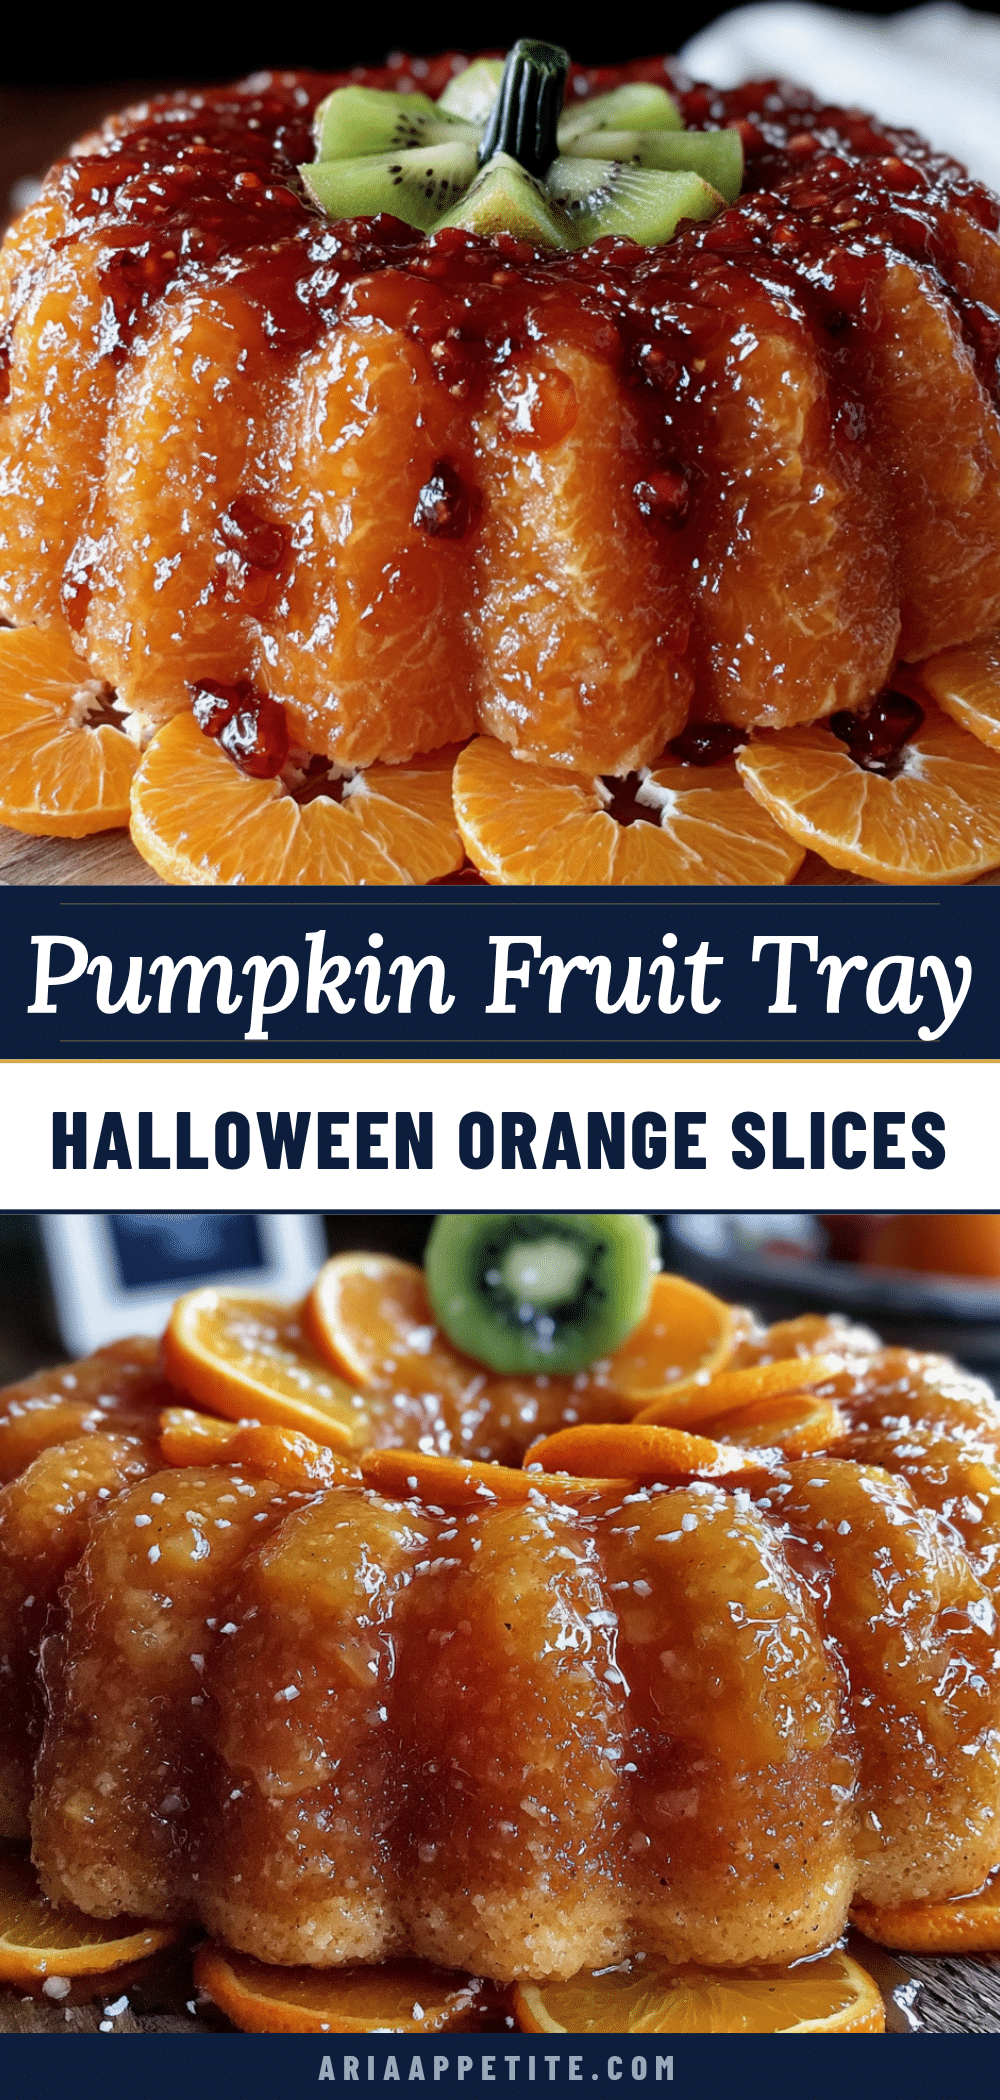
Best Easy Halloween Fruit Tray Pumpkin Shaped with Orange Slices
This quick Halloween fruit tray pumpkin shaped with orange slices is a conversation starter, a crowd-pleaser, and a sanity-saver all rolled into one. It comes together in under 20 minutes with simple ingredients and no baking.
- Prep Time: 20 minutes
- Cook Time: 0 minutes
- Total Time: 20 minutes
- Yield: 8 servings 1x
- Category: Appetizer
- Cuisine: American
Ingredients
- 4–5 large navel oranges, peeled and sliced into rounds (about 1/4-inch thick)
- 1 cup green seedless grapes
- 1 small cucumber or celery stalk, cut into a small rectangle (for stem)
- 1 cup red seedless grapes
- 1 large Granny Smith apple, sliced thin
- 1 cup fresh blueberries or blackberries
- Fresh mint leaves (optional, for garnish)
- 1 small mandarin orange, halved (optional, for base)
Instructions
- Prep the oranges: Slice off the top and bottom of each orange so it sits flat. Cut off the peel in strips, then slice into rounds about 1/4-inch thick. Blot with paper towels to remove excess juice.
- Prep the other fruit: Wash and dry all grapes. Slice the apple into thin wedges (about 1/8-inch thick) and remove seeds. Rinse and dry blueberries. Cut cucumber or celery into a 2-inch by 1/2-inch rectangle for the stem.
- Create the base layer: On a large round or oval platter, arrange the orange slices in a rough circle, starting with the largest in the center and working outward with smaller slices to form a solid, overlapping circle.
- Build the pumpkin shape: Fill in gaps between orange slices with red and green grapes, placing them in clusters to create the illusion of pumpkin ridges. Nestle grapes between orange rounds without piling on top.
- Add the stem and vine details: Place the cucumber or celery rectangle at the top center of the orange circle for the stem. Arrange a few green grapes around the base of the stem to look like vines or leaves. Tuck in mint leaves if using.
- Fill the background: Sprinkle blueberries or blackberries around the outer edge of the pumpkin shape to create a dark ‘shadow’ that makes the orange pop.
- Final touch: Place apple slices in a fan pattern at the bottom of the pumpkin to create a ‘ground’ for it to sit on.
Notes
Blot fruit dry to prevent sliding. Don’t overthink symmetry; a little chaos makes it look homemade. For a Jack-O’-Lantern face, use blackberries or dark grapes. Can slice fruit up to 4 hours ahead but arrange just before serving. To keep apple slices from browning, toss with lemon juice.
Nutrition
- Serving Size: 1 cup
- Calories: 120
- Sugar: 22
- Sodium: 2
- Carbohydrates: 30
- Fiber: 4
- Protein: 1
Keywords: Halloween fruit tray, pumpkin shaped fruit platter, easy Halloween snack, healthy Halloween treat, fruit pumpkin


