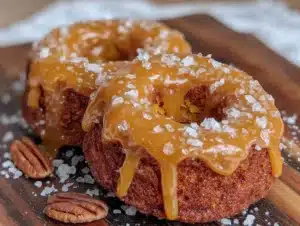
Love this? Save it for later!
Share the inspiration with your friends
The woman at the next stall watched me eyeing her basket of tiny sugar pumpkins for a solid minute before she finally spoke. “You’re not going to bake those, are you?” she asked, not unkindly. I was at the farmers’ market last October, completely overwhelmed by the sheer volume of squash, and honestly, I had no idea what I was doing with them. She reached over, picked up the smallest one, and said, “You want the ones that fit in your palm. Grate them raw. Don’t bother with the can.” Then she just walked away. That conversation—if you can call two sentences a conversation—stuck with me. I went home, bought a six-pack of donuts from the bakery down the street out of spite, and thought about those pumpkins for a whole year.
Fast forward to last Tuesday. I had a sugar pumpkin sitting on my counter, a half-empty can of pumpkin puree in my fridge, and about twenty minutes before my kid needed to be at soccer practice. That’s when this Quick Baked Pumpkin Donuts with Maple Glaze recipe was born. I’m not going to pretend I grated that pumpkin raw—I used the canned stuff, and it was perfect. The woman from the market would probably roll her eyes, but you know what? These donuts are on the table in under half an hour, they taste like fall in a bite, and no one has ever complained about them being “too easy.” Maybe you’ve been there—staring at a can of pumpkin, wanting something special but having zero time or energy to make it happen. These donuts are for exactly that moment.
What I love most about this recipe is how it turned a random stranger’s offhand advice into something I actually use. She was right about one thing: pumpkin doesn’t need to be complicated. It just needs to be treated with a little respect and a lot of butter. These donuts are soft, spiced just right, and that maple glaze? It seeps into the warm crumb in a way that makes you close your eyes. I keep making them because they’re the kind of treat that feels like a hug, even on a Tuesday night when you’re running late.
Why You’ll Love This Recipe
Let’s be real for a second. There are a million pumpkin donut recipes out there, and most of them require deep frying, resting dough, or ingredients you have to hunt down at three different stores. This one is not that. This is the recipe you make when you want something that tastes like you spent hours in the kitchen but actually took you twenty-five minutes from start to finish.
- Quick & Easy: From mixing bowl to your mouth in under 25 minutes. No yeast, no rising time, no deep fryer. Just a whisk, a bowl, and a donut pan.
- Simple Ingredients: You probably have everything in your pantry right now. Flour, sugar, eggs, oil, pumpkin puree, and basic spices. The maple glaze uses two ingredients you likely already have.
- Perfect for Weeknights: These donuts are the answer to “I need something sweet but I’m exhausted.” They come together while you’re unloading the dishwasher or helping with homework.
- Crowd-Pleaser: I’ve brought these to school bake sales, book club meetings, and random Tuesday playdates. They disappear every single time. Kids love them, adults sneak seconds.
- Unbelievably Delicious: The texture is the real star here. They’re cakey but light, with a tender crumb that soaks up that maple glaze like it was made for it. The spices are warm but not overwhelming—just enough to taste like autumn.
What makes this different from every other pumpkin donut recipe? It’s the balance. The pumpkin keeps them moist without making them gummy. The glaze is thin enough to drip down the sides but thick enough to leave a satisfying sweet layer. And you don’t need to be a baker to pull it off. I’ve made these while half-watching a toddler and they still turned out perfect. Honestly, that’s the kind of recipe we all need more of—one that works with your life, not against it.
What Ingredients You Will Need
This recipe uses simple, pantry-friendly ingredients to create donuts that taste anything but basic. The pumpkin puree does the heavy lifting for moisture, while the spices bring all that cozy fall flavor. Here’s what you’ll need:
For the Donuts
- 1 ¾ cups all-purpose flour (I use King Arthur Flour for consistent results, but any brand works)
- 1 ½ teaspoons baking powder (make sure it’s fresh—test by dropping a bit in water; if it fizzes, you’re good)
- ½ teaspoon baking soda
- ½ teaspoon salt
- 1 ½ teaspoons pumpkin pie spice (or make your own: 1 tsp cinnamon, ¼ tsp nutmeg, ¼ tsp ginger, pinch of cloves)
- 1 teaspoon ground cinnamon
- ½ cup granulated sugar
- ¼ cup packed light brown sugar (dark brown works too, just adds deeper molasses flavor)
- 2 large eggs, room temperature (if you forgot to take them out, place them in warm water for 5 minutes)
- ½ cup vegetable oil (canola or melted coconut oil also work beautifully)
- 1 cup pumpkin puree (not pumpkin pie filling—make sure it’s 100% pure pumpkin. Libby’s is my go-to)
- 1 teaspoon vanilla extract
For the Maple Glaze
- 1 cup powdered sugar, sifted (sifting prevents lumps—trust me on this one)
- 3 tablespoons pure maple syrup (not pancake syrup! The real stuff makes a difference here)
- 1-2 tablespoons milk (any kind works—dairy, almond, oat—use as needed to reach desired consistency)
Ingredient Tips: If you’re out of pumpkin pie spice, don’t stress. Just use 1 teaspoon cinnamon, ¼ teaspoon nutmeg, ¼ teaspoon ginger, and a tiny pinch of cloves. For a dairy-free version, use almond milk in the glaze and coconut oil instead of vegetable oil. I’ve tested both swaps and they work perfectly. Also, if you only have dark brown sugar, go for it—it’ll give the donuts a slightly richer flavor that pairs beautifully with the maple glaze. One more thing: make sure your baking powder and baking soda are fresh. I learned this the hard way when my first batch came out flat as pancakes. Nobody wants flat donuts.
Equipment Needed
You don’t need a fancy kitchen to make these donuts, but a few specific tools make the process much smoother.
- Donut Pan: A standard 6-cavity donut pan is ideal. I use the Wilton non-stick pan and it works great. If you don’t have one, you can bake the batter as muffins (just reduce time to 12-14 minutes) or use a mini donut pan and adjust baking time to 8-10 minutes.
- Mixing Bowls: Two medium bowls—one for dry ingredients, one for wet. Nothing fancy needed.
- Whisk: For combining everything smoothly. A fork works in a pinch, but a whisk prevents lumps.
- Piping Bag or Zip-Top Bag: To pipe the batter into the donut cavities. A spoon works, but piping gives you cleaner, more even donuts. I just snip the corner off a quart-sized zip-top bag.
- Cooling Rack: Essential for letting the glaze set properly. If you don’t have one, place the donuts on parchment paper and flip them halfway through cooling.
- Measuring Cups and Spoons: For accuracy. Eyeballing it works for some recipes, but baking is a science.
Budget-Friendly Tip: Donut pans are often available at thrift stores for a couple of dollars. I found my backup pan at Goodwill for $1.50. Also, you can absolutely use a mini muffin tin if that’s what you have—just call them donut holes and no one will question it.
Preparation Method
This is where the magic happens. Follow these steps, and you’ll have warm, glazed donuts in less time than it takes to watch an episode of your favorite show.
- Preheat and Prep (2 minutes): Preheat your oven to 350°F (175°C). Lightly grease your donut pan with non-stick spray or a little melted butter. I use a pastry brush to make sure every nook and cranny is coated—nothing worse than a donut that sticks.
- Mix Dry Ingredients (3 minutes): In a medium bowl, whisk together the flour, baking powder, baking soda, salt, pumpkin pie spice, and cinnamon. Whisk until everything is evenly distributed. This ensures you don’t get a pocket of baking soda in one donut. Yes, I’ve done that. No, it’s not pleasant.
- Mix Wet Ingredients (3 minutes): In a separate larger bowl, whisk together the granulated sugar, brown sugar, and eggs until smooth and slightly thickened—about 30 seconds. Add the oil, pumpkin puree, and vanilla extract. Whisk until completely combined. The mixture should look glossy and smell amazing already.
- Combine Wet and Dry (2 minutes): Pour the dry ingredients into the wet ingredients. Stir gently with a spatula or wooden spoon until just combined. Do not overmix! A few small lumps are totally fine. Overmixing develops gluten and makes the donuts tough. Trust me, you want tender donuts, not rubber ones.
- Fill the Pan (3 minutes): Transfer the batter to your piping bag or zip-top bag. Snip off about ½ inch from the corner. Pipe the batter evenly into the donut cavities, filling each about ¾ full. Don’t overfill—they’ll puff up and lose that classic donut shape. If you don’t have a piping bag, use a spoon and a small offset spatula to spread the batter.
- Bake (10-12 minutes): Bake for 10-12 minutes, or until the donuts spring back when lightly touched and a toothpick inserted into the thickest part comes out clean. My oven runs hot, so I check at 9 minutes. Every oven is different, so start checking early. The donuts should be golden brown on the edges and slightly puffed.
- Cool (5 minutes): Let the donuts cool in the pan for 5 minutes. Then transfer them to a wire rack to cool completely. If you try to glaze them while they’re too hot, the glaze will just slide right off. Trust me, I’ve made that mistake, and it’s a sticky mess.
- Make the Glaze (2 minutes): While the donuts cool, make the glaze. In a small bowl, whisk together the sifted powdered sugar and maple syrup. Add milk 1 tablespoon at a time until you reach a pourable consistency. You want it thick enough to coat the back of a spoon but thin enough to drip. If it’s too thick, add a tiny splash more milk. Too thin? Add a little more powdered sugar.
- Glaze the Donuts (3 minutes): Once the donuts are completely cool, dip the top of each donut into the glaze. Let the excess drip off for a second, then place them back on the wire rack. The glaze will set in about 10-15 minutes. If you’re impatient like me, you can eat them immediately—the glaze will just be a little messy. Totally worth it.
Cooking Tips & Techniques
After making these donuts more times than I care to count, I’ve collected a few lessons that’ll save you time and frustration.
Don’t Overmix the Batter: This is the number one mistake I see people make. Mix until the flour disappears, then stop. A few streaks of flour are fine. Overmixing makes the donuts dense and tough instead of light and tender. I learned this the hard way when I made a batch for a brunch and they came out like hockey pucks. Not my finest moment.
Room Temperature Eggs Matter: Cold eggs can seize the batter and make it lumpy. If you forgot to take them out, place them in a bowl of warm water for 5 minutes. It’s a simple trick that makes a noticeable difference in texture.
Pipe, Don’t Spoon: I know it’s an extra step, but piping the batter into the pan gives you much cleaner, more evenly shaped donuts. A spoon tends to leave gaps and creates uneven shapes. Plus, the piping bag is easier to control and less messy. Just snip the corner and go.
Check for Doneness Early: All ovens run differently. Start checking at 9 minutes. The donuts should be golden and spring back when you touch them. A toothpick inserted should come out with just a few moist crumbs—not wet batter. If it’s clean, they’re done.
Glaze When Cool: I know it’s tempting to glaze them while they’re warm, but the glaze will just melt and slide off. Wait until they’re completely cool. If you’re in a hurry, pop them in the fridge for 10 minutes to speed things up.
Double the Batch: These freeze beautifully (unglazed), so I always make a double batch. Freeze the unglazed donuts in a single layer on a baking sheet, then transfer to a freezer bag. When you want them, just thaw and glaze fresh. It’s like having a bakery in your freezer.
Variations & Adaptations
One of the best things about this recipe is how adaptable it is. Here are some variations I’ve tried and loved.
- Gluten-Free Version: Swap the all-purpose flour with a 1:1 gluten-free baking flour blend. I’ve used Bob’s Red Mill 1-to-1 Baking Flour with great results. The texture is slightly more delicate, but the flavor is spot on. Add an extra tablespoon of milk to the batter if it seems too thick.
- Vegan Adaptation: Replace the eggs with flax eggs (2 tablespoons ground flaxseed mixed with 6 tablespoons water, let sit for 5 minutes). Use coconut oil instead of vegetable oil, and swap the milk in the glaze for almond or oat milk. The donuts will be slightly denser but still delicious.
- Spice It Up: Add ¼ teaspoon of cardamom or allspice for a more complex flavor profile. I tried cardamom once on a whim and now it’s my go-to. It adds this warm, slightly citrusy note that pairs beautifully with the maple glaze.
- Chocolate Drizzle: Instead of maple glaze, melt ½ cup dark chocolate chips with 1 teaspoon coconut oil and drizzle over the cooled donuts. It’s a completely different vibe but equally addictive.
- Mini Donut Holes: Use a mini donut pan and bake for 8-10 minutes. They’re perfect for parties or lunchbox treats. Just double the glaze recipe because you’ll want extra for dipping.
- Savory Twist: Reduce the sugar to ¼ cup, skip the glaze, and add ½ cup shredded cheddar cheese and ¼ teaspoon black pepper. Bake as directed. These are surprisingly good with soup or chili.
Serving & Storage Suggestions
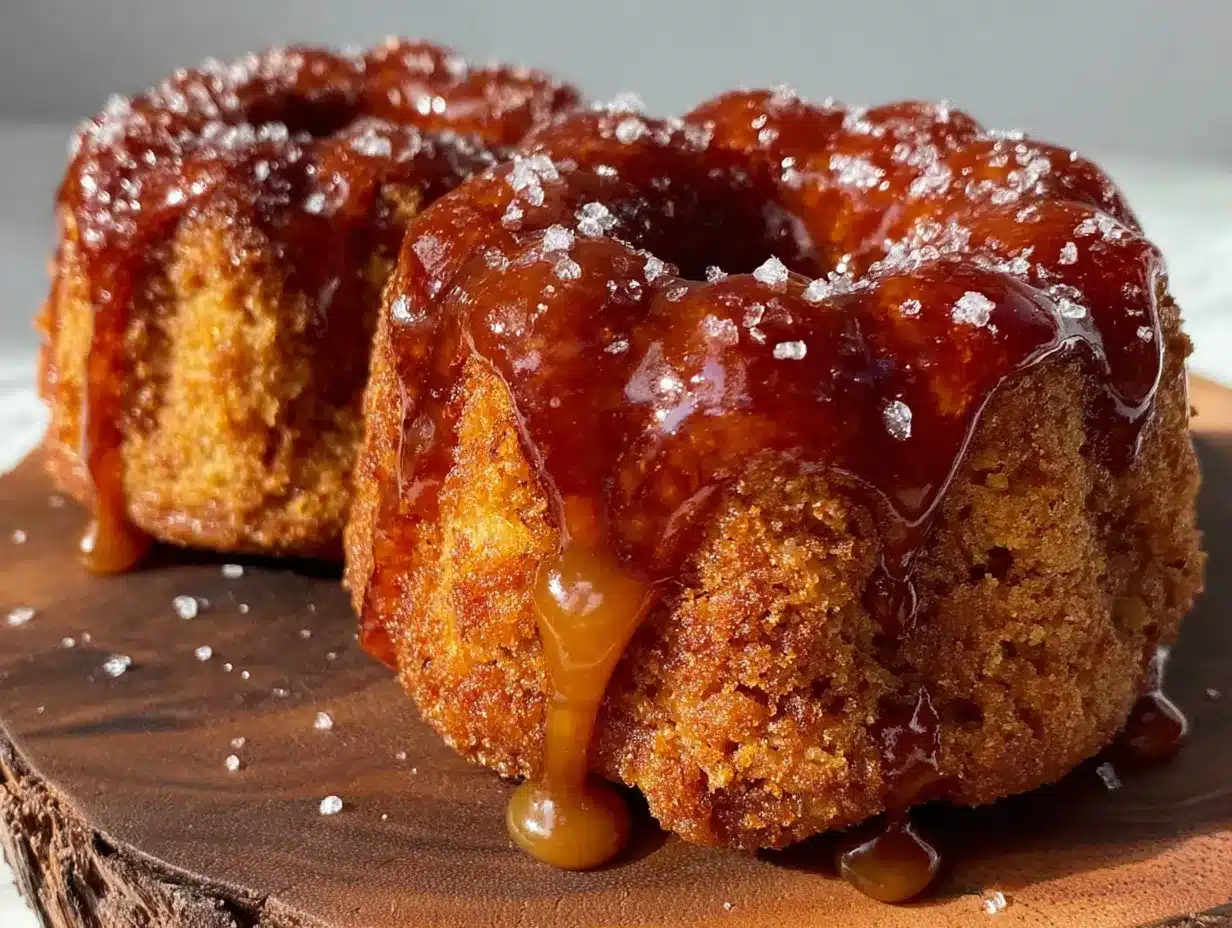
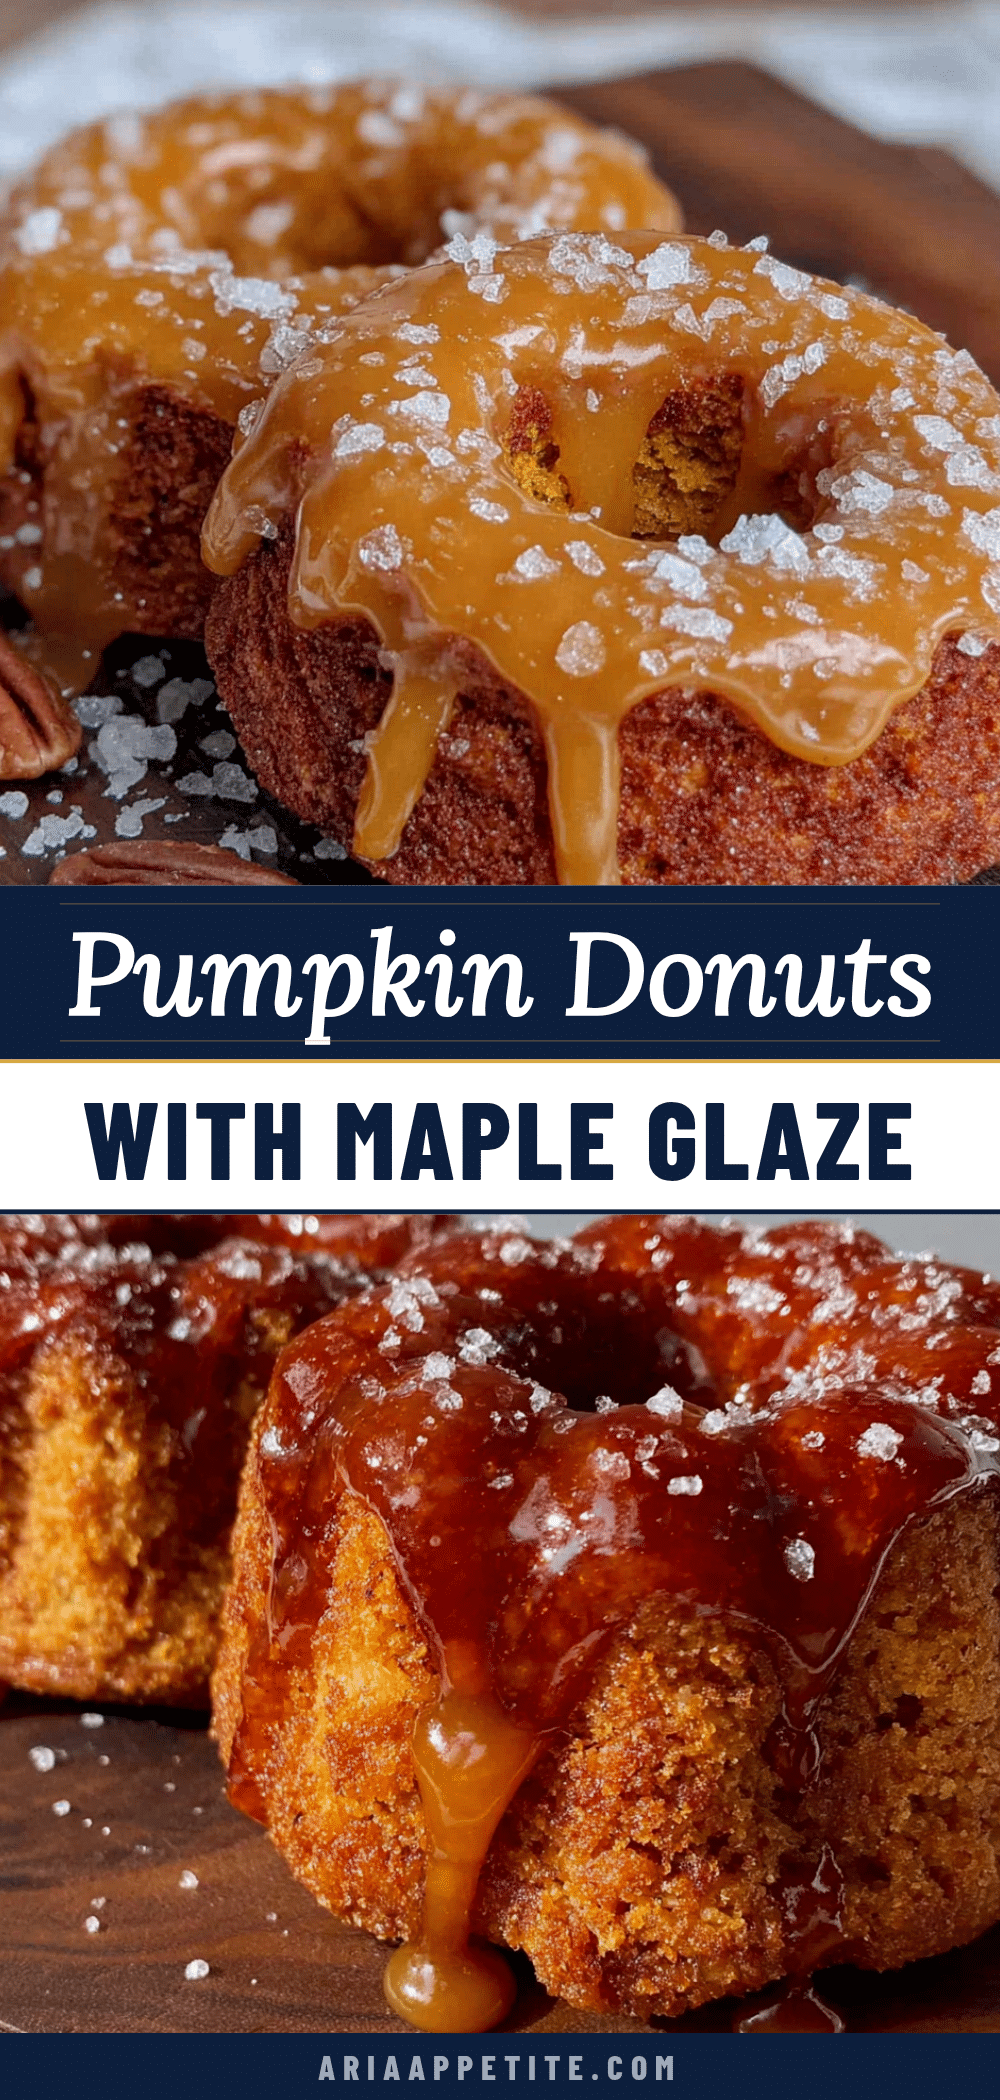
These donuts are best served slightly warm, but they’re delicious at room temperature too. The maple glaze sets into a beautiful, slightly crackly shell that contrasts perfectly with the soft cake underneath.
Serving Ideas: Arrange the glazed donuts on a rustic wooden board or a simple white platter. Sprinkle a little extra cinnamon or a pinch of flaky sea salt on top for a gorgeous finish. They pair beautifully with a hot cup of coffee, chai tea, or a tall glass of cold milk. For a brunch spread, serve them alongside a frittata or a simple fruit salad.
Storage: Store unglazed donuts in an airtight container at room temperature for up to 3 days. Glazed donuts are best eaten within 24 hours—the glaze can get sticky or soften over time. If you need to store glazed donuts, place them in a single layer in an airtight container with parchment paper between layers. Do not refrigerate; it dries them out.
Freezing: Freeze unglazed donuts for up to 3 months. Place them in a single layer on a baking sheet and freeze until solid, then transfer to a freezer-safe bag. To serve, thaw at room temperature for about 30 minutes, then glaze fresh. The texture stays remarkably good. I keep a stash in my freezer for unexpected guests or late-night cravings.
Reheating: If you want that just-baked warmth, pop an unglazed donut in the microwave for 10 seconds, or in a 300°F oven for 5 minutes. Glazed donuts should not be reheated—the glaze will melt. Instead, let them come to room temperature naturally.
Nutritional Information & Benefits
These donuts are a treat, but they also offer some surprising nutritional perks thanks to the pumpkin. Here’s an estimated breakdown per donut (based on 12 servings):
| Nutrient | Amount per Donut |
|---|---|
| Calories | 245 |
| Total Fat | 11g |
| Saturated Fat | 2g |
| Carbohydrates | 34g |
| Fiber | 2g |
| Sugar | 19g |
| Protein | 3g |
| Vitamin A | 80% DV |
Health Highlights: Pumpkin is packed with vitamin A, which supports eye health and immune function. It’s also a good source of fiber, which helps keep you full and supports digestion. The maple syrup in the glaze contains antioxidants and minerals like zinc and manganese. While these donuts are definitely a sweet treat, they’re a step up from the average bakery donut in terms of nutritional value. Plus, baking instead of frying significantly reduces the fat content. I feel good about giving these to my family—in moderation, of course.
Dietary Notes: This recipe can be made gluten-free and vegan with the substitutions listed above. It contains eggs, dairy (in the glaze), and wheat. For nut-free preparation, ensure your milk alternative is nut-free and check your flour blend for any nut-based ingredients.
Conclusion
These Quick Baked Pumpkin Donuts with Maple Glaze are proof that you don’t need hours in the kitchen to create something genuinely special. They’re the recipe I turn to when I want the taste of fall without the fuss—when I need a treat that feels homemade but fits into a real, busy life. The woman at the farmers’ market would probably laugh if she knew her offhand comment led to a recipe I make on repeat. But that’s the thing about cooking, isn’t it? You never know where inspiration will come from. Sometimes it’s a stranger’s advice. Sometimes it’s a half-empty can of pumpkin and a hungry kid. Sometimes it’s just the craving for something warm and sweet on a Tuesday night.
I hope you make these donuts your own. Play with the spices, try a different glaze, double the batch and share them with someone you love. And when you do, I’d love to hear about it. Drop a comment below and tell me how they turned out—what variations you tried, what occasion you made them for, or just how fast they disappeared. Don’t forget to pin this recipe for later and share it with a friend who needs a little fall magic in their life. Happy baking!
Frequently Asked Questions
Can I use pumpkin pie filling instead of pumpkin puree?
No, please don’t. Pumpkin pie filling is pre-sweetened and spiced, which will throw off the sugar and spice balance in this recipe. Stick with 100% pure pumpkin puree for the best results. Libby’s is my favorite brand.
Do I need a donut pan to make these?
Not necessarily! If you don’t have a donut pan, you can bake the batter as muffins (bake for 12-14 minutes) or use a mini muffin tin (bake for 8-10 minutes). They won’t have the classic donut shape, but they’ll taste just as delicious. You can also use a donut hole pan if you have one.
Why did my donuts come out dense?
This usually happens from overmixing the batter. Once you combine the wet and dry ingredients, mix just until the flour disappears. A few lumps are fine. Overmixing develops gluten, which makes the donuts tough instead of tender. Also, make sure your baking powder and baking soda are fresh.
Can I make these donuts ahead of time?
Absolutely! Bake the donuts up to 3 days ahead and store them unglazed in an airtight container at room temperature. Glaze them just before serving for the freshest taste and texture. You can also freeze unglazed donuts for up to 3 months—just thaw and glaze when you’re ready.
How do I make the glaze thicker or thinner?
If your glaze is too thick, add milk 1 teaspoon at a time until you reach your desired consistency. If it’s too thin, add more sifted powdered sugar 1 tablespoon at a time. The perfect glaze should coat the back of a spoon and slowly drip off. For a thicker glaze that sets harder, use less milk and let it sit for a few minutes before dipping.
Pin This Recipe!
Easy Baked Pumpkin Donuts with Maple Glaze in 25 Minutes
These quick baked pumpkin donuts with maple glaze are soft, spiced, and ready in under 25 minutes. Made with simple pantry ingredients, they’re the perfect fall treat for busy weeknights.
- Prep Time: 10 minutes
- Cook Time: 12 minutes
- Total Time: 25 minutes
- Yield: 12 servings 1x
- Category: Dessert
- Cuisine: American
Ingredients
- 1 ¾ cups all-purpose flour
- 1 ½ teaspoons baking powder
- ½ teaspoon baking soda
- ½ teaspoon salt
- 1 ½ teaspoons pumpkin pie spice
- 1 teaspoon ground cinnamon
- ½ cup granulated sugar
- ¼ cup packed light brown sugar
- 2 large eggs, room temperature
- ½ cup vegetable oil
- 1 cup pumpkin puree (not pumpkin pie filling)
- 1 teaspoon vanilla extract
- 1 cup powdered sugar, sifted
- 3 tablespoons pure maple syrup
- 1–2 tablespoons milk
Instructions
- Preheat oven to 350°F (175°C). Lightly grease a 6-cavity donut pan with non-stick spray or melted butter.
- In a medium bowl, whisk together flour, baking powder, baking soda, salt, pumpkin pie spice, and cinnamon until evenly distributed.
- In a separate larger bowl, whisk together granulated sugar, brown sugar, and eggs until smooth and slightly thickened, about 30 seconds. Add oil, pumpkin puree, and vanilla extract; whisk until completely combined and glossy.
- Pour dry ingredients into wet ingredients. Stir gently with a spatula or wooden spoon until just combined (a few small lumps are fine). Do not overmix.
- Transfer batter to a piping bag or zip-top bag with a ½-inch corner snipped. Pipe batter evenly into donut cavities, filling each about ¾ full.
- Bake for 10-12 minutes, or until donuts spring back when lightly touched and a toothpick inserted into the thickest part comes out clean. Start checking at 9 minutes.
- Let donuts cool in the pan for 5 minutes, then transfer to a wire rack to cool completely.
- While donuts cool, make the glaze: In a small bowl, whisk together sifted powdered sugar and maple syrup. Add milk 1 tablespoon at a time until you reach a pourable consistency (thick enough to coat the back of a spoon but thin enough to drip).
- Once donuts are completely cool, dip the top of each donut into the glaze. Let excess drip off, then place back on the wire rack. Glaze will set in 10-15 minutes.
Notes
Don’t overmix the batter to avoid dense donuts. Use room temperature eggs for best texture. Glaze only when donuts are completely cool to prevent melting. Unglazed donuts can be frozen for up to 3 months.
Nutrition
- Serving Size: 1 donut
- Calories: 245
- Sugar: 19
- Sodium: 220
- Fat: 11
- Saturated Fat: 2
- Carbohydrates: 34
- Fiber: 2
- Protein: 3
Keywords: pumpkin donuts, baked donuts, maple glaze, fall recipe, quick dessert, easy donuts