Love this? Save it for later!
Share the inspiration with your friends
My niece asked why I couldn’t just pipe cat faces directly onto the brownies instead of making separate cookie decorations. I started to explain why that wouldn’t work—something about the chocolate seeping into the brownie and losing the shape. Then I stopped. Honestly, I had no good reason except that I’d never tried it before.
That conversation happened on a rainy Tuesday afternoon in October. My kitchen counter was covered in cocoa powder, and I had already burned through two batches of brownies trying to get the “perfect” Halloween treat. My niece, all of twelve years old, watched me struggle and casually suggested the thing that would change everything. I mean, let’s face it—sometimes the people who don’t overthink things have the best ideas.
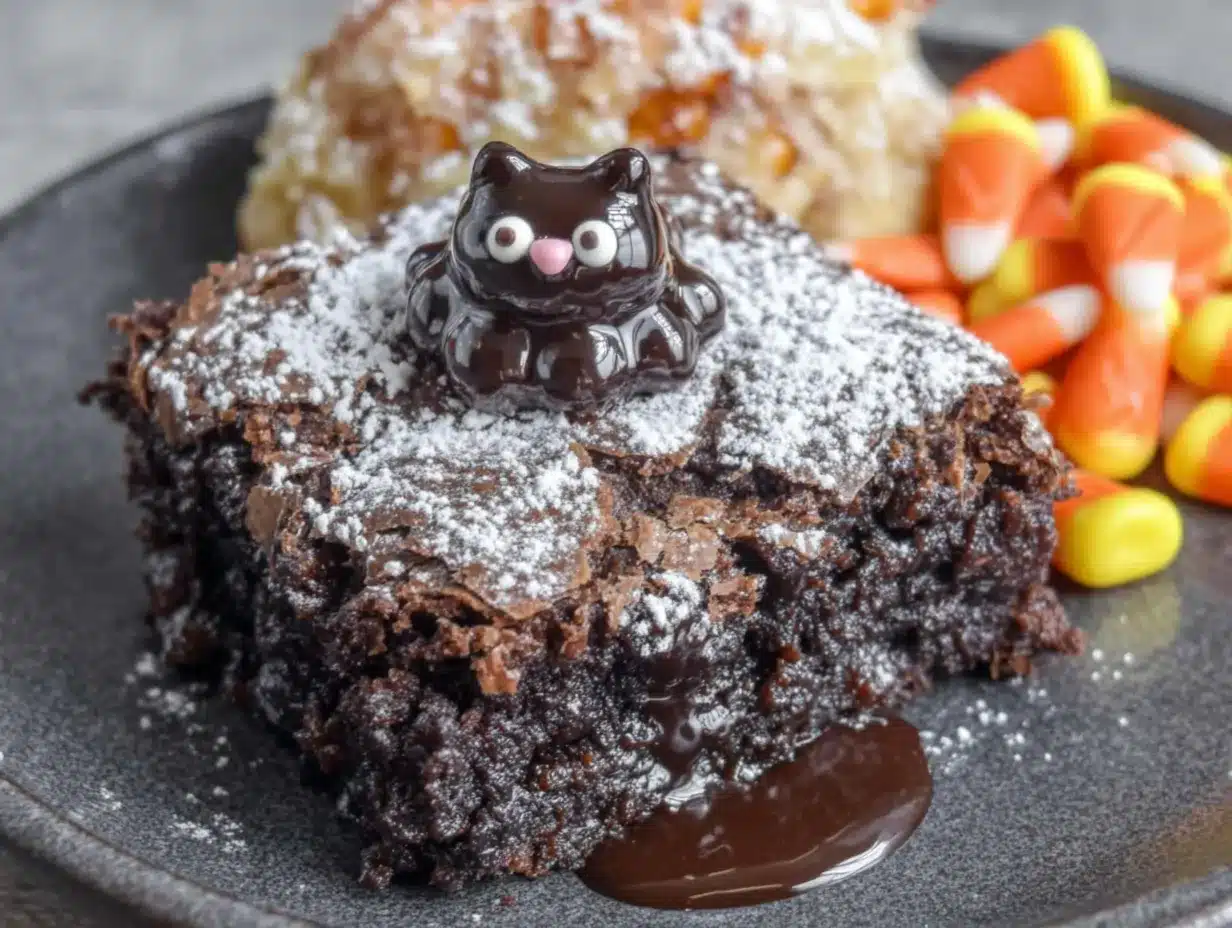
So I handed her the piping bag. She drew a wonky cat face on a warm brownie, and you know what? It looked adorable. The chocolate softened just enough to meld with the brownie surface, creating this seamless little cat face that stared up at us with pure Halloween charm. I felt ridiculous for not thinking of it sooner.
These Perfect Black Cat Halloween Brownies are the result of that moment—a recipe born from a kid’s simple question and my own stubborn refusal to try something new. They’re rich, fudgy, and topped with the cutest little black cat faces that come together in minutes. Maybe you’ve been there too, overcomplicating something that really didn’t need to be that hard. These brownies are proof that sometimes the simplest approach wins.
Every year since, I make these for our Halloween party, and they disappear faster than anything else on the dessert table. There’s something about a brownie that looks back at you before you eat it that makes people smile every single time.
Why You’ll Love This Recipe
These aren’t just any Halloween brownies. After testing this recipe about seven times (my neighbors were very happy that month), I can tell you exactly why this version works so well.
- Quick & Easy : From start to finish, you’re looking at about 45 minutes. The decorations take maybe ten minutes extra, and even my twelve-year-old niece can do them perfectly now.
- Simple Ingredients : No weird candy melts or specialty decorating tools. You need basic baking staples plus some chocolate chips and candy eyes—stuff you can find at any grocery store.
- Perfect for Halloween Parties : These brownies are the star of any spooky spread. Kids love them, adults sneak extra ones, and everyone takes a picture before taking a bite.
- Crowd-Pleaser : I’ve brought these to work parties, school events, and family gatherings. They get rave reviews every single time, and people always ask for the recipe.
- Unbelievably Delicious : The brownie itself is ultra-fudgy with that crackly top we all love. The chocolate decorations add another layer of richness that makes these feel extra special.
What makes this recipe different from all the other Halloween brownies out there is the technique. Instead of trying to shape separate cookie decorations or using fondant (which honestly tastes like sweet cardboard), we pipe the cat faces directly onto the warm brownies. The chocolate melts slightly and creates this perfect bond that looks professional but takes zero special skills.
This isn’t just another version of spooky brownies. It’s the version that actually works without making you want to throw your piping bag across the kitchen. Trust me, I’ve been there.
What Ingredients You Will Need
This recipe uses simple, wholesome ingredients to deliver that rich, fudgy brownie texture we’re all chasing. Most of these are probably already sitting in your pantry right now.
For the Brownies:
- 1 cup (226g) unsalted butter, melted (I use Kerrygold for the richest flavor)
- 2 cups (400g) granulated sugar
- 4 large eggs, room temperature (this matters for that crackly top)
- 1 tablespoon vanilla extract (real vanilla, not imitation)
- ¾ cup (90g) unsweetened cocoa powder (I prefer Ghirardelli for depth of flavor)
- 1 cup (125g) all-purpose flour
- ½ teaspoon salt
- ½ teaspoon baking powder
For the Black Cat Decorations:
- ½ cup (90g) semi-sweet chocolate chips (use Ghirardelli or Guittard for smooth melting)
- 1 tablespoon coconut oil or vegetable shortening (helps the chocolate flow smoothly)
- 48-60 candy eyes (the little white circles with black pupils, found in baking aisles)
- Black food coloring gel (optional, for darker chocolate—I use Americolor Super Black)
Ingredient Selection Tips: Look for good-quality cocoa powder here because it makes a real difference in the final flavor. I’ve tested these with store-brand cocoa, and they’re fine, but the depth just isn’t there. Also, make sure your eggs are truly at room temperature—cold eggs seize the melted butter and give you a denser, less crackly top. Set them out about 30 minutes before you start baking.
Substitution Guidance: If you need a dairy-free version, swap the butter with a good vegan butter stick (not margarine) and use dairy-free chocolate chips. For a gluten-free option, use a 1:1 gluten-free baking flour blend—I’ve had good results with Bob’s Red Mill. The texture will be slightly less fudgy but still delicious.
Equipment Needed
You don’t need fancy equipment for these brownies, which is honestly my favorite thing about them.
- 9×13 baking pan — This gives you the perfect thickness for decorating. An 8×8 pan works too, but your brownies will be thicker and need longer baking time.
- Parchment paper — Non-negotiable. It makes lifting the brownies out so much easier, and you won’t scratch your pan.
- Mixing bowls — One large, one medium. Nothing fancy needed.
- Whisk — For the dry ingredients and for mixing the wet ingredients smooth.
- Spatula — A rubber spatula for folding everything together without overmixing.
- Piping bag or zip-top bag — I use disposable piping bags because they’re easy, but a sturdy zip-top bag with the corner snipped works perfectly too.
- Small microwave-safe bowl — For melting the chocolate for decorations.
Budget-Friendly Options: If you don’t have a piping bag, honestly just use a zip-top bag. I’ve done it that way more times than I can count, and it works exactly the same. Also, if you don’t have a 9×13 pan, you can use a disposable aluminum pan from the grocery store—just keep an eye on the baking time because those can cook a bit faster.
Personal Experience: I once tried to use a pastry brush to paint the cat faces on. Don’t do that. It was a disaster, and I ended up with brownies that looked like they had chocolate camouflage instead of cute cat faces. Stick with the piping method—it’s way easier and gives you so much more control.
Preparation Method
- Preheat your oven to 350°F (175°C). Line your 9×13 baking pan with parchment paper, leaving some overhang on the sides. This is going to make your life so much easier later. Lightly spray the parchment with non-stick spray just to be safe.
- Melt the butter in a large microwave-safe bowl. Heat it in 30-second bursts until completely melted. Let it cool for about 2 minutes—you don’t want it hot enough to cook the eggs when you add them.
- Whisk in the sugar until it’s well combined with the melted butter. The mixture should look glossy and slightly thickened. This takes about a minute of whisking. Don’t rush this step—the sugar needs to start dissolving into the butter for that crackly top.
- Add the eggs one at a time, whisking well after each addition. The batter will look smooth and shiny. Then add the vanilla extract and whisk again. At this point, the mixture should smell amazing—like the beginning of something really good.
- In a separate medium bowl, whisk together the cocoa powder, flour, salt, and baking powder. Make sure there are no lumps in the cocoa powder—I always sift mine if it looks clumpy.
- Gradually add the dry ingredients to the wet ingredients, folding gently with a rubber spatula. Mix just until you can’t see any more streaks of flour. Overmixing at this stage will give you tough, cakey brownies instead of fudgy ones. Stop as soon as it comes together.
- Pour the batter into your prepared pan and spread it evenly. The batter will be thick—that’s exactly what you want. Use your spatula to push it into all four corners.
- Bake for 25-30 minutes at 350°F (175°C). Start checking at 25 minutes. The brownies are done when a toothpick inserted into the center comes out with a few moist crumbs attached—not clean, but not wet batter either. If it comes out clean, you’ve overbaked them. I’ve made that mistake before, and the brownies were still good but not as fudgy.
- Let the brownies cool in the pan for 10 minutes, then use the parchment overhang to lift them out onto a wire rack. Cool completely before decorating. This is important—warm brownies will melt your chocolate decorations into a puddle.
- While the brownies cool, make the decoration chocolate. Place the chocolate chips and coconut oil in a small microwave-safe bowl. Microwave in 20-second bursts, stirring between each, until completely smooth. If you want darker chocolate for your cat faces, add a tiny dab of black food coloring gel and stir well.
- Transfer the melted chocolate to a piping bag or a zip-top bag. If using a zip-top bag, snip a tiny corner off—like, really tiny. You can always cut more if the line isn’t coming through, but you can’t undo a cut that’s too big.
- Pipe the cat faces onto the cooled brownies. Pipe a small circle for the head, then two little triangles on top for ears. Pipe two tiny dots where the eyes will go (this helps the candy eyes stick). Place a candy eye on each dot while the chocolate is still wet. Pipe a tiny nose and whiskers. Don’t stress about perfection—wonky cat faces are actually cuter. My niece’s first batch looked like aliens, and we loved them anyway.
- Let the chocolate decorations set completely before cutting the brownies. This takes about 20 minutes at room temperature, or you can pop them in the fridge for 10 minutes if you’re impatient like me.
- Cut into squares using a sharp knife. Wipe the knife clean between cuts for the neatest edges. I usually get 12-16 brownies depending on how big I cut them.
Cooking Tips & Techniques
After making these brownies more times than I care to count, I’ve learned a few things the hard way. Let me save you some trouble.
The crackly top is all about technique. That beautiful shiny crust on top happens when you dissolve the sugar properly into the melted butter and eggs. Whisk thoroughly at those stages, and don’t be shy about it. I used to get frustrated when my brownies came out with a matte top until I realized I was being too gentle with my whisking.
Chocolate temperature matters for piping. If your melted chocolate is too hot, it will run everywhere when you pipe it. If it’s too cool, it will be stiff and hard to squeeze. Aim for body temperature—it should feel warm but not hot when you touch a tiny drop to your wrist. I learned this after piping a batch that looked like chocolate puddles instead of cat faces.
Don’t overbake. This is the number one mistake I see people make with brownies. They want to make sure they’re done, so they leave them in an extra five minutes, and suddenly they’ve got cake. Pull them out when that toothpick still has a few moist crumbs. They’ll continue cooking slightly from the residual heat in the pan.
Multitasking strategy: While the brownies are baking, set up your decorating station. Get your candy eyes out, prepare your piping bag, and have everything within reach. The actual decorating goes fast once you get going, and you don’t want to be hunting for supplies with chocolate dripping everywhere.
Consistency tip: If you want perfectly even brownies, use a kitchen scale for your ingredients. I resisted this for years, but honestly, it makes such a difference. Flour can vary so much depending on how you scoop it, and that affects the texture dramatically.
Variations & Adaptations
One of the best things about this recipe is how easy it is to change up. Here are some variations I’ve tried and loved.
White Chocolate Cats: Instead of dark chocolate for the decorations, use white chocolate chips with a drop of black food coloring to make gray cats. The contrast against the dark brownies is stunning, and honestly, gray cats are just as cute as black ones. My sister-in-law requests these every year now.
Pumpkin Spice Brownies: Add 1 teaspoon of pumpkin pie spice to the dry ingredients and swap the vanilla extract for maple extract. The warm spices pair beautifully with the chocolate, and it makes the whole kitchen smell like fall. I made these for a Halloween potluck last year, and someone asked if they could buy a whole pan from me.
Gluten-Free Version: Use a 1:1 gluten-free baking flour blend. I’ve tested this with Bob’s Red Mill and King Arthur Measure for Measure, and both work well. The texture is slightly more delicate, so let them cool completely before cutting. Also, the baking time might be a minute or two shorter, so start checking early.
Vegan Adaptation: Replace the butter with vegan butter, use flax eggs (1 tablespoon ground flaxseed mixed with 3 tablespoons water per egg), and use dairy-free chocolate chips. The texture will be a bit denser, but the flavor is still amazing. I brought these to a friend’s vegan Halloween party, and they were gone in twenty minutes.
Peanut Butter Swirl: Before baking, drop spoonfuls of peanut butter on top of the batter and swirl it in with a knife. The peanut butter creates these beautiful marbled pockets that taste incredible with the chocolate. Just don’t over-swirl, or you’ll lose the pattern entirely.
Serving & Storage Suggestions
These brownies shine at room temperature. The texture is at its fudgy best when they’ve had time to fully set after decorating—usually about an hour after you finish piping the cat faces.
Serving temperature: I personally love them at room temperature, but if you want an extra treat, warm them in the microwave for about 10 seconds. The chocolate gets slightly melty, and the brownie becomes almost pudding-like in the center. It’s dangerous how good this is.
What to serve with them: A tall glass of cold milk is the classic pairing, and honestly, it’s perfect. For adults, a scoop of vanilla ice cream on the side turns these into an indulgent dessert. I’ve also served them with a drizzle of caramel sauce and a sprinkle of flaky sea salt for something extra special.
Storage instructions: Keep the brownies in an airtight container at room temperature for up to 5 days. Layer them between sheets of parchment paper to prevent the decorations from smudging. Do not refrigerate them—the fridge dries out brownies and makes them crumbly.
Freezing: These freeze beautifully. Wrap individual brownies tightly in plastic wrap, then place them in a freezer-safe bag. They’ll keep for up to 3 months. To thaw, just leave them at room temperature for about an hour. The decorations might get a little condensation on them when thawing, so pat them dry gently with a paper towel.
Flavor development: Honestly, these brownies taste even better the day after you make them. The flavors meld together overnight, and the texture becomes even more fudgy. If you’re making them for a party, I highly recommend baking them a day ahead and decorating them the morning of the event.
Nutritional Information & Benefits
Let’s be real—these are brownies, not health food. But here’s what you should know if you’re keeping track.
Per serving (based on 16 brownies):
- Calories: approximately 285
- Total Fat: 16g
- Saturated Fat: 10g
- Carbohydrates: 34g
- Sugar: 24g
- Protein: 4g
- Fiber: 2g
- Sodium: 115mg
Health highlights: The cocoa powder in these brownies is actually a decent source of antioxidants—specifically flavonoids that support heart health. Dark chocolate in moderation has been linked to improved mood and reduced inflammation. So there’s that.
Dietary considerations: This recipe contains gluten, dairy, and eggs. For allergen-friendly options, check the variations section above. These brownies are not low-carb or keto-friendly due to the sugar content, but they are vegetarian.
My personal perspective: I believe in balance. These brownies are a treat for special occasions, and there’s nothing wrong with enjoying them fully. I make them once or twice a year for Halloween, and they bring so much joy that I don’t worry about the nutritional profile. Sometimes food is about more than just fuel—it’s about making memories.
Conclusion
These Perfect Black Cat Halloween Brownies have become a tradition in my house, and I hope they become one in yours too. They’re proof that sometimes the best recipes come from the simplest ideas—and from listening to the people around us, even when we think we know better.
The combination of fudgy, rich brownies with adorable cat faces is just unbeatable for Halloween. Kids love decorating them, adults love eating them, and everyone loves how impressive they look without requiring any real decorating skills. Honestly, if my niece can pipe these at twelve years old with zero experience, anyone can.
I’d love to hear how yours turn out. Did you try any of the variations? Did your cat faces come out perfect or wonderfully wonky? Drop a comment below and let me know—I read every single one, and I always love seeing what you create. Tag me in your photos too, because seriously, there’s nothing better than seeing a brownie cat face staring back at me from someone else’s kitchen.
Happy Halloween, and happy baking!
Frequently Asked Questions
Can I use a boxed brownie mix instead of making from scratch?
Absolutely! The decorations work on any brownie base. Just bake the boxed mix according to package directions, let it cool completely, and pipe the cat faces on top. The from-scratch version gives you a fudgier texture, but the boxed version is still delicious.
How far in advance can I make these brownies?
You can bake the brownies up to 2 days ahead and store them in an airtight container at room temperature. Decorate them the day you plan to serve them for the freshest-looking cat faces. The decorations stay perfect for about 24 hours before they start to soften slightly.
My chocolate keeps seizing when I melt it. What am I doing wrong?
This usually happens when water gets into the chocolate. Make sure your bowl is completely dry before adding the chocolate chips. Also, don’t microwave for too long at once—20-second bursts with stirring in between is the way to go. Adding the coconut oil helps keep the chocolate smooth and fluid.
Can I use candy melts instead of chocolate chips?
Yes, candy melts work great for decorating because they’re designed to set hard at room temperature. They come in black, which is perfect for these brownies. Just follow the melting instructions on the package. They tend to set faster than chocolate, so work quickly.
How do I get clean cuts without smudging the cat faces?
Use a sharp knife and wipe it clean between each cut with a damp paper towel. Let the chocolate decorations set completely before cutting—at least 20 minutes at room temperature. If you’re in a hurry, pop the brownies in the fridge for 10 minutes to firm up the chocolate before slicing.
Pin This Recipe!
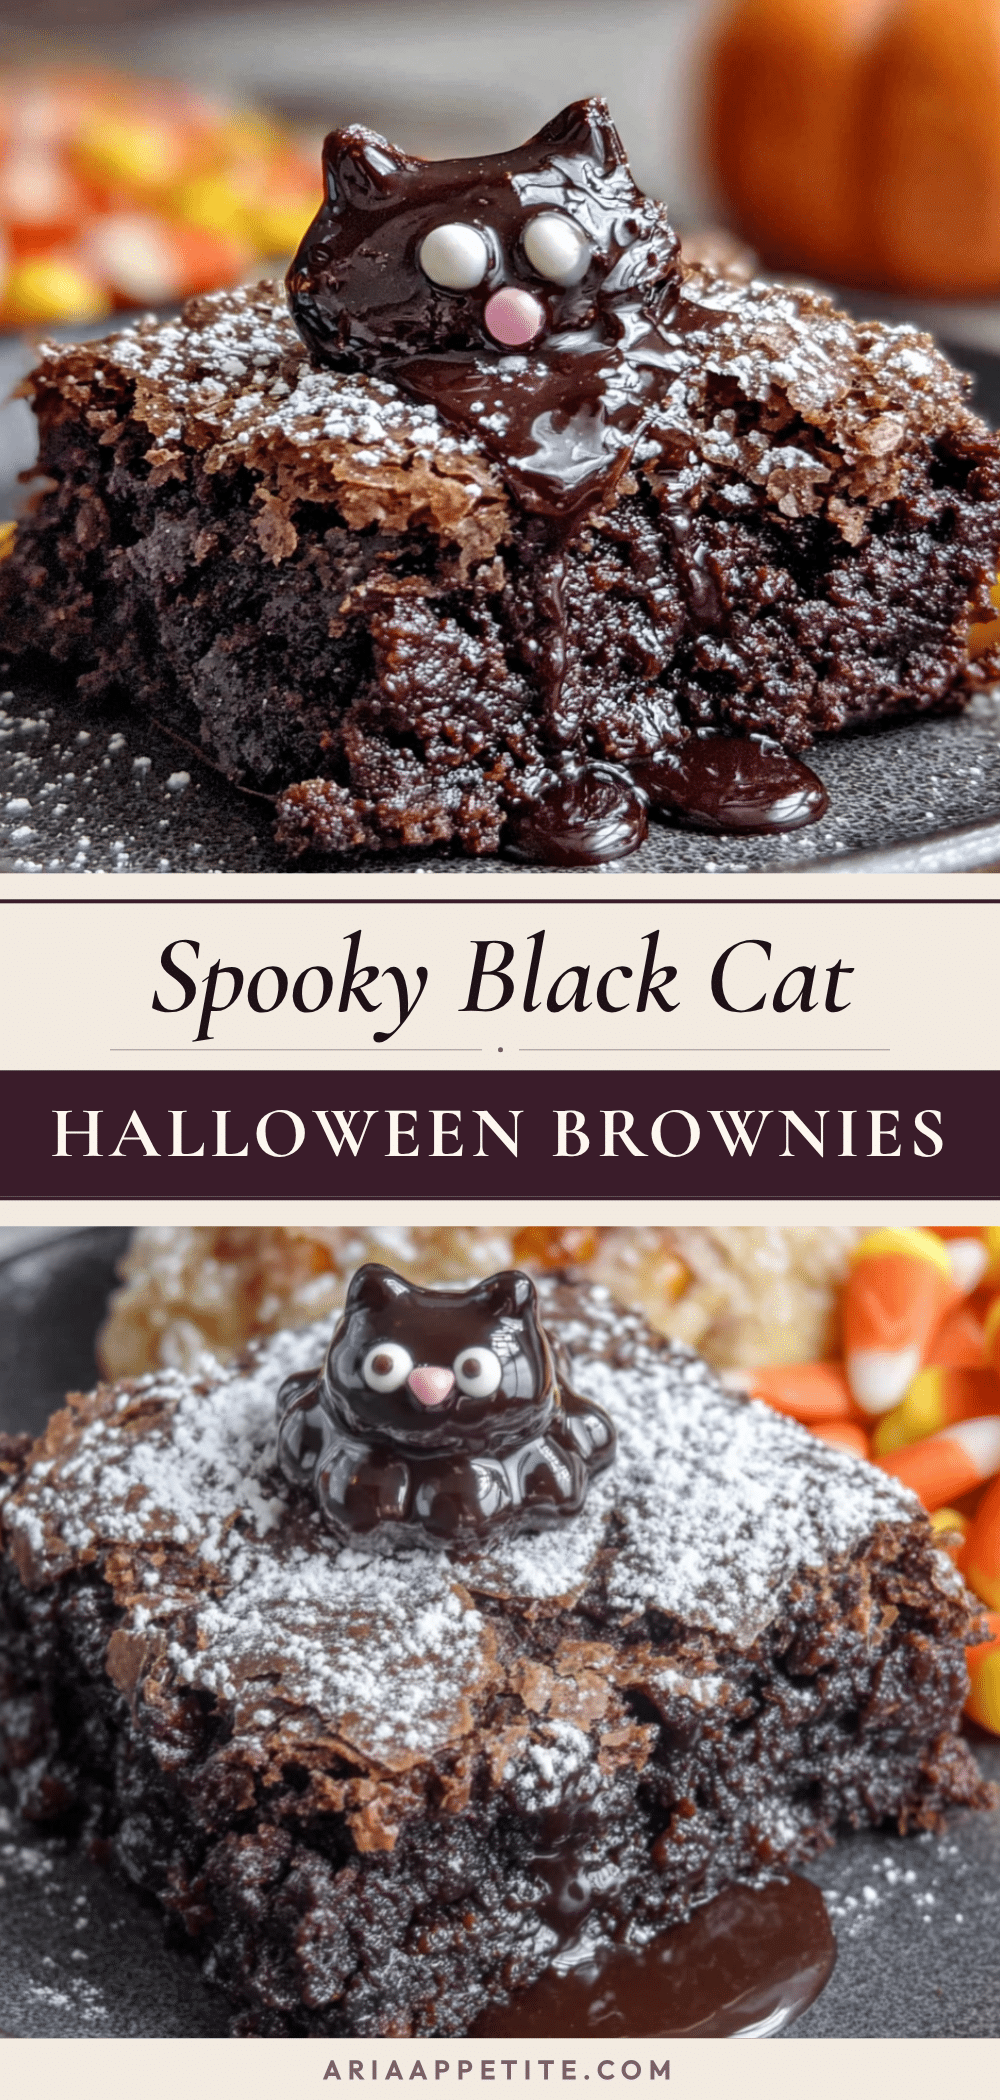
Perfect Black Cat Halloween Brownies: Easy Spooky Treat
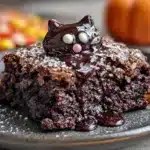
Rich, fudgy brownies topped with adorable black cat faces that come together in minutes. A simple Halloween treat born from a kid’s clever idea, perfect for parties and guaranteed to disappear fast.
- Prep Time: 15 minutes
- Cook Time: 30 minutes
- Total Time: 45 minutes
- Yield: 16 servings 1x
- Category: Dessert
- Cuisine: American
Ingredients
- 1 cup (226g) unsalted butter, melted
- 2 cups (400g) granulated sugar
- 4 large eggs, room temperature
- 1 tablespoon vanilla extract
- 3/4 cup (90g) unsweetened cocoa powder
- 1 cup (125g) all-purpose flour
- 1/2 teaspoon salt
- 1/2 teaspoon baking powder
- 1/2 cup (90g) semi-sweet chocolate chips
- 1 tablespoon coconut oil or vegetable shortening
- 48–60 candy eyes
- Black food coloring gel (optional)
Instructions
- Preheat oven to 350°F (175°C). Line a 9×13 baking pan with parchment paper, leaving overhang. Lightly spray with non-stick spray.
- Melt butter in a large microwave-safe bowl in 30-second bursts. Let cool for 2 minutes.
- Whisk in sugar until glossy and slightly thickened, about 1 minute.
- Add eggs one at a time, whisking well after each. Add vanilla extract and whisk again.
- In a separate bowl, whisk together cocoa powder, flour, salt, and baking powder until no lumps remain.
- Gradually add dry ingredients to wet ingredients, folding gently with a rubber spatula until just combined. Do not overmix.
- Pour batter into prepared pan and spread evenly.
- Bake for 25-30 minutes, until a toothpick inserted in center comes out with a few moist crumbs.
- Cool in pan for 10 minutes, then lift out onto a wire rack to cool completely.
- While brownies cool, melt chocolate chips and coconut oil in a small microwave-safe bowl in 20-second bursts, stirring until smooth. Add black food coloring if desired.
- Transfer melted chocolate to a piping bag or zip-top bag. Snip a tiny corner off.
- Pipe cat faces onto cooled brownies: small circle for head, two triangles for ears, two dots for eyes. Place candy eyes on dots while chocolate is wet. Pipe tiny nose and whiskers.
- Let chocolate set completely, about 20 minutes at room temperature or 10 minutes in the fridge.
- Cut into squares using a sharp knife, wiping clean between cuts.
Notes
For the crackly top, whisk sugar and butter thoroughly. Don’t overbake; pull brownies when toothpick has moist crumbs. Chocolate for piping should be warm but not hot. Wonky cat faces are cuter. Brownies taste even better the next day.
Nutrition
- Serving Size: 1 brownie
- Calories: 285
- Sugar: 24
- Sodium: 115
- Fat: 16
- Saturated Fat: 10
- Carbohydrates: 34
- Fiber: 2
- Protein: 4
Keywords: Halloween brownies, black cat brownies, spooky treats, fudgy brownies, easy Halloween dessert