Love this? Save it for later!
Share the inspiration with your friends
I had never, in my entire adult life, considered making anything other than a sheet pan of plain Rice Krispie treats. They were a last-minute dessert, a sticky, buttery mess that I’d press into a pan and forget about until someone asked for something sweet. Honestly, they felt a little… boring. Then, last October, my best friend called me in a panic. Her son’s classroom Halloween party was the next morning, and she had promised to bring a festive treat. She had zero time, zero energy, and a sudden, desperate need for something that looked impressive but took almost no effort. I told her to grab a box of cereal and a bag of marshmallows, and I’d figure it out. That night, standing over my stove, I realized I was having more fun than I expected. I was cutting the marshmallow mixture into little pumpkin shapes, and I couldn’t stop laughing at how cute they were. I mean, I was genuinely grinning at a blob of orange food coloring. I sent her a photo, and she replied with a string of exclamation points that crashed my phone. The next day, she texted me a photo of an empty plate with the caption “Gone in 60 seconds.” That’s the moment I knew I had stumbled onto something special. These Easy Halloween Jack-o-Lantern Rice Krispie Treats are the result of that accidental kitchen experiment, and they’ve become my go-to for every fall gathering since. They’re proof that you don’t need fancy piping bags or complicated techniques to make something that feels truly festive. Maybe you’ve been there—staring at a Pinterest board full of elaborate desserts and feeling totally overwhelmed. Let me tell you, this is the recipe that saves the day.
Why You’ll Love This Recipe
These aren’t just another batch of cereal bars. They are a complete Halloween game-changer, and here is why you will keep coming back to this recipe year after year:
- Quick & Easy: From start to finish, you are looking at about 20 minutes of active work. No baking, no complicated steps. It’s the perfect project for a busy weeknight or a last-minute classroom treat.
- Simple Ingredients: You likely have everything you need in your pantry right now. There are no weird extracts or hard-to-find candies. Just butter, marshmallows, cereal, and a few drops of gel food coloring.
- Perfect for Halloween Parties: These little pumpkins are the star of any potluck, classroom celebration, or spooky movie night. They look like you spent hours, but we both know the secret.
- Crowd-Pleaser: Kids absolutely go crazy for them, and adults can’t resist grabbing one (or three). They are nostalgic, fun, and just the right amount of sweet.
- Unbelievably Delicious: The classic, buttery, marshmallow flavor is still there, but shaping them into pumpkins makes them taste even better. It’s a psychological thing, I swear.
What makes this recipe different from all the other pumpkin-shaped treats out there? It’s the technique. I’ve tested this a dozen times to find the perfect ratio of butter to marshmallow so the treats stay soft and chewy, not rock-hard. I also use a specific method for shaping them that keeps your hands from turning into a sticky, orange mess. This isn’t just another version of a Rice Krispie treat—it’s my best version, honed through trial and error (and more than a few sticky fingers). This recipe is comfort food reimagined for the Halloween season. It’s the kind of treat that makes you close your eyes after the first bite, because it tastes exactly like childhood, but with a festive twist. It’s perfect for impressing the other parents at the school party without adding stress to your already busy day.
What Ingredients You Will Need
This recipe relies on a handful of pantry staples to create a magical, festive treat. The key is using high-quality ingredients where it counts, and knowing when a simple swap works just fine. Here is everything you need:
- Unsalted Butter (6 tablespoons): This is the foundation of the flavor. I always use unsalted so I can control the salt level. If you only have salted butter on hand, just skip the pinch of salt I mention later. (Adds richness and prevents the treats from being too hard)
- Mini Marshmallows (10 oz bag, plus 4 cups for later): This is a two-step process. The first bag melts down to create the sticky base. The second addition of marshmallows, stirred in after the butter mixture is off the heat, gives the treats that signature gooey texture and prevents them from becoming dense bricks. I prefer the name brand for consistent melting, but store brands work fine.
- Orange Gel Food Coloring (about ½ teaspoon): This is non-negotiable for the pumpkin look. Liquid food coloring will water down the marshmallow mixture and give you a pale, sad orange. Gel coloring is concentrated and creates a vibrant, fun color. I use the Wilton brand, but any gel will work.
- Crispy Rice Cereal (6 cups): The classic choice. I find that the generic store brands work just as well as the name brand here, so save your money. Do not use puffed rice or a different cereal texture, as it will change the final consistency.
- Pinch of Salt: A tiny pinch balances the intense sweetness of the marshmallows. It’s a small detail that makes a big difference.
- Pretzel Sticks (for the stems): These make the perfect little pumpkin stems. Break them into 1-inch pieces. You can also use small pieces of green licorice or a mini chocolate wafer, but pretzels give that nice salty crunch.
- Green Candy Melts or M&Ms (for the leaves): A small green leaf at the top of the stem completes the look. I use green candy melts (melted and piped), but a simple green M&M or a green jelly bean works perfectly for a no-fuss option.
Ingredient Selection Tip: For the best texture, look for a bag of mini marshmallows that feels soft and fresh. Stale marshmallows will be harder to melt and can lead to a grainy texture. Also, if you are making these for a party with dietary restrictions, you can use a vegan butter and a vegan marshmallow brand (like Dandies) with excellent results. The treats will still be perfectly soft and delicious.
Equipment Needed
You don’t need a fancy kitchen to pull these off. Here is what you will need to make the process smooth and (mostly) mess-free:
- Large Microwave-Safe Bowl or Large Pot: If using the microwave, make sure the bowl is big enough to hold all the cereal without spilling over. If using the stovetop, a large Dutch oven or heavy-bottomed pot works best.
- Rubber Spatula: A sturdy, heat-resistant spatula is your best friend here. It will help you fold everything together without scratching your bowl. I’ve ruined a few cheap spatulas on hot marshmallow, so invest in a good one.
- 9×13-inch Baking Pan: This is the perfect size for shaping the treats. You can also use a 9×9 pan for thicker treats, but you will need to adjust the cutting time.
- Parchment Paper or Plastic Wrap: Lining your pan is crucial. It prevents the treats from sticking and makes cleanup a breeze. I prefer parchment paper because it’s sturdier.
- Sharp Knife or Bench Scraper: A sharp, greased knife makes clean cuts. A bench scraper is even better for getting straight edges.
- Small Bowl of Water: This is my secret weapon. Dipping your fingers in water when pressing the mixture into the pan prevents the sticky marshmallow from gluing your hands together.
Budget-Friendly Options: Don’t have a 9×13 pan? You can use a large cutting board or a clean countertop. Just grease it well or line it with parchment. A pizza cutter also works surprisingly well for cutting the treats.
Preparation Method
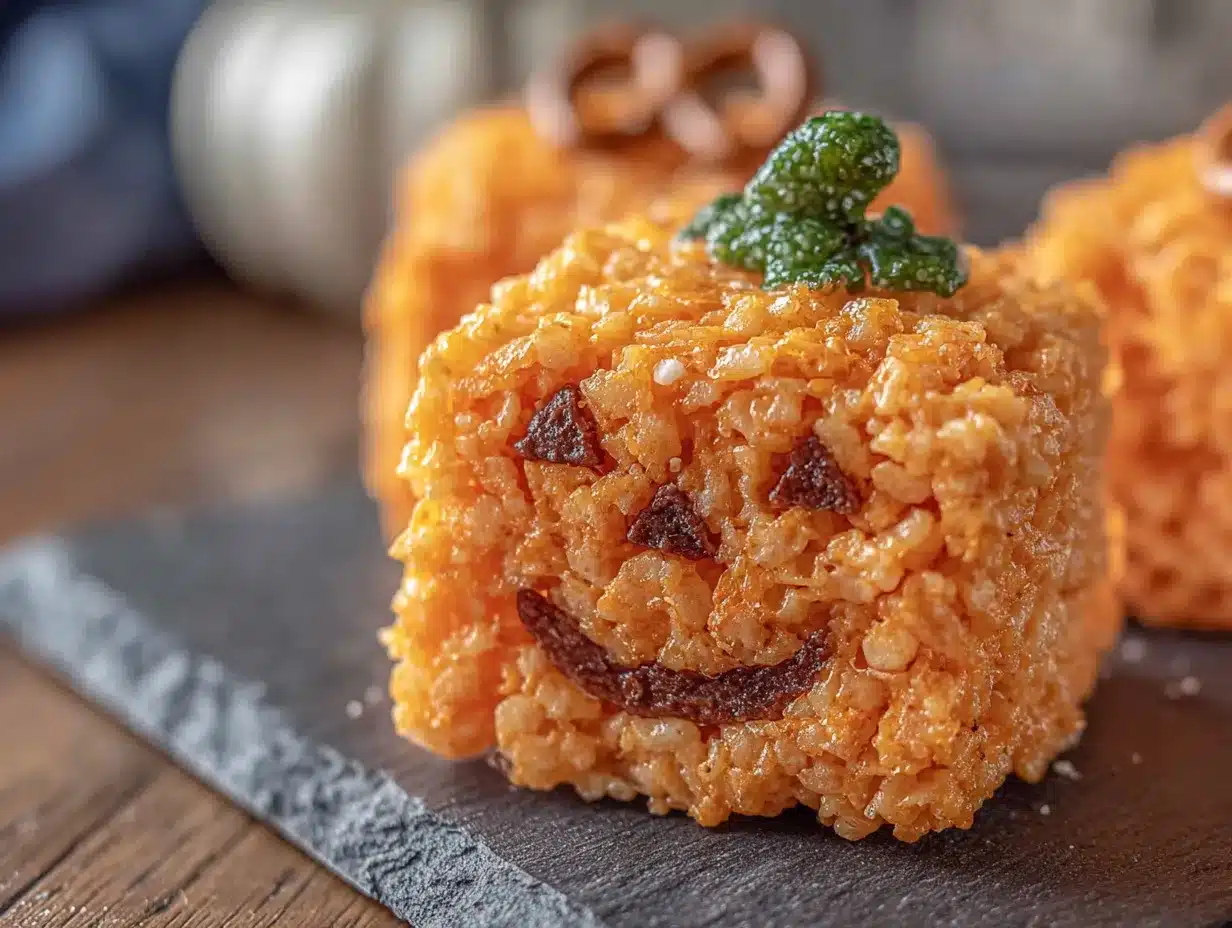
Follow these steps carefully, and you will have perfect little pumpkins in no time. I’ve included all my hard-won tips to make sure you don’t end up with a sticky disaster.
- Prep Your Pan: Line a 9×13-inch baking pan with parchment paper, leaving a bit of overhang on two sides. This will serve as handles to lift the treats out later. Lightly spray the parchment with non-stick cooking spray. Set aside.
- Melt the Butter and First Batch of Marshmallows: In a large microwave-safe bowl, combine the 6 tablespoons of unsalted butter and the first 10 oz bag of mini marshmallows. Microwave on high for 1 minute. Stir. If the mixture isn’t fully melted, microwave in 30-second increments, stirring in between, until smooth and glossy. Be careful not to overheat, or the mixture will become tough.
- Add the Second Batch of Marshmallows and Color: Immediately stir in the remaining 4 cups of mini marshmallows and the pinch of salt. The residual heat will start to melt them, but you want some chunks to remain. This is the secret to soft, gooey treats. Now, add about ½ teaspoon of orange gel food coloring. Stir vigorously until the color is evenly distributed. The mixture will look slightly marbled at first, but keep folding. If the color looks too pale after mixing, add a tiny drop more. Remember, the color will lighten slightly once you add the cereal.
- Fold in the Cereal: Add the 6 cups of crispy rice cereal to the bowl. Using your rubber spatula, gently fold the cereal into the marshmallow mixture. Start from the bottom and work your way up. Be gentle—you don’t want to crush all the cereal into dust. Fold until every piece is coated. This is a workout for your arm, but it’s worth it.
- Press into the Pan: Scrape the mixture into your prepared pan. Wet your fingers with a little water (this is a game-changer) and gently press the mixture into an even layer. Don’t press too hard, or the treats will become dense and hard. You just want a flat, even surface. If the mixture is too sticky, wet your fingers again.
- Cool and Cut: Let the treats cool completely at room temperature. This takes about 30-45 minutes. Do not put them in the fridge, or they will become hard. Once cool, use the parchment overhang to lift the block out of the pan. Place it on a cutting board. Using a sharp knife or bench scraper, cut the block into 12 even rectangles. I usually cut three rows by four rows. Wipe the knife clean between cuts for the cleanest edges.
- Shape the Pumpkins: Take one rectangle and gently round the corners with your fingers to form a pumpkin shape. It doesn’t have to be a perfect circle—a slightly oblong shape looks more natural. Repeat with all the pieces. If the treats start to stick to your hands, just wet your fingers again.
- Add the Stem and Leaf: Gently push a 1-inch piece of pretzel stick into the top center of each pumpkin. For the leaf, either press a green M&M next to the stem or pipe a small green leaf using melted green candy melts. If using candy melts, melt them according to package directions, transfer to a small zip-top bag, snip a tiny corner, and pipe a small leaf shape. Let the candy set for a few minutes.
Sensory Cue: When you are folding the marshmallow mixture, it should look like a thick, glossy, orange lava. When you press it into the pan, it should feel soft and pliable, not stiff and dry.
Cooking Tips & Techniques
Over the years, I have made every mistake in the book with these treats. Here is what I learned so you don’t have to repeat my errors.
The Biggest Mistake: Overheating the Marshmallows. I cannot stress this enough. If you melt the marshmallows too long or at too high a heat, the sugar will seize, and you will end up with a hard, crumbly mess that is impossible to shape. Always melt on medium heat (or 50% power in the microwave) and stop as soon as the mixture is smooth. The residual heat will finish the job.
The Second Biggest Mistake: Pressing Too Hard. I used to press the mixture into the pan with all my strength, thinking I was making them more compact. I was actually making them rock-hard. A gentle, even press is all you need. You want them to hold together, not feel like a hockey puck.
Timing Strategy: These treats are best made the day you plan to serve them, but you can get ahead. I often make the base, press it into the pan, and let it cool. Then, I cut and decorate them the next morning. It takes about 10 minutes to finish them. This is a lifesaver for morning school parties.
Consistency Check: If your mixture looks dry after adding the cereal, you might have overheated the marshmallows. Next time, add a tablespoon of butter to the mixture to help loosen it. If it looks too wet and sticky, you can add a small handful of extra cereal to balance it out.
Variations & Adaptations
This recipe is a fantastic base for all kinds of Halloween creativity. Here are a few ways I’ve adapted it over the years:
- Ghostly White Treats: Skip the orange food coloring entirely. Shape the treats into ghost shapes (use a ghost cookie cutter or just freehand a rounded top). Use mini chocolate chips for eyes and a mouth. It’s a fun, spooky twist.
- Chocolate Pumpkin Spice: Before adding the cereal, stir in ¼ cup of unsweetened cocoa powder and 1 teaspoon of pumpkin pie spice. The chocolate-orange combo is surprisingly delicious. It gives the treats a more sophisticated, fall flavor.
- Vegan & Gluten-Free Version: As I mentioned, use a vegan butter and vegan marshmallows (Dandies are a great option). Check the label on your crispy rice cereal, as some brands contain malt flavoring that isn’t gluten-free. Most standard brands are, but it’s always worth a double-check. The taste and texture are identical to the original.
- Peanut Butter Pumpkins: Melt ¼ cup of creamy peanut butter with the butter and marshmallows. This adds a salty, nutty depth that pairs beautifully with the sweet cereal. Be sure to stir it in thoroughly.
I once made a batch of these with a friend who is allergic to dairy. We used a coconut oil-based butter and oat milk marshmallows, and honestly? I couldn’t tell the difference. They were just as soft and delicious. Don’t be afraid to experiment.
Serving & Storage Suggestions
These treats are best served at room temperature. The texture is perfectly soft and chewy. I like to arrange them on a platter lined with orange or black napkins for a festive touch. They look amazing next to a bowl of candy corn or some caramel apples.
Storage: Store any leftover treats in an airtight container at room temperature. They will stay fresh for up to 3 days. Do not refrigerate them, as the cold air will make them hard and stale. I like to layer them between sheets of parchment paper to prevent them from sticking together.
Freezing: You can freeze these treats for up to 3 months. Wrap each one individually in plastic wrap, then place them in a freezer-safe bag or container. To thaw, simply leave them on the counter for about 15 minutes. They will taste just as fresh as the day you made them. This is a great way to get ahead for a big party.
Flavor Development: Honestly, these treats are best on day one. The marshmallow is at its peak softness, and the cereal is perfectly crunchy. By day two, they are still delicious, but the cereal will have softened slightly. If you are making them ahead, I recommend waiting to add the pretzel stems and green leaves until just before serving, as the pretzels can get a bit soft from the moisture in the treats.
Nutritional Information & Benefits
Let’s be real—these are a treat, not a health food. But that doesn’t mean they can’t be part of a balanced life. Here is a rough estimate per serving (based on 12 servings):
- Calories: Approximately 280
- Fat: 9g
- Carbohydrates: 48g
- Sugar: 28g
- Protein: 2g
Health Benefits: While they are sugary, the crispy rice cereal does provide a small amount of iron and B vitamins. The butter adds a bit of vitamin A. The real benefit here is the joy they bring. A small, festive treat can be a wonderful way to celebrate a holiday and create happy memories with your family. I believe in enjoying food without guilt, and these treats are a perfect example of that philosophy.
Dietary Considerations: As mentioned, this recipe can easily be made vegan and gluten-free. It is nut-free if you use a nut-free butter alternative. The main allergens are dairy (from the butter) and gluten (from the cereal, depending on the brand). Always check labels if you are serving someone with a severe allergy.
Conclusion
These Easy Halloween Jack-o-Lantern Rice Krispie Treats are more than just a dessert. They are a little moment of joy in a busy season. They are proof that you don’t need to be a professional baker to create something that makes people smile. Whether you are making them for a classroom party, a family movie night, or just because you want to feel a little festive, they are guaranteed to be a hit. I love that this recipe is forgiving, adaptable, and always, always delicious. It’s the kind of recipe that becomes a tradition. So go ahead, get a little sticky, and make some pumpkins. And when you do, I want to hear about it! Leave a comment below and tell me how yours turned out. Did you add a special twist? Did the kids help you shape them? Share your photos on social media and tag me—I love seeing your creations. Happy Halloween, and happy snacking!
Frequently Asked Questions
Can I use liquid food coloring instead of gel?
I really don’t recommend it. Liquid food coloring adds extra water to the marshmallow mixture, which can make the treats sticky and prevent them from setting properly. Gel food coloring is concentrated and gives you that vibrant orange color without affecting the texture. It is worth the small investment.
My treats turned out rock hard. What went wrong?
This is usually a result of overheating the marshmallows or pressing the mixture into the pan too firmly. Next time, melt the marshmallows on lower heat and stop as soon as they are smooth. When you press them into the pan, use a gentle hand. A little water on your fingers will help you get an even layer without crushing the cereal.
Can I make these without a microwave?
Absolutely. Use a large pot on the stovetop over low heat. Melt the butter first, then add the marshmallows. Stir constantly with a rubber spatula until everything is smooth. The process is the same from there. Just be careful not to let the mixture burn on the bottom.
How far in advance can I make these?
You can make the base treats up to 2 days in advance. Store them in an airtight container at room temperature. I recommend waiting to add the pretzel stems and green leaves until the day you plan to serve them, as the pretzels can soften over time. The decorated treats are best enjoyed within 24 hours.
Can I use a different cereal?
You can, but the texture will change. A similar crispy rice cereal (like a generic store brand) works perfectly. Do not use puffed rice, which is too light, or a flaked cereal, which will get soggy. For a fun twist, you can use a chocolate crispy rice cereal for a darker pumpkin look!
Pin This Recipe!
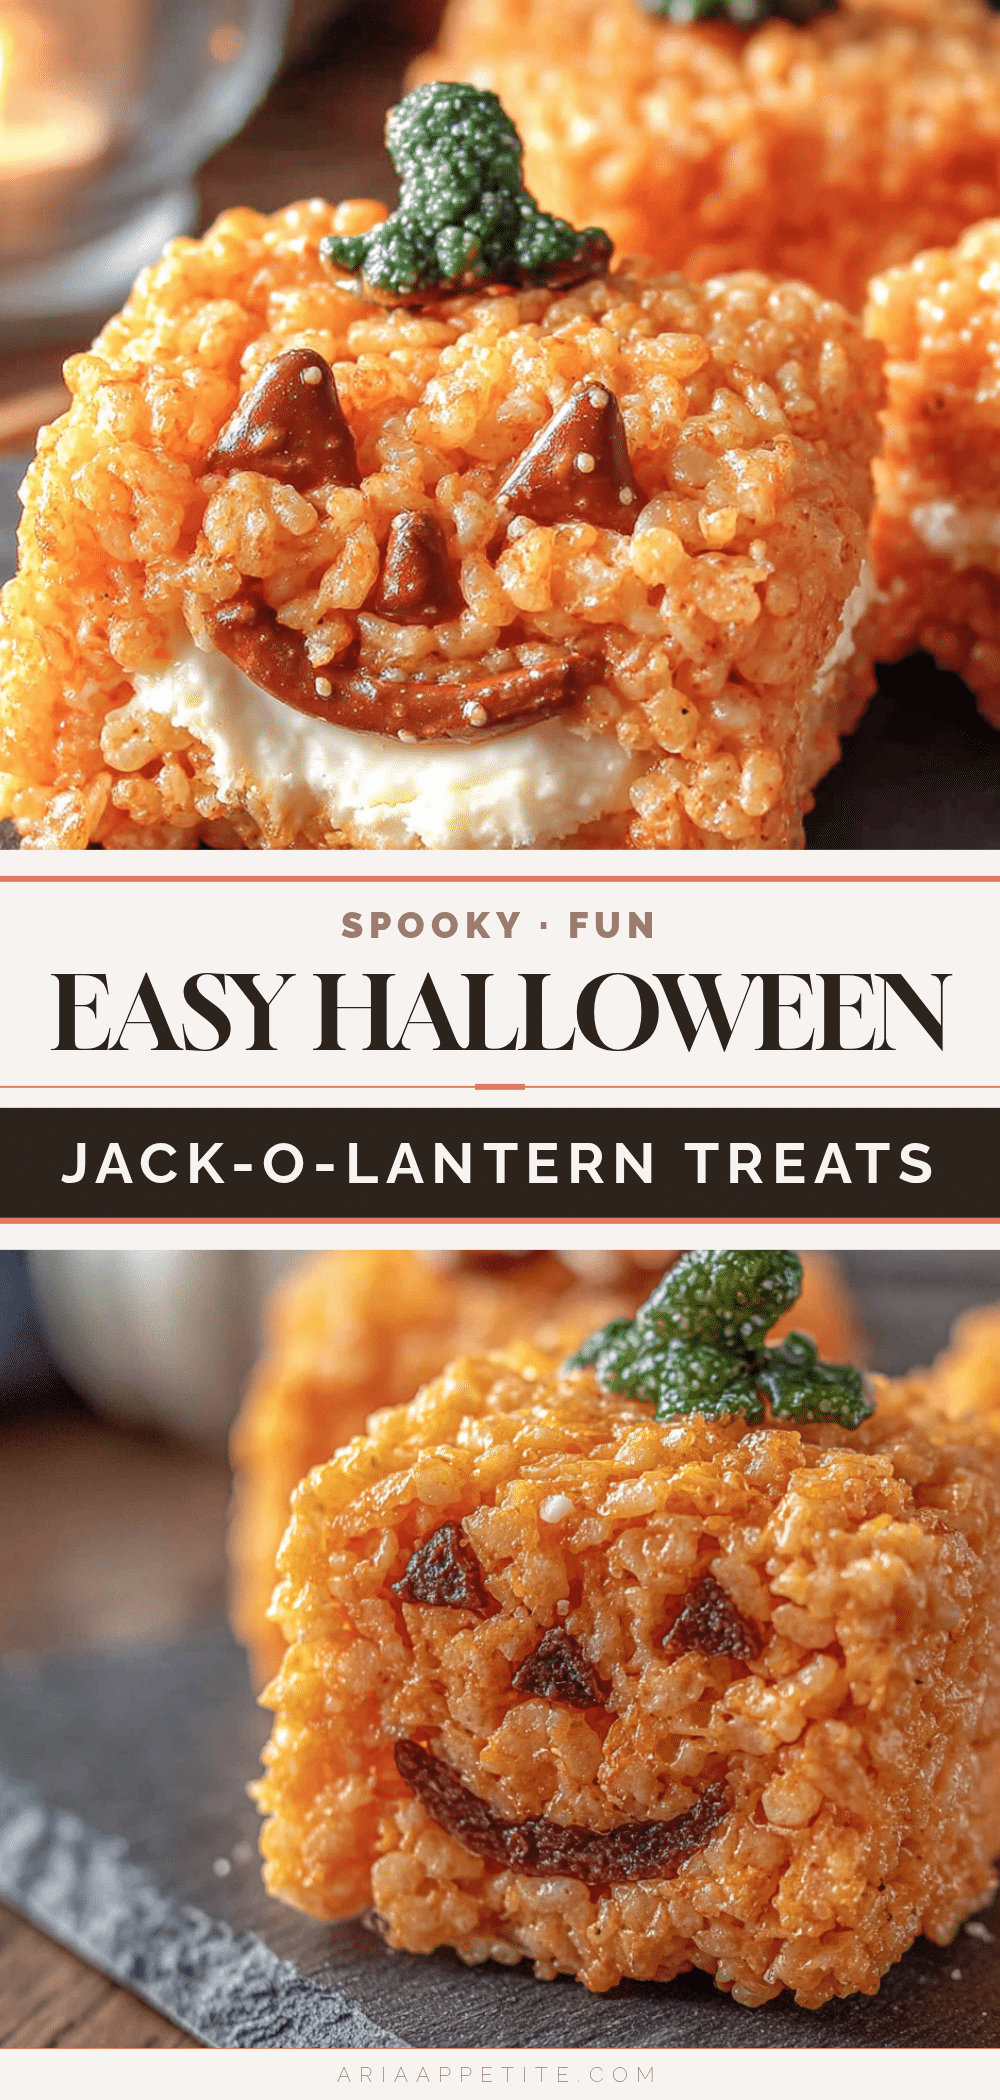
Easy Halloween Jack-o-Lantern Rice Krispie Treats
These Easy Halloween Jack-o-Lantern Rice Krispie Treats are a festive, no-bake dessert perfect for classroom parties or spooky movie nights. Made with simple ingredients and shaped into cute pumpkins, they’re a crowd-pleaser that looks impressive but takes almost no effort.
- Prep Time: 20 minutes
- Cook Time: 5 minutes
- Total Time: 25 minutes (plus 30-45 minutes cooling)
- Yield: 12 servings 1x
- Category: Dessert
- Cuisine: American
Ingredients
- 6 tablespoons unsalted butter
- 10 oz bag mini marshmallows (plus 4 cups for later)
- ½ teaspoon orange gel food coloring
- 6 cups crispy rice cereal
- Pinch of salt
- Pretzel sticks (for stems)
- Green candy melts or M&Ms (for leaves)
Instructions
- Line a 9×13-inch baking pan with parchment paper, leaving overhang on two sides. Lightly spray with non-stick cooking spray.
- In a large microwave-safe bowl, combine 6 tablespoons unsalted butter and the first 10 oz bag of mini marshmallows. Microwave on high for 1 minute. Stir. If not fully melted, microwave in 30-second increments, stirring in between, until smooth and glossy.
- Immediately stir in the remaining 4 cups of mini marshmallows and a pinch of salt. Add about ½ teaspoon of orange gel food coloring. Stir vigorously until color is evenly distributed.
- Add 6 cups of crispy rice cereal. Gently fold with a rubber spatula until every piece is coated.
- Scrape mixture into prepared pan. Wet fingers with water and gently press into an even layer. Do not press too hard.
- Let cool completely at room temperature (30-45 minutes). Do not refrigerate.
- Use parchment overhang to lift block out of pan. Cut into 12 even rectangles (3 rows by 4 rows).
- Round corners of each rectangle with fingers to form pumpkin shapes.
- Gently push a 1-inch piece of pretzel stick into top center of each pumpkin for stem. Add a green M&M or piped green candy melt leaf next to stem.
- If using candy melts, melt according to package directions, transfer to a small zip-top bag, snip a tiny corner, and pipe small leaf shapes. Let set for a few minutes.
Notes
Do not overheat marshmallows or press mixture too hard to avoid hard treats. Best served day of making. Store in airtight container at room temperature for up to 3 days. Can be frozen for up to 3 months. Add pretzel stems and leaves just before serving to prevent softening.
Nutrition
- Serving Size: 1 pumpkin treat
- Calories: 280
- Sugar: 28
- Sodium: 180
- Fat: 9
- Saturated Fat: 5
- Carbohydrates: 48
- Protein: 2
Keywords: Halloween treats, Rice Krispie treats, pumpkin treats, no-bake dessert, easy Halloween recipe, kids party food