Love this? Save it for later!
Share the inspiration with your friends
I used to think trifles were just fancy layered desserts that took way too much effort for what you got. Honestly, I’d scroll past them on Pinterest thinking, “That’s pretty, but who has the time?” Then my neighbor, a sweet woman named Carol who gardens like a professional, showed up at my door last July with a glass bowl full of something so beautiful I almost didn’t want to eat it. Almost.
“Just try a spoonful,” she said, practically shoving it into my hands. I took a bite—and let me tell you, I stood there on my front porch, fork halfway to my mouth again, completely caught off guard. The creamy layers, the burst of fresh berries, the soft cake soaking up all that goodness. I asked for the recipe right then and there, and she laughed at me. “I knew you’d come around.”
She was right. I’d been avoiding trifles for years, thinking they were fussy and finicky. But this red white and blue berry trifle changed my mind completely. It’s the kind of dessert that makes people stop mid-conversation and just stare at the table. You know that feeling when something looks too good to eat, but tastes even better than it looks? That’s this recipe.
I’ve made it every Labor Day since, and it never lasts more than twenty minutes on the counter. The best part? It’s actually simple to put together. No complicated techniques, no special skills required. Just layers of fresh berries, creamy filling, and tender cake that come together into something truly special. Let me show you how it’s done.
Why You’ll Love This Recipe
This isn’t just another pretty dessert. After testing this recipe about six times (Carol was very patient with my phone calls), I can tell you exactly why it works so well.
- Perfect for Labor Day: The red, white, and blue colors are made for patriotic holidays, and it serves a crowd without any last-minute fuss.
- No-Bake Wonder: You don’t even need to turn on the oven. On a hot September day, that’s a game-changer.
- Make-Ahead Friendly: This trifle actually gets better after a few hours in the fridge. You can assemble it the morning of your party and forget about it.
- Simple Ingredients: Everything comes from a regular grocery store. No hunting down specialty items.
- Completely Customizable: Use whatever berries look best, swap the cake, change the filling—it’s forgiving and flexible.
- Crowd-Pleaser: I’ve served this to kids, grandparents, and everyone in between. The bowl is always scraped clean.
What makes this version different from all the other berry trifles out there? It’s the balance. The filling isn’t too sweet, the berries are allowed to shine, and the texture is just right—not soggy, not dry. I spent a lot of time figuring out how to keep the cake from turning into mush while still letting it soak up that creamy goodness. The trick is in how you layer and how long you let it sit.
This is the kind of dessert that makes you close your eyes after the first bite. It’s comfort food dressed up in its holiday best, but it still feels like home.
What Ingredients You Will Need
This recipe uses simple, fresh ingredients to create something that looks and tastes impressive. Most of these are probably already in your kitchen, or easy to grab on a quick grocery run.
For the Cream Layer:
- 2 cups heavy whipping cream (cold, for best volume)
- 8 ounces cream cheese, softened to room temperature
- 1 cup powdered sugar
- 1 teaspoon vanilla extract
- 1/4 cup sour cream (adds a subtle tang that balances the sweetness)
For the Berry Layers:
- 2 cups fresh strawberries, hulled and sliced
- 2 cups fresh blueberries
- 2 cups fresh raspberries
- 1 tablespoon granulated sugar (optional, use if berries are tart)
- 1 tablespoon lemon juice (brightens the berry flavor)
For the Cake Base:
- 1 store-bought pound cake or angel food cake (about 10-12 ounces)
- You can use homemade if you prefer, but I honestly love how Sara Lee pound cake holds up in this recipe
For Garnish:
- Fresh mint leaves (optional, but pretty)
- Extra berries for the top
- White chocolate shavings (if you’re feeling fancy)
A few notes on ingredients: Use the heaviest cream you can find—whipping cream with at least 36% milk fat will give you the best volume. For the berries, look for ones that are firm and not mushy. If strawberries are out of season, you can use frozen, but thaw and drain them first to avoid watery layers. I’ve used both Philadelphia and store-brand cream cheese, and honestly, they both work fine as long as it’s softened properly.
Equipment Needed
You don’t need much special equipment for this recipe, which is part of why I love it.
- A large glass trifle bowl: A 4-quart bowl works perfectly. If you don’t have one, a large glass salad bowl or even a wide-mouth jar works for a smaller version.
- Electric mixer: Hand mixer or stand mixer both work. You could whip the cream by hand, but your arm will thank you for using a mixer.
- Large mixing bowls: You’ll need at least two—one for the cream mixture and one for the berries.
- Spatula: A rubber spatula for folding and spreading.
- Sharp knife and cutting board: For slicing strawberries and cake.
- Measuring cups and spoons: Accuracy matters, especially with the cream.
If you don’t have a trifle bowl, don’t run out and buy one. I used a clear glass casserole dish the first time I made this, and it looked just as pretty. The key is seeing the layers, so anything transparent works.
Preparation Method
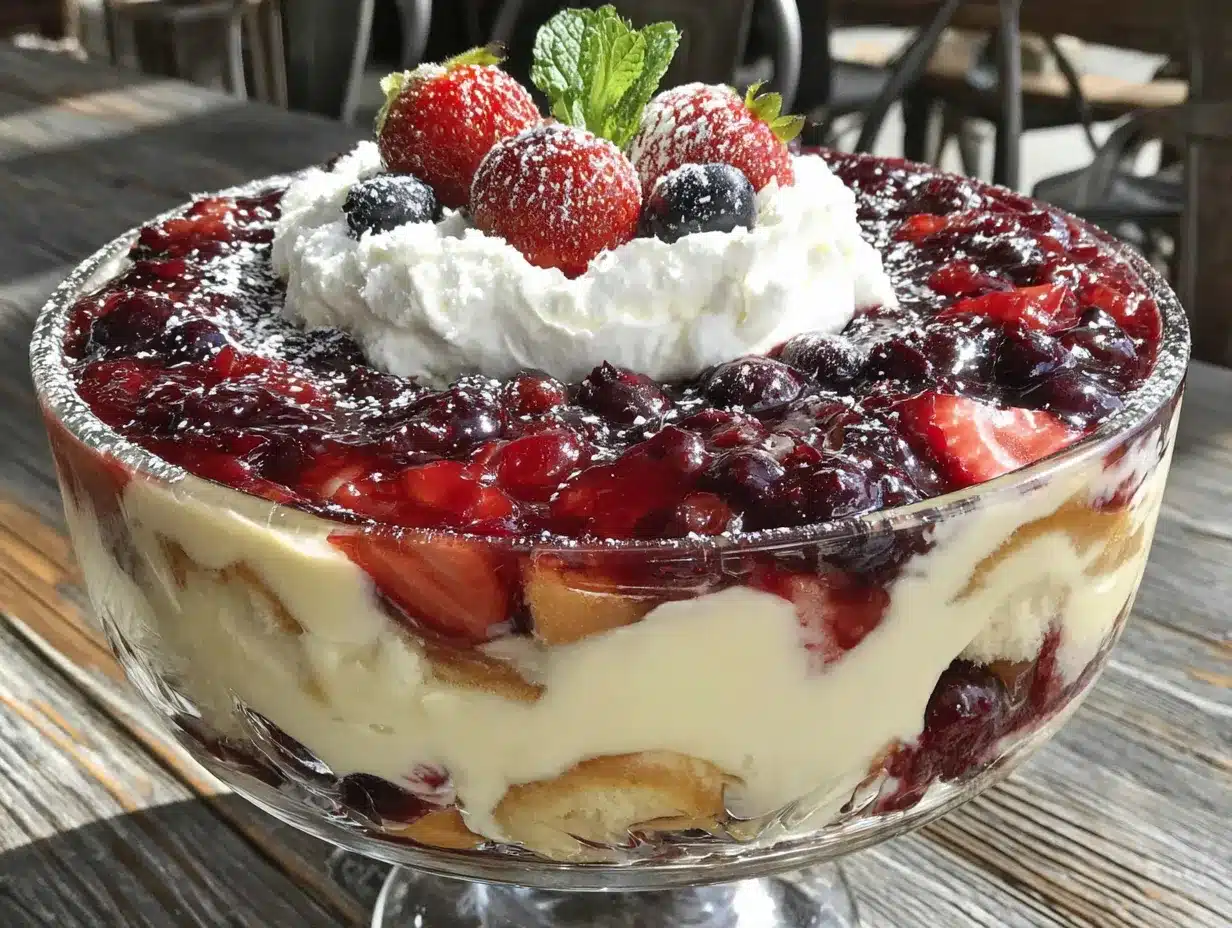
Take your time with this one. The layers are where the magic happens, and rushing leads to messy results. Trust me, I learned that the hard way.
- Prep the berries: Wash all berries gently and pat them dry with paper towels. Slice the strawberries into even pieces, about 1/4 inch thick. Toss all berries with lemon juice and sugar if using. Set aside about 1/2 cup of mixed berries for topping later. Let them sit for 10 minutes while you prepare everything else.
- Make the cream filling: In a large mixing bowl, beat the softened cream cheese with an electric mixer until smooth and fluffy, about 2 minutes. Add the powdered sugar and vanilla, then beat until combined. Scrape down the sides of the bowl with your spatula.
- Whip the cream: In a separate cold bowl, pour the heavy cream. Beat on medium-high speed until soft peaks form—this takes about 3-4 minutes with a hand mixer. You want the cream to hold its shape but still be soft and billowy. Stop before it turns into butter!
- Fold it together: Gently fold the whipped cream into the cream cheese mixture in three additions. Add the sour cream and fold just until combined. Don’t overmix or you’ll deflate all that air. The mixture should be light, creamy, and spreadable.
- Cut the cake: Slice the pound cake into 1-inch cubes. You should have about 4-5 cups of cake cubes. If the cake is very soft, you can toast the cubes lightly on a baking sheet at 350°F for 5 minutes to help them hold up better in the layers.
- Start layering: Place a single layer of cake cubes at the bottom of your trifle bowl. Press them down gently to create an even base. Spoon about 1/3 of the cream mixture over the cake and spread it evenly.
- Add the berries: Scatter a generous layer of mixed berries over the cream. Don’t be shy—you want every bite to have fruit. Press some berries gently into the cream layer so they stay put.
- Repeat the layers: Add another layer of cake cubes, followed by cream, then berries. Repeat one more time until you’ve used all the ingredients. You should have three layers total, ending with a cream layer on top.
- Decorate the top: Use your reserved berries to create a beautiful pattern on top. I like to arrange blueberries in a circle around the edge, raspberries in the next ring, and strawberry slices in the center. Add mint leaves if using.
- Chill: Cover the bowl with plastic wrap and refrigerate for at least 4 hours, but overnight is even better. This allows the flavors to meld and the cake to soften slightly while still holding its shape.
Here’s a tip I learned from my third attempt: if you’re short on time, you can serve this after just 2 hours of chilling. The layers will be more distinct, and the cake will still have some texture. Both versions are delicious, just different.
Cooking Tips & Techniques
I’ve made this red white and blue berry trifle about a dozen times now, and I’ve collected some hard-won wisdom along the way.
Don’t overwhip the cream. This was my biggest mistake early on. You want soft peaks that fold easily into the cream cheese. If you go too far, the cream turns grainy and the filling becomes heavy. Stop when the cream looks like fluffy clouds that just barely hold their shape.
Room temperature cream cheese matters. I know it’s tempting to use it straight from the fridge, but cold cream cheese creates lumps that never quite smooth out. Leave it on the counter for about 30 minutes before you start. If you’re in a hurry, microwave it for 10 seconds at a time until it’s soft.
Pat those berries dry. Wet berries release moisture into the layers, and that’s how you end up with a soggy trifle. After washing, spread them on a paper towel-lined baking sheet and pat them dry. It takes an extra two minutes and makes a huge difference.
Layer with intention. Press the cake cubes down slightly so they create a solid base. If you just toss them in, the layers will collapse when you scoop servings. Think of each layer as a foundation for the next one.
Make extra cream filling. I always make about 1/4 cup more than I think I need. There’s nothing worse than running out halfway through layering, and extra cream makes a lovely topping for the final layer.
Variations & Adaptations
This recipe is wonderfully flexible. Here are some ways to make it your own.
Dietary Adaptations:
- Gluten-Free: Use a gluten-free pound cake or angel food cake. Most store-bought versions work well, just check the label.
- Dairy-Free: Substitute coconut cream for heavy cream and dairy-free cream cheese. The texture will be slightly different, but still delicious.
- Lower Sugar: Use a sugar substitute in the cream filling and skip the sugar on the berries. The natural sweetness of the fruit will carry the dessert.
Flavor Twists:
- Lemon Berry: Add 1 tablespoon of lemon zest to the cream filling. It brightens everything up and pairs beautifully with the berries.
- Chocolate Version: Use chocolate cake cubes instead of pound cake and add a layer of chocolate shavings between the cream layers.
- Citrus Kick: Brush the cake cubes with a mixture of orange juice and honey before layering. It adds a subtle sweetness that complements the berries.
Seasonal Swaps:
- In summer, use fresh peaches and blackberries for a different color palette.
- In fall, try cubed gingerbread with cranberries and a spiced cream filling.
- In winter, use frozen berries (thawed and drained) with a vanilla cake base.
I once made a version with lemon curd layered between the cream and berries, and it was absolutely incredible. My family now requests that version for Easter every year.
Serving & Storage Suggestions
This trifle is best served cold, straight from the refrigerator. The chilled cream filling firms up beautifully, and the berries taste extra refreshing on a warm day.
How to Serve: Use a large spoon or spatula to scoop servings, making sure to get all the layers in each portion. I like to serve it in clear glass bowls so the colors show through. A dollop of extra whipped cream on top never hurts.
What to Pair It With: This dessert is rich enough to stand alone, but it pairs wonderfully with a cup of coffee or iced tea. If you’re serving it after a barbecue, keep the portions small—it’s surprisingly filling.
Storage: Cover the trifle bowl tightly with plastic wrap and refrigerate for up to 3 days. The flavors actually deepen overnight, so day two is often even better than day one.
Reheating: Don’t. This is a cold dessert through and through. If you’ve stored it, just let it sit at room temperature for 10 minutes before serving to take the chill off.
Freezing: I don’t recommend freezing this trifle. The cream filling separates when thawed, and the texture becomes watery. Make it fresh or up to two days ahead, but don’t push it further than that.
One thing I’ve noticed: after about 48 hours, the cake starts to break down significantly. It’s still edible, but the layers become less distinct. For the best presentation, serve within 24 hours of assembling.
Nutritional Information & Benefits
Here’s an approximate nutritional breakdown per serving (based on 12 servings):
- Calories: 385
- Total Fat: 24g
- Saturated Fat: 14g
- Cholesterol: 85mg
- Sodium: 210mg
- Total Carbohydrates: 38g
- Dietary Fiber: 3g
- Sugars: 26g
- Protein: 5g
Health Benefits: Berries are packed with antioxidants, vitamin C, and fiber. Blueberries are particularly known for their brain health benefits, while strawberries provide a solid dose of vitamin C. The cream cheese and heavy cream add calcium and protein, making this a more balanced dessert than many alternatives.
Dietary Considerations: This recipe contains dairy and gluten (from the cake). It can be adapted for gluten-free diets as mentioned above. For those watching sugar intake, using a sugar substitute in the cream filling can reduce the carb count significantly.
I personally love that this dessert feels indulgent but still incorporates whole fruit. It’s not health food by any means, but it’s a far cry from processed desserts loaded with artificial ingredients.
Conclusion
This red white and blue berry trifle has become my go-to for Labor Day, Fourth of July, and any summer gathering where I want to impress without stress. It’s beautiful enough for a party but simple enough for a Tuesday night when you just want something special.
What I love most about this recipe is how forgiving it is. You can swap ingredients, adjust the sweetness, change the layers—and it still turns out delicious. It’s the kind of dessert that makes you look like a hero in the kitchen with minimal effort.
I’d love to hear how yours turns out. Did you try a variation? Did your family love it as much as mine does? Drop a comment below and let me know. And if you share a photo on Pinterest, tag me—I’m always looking for new ideas and inspiration from this amazing community.
Now go make that trifle. Your Labor Day table deserves it, and honestly, so do you.
Frequently Asked Questions
Can I make this trifle the night before?
Absolutely. In fact, I recommend it. Making it the night before gives the flavors time to meld and the cake to soften just enough. Just cover it tightly and refrigerate until you’re ready to serve.
What if I can’t find fresh berries?
Frozen berries work fine, but you need to thaw and drain them first. Pat them dry with paper towels to remove excess moisture. Keep in mind that frozen berries are softer, so they might break down a bit more in the layers.
Can I use a different type of cake?
Yes! Angel food cake, sponge cake, or even ladyfingers work well. Avoid very dense cakes like banana bread, as they won’t absorb the cream properly. I’ve also used leftover vanilla cupcakes in a pinch, and it worked great.
How long will this trifle last in the fridge?
Up to 3 days, but the texture is best within the first 24-48 hours. After that, the cake starts to break down and the layers become less defined. It’s still safe to eat, just not as pretty.
Can I reduce the sugar in this recipe?
Definitely. Skip the sugar on the berries if they’re sweet enough on their own. You can also reduce the powdered sugar in the cream filling to 3/4 cup without affecting the texture too much. For a sugar-free version, use a granulated sweetener in the cream filling.
Pin This Recipe!
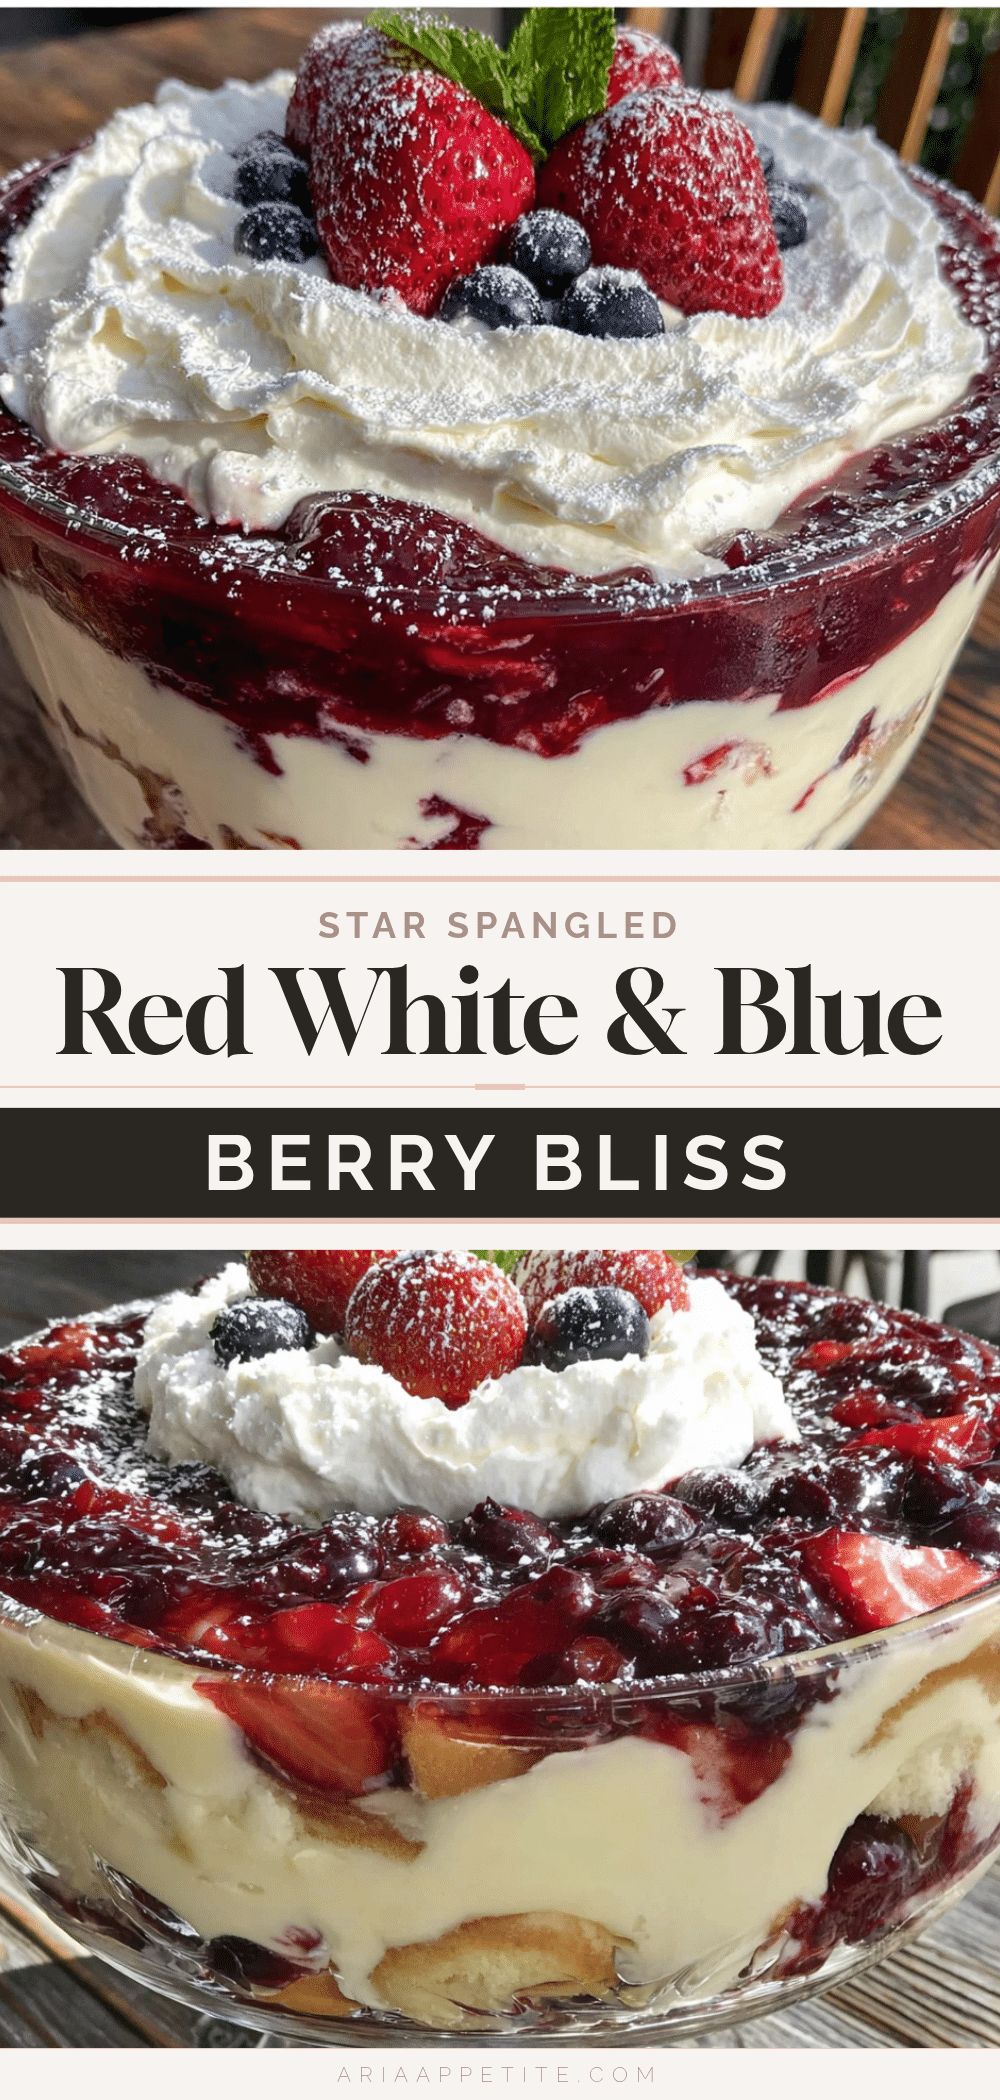
Best Red White & Blue Berry Trifle for Labor Day

This stunning no-bake berry trifle features layers of fresh strawberries, blueberries, and raspberries with a creamy filling and tender cake. It’s the perfect patriotic dessert for Labor Day or any summer gathering, and it can be made ahead for easy entertaining.
- Prep Time: 20 minutes
- Cook Time: 0 minutes
- Total Time: 4 hours 20 minutes (includes chilling time)
- Yield: 12 servings 1x
- Category: Dessert
- Cuisine: American
Ingredients
- 2 cups heavy whipping cream (cold)
- 8 ounces cream cheese, softened to room temperature
- 1 cup powdered sugar
- 1 teaspoon vanilla extract
- 1/4 cup sour cream
- 2 cups fresh strawberries, hulled and sliced
- 2 cups fresh blueberries
- 2 cups fresh raspberries
- 1 tablespoon granulated sugar (optional)
- 1 tablespoon lemon juice
- 1 store-bought pound cake or angel food cake (about 10–12 ounces)
- Fresh mint leaves (optional, for garnish)
- Extra berries for the top
- White chocolate shavings (optional, for garnish)
Instructions
- Prep the berries: Wash all berries gently and pat them dry with paper towels. Slice the strawberries into even pieces, about 1/4 inch thick. Toss all berries with lemon juice and sugar if using. Set aside about 1/2 cup of mixed berries for topping later. Let them sit for 10 minutes while you prepare everything else.
- Make the cream filling: In a large mixing bowl, beat the softened cream cheese with an electric mixer until smooth and fluffy, about 2 minutes. Add the powdered sugar and vanilla, then beat until combined. Scrape down the sides of the bowl with your spatula.
- Whip the cream: In a separate cold bowl, pour the heavy cream. Beat on medium-high speed until soft peaks form—this takes about 3-4 minutes with a hand mixer. You want the cream to hold its shape but still be soft and billowy. Stop before it turns into butter!
- Fold it together: Gently fold the whipped cream into the cream cheese mixture in three additions. Add the sour cream and fold just until combined. Don’t overmix or you’ll deflate all that air. The mixture should be light, creamy, and spreadable.
- Cut the cake: Slice the pound cake into 1-inch cubes. You should have about 4-5 cups of cake cubes. If the cake is very soft, you can toast the cubes lightly on a baking sheet at 350°F for 5 minutes to help them hold up better in the layers.
- Start layering: Place a single layer of cake cubes at the bottom of your trifle bowl. Press them down gently to create an even base. Spoon about 1/3 of the cream mixture over the cake and spread it evenly.
- Add the berries: Scatter a generous layer of mixed berries over the cream. Don’t be shy—you want every bite to have fruit. Press some berries gently into the cream layer so they stay put.
- Repeat the layers: Add another layer of cake cubes, followed by cream, then berries. Repeat one more time until you’ve used all the ingredients. You should have three layers total, ending with a cream layer on top.
- Decorate the top: Use your reserved berries to create a beautiful pattern on top. I like to arrange blueberries in a circle around the edge, raspberries in the next ring, and strawberry slices in the center. Add mint leaves if using.
- Chill: Cover the bowl with plastic wrap and refrigerate for at least 4 hours, but overnight is even better. This allows the flavors to meld and the cake to soften slightly while still holding its shape.
Notes
For best results, use heavy cream with at least 36% milk fat. Ensure cream cheese is at room temperature to avoid lumps. Pat berries dry thoroughly to prevent soggy layers. The trifle can be served after 2 hours of chilling for more distinct layers, but overnight chilling allows flavors to meld better. Store covered in the refrigerator for up to 3 days; best within 24-48 hours. Do not freeze.
Nutrition
- Serving Size: 1 serving (1/12 of r
- Calories: 385
- Sugar: 26
- Sodium: 210
- Fat: 24
- Saturated Fat: 14
- Carbohydrates: 38
- Fiber: 3
- Protein: 5
Keywords: berry trifle, red white blue dessert, Labor Day dessert, no-bake dessert, patriotic dessert, summer dessert, berry dessert, trifle recipe