Love this? Save it for later!
Share the inspiration with your friends
My neighbor Carol swore she hated sourdough. “Too tangy,” she’d say, wrinkling her nose every time I mentioned my starter. “Like eating a pickle wrapped in bread.” For two years, I’d bring her loaves—classic, seeded, everything bagel—and she’d politely decline. Then last October, I made this brown butter pumpkin version just for myself, figuring the autumnal flavors would be wasted on her anyway. I found her standing in my kitchen at 7 AM, eating a slice cold, straight off the cutting board. She didn’t even look guilty. She just said, “This doesn’t taste like sourdough. It tastes like fall.”
Honestly, I think that’s the highest compliment this bread could get. The brown butter brings this deep, nutty warmth that plays so well with the pumpkin, and the sourdough tang steps back just enough to let the cozy spices shine. It’s tender, it’s fragrant, and it makes your whole house smell like a candle shop exploded in the best possible way. I’ve made it every October since, and Carol now asks me when “that pumpkin bread” is coming before the leaves even start turning.
This isn’t your typical sourdough, and that’s exactly the point. Maybe you’ve been there—stuck in a rut with your starter, making the same crusty loaf week after week. This recipe breaks the pattern. It rewards patience with a soft, almost cake-like crumb and a crust that shatters just enough. I mean, I’ve forgotten to score it before baking and it still turned out gorgeous. That’s the kind of forgiving recipe this is. It stayed with me because it proved that sourdough could be something different—something that doesn’t argue with you, but wraps you up in a warm blanket instead.
Why You’ll Love This Recipe
I’ve tested this recipe seven times over two seasons, tweaking the hydration, the butter temperature, the spice ratio. Let me tell you, the final version is the one that made my husband—a man who claims he doesn’t like pumpkin—ask for a second loaf. Here’s why this bread earns a permanent spot in your fall baking rotation:
- Rich, Cozy Flavor: Brown butter adds a toasty, caramelized depth that plain butter just can’t touch. Paired with pumpkin and warm spices, every bite tastes like Thanksgiving morning.
- Perfectly Soft Crumb: The pumpkin puree keeps this bread incredibly moist and tender, almost like a brioche but with less fuss. No dry, crumbly slices here.
- Mild Sourdough Tang: If you or someone you know isn’t a fan of aggressive sourdough flavor, this is your bread. The pumpkin and brown butter mellow the tang to a gentle background note.
- Simple Ingredients: You likely have most of these in your pantry already. No obscure flours or hard-to-find extracts—just real, wholesome staples.
- Forgiving Dough: This dough is slightly sticky and very forgiving. It doesn’t punish you for a rushed stretch-and-fold or a slightly under-proofed loaf. It just works.
- Showstopper for Fall Gatherings: Bring this to a brunch or Friendsgiving, and watch people hover around the cutting board. It’s impressive without being pretentious.
This recipe isn’t just good—it’s the kind that makes you close your eyes after the first bite. It’s comfort food reimagined: healthier than a pastry, more satisfying than plain toast, and with the same soul-soothing satisfaction as a warm blanket on a chilly evening.
What Ingredients You Will Need
This recipe uses simple, wholesome ingredients to deliver bold flavor and satisfying texture without the fuss. Most are pantry staples, but a few deserve a closer look to get the best results.
For the Brown Butter
- Unsalted butter, ½ cup (113g) – I recommend Kerrygold or Challenge for their rich flavor. The browning process concentrates the milk solids, giving you that nutty, golden goodness.
For the Dough
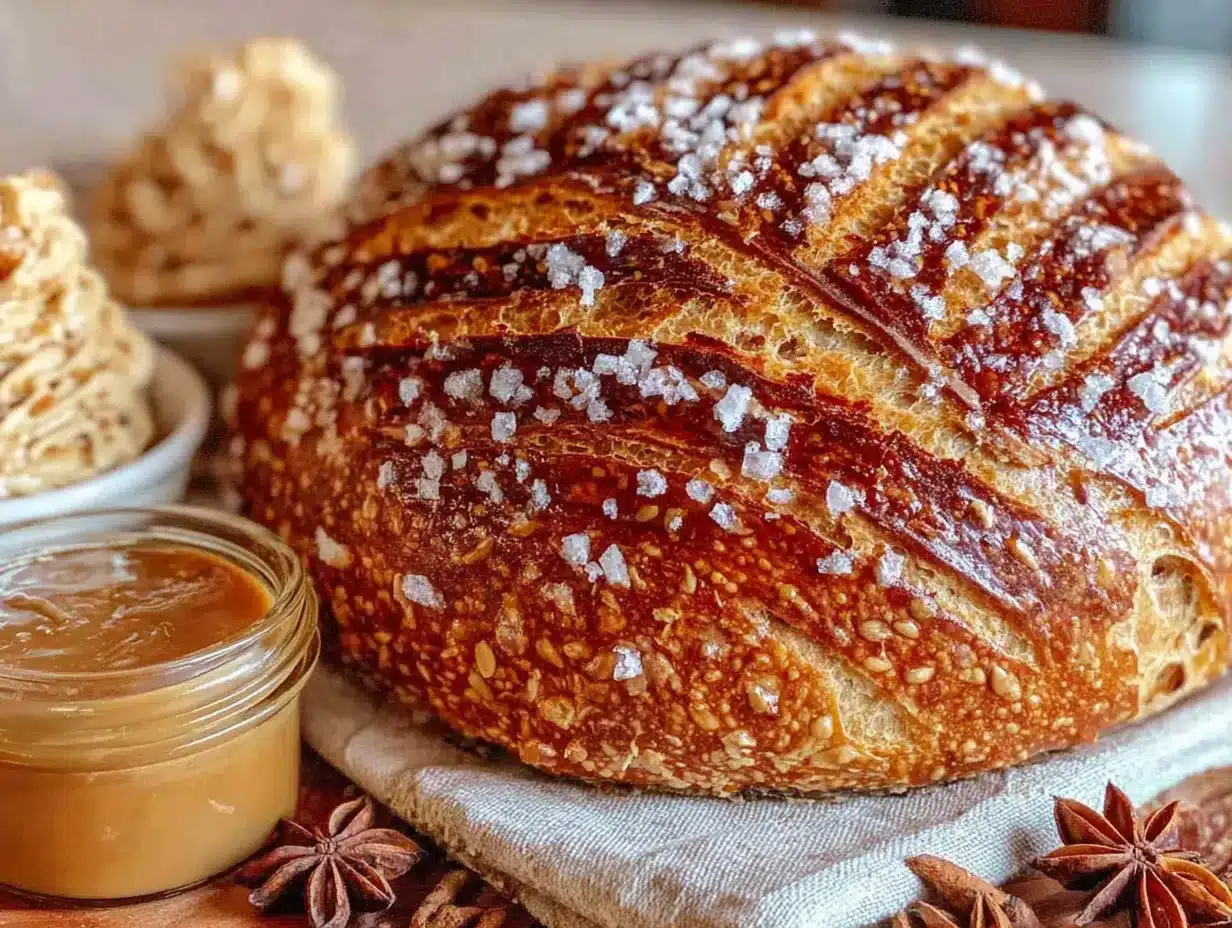
- Active sourdough starter, 100g (about ½ cup) – Use a fed, bubbly starter at its peak. A hungry starter won’t give you enough lift. If your starter is sluggish, feed it 8-12 hours before mixing.
- Pumpkin puree, 150g (about ⅔ cup) – Not pumpkin pie filling! Look for 100% pure pumpkin puree. Libby’s is my go-to for consistent texture and moisture content.
- Bread flour, 400g (about 3 cups) – King Arthur Bread Flour gives the best structure and chew. All-purpose works too, but the crumb will be slightly less airy.
- Whole wheat flour, 50g (about ⅓ cup) – Adds a subtle nuttiness that complements the brown butter beautifully. You can substitute with more bread flour if needed.
- Water, 100g (about ⅓ cup plus 1 tablespoon) – Room temperature. The pumpkin adds moisture, so we use less water than a standard sourdough loaf.
- Brown sugar, 50g (about ¼ cup packed) – Light or dark brown works. Dark brown adds deeper molasses notes, which I prefer for fall baking.
- Salt, 9g (about 1½ teaspoons) – Fine sea salt dissolves more evenly than kosher in this dough.
- Pumpkin pie spice, 2 teaspoons – Store-bought is fine, but I mix my own: 1 tsp cinnamon, ½ tsp ginger, ¼ tsp nutmeg, ¼ tsp cloves, ¼ tsp allspice. Adjust to your taste.
Optional for Topping
- Pepitas (pumpkin seeds), 2 tablespoons – For sprinkling on top before baking. Adds a nice crunch and visual appeal.
- Rolled oats, 1 tablespoon – Another topping option for a rustic look.
Substitution Guidance: For a dairy-free version, use vegan butter for browning—just watch it closely as it browns faster. Gluten-free? Swap the bread flour for a good 1-to-1 gluten-free baking blend, though the texture will be denser. If you don’t have pumpkin pie spice, use 1½ teaspoons cinnamon and ½ teaspoon ginger—it’ll still be delicious.
Equipment Needed
You don’t need a fancy bakery setup for this bread. Here’s what I use and what you can substitute if you’re improvising:
- Digital kitchen scale – Honestly, this is non-negotiable for consistent sourdough. A cup of flour can vary by 30g depending on how you scoop. I use my Escali scale for everything.
- Dutch oven (5-6 quart) – Creates the steam needed for a beautiful crust. No Dutch oven? Use a heavy oven-safe pot with a lid, or bake on a preheated baking sheet with a pan of hot water on the lower rack.
- Large mixing bowl – Glass or ceramic works best. I’ve used a plastic salad bowl in a pinch—it’s fine, just harder to keep the dough from sticking.
- Bench scraper – A $5 plastic one from the grocery store works perfectly. It’s also great for dividing dough and cleaning your counter.
- Banneton or proofing basket (optional) – A bowl lined with a floured kitchen towel works just as well. I used a towel-lined colander for years before buying a banneton.
- Parchment paper – For easy transfer to the Dutch oven. Don’t skip this—trust me, you don’t want to scrape baked-on dough off your pot.
- Small saucepan – For browning the butter. A light-colored pan helps you see the color change.
Budget-friendly tip: Skip the banneton and Dutch oven initially. A bowl, towel, and a heavy baking sheet with steam will still give you excellent bread. Upgrade as you fall in love with the process.
Preparation Method
This recipe takes about 24 hours from start to finish, but most of that is hands-off fermentation. Plan to start the brown butter and dough in the evening, then bake the next morning.
Step 1: Brown the Butter
Place the butter in a small saucepan over medium heat. Let it melt completely, then swirl the pan occasionally. After 3-4 minutes, the butter will start to foam and you’ll see brown specks forming at the bottom. This is the milk solids toasting—exactly what you want. Once it smells nutty and turns a deep amber color (about 5-6 minutes total), remove it from the heat immediately. Pour it into a heat-safe bowl to stop the cooking. Let it cool to room temperature—about 20 minutes. Don’t rush this; hot butter will kill your starter.
Step 2: Mix the Dough
In a large mixing bowl, combine the cooled brown butter, pumpkin puree, water, and brown sugar. Stir until the sugar dissolves. Add the active starter and mix well. The mixture should look like a thick, creamy orange soup. In a separate bowl, whisk together the bread flour, whole wheat flour, salt, and pumpkin pie spice. Add the dry ingredients to the wet mixture and stir with a dough whisk or your hand until no dry flour remains. The dough will be shaggy and slightly sticky—that’s normal. Cover the bowl with a damp towel and let it rest for 30 minutes (this is the autolyse).
Step 3: Stretch and Folds
Over the next 2 hours, perform 4 sets of stretch and folds every 30 minutes. Wet your hand slightly to prevent sticking. Grab one side of the dough, stretch it up as high as it will go without tearing, and fold it over the center. Rotate the bowl 90 degrees and repeat. Do this 4 times per set. You’ll feel the dough tighten and become smoother with each set. After the last set, cover the bowl and let it rest for the remainder of the bulk fermentation.
Step 4: Bulk Fermentation
Let the dough rise at room temperature (70-75°F) for 6-8 hours, or until it has increased by about 50% and looks bubbly and domed. The time varies depending on your starter’s strength and your kitchen temperature. A warm kitchen speeds things up; a cool one slows it down. Look for visual cues: the dough should feel puffy and jiggly, with small bubbles visible on the surface. If it’s still dense after 8 hours, let it go longer—under-proofed bread is worse than over-proofed.
Step 5: Shape the Dough
Lightly flour your work surface. Turn the dough out gently—try not to deflate it too much. Using your bench scraper, fold the dough into a rough round by pulling the edges toward the center. Let it rest, seam-side down, for 20 minutes. This bench rest relaxes the gluten. After resting, flip the dough over and shape it into a tight boule by pulling the dough toward you in a circular motion with cupped hands. Place it seam-side up in your floured banneton or towel-lined bowl.
Step 6: Cold Proof
Cover the shaped dough with plastic wrap or a reusable shower cap. Place it in the refrigerator for 12-16 hours. This cold proof develops flavor and makes the dough easier to score. I usually mix the dough around 8 PM, shape it by midnight, and bake it the next morning around 10 AM.
Step 7: Bake
Place your Dutch oven in the oven and preheat to 475°F (245°C) for at least 30 minutes. When ready, remove the dough from the fridge. Flip it onto a piece of parchment paper. Score the top with a sharp knife or lame—a simple cross or leaf pattern works beautifully. Brush off excess flour if you want a darker crust. Sprinkle with pepitas or oats if using. Carefully place the parchment and dough into the hot Dutch oven, put the lid on, and bake for 25 minutes. Remove the lid and bake for another 20-25 minutes until deep golden brown. The internal temperature should reach 200-205°F. Let it cool completely on a wire rack—at least 2 hours. I know it’s tempting, but slicing hot bread ruins the texture.
Cooking Tips & Techniques
I’ve burned my fair share of butter and produced a few frisbee-like loaves along the way. Here’s what I learned so you don’t have to:
Watch the butter like a hawk. Brown butter goes from perfect to burnt in about 15 seconds. Once you see amber specks and smell that nutty aroma, pull it off the heat immediately. Pour it into a cold bowl to stop the cooking. I once got distracted by a phone call and ended up with black butter—it smelled like burnt popcorn and ruined the batch.
Don’t skip the autolyse. That 30-minute rest after mixing gives the flour time to absorb the liquid and develop gluten naturally. It makes the stretch and folds easier and the crumb more open. I skipped it once when I was in a hurry, and the dough never developed the same strength.
Trust your senses over the clock. Fermentation times are guidelines, not rules. Your dough is ready to shape when it feels puffy and alive, not when the timer goes off. I’ve had dough that took 5 hours in a warm kitchen and 10 hours on a cold counter. Learn what “jiggly and domed” looks like for your specific environment.
Score with confidence. A shallow, hesitant score will close up during baking. Use a sharp blade and cut about ¼ to ½ inch deep at a 45-degree angle. If you’re nervous, practice on a piece of paper first. The first time I scored, I barely scratched the surface and my loaf burst open on the side like a volcanic eruption.
Let it cool completely. This is the hardest tip to follow, but the most important. Cutting into warm sourdough compresses the crumb and makes it gummy. The interior continues to set as it cools. I set a timer for 2 hours and walk away.
Variations & Adaptations
This recipe is flexible enough to adapt to different tastes and dietary needs. Here are a few variations I’ve tried and loved:
Vegan Brown Butter Pumpkin Sourdough: Use vegan butter for the browning step. Miyoko’s or Earth Balance work well. Swap the brown sugar for coconut sugar for a more natural sweetness. The texture will be slightly less tender, but the flavor is still incredible. I made this for a vegan friend’s brunch and she asked for the recipe before she even finished her slice.
Chocolate Chip Pumpkin Sourdough: Add 100g (about ½ cup) of dark chocolate chips during the last stretch and fold. The combination of brown butter, pumpkin, and chocolate is surprisingly perfect—like a grown-up pumpkin muffin. My kids devour this version within 24 hours.
Gluten-Free Adaptation: Substitute the bread flour and whole wheat flour with 450g of a high-quality 1-to-1 gluten-free baking blend (I use King Arthur Measure for Measure). Add 1 teaspoon of xanthan gum if your blend doesn’t include it. The dough will be more like a thick batter than a traditional dough. Bake in a loaf pan instead of a Dutch oven for best results. It won’t have the same open crumb, but it’s still deliciously cozy.
Savory Pumpkin Sourdough: Omit the brown sugar and pumpkin pie spice. Add 1 teaspoon of fresh rosemary, ½ teaspoon of black pepper, and 100g of grated sharp cheddar cheese. The brown butter and pumpkin create a rich base for savory flavors. This is incredible with a bowl of soup or toasted with butter.
Serving & Storage Suggestions
This bread is versatile enough for breakfast, brunch, or a cozy afternoon snack. Here’s how I serve and store mine:
Serving: Let the bread cool completely, then slice with a serrated knife. Serve at room temperature, or toast slices lightly to revive the crust. I love it with a generous smear of salted butter and a drizzle of honey. For a more indulgent treat, top with cream cheese and a sprinkle of cinnamon. It also makes incredible French toast—just dip thick slices in an egg-milk mixture and pan-fry until golden.
Storage: Store the bread cut-side down on a cutting board, wrapped in a clean kitchen towel, for up to 3 days. For longer storage, slice the entire loaf and freeze the slices in a zip-top bag. Toast directly from frozen—no need to thaw. The flavor actually deepens after a day or two, as the pumpkin and spices meld together.
Reheating: For a single slice, pop it in the toaster. For half a loaf, wrap it in foil and warm it in a 350°F oven for 10 minutes. This restores the crust without drying out the crumb.
Nutritional Information & Benefits
This bread is a treat, but it also offers some nutritional perks thanks to its wholesome ingredients. Here’s a rough estimate per slice (assuming 12 slices per loaf):
Calories: 220 | Fat: 8g | Carbohydrates: 34g | Fiber: 2g | Protein: 5g | Sugar: 6g
Key Benefits: Pumpkin is packed with vitamin A and fiber, supporting eye health and digestion. Brown butter adds healthy fats that help absorb fat-soluble vitamins. The sourdough fermentation process reduces phytic acid in the flour, making minerals like zinc and magnesium more bioavailable. Plus, the natural fermentation creates beneficial probiotics for gut health—though most are killed during baking, the prebiotic fiber remains.
Dietary Considerations: This recipe contains gluten and dairy. For a dairy-free option, use vegan butter. For a lower-sugar version, reduce the brown sugar to 25g (about 2 tablespoons)—the pumpkin and spices still provide plenty of flavor.
Conclusion
This brown butter pumpkin sourdough bread is more than just a recipe—it’s a fall tradition waiting to happen. It’s the bread that made my neighbor Carol change her mind about sourdough entirely, and it might just become the one you make every October without fail. The combination of nutty brown butter, sweet pumpkin, and warm spices wrapped in a tender, tangy crumb is genuinely something special.
I hope you give this recipe a try and make it your own. Maybe you’ll add chocolate chips, or go savory with cheese and rosemary, or keep it classic with a sprinkle of pepitas. Whatever you choose, I’d love to hear how it turns out. Drop a comment below and tell me about your baking adventure—did your family fight over the last slice? Did you discover a new favorite variation? Your stories make this whole process worth it.
Happy baking, friends. May your kitchen smell like brown butter and your heart feel full.
Frequently Asked Questions
Can I use canned pumpkin pie filling instead of pumpkin puree?
No, please don’t. Pumpkin pie filling contains added sugar and spices that will throw off the dough’s hydration and fermentation. Stick with 100% pure pumpkin puree for the best results.
Why did my bread turn out dense and flat?
This usually means the dough was under-proofed or your starter wasn’t active enough. Make sure your starter is bubbly and passes the float test (a spoonful floats in water) before mixing. Also, give the bulk fermentation enough time—look for a 50% rise, not just a timer.
Can I make this without a Dutch oven?
Absolutely. Preheat a baking sheet in the oven, then carefully slide the dough onto it. Place a metal pan on the lower rack and pour 1 cup of hot water into it when you add the dough. The steam creates a similar effect to a Dutch oven.
How do I know when the bread is fully baked?
The crust should be deep golden brown and sound hollow when tapped on the bottom. For precision, use an instant-read thermometer—the internal temperature should read 200-205°F (93-96°C) in the center.
Can I speed up the process and skip the cold proof?
You can, but the flavor won’t be as developed. The cold proof deepens the tang and makes the dough easier to handle. If you’re short on time, do a 2-hour room temperature proof after shaping instead, then bake immediately. The bread will still be good, just less complex.
Pin This Recipe!
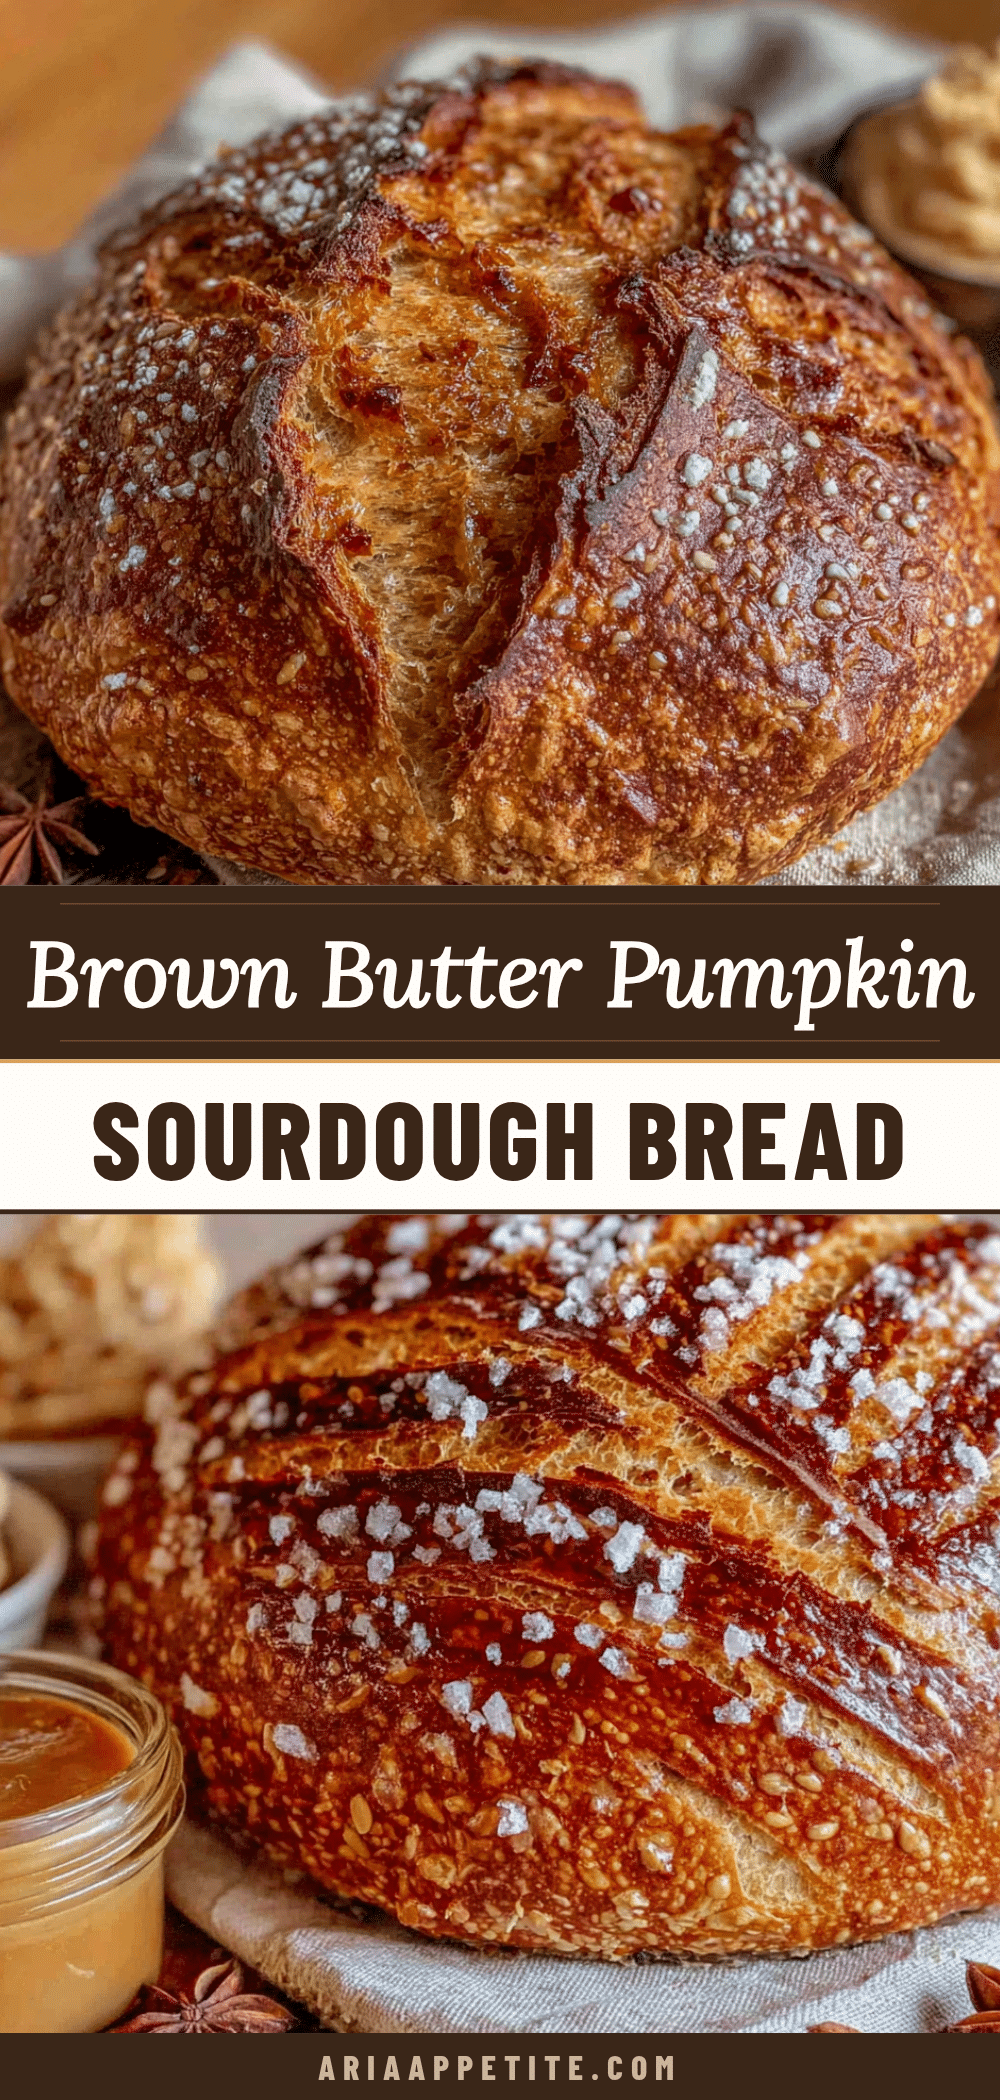
Easy Brown Butter Pumpkin Sourdough Bread Recipe
This brown butter pumpkin sourdough bread is tender, fragrant, and has a mild tang that lets cozy fall spices shine. It’s a forgiving recipe that yields a soft, almost cake-like crumb with a shatteringly crisp crust.
- Prep Time: 30 minutes
- Cook Time: 45 minutes
- Total Time: 24 hours (includes fermentation and proofing)
- Yield: 12 servings 1x
- Category: Bread
- Cuisine: American
Ingredients
- ½ cup (113g) unsalted butter (for browning)
- 100g (about ½ cup) active sourdough starter, fed and bubbly
- 150g (about ⅔ cup) 100% pure pumpkin puree (not pumpkin pie filling)
- 400g (about 3 cups) bread flour (King Arthur recommended)
- 50g (about ⅓ cup) whole wheat flour
- 100g (about ⅓ cup plus 1 tablespoon) water, room temperature
- 50g (about ¼ cup packed) brown sugar (light or dark)
- 9g (about 1½ teaspoons) fine sea salt
- 2 teaspoons pumpkin pie spice (or homemade blend: 1 tsp cinnamon, ½ tsp ginger, ¼ tsp nutmeg, ¼ tsp cloves, ¼ tsp allspice)
- 2 tablespoons pepitas (pumpkin seeds) for topping (optional)
- 1 tablespoon rolled oats for topping (optional)
Instructions
- Brown the butter: Place ½ cup (113g) unsalted butter in a small saucepan over medium heat. Melt completely, then swirl occasionally. After 3-4 minutes, the butter will foam and brown specks will form. Once it smells nutty and turns deep amber (about 5-6 minutes total), remove from heat immediately. Pour into a heat-safe bowl and let cool to room temperature (about 20 minutes).
- Mix the dough: In a large mixing bowl, combine cooled brown butter, pumpkin puree, water, and brown sugar. Stir until sugar dissolves. Add active starter and mix well. In a separate bowl, whisk together bread flour, whole wheat flour, salt, and pumpkin pie spice. Add dry ingredients to wet mixture and stir until no dry flour remains. Cover with a damp towel and let rest for 30 minutes (autolyse).
- Stretch and folds: Over the next 2 hours, perform 4 sets of stretch and folds every 30 minutes. Wet your hand slightly. Grab one side of dough, stretch it up, and fold over the center. Rotate bowl 90° and repeat 4 times per set. After the last set, cover and let rest for the remainder of bulk fermentation.
- Bulk fermentation: Let dough rise at room temperature (70-75°F) for 6-8 hours, or until increased by about 50% and looks bubbly and domed. The dough should feel puffy and jiggly with small bubbles visible.
- Shape the dough: Lightly flour your work surface. Turn dough out gently. Using a bench scraper, fold edges toward center to form a rough round. Let rest seam-side down for 20 minutes. Flip dough over and shape into a tight boule by pulling dough toward you in a circular motion with cupped hands. Place seam-side up in a floured banneton or towel-lined bowl.
- Cold proof: Cover shaped dough with plastic wrap or a reusable cover. Refrigerate for 12-16 hours to develop flavor and make scoring easier.
- Bake: Place Dutch oven in oven and preheat to 475°F (245°C) for at least 30 minutes. Remove dough from fridge. Flip onto parchment paper. Score the top with a sharp knife or lame (¼ to ½ inch deep at a 45° angle). Brush off excess flour if desired. Sprinkle with pepitas or oats if using. Carefully place parchment and dough into hot Dutch oven, cover, and bake for 25 minutes. Remove lid and bake for another 20-25 minutes until deep golden brown (internal temperature 200-205°F). Cool completely on…
Notes
Watch the butter carefully as it browns—it goes from perfect to burnt in about 15 seconds. Don’t skip the autolyse; it helps develop gluten naturally. Trust your senses over the clock for fermentation times. Score with confidence using a sharp blade. Let the bread cool completely before slicing to avoid a gummy texture. For a dairy-free version, use vegan butter. For gluten-free, substitute flours with a 1-to-1 gluten-free blend and bake in a loaf pan.
Nutrition
- Serving Size: 1 slice
- Calories: 220
- Sugar: 6
- Sodium: 180
- Fat: 8
- Saturated Fat: 4
- Carbohydrates: 34
- Fiber: 2
- Protein: 5
Keywords: brown butter, pumpkin, sourdough bread, fall baking, artisan bread, sourdough recipe, pumpkin bread, homemade bread