Love this? Save it for later!
Share the inspiration with your friends
I was standing in the grocery store aisle last July, staring at a display of blueberries that looked almost too perfect, when my phone buzzed. My sister-in-law had texted, “What are you bringing to the cookout?” and I had absolutely no idea. I mean, I could have grabbed a store-bought pie, but that felt lazy. I could have made my go-to pasta salad, but everyone brings that. I wanted something that screamed summer, that looked impressive without requiring me to break a sweat in my tiny, non-air-conditioned kitchen. And then it hit me—a trifle. Not just any trifle, but one that looked like a flag. A red, white, and blue berry trifle.
Honestly, the first time I attempted a layered dessert like this, it was a bit of a mess. I didn’t chill the custard long enough, and the whole thing turned into a soupy, sad-looking puddle by the time we ate it. You know that feeling when you lift the lid off a dish and everyone goes quiet? Yeah, it was that. But I learned my lesson, and after a few more tries (and a lot of pudding mix), I cracked the code. The secret is patience and letting those layers set up properly. This version is foolproof, I promise.
This recipe came together from a few different places. My grandmother was a master of the classic English trifle, always with a heavy hand on the sherry. I wanted something brighter, more American, and perfect for a backyard barbecue. I swapped the sherry for fresh lemon zest and a simple vanilla pudding that lets the berries do all the talking. The conversation that started with that text message ended with me holding a glass bowl full of creamy, fruity, patriotic goodness. It’s the dessert that now gets requested every single year, and I keep making it because honestly, it just makes people happy.
Why You’ll Love This Recipe
Let me tell you why this red, white, and blue berry trifle is about to become your new favorite summer dessert. I’ve tested this recipe about half a dozen times to make sure the layers stay perfect and the flavors pop just right. It’s not just another pretty dessert—it actually tastes incredible.
- Quick & Easy: This comes together in about 30 minutes of active prep time. The hardest part is waiting for it to chill in the fridge. Perfect for those last-minute holiday invites.
- Simple Ingredients: You likely have most of these things in your kitchen right now. No fancy grocery store runs for obscure items. Just good old-fashioned berries, pudding, and cake.
- Perfect for Celebrations: This is made for the Fourth of July, Memorial Day, or any summer get-together. It looks like a centerpiece but eats like a dream.
- Crowd-Pleaser: I’ve watched kids and grandmas alike go back for seconds. The combination of creamy pudding, soft cake, and fresh berries is universally loved.
- Unbelievably Delicious: The texture is what gets me every time. You get a bite of soft, vanilla-soaked cake, followed by a spoonful of rich, cold pudding, and then a burst of tart, juicy berries. It’s comfort food in a glass.
What makes this recipe different from the rest is the simple trick of toasting the pound cake cubes. It sounds odd, I know, but it adds a layer of texture that keeps the cake from turning into complete mush. Plus, I use a combination of instant pudding and a touch of cream cheese in the middle layer to give it a little tang and stability. This isn’t just another version of a trifle—it’s the one that will get you asked for the recipe every single time. It’s the kind of dessert that makes you close your eyes after the first bite, and honestly, that’s exactly what summer should taste like.
What Ingredients You Will Need
This recipe uses simple, honest ingredients that come together to create something truly special. Most of these are pantry staples or easy to find at any grocery store, especially during berry season.
For the Berry Layer
- 2 cups fresh strawberries, hulled and sliced (Look for bright red, fragrant berries. I prefer local ones when they’re in season.)
- 1 ½ cups fresh blueberries (I like to use small, firm blueberries for the best pop of flavor.)
- 1 ½ cups fresh raspberries (These add a nice tartness. If you can’t find good ones, frozen and thawed work in a pinch.)
- 2 tablespoons granulated sugar (Just a little to macerate the berries and draw out their natural juices.)
- 1 tablespoon fresh lemon juice (This brightens everything up and keeps the berries from tasting flat.)
For the Cream Layer
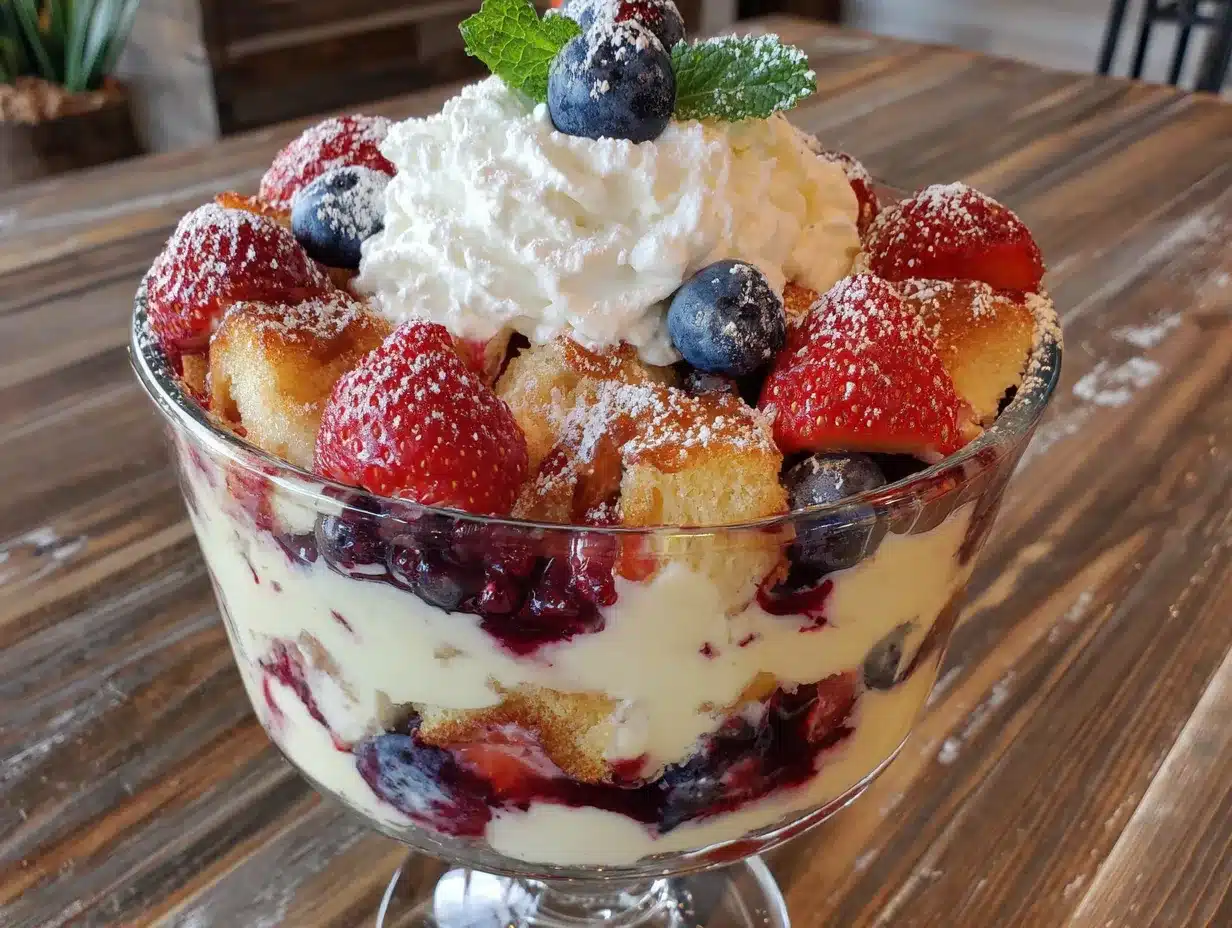
- 1 (3.4 oz) package instant vanilla pudding mix (I use Jell-O brand, but any brand works. Don’t use cook-and-serve for this.)
- 2 cups cold whole milk (Whole milk gives the richest, creamiest texture. You can use 2%, but it won’t be as luscious.)
- 4 ounces cream cheese, softened to room temperature (This is my secret ingredient—it adds a subtle tang and helps the pudding set up firmer.)
- ¼ cup powdered sugar (To sweeten the cream cheese without making it grainy.)
- 1 teaspoon vanilla extract (Pure vanilla is best, but imitation works fine here too.)
- 1 ½ cups heavy whipping cream (For the top layer. You can use Cool Whip if you’re in a hurry, but homemade is so much better.)
- 2 tablespoons powdered sugar (For sweetening the whipped cream.)
For the Cake Layer
- 1 (10.75 oz) frozen pound cake, thawed (I like Sara Lee or the store brand. You can also use a homemade pound cake if you have one.)
- ¼ cup milk or berry juice (To lightly soak the cake cubes. I use the juice from the macerated berries for extra flavor.)
For Garnish
- Extra fresh berries (A few whole strawberries, blueberries, and raspberries for the top.)
- Fresh mint sprigs (Optional, but they make it look fancy.)
Equipment Needed
You don’t need a lot of fancy tools to make this trifle, which is part of why I love it. Here’s what you’ll need:
- A large glass trifle bowl or a tall glass serving dish: I use a 4-quart trifle dish that I picked up at a home goods store for about $15. The clear glass is key for showing off those beautiful layers. If you don’t have one, a large glass mixing bowl or even a wide-mouth mason jar works for individual servings.
- Electric hand mixer or stand mixer: You can whip the cream by hand, but honestly, it takes forever. A hand mixer makes the job quick and easy.
- Medium mixing bowls: You’ll need a few for the berries, the cream cheese mixture, and the whipped cream.
- Sharp knife and cutting board: For slicing the strawberries and cubing the pound cake.
- Rubber spatula: For folding the whipped cream and scraping every last bit of pudding out of the bowl.
- Measuring cups and spoons: Accuracy matters, especially for the pudding mix.
If you’re on a budget, skip the trifle dish and use a clear plastic punch bowl. I’ve done it before for a potluck, and it looked just as pretty. Just make sure whatever you use is deep enough to hold all those layers.
Preparation Method
Alright, let’s get to the good part. Follow these steps carefully, and you’ll have a dessert that looks like it came from a magazine. I’ve added some notes from my own trials and errors along the way.
-
Macerate the berries. In a medium bowl, combine the sliced strawberries, blueberries, and raspberries. Sprinkle with 2 tablespoons of granulated sugar and 1 tablespoon of fresh lemon juice. Gently toss everything together with a spatula. Let this sit at room temperature for about 15-20 minutes. You’ll see the berries start to release their beautiful red and purple juices. Don’t skip this step—it’s what gives the trifle that incredible berry flavor throughout. Set aside about ½ cup of the berry juice for soaking the cake.
-
Toast the pound cake cubes. While the berries are macerating, preheat your oven to 350°F (175°C). Cut the thawed pound cake into 1-inch cubes. Spread them out on a baking sheet in a single layer. Pop them in the oven for about 8-10 minutes, or until they are lightly golden and firm to the touch. Let them cool completely. This step is a game-changer—it keeps the cake from turning into a soggy mess and adds a lovely texture contrast.
-
Make the cream cheese pudding layer. In a medium bowl, beat the softened cream cheese with ¼ cup of powdered sugar and 1 teaspoon of vanilla extract until smooth and fluffy. In a separate bowl, whisk together the instant vanilla pudding mix and 2 cups of cold whole milk. Whisk for about 2 minutes until it starts to thicken. Then, fold the cream cheese mixture into the pudding until fully combined. Set this aside. It will continue to thicken as it sits.
-
Whip the heavy cream. In a large, chilled bowl, pour in 1 ½ cups of heavy whipping cream. Using an electric mixer, beat on medium-high speed until soft peaks form. Add 2 tablespoons of powdered sugar and continue beating until stiff peaks form. Be careful not to over-whip, or you’ll end up with butter. I’ve done that before, and it’s a sad day. Set the whipped cream aside in the fridge.
-
Assemble the first layer. Now for the fun part. Take your trifle dish and place a single layer of the toasted pound cake cubes at the bottom. You want to cover the bottom completely, but don’t pack them in too tightly. Using a pastry brush or a spoon, drizzle about 2-3 tablespoons of the reserved berry juice over the cake cubes. Let them soak it up for a minute.
-
Add the berry layer. Spoon about half of the macerated berries (including their juices) over the cake layer. Spread them out evenly. Then, spoon about half of the cream cheese pudding mixture over the berries. Use a spatula to spread it gently to the edges.
-
Repeat the layers. Add another layer of toasted pound cake cubes on top of the pudding. Drizzle with more berry juice. Add the remaining berries, followed by the remaining pudding mixture. Smooth the top gently.
-
Top with whipped cream. Spread the homemade whipped cream over the top layer of pudding. Use a spatula to create soft swirls and peaks. This is your canvas for decoration.
-
Chill and garnish. Cover the trifle loosely with plastic wrap and refrigerate for at least 4 hours, but overnight is even better. This allows all the flavors to meld together beautifully. Just before serving, garnish with fresh whole strawberries, extra blueberries, raspberries, and a few sprigs of mint for that wow factor.
Cooking Tips & Techniques
I’ve made this trifle more times than I can count, and I’ve picked up a few tricks along the way that make a real difference. Let me share them with you so you can avoid my early mistakes.
Don’t skip the toasting step. The first time I made a trifle, I just used soft, untoasted pound cake. By the next day, it was a soggy, unappetizing mess. Toasting the cubes for just 8 minutes gives them structure. They absorb the berry juice and stay firm, giving you that perfect bite every time. It’s a small extra step that yields huge results.
Patience is your best friend. I know it’s tempting to dig in right after you assemble it, but trust me on this one. The trifle needs at least 4 hours in the fridge to set up properly. The pudding needs time to firm up, and the flavors need to mingle. I once served it after only 2 hours, and the layers slid all over the place when I scooped it out. It still tasted good, but it looked like a crime scene. Give it time.
Use a piping bag for the whipped cream. If you want that picture-perfect look, transfer your whipped cream to a piping bag fitted with a large star tip. Pipe it on in rosettes or swirls. It makes the top look professional and gives you nice little pockets to tuck berries into. If you don’t have a piping bag, a zip-top bag with the corner snipped off works just fine.
Watch your berry juice. When you’re drizzling the juice over the cake layers, don’t go overboard. You want to moisten the cake, not drown it. Too much liquid will make the bottom layers soupy. I use a pastry brush to control the amount, and I never use more than about ¼ cup total for the whole trifle.
Make it ahead for better flavor. Honestly, this trifle tastes better on day two. The berries release more juice, the cake absorbs all that creamy goodness, and everything settles into one harmonious dessert. I always make mine the night before a party. It takes the stress out of the day and tastes incredible.
Variations & Adaptations
One of the best things about this red, white, and blue berry trifle is how adaptable it is. You can switch things up based on what you have on hand or who you’re serving. Here are some of my favorite variations.
Dietary Swaps: For a gluten-free version, use a gluten-free pound cake or even gluten-free angel food cake. The rest of the ingredients are naturally gluten-free. If you need it to be dairy-free, use a dairy-free vanilla pudding mix made with almond or oat milk, and swap the cream cheese and heavy cream for dairy-free alternatives. I’ve used coconut cream for the whipped topping, and it adds a lovely tropical hint.
Seasonal Twists: In the summer, fresh local berries are unbeatable. But in the winter, you can use frozen berries (thawed and drained) with great success. I’ve also made this with sliced peaches and blackberries for a late-summer version that’s absolutely divine. Just keep the red, white, and blue theme going if you’re making it for a patriotic holiday.
Flavor Variations: If you want a boozy adult version, swap the berry juice for a splash of limoncello or a light rum. It adds a nice kick without overpowering the fruit. For a chocolate twist, use chocolate pound cake and add a layer of chocolate pudding instead of vanilla. The berries and chocolate are a surprisingly good combo.
Individual Servings: Instead of one big trifle, make these in small mason jars or clear plastic cups. They’re perfect for parties and picnics. Just layer the ingredients the same way, and you’ll have individual desserts that are easy to grab and go. I did this for a Memorial Day barbecue, and people loved having their own little cup of heaven.
Low-Sugar Option: Use sugar-free vanilla pudding mix and skip the added sugar on the berries. The natural sweetness of the fruit is often enough. You can also use a sugar substitute in the whipped cream. It won’t be quite as rich, but it’s still delicious.
Serving & Storage Suggestions
This trifle is best served cold, straight from the fridge. The contrast between the cold, creamy pudding and the soft, juicy berries is what makes it so addictive. I like to let it sit out on the counter for about 10 minutes before serving, just to take the chill off, but that’s optional.
Presentation Tips: Use a large serving spoon to scoop all the way down through the layers. You want each serving to have a little bit of everything. If you’re feeling fancy, you can layer the garnishes on top in a star pattern with the strawberries, blueberries, and raspberries. It makes for a stunning centerpiece.
What to Serve With It: This trifle is rich enough to stand on its own, but it pairs beautifully with a cup of hot coffee or iced tea. For a full summer spread, serve it alongside grilled burgers, corn on the cob, and a fresh green salad. It’s the perfect sweet ending to a savory meal.
Storage Instructions: Cover the trifle tightly with plastic wrap or a lid and store it in the refrigerator. It will keep well for up to 3 days. The flavors actually get better after the first day, but after 3 days, the cake can start to get a bit too soft. I’ve never had leftovers last longer than that, honestly. They disappear fast.
Freezing: I don’t recommend freezing this trifle. The dairy-based layers will separate and become grainy when thawed, and the berries will turn to mush. It’s really a make-ahead, serve-fresh kind of dessert. If you need to prep something in advance, make the components separately and assemble the day of.
Nutritional Information & Benefits
Let’s be real—this is a dessert, so it’s not exactly health food. But it does have some redeeming qualities. A typical serving (about 1 cup) contains roughly 350-400 calories, 20 grams of fat, 45 grams of carbohydrates, and 5 grams of protein. The exact numbers will vary based on your specific ingredients and portion sizes.
The berries are the real stars here from a nutritional standpoint. Strawberries are packed with vitamin C and antioxidants, while blueberries are known for their brain-boosting properties. Raspberries are high in fiber, which helps with digestion. So you’re getting a good dose of fruit, which is always a win.
If you’re watching your sugar intake, you can easily reduce the sugar in the berry mixture and use a sugar-free pudding mix. The sweetness from the fruit and the cake is often enough. For a lower-fat version, use reduced-fat cream cheese and a lighter whipped topping. It won’t be as decadent, but it will still satisfy that sweet craving.
This recipe contains dairy and gluten (from the pound cake). If you have allergies, be sure to use the substitutions I mentioned earlier. It’s a treat, meant to be enjoyed in moderation as part of a balanced diet. And honestly, a little bit of joy in the form of dessert is good for the soul.
Conclusion
This red, white, and blue berry trifle is more than just a pretty dessert. It’s a celebration of summer, of gathering with the people you love, and of taking the time to make something that feels special. I’ve made it for backyard barbecues, quiet family dinners, and even a friend’s engagement party, and it never fails to get compliments. The combination of creamy, fruity, and cakey layers is just irresistible.
I hope you give this recipe a try and make it your own. Maybe you’ll add a little extra lemon zest, or swap in your favorite berries. That’s the beauty of a trifle—it’s forgiving and flexible. Don’t be afraid to experiment. And when you do make it, I’d love to hear how it turns out. Drop a comment below and let me know if your family loved it as much as mine does.
Now go on, get yourself to the store, grab those berries, and make something beautiful. You’ve got this. Happy cooking, and here’s to a summer full of sweet moments.
Frequently Asked Questions
Can I use frozen berries for this trifle?
Yes, you can! Just make sure to thaw them completely and drain off any excess liquid before using them. Frozen berries tend to release more juice, so you might want to reduce the amount of liquid you add to the cake layer. The texture will be slightly softer, but the flavor will still be wonderful.
How far in advance can I make this trifle?
You can make this trifle up to 24 hours in advance. In fact, it tastes better the next day because the flavors have time to meld together. Just keep it covered in the refrigerator. If you make it more than a day ahead, the cake might start to get too soft.
Can I use a different type of cake?
Absolutely. Angel food cake, sponge cake, or even vanilla cake cubes work great. If you use a lighter cake like angel food, you might not need to toast it. Just be aware that the texture will be different. Pound cake is my favorite because it holds up well to all the moisture.
How do I prevent the layers from sliding around?
The key is patience. Let the pudding set up properly before adding the next layer. Also, make sure your cake cubes are toasted and firm. Chilling the trifle for at least 4 hours before serving helps everything set and stay in place. If you’re still worried, you can add a thin layer of pudding between each cake and berry layer to act as a glue.
Can I make this into individual servings?
Yes, and it’s a great idea for parties. Use small mason jars, clear plastic cups, or wine glasses. Layer the ingredients the same way, but use smaller amounts. They’re perfect for grab-and-go desserts and look adorable on a dessert table. Just adjust the chilling time—individual servings set up faster, usually in about 2 hours.
Pin This Recipe!
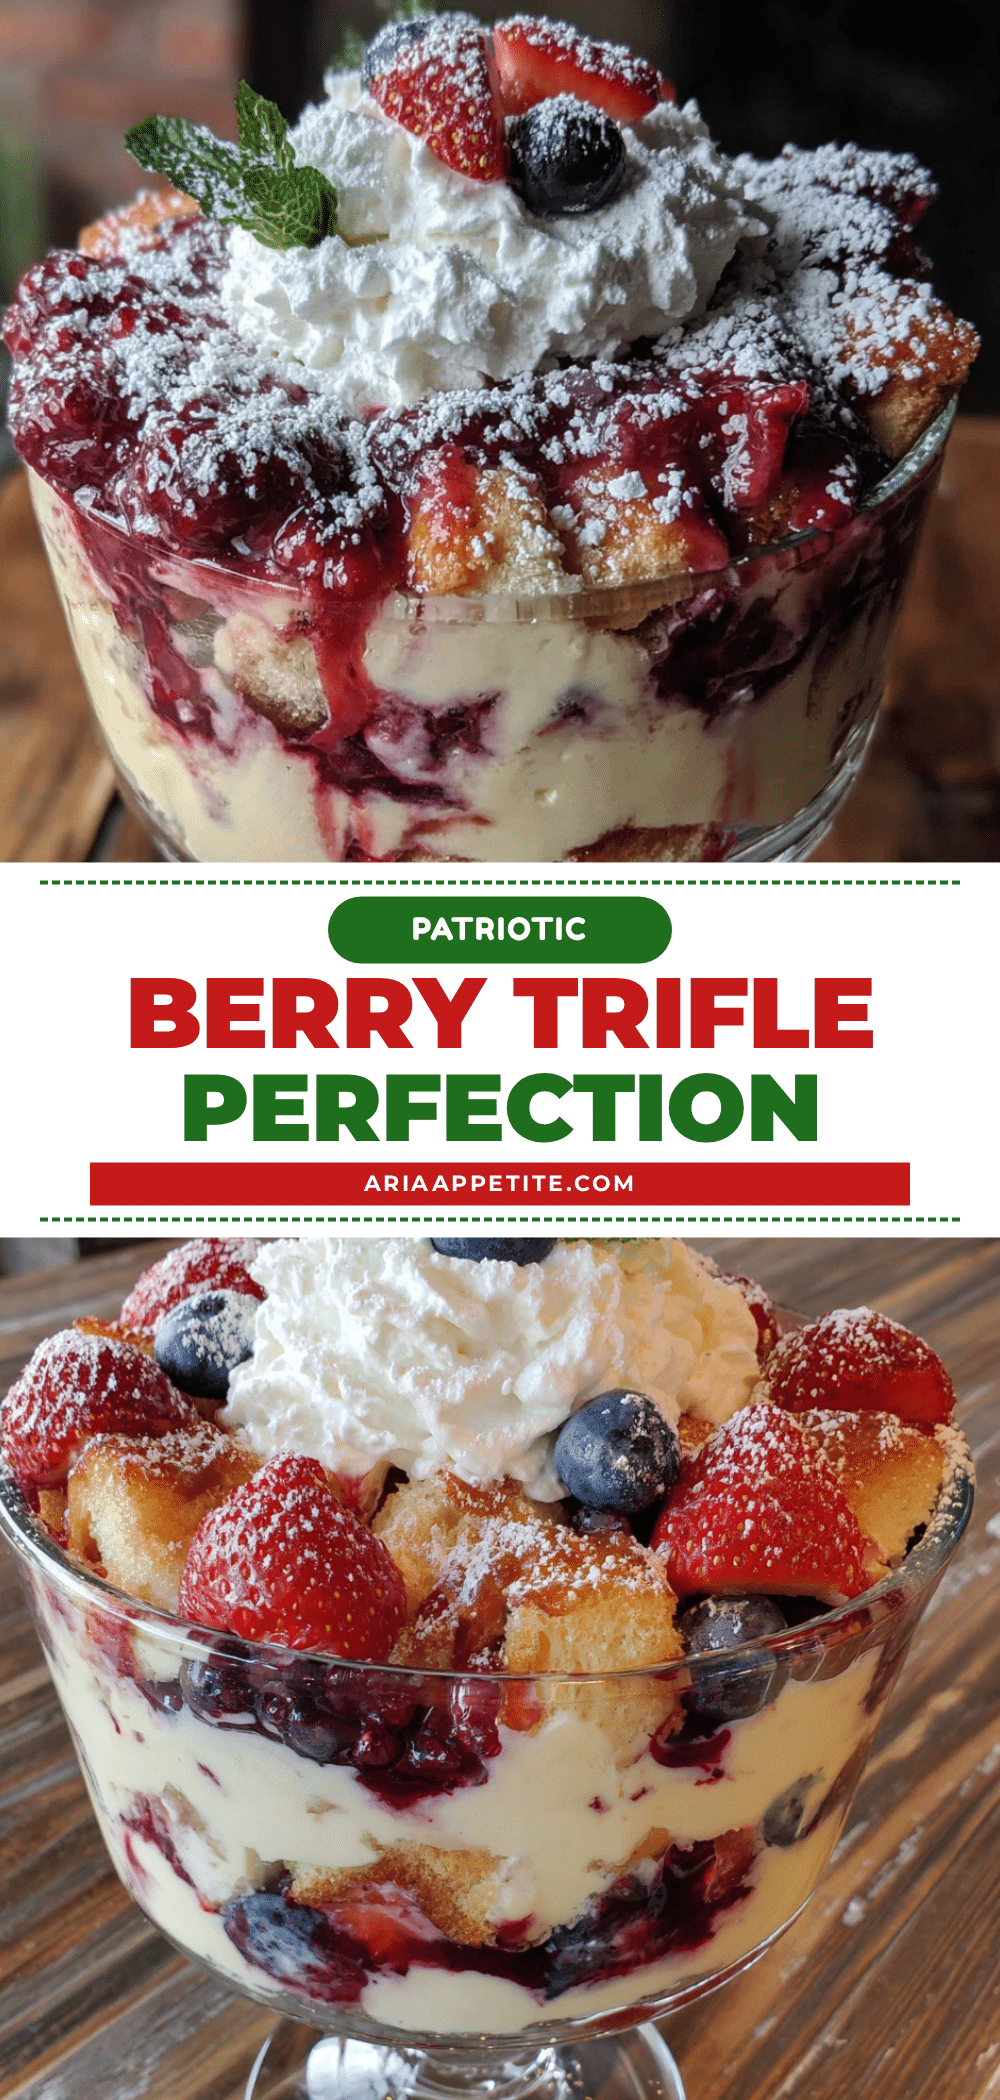
Best Red White and Blue Berry Trifle Recipe

This red, white, and blue berry trifle is a stunning, no-bake dessert perfect for summer celebrations. Layers of toasted pound cake, macerated berries, creamy vanilla pudding, and homemade whipped cream create a show-stopping centerpiece that tastes as good as it looks.
- Prep Time: 30 minutes
- Cook Time: 10 minutes
- Total Time: 4 hours 40 minutes (includes chilling)
- Yield: 8 servings 1x
- Category: Dessert
- Cuisine: American
Ingredients
- 2 cups fresh strawberries, hulled and sliced
- 1 ½ cups fresh blueberries
- 1 ½ cups fresh raspberries
- 2 tablespoons granulated sugar
- 1 tablespoon fresh lemon juice
- 1 (3.4 oz) package instant vanilla pudding mix
- 2 cups cold whole milk
- 4 ounces cream cheese, softened to room temperature
- ¼ cup powdered sugar
- 1 teaspoon vanilla extract
- 1 ½ cups heavy whipping cream
- 2 tablespoons powdered sugar
- 1 (10.75 oz) frozen pound cake, thawed
- ¼ cup milk or berry juice
- Extra fresh berries for garnish
- Fresh mint sprigs for garnish (optional)
Instructions
- Macerate the berries: In a medium bowl, combine sliced strawberries, blueberries, and raspberries. Sprinkle with 2 tablespoons granulated sugar and 1 tablespoon lemon juice. Gently toss and let sit at room temperature for 15-20 minutes. Reserve about ½ cup of the berry juice for soaking the cake.
- Toast the pound cake cubes: Preheat oven to 350°F (175°C). Cut thawed pound cake into 1-inch cubes. Spread on a baking sheet in a single layer and bake for 8-10 minutes until lightly golden and firm. Let cool completely.
- Make the cream cheese pudding layer: In a medium bowl, beat softened cream cheese with ¼ cup powdered sugar and 1 teaspoon vanilla extract until smooth. In a separate bowl, whisk instant vanilla pudding mix with 2 cups cold whole milk for 2 minutes until thickened. Fold cream cheese mixture into pudding until combined. Set aside.
- Whip the heavy cream: In a large chilled bowl, beat 1 ½ cups heavy whipping cream on medium-high speed until soft peaks form. Add 2 tablespoons powdered sugar and beat until stiff peaks form. Refrigerate until ready to use.
- Assemble the first layer: Place a single layer of toasted pound cake cubes in the bottom of a trifle dish. Drizzle with 2-3 tablespoons of reserved berry juice.
- Add the berry layer: Spoon half of the macerated berries (with juices) over the cake. Then spoon half of the cream cheese pudding mixture over the berries and spread gently.
- Repeat the layers: Add another layer of toasted pound cake cubes, drizzle with more berry juice, then add remaining berries and remaining pudding mixture. Smooth the top.
- Top with whipped cream: Spread the homemade whipped cream over the top layer of pudding, creating soft swirls and peaks.
- Chill and garnish: Cover loosely with plastic wrap and refrigerate for at least 4 hours, preferably overnight. Just before serving, garnish with fresh whole strawberries, extra blueberries, raspberries, and mint sprigs.
Notes
Toasting the pound cake cubes prevents sogginess. The trifle needs at least 4 hours to set; overnight is best. For a professional look, pipe the whipped cream using a piping bag with a star tip. Do not over-soak the cake with berry juice. This dessert tastes even better on day two.
Nutrition
- Serving Size: 1 cup
- Calories: 375
- Sugar: 32
- Sodium: 320
- Fat: 20
- Saturated Fat: 12
- Carbohydrates: 45
- Fiber: 3
- Protein: 5
Keywords: red white and blue trifle, berry trifle, Fourth of July dessert, summer dessert, patriotic dessert, no-bake dessert