Love this? Save it for later!
Share the inspiration with your friends
“You know that feeling when the Fourth of July is just around the corner, and suddenly every dessert table is begging for something festive but fuss-free? Well, last summer, I found myself in a bit of a pinch. It was the day before the big neighborhood barbecue, and I’d completely forgotten to bring a dessert. Honestly, I was staring at a nearly empty pantry — no time to bake, no fancy ingredients. Then my neighbor, Mrs. Jenkins, popped over with a smile and a secret weapon: her easy no-bake red white and blue Rice Krispie squares.
She whipped them up like a pro, right in her tiny kitchen, mixing marshmallows and cereal with a splash of patriotic colors. I was amazed — no oven, no mess, just a quick, colorful treat that looked like a celebration on a plate. And let me tell you, the moment those squares hit the picnic table, they disappeared faster than the fireworks overhead.
Maybe you’ve been there — juggling kids, last-minute plans, and a craving for something sweet but simple. This recipe stuck with me because it’s honest, approachable, and honestly, a little bit nostalgic. It reminds me of those perfect summer nights where the company is great, the food is simple, and the colors on the plate bring a smile. Plus, it’s one of those recipes that even if you mess up a bit (like I once forgot the butter), it still turns out pretty fantastic.
I keep coming back to this easy no-bake red white and blue Rice Krispie squares recipe because it’s just that kind of dependable, fun, and festive treat. Ready to make some magic without the oven? Let’s get to it!
Why You’ll Love This Recipe
This easy no-bake red white and blue Rice Krispie squares recipe isn’t just a pretty face at your summer party — it’s a tried-and-true crowd-pleaser that blends simplicity with a pop of festive flair. Here’s why it holds a special place in my recipe box:
- Quick & Easy: Ready in under 20 minutes, perfect for last-minute celebrations or when you just don’t want to heat up the kitchen.
- Simple Ingredients: You probably have everything on hand already — no fancy grocery store trips needed.
- Perfect for Patriotic Events: Whether it’s the Fourth of July, Memorial Day, or just a summer BBQ, these squares add that perfect touch of red, white, and blue.
- Crowd-Pleaser: Kids love them, adults sneak extra squares, and they’re always the first dessert gone.
- Deliciously Nostalgic: That familiar marshmallow and crispy cereal combo with a festive twist makes it feel like a summer memory in every bite.
What makes this version stand out? I like to add just the right balance of color with natural food colorings to keep it vibrant but not overpowering. Plus, using a blend of butter and marshmallows makes the texture just right — chewy but not sticky. Honestly, it’s this little balance that turns a classic into something worth making again and again.
So, if you want a recipe that’s fuss-free, fun, and full of summer spirit, grab your mixing bowl. This recipe is ready to bring some red white and blue joy to your next gathering.
What Ingredients You Will Need
This recipe uses simple, wholesome ingredients to deliver a bold festive flavor and that satisfying crispy-chewy texture without any stress. Most of these are pantry staples, and you can swap a few items if needed.
- Rice Krispies cereal (6 cups / 150g) – Classic crispy base, I recommend Kellogg’s for the best crunch.
- Marshmallows (10 oz / 280g) – Use regular or mini marshmallows; they melt differently but both work well.
- Unsalted butter (4 tbsp / 57g), softened – Adds richness and helps bind the squares.
- Red food coloring (natural or regular) – Just a few drops for that bright patriotic pop.
- Blue food coloring (natural or regular) – Same as red, a little goes a long way.
- Vanilla extract (1 tsp / 5ml) – For a subtle depth of flavor.
- Salt (a pinch) – Balances sweetness and enhances flavor.
Optional:
- White chocolate chips (1/2 cup / 85g) – Stir into the white layer for an extra creamy texture.
- Patriotic sprinkles – For garnish, if you want to add some sparkle on top.
Substitutions: Use coconut oil instead of butter for a dairy-free version. Swap Rice Krispies for gluten-free crispy cereal if needed. If you prefer, try a natural beet juice or blueberry powder for coloring instead of artificial dyes.
Equipment Needed
- Large mixing bowl: To combine your ingredients easily. I like a big glass bowl because it’s sturdy and easy to clean.
- Microwave-safe bowl or saucepan: For melting butter and marshmallows. A saucepan lets you control heat better, but the microwave saves time.
- Spatula or wooden spoon: Essential for stirring the gooey marshmallow mixture without scraping the bowl too hard.
- 9×13-inch baking dish: Perfect size for setting the squares. Line it with parchment paper or grease it lightly for easy removal.
- Measuring cups and spoons: Accurate measurements make sure your squares turn out just right.
- Sharp knife: To cut the squares cleanly once set.
If you don’t have a microwave, the stovetop method works just as well but watch the marshmallows carefully so they don’t burn. For those on a budget, any heatproof bowl and a simple spatula will do just fine — no need for fancy gadgets here!
Preparation Method
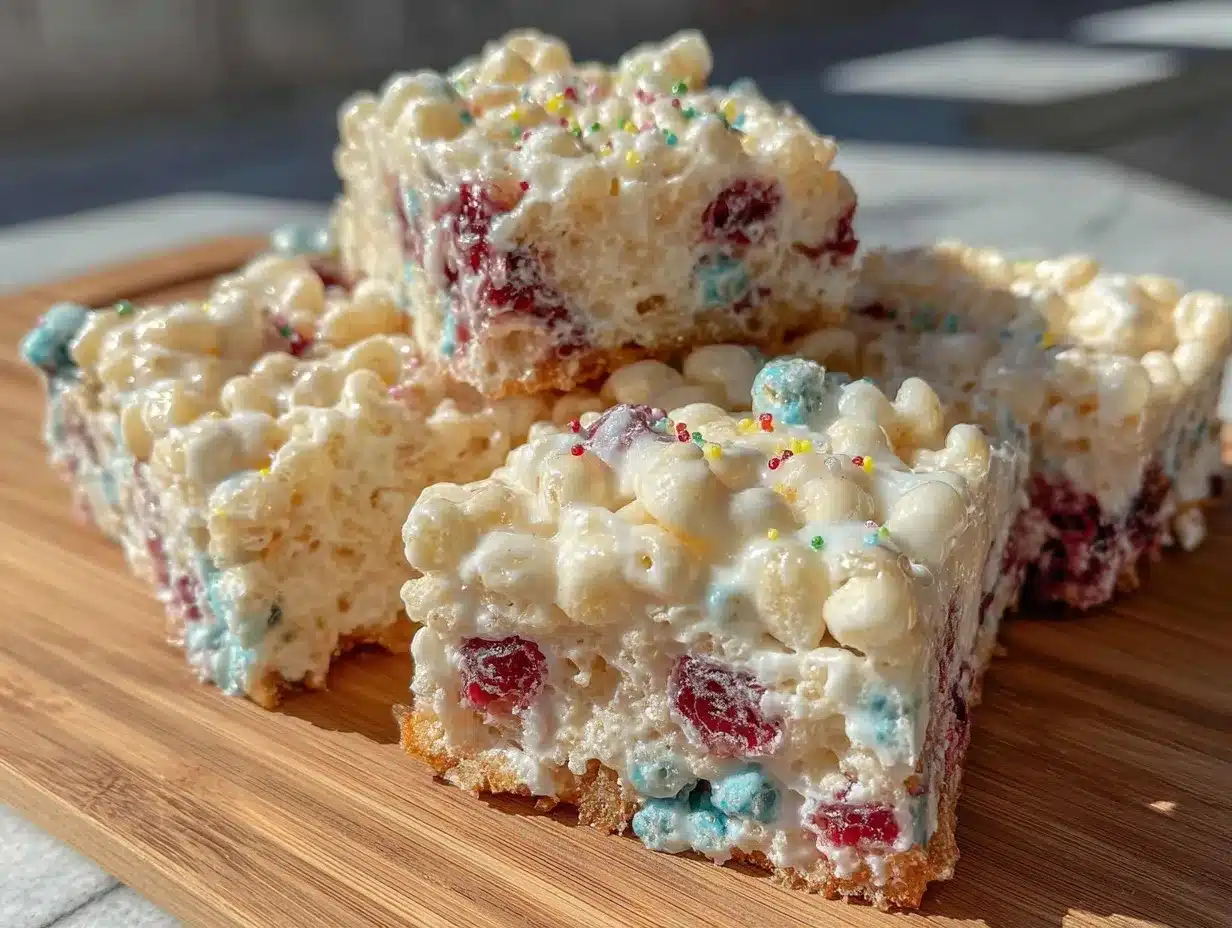
- Prepare your baking dish: Line a 9×13-inch (23×33 cm) baking pan with parchment paper or lightly grease it. This helps the squares come out easily later. Set aside.
- Melt the butter and marshmallows: In a large microwave-safe bowl, combine 4 tablespoons (57g) of softened unsalted butter and 10 ounces (280g) of marshmallows. Microwave on high for 1 minute, then stir. Repeat in 15-second bursts, stirring each time, until completely melted and smooth. If you prefer the stovetop, melt them over low heat in a saucepan, stirring constantly to avoid burning. This step should take about 3-5 minutes total.
- Add vanilla and salt: Stir in 1 teaspoon (5ml) of vanilla extract and a pinch of salt to the melted mixture for depth and balance.
- Divide the marshmallow mixture: Split the melted marshmallow mixture evenly into three bowls. This helps create the red, white, and blue layers without mixing colors.
- Color the mixtures: Add a few drops of red food coloring to the first bowl and mix well until you get a bright red color. Leave the second bowl as is (this is your white layer). Add blue food coloring to the third bowl and stir until the color is vibrant but not too dark. Remember, a little color goes a long way!
- Mix in the Rice Krispies: Into each colored marshmallow bowl, gently fold 2 cups (50g) of Rice Krispies cereal. Stir carefully to coat all the cereal without crushing it. If you’re adding white chocolate chips to the white layer, fold them in now.
- Layer the squares: Starting with the red mixture, press it evenly into the bottom of the prepared pan using a spatula or your hands (lightly greased to prevent sticking). Next, carefully spread the white mixture on top, pressing gently but firmly. Finish by layering the blue mixture on top. This step takes about 10 minutes. Don’t worry if the layers aren’t perfectly even — that homemade look is part of the charm.
- Chill and set: Place the pan in the refrigerator for at least 1 hour to let the squares set firmly. This makes cutting easier and keeps the layers intact.
- Cut and serve: Once set, lift the squares out of the pan using the parchment paper. Use a sharp knife to cut into 12-16 squares. Serve chilled or at room temperature.
Tip: If your marshmallow mixture gets too stiff while you’re working, a quick 10-second microwave zap will soften it again. Just be careful not to overheat.
Cooking Tips & Techniques
Making the perfect easy no-bake red white and blue Rice Krispie squares takes a few little tricks I’ve learned over time. Here’s what helps get it just right every time:
- Don’t rush melting the marshmallows: Low and slow (or short microwave bursts) prevent burning, which can give a bitter taste.
- Butter temperature matters: Softened butter blends better with marshmallows, making the mixture smoother and easier to work with.
- Fold gently: When mixing Rice Krispies into the marshmallow, use a spatula to fold — vigorous stirring can crush the cereal and result in dense squares.
- Layer with care: Press each layer firmly but gently. Using a piece of wax paper or a greased spatula to press helps keep things neat without squashing the cereal.
- Work quickly: Marshmallow mixtures can harden fast, so have your cereal and pans ready before melting.
- Color control: Adding too much food coloring can make the marshmallow sticky or affect the flavor; a few drops at a time is best.
- Storage tip: Keep the squares in an airtight container to prevent them from getting stale or sticky.
- Personal mishap: I once forgot to grease my spatula while pressing the layers and ended up with a big sticky mess on my hands — lesson learned!
Variations & Adaptations
While this recipe keeps it classic and festive, I’ve tried a few fun twists that you might enjoy:
- Vegan Version: Swap butter for coconut oil and use vegan marshmallows (brands like Dandies work great). Use gluten-free crispy cereal to keep it allergy-friendly.
- Fruit Infusion: Add freeze-dried strawberries into the red layer and dried blueberries into the blue layer for a fruity crunch and natural color boost.
- Chocolate Layer: Mix in white chocolate chips to the white layer and drizzle melted dark chocolate on top for a richer treat.
- Seasonal Adaptation: For winter holidays, replace red and blue with green and red food coloring, and add peppermint extract for a minty twist.
- Personal Favorite: I once sprinkled a dash of sea salt on top before chilling — that salty-sweet combo is unexpectedly delicious.
Serving & Storage Suggestions
These easy no-bake red white and blue Rice Krispie squares taste best chilled or at room temperature. I like to serve them plated with a glass of cold lemonade or iced tea for a refreshing pairing on a hot summer day.
They’re perfect finger food for picnics, potlucks, or kids’ parties — just grab and go. Presentation tip: cut the squares into neat rectangles and line them up on a festive plate or tray. Adding some extra patriotic sprinkles on top right before serving makes them even more eye-catching.
Store any leftovers in an airtight container at room temperature for up to 3 days. If your kitchen is warm, refrigeration is fine and helps keep their shape. To revive a bit of chewiness after chilling, let them sit at room temperature for 10-15 minutes before serving.
For longer storage, these squares freeze well. Wrap individual squares tightly in plastic wrap and store in a freezer-safe bag for up to 1 month. Thaw overnight in the fridge or at room temperature before enjoying.
Nutritional Information & Benefits
One serving (about one square if you cut 16) of these easy no-bake red white and blue Rice Krispie squares contains approximately:
| Calories | 150 |
|---|---|
| Fat | 4g |
| Carbohydrates | 28g |
| Protein | 1g |
| Sugar | 15g |
While these treats aren’t a health food, they do bring joy — which counts, right? The butter adds some healthy fats, and the cereal provides a light crunch without too many additives. If you’re looking for gluten-free options, simply swap in certified gluten-free cereal.
From a wellness perspective, making these at home means you control the ingredients and avoid preservatives found in many store-bought snacks. Plus, sharing a homemade treat always feels a little healthier for the soul.
Conclusion
This easy no-bake red white and blue Rice Krispie squares recipe is a go-to for any patriotic celebration or whenever you want a cheerful, fuss-free dessert. I love how it’s simple enough to whip up last minute but still brings that festive wow factor to the table.
Feel free to tweak the colors or mix-ins to fit your taste — it’s a recipe that welcomes creativity. Honestly, I keep coming back to it because it reminds me of those perfect summer days, friends gathered around, and dessert that doesn’t require a chef’s degree.
Give it a try, and let me know how yours turn out! I’d love to hear your favorite variations or any fun twists you add. Here’s to sweet, colorful moments that bring us together.
FAQs About Easy No-Bake Red White and Blue Rice Krispie Squares
Can I make these squares ahead of time?
Yes! They keep well refrigerated for up to 3 days and can be frozen for up to a month. Just thaw before serving for the best texture.
What if I don’t have red or blue food coloring?
You can skip the coloring or use natural alternatives like beet juice for red and blueberry powder for blue. The colors will be softer but still festive.
Can I use a different cereal instead of Rice Krispies?
Absolutely! Just choose a light, crispy cereal that holds up well to marshmallow coating, like gluten-free crispy rice or corn flakes.
Is there a way to make these squares less sticky?
Using slightly more butter or pressing the mixture firmly into the pan helps reduce stickiness. Also, letting them chill thoroughly before cutting is key.
Can kids help make this recipe?
Definitely! It’s a fun, no-bake recipe perfect for little hands to help mix, color, and press the layers. Just supervise when handling hot melted marshmallows.
Pin This Recipe!
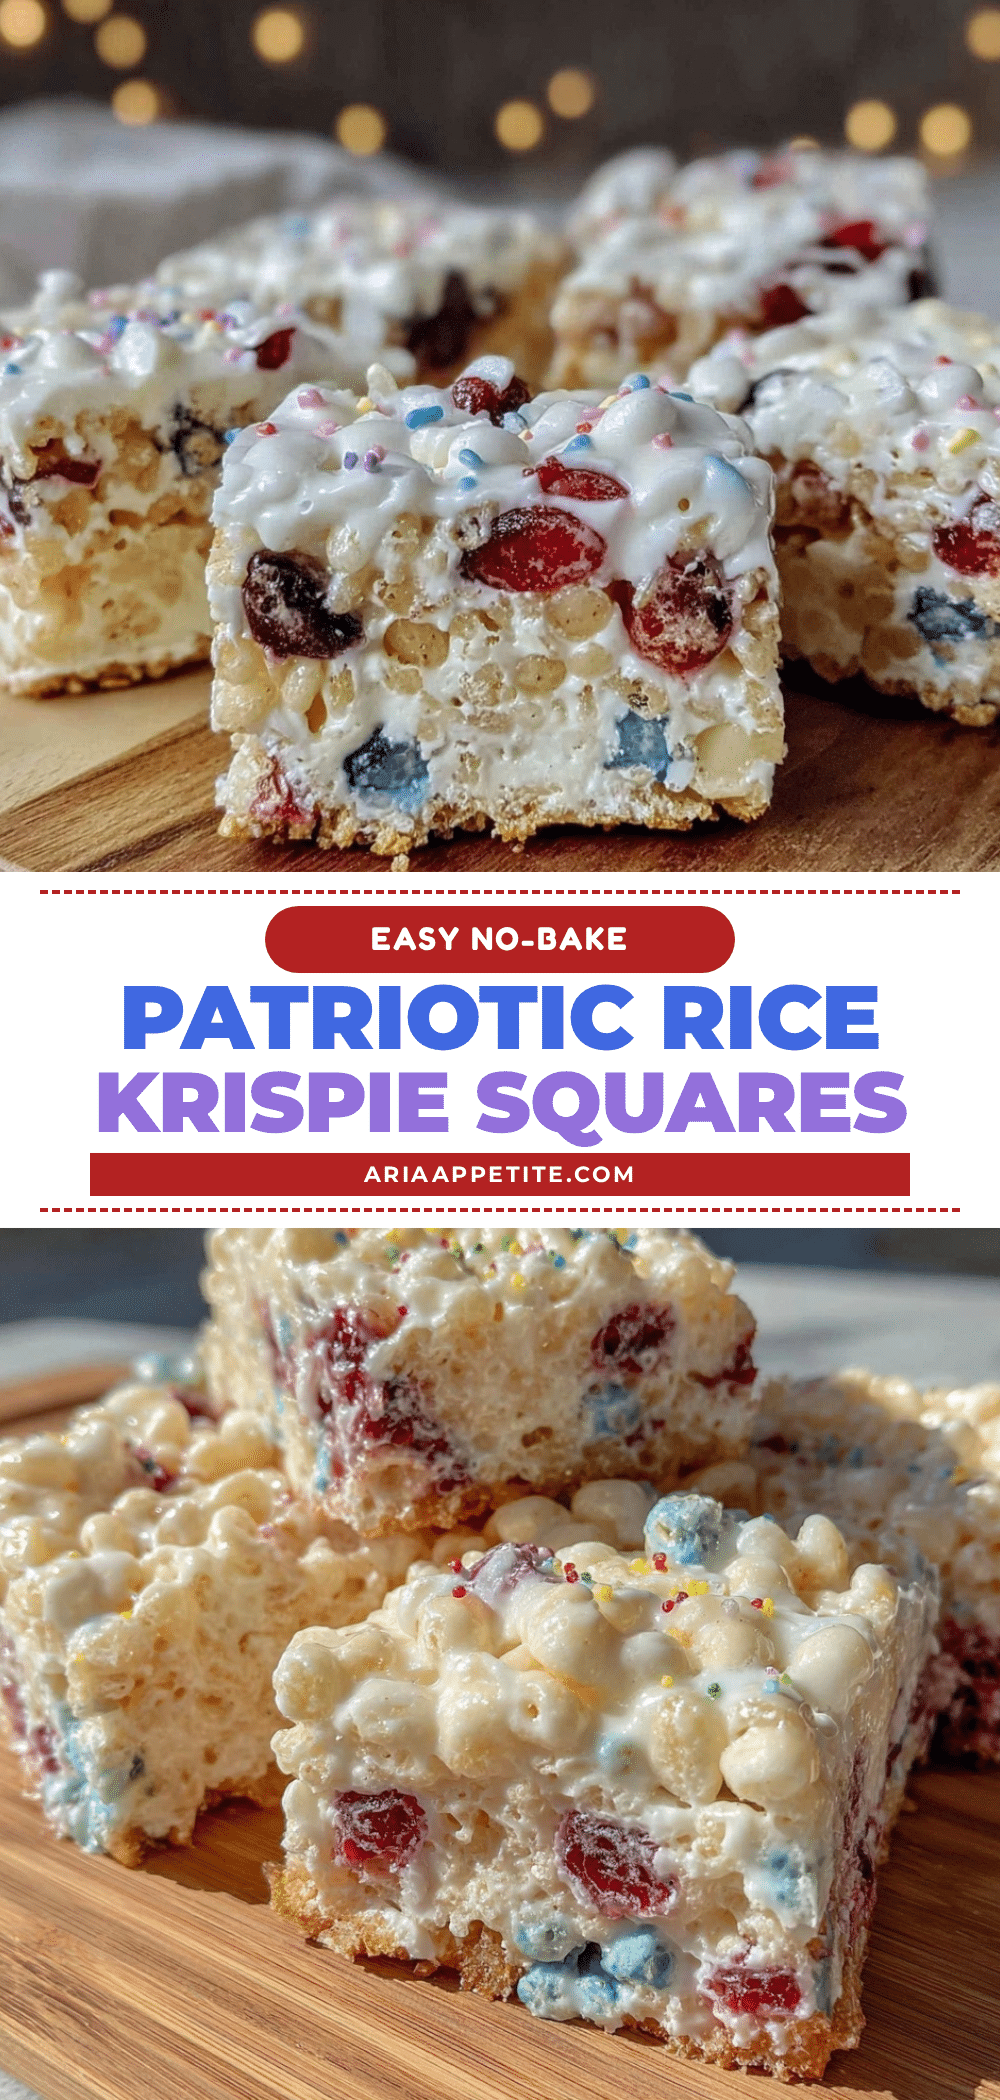
Easy No-Bake Red White and Blue Rice Krispie Squares
A quick and festive no-bake treat perfect for patriotic celebrations, combining marshmallows and crispy cereal in red, white, and blue layers.
- Prep Time: 10 minutes
- Cook Time: 10 minutes
- Total Time: 1 hour 20 minutes
- Yield: 12-16 squares 1x
- Category: Dessert
- Cuisine: American
Ingredients
- 6 cups (150g) Rice Krispies cereal
- 10 oz (280g) marshmallows (regular or mini)
- 4 tbsp (57g) unsalted butter, softened
- Red food coloring (natural or regular), a few drops
- Blue food coloring (natural or regular), a few drops
- 1 tsp (5ml) vanilla extract
- Pinch of salt
- Optional: 1/2 cup (85g) white chocolate chips
- Optional: Patriotic sprinkles for garnish
Instructions
- Line a 9×13-inch baking pan with parchment paper or lightly grease it.
- In a large microwave-safe bowl, combine softened butter and marshmallows. Microwave on high for 1 minute, stir, then continue in 15-second bursts stirring until melted and smooth. Alternatively, melt over low heat on stovetop, stirring constantly.
- Stir in vanilla extract and a pinch of salt.
- Divide the melted marshmallow mixture evenly into three bowls.
- Add red food coloring to the first bowl and mix well for a bright red color. Leave the second bowl plain for the white layer. Add blue food coloring to the third bowl and stir until vibrant.
- Gently fold 2 cups (50g) of Rice Krispies cereal into each colored marshmallow mixture. Fold white chocolate chips into the white layer if using.
- Press the red mixture evenly into the bottom of the prepared pan. Layer the white mixture on top, pressing gently but firmly. Finish with the blue mixture on top.
- Chill the pan in the refrigerator for at least 1 hour to set.
- Lift the set squares out using parchment paper and cut into 12-16 squares. Serve chilled or at room temperature.
Notes
If marshmallow mixture stiffens while working, microwave for 10 seconds to soften. Use softened butter for better texture. Fold cereal gently to avoid crushing. Press layers firmly but gently. Store in airtight container to prevent staleness. Can substitute coconut oil and vegan marshmallows for dairy-free version. Gluten-free crispy cereal can be used for gluten-free option.
Nutrition
- Serving Size: 1 square (if cut int
- Calories: 150
- Sugar: 15
- Fat: 4
- Carbohydrates: 28
- Protein: 1
Keywords: no-bake, Rice Krispie squares, patriotic dessert, Fourth of July, red white and blue, easy dessert, summer treat