Love this? Save it for later!
Share the inspiration with your friends
“I wasn’t expecting much when I pulled into that tiny roadside farmers market last July,” I admit, “but the sun was blazing, and I was desperate for something cool and sweet.” That’s when I overheard an elderly couple chatting about their favorite summer treat—a simple, no-fuss banana pudding trifle featuring those iconic Nilla Wafers. Honestly, I was skeptical. Could something so easy really be that good?”
Fast forward to my kitchen a week later, armed with a bag of ripe bananas and a box of Nilla Wafers, I gave it a shot. The first spoonful was a revelation—the creamy pudding, the crunch of wafers softened just right, and the fresh banana slices all layered perfectly. And the best part? No baking, no fuss, just a quick assembly that feels like summer itself in a bowl. Maybe you’ve been there too, craving something sweet but not wanting to heat up the kitchen or spend hours stirring and baking.
Let me tell you, this Easy No-Bake Banana Pudding Trifle with Nilla Wafers quickly became my go-to dessert for hot afternoons and casual get-togethers. It’s that kind of recipe you want on speed dial, especially when life gets hectic but you need a little comfort on the side. I remember the first time I made it, I forgot to chill it long enough before serving—major rookie move—but even then, it was a hit. That slightly melty pudding just added its own charm.
This recipe sticks around because it’s as effortless as it is nostalgic, delivering a classic Southern vibe without the stress. Plus, it’s perfect for summer, when your oven is better off staying off. So, if you’re looking for a refreshingly simple dessert that hits all the right notes, you’re in the right place.
Why You’ll Love This Recipe
After testing this Easy No-Bake Banana Pudding Trifle with Nilla Wafers more times than I can count, I can confidently say it’s a crowd-pleaser that’s as reliable as summer sunshine.
- Quick & Easy: Ready in under 20 minutes, making it ideal for busy weeknights or last-minute dessert emergencies.
- Simple Ingredients: Uses pantry staples and fresh bananas—no hunting down obscure items required.
- Perfect for Summer: No oven means no extra heat in the kitchen, which is a blessing on hot days.
- Crowd-Pleaser: Loved by kids and adults alike, it’s a safe bet for potlucks, picnics, or family dinners.
- Unbelievably Delicious: The combination of creamy pudding, crisp-but-softened wafers, and ripe bananas hits that perfect comfort-food note.
What sets this recipe apart? For one, it uses a quick homemade pudding mix that’s lighter than the canned versions but just as luscious. Plus, layering everything in a clear trifle bowl means the colors and textures show off beautifully—making it as pretty as it is tasty. I often swap out the vanilla wafers for a cinnamon twist or add a dollop of whipped cream for extra indulgence.
This isn’t just any banana pudding; it’s the kind that makes you pause and savor that first bite, closing your eyes for a second because it feels like a warm hug. I promise, once you try it, you’ll find yourself reaching for this recipe again and again when you want a fuss-free dessert that doesn’t skimp on nostalgia or flavor.
What Ingredients You Will Need
This Easy No-Bake Banana Pudding Trifle with Nilla Wafers comes together with straightforward, wholesome ingredients that create a delicious balance of textures and flavors.
- For the pudding:
- 2 cups whole milk (or 480 ml; use dairy-free milk like almond if preferred)
- 1/2 cup granulated sugar (100 g)
- 1/3 cup all-purpose flour (40 g; for gluten-free, try a 1:1 baking flour)
- 1/4 teaspoon salt
- 3 large egg yolks (room temperature)
- 2 tablespoons unsalted butter (28 g; softened)
- 1 1/2 teaspoons pure vanilla extract (I recommend Nielsen-Massey for best flavor)
- For the trifle assembly:
- 4–5 ripe bananas, sliced (look for firm yet yellow bananas for the best texture)
- 1 box Nilla Wafers (about 11 ounces / 312 g; original flavor works best)
- 1 cup heavy whipping cream (240 ml; chilled)
- 2 tablespoons powdered sugar (15 g; optional for whipped cream sweetness)
Pro tip: If bananas are super ripe, they’ll be sweeter but softer—perfect for this recipe. Also, you can swap the Nilla Wafers for graham crackers or even ladyfingers if you want a different twist. Just don’t skip the vanilla extract in the pudding—it really brings out that classic banana pudding vibe.
Equipment Needed
- Medium saucepan for cooking pudding
- Whisk (essential for smooth pudding, I use a silicone whisk that’s easy to clean)
- Mixing bowls (one large for whipping cream, one for pudding)
- Electric hand mixer or stand mixer (for whipping cream to soft peaks)
- Trifle bowl or large glass serving dish (clear is best for showcasing layers)
- Measuring cups and spoons
- Rubber spatula (for folding whipped cream into pudding)
If you don’t have a trifle bowl, a deep glass bowl or even individual mason jars make great alternatives. I once whipped this up in a simple Pyrex dish when my trifle bowl was in the dishwasher, and it worked just fine! Maintenance-wise, I find non-stick saucepans make pudding clean-up easier, but any heavy-bottomed pan will do.
Preparation Method
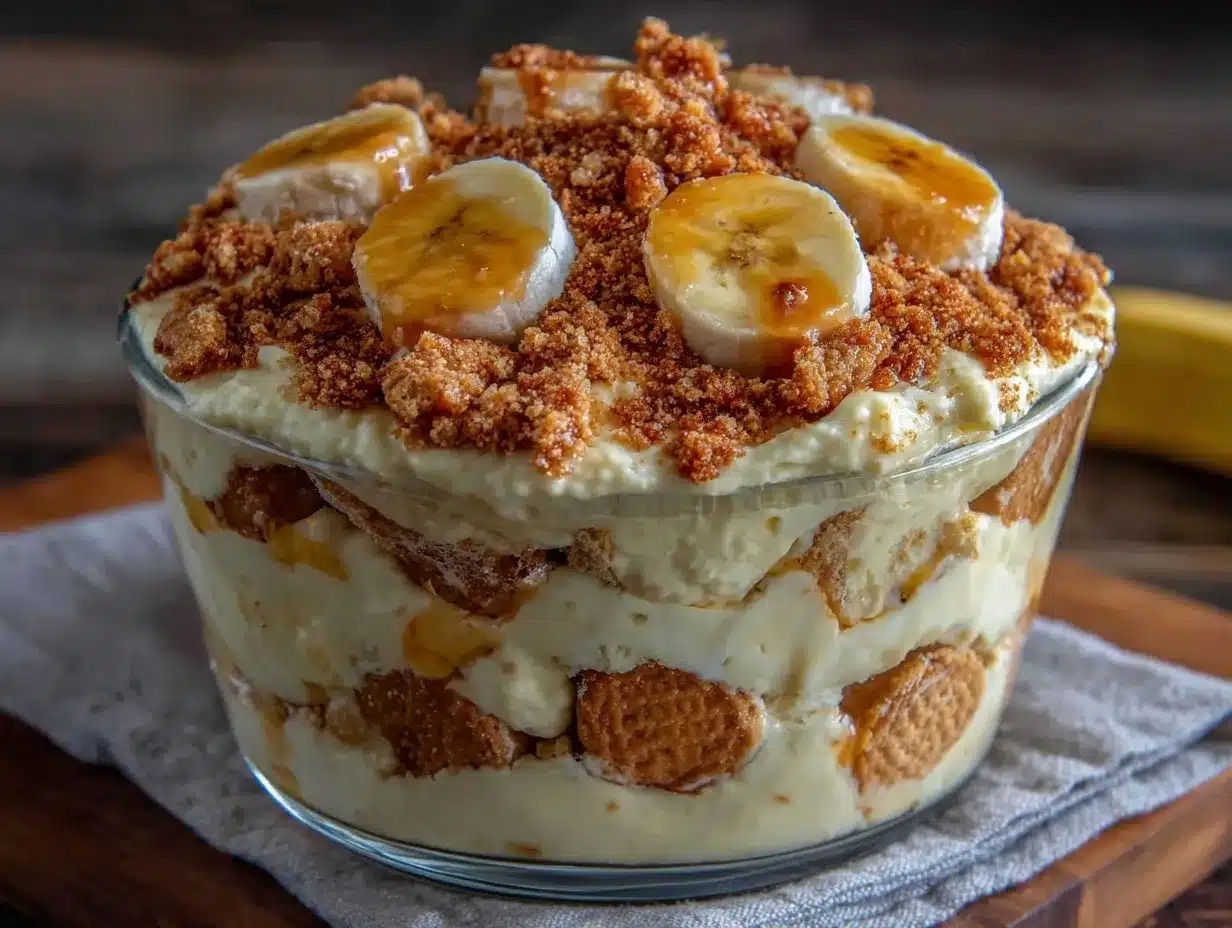
- Make the pudding: In a medium saucepan, whisk together 1/2 cup sugar, 1/3 cup flour, and 1/4 teaspoon salt until combined. Slowly pour in 2 cups of milk, whisking constantly to avoid lumps. Cook over medium heat, stirring often, until the mixture thickens and starts to bubble—about 7-9 minutes. (Watch carefully here; it can scorch if left unattended!)
- Temper the egg yolks: In a small bowl, lightly beat the 3 egg yolks. Slowly add about 1/2 cup of the hot milk mixture into the yolks while whisking vigorously (this prevents scrambling). Then pour the yolk mixture back into the saucepan. Cook for another 2 minutes, stirring constantly, until thickened.
- Finish the pudding: Remove from heat and stir in 2 tablespoons softened butter and 1 1/2 teaspoons vanilla extract. Transfer pudding to a bowl, cover with plastic wrap pressed directly on the surface (to avoid skin forming), and let cool to room temperature, about 30 minutes.
- Prepare the whipped cream: While pudding cools, beat 1 cup chilled heavy cream with 2 tablespoons powdered sugar until soft peaks form—about 3-4 minutes on medium speed.
- Fold whipped cream into pudding: Gently fold about half of the whipped cream into the cooled pudding to lighten the texture, saving the rest for topping.
- Assemble the trifle: In your glass serving dish, start with a layer of Nilla Wafers (about 1 cup crushed or whole, depending on preference). Add a layer of banana slices, then spread a layer of pudding mixture on top. Repeat layers, ending with pudding.
- Top and chill: Finish with the remaining whipped cream spread over the top and a few whole Nilla Wafers for decoration. Cover and refrigerate for at least 2 hours—overnight is best for those flavors to meld.
Note: If your pudding feels too thick after cooling, a splash of milk can loosen it up. Also, when slicing bananas, try to keep them uniform so every bite has that perfect balance of fruit and cream. I once rushed and ended up with some banana chunks that were too thick—still tasty, but a bit uneven.
Cooking Tips & Techniques
One trick I learned early on is to whisk continuously while cooking the pudding. It prevents lumps and ensures that smooth, velvety texture that makes all the difference. I made the mistake once of walking away and came back to a clumpy mess—lesson learned!
When tempering the egg yolks, don’t rush adding the hot milk. Pour slowly and whisk vigorously to avoid scrambled eggs in your pudding. Trust me, it’s worth the patience.
Whipping the cream to soft peaks rather than stiff peaks keeps the pudding light and airy when folded in. Over-whipping can cause it to break down or feel too heavy.
Another tip: layer the trifle gently. Pressing wafers too hard can crush them into mush, but layering them evenly allows for that perfect balance of crunch and softness after chilling.
Timing-wise, I find this recipe comes together quickly, but chilling is crucial. The flavors deepen and the texture sets beautifully if you let it rest for at least a couple of hours. Multitasking tip: whip the cream while the pudding cools to save time.
Variations & Adaptations
- Dietary swaps: Use coconut milk and coconut whipped cream for a dairy-free version. Almond or oat milk works, too, but the pudding may be less rich.
- Seasonal twist: Add fresh berries like strawberries or blueberries layered with the bananas for a colorful, fruity upgrade in the warmer months.
- Flavor variations: Swap vanilla extract for a splash of rum or bourbon for an adult-friendly version, or stir in a teaspoon of cinnamon or nutmeg for warm spice notes.
- Cooking method: For an extra quick version, use instant vanilla pudding mix and skip cooking the pudding from scratch. The texture is slightly different but still delicious.
- Personal favorite: I once tried swapping Nilla Wafers with crushed gingersnaps—unexpected but amazing for a little zing. It’s a fun variation to surprise guests.
Serving & Storage Suggestions
Serve this Easy No-Bake Banana Pudding Trifle chilled, ideally straight from the fridge. It’s perfect as a light dessert after a summer meal or alongside crispy garlic chicken for a casual dinner.
Presentation-wise, a clear trifle bowl shows off those beautiful layers, but individual glasses make charming single servings for parties.
Store leftovers covered tightly in the refrigerator for up to 2 days. The wafers will continue to soften, so if you prefer crunch, add fresh wafers just before serving.
To reheat, this isn’t the best candidate since it’s meant to be cold, but letting it sit at room temperature for 10 minutes before serving can help the flavors bloom.
Flavors tend to meld and deepen after a night in the fridge, so if you make this ahead for a gathering, you’re in for a treat.
Nutritional Information & Benefits
Each serving (about 1 cup) of this Easy No-Bake Banana Pudding Trifle with Nilla Wafers provides roughly 250-300 calories, depending on portion size and specific ingredients used.
Key benefits include potassium from the bananas, calcium and protein from the milk and cream, and moderate sugar content balanced by wholesome ingredients.
This recipe can be made gluten-free by swapping the wafers for gluten-free cookies and using gluten-free flour. It’s not low-carb but offers a satisfying treat that’s better than processed desserts.
From a wellness perspective, I appreciate that it uses real ingredients with no preservatives, and the homemade pudding means you avoid additives common in store-bought mixes.
Conclusion
All in all, this Easy No-Bake Banana Pudding Trifle with Nilla Wafers is a winner for anyone craving a fuss-free dessert that tastes like a nostalgic summer afternoon. It’s quick, approachable, and adaptable, making it perfect for cooks at any level.
Feel free to customize it with your favorite twists or ingredient swaps—it’s forgiving and welcoming. I love this recipe because it reminds me that sometimes the simplest things bring the biggest smiles around the table.
If you try this recipe, I’d love to hear how you made it your own—drop a comment below or share your photos. Let’s keep the sweet summer vibes going!
FAQs
Can I make this banana pudding trifle ahead of time?
Yes! It actually tastes better after chilling for a few hours or overnight, allowing the flavors to meld and the wafers to soften just right.
What can I substitute for Nilla Wafers?
Graham crackers, ladyfingers, or even crushed gingersnaps work well. Just keep in mind the texture and flavor will vary slightly.
How do I prevent the bananas from browning?
Use ripe but firm bananas and slice them just before assembling. You can also toss banana slices in a little lemon juice to slow browning.
Is there a dairy-free version of this recipe?
Absolutely! Use coconut milk and coconut-based whipped cream, and swap butter for a dairy-free margarine or coconut oil.
Can I use instant pudding mix instead of making pudding from scratch?
Yes, for a quicker option, instant pudding mix works fine. The texture and flavor will be slightly different but still tasty and convenient.
Pin This Recipe!
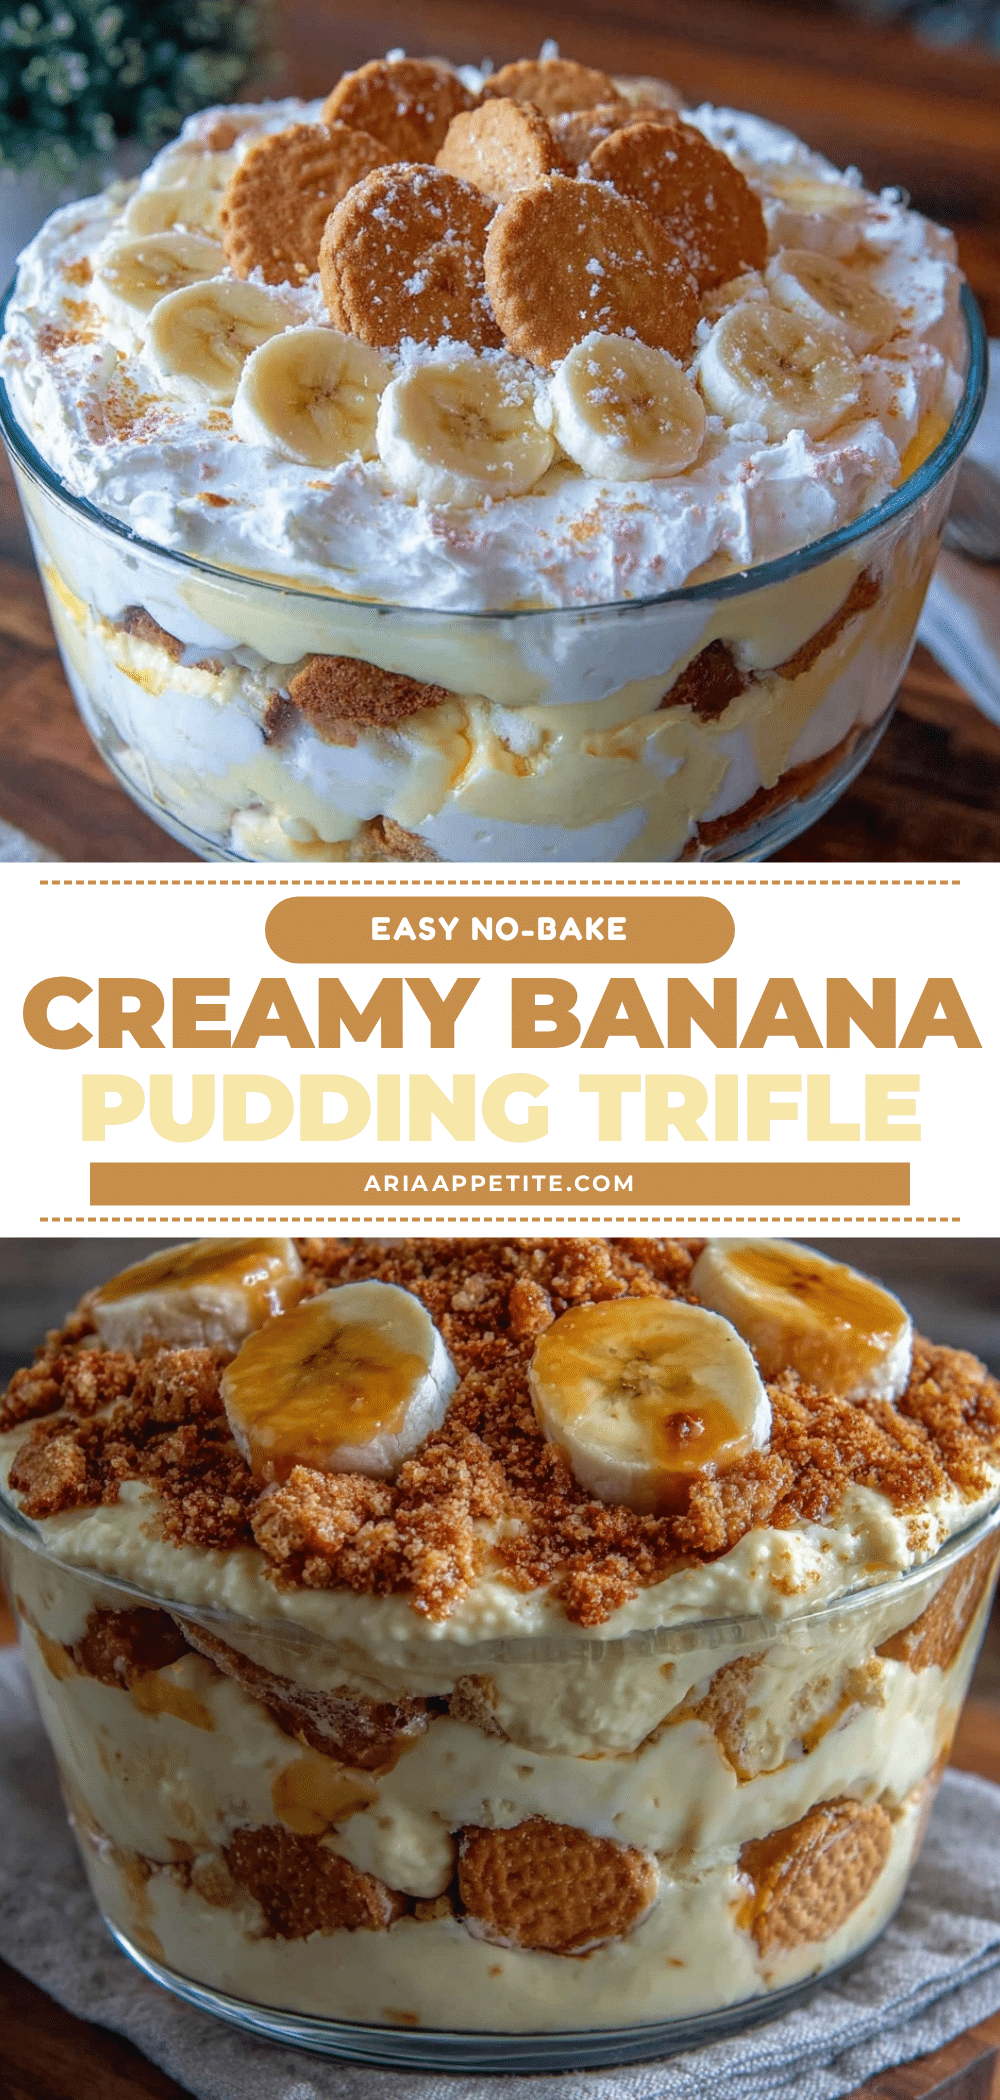
Easy No-Bake Banana Pudding Trifle Recipe for Perfect Summer Dessert
A quick and easy no-bake banana pudding trifle featuring creamy homemade pudding, ripe bananas, and crunchy Nilla Wafers. Perfect for summer, this nostalgic dessert requires no oven and is ready in under 20 minutes plus chilling time.
- Prep Time: 15 minutes
- Cook Time: 10 minutes
- Total Time: 2 hours 25 minutes
- Yield: 8 servings 1x
- Category: Dessert
- Cuisine: Southern American
Ingredients
- 2 cups whole milk (or 480 ml; use dairy-free milk like almond if preferred)
- 1/2 cup granulated sugar (100 g)
- 1/3 cup all-purpose flour (40 g; for gluten-free, try a 1:1 baking flour)
- 1/4 teaspoon salt
- 3 large egg yolks (room temperature)
- 2 tablespoons unsalted butter (28 g; softened)
- 1 1/2 teaspoons pure vanilla extract
- 4–5 ripe bananas, sliced
- 1 box Nilla Wafers (about 11 ounces / 312 g)
- 1 cup heavy whipping cream (240 ml; chilled)
- 2 tablespoons powdered sugar (15 g; optional for whipped cream sweetness)
Instructions
- In a medium saucepan, whisk together 1/2 cup sugar, 1/3 cup flour, and 1/4 teaspoon salt until combined.
- Slowly pour in 2 cups of milk, whisking constantly to avoid lumps.
- Cook over medium heat, stirring often, until the mixture thickens and starts to bubble—about 7-9 minutes.
- In a small bowl, lightly beat the 3 egg yolks.
- Slowly add about 1/2 cup of the hot milk mixture into the yolks while whisking vigorously to temper the eggs.
- Pour the yolk mixture back into the saucepan and cook for another 2 minutes, stirring constantly, until thickened.
- Remove from heat and stir in 2 tablespoons softened butter and 1 1/2 teaspoons vanilla extract.
- Transfer pudding to a bowl, cover with plastic wrap pressed directly on the surface, and let cool to room temperature, about 30 minutes.
- While pudding cools, beat 1 cup chilled heavy cream with 2 tablespoons powdered sugar until soft peaks form—about 3-4 minutes on medium speed.
- Gently fold about half of the whipped cream into the cooled pudding to lighten the texture, saving the rest for topping.
- In a glass serving dish, start with a layer of Nilla Wafers (about 1 cup crushed or whole).
- Add a layer of banana slices, then spread a layer of pudding mixture on top.
- Repeat layers, ending with pudding.
- Finish with the remaining whipped cream spread over the top and a few whole Nilla Wafers for decoration.
- Cover and refrigerate for at least 2 hours—overnight is best for flavors to meld.
Notes
Whisk continuously while cooking pudding to prevent lumps. Temper egg yolks slowly to avoid scrambling. Whip cream to soft peaks for light texture. Layer wafers gently to maintain crunch. Chill at least 2 hours or overnight for best flavor and texture. Can substitute Nilla Wafers with graham crackers, ladyfingers, or gingersnaps. For dairy-free, use coconut milk and coconut whipped cream.
Nutrition
- Serving Size: About 1 cup
- Calories: 275
- Sugar: 22
- Sodium: 150
- Fat: 14
- Saturated Fat: 8
- Carbohydrates: 35
- Fiber: 2
- Protein: 4
Keywords: banana pudding, no-bake dessert, summer dessert, trifle, Nilla Wafers, easy dessert, homemade pudding, crowd-pleaser